Aquarium support / storage

UKworkshop.co.uk

Help Support UKworkshop.co.uk:

This site may earn a commission from merchant affiliate links, including eBay, Amazon, and others.
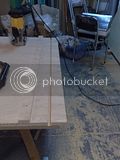
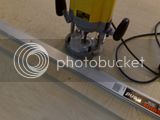
So, having failed on the edge trimming thing I thought I'd deal with the next vital ingredient - the cutting guide for the router

As you can see my current straight edge is rather over endowed when cutting across the board, I also want to be able to reference the edge of the component rather than measure x cm off from the line.
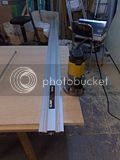
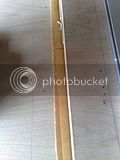
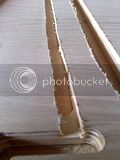
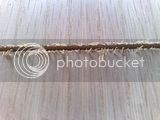
I am using a trend up cutting shear cutter and was a little surprised at the amount of feathering I got off the first cut (which will form the guide for the router). A little work with a very blunt and poorly set plane sorted the feathers out without impacting on the straightness.

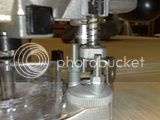
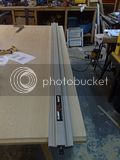
So now I've got the straight edge I need to screw it onto the bas board and then cut out the reference edge. To do this I set the router to the depth of the sacrificial MDF cutting surface with a thin bracket between the router turret and the depth stop. This means that once the bracket was removed the actual cut went 1.45mm into the MDF surface.
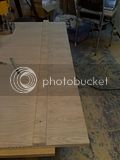
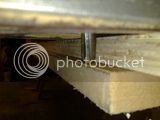
This resulted in a rather nicer cut straight off the board:
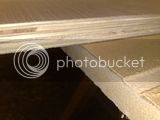
So now the jig is correctly set up but still attached to the 4x6' board which would make it rather unwieldy :) Next job is to part it from the main board. I figured I'd be a cleaver clogs and use a different router to do this - I nice thin one so that I had a fine cut capability if I needed the thread the cut into a tight space. Sadly I manage to snap the cutter - nothing spectacular, it just came off during the first cut (set up the same way as the up cut one) - must be a basic user error, I guess I was taking too big a cut but I thought it would be able to handle 5mm or so.

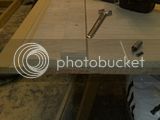
Retreating from that Idea I just used the up cutter to part off the jig from the main board and the cut I get from it is great - it only needs a couple of wipes with 320 on a stiff board to get rid of the slight ridges from the router (why am I getting this - am I feeding too fast?)

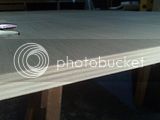
Very pleased - this evening's job is to mark up all the components on one of the sheets ready to be cut out tomorrow.

Miles
 
miles_hot":2znzmul6 said:
A little work with a very blunt and poorly set plane sorted the feathers out without impacting on the straightness.

I hope you arent talking about my no.7 mate ;) - that blade was new :shock:
 
big soft moose":r0hw7gc8 said:
miles_hot":r0hw7gc8 said:
A little work with a very blunt and poorly set plane sorted the feathers out without impacting on the straightness.

I hope you arent talking about my no.7 mate ;) - that blade was new :shock:
god no - some cheep draper block plane that I have knocking around which can be relied on not to take too much off in my ham fisted hands! :)

Miles
 
miles_hot":tyutmw3t said:
big soft moose":tyutmw3t said:
miles_hot":tyutmw3t said:
A little work with a very blunt and poorly set plane sorted the feathers out without impacting on the straightness.

I hope you arent talking about my no.7 mate ;) - that blade was new :shock:
god no - some cheep draper block plane that I have knocking around which can be relied on not to take too much off in my ham fisted hands! :)

Miles

so use the no.7 you know it makes sense ( if you set it to just take a teeny shaving it wont take too much off )
also a big ass plane like a 7 is less likely to dig into an edge on account of its longer sole.

However if you want to use a block plane ive got a spare Record you can borrow ( I got two nas part of a bundle deal IIRC ) - the best thing to do with a draper block plane is use it as a doorstop !

all that not withstanding i find the best way to clean up feathers on ply is with a sanding block and some 240g
 
AHHHHHH!!!! :twisted: :twisted: :evil:

There isn't a square corner on this ply sheet - I had expected to be able to find at lest one to act as a datum point! Sod it. marking out is now dependent on me making a datum point.

Sorry just had to vent - I was stupidly expecting to be able to use the factory cut as a "superior cut' and hence trust it to be square in at least some point.

bugger.

Miles

 
miles_hot":uq83fpo9 said:
AHHHHHH!!!! :twisted: :twisted: :evil:

There isn't a square corner on this ply sheet - I had expected to be able to find at lest one to act as a datum point! Sod it. marking out is now dependent on me making a datum point.

Sorry just had to vent - I was stupidly expecting to be able to use the factory cut as a "superior cut' and hence trust it to be square in at least some point.

bugger.

Miles
thats usual - big vertical panels saws just arent that accurate

check all the edges for straightness and assuming you can find one use that as a datum edge for your marking out

cutting at 90 deg shouldnt be a problem with that big ass table saw you've got - especially if you use the sliding table (note thogh that the finish from the table saw wont be great with high probability of breakout so you probably need to cut outside the line and either plane down or trim down with the B/S later)
 
Made slow progress yesterday - as can be seen by my "venting" message I spent the morning marking out half of the 1st board only to find that upon checking that many of the items marked out did not have opposite lengths the same. This really confused me until I strapped a straight edge to each edge and found that none of them were straight nor were any of the corners square. DUH! :twisted: School boy error not to have checked and assumed that as the factory has a far better saw than I do it would be accurate!

After rubbing out all my markings - which now had all the relevance to a fish tank as some primitive cave art - I went and had a sit down

I also started to worry that this would mean that my guide could be carrying inaccuracies - maybe I had swapped the timber length that I cut off over and hence I would be using a poor straight edge I built a mark II using an old trend clamp guide which had lost it's clamping ability

The nice thing thing about these router guides is that not only do you line up the cut edge with the line (the expected benefit) but you can also screw through them into waste areas when you can't get a clamp onto the end of them and you can screw stop blocks in to limit the amount of travel - stopping the cut crossing into another component on the sheet.


So having made this I then set about making a straight edge - ripping 2mm off one of the 8' edges


I then forgot to take any more pictures for the day! Having got a straight edge I then created a right angle, took all my measurements from that and cut out the components for that board making only one mistake when I cut the wrong side of a line - a design challenge I will solve in the future!

A friend came over to help move the next sheet into position and I will get to that later today when I have collected my car from the mechanics and had a sit down at the cost :( I'm quite pleased at the fact that progress is being made but it feels so slow and is bad breaking work as I'm at the wrong height and I suspect pretty tense for much of the time. I'm sure this will get better as I get more experience and I suspect more kit (track saw would be nice to avoid having to take 3-6 passes for each cut).

My first cuts had fairly good break out at the exposed ends which I now avoid by taking an initial "wrong way" pass for 0.5 - 1 inches at the exposed end (hence possibly 6 cuts).

Miles
 
miles_hot":204povou said:
(track saw would be nice to avoid having to take 3-6 passes for each cut).

guess what ive got taking up room in my workshop , waiting on the work 'shop move.

I'll chuck it in the car nand see you in a bit - you'll note from the time of posting that i'm running late (we went to the garden centre this morning, and i think my credit card may be about to explode ;) )
 
BSM kindly loaned me a dewalt track saw (following my recent comment) - huge thanks and a real vision of what should be in terms of converting the sheet material!

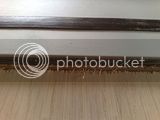
Sadly the cut is not all it should be:

I think that this is caused by the rubber on the track edge not lining up with the cut

So it was back to the router method again, and boy did I mess up today!

The first time this happened I just put it down to user error - failing to tighten the clap enough. The next time it happened I realised that one of the clamp heads was missing the rubber protector bit - this has not been an issue the whole time but I guess that it has just polished the guide enough to become an issue. To overcome this I glued some rubber matting used in tool boxes to the clamp and had no further slippage.

Whilst I got lucky in terms of the location of the slippage - bottom of the sides and out of sight I may go back and remove the problem bit and replace with a solid bit of wood as I'm a little concerned that the weight of the tank will now be taken by something that is missing 1/3 of the thickness....

Only one more component to go, though the top will need to be cut to shape and scribed to the wall. Next step will be the edging strips...

Miles
 
I'm being lazy and not reading the whole thread... Can this be summarised as trying to find a way to cut ply without breakout?

If yes, then have you tried scoring the cut line with a blade? Also, when using the circular saw, try to ensure the blade only protrudes below the board just enough to cut it.

If no, then ignore the above :oops:

:D
 
matt":qubil0l9 said:
I'm being lazy and not reading the whole thread... Can this be summarised as trying to find a way to cut ply without breakout?

If yes, then have you tried scoring the cut line with a blade? Also, when using the circular saw, try to ensure the blade only protrudes below the board just enough to cut it.

If no, then ignore the above :oops:

:D

Matt, I have found a way - using a router with a shop made guide and cutting 1-2mm into the supporting board. The only down side of this is the shear time it takes (3-6 cuts per edge of each component). I didn't try the knife thing but I did have the blade cutting 1-2 mm into the MDF base on which I have the sheet resting.

I am looking to see if I can replace the rubber anti splinter strips on BSM's saw to see if this solves the issue, not least as frankly it is sooo much nicer to use than the router and I want to see if it is possible to sort out before I commit to buying a track saw in future.

Miles
 
miles_hot":rwbt1m2g said:
[

I am looking to see if I can replace the rubber anti splinter strips on BSM's saw to see if this solves the issue, not least as frankly it is sooo much nicer to use than the router and I want to see if it is possible to sort out before I commit to buying a track saw in future.
Miles

ive never noticed breakout being a big problem with that tracksaw, but then we arent normally cutting veneered ply.

also we've got a fairly savage blade in that saw, one with more teeth would give a finer finish (if you want to buy a replacement keep the receipt and i'll claim it back and we'll keep the blade when you're done)

what you could do would be to stick a line of tape (duct/parcel/masking) etc along the cut then draw the line on top of that. (note dont use carpet tape as it sticks so feircely it lefts the veneer when you peel it off)

another option would be to take one pass with the router then run the tracksaw along the routered cut
 
big soft moose":27z1x3ri said:
ive never noticed breakout being a big problem with that tracksaw, but then we arent normally cutting veneered ply.

also we've got a fairly savage blade in that saw, one with more teeth would give a finer finish (if you want to buy a replacement keep the receipt and i'll claim it back and we'll keep the blade when you're done)

what you could do would be to stick a line of tape (duct/parcel/masking) etc along the cut then draw the line on top of that. (note dont use carpet tape as it sticks so feircely it lefts the veneer when you peel it off)

another option would be to take one pass with the router then run the tracksaw along the routered cut

I'm happy to buy a new blade - anyone got any recommendations for brands other than my default of Frued?

I'll give the sticking tape a go (I've already ordered some replacement edging as I found some for late teens) however I'll pass on the routing idea as that would be two set ups.

I have to say that the track saw is sooo much nicer to use than the router! :)

Miles
 
miles_hot":3bk3gl84 said:
big soft moose":3bk3gl84 said:
ive never noticed breakout being a big problem with that tracksaw, but then we arent normally cutting veneered ply.

also we've got a fairly savage blade in that saw, one with more teeth would give a finer finish (if you want to buy a replacement keep the receipt and i'll claim it back and we'll keep the blade when you're done)

what you could do would be to stick a line of tape (duct/parcel/masking) etc along the cut then draw the line on top of that. (note dont use carpet tape as it sticks so feircely it lefts the veneer when you peel it off)

another option would be to take one pass with the router then run the tracksaw along the routered cut

I'm happy to buy a new blade - anyone got any recommendations for brands other than my default of Frued?

I'll give the sticking tape a go (I've already ordered some replacement edging as I found some for late teens) however I'll pass on the routing idea as that would be two set ups.

I have to say that the track saw is sooo much nicer to use than the router! :)

Miles

CMT (which axminster amongst others sell) are the other usual suspect.

the other thing you can do is stick a stip of lino/hardboard/mdf or whatever to the underneath of the track with doublesided tape - if you make it oversize then run the saw down the whole length of the track it ought to give you an edge which lines up exactly with the cut.

the downsides are that a) it will make the track/wood contact more slidy - not a problem as you have the clamps, and b) it reduces the depth of cut - again not an issue given that you are only cutting 18mm ply and the saw plunges to 55mm
 
Miles, have a look at the Atkinson Walker saw blades as sold by Workshop Heaven. I'm currently playing with one of their Industrial blades in my mitre saw (it's awesome! 8)) but Matthew says their ProTrade range is comparable to the quality of Freud's. Yet, they're generally much cheaper and, depending on the blade diameter, you may also find a greater variety of fine-toothed blades available (on the smaller blades, Freud generally seem to stop at 40t, which is a 'general-purpose' configuration, really).

CMT blades are very good and comparable to the industrial quality blades. However, for one-off or occasional use, they are rather expensive!
 
Hi Miles.
Thanks for the pointer to your problem.
First thing.
The picture of the broken router cutter shows a lot of wear around the shank. that is not good. It can be indicative of the wrong size collet for the shank or a worn collet. or could be the bearings are on their way out. That could have had something to do with the breakage. also an "upcut cutter" should be used to get a clean finish on the bottom (underside) of the material. you may have an issue with waste being pushed down into the cut with a downcut cutter. for ply you need really sharp cutters.

Second.
The saw.
as many teeth as you can get and I would suggest using a severe negative hook alternate bevel. Not widely available. Let me know the size (diameter and bore size) and I will see if one is available from my range.

Doug
 
cutting solutions":m2nf32tq said:
Hi Miles.
Thanks for the pointer to your problem.
First thing.
The picture of the broken router cutter shows a lot of wear around the shank. that is not good. It can be indicative of the wrong size collet for the shank or a worn collet. or could be the bearings are on their way out. That could have had something to do with the breakage. also an "upcut cutter" should be used to get a clean finish on the bottom (underside) of the material. you may have an issue with waste being pushed down into the cut with a downcut cutter. for ply you need really sharp cutters.

Second.
The saw.
as many teeth as you can get and I would suggest using a severe negative hook alternate bevel. Not widely available. Let me know the size (diameter and bore size) and I will see if one is available from my range.

Doug

Hi Doug

The broken cutter was fresh from the trend selection box and had never been used. The total cut length was as shown - about 20 cm tops.

The cutter issue that I may have is with the trimming of the edging to be flush with the ply - do you want me to isolate the pictures concerned?

In terms of the saw I may have a solution with Workshop Heaven however if that doesn't work I'll chuck it at you :)

Miles
 
The broken cutter was fresh from the trend selection box and had never been used. The total cut length was as shown - about 20 cm tops.
there seems to be wear towards the bottom of the shank or is it just the angle of the image

The cutter issue that I may have is with the trimming of the edging to be flush with the ply - do you want me to isolate the pictures concerned?
No. I'm not sure that routing is the best option. try the saw blade and see how you get on.
 
I have come to realise that trend are awful.

Where you trying to do it in one pass? Where you getting a lot of burning?
 
cutting solutions":2333z3lg said:
The broken cutter was fresh from the trend selection box and had never been used. The total cut length was as shown - about 20 cm tops.
there seems to be wear towards the bottom of the shank or is it just the angle of the image

The cutter issue that I may have is with the trimming of the edging to be flush with the ply - do you want me to isolate the pictures concerned?
No. I'm not sure that routing is the best option. try the saw blade and see how you get on.


Doug, sorry together we seem to have managed to mislead you as to the issue so I'll start again - cue wavy line effect so beloved of 80's films for the flash back sequence....

I have attached some oak edging to the edge of my 18 mm oak faced ply - this edging is some 3-5 mm thicker on each side than the ply panel. I need to trim this excess off.

I saw Karl do this on his oak kitchen project thread - see around half way down the page for his method.

I attempted to do this and initially used some hardboard (as I needed it to be be thin as I only had the screws to attach the router to a base plate) and suffered some "bounce" causing the bit to dig in slightly making circular marks in the edging.

Having bought longer screws I then made a new base plate out of 18mm ply but still has some issues. This has prompted me to take a hard look at how I'm doing this and two possible challenges / causes present themselves:
1) User error in how I am handling the base plate - possible solution is to move onto a router table fitted with a false base:

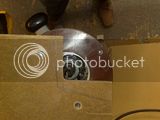
2) The router bit that I'm using has a slight downward angle on the base of the cutter (see below) which presents two very sharp points to the work - I imagine that this will not take much to dig in and they are a cutting surface. I wonder (hence my original question to you) if there is a better / specialist cutter for doing what I am attempting to do without marking the surface under it?


So my questions to you are
1) Is there a specialist bit / class of bits for this sort of work which will improve matters and if so what are they, how much and how fast can you get it to me
2) Do you have any suggestions for how I can make this work?

Many thanks

Miles
 
Back
Top