Aquarium support / storage

UKworkshop.co.uk

Help Support UKworkshop.co.uk:

This site may earn a commission from merchant affiliate links, including eBay, Amazon, and others.
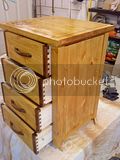
I am trying to design the draws for the unit and I think I've got most of it sorted out however I hope you can help me with a question I have...

I am using blum Tandem - side mounted in the cabinet and fixing to the base of the draw. I'm pretty sure that I've got that bot sorted out.

The sides will be 12mm ply (oak faced?) with 12mm square edging for neatness. This will also allow me to rebate across the top of the edging at the bottom all the way along with no need for a stopped rebate (can provide a picture of this is this makes no sense).

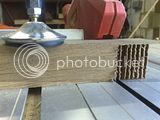
My problem comes at the front of the draw. I am planning on using 18mm ply for the fronts (no real reason other that that's what the frame is made out of) but retaining the 12mm edging. This gives rise to the mismatch of edgings shown below:

My questions are:
1) Should I be producing a box of equal height all around and then adding the face of the draw to that - however I am concerned that this will just result in a clunky look to the front by having a front which is only 7mm higher than the draw box
2) Should I increase the edging on the draw front to 18mm (in keeping with the "square edging" theme? With this sort of thickness of edging will I run into issues with the wood moving in relation to the stable ply? Will it "look" right - I know this is very subjective however there is such a body of experience here that maybe I would be committing some sort of idiot error :) This is how the draw will look from the side:

This is the look from the front (note the spacing of the draws is only to allow me to easily modify stuff:


Many thanks

Miles
 
Seems to me using veneered stuff for the draw sides and lipping them would be a lot of work.

If I made an Oak cabinet I'd use a light colour softwood for the drawers, in my case I'd use Pine as I can buy it in big sheets very cheaply. Makes for lovely drawers like here:

Walnut front edge but sides and main face are pine.


I buy mine from Build Centre which is a UK chain, find your nearest and ask for pine laminated boards 2.4m by 600 an I pay about £16-18 a board.

I'd still use Oak Veneer for the front and lip them.

HTH!
 
Chems":o4nexilp said:
If I made an Oak cabinet I'd use a light colour softwood for the drawers, in my case I'd use Pine as I can buy it in big sheets very cheaply.

Pine may provide a nice contrast but there are many other better choices available, particularly if these drawers are going to get frequent use! Sycamore or maple would be better, in my opinion, as pine is neither hard-wearing or as stable, by comparison. If you're going to the effort of making the rest of the unit from oak then, why settle for pine (unless you're working to a very strict budget?). :)
 
OPJ":3fes1uub said:
Chems":3fes1uub said:
If I made an Oak cabinet I'd use a light colour softwood for the drawers, in my case I'd use Pine as I can buy it in big sheets very cheaply.

Pine may provide a nice contrast but there are many other better choices available, particularly if these drawers are going to get frequent use! Sycamore or maple would be better, in my opinion, as pine is neither hard-wearing or as stable, by comparison. If you're going to the effort of making the rest of the unit from oak then, why settle for pine (unless you're working to a very strict budget?). :)

Budget is important but not a limiting factor. The rest of the unit will be the Oak faced ply - hence the choice of the same stuff for the draw sides.

Miles
 
Well, some actual work has been done! :)


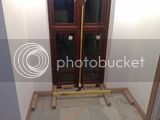
The base members were cut to size (managed to find some 40x45mm oak in the garage).


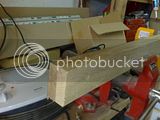
Having managed to work out the amount to project past the blade to be able to get the exact length I wanted I managed to cut all but one of the lengths right - the one I got wrong I had a senior moment on and read 37 for 27 and cut it (very precisely) 10mm to short. No matter - I ripped the tongue and grove off some oak floor boards and laminated the resulting boards together to make a beam.


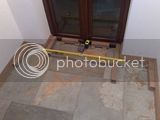
The next thing was to shim up the little feet (also made from floor boards) to take out the uneven nature of the floor. First of all I attempted to take of small slices using the bandsaw, but the blade just wandered and it was too hard to keep the stick of wood at 90 degrees. Then I used the table saw and correctly calculated the amount the stick would have to stick out and cut the sliver - only to watch it fall into the guts of the saw as I can't have a zero clearance set up :evil: Finally I dropped the blade a little so that I was only trenching out rather than cutting and managed to cut a stack of shims 0.6 - 2 mm:


I worked from the left hand side using the shims to raise the front and back of each support up and the plane to drop it down referencing the beam to the left to ensure that all was level. Sadly, last thing at night, I managed to find a straight edge long enough to span the left to right but not foul the wall and discovered about some reasonable light coming under the edge over one of the beams. I put this down to the fact that I am dealing with a bubble rather than something that is vert accurate. To get over this I am investigating a digital level - I'll let you know how I get on when it arrives. Gutted but I can't afford for this thing not to be level as it will have a very visible tank of water showing up any sloppiness! Also concerned that that 1mm difference could cause a lot of stress on the elements left and right of the beam hanging in the air. Goodness knows if I'm being stupidly paranoid though!

I have sent of a bunch of emails to some of the ply suppliers to see what it will cost and when they can deliver, I have also asked Winwood about their bur oak panels as Waka had good things to say about the stuff they did for his tool cabinet. Hopefully I'll be able to order the ply in the next 24 hours and work on the frame next weekend. The new tool should be coming before that so the base will be ready for the frame after the weekend.

Any hints and tips gratefully received :)

Miles
 
Chems":3agu317k said:
I would save your money on the digital level and buy a bag of self leveling compound and pour it into that space, put something along the front that can eventually be covered by your plinth.

http://www.diy.com/diy/jsp/bq/nav.jsp?a ... =350176943

Very pragmatic but I fear this will not go down well - the floor isn't even 4 years old and this tank may not be permanent where as the stone floor will be :)

Miles
 
Are you sure a fishtank in front of a window is a good idea?

IIRC sun shining through the window can cause problems with regulating water temp, and the light can cause out of control algee growth, so your glass ends up covered in green gunk.

I'm not certain about this, but I'm pretty sure it was a factor when choosing a spot for my brothers fish tank, and at the very least you'll need an opaque backing behind the tank to screen the back from direct light.

I could be wrong, but I'd recommend checking with an experienced party before you get much further along.
 
I would make a plinth that sits in the space. Then pop your level on it, use spacers to level at the points directly below the verticals in your design. Once you're happy pop some further spacers that are a hairs width smaller than the space at intervals to handle any potential deflection. Trying to level lots of individual pieces it likely to send you mad.
 
Setch":2ybfmavf said:
Are you sure a fishtank in front of a window is a good idea?

IIRC sun shining through the window can cause problems with regulating water temp, and the light can cause out of control algee growth, so your glass ends up covered in green gunk.

I'm not certain about this, but I'm pretty sure it was a factor when choosing a spot for my brothers fish tank, and at the very least you'll need an opaque backing behind the tank to screen the back from direct light.

I could be wrong, but I'd recommend checking with an experienced party before you get much further along.
You are right and hence I will be getting a tank with at least an opaque back and I may consider boarding the window to the height of the tank (will see what can be done with the tank before doing that).

Hopefully I can get away with it however this is the only real location for the tank in the house so I'll have to give it my best shot :)

Miles
 
miles_hot":l9ldzebd said:
The next thing was to shim up the little feet (also made from floor boards) to take out the uneven nature of the floor. First of all I attempted to take of small slices using the bandsaw, but the blade just wandered and it was too hard to keep the stick of wood at 90 degrees. Then I used the table saw and correctly calculated the amount the stick would have to stick out and cut the sliver - only to watch it fall into the guts of the saw as I can't have a zero clearance set up :evil: Finally I dropped the blade a little so that I was only trenching out rather than cutting and managed to cut a stack of shims 0.6 - 2 mm:


cant help noticing that you are cutting you shims off the end grain - hence your problems in keeping it at 90 deg - for future reference it is easier to rip one long 2mm thick bit off the side grain using your bandsaw - running the wood against the fence to stop wander (if its wandering a lot either the blade tracking isnt right , the blade is too loose, or the blade is blunt - refer to W.E 4 for more detail )

then cut the resulting 2mm thick "plank" into squares using either the tablesaw and mitre fence or just by hand.
 
miles_hot":3cfy9yed said:
Chems":3cfy9yed said:
I would save your money on the digital level and buy a bag of self leveling compound and pour it into that space, put something along the front that can eventually be covered by your plinth.

http://www.diy.com/diy/jsp/bq/nav.jsp?a ... =350176943

Very pragmatic but I fear this will not go down well - the floor isn't even 4 years old and this tank may not be permanent where as the stone floor will be :)

Miles

Yes that could become an issue!
 
big soft moose":1ehs4riz said:
miles_hot":1ehs4riz said:
The next thing was to shim up the little feet (also made from floor boards) to take out the uneven nature of the floor. First of all I attempted to take of small slices using the bandsaw, but the blade just wandered and it was too hard to keep the stick of wood at 90 degrees. Then I used the table saw and correctly calculated the amount the stick would have to stick out and cut the sliver - only to watch it fall into the guts of the saw as I can't have a zero clearance set up :evil: Finally I dropped the blade a little so that I was only trenching out rather than cutting and managed to cut a stack of shims 0.6 - 2 mm:


cant help noticing that you are cutting you shims off the end grain - hence your problems in keeping it at 90 deg - for future reference it is easier to rip one long 2mm thick bit off the side grain using your bandsaw - running the wood against the fence to stop wander (if its wandering a lot either the blade tracking isnt right , the blade is too loose, or the blade is blunt - refer to W.E 4 for more detail )

then cut the resulting 2mm thick "plank" into squares using either the tablesaw and mitre fence or just by hand.

True - good point, thanks. I got fixated on the fact that the wood was the same dimension and that this method allowed a number of them to be produced of different sizes quickly. Dumb really :roll:

Miles
 
At the moment the design is using ply faced with Oak veneer on both sides. One supplier is able to do this for the frame (18mm) elements but the draw sides can only be faced on one side with oak. Is there a convention for putting that side facing inside the draw (the most viewed in use) or the outside (as you can see it when you have the draw open where as the inner surface is obscured by clutter)?

Many thanks

Miles
 
I think it will look totally pants with veneered sides. Honestly get some nice pine, I know people say its not hardwaring but I've got pine furniture in my house that has been here for 15+ years an no sign of wear and tear.
 
Chems":puyoocsr said:
I think it will look totally pants with veneered sides. Honestly get some nice pine, I know people say its not hardwaring but I've got pine furniture in my house that has been here for 15+ years an no sign of wear and tear.

Why do you feel this? I would have thought that veneered sides with the same wood as a capping wouldn't look pants but then I've never done this stuff before so I am very interested to know why you say this.

There's also a part of me that worries about real wood's movements as I've never made furniture before :)

Miles
 
Well if you were to cap all the sides it wouldn't be so bad but it still wouldn't be great looking. Maybe done one to see how it looks?
 
Chems":3qhslfmc said:
Well if you were to cap all the sides it wouldn't be so bad but it still wouldn't be great looking. Maybe done one to see how it looks?

if you look at a lot of the furniture that, (for example) brad, builds its veneered mdf with solid wood lipping , and it looks okay
 
Chems":3a3mv5xd said:
Well if you were to cap all the sides it wouldn't be so bad but it still wouldn't be great looking. Maybe done one to see how it looks?

I will be capping the top (and bottom) of the ply. The difficulty is that to try it out I first need to buy the ply...

Miles
 
miles_hot":2l29c9jn said:
Chems":2l29c9jn said:
Well if you were to cap all the sides it wouldn't be so bad but it still wouldn't be great looking. Maybe done one to see how it looks?

I will be capping the top (and bottom) of the ply. The difficulty is that to try it out I first need to buy the ply...

Miles

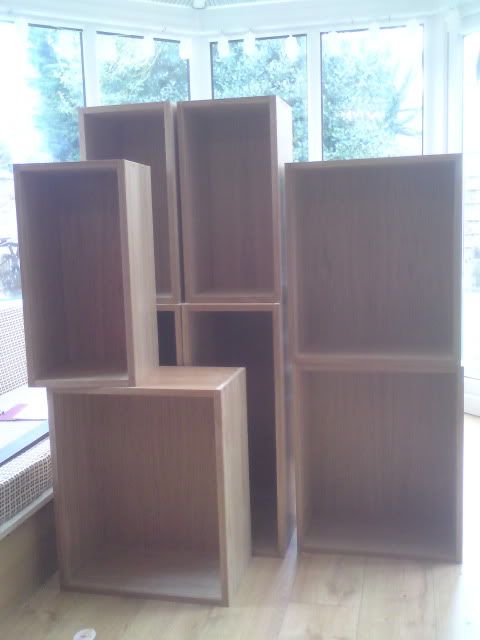
these units (by Karl) are 18mm veneered mdf with oak lipping

DSC00099-2.jpg


IMO they look fine - in fact if you didnt know one might think they were solid wood. (see karls thread "oak kitchen makeover" for procedure etc)

btw remember that as well as top and bottom you need to cap the front side - actually you dont need to do the bottom because no one can see it
 

Latest posts

Back
Top