Aquarium support / storage

UKworkshop.co.uk

Help Support UKworkshop.co.uk:

This site may earn a commission from merchant affiliate links, including eBay, Amazon, and others.
miles_hot":2nj4ub3u said:
Chems":2nj4ub3u said:
Well if you were to cap all the sides it wouldn't be so bad but it still wouldn't be great looking. Maybe done one to see how it looks?

I will be capping the top (and bottom) of the ply. The difficulty is that to try it out I first need to buy the ply...

Miles

Try it out on any 18mm scrap you have with any bit of solid wood you have.

A Festool MK700 is the tool you need :twisted:
 
Well, used by new toy, sorry precision tool and got the whole thing level in both planes :) yeh ha, I'm a happy bunny.


Love the look of it too - now all I have to do is convince people that they want to buy me the 60cm one as well as this one is too long to fit into some of the tight spaces and I'm not sure I can go back to the old tech bubble :) :)

Now all I have to do is work out how the heck I'm going to fix all the little shims in place :( I'm thinking screws with holes drilled through the shim to avoid it splitting as I screw threw.

Ah well - little things to amuse me as I find out the cost of the ply etc - current strong contenders are Lanthams as they were quick off the draw, reasonably priced and actually have the stuff. The Draw fronts will probably come from Winwood as they have been very helpful (thank you Waka for the pointer all those months ago) and I think the panels will look great (very much an indulgence though - a good argument for getting into veneering!).

Miles
 
miles_hot":1kvlfh0w said:
Now all I have to do is work out how the heck I'm going to fix all the little shims in place :( I'm thinking screws with holes drilled through the shim to avoid it splitting as I screw threw.
I'd suggest glue - no nails or similar
 
big soft moose":oikpoat3 said:
miles_hot":oikpoat3 said:
Now all I have to do is work out how the heck I'm going to fix all the little shims in place :( I'm thinking screws with holes drilled through the shim to avoid it splitting as I screw threw.
I'd suggest glue - no nails or similar
The only thing I thought of there was that this will have a thickness - I remember reading on the veneering book that when working out the thickness of the panel you have to allow for the glue (given that some of my shims are 0.6mm thick and there is a variable number of them)...

Miles
 
Kribensis in particular are usually ok if you limit it to a male and female (or more females to males and you're prepared to take out the females that don't pair with the male if they become a persistent target). They can be a little spikey but tend to direct it at other cichlids. Even then they chase a little and then just stop and carry on about their busines. By comparison to, Angelfish (another cichlid and often touted community fish) they are less grumpy. I also have Keyhole cichlids in the same tank and other community fish. The Keyholes are even less grumpy than the Kribensis. By contrast... many other cichlids are NOT suitable for community tanks.

Personally I've found that a little, well balanced, territorialism is a good thing for a tank.
 
matt":3owsvffb said:
Kribensis in particular are usually ok if you limit it to a male and female (or more females to males and you're prepared to take out the females that don't pair with the male if they become a persistent target). They can be a little spikey but tend to direct it at other cichlids. Even then they chase a little and then just stop and carry on about their busines. By comparison to, Angelfish (another cichlid and often touted community fish) they are less grumpy. I also have Keyhole cichlids in the same tank and other community fish. The Keyholes are even less grumpy than the Kribensis. By contrast... many other cichlids are NOT suitable for community tanks.

Personally I've found that a little, well balanced, territorialism is a good thing for a tank.

Something to bear in mind when we get to the good bit of choosing fish - in, oh about 2 months :)
Miles
 
Just a note but i've just had a quick browse through the post and should mention you only need foam under the tank if its flat bottomed which will be the case if its a custom size but if its of the shelf tank then it will probably have a trim round the bottom the tank sits on ( a floating base ) in which case the foam can cause problems.
Being a new member and a relative novice to woodwork nice to find a post I may have some incite into having worked in the aquarium trade for 10 years or so, its nice to feel useful! :)

If it helps, your plans look more than strong enough to me having seen some of the ridiculously flimsy looking stand companies sell with there aquariums I would say yours will easily take the weight. If you can I would definitely stick clear of mdf though.

Hope some help, mad me feel better! :lol: good luck!
 
rocksteadyeddy":qui01nfh said:
Just a note but i've just had a quick browse through the post and should mention you only need foam under the tank if its flat bottomed which will be the case if its a custom size but if its of the shelf tank then it will probably have a trim round the bottom the tank sits on ( a floating base ) in which case the foam can cause problems.
Being a new member and a relative novice to woodwork nice to find a post I may have some incite into having worked in the aquarium trade for 10 years or so, its nice to feel useful! :)

If it helps, your plans look more than strong enough to me having seen some of the ridiculously flimsy looking stand companies sell with there aquariums I would say yours will easily take the weight. If you can I would definitely stick clear of mdf though.

Hope some help, mad me feel better! :lol: good luck!
Many thanks for that - very helpful to know that you think that the unit will be strong enough :) I'm a little confused on the foam /polystyrene bit - with a custom tank will I need one or not (I think from your post that I will, but thought I'd check).

Any other tips gratefully received being a bit of a novice at wood work and a total novice at fish work :)

Miles
 
You don't normally need a foam/polystyrene layer with a framed tank because the glass base is lifted off the cabinet surface by the frame. If, however, the glass base is in contact with the surface then the foam/polystyrene ensures the base is not subject to any undulations in the surface which set up stresses in the glass and usually cause it to crack - sometimes months of even years later.
 
Sorry, in answer to your question, yes with a custom made tank you will need to use foam, or polystyrene. It is unlikely it will come with a tray (as before mentioned - floating base - the whole tank sits on a plastic trim all the way round keeping it floating by 8-10mm of the top of your unit) If you haven't had the tank made yet ask them for the base to be made double thickness if they don't as standard that way you shouldn't have any problems at all.
I was thinking afterwards my tank is approx 60-70 gal and the unit thats been sat on for the past 5 years is really only three box section columns made from (I know what I said! :roll: ) 16mm MDF witch are about 16" x 4", with a piece of 16mm ply sat on top! id post a picture but the tank looks a state and what can I say..... I'm embarrassed!! :oops:

Oh and I meant to say "you better start stocking up on algae pads now!!" :lol: :lol: Or you could go marine they like the sunlight but you would probably need a chiller unit.

Keep up the good work!
 
Update :)

The ply turned up today - excellent speed of service from Lathams as well as very patient with my questions. The 18mm oak both sides ply looks lovely - I'm already sorting out which bit will go on the top surface :)

I have some concerns about the 12mm and 6mm which I hope you can help with:

1) the 12mm ply (oak on one face and balancing veneer on the other) has what seem to me to be pretty big patches on the back - 2 very obvious ones being 15"x5" and 28"x9". They're not an especially good match to the surrounding area and seem to have staining from the tape I assume was used to hold them in place


2) the 6mm sheet appears pretty bent - when I propped it gently against an 18mm sheet of MDF it touched at either end of the 8' run but was nearly 3" off the MDF in the middle. It also sort of popped into and out of position as the side which was on the floor moved around.


My questions are:
Assuming that the 12mm board is actually a BB grade (Shaun rang me up on Monday to confirm the order and I thought he said it was a B grade however it is entirely possible he actually said BB) is that sort of size patch normal? If so how the hell do I deal with it and allow my draw sides to look OK (assuming I can't avoid at least some of the patches - which I don't think I've got a hope of doing

Is the degree of warping in the 6mm normal and if so how do I deal with it? If not I assume I just ask them to collect it and bring me a better bit?

Many thanks

Miles
 
on the second - that degree of warping is regretably common but it doesnt mean its acceptable - they contracted to supply you with undamaged goodsand you should definitely ask for a replacement.

with the former - if you are making drawsides can you work arround the patch so that it is in the "waste" ? - failing that i'd return that as well and ask for a better grade
 
OK - long over due progress is being made now :)

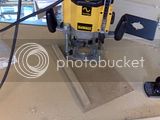
I screwed some oak to a gash bit of ply from a previous project and attempted to route it off flush.

As I only have the fixing screws that allow me to attach the router to the metal base for use in a router table I am rather constrained to rather thin material for the based of the trimmer jig - in this case 4mm handboard. To stiffen things up I screwed a oak 1cm x1cm strip:

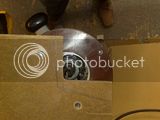
I initially made the cut out far to small and had trouble getting onto the edging strip:

However having widened that it sort of worked in that the edge was nice and flush with the edge of the ply but because I could feel it slightly bouncing it left marks on the edge:

I need to invest in longer screws - anyone know if the axminster kitcontains the longer screws I need to attach to the dewalt as I am a little unsure what size screws it is using?

more updates after my last day with the current client (and a lack of role to go to - anyone need a really good project planner / manager?) will mean that progress should be swift now :)

Miles
 
what you need mate is a router table - i'll bring that top over in the next few days but you'll still need a phenolic plate
 
When you said Dewalt did you mean the Triton? Cause if you did I fix the triton to my table and have done for over 2 years with the supplied quick release bolts which are just M6 bolts if I remember correctly.

A bit of sanding should bring out those "bounce" marks if your careful. Don't worry about the bending of the 6mm stuff, it will be fine once you put it in the drawer bottoms.
 
Chems":64srw1ai said:
When you said Dewalt did you mean the Triton? .

huh :duno:

i would imagine he meant dewalt as thats definitely a dewalt in the picture

 
That was weird I thought the picture was a triton when I looked at it. Never mind me!
 
Chems":2j73zouu said:
When you said Dewalt did you mean the Triton? Cause if you did I fix the triton to my table and have done for over 2 years with the supplied quick release bolts which are just M6 bolts if I remember correctly.

A bit of sanding should bring out those "bounce" marks if your careful. Don't worry about the bending of the 6mm stuff, it will be fine once you put it in the drawer bottoms.

The thing about sanding is that the ply is exactly at the level of the edging and I worry that sanding the marks out might stuff the ply. I'd prefer to minimise the bounce and then deal with any smaller marks...

Miles
 
Back
Top