Timber Porch Build W.I.P

UKworkshop.co.uk

Help Support UKworkshop.co.uk:

This site may earn a commission from merchant affiliate links, including eBay, Amazon, and others.
Difficult to tell from the photo Mark, but will you have enough room to fit flashings to the existing house wall?
 
Yeah there should just be enough room. Looking at using some aluminium thing my misses nephew was talking about as lead would get nicked from it in about 20 minutes haha.
 
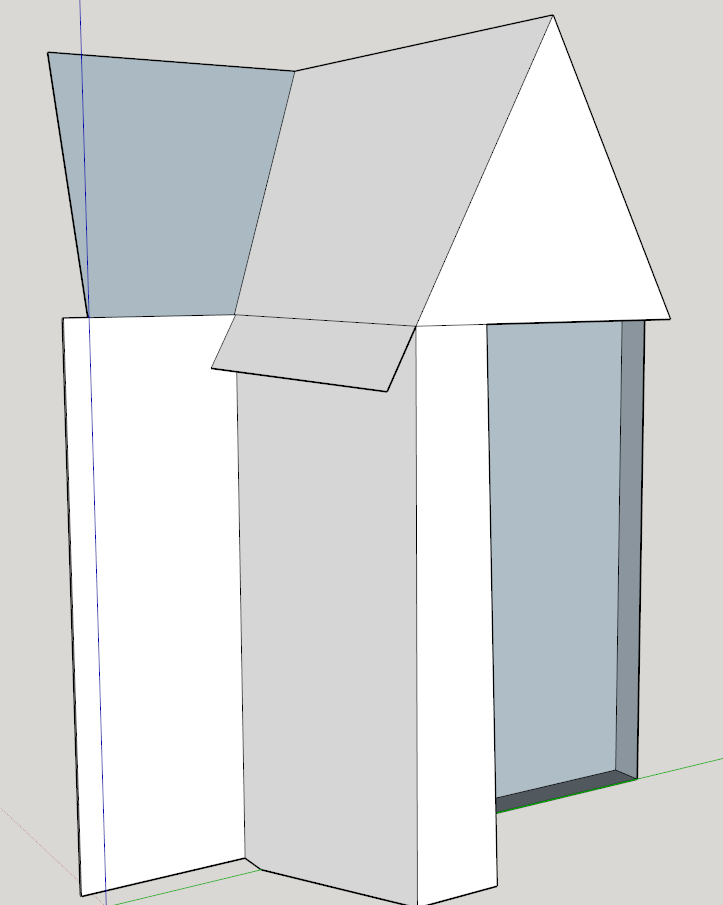
Hi Mark, I'm a bit confused can you not extend the existing roof line out over the porch to keep in line and disguise the internal/external height difference with sarking or what not? Scuse the roughness of my sketch up knowledge. To high for permitted development?

9CS5adt.png
 
Hi Bm,

As I said to Graham on the previous page

I cannot do that for 2 reasons. 1st being that the roof is above 3m so it is not permitted development and the 2nd (if this did not exist I would have done planning permission) there is an inspection cover for the sewer there and to move it would have cost a bomb

the right side of the building (furthest from camera shot) does not sit flush to the side of the building so does not match up to the roof line. limitation of where it sits as stated above with regards to the inspection chamber being in the way


Cheers
Mark
 
no probs mate. Thanks. Its a shame as if the inspection chamber was not there I would have put in for planning and joined it to the existing roof.
Cheers
Mark
 
Day 19 and 20

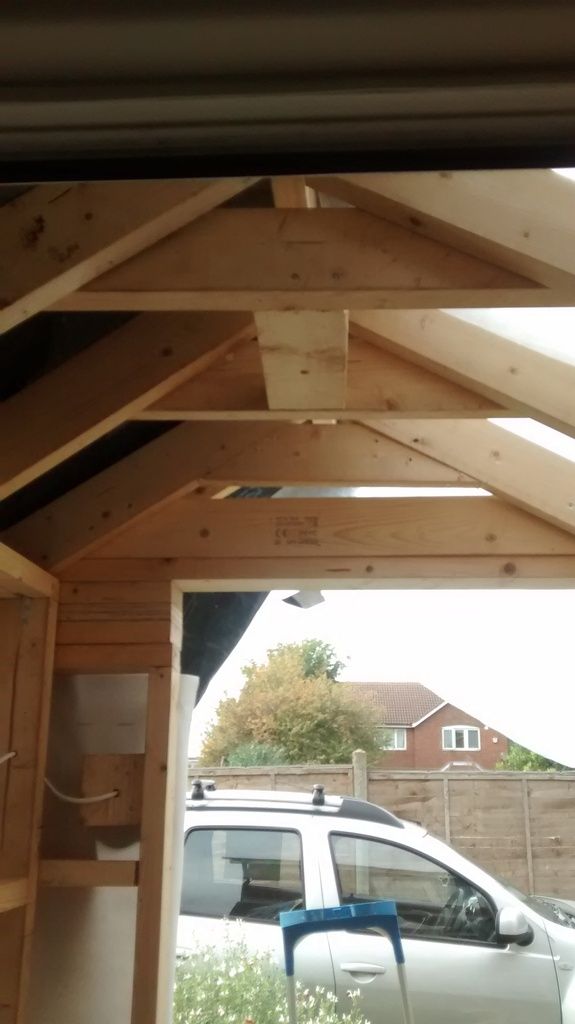
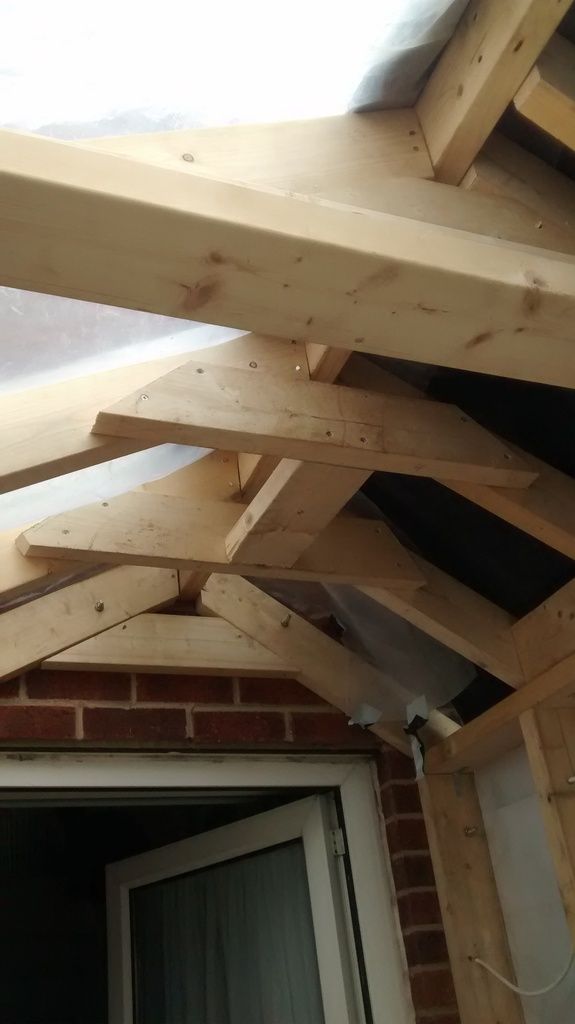
So over the last couple of days I focused on getting the rest of the roof on and braces in nothing too major happened so just have a couple of progress pictures really.

Next weekend I am hoping to get the rest of the noggin's in and then the breather membrane on and battens put down ready for the tiles. I also need to put on one more rafter at the front on the left (when looking at the building from the outside)

IMG_20151018_134729935_zpsgw4pbftf.jpg


IMG_20151018_131732751_zpspywiv90t.jpg


IMG_20151018_131724672_zpsfba3hvgp.jpg


Cheers
Mark
 
Day 21

So over the weekend got a bit of time to do a little more before the weather stopped me. I put the remaining front left rafter on and then put the gable end filler pieces so the battens for the cladding have something to go on.

I also went around the gaps and filled with spray foam to close up any holes in the eaves.

I went to my uncles who is doing his own little home renovating project and got the left over Celotex he is not using, so save me some money there with not having to buy it and should be enough to insulate the porch.

IMG_20151024_124414634_zps0olna9o1.jpg


Up next is to put the breather membrane over the roof and batten and then tile. I am hoping I can get this done over the upcoming weekend. I'm also having Friday off in which I hope to be able to fit the door frame and maybe the door (have to get them bought Friday morning). The hassle I see at the moment is that my door opening I have is about 920 and I need 926 XD. Guess some trimming will needs doing to this door frame. Also have to take the kids swimming on Friday as its half term and I said I would take them. Im just hoping the weather holds out this week and I may even try and get on with some bits in the evening.

Cheers
Mark
 
I've had a similar tight opening at 6mm too small, so even plastic frame can be carefully reduced by 3mm both sides.
Plumb the hanging stile and fix it and then fix the striking stile to suit the door closing exactly parallel so it closes nice and snug, without any gaps top or bottom, nothing worse than a Wibbly Wobbly door.
Regards Rodders
 
Hi Rod,
Door and door frame I am going with is wood so that is a bonus :). When your referring to fitting the striking stile is this the case as well if it is a door frame kit? or are your talking along the lines of making your own. Just out of interest is it better to buy a frame as I thought the striking style was inbuilt into the frame.

I was going with a hard wood frame, I take it that would serve me better over a softwood frame. Would it mean repainting of the frame can happen less if I go with a hardwood frame
Cheers
Mark
 
Sorry for the late reply. As you will appreciate it's difficult to read a level exactly in between 2 lines with accuracy in repetition, as needed
for the pair of door stiles or frame.
So what I was taught was to plumb and fix the hanging stile, and then, as we say in Sunny Devon, to either eye up, or "bone" the lock, latch, or striking stile, this is to "line" up with the eye the opposite sides to each other, in other words the outside, line of the plumbed lining or frame, with the other, inside line of the frame striking stile, or vice versa, done with accuracy, this works very well, but it's a good idea to check the door in the same manner should you be using a pre hung door "set", as you said maybe one of you're options were.
HTH Regards Rodders
 
Day 22,23,24

So not posted to much of late but it mainly because the weather turns just as I finish something and I need to get in before I have a chance to take a picture.

Any how, Over the last few days I have now

- Removed the fascia about the porch as going to replace this with some PVC (along with the rest of the lower front of the house)

- Added some 6x1 for fascia around the porch and covered the porch in the breather membrane.

- Fitted the door frame (which now has a couple of coats of primer on it to protect it and expander foam around it so its fully secure) had some frustration fitting this but got there in the end and learned a couple of lessons along the way.

- Started to add some insulation into the porch now so it is one less job to do later. (plus the missus and kids got on with this as well)

I am hoping this weekend I can get the roof battens on ready for tiling and maybe even start tiling. The weather is not looking good though so it may give me time to make the windows instead.


A couple of pictures

The oldest of the youth measuring and cutting some insulation
IMG_20151029_150934452_zpsuwrv2r4h.jpg


You can see the frame in, the porch wrapped and the night drawing in. This was my cue to pack up and go trick or treating with the girls.
IMG_20151031_170519940_zpswivzyxzm.jpg


A couple of other shots of the frame with some of the packing in to do some of the fixings
IMG_20151031_170537186_zpsqyiluyum.jpg

IMG_20151031_170531846_zpsbdlqouga.jpg


I will try and get a couple of decent pictures this weekend so you can see what it is looking like now.

Oh on a note i'm sure one of my quick release clamps got nicked as well. that I left out in the porch poxy Halloween.

Cheers
Mark
 
Day 25 and 26

So although I am saying it is 2 days work I really only got a couple of hours work done on the 25th day as the weather was total crap. Anyhow, on with the post.

Day 25
Today I set out the battens for the first course of tiles. After getting the eaves setup and trying to put on the overlapping course I could see something was wrong, the weather was getting worse so I decided to just stop and I posted a message on here. Turned out I needed to put a double stack of battens at the front for the eave tiles to rest on and that sorted my issue out. So by the end of the day (about 3 hours work total) I had the eave tiles on either side and the second batten in place to take the overlapping course of tiles.

Day 26
Woke this morning to a gale force wind but looked out side an saw the tiles were there still so that was a relief. Today's objective was to get the roof full tiled so I measured from the last batten to just under the ridge to work out my gauge and found that I did not have enough batten left to do both sides.

So instead of only half doing one side I decided to do the smaller of the two sides as I could at least get that finished of. After struggling with nailing the battens under the existing roof line (timber from the roof stopping me from getting a good swing with the hammer) the tiles went on pretty quickly, especially when I got the misses to pass the tiles up to me rather than me going up and down the ladder like a YOYO.

So with the one side all tiled I only have the other side to do now and then put the ridge tiles on, or so I thought. After speaking to my misses nephew (he's a roofer) he said to get some aluminium soaker's for the edge that meets the existing wall. So a quick hop on ebay and they are all ordered and should be with me by Tuesday so I can get them installed on both sides, a little more work to take off the existing tiles I put on already but will be worth it in the long run if it prevents water from getting under the tiles.

I have a half a day off work this Friday as I need to take the middle child to hospital so she can get her cast off (well hopefully get it off) and I'm hoping I will have enough time to get the extra battens I need. Now just to hope that the weather is nice over the weekend so I can get cracking and get this tiling finished off.

IMG_20151115_141213067_zpsqajxdmly.jpg


Cheers for reading
Mark
 
Day 27 and 28

Well this weekend my task was the get the roof finished off and it almost happened.

Day 27
I got up early this morning and went do the road to buy the ridge tiles and the battens that I needed. So with them bought I could get on with the rest of the roof.

The first thing I done was to put the rest of the battens on the roof ready for the tiles and with that done I decided to batten the rest of the side of the porch ready for the cladding when I get it.

I then continued to tile the roof and install the aluminium soakers, There was a bit of faffing about getting the soakers to go in but with a few cuts they are all present and correct. I then had to go back to the other side of the roof and retro fit the soakers in as I forgot about them when I was doing them before.

so the roof now had both sides on with soakers installed. all that was needed now was the ridge tiles


Day 27
I realised this morning I messed up the top layer of the roof as the top layer of tiles where not correctly covered by another set of tiles. Luckily I was able to squeeze another batten in and fit the needed tiles into place, but I discovered I was short 9 tiles XD. So took a trip to Selco to get a few more tiles. Came back to put them on and discovered they were the wrong ones as the nibs where in the wrong place, grrrr. But after i de-stressed I remembered the misses had taken a few tiles and painted them (she was trying to sell them at a craft fair she done). So I went on a quick search and found them and there was just enough to get it finished.

Whilst I was out getting the tiles the misses nephew came round and dropped off the dry ridge system he aquired from work for me so after the tiles were in place i could get it on. I put the needed battens on the ridge and laid out the system on it. After putting it all out I discovered i needed to cut one of the ridge tiles and by this time it was dark and I did not want to get the angle grinder out. so it is at that point I stopped.

So next weekend I need to cut the one ridge tile and finish the rood which i am hoping will not take to long as i can then install the front door as well.

Here are a couple of pics any way.

In the process
A15112113221110_zpsiny9qm2v.jpg


Almost there
IMG_20151122_131121028_zpslgiqieuo.jpg


as it stands at the moment
toproof_zpsr2hike9z.png


overall I am quite pleased with how it has turned out seeing as it was my first time at doing anything like this. I learned a few lessons that I can take on board for future projects.

Cheers
Mark
 
It's looking good Mark! Getting there mate. How are you going to finish the underneath of the tiles? Will you slide a bit of roofing board in so you can mortar up or do you have another solution? Forgive me if I missed a previous explanation. Does your Mrs know you stole back the tiles?!? :shock: 8)
 
Think I am gonna go for the dry verge system to finish it off. Yeah she knows I took them. She actually reminded me where more were haha
 
Day 29 and 30

Day 29
So had a little time today and I wanted to get the ridge tiles on and mortared in place. So today's objective was to get that sorted I used a dry verged system to hook it all into place but the ridge tiles I used where not really the correct size for the dry ridge system as they had about a 1 inch gap between the bottom of the ridge tile and the roof tile. To get around this I just mortared the gap up and through the mortar in the front ride tile to finish it off in all I was done in about 2 hours or so. Overall I'm happy with how the roof looks and I think for my first effort it is not half bad.

I do not have any pics as it started to rain just as I finished up so I had to quickly cover it so it did not wash the mortar away. I will get the cover off this coming weekend and be able to get a couple of pictures so you can all see.

Day 30

So day 30 is actually a couple of days but i'm counting it as one (like I have been doing for the majority of days, I am keeping track of hours spent on this project so at the end I will update what I actually done in total). Anyway today I cut the hinge slots out in the front door (door weighs a ton as it is solid oak so was a struggle to move but the missus came out and gave us a hand) After the slots where cut I made story stick of the hinge positions.

I offered the story stick to the frame and marked the hinge locations and chopped them out. When I offered the door up the hinges lined up bang on really so I was a happy camper. quite amazed with the hinges really they are fire door hinges I used and they make the door feel like it weighs nothing and it just glides open.

Although the hinges were in the right location I did spend a bit of time faffing with chopping the middle and bottom hinge so the door sat a bit tighter to match the top. It is not 100% but looks good unless you stare closely, I will probably come back to it at a later time but thought I should get the rest the porch built first rather than focus on what is really a cosmetic issue.

Once the door was hung I then put the mortice lock and door handles on as well as a latch on the inside of the door to that can be slid across to lock the door. Cutting the mortice lock in was a bit of a pain, I managed to mangle 2 spade bits so need to replace them as well, but after some faffing it is sat in there nicely now. I still need to finish off putting the strike plate in as I run out of time but I am to get that in tonight. I will then touch up the primer on the frame and maybe even give it a top coat.

This was the first time installing a door from scratch fitting locks and handles etc am Im happy with how it turned out. I have learnt a few things that I can take forward with the next door I do.

Jobs remaining on the door are letter box installation and actually staining the door. The next couple of days are meant to be ok weather so may try and get the teak oil on in the evening so it can start soaking in but I will see.


Due to the time I get home from work it is to dark to get pics but I will get a few up at the weekend so progress can be seen.

Thanks for reading

Mark
 
Day 31 and 32

Day 31
So today I was focused on getting the door finished. First job was to get the letter box installed, After some careful measuring out I went about cutting it. After cutting it I realised my jig saw bed was on a slight tilt so had to have a few more minutes to flatten out the opening. I offered up the Letter box and took note of the tight/high spots and went back a trimmed it all down so the letter box opened nicely.

Next up was replacing the weather stripping. I used the original door weather stripping before but it obstructed the sliding bolt so would not locate in the hole that was there for it and I could not make the hole any bigger as it was right on the edge of the frame so for a quick fix I put some thinner weather stripping around the door and removed the one that came with it. However, the fit of the door to the weather stripping was quite loose and I did not like it. My dad popped round and said why don't I just shim the bolt out so it fits on with the correct weather stripping so that is what I did and now works a treat and still looks ok with it shimmed out.

After having the door on for a week I realised the light we have out front needed to be switched to the other side. So after a bit of think I re-run all the wires in the porch to move the light over and so the electrics were in place for all other parts that were going to be fixed. Just waiting for my misses brother to pop round so he can change an MCB over for me and hook a different wire up into the unit (he is an sparky as you may have guessed).

I then patched up some some more holes with some insulation to make sure all the draughts were being cut down and the walls insulated. I then went mad with some expanding foam to make sure all little holes were closed up and with the wind we had on Saturday the change was felt almost instantly. The draughts are really non existent now and it is starting to feel a bit warmer.

With the light beginning to fade I wanted to get one coat of stain on the door as it is a 30min quick dry stain and wanted at least a bit of protection from the elements. With some help from my dad holding the door at the needed angles (battling the wind that was trying to close it) I managed to get the coat on.

I then fitted the weather bar (I had to lop a 45 degree angle off on the opening side so the opening of the door was not obstructed and could open enough). After caulking and fixing it to the door I realised it looked a mess and I should have done the 45 on the other side too so it matched. However, it was too dark by then so I could not take it off so I though I would do it the next day.

Day 32
I went to take the weather strip off and found it was well and truly stuck to the door, bugger is a words that come to mind. Instead of butchering it and trying to get it off and ruining the door in the process I have decided to leave as is and take it as a lesson learned for future reference. Maybe I will come back to it in the future and sort it out if possible.

Today I wanted get the sub floor in and floor insulation. So I laid some plastic down on the slab first to help protect against an moisture and then I measured up the timber to go around the porch and cut and fixed it to the floor with hammer through fixings. I put a couple of cross supports in the floor and levelled the frame up. I then put some insulation down in between the floor battens and then 2 layers of 9mm osb board across the top (I used 9m as my uncle had some laying about so it enable me to save a few quid).

I have noticed that a section has a bit of bounce to the floor so I am going to lift it and add another support under the section and it should sort it all out. Other than that section the floor feels solid under foot and it has warmed the porch up even more.

Next on the list is to make the needed corrections to the floor and screw that all down, then insulation put in the roof, get the window frames made and installed and then get the cladding sized and ordered.

Each stage now shows a bit more progress each time and is starting to look like a finished product which is nice to finally see.

Again by the time I finished work or both days I did not have time to get pic's. But they will come.

Here are a couple of pics from last weeks work so you can get a bit of an idea of how it is going.

A nice blurry one for you all
IMG_20151205_100503960_zpsmjjytre7.jpg


a bit clearer and with work in progress holes for the letter box :p
IMG_20151205_100509742_zpsutyd7vvb.jpg


A shot of the roof with the ridge beam foxed in place
IMG_20151205_100516126_zpsveblyjny.jpg


Cheers
Mark
 

Latest posts

Back
Top