Timber Porch Build W.I.P

UKworkshop.co.uk

Help Support UKworkshop.co.uk:

This site may earn a commission from merchant affiliate links, including eBay, Amazon, and others.
Hi Graham,
Yeah I have one coat of stain on it to give us a little bit of protection (better than nothing) Hoping the weekend is nice and can get the remainder on the outside and the inside.
Cheers
Mark
 
Great job Mark. +1 to getting something on that nice door. Hope the weather is good to you =D>
 
Liking the professional standard hop up says one dad to another. Is that a Festool systep? :wink: Coming on Mark.
 
Its the Ikea step stool premium BM101. A quality piece of kit for £4 going to have to spray some green stripes on it so people know the value of it.
 
Day 33 and Day 34

This weekend I had some tasks I wanted to complete to be able to call them finished so here is what I done

Day 33
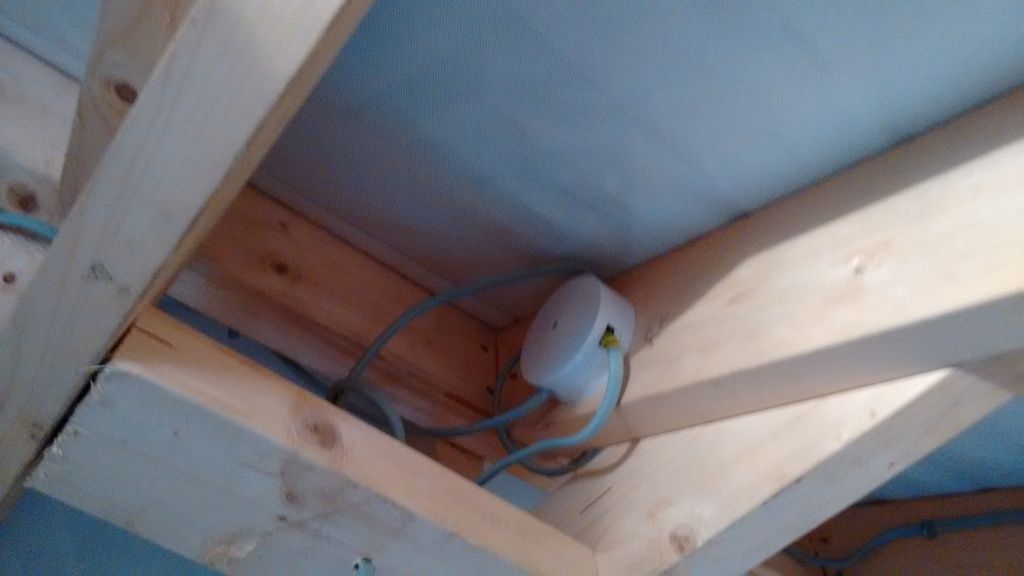
all the electric cables were run last weekend so this weekend I wanted to connect everything up and run the new wire into the house that will be used to power it all. I first connected everything up in the junction boxes and ensured all wires were clipped into place along the frame work to make sure they were out the way and I put nailer plates where they needed to go.

The next stage was to get the new wire through the hole in the wall to replace the existing, this new wire is to be connected to the consumer unit to a new fuse so it had to be a bit chunkier than the wire that ran through previously. After a number of attempts at threading the wire through the hole it was no good and I had to get the SDS out and enlarge it (should have done this in the first place and it would have made the job a 20 minute job instead of about an 1 hour that I spent on it.

With that finally pulled through I cleaned up the porch floor and lifted the osb board I had put down last weekend (I had put it down just not fixed it). When I put it down last week it was a bit wet and it still was a bit wet (the lower layer at least and the bits that had been under plastic), So I took it all up and allowed it to dry in the kitchen (my misses is very understanding). Whilst that was drying I tided up the plastic membrane I laid over the concreate slab and fixed it around the side so it was nice a neat.

The final task was to try and get some silicon off from around the existing front door as it was looking aged and I wanted to put a nice fresh bead down. Blimey was that a mistake, I am currently still battling getting this off from one side of the door. I used some bike chain lubricant as it is meant to break it down a bit but it is still tough. I have put this on the back burner for now and will tackle it during the week.

Day 34
I got up today and the osb board is considerably dryer so I decided to fix it down. With that screwed to the frame and screwed to each other it is now solid and feels very nice to walk on (I got the OSB from my uncle who was using it to divide 2 rooms temporarily, so it is only 9mm thick hence the 2 layers I put down)

My dad then came round and gave us a hand so I could get a few more jobs finished up. So whilst he switched the front exterior light over to the other side of the porch I cracked on and continued insulating the porch. My dad then gave me a hand to finish insulating the porch. After the insulation was in the mess was everywhere so a clean up operation then ensured.

I then had to stop the porch and get all the tools packed up from the living room (they have been living there for the past month or so whilst I was working on the porch) and put away in there needed places so the Christmas tree could go up or else the kids would not be too happy.

Once the tree was up I went back to the porch and went crazy with spray foam sealing any gaps I could find and that was really all I could do for today.

Up Next

So during the week I will aim to remove the rest of the silicon from around the existing front door and get a new bead down on that, then cut all the expanding foam flush with the frame so I can then put up the vapour barrier so it is all ready for the plasterboard, I then need to get the windows made and then get the outside measured up so I can order the cladding and depending on the weather I would also like to get the door stain finished, but not holding much hope for that.

The list goes on but I will just look at a few things at a time.

Some Images
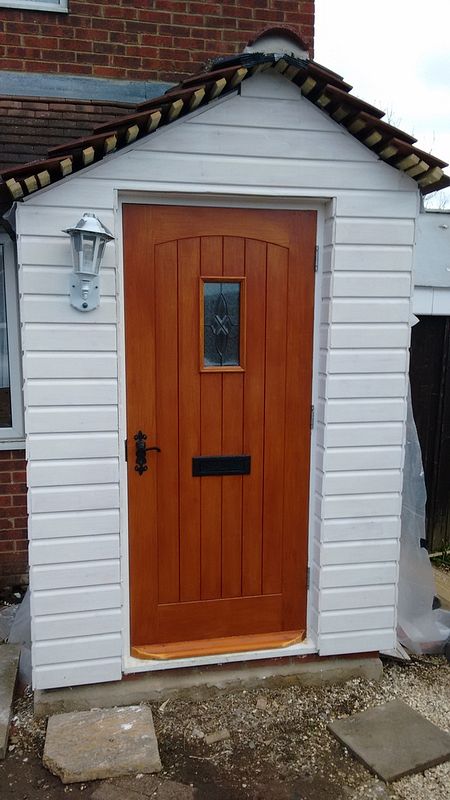
The door with once coat of stain (and the mistake of the one cut side drip edge)
IMG_20151212_131153048_zpssss5tgho.jpg


inside view of the door
IMG_20151212_131133736_zpsfxinlhn4.jpg


the floor battened and insulated
IMG_20151212_131141429_zpsp4q65grp.jpg


plastic under the floor to stop any damp that comes up (left and air gap around the outside of the frame so it can breath a bit though)
IMG_20151212_131549913_zpsfek0f0w0.jpg.html


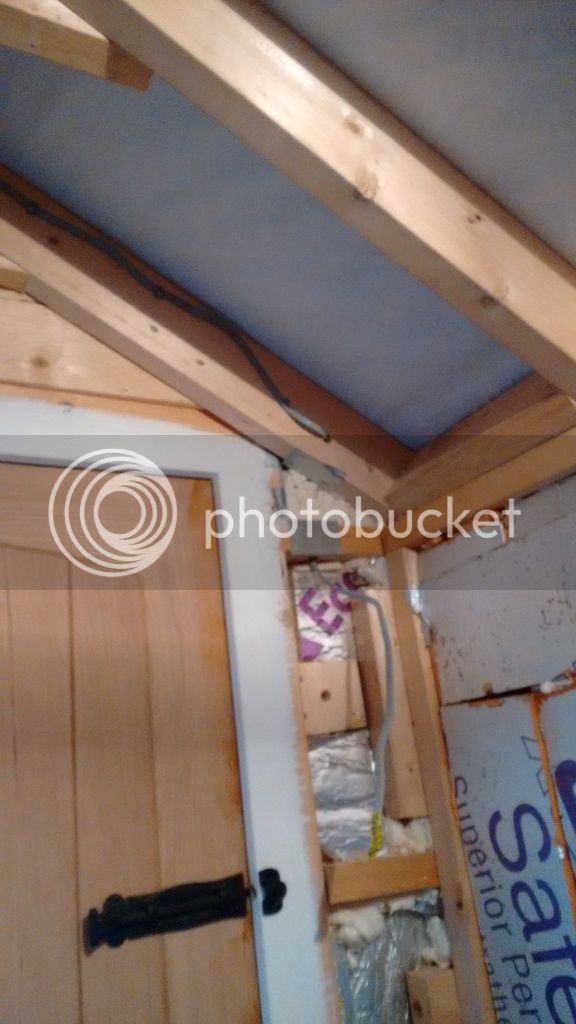
some insulation (not finished though will need to get a new pic of it all in)
IMG_20151212_131122072_zpscnpkrrbb.jpg


junction box
IMG_20151212_131114005_zpst73qld0p.jpg


the floor again (with additional brace to stop the bounce)
IMG_20151212_131047101_zpsxqnvfbmc.jpg


Wire for the outside light
IMG_20151212_131108532_zpsgmzlb14j.jpg


Thanks for reading, more updates and images to come

Cheers
Mark
 
Looking good Mark. You could cut the other end of the drip strip off at an angle because it's on the opening side - you'd just need to do it carefully is all.
 
I did try and take it off but the caulk had stuck it on. I can take my multi tool to it but i'm just debating to do it or not as I don't want to mare the door under it. I would rather put up with it as is then screw up the door as you can probably imagine.

When it is all done I may try and tackle it then, as I would prefer it both angled. But for now it can stay as is.

Cheers
Mark
 
Day 35

So I finished work for Christmas on 18th December and from then to the 23rd I had not done much on the porch but I did put some time into making the windows for the porch. I only got the smaller one done as the larger window double glazed pane I got from my uncles conservatory tear down turned out to me no good (after I wasted a day trying to make the frame for it and ended up binning the oak after I could see it was not going to work) I also got hung up on a couple of last minute xmas gifts as well.

I now have a new lager double glazed pane ready to go that it a better fit for purpose and I am hoping I can get that window made before I go back to work on the 4th Jan.

So today I had a bit of time and used that to install the window. Here are a couple of picks on the install and also a pick of how the door is looking now with a couple more coats of stain.

Opening cut and started to put the flashing on
IMG_20151230_113447260_zpsfzucah9u.jpg


Different view
IMG_20151230_113505234_zpshkufsntk.jpg


Window in and levelling it out
IMG_20151230_122159387_zpsr8p97btj.jpg


Window fixed in
IMG_20151230_130623436_zpskaar8vio.jpg


I did use expanding foam around the window to finish the installation as well but don't have any shots of that. I will get a shot of that tomorrow as well as a couple other shots if inside the porch to show the floor and roof insulation

Bonus shot of the door with the inside now stained
IMG_20151230_113454853_zpsqnuoarow.jpg


Cheers for reading
Mark
 
Thanks Alex, I have a few extra photos to put up soon and I connected the electric out there Friday morning so feels like progress haha
 
Hi All,
Not posted in a while but just wanted to let you all know it is still alive and I have made and installed the second window (the one for the large hole you can see in one of the pics for the door)

The first window is all painted on the inside and needs another coat on the outside the second larger window needs one more top coat and then 2 on the outside (weather a limiting factor on getting the outside coats done)

I have the cladding now for the porch and over the weekend the front room and kitchen were a painting studio. Good job the heating is on as it allowed the primer to dry fairly quick. I just have 5 2.4m boards left to paint now but need decent weather to get them painted (or I may cut them to final size so I can just get on with them and paint them indoors I will see though)

I am hoping for a little break in the weather this weekend so I can at least start to get the cladding on and get a coat of primer on the exterior face of the wood to protect it until a time when i can get it painted.

I still need to buy corner boards for the cladding and around the windows but will get them later once I know what I want to go with.

As the cladding is in the porch work on the inside is on hold for now (minus the little bits of painting) However I did install the PIR sensor to run the light and that works, just need to hock it up to work with the pot lights I have.

Once there is some room in the porch I will be able to get one more brace in to hold a coat hook or 2 and then I can vapour barrier it and then install the plaster board.

It is all moving along and hopefully I should have some pictures up this weekend.

Cheers
Mark
 
Hey All,
Here are a few photos of the progress so far. Saturday there was a break in the weather so from about 1pm to 4pm ish I could make a start on the cladding.

The new larger window
IMG_20160130_163048524_zpslh4zgzns.jpg


one side cladded
IMG_20160130_154225552_zpsjf9qziem.jpg


with the window ledge
IMG_20160130_163024045_zpsaagpxvsu.jpg


close up of the side
IMG_20160130_163037496_zpsvgpqpoui.jpg


Sunday evening at about 3 i spent and hour or 2 doing the other side but light faded and I got a couple of rows on with the window ledge and had to call it a day. I don't have any images of this due to the light.

I will get some more pics up next weekend hopefully


Cheers
Mark
 
Its coming along, not really the weather just now to be outside with a hammer if you don't have to be. I have a porch to do at home, but leaving it until summer I think.
 
Yeah is a bit chilly cammy, but I can see the end getting closer so it is driving me on. Plus a nail gun helps a lot lol
 
Hi all,
Quick update with some pictures. the weather turned out to be not to bad on Sunday so was able to get a bit more work done on the cladding. Would like to have finished it but had the occasional stop and start due to seeing to the baby etc but pleased overall.

It is really starting to take shape now and I can see what it will look like in the end more and more.

IMG_20160207_152516359_zpsybkd6dpi.jpg


IMG_20160207_152510312_zpsvldg15a6.jpg


IMG_20160207_152457769_zpsnbyuf4xe.jpg


IMG_20160207_152450116_zpswa4tuzrh.jpg


I was not overly happy with the gaps left near the tiles on the front from my poor judgement on what to cut however the gap will be covered by the fascia board and I can block in the gaps with something else to cut down on an draughts that may come through and I will cut some other bits of cladding to fill the large holes.

Cheers
Mark
 
Hi All,
So some more progress on the porch


The cladding is now complete and below you can see the results.

You may also remember from an earlier post when I stated I messed up the weather strip on the front of the door as it looked weird to have one side angled and the other not, well it got the better of me and I changed it so now each side now matches.

You can see that the very top bit of cladding actually fits rather well. It was at the point of putting this last piece in i realised what I was doing wrong XD. Never mind I now know for the future. The gap will be hidden by the fascia anyway.
IMG_20160221_170042351_zpscddrnehh.jpg


IMG_20160221_170034992_zpsawvonjhx.jpg


IMG_20160221_170107403_zps6syczpcy.jpg

I have the plastic over the window so some silicon can dry around the moulding and the window, as I came out in the morning and found a small puddle of water on the window sill where it had crept in through the small gap.

IMG_20160221_170058804_zpswckqcoun.jpg


I have got all the corner mouldings cut to size and I just need a nice couple of days at the weekend so I can finish the painting and then I can fit the corner mouldings.

As the weather is stopping me from progressing on the outside I used the time to work on the inside with fitting the new lighting and putting the vapour barrier up. There is just a small amount of vapour barrier left to go up which I will be doing hopefully tomorrow.

At the weekend I am hoping to get the plasterboard up and taped and maybe even start on the joint compound

IMG_20160224_212732314_zps2k0vwwhf.jpg


IMG_20160224_212741847_zpsajaohzrl.jpg


IMG_20160224_212745186_zpssyubcn94.jpg
 
Hi all not had an update in a while but thought i would provide on now.

So the outside is pretty much there now just the final trim bits and fitting new lights and bells.

IMG_20160313_181614453_zps7vjfwxof.jpg


IMG_20160313_181619620_zpsdzgxtykw.jpg


IMG_20160313_181635006_zpsglqzmlge.jpg


the inside is also almost there now as well. I have gone through and plasterboarded is up and started to tape and joint. I have to sand the walls down and do another coat of compound which hopefully wont take me too long to get on. below are a few shots of the plasterboard up (before joints were taped and compounded.

It is getting quite close now.

IMG_20160305_091027846_zpsxbswx0dl.jpg


IMG_20160305_091023933_zpsd2ld4t6q.jpg


IMG_20160305_091018825_zpsuok1qkyu.jpg


Cheers
Mark
 
Looking good Mark.
Have you got enough screws in that plasterboard? :D I've just realised you're not far away from me at all (I drive home up the crooked mile most days), and wondering if I should be worrying about an upcoming tornado season you're preparing for that I know nothing about. :-"

Nearly there mate.

Cheers
Chris
 
Haha Chris, well I had a box . Of 1000 and wanted to make a dent in it lol. Yeah I drive down there if I'm going Harlow and such. Prefer it to the a10.
 

Latest posts

Back
Top