Making a brass infill plane (Hattori Hanzo, DP)

UKworkshop.co.uk

Help Support UKworkshop.co.uk:

This site may earn a commission from merchant affiliate links, including eBay, Amazon, and others.
...... Once the handle is at its final shape and the sharp edges have been removed I'm hoping it will be as comfortable as a traditional gents saw....

If you use it enough, it will wear into your hand-shape eventually.... :D
 
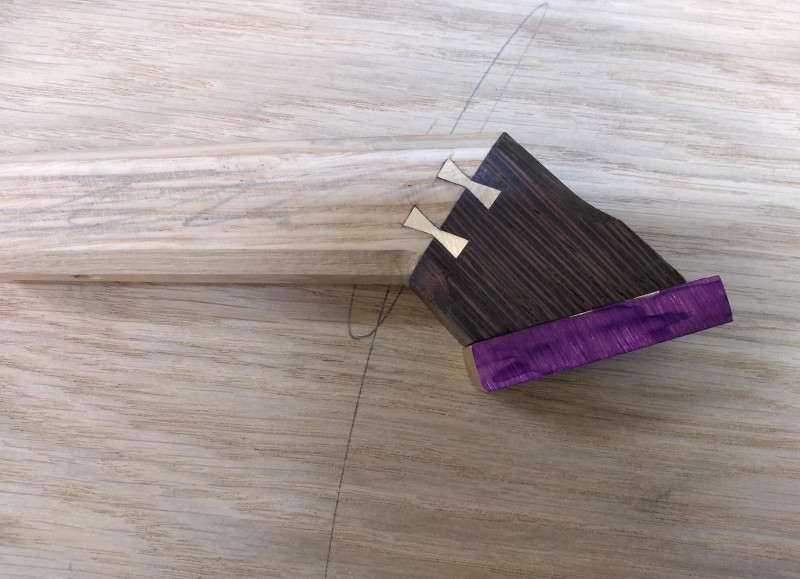
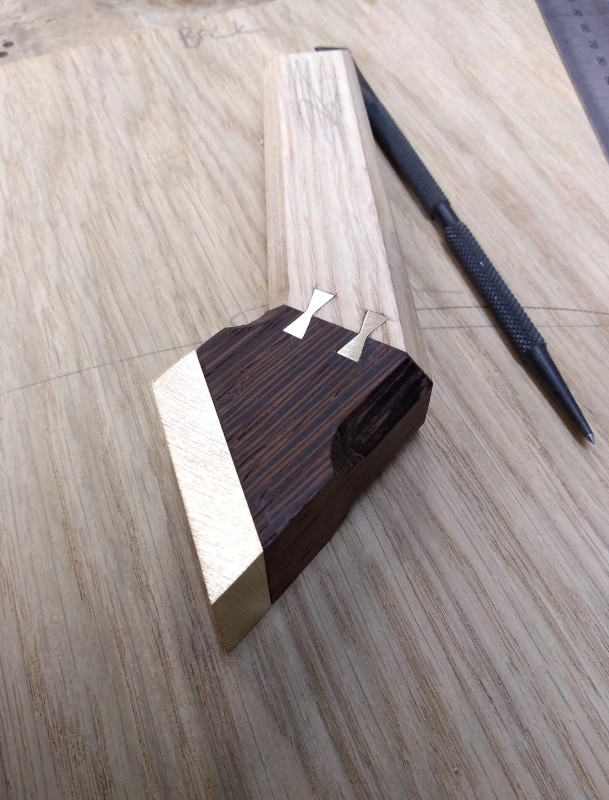
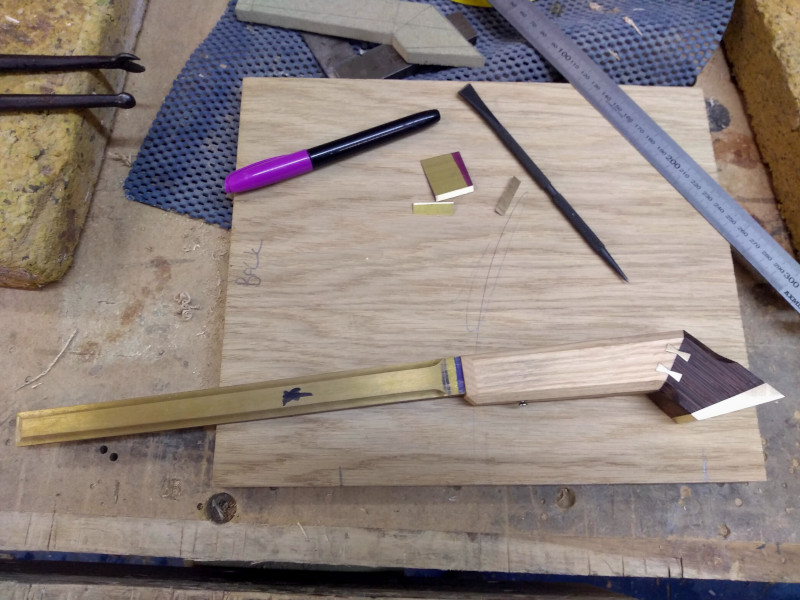
With all the brass bows cut in I could add the last brass detail to the handle which also acts as a counter weight to the brass back.

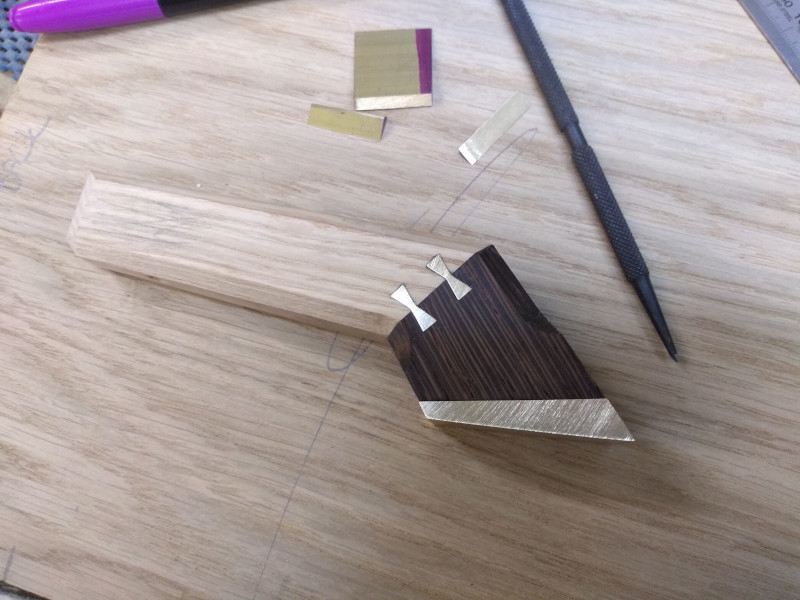
I cut a piece of brass and flatten one face so it fits tightly to the bottom of the handle.

DqOmx29.jpg


As the brass backs are much heavier than traditional folded backs this adds some much needed weight back to the grip end of the saw.

8LtoSXg.jpg


I temporarily fit the brass to the handle with super glue then cut the final taper and sand flush with the disc sander.

Pr3Hsk3.jpg


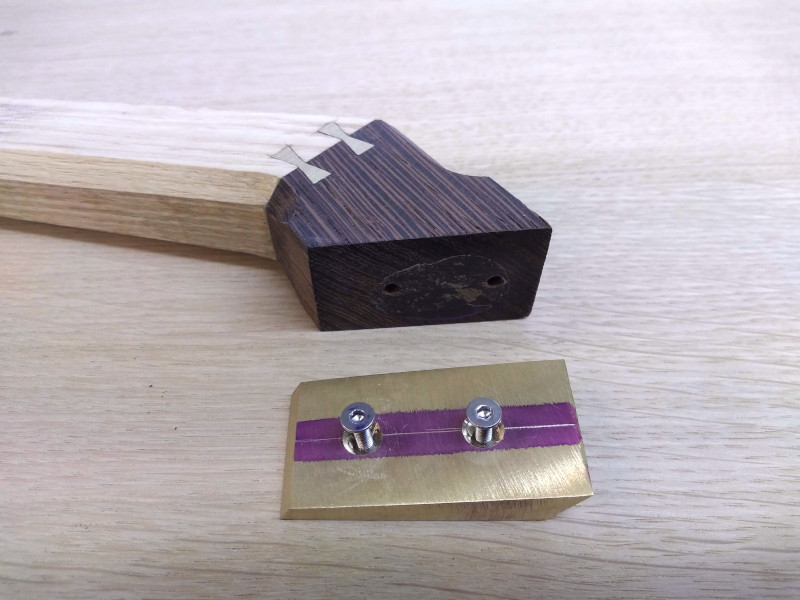
The brass is then permanently fixed in place with strong set epoxy, threaded inserts and bolts.

MYC9NAd.jpg


Lastly I could dry fit the backs into the handles to feel the weight together and the see how the saws looked.

hF3Qp1c.jpg
 
Last edited:
That has to be one of the more intricate saw handles I've seen, HH! :)
I do like your design aesthetic, it's sort of Japanesy in a Western way - very appealing...

However, yours & my saw-making philosophies seem a little different. My couple of "gents' saws" have simple, boring turned handles. They are not a big part of my saw kit, in fact one is a tiny 24tpi thing with a blade barely 100mm long, that I mostly use for nipping off the drive-ends of small turnings. The handles are quite small & light, just a comfortable handful. I never did get on with straight handles for more demanding work - I tried Japanese saws back in the 70s when they were first being touted as the best thing ever to hit the woodworking world, but just couldn't get on with them, I was too rusted-on to push saws. I can imagine a Japanese woodworker responding similarly to Western saws..

It's interesting (to me, anyway) that you've put quite a hefty spine on your saw. Something that has been commented on before is that British saws of the last century & before tend to have heavier backs than equivalent sizes of American saws, sometimes much heavier. I've not seen any reasons advanced for this, & wonder if there are any, other than local custom? Heavy backs certainly aren't 'necessary' - my favorite little dovetailing saw has a 5 x 18mm spine, but slices easily through hardwood under its own weight. But it's what you get used to; to me it's highly controllable and easy to use accurately, but a friend who is a very competent woodworker & well used to saws doesn't like it at all.

However, a little bit of weight in the back certainly helps. I recently tried out a couple of plastic-handled hardpoint saws from a local hardware chain to see if they were capable of accurate work. Their 'spines' were bits of thin metal - looked like scraps left over from making jam tins. The very light weight plus very badly-cut teeth made them unusable - if you could get them to cut at all, it was never in the one direction for long. Not the sort of saw a beginner would want to start trying to cut dovetails with!

Cheers,
Ian
 
Thanks Ian.

I have a 22tpi Pax gents saw with standard round handle that's been my go to saw for the last 15 years, I love it though it does need re-toothing now. (Watch this space)
I prefer to use it over my dovetail saws and will only swap over if I need the extra depth.

I also have a nice Shokunin ryoba Japanese saw which I also like a lot and it gets a lot of use. I'm fully onboard with the hype of them, they do produce an excellent, crisp, effortless cut if you can get along with the mechanics. Former colleague with 45 years experience using push saws bought one and got into all sorts of bother trying to use it. His muscle memory just wouldn't let him function it properly so he soon gave up on it.
Like you say horses for courses.

I've heard that heavy backs on saws can help to train vertical cuts faster for beginners as you can concentrate on keeping the saw plumb while the extra weight helps the saw through the wood. The extra weight aids stability but increases effort, on small saws the extra weight isn't an issue where fatigue is concerned as you generally only cut small pieces but I wouldn't like the extra weight on a large tenon saw.

Could all be a load of nonsense of course but it made sense to me........that and it's the only brass stock I had available 😆
 
........that and it's the only brass stock I had available 😆

"What I have on hand" has very often played a major role in my design processes, HH! ;)

There is a lot of rather suspect stuff written and spoken about most tools, but I reckon planes & saws get more than their fair share. Personal preference in saws has a huge amount to do with what you will choose for any given operation, and our preferences cover a very wide range. 'Twas ever thus, I think - just look at the staggering variety of sizes, handles, & tooth patterns that were available back in the days when back saws & hand saws were used all day, every day?

I have always contended that one of the reasons for the popularity of Japanese saws was that they came along at a time when the ability to properly fettle a saw was dying out. I would see (& still see!) people struggling with saws that would take a week to cut your finger off. The overwhelming advantage the Japanese saws had is that they came sharp, very sharp, and well-set, out of the box. To go from any dull, poorly-set saw, push or pull, to a saw that slices through wood effortlessly is bound to make a lasting impression.

Some lucky people seem to be able to switch between push & pull saws constantly, but I'm not one - wish I was! If asked which type is best, I always say, it's the one you are used to, and preferably, one sharpened & set appropriately to the task...

Viva les differences.....
:)
Cheers,
 
With the handles partially done I turn my attention to the saw plate.

I picked up some 0.5mm thick spring steel, hardened and tempered to Rockwell 50-52c
I went with a thinner plate as I thought it would suit a gents saw batter and give a really fine cut.

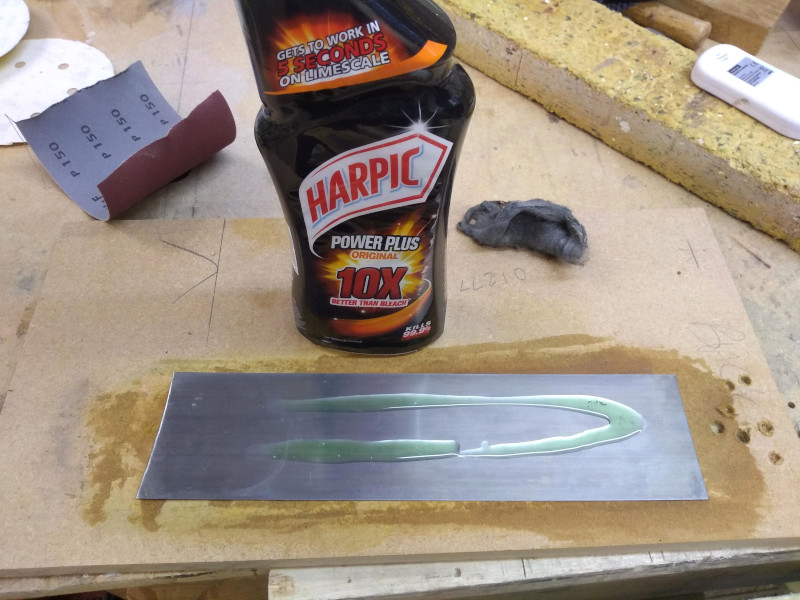
The steel came blue so I used some Harpic to remove the bluing process.
I poured plenty on and let it sit for a few moments before rubbing off with fine wire wool.

pFGoged.jpg


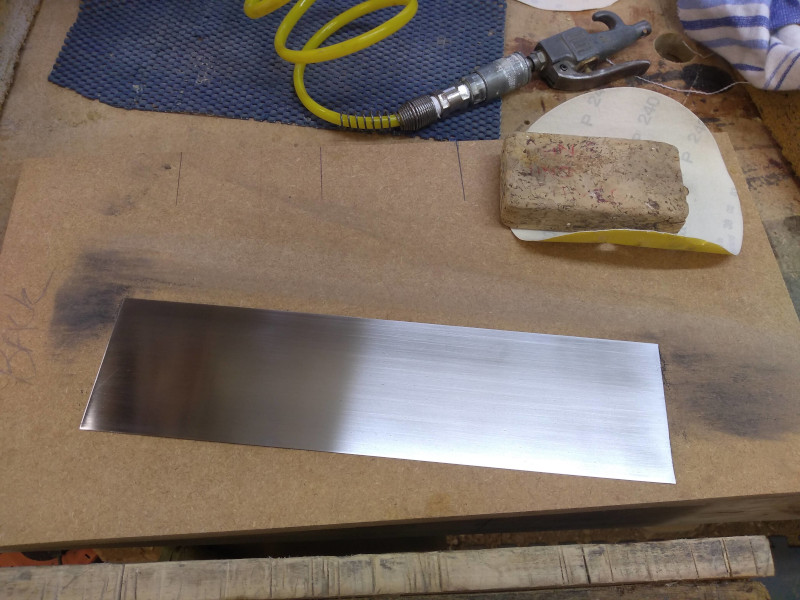
After cleaning the plate with WD40 I gave it a very light sanding.

day8GjW.jpg


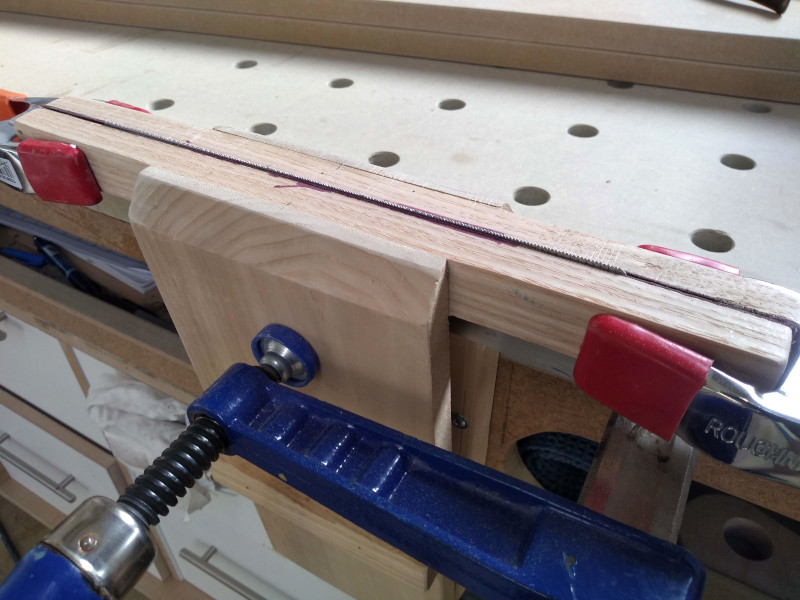
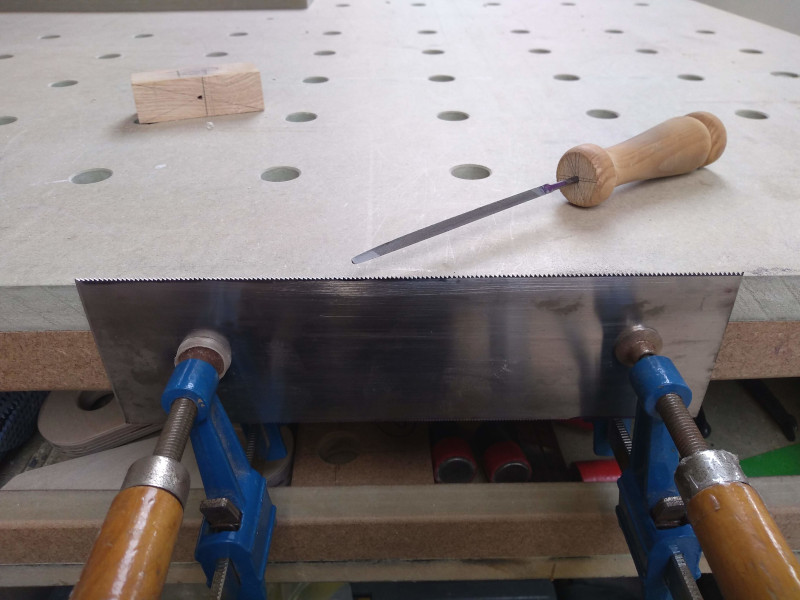
I don't have a proper saw vice so just made a quick one from wood, screwed to the bench and held shut with a variety of cramps.

CooPxtd.jpg


I bought larger saw plate than needed to give myself plenty of chance to practise on before cutting the real thing.
I wanted to replicate my 22TPI rip cut paxs gent saw on one of my saws and then do a slightly lower 16 TPI cross cut pattern on the other.

I tried several approaches to cutting the teeth after on-line reading and watching tutorials.

While the 16 TPI plate was coming out acceptable after a bit of practise the 22 TPI plate was proving more difficult.


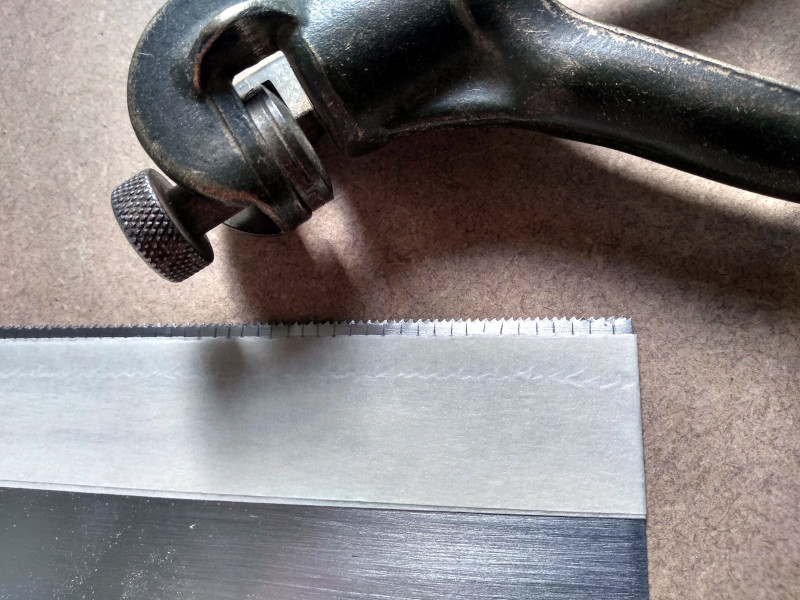
Using a double extra slim saw file I tried cutting the teeth free hand, using a printed paper template and even using wooden guide sticks. After several attempts each one getting progressively better and with more confidence in my filing technique in the end I was unable to attain the accuracy in the teeth spacing I was striving for.

I was finding that with such a high tooth count it was leaving zero room for correction if the teeth spacing was not perfect. A fraction of a mm off in either direction would leave a small out of place tooth. In the grand scheme of things a few miss shaped teeth on a plate wouldn't cause much of an issue but I couldn't let it go, I was aiming for better.

So after a few restless nights trying to come up with ways to improve the accuracy I had a light bulb moment and a very simple idea came into my head.
The next day I made this simple jig from scraps and was amazed by the results.
I don't want to go into to much detail about it at the moment as I'm currently working on a final version of the jig that I'll cover in this thread once it's finished. It probably isn't a unique idea (those are hard to come by) but after some searching I've not seen any thing like it for hand cutting teeth.

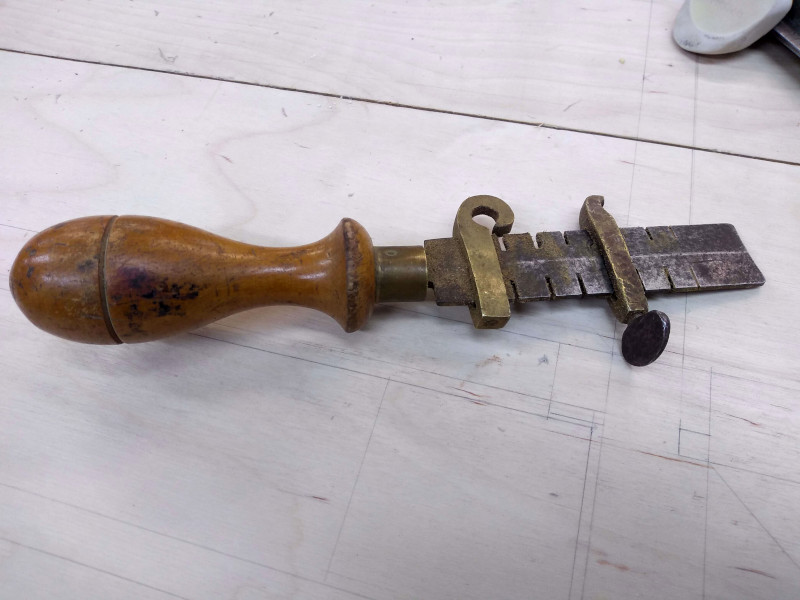
With much care and attention I used an old saw set to set the teeth.
too little set and the saw will bind in the cut while too much set will cause the saw to wander.
Being a gents saw I tried to go with as little set as possible. I wrapped masking tape around the plate to stop the saw set from marring it.

tNrRJrm.jpg


A colleague saw what I was up to and came back with this. Not seen a set like this before. He asked if I wanted to give it a try but I passed on the offer :)

DroILYW.jpg


With the teeth set I gave them one last very light sharpen before cutting the blade to size with an angle grinder and hand filing to final dimensions.

DS4CIpO.jpg


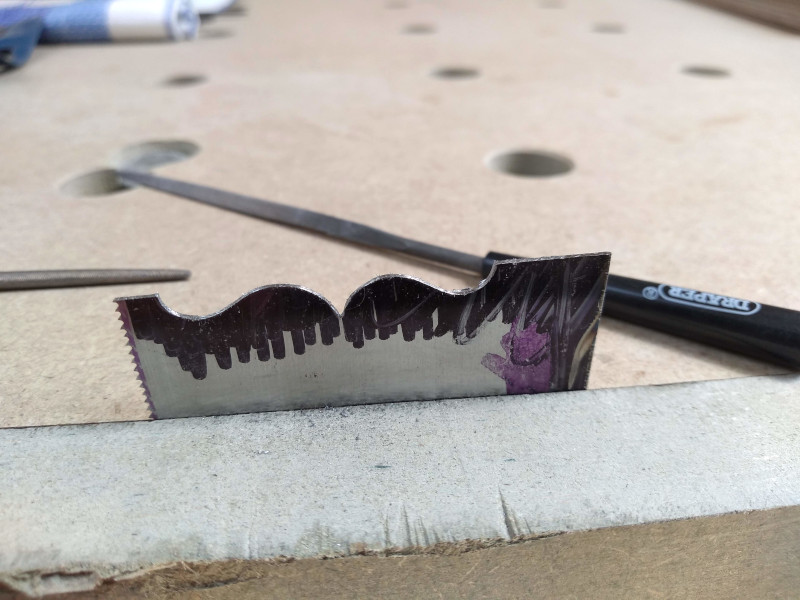
lastly I filed a little cupids bow in the handle end of the plate for decoration.

S2xSvpW.jpg
 
Last edited:
Lookin' good, HH.

I think you should have created a new thread for your saws - it would make it easier for anyone searching on saw-making. However, it's done now so we may as well press on with the theme...

A couple of tips regarding saw files:
1. modern files tend to be all over the shop wrt to their corner radii - a DES 4 inch file should handle up to 18tpi well enough, but far too many won't, the corners are too rounded (you end up with all gullet and no teeth), & they are often inconsistent from corner to corner on the same file, which is really annoying. Another problem I've encountered all too frequently is that they are either too brittle & shed teeth like an ageing ewe, or too soft & wear smooth after a few dozen strokes. Toothing hard plate from scratch is a severe test for any file, and the file needs to be up to scratch to do the job well.

I've found far & away the best files for smaller saw teeth (from around 16tpi & smaller), are good quality needle files. Grobet files are my pick, they have very fine & consistent corners. These files are double-cut & despite their fine teeth, remove metal very rapidly. And they keep on cutting; they outlast anything else I've tried by a very comfortable margin. This is really important, it's far easier to keep teeth consistent when your file cuts reliably & consistently stroke after stroke. A #4 cut is my choice but a #6 will cut almost as quickly & leave a slightly cleaner surface. It only takes 3-4 full strokes to cut a tooth to depth with these files.

2. The easiset/best way of cutting very fine teeth that I've found is to use a hacksaw blade as a template (but you'd have to settle for 24tpi as I've never seen 22 on a hacksaw blade :) ). Clamp the hacksaw blade to the blank so that about 1/2 the tooth is below the top of your saw plate. Drop the near end of the file down & touch it against one side of a hacksaw tooth, then lift the file and push forward so that it's not touching the template tooth, but cutting te saw plate. With a little practice, you can move from tooth to tooth vey quickly & regularly - all you want is a good mark on the top of your blank.

Remove the blade & cut the teeth to depth. I always use a guide-stick to maintain consistent rake-angle when making new teeth - I've watched pros in the old days do it by eye, but I'm not up to that standard!
Rake angle guide.jpg


As I said, with a good file, it only takes a few strokes to cut each tooth in that size. I find it easier when cutting new teeth to make no more than two strokes per gullet on each pass, watching the flats & leaning a bit on one side or the other to even out any gullets that are straying to left or right.

Cheers,
 
Good advice on filing 24 tpi - I've used a technique nearly the same, but found the setting a pain. for finer tpi I now use a Zona - can tickle the sharpness with a needle file but then give up on setting (made a nicer handle for their changeable blades, but doesn't compare with any shown here)

The Vixen file subject keeps re-appearing - should be a separate thread really - the UK inventors of these milled files was Firth Brown Tools, under names Dreadnought and Millenicut, about 1900 - and another UK maker of the more flexible version was Aven Tools - all used a lot for car body make/repair when much was hammered into shape and leaded/fibreglassed etc. I think they must be surface hardened (very hard, possibly nitrided?) so the unhardened core is flexible. There are plenty available used - go for the sharp, unclogged ones of finer cut. The Japanese version is expensive but said to be also undercut by acid etch - can't see much difference with a lens, or in use. (Oh yes, and they make good 'planemakers floats' - I've saw a couple this week at the fleamarket ground to shape with the rear teeth ground blunt).

Back to the saw and plane build -- again -- so much respect for a true craftsman.
 
Thanks for the comments chaps, loads of interesting and useful info there.
I now know what a plane makers float is, I'd seen them in action but never knew what they were called.

Reason I'm putting every thing in one thread is its kind of like an on-line diary for me, I can look back and see when and how I made each stage of something.
Thread might need a name change though :)

When I left my previous work I was gifted some very old but very nice Nicholson saw files the quality of which looked great and while some where a little dull they still cut nicely.
Unfortunately there was no 4" extra slim so I bought a new one for this project. Unfortunately again the visual quality of the new file was no where near that of the old files.
Like you said the file was slightly misshapen on the corners, not terribly bad but very obvious when sat next to an old one. the plus side is it seems to cut fast.

I used it for these plates picking the best edge to form the gullets. A couple of short strokes and the tooth is pretty much fully formed.

I can't seem to find a UK seller for Grobet files?
I've read that Bahco and Vallorbe are highly regarded files so will treat myself and pick up a 3 square needle file for my next project to see how it compares to the Nicholson.

Thanks for the tip on using a hacksaw blade as a template, not heard that one before. Would you need to remove the wave set on the hacksaw blade so it can be clamped tightly to the saw plate or does a slight gap between the two not matter?

Guide block was indeed a great aid though mine looks decidedly chunky compared to yours :)
 
Last edited:
Something I meant to say yesterday: I have another essential "artificial aid" I use when filing teeth on any saw - a magnifying head-band. The day has long since gone when I could do even an 8tpi saw with naked eye.

Very fine teeth like 24tpi & up are sill a challenge even when I can see them, they are devilishly hard to keep even, any variation in file pressure from tooth to tooth, or worse, filing the same gullet twice (which is all too easy to do!) will give you a set of 'cows & calves' & a rough-cutting saw that isn't very pleasant to use.

When I started sharpening finer saws I would use a very fine felt-tipped pen to mark the teeth between filing runs so I could see where I was at. I would also put a mark on the back of every 2nd tooth when setting so I wouldn't jump over 2 teeth instead of 1 - easy to do with the saw-set obscuring much of your view. After a while, my hands took over & knew how far to move the file or set without so much help from the eyes, so I rarely need to mark them now.

I guess there are a few lucky folks who master saw-sharpening quickly, but for many of us it's a long & steep hill to negotiate, partly, at least, because we don't get enough consistent practice just doing our own saws. However, it's one of the more worthwhile things to become competent at if you use handsaws - the pleasure of using a saw that slices through wood accurately & quickly is at least equal to the pleasure of snicking off consistent 1 thou shavings with a well-fettled plane...
:)
Cheers,
Ian
 
...... I can't seem to find a UK seller for Grobet files?
I've read that Bahco and Vallorbe are highly regarded files so will treat myself and pick up a 3 square needle file for my next project to see how it compares to the Nicholson.....

HH, there has been an awful lot of chatter on several forums on the poor quality of saw files over the last 10-15 years! To make a really good job of sharpeneing a saw, you want a file that cuts consistently and doesn't fade halfway along the first set of teeth on a 300mm saw. Few files do that now. I'm flat-out getting more than a couple of sharpenings out of most new files, and the files I use for other work are of similar poor quality. And they ain't cheap, so what used to be a fairly minor expense for these consumables has become a significant factor in my shed life.

All of the big names have come in for severe criticism, largely because they have all moved production to countries & profit matters far more than quality. A group of us did a fairly extensive trial of several brands about 7 years ago, & the results were not very encouraging! Apart from brittleness/softness issues, the corner inconsistency within brands was extremely annoying - in some cases corners on supposedly DEST files that were coarser than their bretheren two sizes larger, and there were very few that fell within the supposed standards for triangular files. I've sometimes used up two brand-new files toothing-in a 12tpi 300mm saw blade.

However, some seem to be lifting their game a bit over the last few years, so if you are lucky you might get a batch of files that is about half as good as the Wiltshires & Nicholsons of old. I've been using Bahcos as the best of a bad lot for several years, but they could still do with improvement, particularly in their corner consistency. I've got a few new-old-stock files made in Australia, probably 40 years ago, that I compare other files to, and they are streets ahead of any new file I've bought these last 15 years or so. I'm down to just a few of the larger sizes, so they'll soon all be gone, unfortunately.

The Grobet files (Vallorbe is the place in Switzerland where they are made) are well worth pursuing. They are far & away the best files for fine teeth, sharp-cornered, highly consistent, and they last! I get many times the mileage out of Grobet files compared with any other brand I've tried, & I've tried just about every brand you can name.

.......Thanks for the tip on using a hacksaw blade as a template, not heard that one before. Would you need to remove the wave set on the hacksaw blade so it can be clamped tightly to the saw plate or does a slight gap between the two not matter? ....

I got it from someone else, so can't claim originality. Some hacksaw blades don't have that wave pattern, they use set teeth like a saw for wood, & they are easier to use as a template if you can find one. But you can manage with the wavy ones if you are careful, you just have to watch that you keep the file straight across all the time. The main thing is don't run your file against the very hard hacksaw teeth, it doesn't do the file much good.

I've made templates out of scrap sawplate for several of the common sizes. For a while I was making saws by the dozen, so I put the effort in & made some accurate templates in the most common tooth pitches. If you are only making a few saws, there are a coupe of sources of paper templates on the Web. It can take a bit of trial & error to get them to print out at the precise size, but what I did was print out all of the sizes close to what I wanted, check them, & choose the one that was closest to what I wanted (hand-sharpened teeth don't have to be an exact pitch, just consistent). It takes longer & you need to be more careful to keep the spaces even as you mark out, but for a few saws, it's not that big a deal.

Stick the paper template on your saw and just file a notch at each mark (either use a non water-based glue, or clean it up as soon as you have finished, modern saw plate just loves to become iron oxides again - damhik!) . The needle files excel at this task, you can place the sharp corners very precisely, and a single stroke usually cuts a very distinct notch. Once you have your notches, remove the paper so it doesn't clog the file, grab a file that best suits that pitch, and file to depth.

Cheers,
Ian
 
Thanks for all the info Ian.

I'm going to keep an eye out for some Grobet files for sure.
I see Axminster tools sell Vallorbe and bacho needle file sets which I am considering purchasing as my current cheap draper set are really starting to dull.

I did try the paper templates and they did help considerably in getting consistent teeth spacing on the 16TPI blade where there was a little more scope to correct the spacing but I just wanted to try and go that step further for the 22 TPI blade as even with the template I found it difficult to achieve the accuracy, maybe I'm being overly anal about it and my eyes definitely aren't as good as they used to be :unsure:

Like most things if you're re-toothing saws regularly then experience and muscle memory will take over but for someone like me that only sharpens and re-tooths saws sporadically a template at the very least is a must.


Not much of an update today but with all the parts of the saw partly finished I could start to assemble them

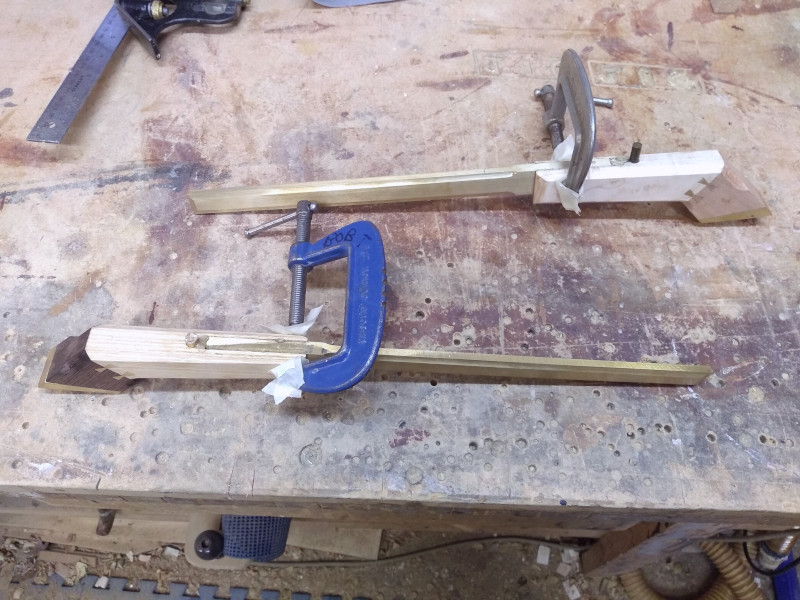
The saw backs are glued into the handles with strong epoxy and securely bolted from underneath the handle with stainless steel bolts.
The brass rod was also glued in place and a cramp pinched the handle up tight.

ccCuEJW.jpg


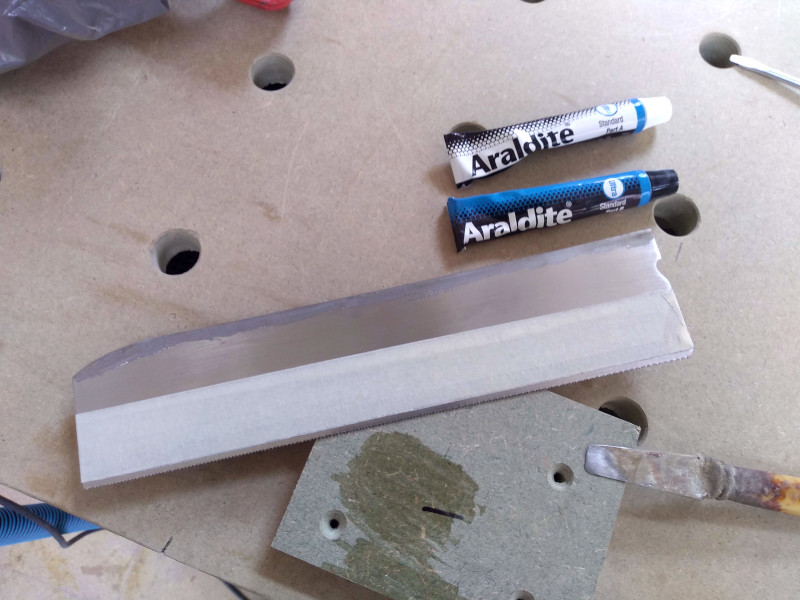
Once the handles were dry I could fit the saw plate. I used the same epoxy to glue them in place.
The curved front end on the plate is because I didn't want to see the saw plate passing through the front of the saw. Hopefully this won't be detrimental to the blades rigidity as there is still a good amount of the plate inserted into the brass at that point.
After watching the bench talk series with Shane Skelton recently I'd really like to experiment with tensioning a blade in a future saw and have a few ideas in my mind of how I could incorporate it into this design of saw, but that won't be for a while :)
Like I keep saying he really is a master of his craft.

MlXBfOn.jpg


With the saws assembled there is going to be a lot of cleaning up to do once they are dry. In the meantime I can make a start on the saws sheaths.
 
HH, I subscribe to the idea that one of the functions of the spine on backsaws is to apply a small amount of tension to the blade. I cramp the spine lightly until it is a tight fit on the plate at back & front - I strive to make it a good firm fit all along, then apply a little extra grip at each end. When assembling the saw, I first bolt the plate into the handle, then place the spine on the plate with about about 10-15mm overhang at the toe end of the saw, tap it down til it's seated in the handle & straight along the plate, then tap the spine back to fully engage it in he handle slot. This ensures the blade is straight, & introduces just a small amount of tension, which adds a bit of 'life' to the blade when sawing. You really don't need the elaborate bit of engineering of a Skelton saw to achieve enough tension to do this job.

I see a lot of folks glueing plate into their spines, or using rivets in the case of one boutique maker, and it seems to me you are losing one of the benefits of having a spine by doing that.

Far and away the most important part of any saw is the teeth - the pitch, rake angle (and fleam angle on crossscuts) are the major determinants of how a saw cuts. Get them right for the job in hand & you'll have a good saw. If the handle is comfortable, & the hang angle of the grip is suited to the task the saw is mostly used for, it will take it to the level of an excellent saw.

I don't want to clutter your thread with a discussion on hang-angles, it's irrelevant to your style of saw, so I'll leave off my ravings & maybe start another thread on the topic to get a range of opinions on that topic.

Waiting to see some sawdust......:)
Cheers,
Ian
 
Thanks again for the info Ian

I should have elaborated more on fitting the plate.
While doing research prior to starting the saws I found that folded backs like you say grip the plate in a way to tension it as it is inserted.
This was something I was unaware of.

I believe in most cases the saw plate can easily be removed from folded back saws so the tension they exert must be quite small?

I think what sets Shanes saws apart is that with his tension mechanism he can set exactly the amount of tension for each saw, something I think would be extremely difficult with a folded or slotted back.
Maybe it's unnecessary, I've never used one of his saws to compare but I see they get a lot of praise. It makes sense to me to, a lot like a well tensioned band saw seems to cut and sing better than a poorly tensioned one.

Unfortunately I saw the bench talk video too late but I've since had an idea to add an tension adjuster to my gents saws much like a hacksaw has, this way you could adjust the blade tension to suit different wood species.
Would it be of any benefit? I don't know but it would be pretty cool and fun to make :)

Earlier in the thread I mentioned that the slitting saw I had made a slot that was "about" the right thickness for the saw plate.
As I was cutting the slot on a pillar drill a certain amount of deflection was introduced while cutting which made the slot a little bigger.

To overcome this I found a thin piece of veneer backing fibre which measured by luck exactly that of the saw plate.
I fitted the fibre into the slot and used a large engineering vice to pinch the slot tight at the toe and heel of the back leaving the middle a snug fit.
As the fibre can be crushed a little this made the fit on the blade very tight.
In doing this I hoped the slot would act like a folded back and add a little tension to the blade as it was inserted, the glue was there for "belt and braces" as my old boss would have said.
I don't know how much, if any tension was added to the blade as I fitted it but if any the glue would hold it in place. Obviously this means the blade can't be removed but it never really should have to be on a gents saw.
That was the idea any way. :unsure:
 
HH, yes, you can remove folded backs fairly easily from most saws, though it's sometimes not "easy". Apart from corrosion, which can make them very hard to budge innitially, there does seem to be a bit of variability between how tight they were when first fitted. I haven't adjusted enough spines on enough saws to have any idea if the variation is random or if some brands were more careful when fitting spines.

I was unaware of Skelton saws until you mentioned them, so yesterday, I spent some time on their website. If you have a very generous tool budget & want a tool to brag about, they have much to offer. However, I have mixed feelings about tools like these. As someone who has made many saws, I admire & fully appreciate the workmanship & the thought that's gone into them, but that tensioning system is rather overboard & quite unnecessary, imo. If your back is reasonably tight, and you tap the blade back 10-15 mm when fitting it as I mentioned previously, you'll introduce the tiny amount of tension required. It will be quite sufficient for sawing any wood, from the hardest known (of which we have numerous examples where I live!) to the softest. Unlike with a bandsaw blade, for e.g., the amount of heat generated when sawing is highly unlikely to cause warping unless you like zero set & use a very frenzied sawing action.

I can't remember where I saw the article, but I think it might have been in a very old Fine Woodworking, where an 'old-timer' (& that was 35- 40 years ago) was talking about refurbishing old backsaws. He talked sbout the function of the spine & showed an example of a warped-looking blade that he "fixed" by tapping the spine about a bit to set it properly. That opened my eyes to the fact that the spine does a bit more than passively holding the blade straight. But you can easily achieve these ends without having to introduce extra tensioning devices - a cool bit of engineering & superbly executed, but totally OTT (again, imo!).

I think you've shown a lot of practicality and common-sense in your approach to tool-making, & we've found similar solutions to the same problems, but you seem to have progressed more rapidly than I did - it has taken me many years to figure out some of the basics. But stick with the common-sense approach, I say. If a certain design has been static for 200 years, it's a good indication that it's because it does a very good job & there is really no need for further refinement. Not always, of course, & I'm sure there are examples to the contrary, but it should give us pause to think if our 'improvements' are either necessary or desiraable.

I talk from the perspective of a tool-user rather than a maker. I've made at least 50 saws by now, and the last dozen were definitely better than the first few, the fit of spine & blade is hard to get perfect in the silly hard (but highly attractive!) woods I choose to use, but is one thing you do need to get right in order to have a solid, straight saw. Those Skelton saws are exemplary in that respect, thanks to some neat machining. The other really important part is the grip angle & position. The Skelton dictum that it should be set so your index finger points to the centre of the tooth line is rather simplistic. It is all about smooth transfer of power to the tooth line, which really depends on what height you use a saw at.

For years I had an absolute favourite dovetail saw. It was a Tyzack, acquired bout 1980. It came with an excuse for a handle, which I hated both the look & feel of, and was quickly replaced with a handle copied from a friend's similar-sized 1920s Disston. With the new handle, it suddenly became my go-to saw for dovetailing, but it was at least 25 years later before I figured out why. By sheer fluke, I'd got he grip angle perfect for sawing at an elevated height as you do when sawing D/Ts or tenons. With this saw, my wrist is in a 'neutral' position as I begin the cut, which makes it comfortable & easy to control the saw intuitively. At the end of the cut, it's bang on the line front & back, almost no need to check. An old cabinet-maker who mentored me in my 20s used to insist I should saw tails & pins & just tap them together for a perfect fit - paring to fit was a waste of time & an admission of failure in his eyes. I struggled for many years to achieve this, but when that saw entered my life, it became easy. It was ousted a few years back by one I've made, which is fractionally better, it has a nicer handle that fits my hand a bit better, but what gives it the edge is that it has a lighter spine, which makes it easier to place & start for the left/right tail cuts. The Tyzack has a much wider, thicker & heavier spine, & now I'm used to my saw, I find it clumsy.

It's minor details like these that I think take a saw from good to excellent. But the paramount requirements of any saw is a straight blade, with a pitch & tooth conformation appropriate to the task, & above all, sharp. Satisfy those criteria & I'll take bets I can split the line with just about any handle on it (even plastic 😲 ), but it will take much more concentration & I won't enjoy the task anywhere near as much.....

Cheers,
 
Last edited:
I think my progression is largely based on the wealth of information that is so readily available via the internet now. Although it has it's negatives you couldn't ask for a better learning tool.
That and my stupid determination :)

I see your points about Shanes tools, I think they appeal to a certain kind of consumer and they are expensive but I don't think they are over priced considering the investment in time and development to make them. I believe it is only himself and wife that form the company and while he uses machines to speed up processes and to achieve the levels of accuracy he strives for there is also a lot of hand work involved to finish the saws.
I could be totally wrong of course but I see his saws much like a Holtey hand plane, they are an investment and meant to be cherished.
I know I would love to own one, along with many other bespoke makers tools but my pockets just don't run deep enough.

I agree with the motto "if it ain't broke don't fix it" but I'm also in favour of pushing boundaries and implementing new ideas for progression or just for self curiosity.
Like you say with saws, it's a good idea to follow the fundamental proven designs but I'm all for trying new ideas to try and improve on them, whether that be aesthetically or functionally.

As for tool comfort I suppose its a bit subjective, what feels comfortable for one person won't for the next. I suspect we all know the feeling of picking up someone else's tools and they just feel wrong in the hand but when you do find a tool that fits you perfectly it does make the job that bit easier.
 
Yep, I think we are basically in agreement, HH.

I think the comparison of Skelton saws with Holtey planes is quite apt. The latter are superb tools that seem too precious to use for fear of diminishing their investment value (I wonder how many actually plane wood and get marked & occasionally dinged? Maybe they'll be the more valuable in yeas to come! :D).

I do think it's a good thing that some of us strive to make things better than they've been made before, if nothing else, it gives you a direction in life. Most of my striving has been simply to get to a standard of workmanship I can live with, though I have made some attempts at "improving" on the past. In most cases my improvements have tended to be the opposite, I confess. But I have come up with a few 'original' ideas of my own on a coupe of occasions and felt very smug for a while. Until I discovered someone had beaten me to it by 100 years (like Norris's "thumbscrew-wedge" like he used for the A28, etc.) :(

But for true amateurs, it's the journey that really matters, as soon as you reach one goal, another will beckon...
Cheers,
Ian
 
I think I agree with you both as well.
And just to provide a note of reassurance: I have a Skelton saw, which I use, on good work only.
I know four other woodworkers who each have several of his saws; all are for pleaasurable use, not investment.
 
Just a quick update this evening, been putting in some late nights so project work has taken a back seat.

I made a start on the sheaths for the saws.
I've been sitting on a nice bundle of birds eye maple and rippled sycamore veneer waiting for the right time to use them.

I make a start by machining some maple into 5mm thick strips. Thankfully work has a large drum sander so processing thin material is made easy are tear out free.

2o1tn7z.jpg


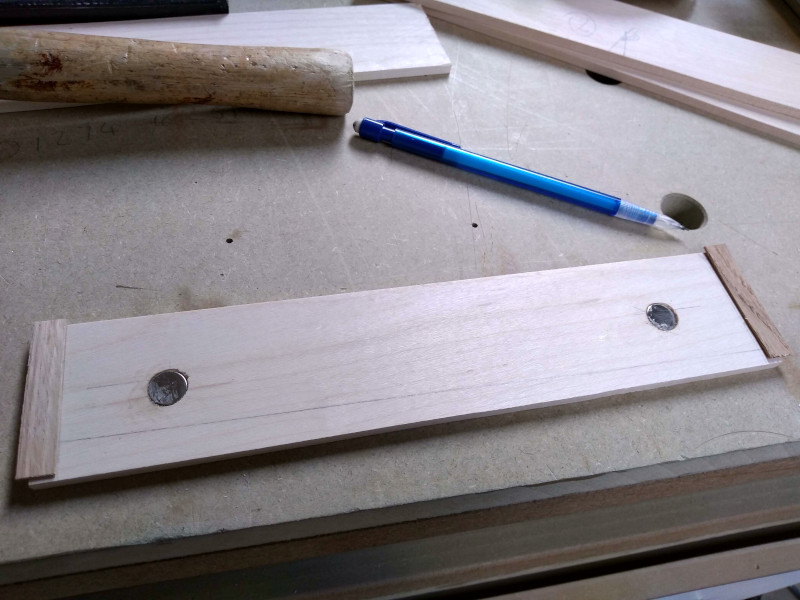
I then drill two shallow holes into the maple and epoxy in some 10mm neodymium magnets.
These will hopefully hold the saw nicely in place when inserted and stop the sheath from falling off.

I then roughly cut some 1mm thick veneer to act as a spacer to separate the maple strips, one at each end and one along the bottom.
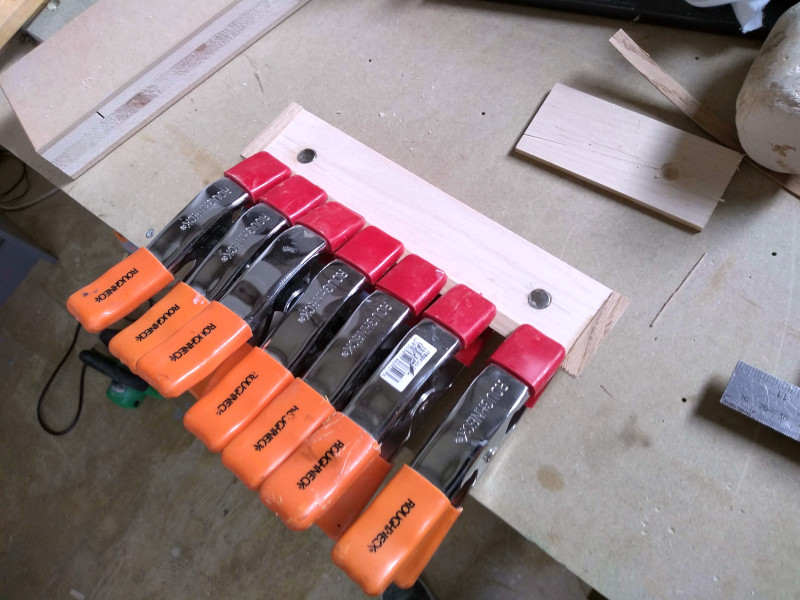
Simply butt jointed and glued on with PVA and cramps
I'm not being overly fussy with this stage as all of this will be hidden once the two halves come together.

dVJsF5x.jpg


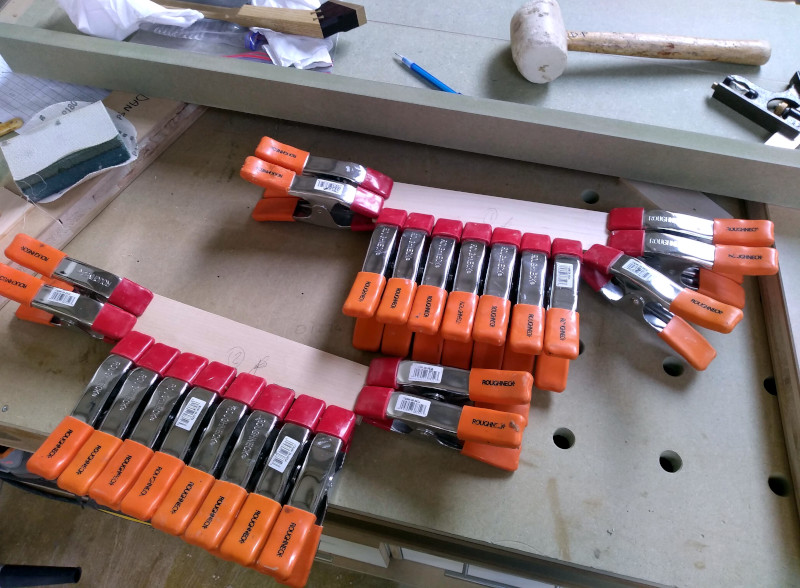
Lastly I glued the top maple strip onto the spacers and used cramps....lots of cramps to hold it together while the glue dried.

FZqer55.jpg


I put a little message inside the sheath, though the only way to find it would be to break it apart.

Once this is dry I can start preparing the veneers.
 

Latest posts

Back
Top