Making a brass infill plane (Hattori Hanzo, DP)

UKworkshop.co.uk

Help Support UKworkshop.co.uk:

This site may earn a commission from merchant affiliate links, including eBay, Amazon, and others.
Cheers guys :)

I'm slowly working my way through the build photos, there's hundreds so I'm weeding out the duplicates, will post up part 1 soon.

Thanks Ttrees, I spent ages and ages trying to come up with a fancy design/logo that I thought would suit but in the end keeping it simple looked best to me.
Think I've settled on this design for the time being but I do like to change things up every now and then :)

Thanks again for all the support and likes every one.
 
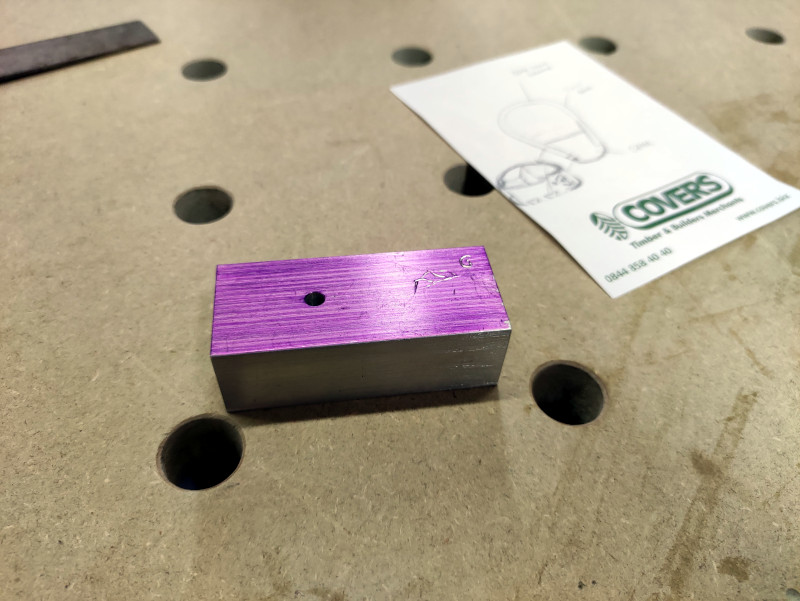
This project started in the usual fashion, with a quick sketch and a lump of aluminium.

rEMgZEz.jpg


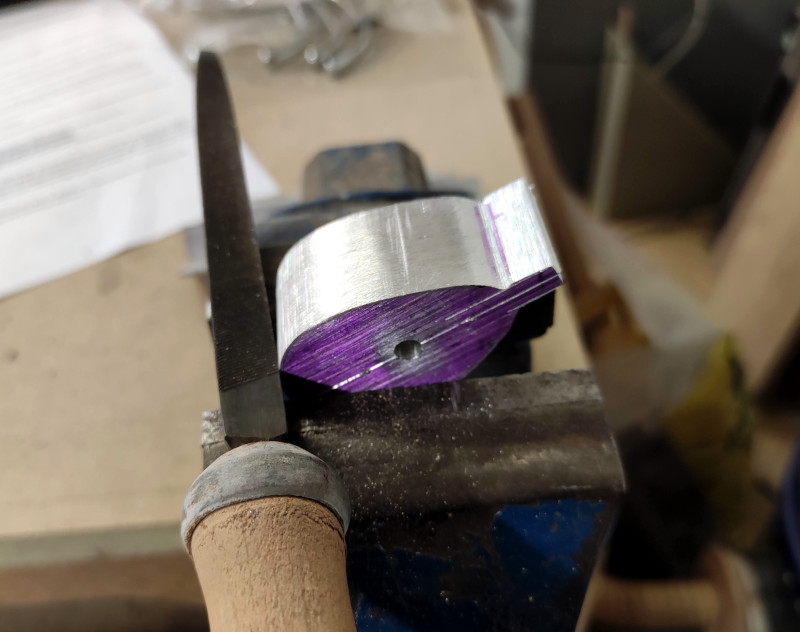
I marked the inner dimensions of the planes body onto the aluminium then cut and filed it to shape. I will later use this as the forming block for the plane.

3i0S4eN.jpg


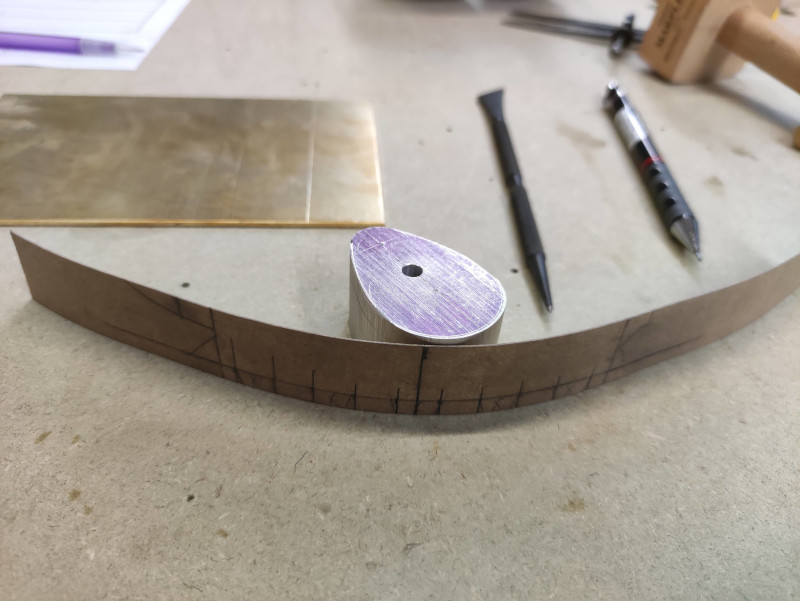
With the form filed I used a thick piece of card to template out the dovetails. I could easily bend the card around the form to work out the spacings.

PZLwsVa.jpg


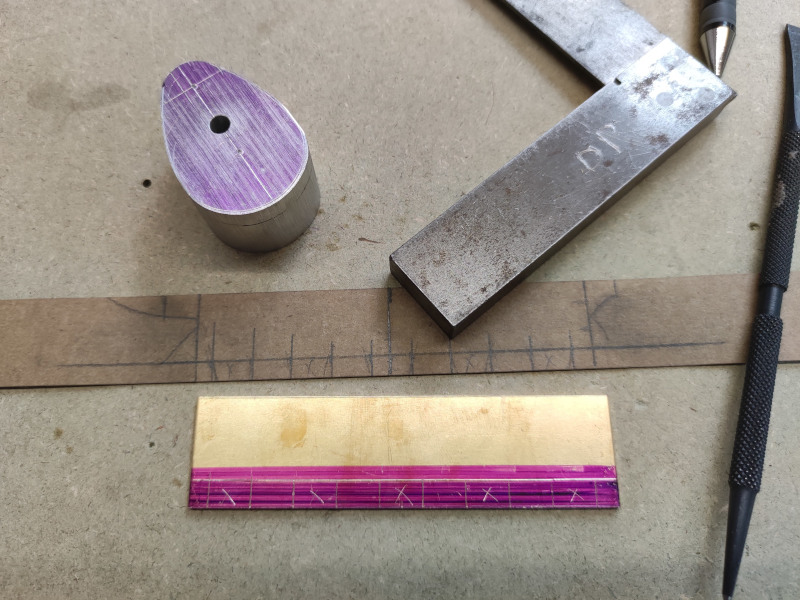
I then transferred them to the brass

wSRwMdw.jpg


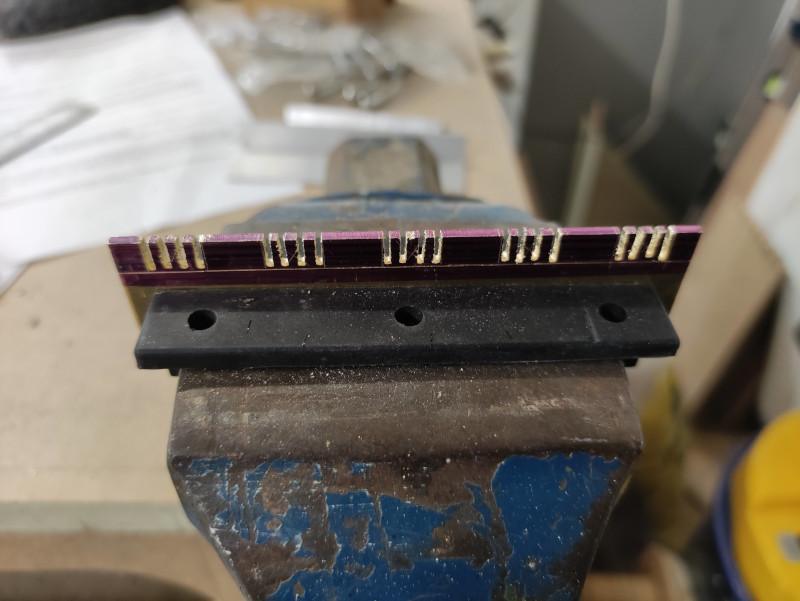
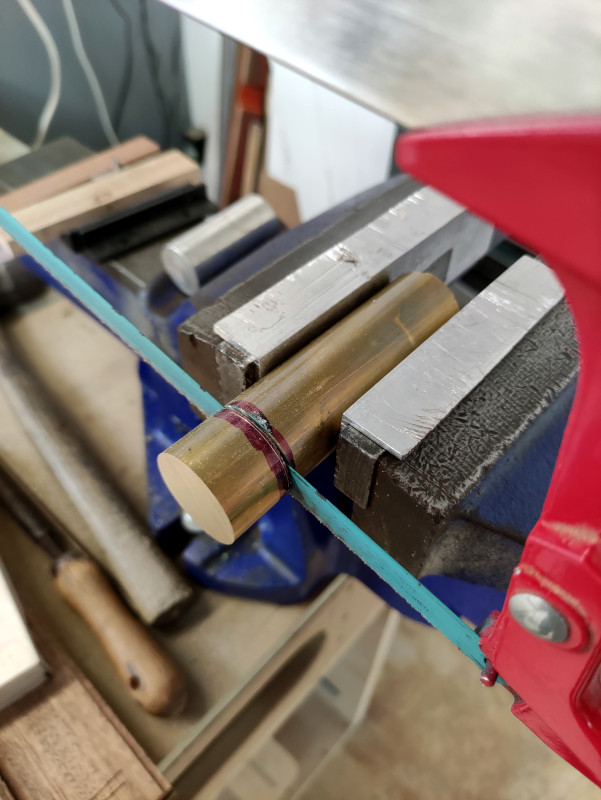
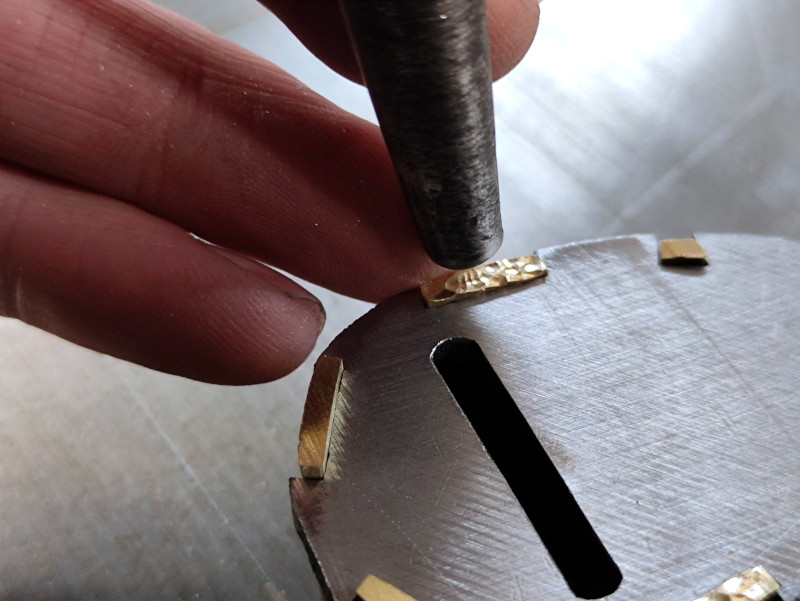
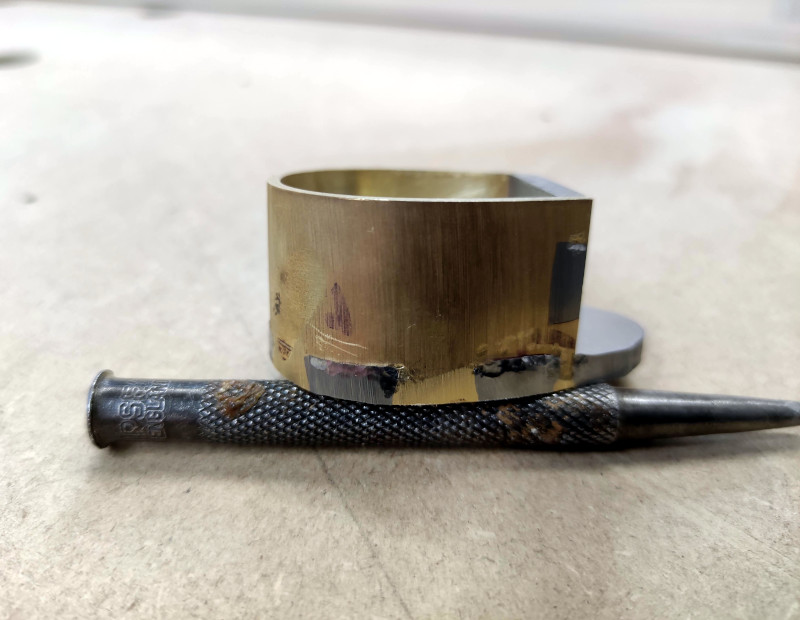
I began to cut straight lines that will later form the dovetails. I make a series of cuts then use a punch to knock out the waste. I've found this to be the fastest and easiest method for removing the waste metal.

NRKCHAi.jpg


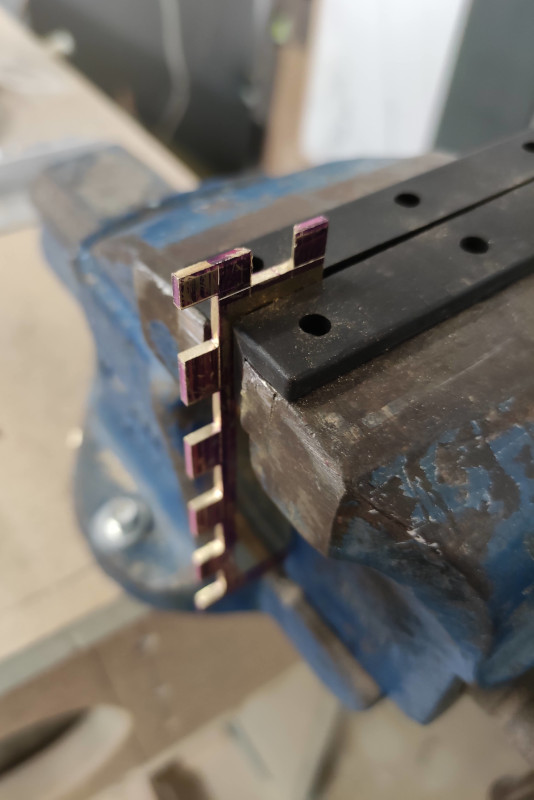
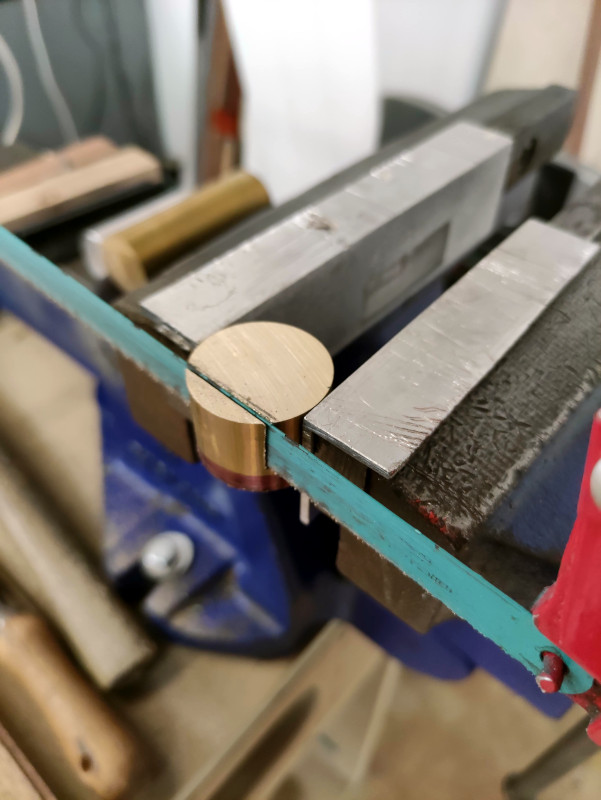
I also marked out and cut the dovetails at the end of the brass.
You will notice these dovetails are cut at a much shallower angle than usual, the reason for which will become apparent later.

SaPJHKm.jpg


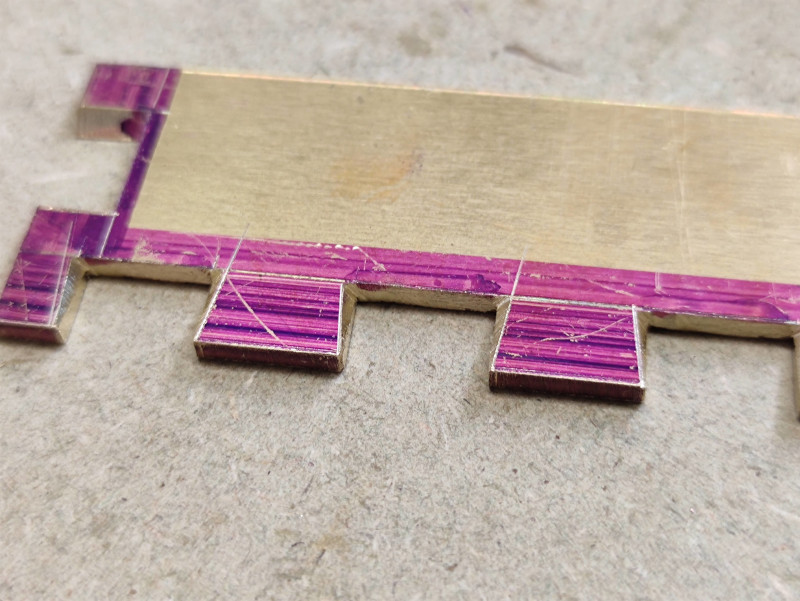
Next I filed a small amount away from each straight cut to form the dovetails.

vNykl2H.jpg


I spent a long time carefully filing each dovetail to ensure the beds where flat and the dovetails where as clean as possible.

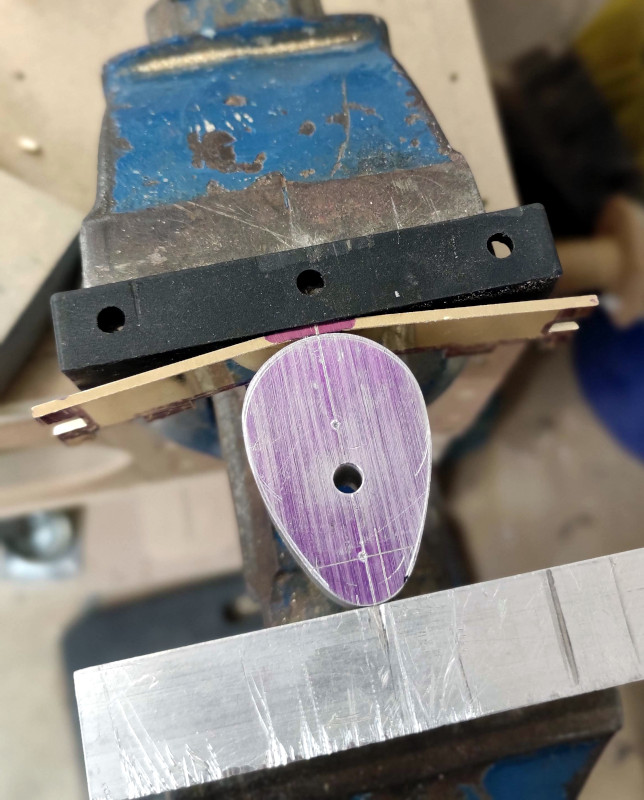
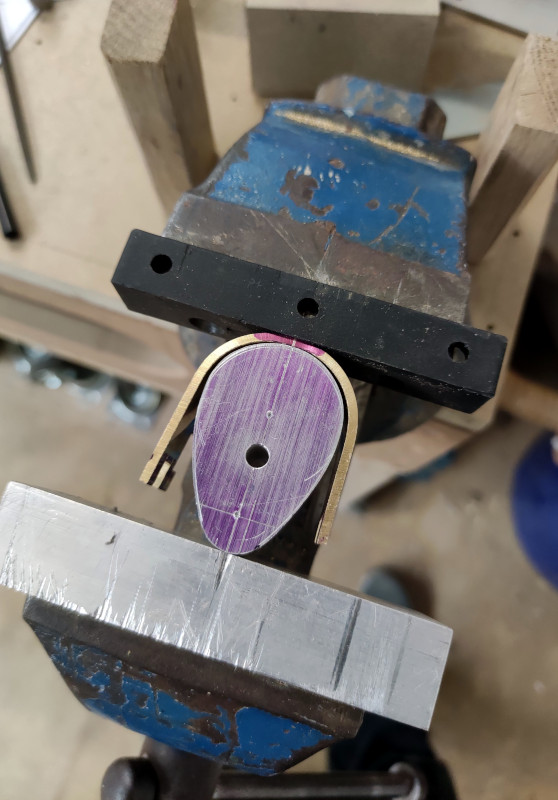
I could then start bending the brass around my aluminium former.
Ensuring the centre marks where lined up I secured it in the vice and began to bend by hand.

pat50Da.jpg


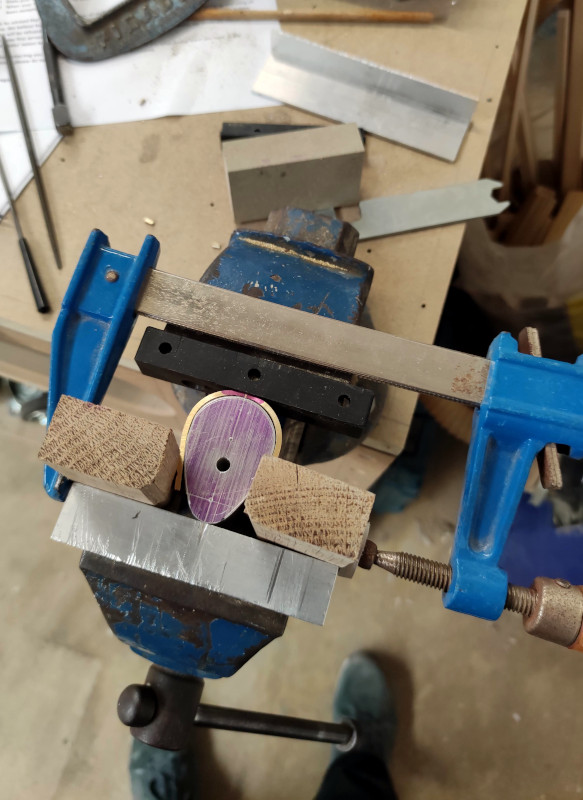
This is as far as I got before my arms gave up. Even at 2.5mm thin the brass puts up a good fight!

9tqernN.jpg


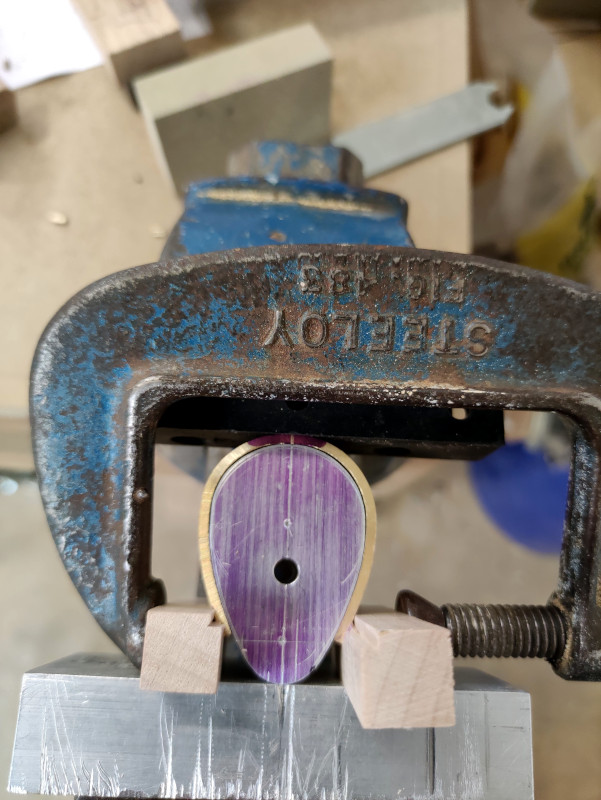
I used a selection of cramps and wooden blocks to pull the last bit up.

495qA7f.jpg


I went with 2.5mm thick brass as it's a tight radius and I feared any thing thicker wouldn't conform to such a contour.
Even at this thickness it was difficult to form the brass exactly , partly because of the tight curve but also because it's very difficult to hold something this small while trying to apply a lot of force onto it.

In the end after a lot of work I was happy with the result.

J7Gvz3P.jpg


Already I was a good few hours into the project.....no going back now!
 
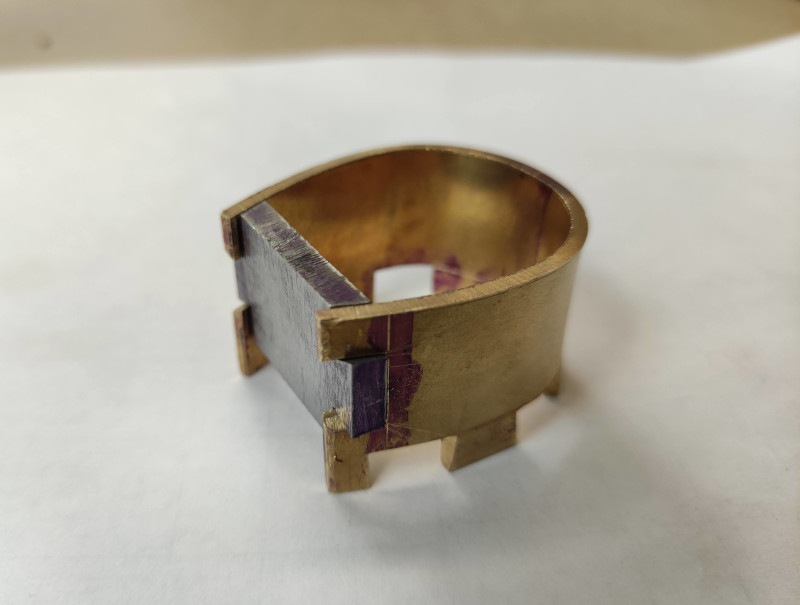
With the plane body now formed I started to make the back brace.
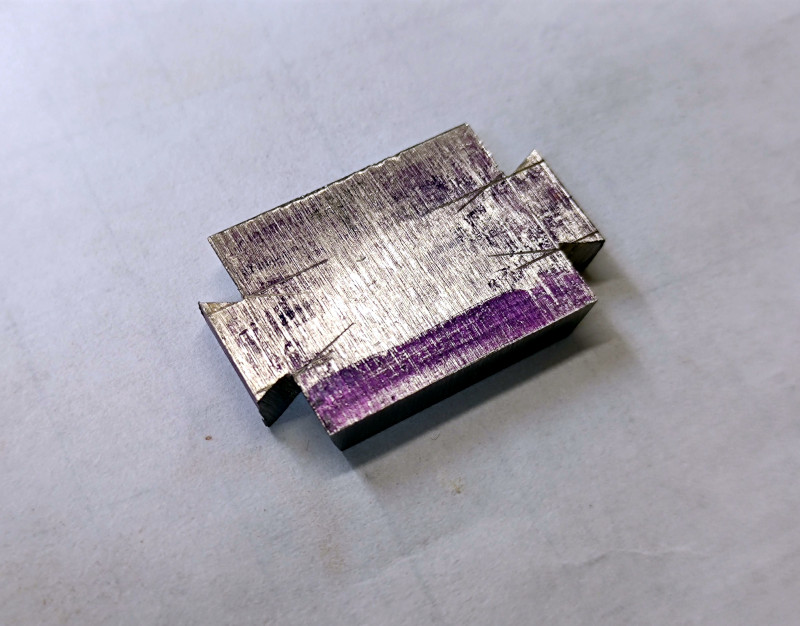
I cut a piece of 01 tool steel and started to form the dovetails to match the body.

WAAtolP.jpg


This turned out to be a little more difficult than I had expected as the shoulders of the dovetails had to be curved to follow the curve of the plane body, along with the back face slightly tapered.
After a lot of careful filing they started to fit. This process was made even more tricky due to the spring back from the body.

b6eiszW.jpg


I was expecting a small amount of spring back from the body and this was the reason why I cut these dovetails at a steeper angle.
I hoped that the pressure from peening would help to force the shoulders tight at the top and bottom of the plane body.
I feared had I cut these any shallower the spring back from the body would have caused gaps between the brace and body on the shoulders.

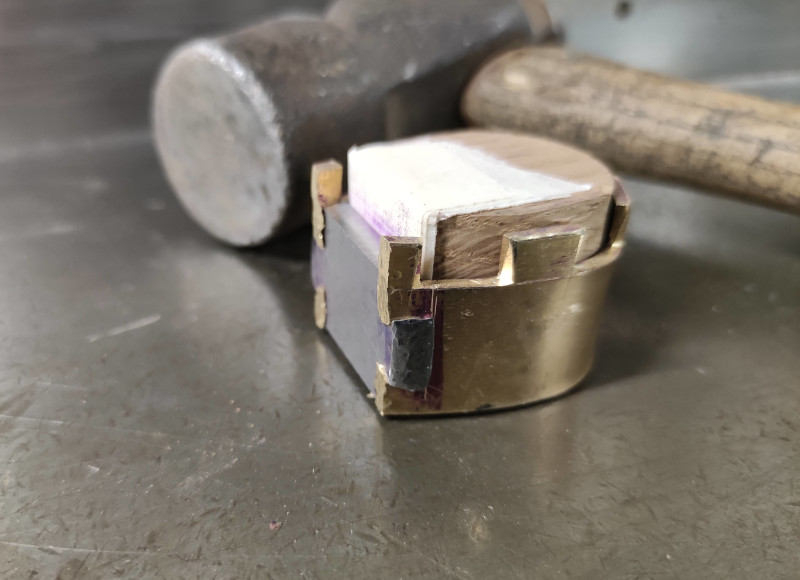
Next came the first stages of peening and the first doubts that this project may fail.
One thing I've learnt along the way is that accurate peening is difficult, and in some situations it's better to use a rounded punch with light blows from a heavy hammer than wild swings from a lighter one.
It's also crucially important to hold the work piece rigid and have the opposite point of impact most supported, this is difficult to do when the piece being worked is curved.

I tried several ways of holding the body without distorting it so I could use my rounded punch but as soon as the first strike came the body would either slip loose or distort.
In the end I resorted to wedging the body against a steel upright and using light blows direct from the hammer. Wedging the body against something stopped it from slipping away and the impact point was directly underneath where I was peening.

dgSKGRa.jpg


finally after a lot of apprehension the peening was done, It was easily one of the most difficult things I've peened so far. Holding the plane still with one hand coupled with it's small size meant I was peening blind, It took a lot of careful well placed blows with the constant fear in the back of my mind that if I miss hit there was a very likely chance I would snap off one of the brass dovetails, or at least irreversibly bend it out of shape.

Thankfully after a lot of sweating the peening was done.
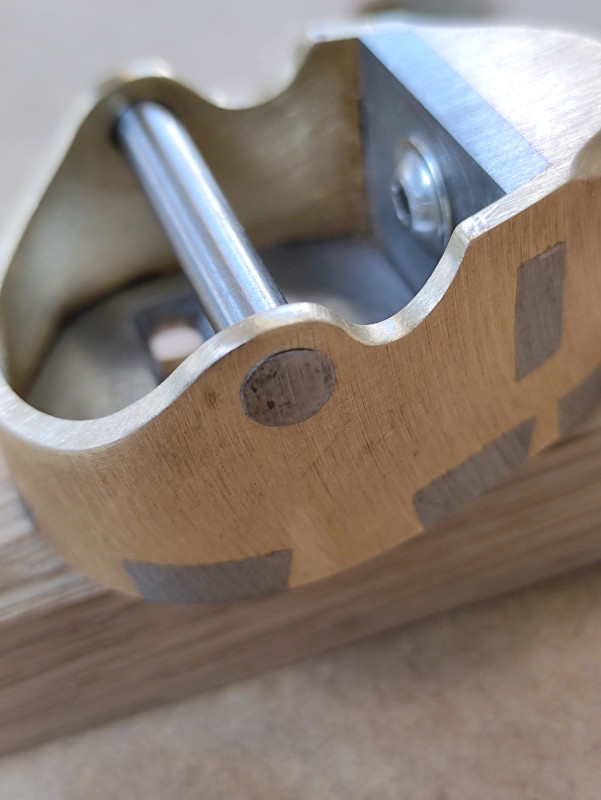
The steep dovetails had worked and the brass was forced up tight to the braces shoulders...what a relief :)

I3hq9Sk.jpg


With the body permanently fixed in position I could start work on the sole.
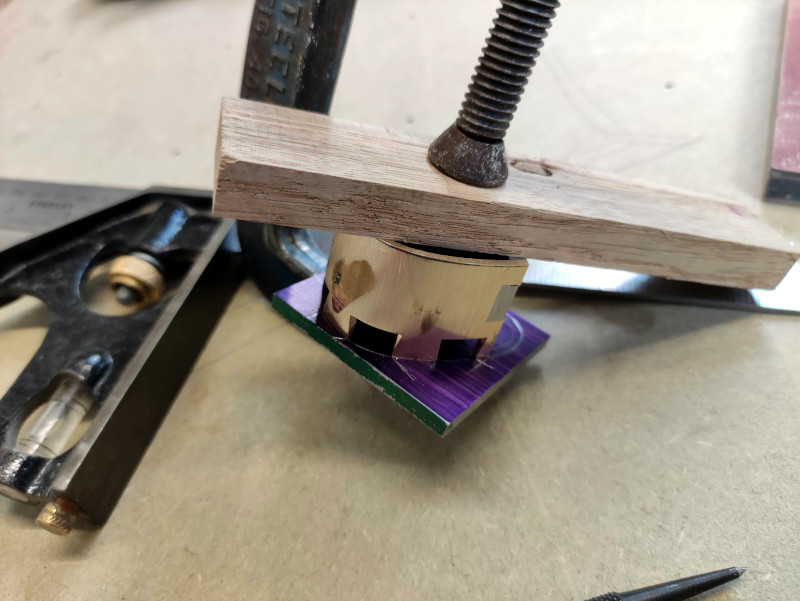
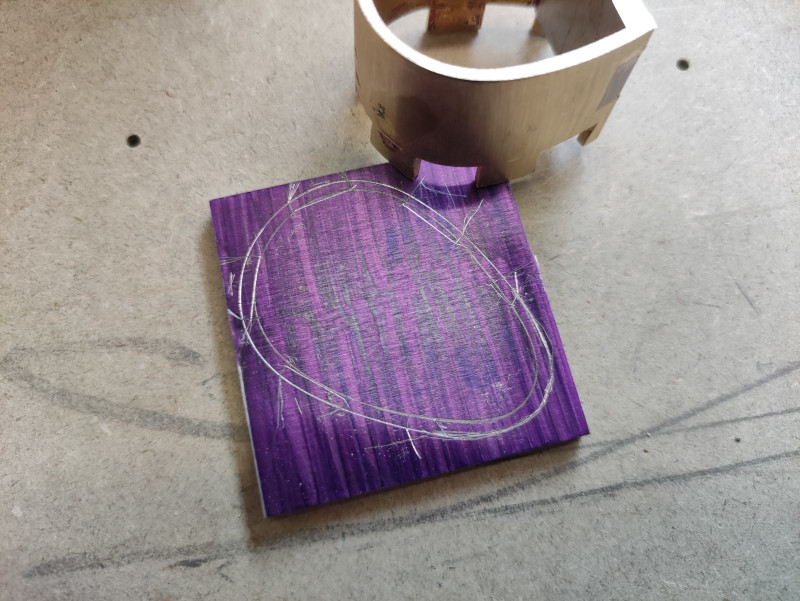
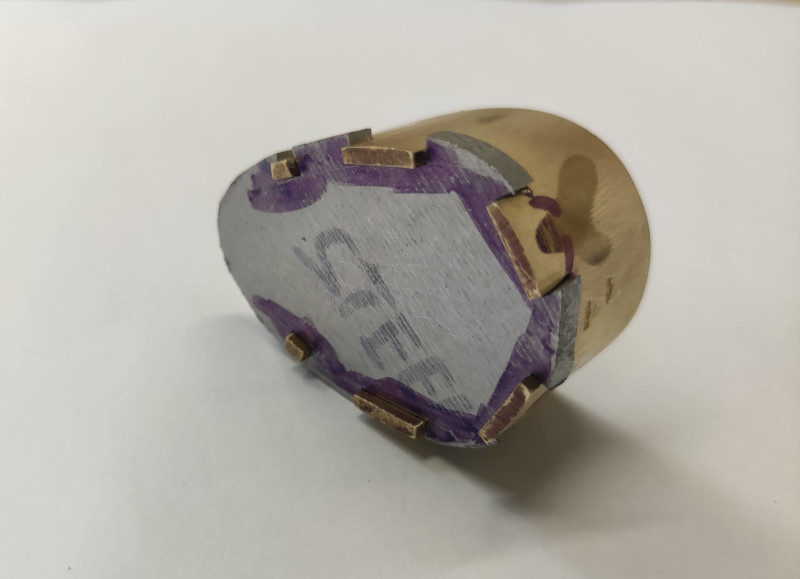
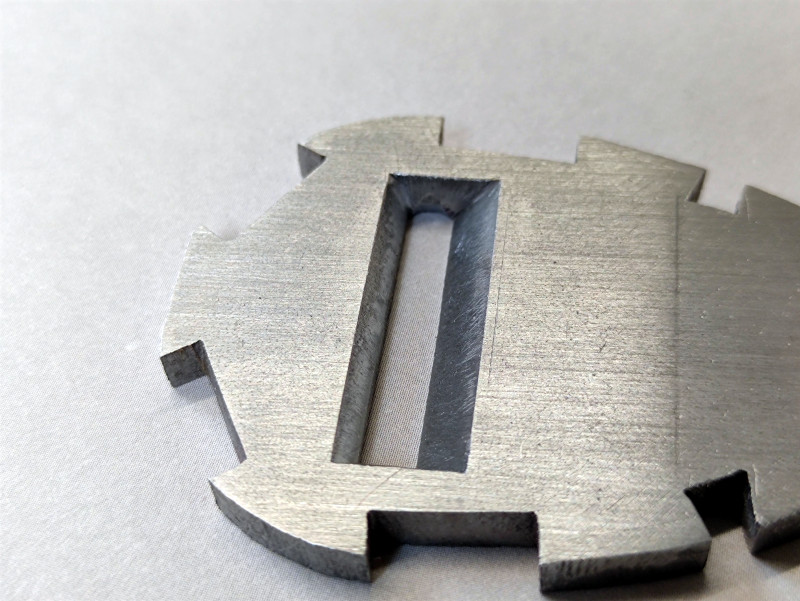
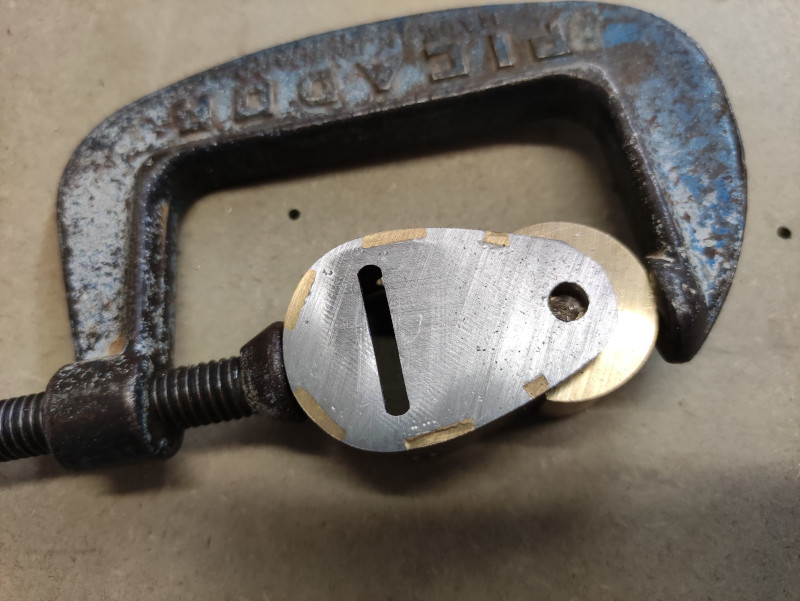
I cut a piece of 01 tool steel and clamped the body to it so I could accurately scribe around the dovetails.

AFx1JTf.jpg


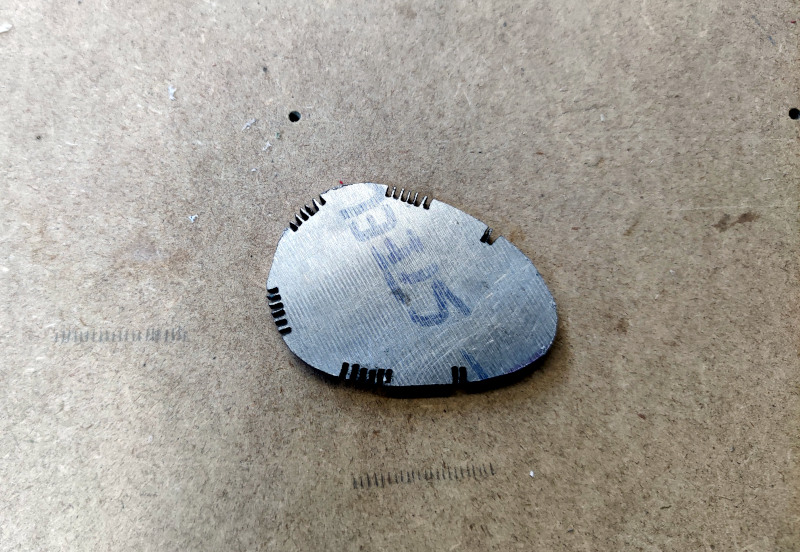
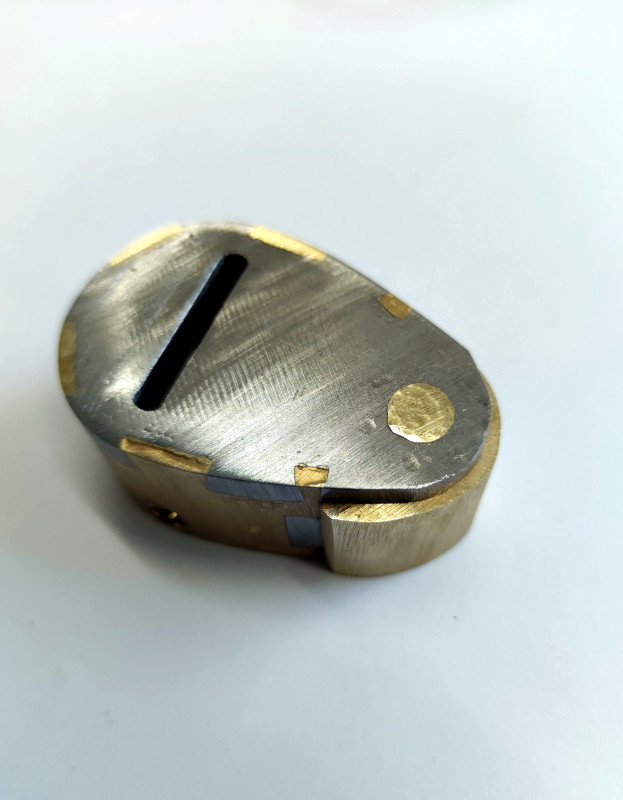
Marking the waste I cut away the surplus metal and shaped the sole to allow enough for peening later.

QMzhaZO.jpg


I cut a series of notches as before and tapped out the waste with a punch.

hR2zwG4.jpg


CVsVrJJ.jpg


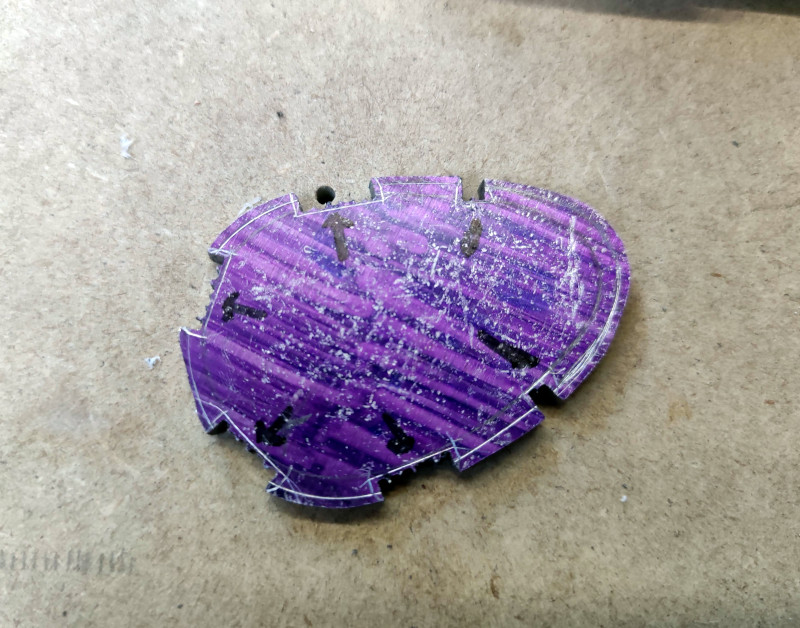
Then filed down to my scribe lines

IV45TQZ.jpg


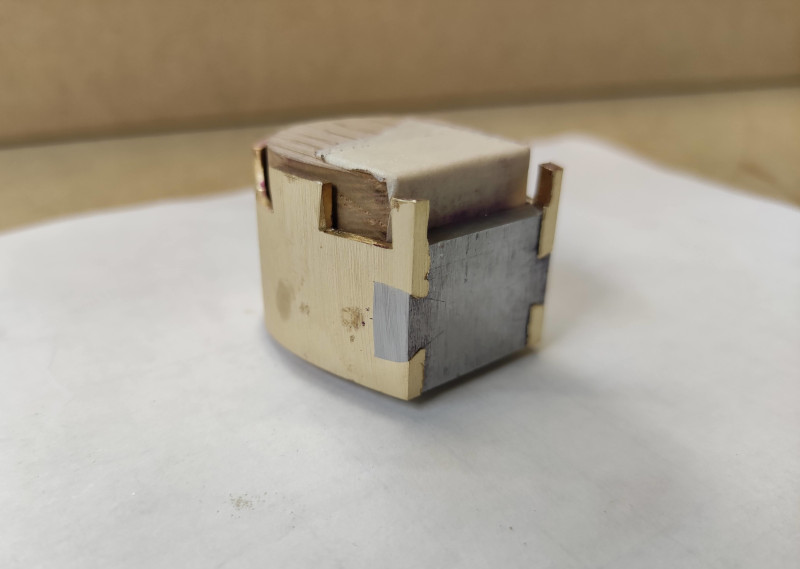
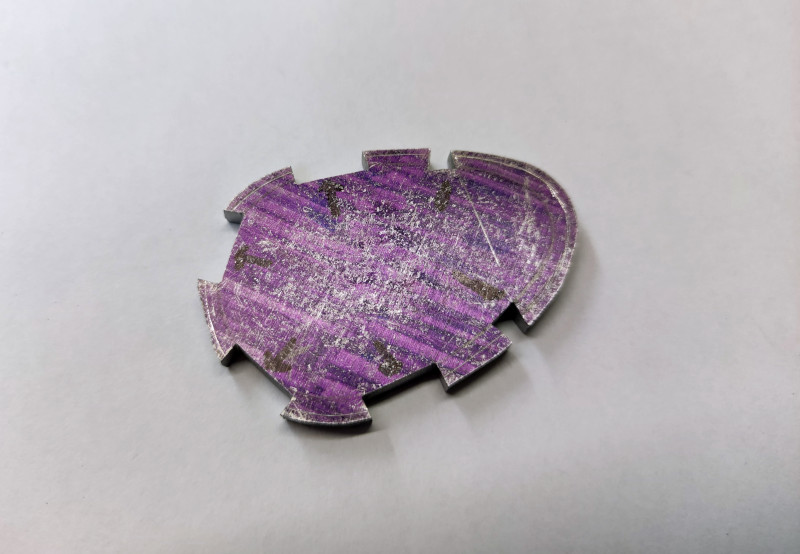
Again after a lot of test fits and careful filing the sole was fitted.

lk9m1Ch.jpg
 
Blimey Dan, you don't ever take the easy road, do you!? :D

I doubt anyone who hasn't made a plane or two themselves could fully appreciate just what a remarkable job you've done. The size alone would be challenging enough for me, but the thought of bending up that elegant egg shape sufficiently accurately would stop me before I began. And this is your 4th? metal plane? By pushing yourself so hard you've developed at an incredible rate (& your detailing gets more fancy with every production!). I guess having some obvious innate skill didn't hurt, either...

I've been at it quite a few years more than you, but my progress has been far less spectacular. I've made a few very small planes, starting with straight-soled parallel-sided versions & finally progressing to curved sides, but these curves are relatively easy to manage: 6 Mouth.jpg

At 75mm, it's probably twice the size of your baby, but still a more fussy size to work on compared with a "full-size" plane.

The tight mouth makes it a good little performer despite the single-iron blade:7 Shavings.jpg

The cutter in the pic has since been replaced with a slightly longer one to make adjustment easier. Infill is from scraps of Rosewood I'd had kicking about since before CITES.

I didn't think such small planes would be very useful in cabinet work, but now I don't know how I got along without it, it's very handy for all sorts of little jobs & gets regular workouts. I've since made one slightly bigger (100mm long) in the same style, but this little thing gets more use than its bigger sister/brother...

I hope you get to pursue this passion, maybe there's a living in it for you someday? Someone has to fill the void when the current generation of top-flight makers retire...
:)
Cheers,
Ian
 
Thanks for your post Ian, really appreciate all you've said and the encouragement to continue (y)

That's a beautiful plane you've made, I bet it works a treat. the dovetailing and styling look amazing, I like how the front bun comes back on it's self rather than going straight up or forward.

I've fancied having a go at a coffin smoother for a while but it's one of those planes that demands a nicely figured piece of wood or something exotic like your rosewood. Nice timbers are getting so hard to obtain now and becoming very expensive.

Konrad makes them so well I don't think I'd come close :LOL:

How did you create the curve on the sides, did you bend then round a former first?

Cheers.
 
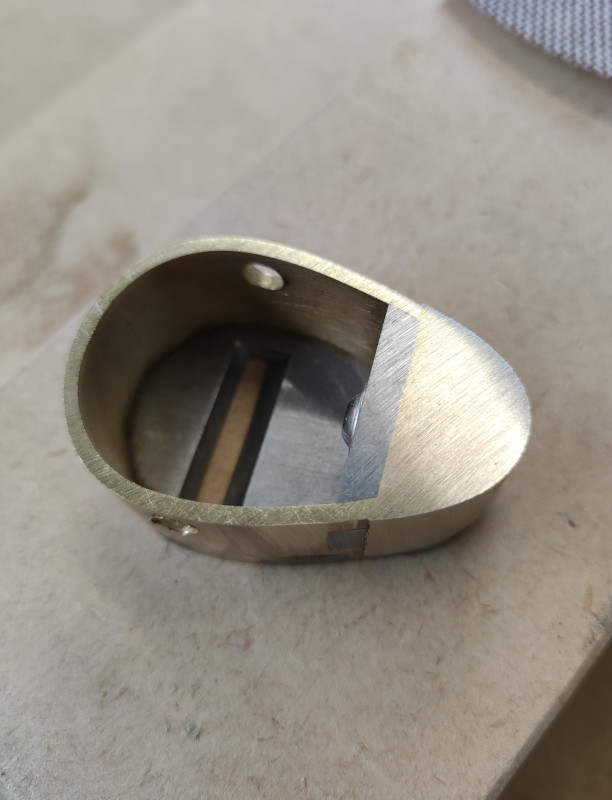
With the sole of the plane fitted I could move onto cutting the mouth opening.

Because the blade sits bevel down I could cut the mouth opening with the sole as one piece, rather than having to split the sole into two pieces like with bevel up planes.
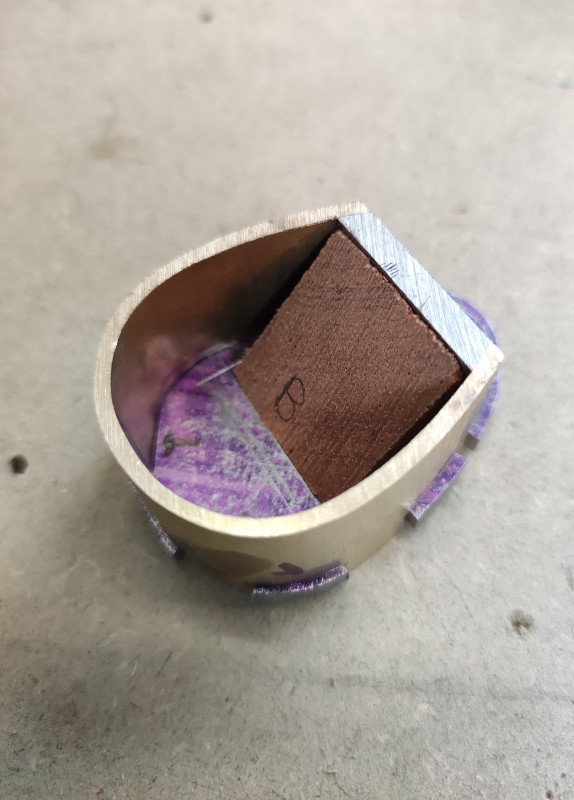
I made a wooden block shaped at the same angle the blade will sit at.

XSDt8zC.jpg


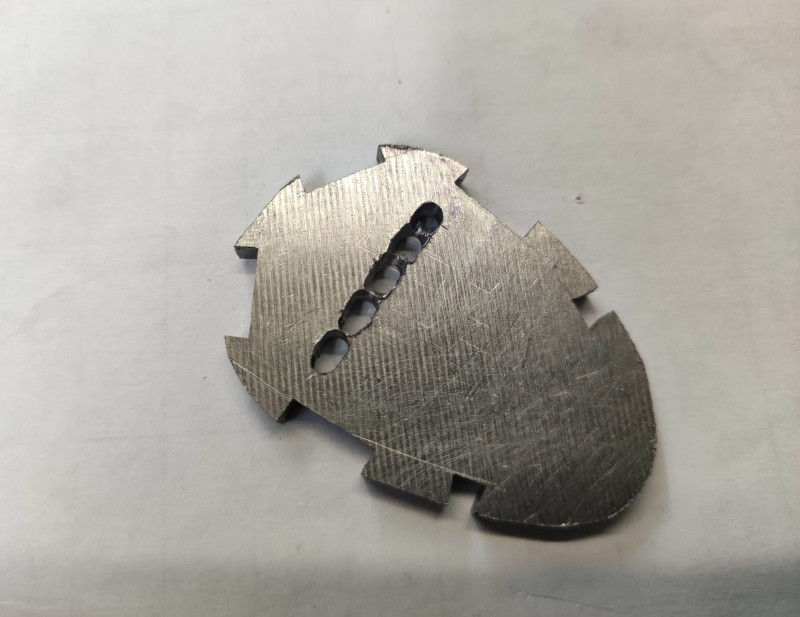
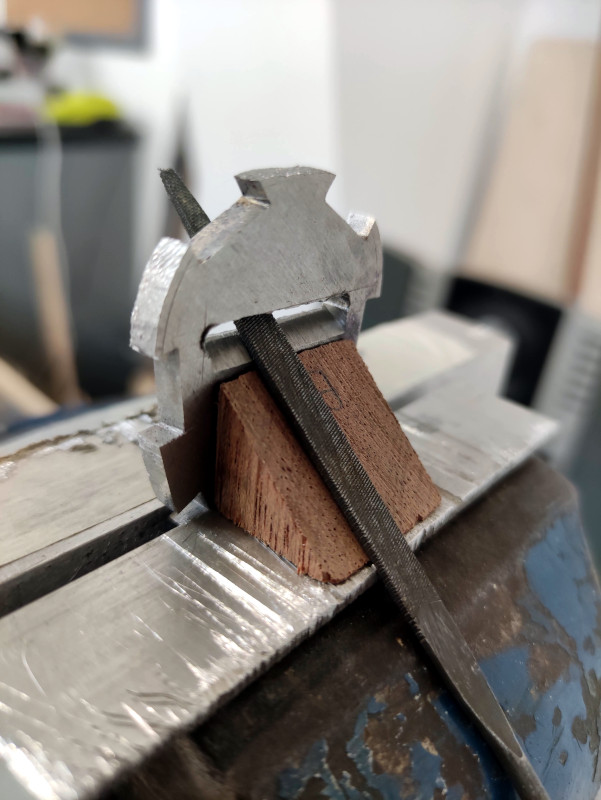
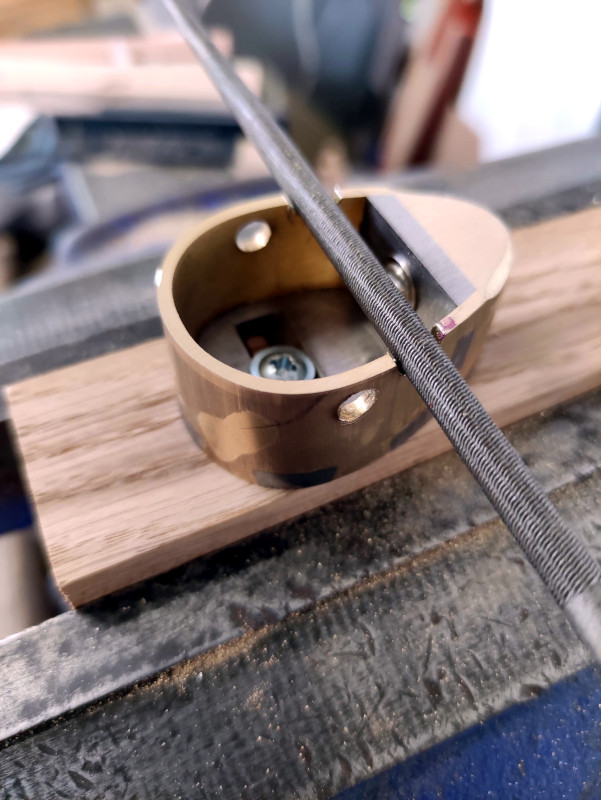
I drilled a series of holes narrower than the desired mouth opening but large enough to fit a small file in.

cLrau46.jpg


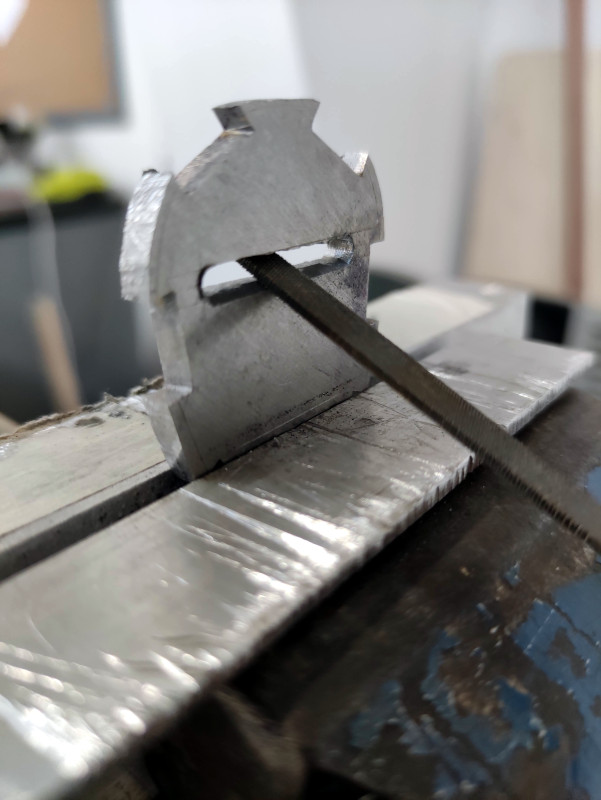
From there I started to file the mouth, being careful to only remove material from the back edge of the opening. Removing to much metal from the front of the opening at this stage could adversely affect the mouth opening.

qDC6CFt.jpg


Once I had filed enough material away I could insert my wooden block and use it as a guide to start filing at the correct angle.

NBeFG6y.jpg


A lengthy amount of time later it was starting to take shape

pnQMQlY.jpg


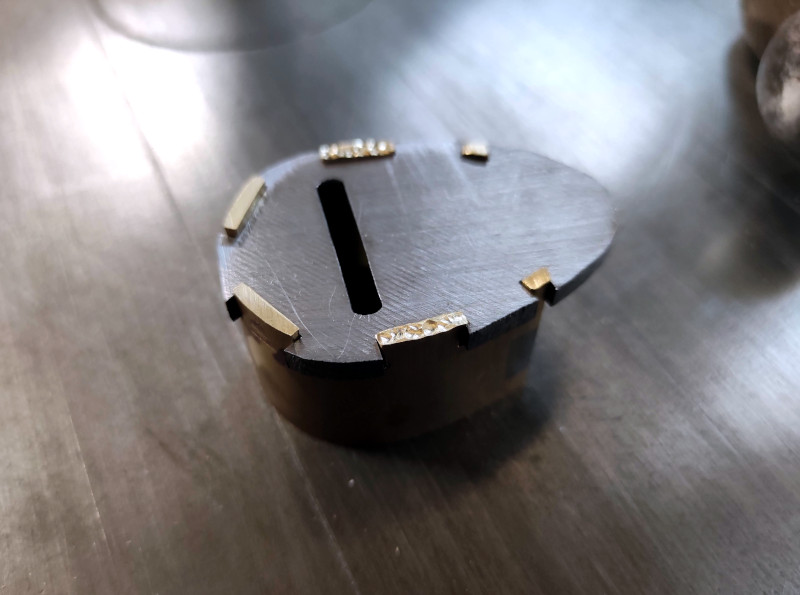
After a little more refinement I could start to peen the sole onto the body.
The flat top to the plane body made it a lot easier to work on, this time round I could use my punch as intended.

T34dvHI.jpg


Using the punch enables me to make controlled strikes which in turn makes it easier to move the metal in the desired direction.

QhHDG0r.jpg


With the sole dovetails secured I could move onto the outside of the body.

I had to get creative again with holding the body as the curved shape made it difficult to peen on a flat surface.
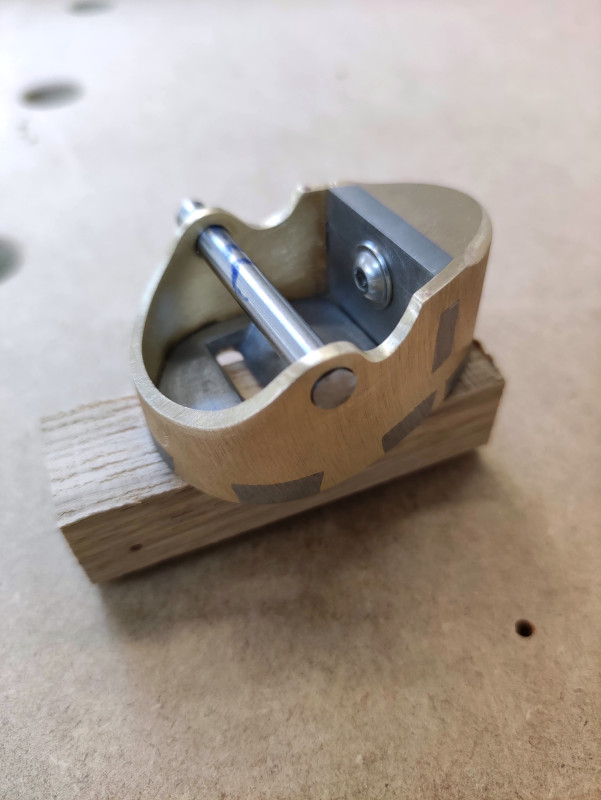
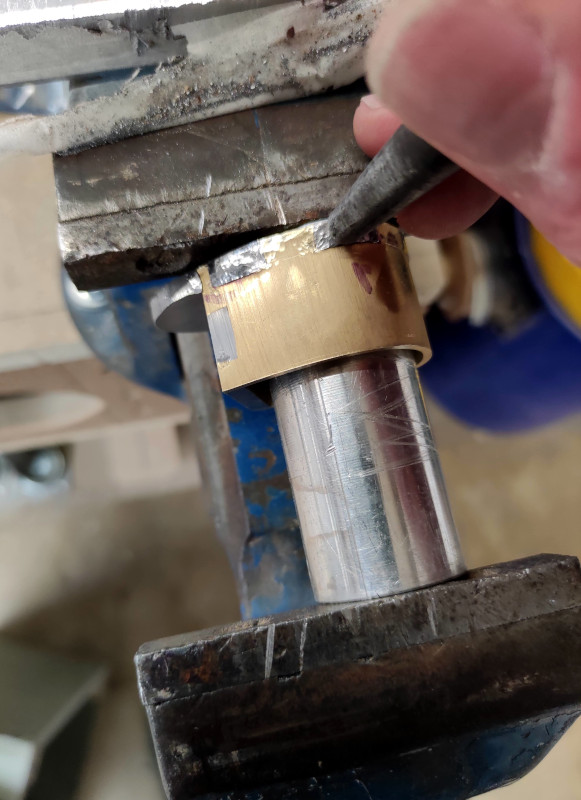
I inserted a piece of steel round bar into the body and then used a large penny washer on the underside of the sole while clamping it tightly in the vice.
This held the body firmly enough for me to peen the steel dovetails.
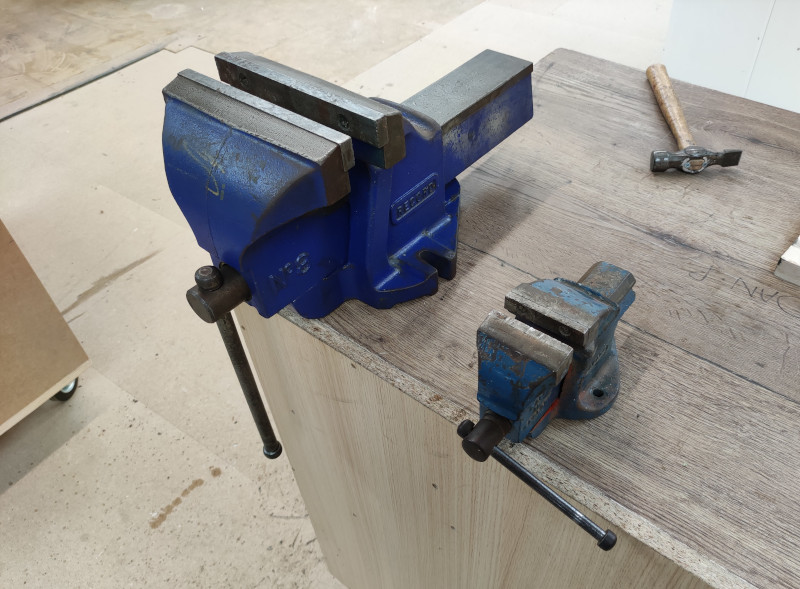
The clamping force needed was high and it was pushing my tiny 3" vice to the limit. I had to wedge a lump of wood under the vice to reduce bounce back when hammering.

fNdeF8R.jpg


The next day, as luck would have it and after years of searching I finally struck lucky on a large engineering vice, bit of an upgrade :) Did my back in lifting it though!

8aZvFdw.jpg


This made peening a lot easier and after a few more hours of refinement and an initial clean up the dovetails where starting to take shape.

6sMgvDv.jpg
 
.....
Konrad makes them so well I don't think I'd come close :LOL: .....

His work is flawless and he has a great eye for style (imo), but you're making amazing progress. Don't underestimate yourself! ;)


......How did you create the curve on the sides, did you bend then round a former first? .....

Yes, that's the standard procedure. Some advocate bending before cutting out the side profile to avoid kinking of the narrow sections, but that makes it much harder to saw & refine the shape, so I prefer to cut out first, then bend. I use a form like this: Bending form.jpg

Used with care it minimises the risk of kinking. Takes a bit of trial & error to make a form for a one-off because you never quite know how much extra curve to put on the form to compensate for spring-back. Different brass alloys will 'spring' more or less, and even different batches of the supposed same alloy can behave a little differently so I can't give you any precise formulas for calculating the amount of "extra" bend for the form.

I shouldn't clutter your thread with side issues - maybe I should post a "WIP" on how I go about curved sides in a separate thread. Someone may well have a better method....
Cheers,
Ian
 
Cheers Ian, that's how I'd imagine you'd do it. I assume a small amount of spring back isn't an issue as it will conform to the shape of the sole once peened any way?
Or did you shape the sole to the sides after they where bent?

I'd be interested to see a build log on your coffin plane for sure.
 
Next up I moved onto the bed of the plane.
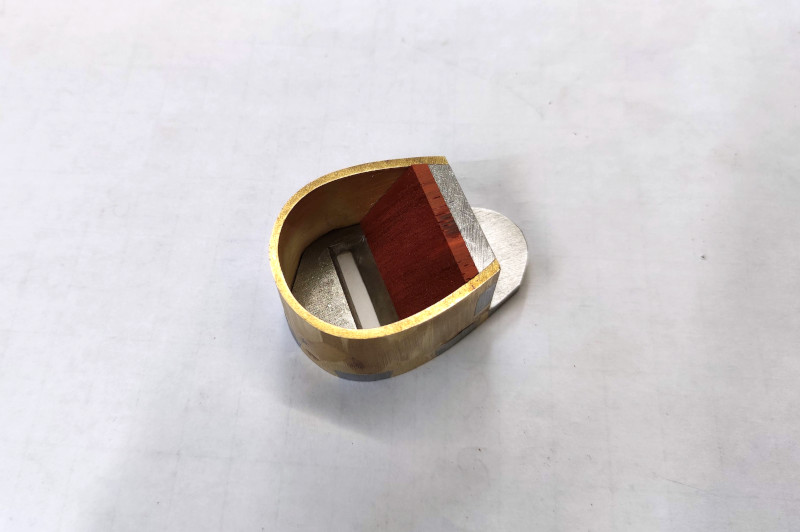
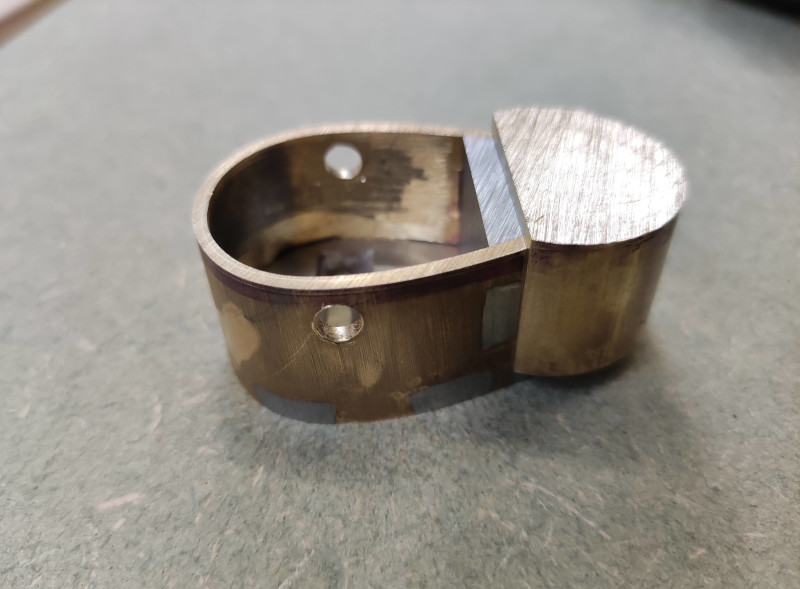
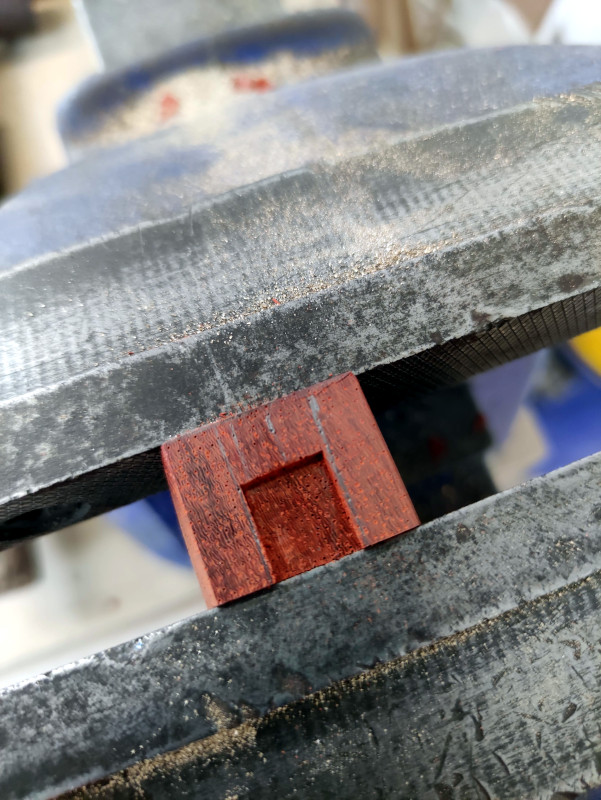
I cut and shaped a piece of padauk to fit into the body. I cut an initial bed angle on it but this will be changed slightly later once I have the blade made and can see the bedding angle better.

zy3wEcQ.jpg


Next I cut a chunk from a piece of round bar

GDlSn6b.jpg


Then cut a flat on one side, this piece will form the back of the plane.

c8PwGTY.jpg


After some filing and test fitting it sat tightly in place.
It was important to get this join as clean as possible as any gap would spoil the seamless shape of the body.

hcedG4Z.jpg


Once I was happy with the fit I clamped the two pieces together and drilled a hole through the sole and into the brass.

h6i1U0S.jpg


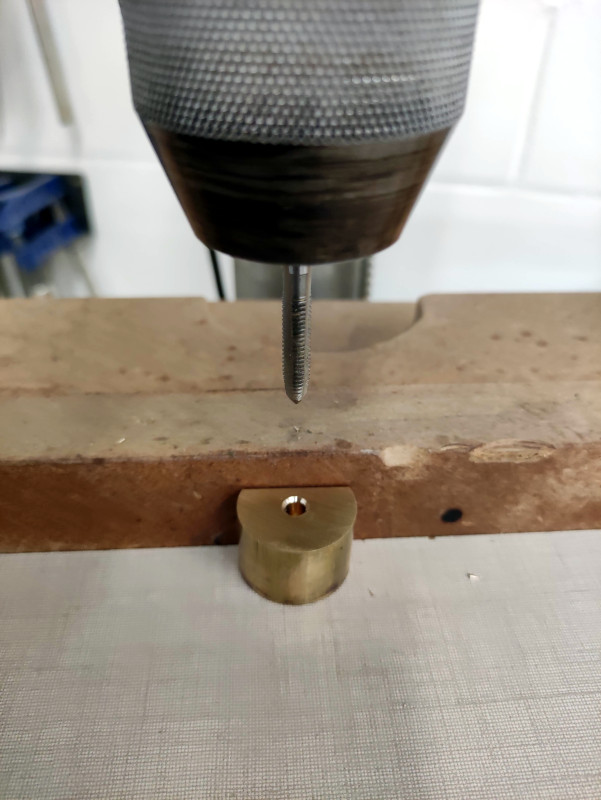
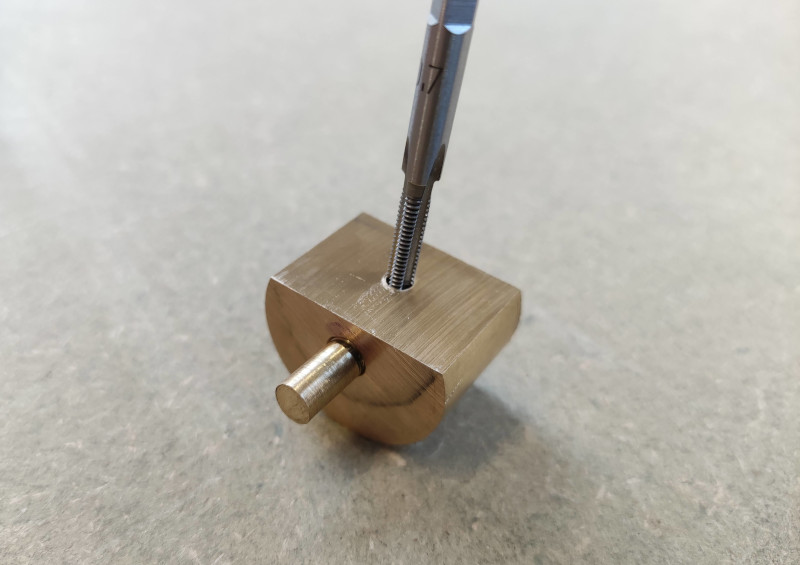
I then drilled and tapped the hole.

0n2wfhP.jpg


I threaded a small piece of brass rod and secured it into the brass piece with high strength lock tight.
I then drilled and tapped another hole,

KNFiiMZ.jpg


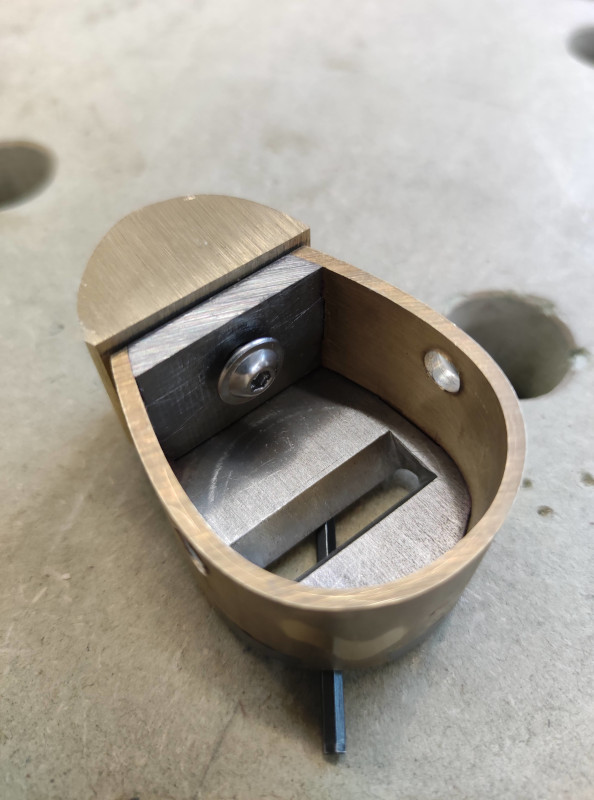
This hole accepts a small pan head bolt which pulls the brass piece tightly against the back of the body, again once tight was secured with high strength lock tight.

XlanJVf.jpg


With the back piece semi fixed in place I could flip the plane over and peen the brass rod to permanently secure it in place.

9k1KmPi.jpg


Finishing by filing it down flush with the rest of the body.

SolbXEy.jpg


I then had to remove a small section from the back of the bed,

oXniApJ.jpg


to enable it to fit over the head of the pan headed bolt.

vaVFlBF.jpg
 
I don't want to blow too hard but I just love this thread. Between your progress and Ian's advice it its just a constant pleasure and a learning curve that pushes the possible boundaries of where I see my occasional attempts going.
Wishful thinking but a valid point. Our own targets are increased exponentially when we see the work of others. Custard for example has always made me think, More! Better! Don't be happy with OK! Slow down and expect more, work harder. Be better!
The accuracy of your work is boggling! I've done a small amount of metal work, filing, peining etc, just enough to realise the quality and difficulty of what you are doing. I honestly brighten up when I see this thread updated. Really. No flattery intended, no false praise. Just love it. It is a real pleasure reading, to the point I save it till a relaxed time of evening. Thanks for posting and taking the time to update on your progress.
Best as always
Chris
 
Hey Chris, thank you so much for following my progress and taking the time to reply, honestly I appreciate it so much.

I pour so much of my time into these projects, from making them to photographing and write ups, mostly for my own pleasure and curiosity but it is really nice to read encouraging messages, they really do help to drive me to continue to make more things.

Cheers.
 
I reckon you'd be surprised how many people take a lot of pleasure reading your threads. The silent lurkers who never post. Anyway. Just saying. Thanks for sharing.
 
With the majority of the peening work done on the body I could start to shape it.

After a lot of pencil scribbles I settled on a design I liked and went at it with hand files.

BN9AhPM.jpg


After removing the bulk of material with files I was getting tired/lazy so came up with another way to finish off the larger curve.
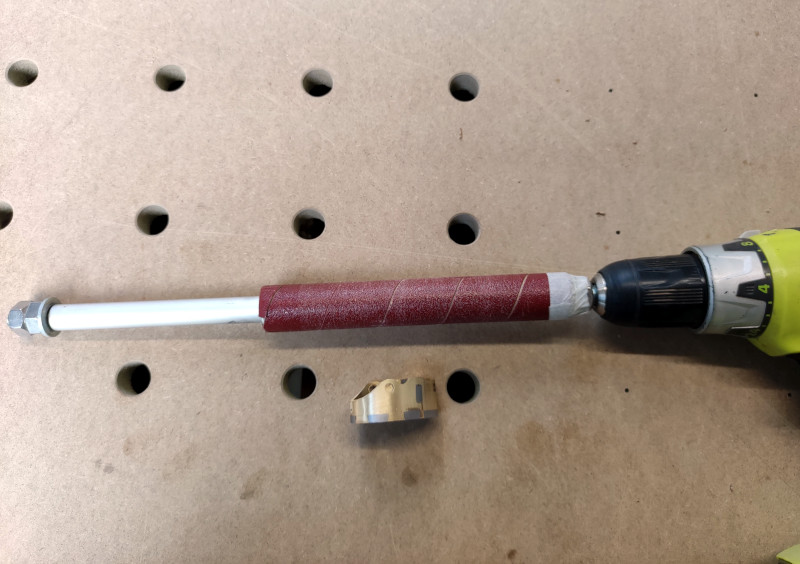
No bobbin sander any more so I made this quick thing, it's just two pieces of aluminium tube slid over a length of threaded rod and a bunch of washers.
One end goes into the drill chuck while you can use the other end as a handle.
It worked surprisingly well, but I still had to finish by hand of course :(

u1SFgNp.jpg


With the shapes roughly laid out I could fit the silver steel bar into the body and add a chamfer to the back of the plane.

vqMSuUl.jpg


The steel rod is a tight fit in the hole, then It's peened to hold it permanently in place.

XjbMsRT.jpg


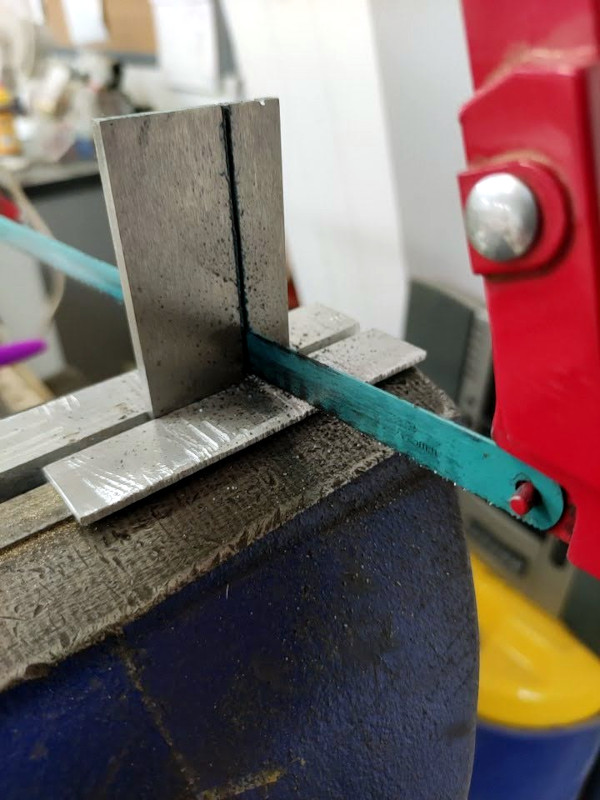
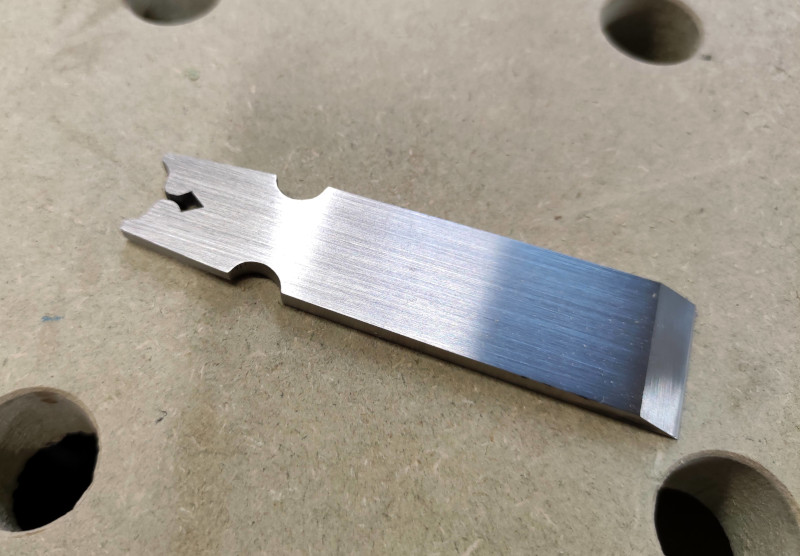
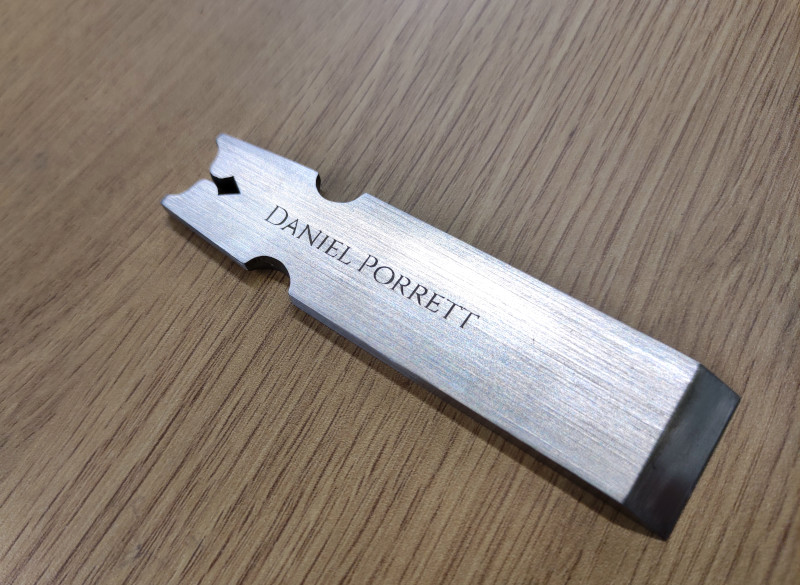
Next I moved onto the blade. Cutting a length of 4mm 01 tool steel, it never gets any easier and a reminder I need some new hacksaw blades!

rGRglfO.jpg


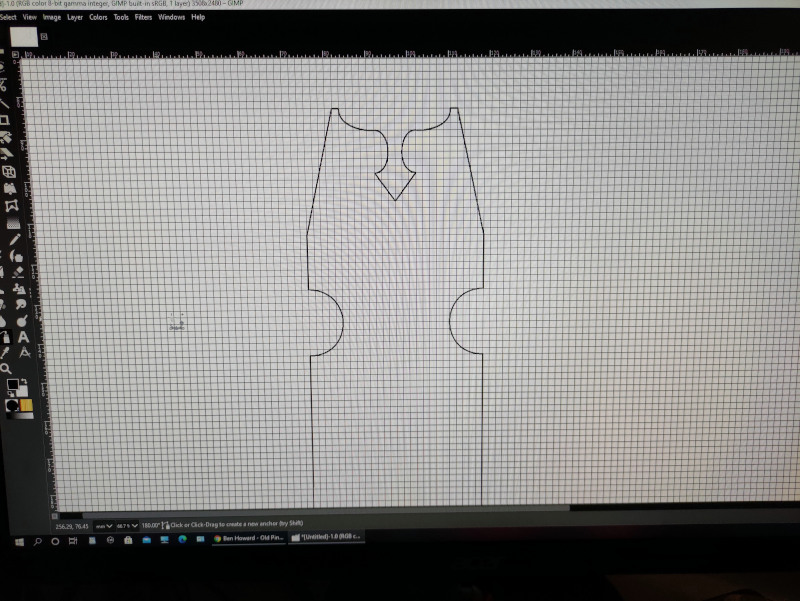
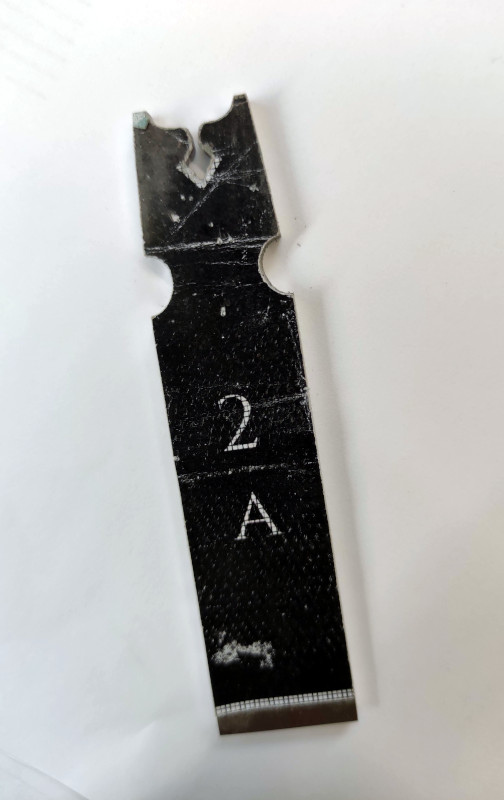
I also started to design the top of the blade. I went through a lot of different ideas before settling on this one. This was an early iteration, after a few more changes I had one I liked.
aWkfFAp.jpg


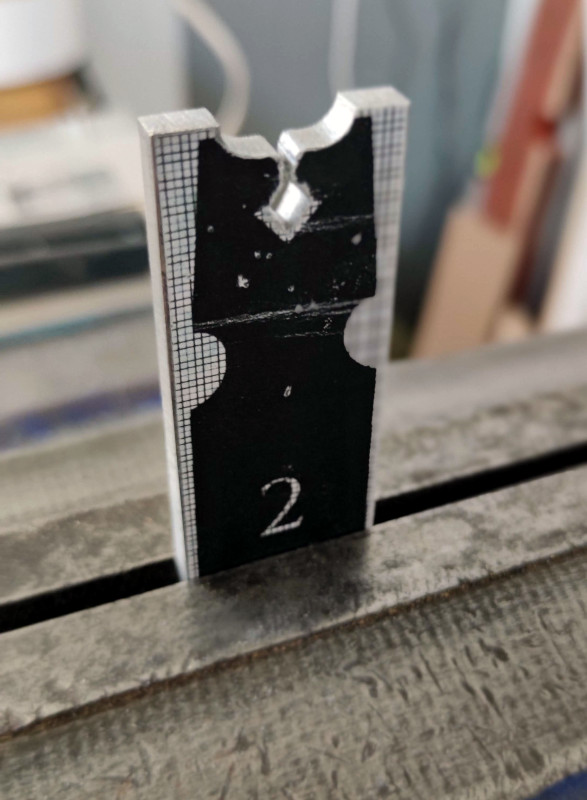
I printed the design out and stuck it to the blade blank so I could use it as a template to file to.

A6s7UNn.jpg


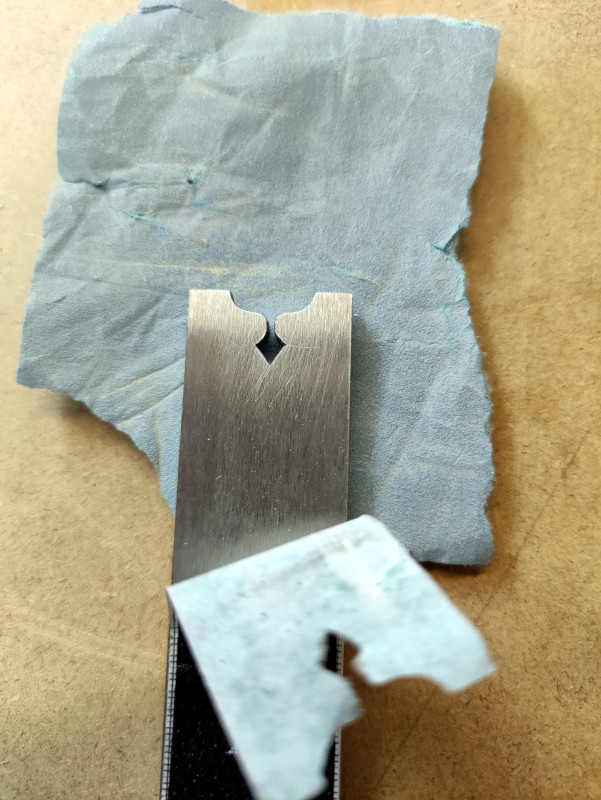
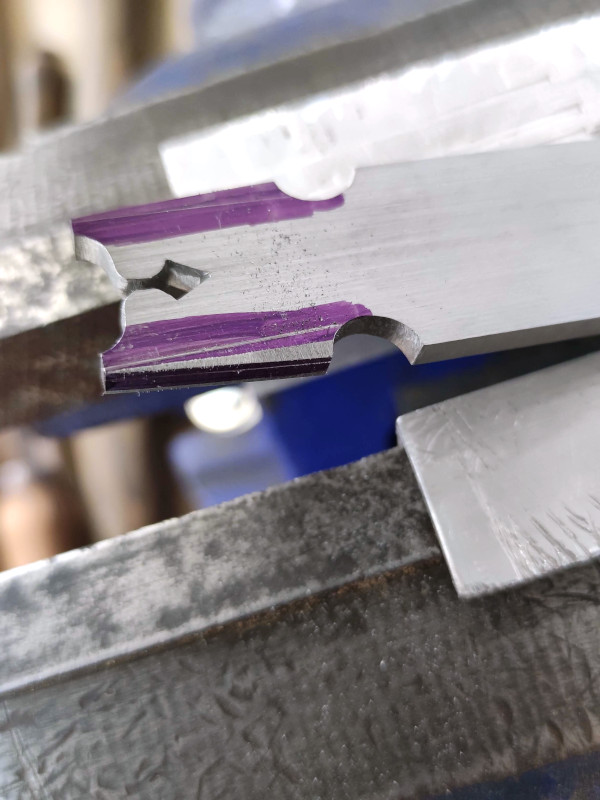
constantly checking progress under the template. The diamond was trickier to cut that I had anticipated, with my smallest needle file just barely fitting.

0PKC1HZ.jpg


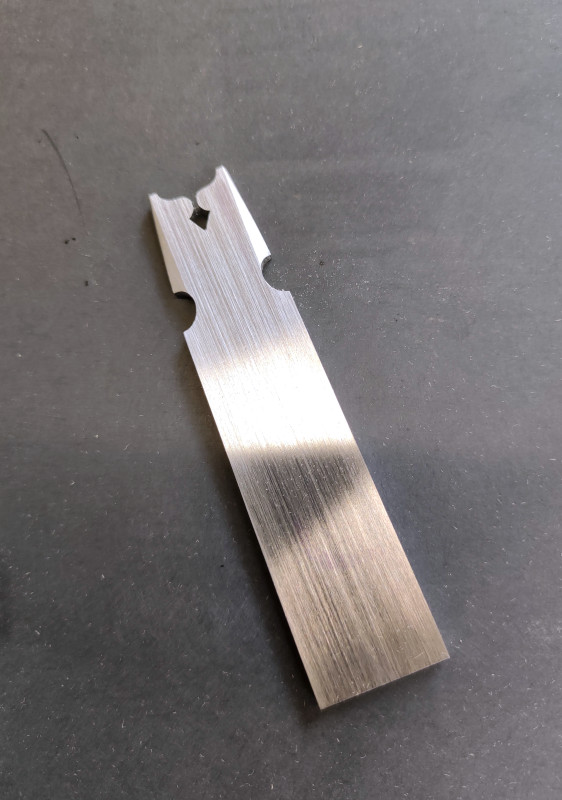
Eventually I got the shape done. Like I mentioned earlier I had intentions of carrying this design onto future planes but it took a lengthy amount of time to get this done and improvements are still to be made, but as a wise man kept telling me "you only get better with practise" so maybe I should :)

uYX0fRA.jpg


lastly I added a few bevel details to soften the edges

0oFfJwp.jpg


And a quick clean up before the next stage.

JVH7jLU.jpg
 
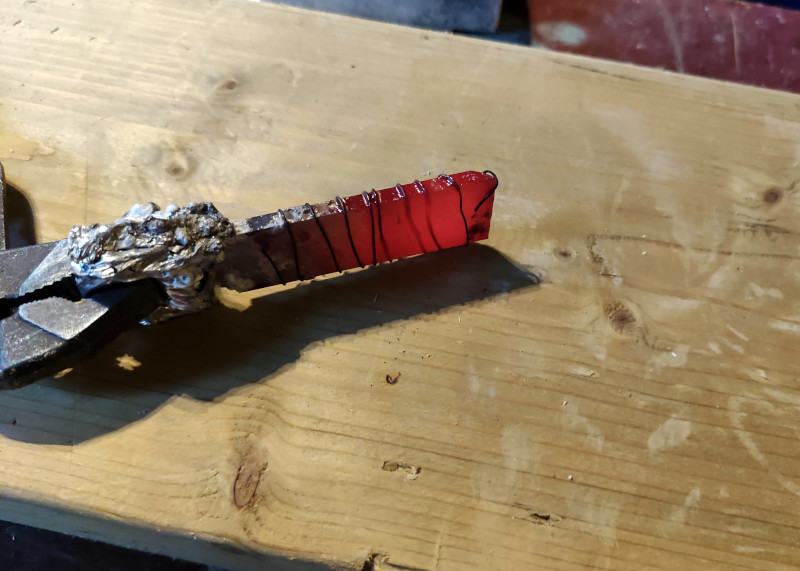
With the blade shaped I could begin to heat treat it.

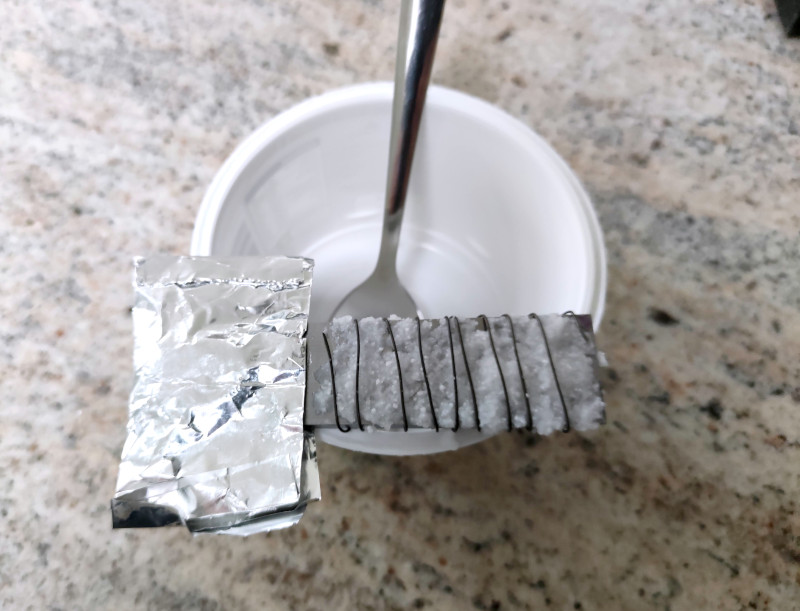
I covered the blade with borax (using some thin gauge wire to help hold it to the blade) as a make shift anti scale compound.
DqaX7jd.jpg


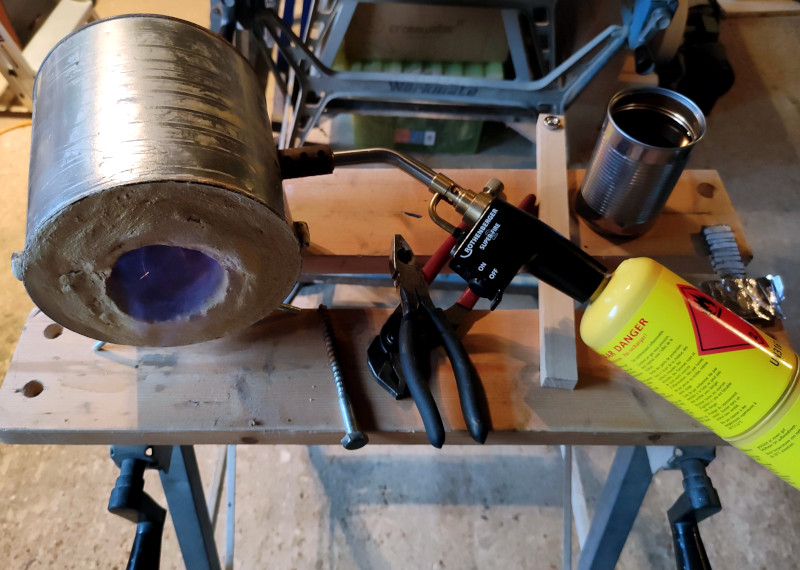
I then fired up the tin can forge, using a mapp gas torch as the fuel.
I have a magnet screwed to a piece of wood to test the blade once it starts getting to critical temperature and a tin of pre heated vegetable oil to quench the blade in.
XnkW3PS.jpg


I was doing some more reading on heat treating 01 tool steel and the "normalizing" process.
Essentially heating the blade to just over critical temperature then letting it air cool fully, repeating the process 2 or 3 times.
My basic understanding it it's meant to help relieve stresses in the metal and improve the grain structure.
It's difficult to know if the correct temperatures are being reached in a diy tin forge, and some say it isn't entirely necessary with pre annealed steels but a few cycles certainly shouldn't harm the blade.

2EZALHr.jpg


After the final heating and quenching I tempered the blade in an oven.
Lastly I cleaned it up, ground the bevel and honed it sharp.
It seems to hold a very keen edge so I'm happy with the results.

ZKBJqBx.jpg


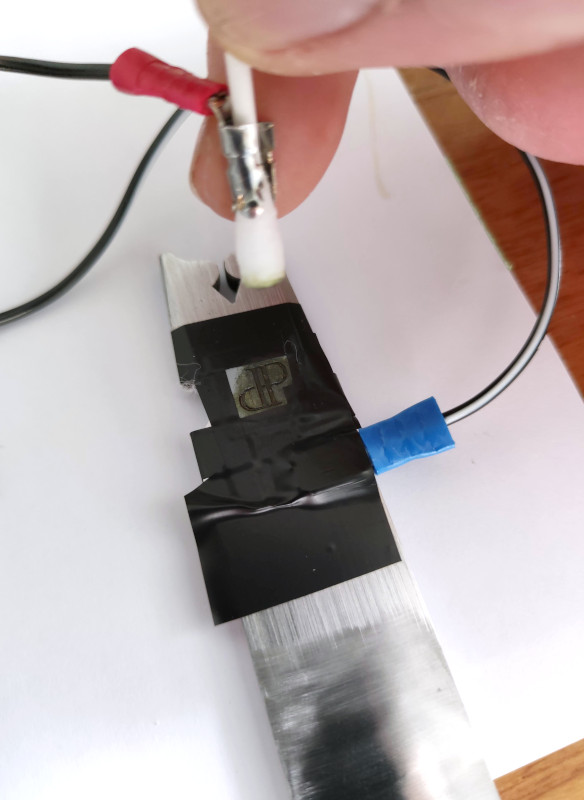
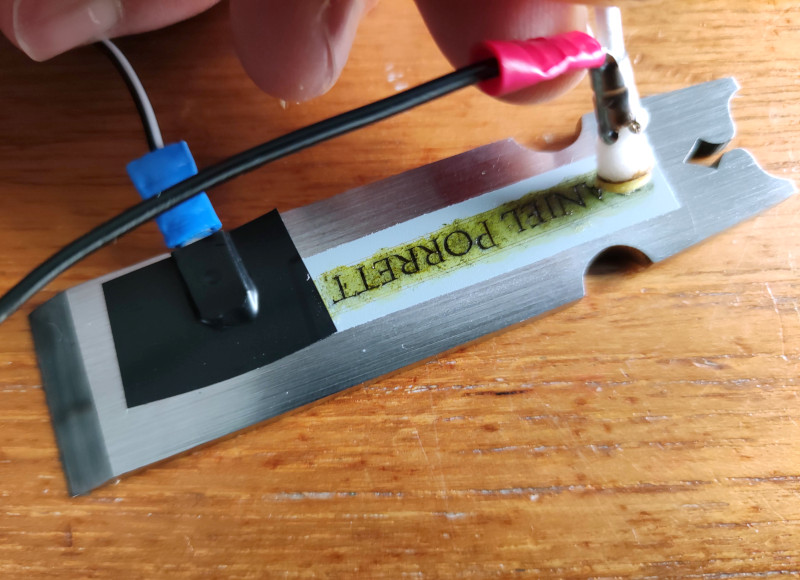
I could then add my new makers marks using stencils and electro etching.

t0zoGOP.jpg


Using an old battery charger and a salt water solution to apply the etch.

GAwwZQf.jpg


And finally after another clean up it was finished.

Wezaw14.jpg
 
Hey Marcros

The etching it's self is quite quick depending on the voltage you use.
These where done with a 7.2v battery charger and took around 10 minutes to fully etch.
I also have a 12v charger which will etch deeper a lot quicker.

If you wanted a light etch it would only take a few minutes.
The deeper the etch the longer it takes and you also risk losing edge definition.

The hard part is getting hold of the stencils, then weeding and laying them can take ages.

I think electro etching works on most metals though you need to change the metal salt to match the metal you are etching.

Ferrous sulfate (Rock salt) works well for steels, if you want to etch brass or copper you would need a copper sulfate solution.

You can also use the same vinyl stencils and ferric chloride to etch non ferrous metals like brass, which is how I did the marks on my gents saw sheaths.

Hope that helps
Cheers
Dan.
 
With the blade finished I could start working on the wedge.

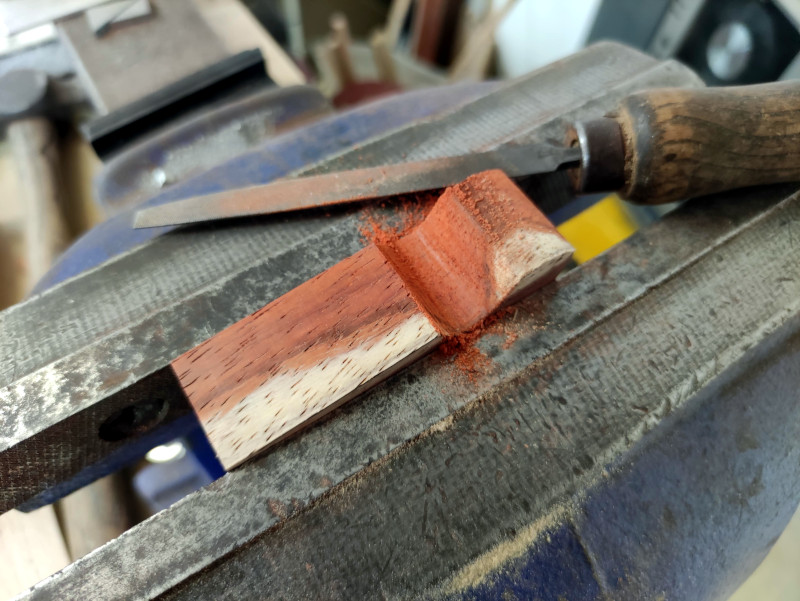
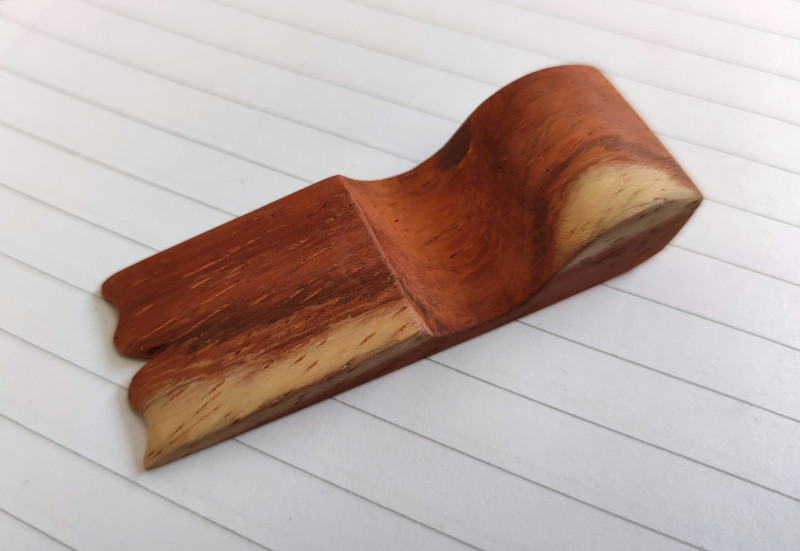
I had a piece of padauk that had a small amount of contrasting sapwood which I thought would look nice in the wedge.
I cut the wedge out and started shaping it with a coping saw and files.

qQX3gm7.jpg


With the wedge partially formed I added a small cupids bow detail to the end.

cunvGm8.jpg


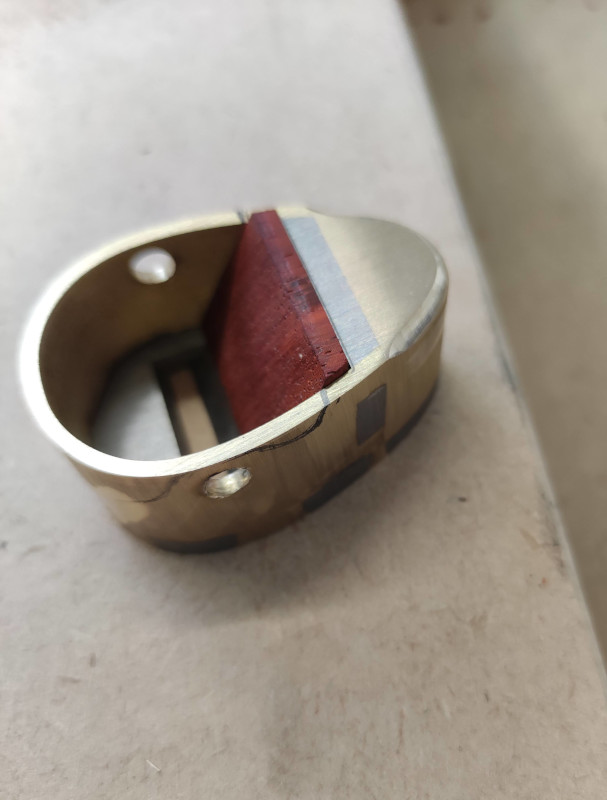
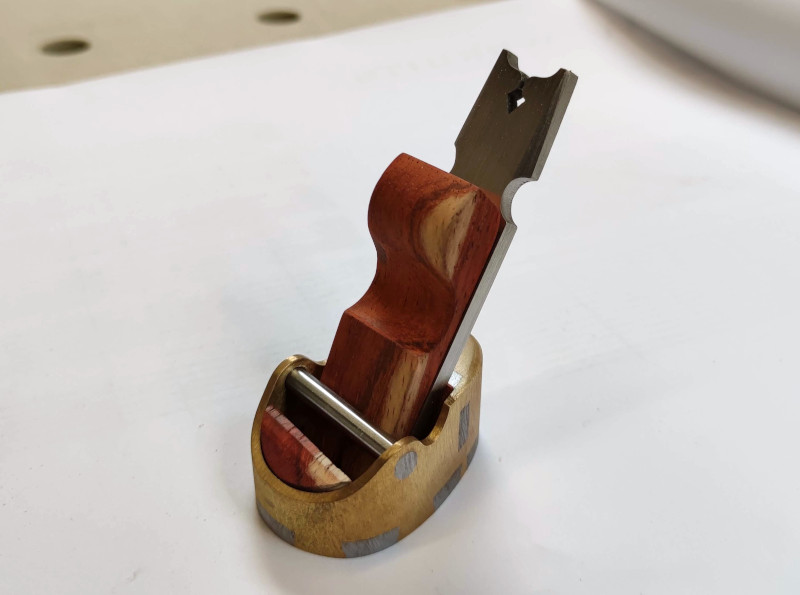
After test fitting the wedge to make sure it was seating uniformly with the blade I cut a small piece of matching padauk for the front infill of the plane body.

t512a3q.jpg


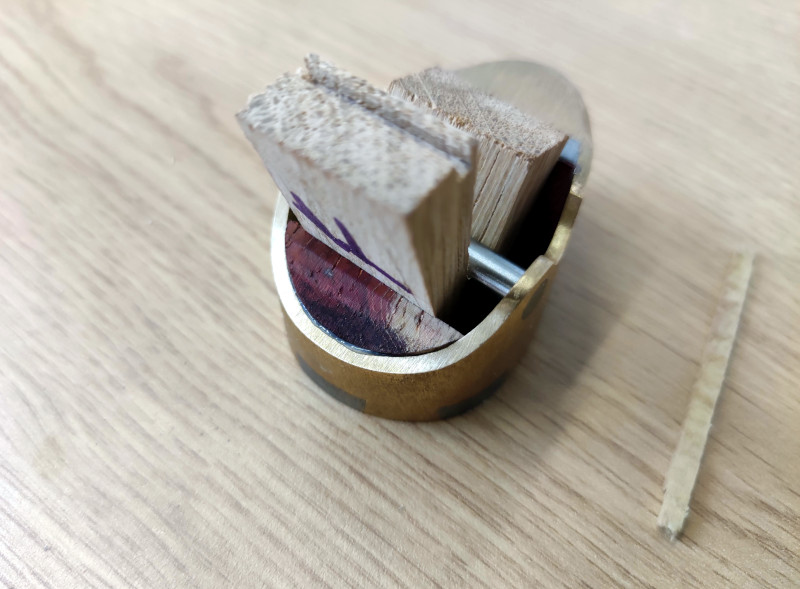
I then glued the front infill and bed into the body using strong epoxy.
I cut some small wedges to hold them in position while the glue cured.

o93CGx8.jpg


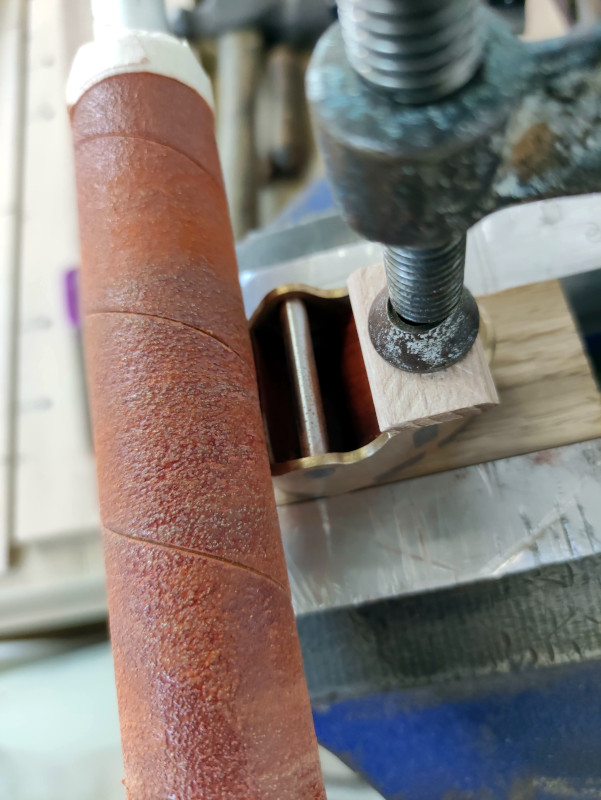
Once the epoxy had cured I used my makeshift sander to blend the padauk infill to the body.

bGEOwal.jpg


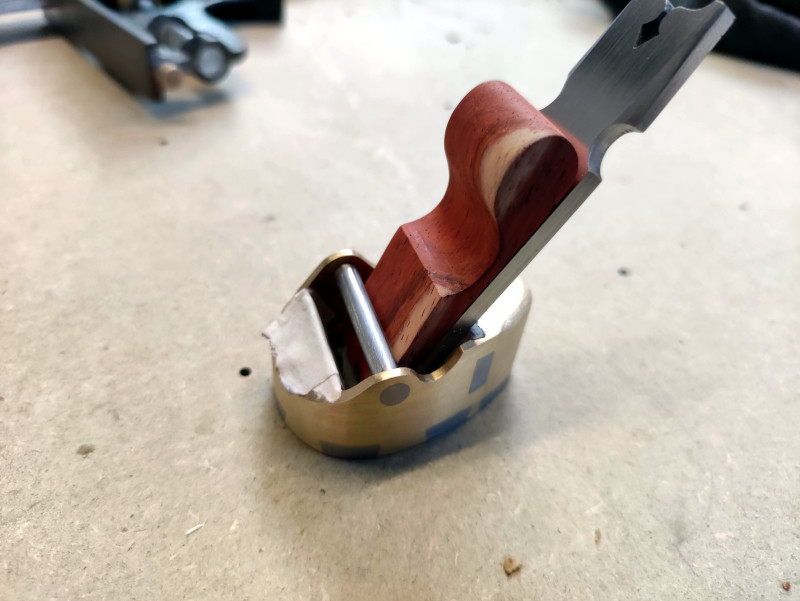
And finished the curved end to the wedge.

h9MYme9.jpg


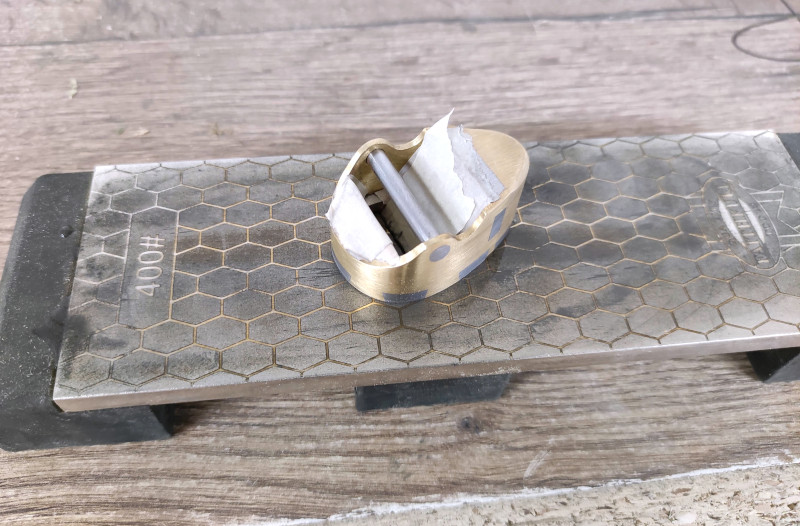
I was now ready to start flattening the sole of the plane. I masked up the padauk to prevent it getting dirty while lapping the sole.
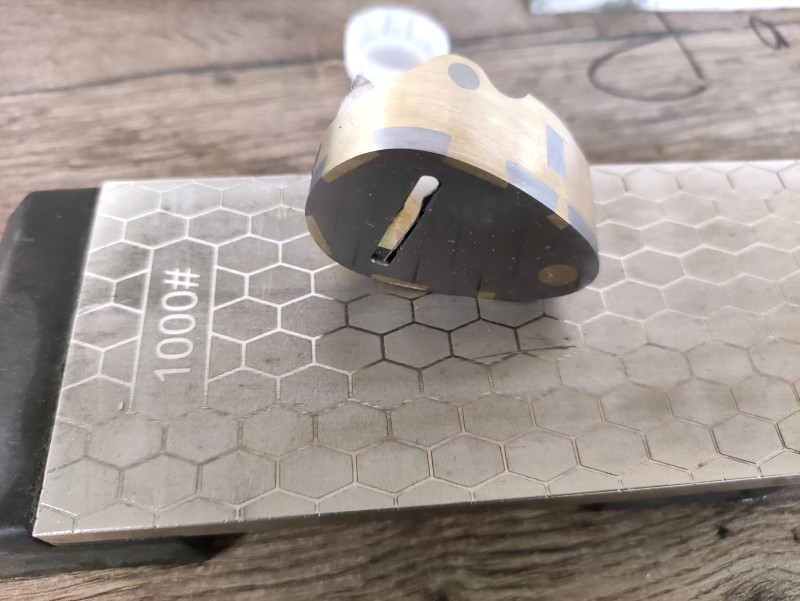
I started on a piece of sheet glass with 180 grit wet and dry paper, then moved up through the grits to a 400 grit diamond stone.

fD5MTsn.jpg


I went up to 1000 grit diamond stone, the sole was starting to get a nice flat sheen.

uN9ZAHu.jpg


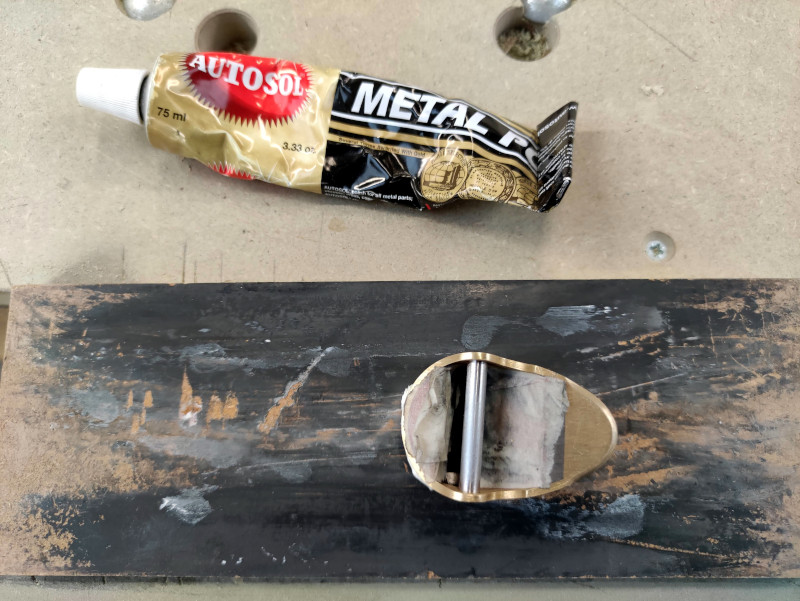
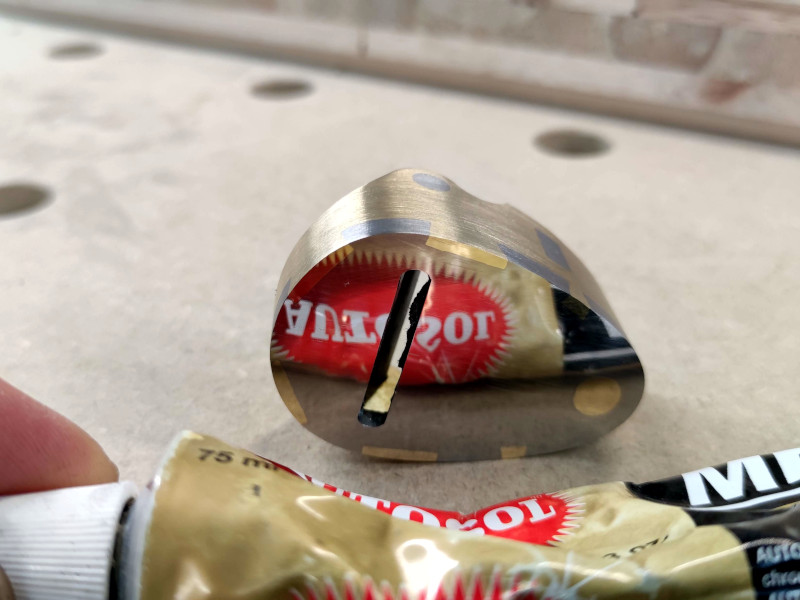
Lastly I gave the sole a quick polish with a strop and some metal polish compound.

0Czmfb9.jpg


5twJ2ix.jpg
 

Latest posts

Back
Top