DBT85s Workshop - Moved in and now time to fit it out

UKworkshop.co.uk

Help Support UKworkshop.co.uk:

This site may earn a commission from merchant affiliate links, including eBay, Amazon, and others.
Also take in to account, whilst the tile is 300m wide, you will create a gap of 4-5mm between each tile. Over 24 tiles this could amount to nearly a half tile extra. You will find 7200mm/300mm isn’t 24, more like 23.5. The head lap at the ridge I ended up with was 150mm instead of the 110mm I’d used all the way up. It looks no different from any distance and means the ridge has even better protection from wind driven rain. If you want to be really pedantic, you could trim off 40mm of the top tile, but there really is no need. You can’t just adjust the headlap to suit on pre drilled tiles. The max you can really go is 110mm as your nail is then just against the previous row assuming a 245 mm gauge on the battens. You can’t space battens less to get a bigger headlap and get a nail in the next row without drilling every lap. ‘Universal spacing’ is finite.

Do you go for riven? I thought about it, but the tiles on all the houses around are a mixture of dressed and plain, I went with the half price bargain from the Bay, and went straight edge. My cost base was already spiralling due to building control restrictions on cladding, insulation and internal finishes, so had to draw a line somewhere. I’m really happy with the roof I’ve ended up with, riven would have doubled the cost, I’ve no regrets, although it would have been a nice ‘upgrade’.
 
Yeah I counted for 303mm wide tiles rather than 300 for that reason. The actual distance from face of batten one end to face of batten the other is 7105mm, so a fraction under 23.5 tiles with that space, though apparently with fibre cement tiles it can be wider if needed. That extra half a tile (150mm) split at each end goes nicely to just about extend further than the feather edge once its applied.

From my drawings the headlap would have to be in the region of 124mm to eliminate the need to cut both top rows of tiles. So too large.

Did you just cut a template slate adn then cut all other to match or did you measure them all individually?

I'm not too worried about riven faces on the tiles, but I did think about the dressed edges. At the end of the day the buildings here have about 5 different coverings so adding one more isn't going to upset the apple cart!

Sorted out my DPM last night from ebay, 6x8m for £49. Will have to get it lined up nicely! Didn't really want to have to join 2 together.

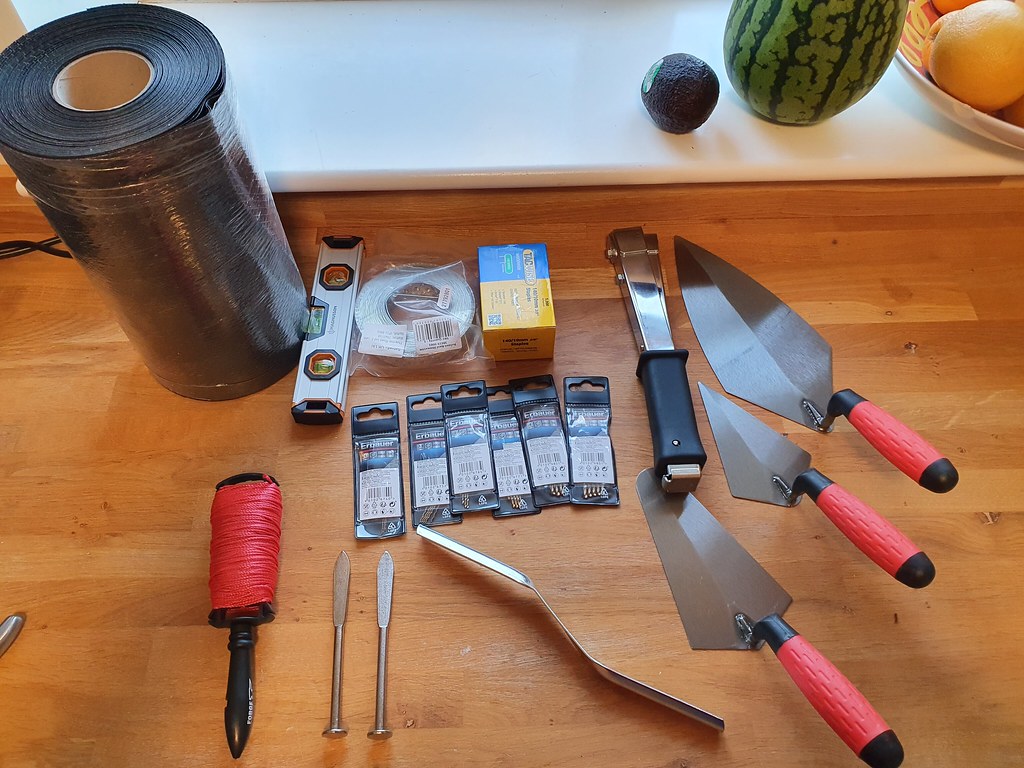
Also this lot arrived.

49927600527_2b5f0e34db_b.jpg
 
When you reach ridge, You will have a batten almost directly above the previous one for the final tile.

I marked each one with a scribe line. I hooked the tile on the rivet, offered up a slate from the opposite side, sighted a 10mm ridge gap, scribed and cut each one. It took 30 seconds a tile to measure, a little less to cut. The top tile will need drilling to fix, as the holes will not be in the right place.

I put a vented ridge roll over the top at the end, fully ventilated, no bugs or water in.
 
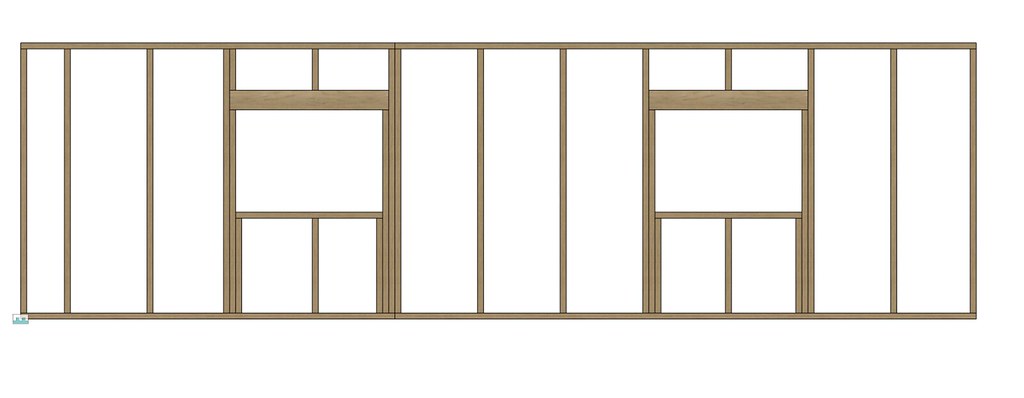
So, finally adding some windows. Too small? Too not spaced from either end evenly causing your eye to twitch?

Acquisition of windows to whatever size I want isn't a problem.

Those are 755x1085 openings. My gut says go wider.

49929737391_3cdb12a922_b.jpg
 
It's how they co-ordinate with the internal layout that counts. Obviously any wall given over to window is wall you can't use for something else, such as storage, so window sizes are always a compromise. As it happens, they look great to me. BTW, add 10 to 20mm to your window size to get your structural opening size.
 
Thanks Mike. Layout will be a fair bit decided as I go, simply because my actual workshop space is nearly doubling. Things will get moved around as I've nothing too heavy yet that can't shift as I get comfortable. I've not had as many years as you to learn where I want stuff. I only just started putting things on walls to get them off my workbenches!

I literally just make the hole the size to fit with one stud missing. The shorter section of that long wall nadgers it up a bit for the left window just because of where I've chosen to join them. One OSB sheet will span both the long and the short part of that wall, I figured it couldn't hurt.

I might draw a v2 with a wider opening and see how I feel. I estimate I have until about the 5th to decide before framing could start.
 
Just a quick observation, looking at your elevation drawing for the frame, I would put the lintels for the openings under the wall plate, not on the top of the windows.
 
Also, make sure the bottom of the windows is high enough for benches, storage cabinets or even sheet material to be placed under.

I positioned my windows 1200mm from the floor and currently have a 950mm high bench under one and 1000mm high metal cabinets under the other.
 
I'm with GPB in having the windows high enough for useful space below. I have 3 across the front of the shop that are about 27"/700mm off the floor. It was done that way to match the rest of the windows in the attached house. You can't put much in front of them unless you don't mind blocking them. In your shoes I would move them up the wall and have the bottom of the window a touch above sheet height. Electrics also above sheet height between the windows. With the header/lintel (for Mike) at the top of the wall there is room to have a 6"/150mm dust pipe run across the top of the wall with drops between if needed. It is nice to have them open if your budget allows. The breeze is welcome in the summer.

One other small consideration. If the window is further up it is that much harder for a rat bag to climb into.

Pete
 
Appreciate the comments chaps. Felling occured today, just need to finish clearing up. digger will deal with what's left.

49931586817_b67ed3f5b2_b.jpg


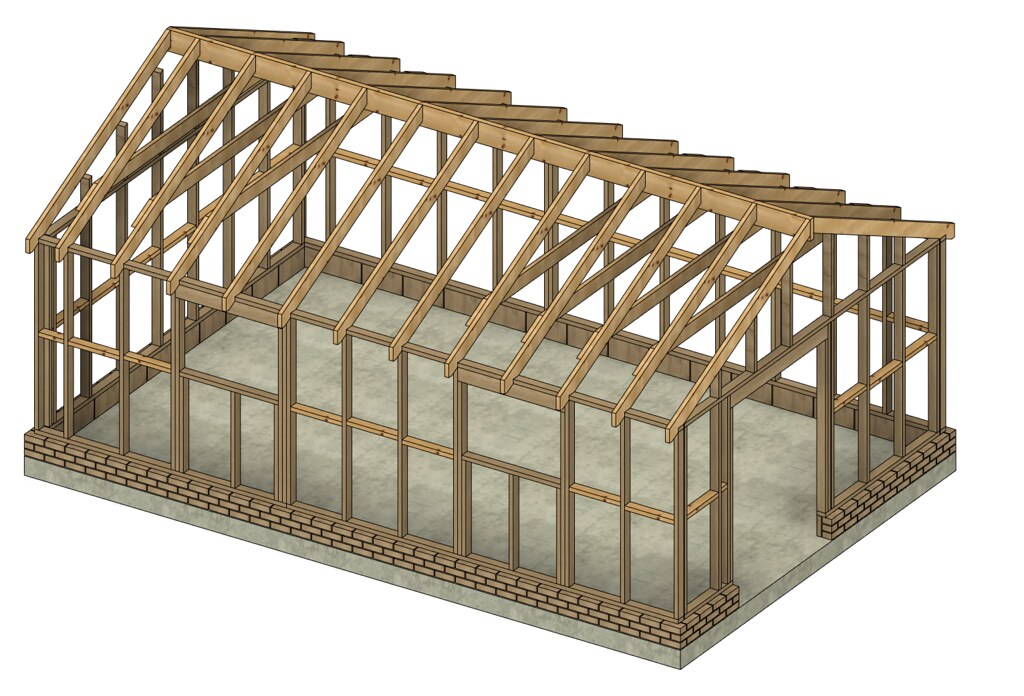
Rejigged things and now I have this. Just realised I need to put my plate in under the sole still.

49931651452_c3c5147e91_b.jpg


HOJ":1r5882l9 said:
Just a quick observation, looking at your elevation drawing for the frame, I would put the lintels for the openings under the wall plate, not on the top of the windows.
Could you explain why for me?

Never mind, Just moved the window up and it basically moved the lintel to the plate anyway.

GPB":1r5882l9 said:
Also, make sure the bottom of the windows is high enough for benches, storage cabinets or even sheet material to be placed under.

I positioned my windows 1200mm from the floor and currently have a 950mm high bench under one and 1000mm high metal cabinets under the other.

At the moment the bottom of that opening is 1015 from the slab, so approx 937mm from the top of any floating floor. I will raise it higher than that I think.

Inspector":1r5882l9 said:
I'm with GPB in having the windows high enough for useful space below. I have 3 across the front of the shop that are about 27"/700mm off the floor. It was done that way to match the rest of the windows in the attached house. You can't put much in front of them unless you don't mind blocking them. In your shoes I would move them up the wall and have the bottom of the window a touch above sheet height. Electrics also above sheet height between the windows. With the header/lintel (for Mike) at the top of the wall there is room to have a 6"/150mm dust pipe run across the top of the wall with drops between if needed. It is nice to have them open if your budget allows. The breeze is welcome in the summer.

One other small consideration. If the window is further up it is that much harder for a rat bag to climb into.

Pete

I'd like it to open eventually but it might well be that to get it in there in the first place I just knock something together to let light in.
 
Could you explain why for me?
Putting them at the top means you can position rafters along its length rather than trying to land on a stud position, you can't always put windows and doors on gauge.

Also, I put on a header plate as well which also gives more flex where the rafters land, it will also span over wall frames where they are joined in a run and at the corners, helps to stiffen everything up, belt and braces.

Looking at your last drawing, I would make the gable ends (spandrels) as frames as well, rather than messing with loose sticks, it will also give you a means of support for setting the ridge beam, if you make them as 2 triangles you can put a "King post" in between to sit under the ridge.

For example:
spandrel.jpg


Bear in mind I build for residential use, and have to comply with Building regs, you can, by all means ignore my comments as in this case they don't apply!
 

Attachments

  • spandrel.jpg
    spandrel.jpg
    46.8 KB
Thanks for the details HOJ.

As you can see I've moved the lintels up more to get the window higher than anything else, though it has the added benefit you mention. The plan is to get the rafters on studs all along the plate anyway. I've also got OSB sheet covering the joins between frame joins, though I understand the use of a top plate for that purpose also.

I'll have a think about the gable ends. Much of my thinking has come from Mikes own build but naturally being an architect he often knows more than anyone else chipping in with ideas so to have further thoughts from a pro is great!

My current plan for the ridge is to use some lengths secured together with a suitable gap and stand them on the floor against the gable ends where the ridge needs to go (as its 225x75). Then lift one end up a few feet, put a pin in under it and then do the other end. Just walking it up a bit at a time to its eventual height.

What are your thoughts on my beam spanning that 3m gap between rafters to give me storage in the roof space, given that there are also 150x50 ties supporting the rest of it and stopping things spreading?
 
Excellent little video! Your little pink-clad helper needs to smarten her ideas up a bit, though. It was almost as if she was just a spectator.
 
Trust me when I say she'll be trying to help when it all kicks off. It's just a variable definition of the word help. The life of a toddler.
 
So I might have found 2 windows in the barn that will suit until I order new ones, they are blown but still intact. Need to measure up. I can deal with them being different widths but different heights might make my eye twitch.

Also around the barn are the piles and piles of bricks, naturally not 290 of any one bloody type, but close enough that I don't mind a few straggles hidden around the back. There are also a bunch with no frog. I guess bricking for the first time might be best with frogged bricks huh?
 
As I say, my work is regulated, so I would have engineer calcs done for the structure, in any case I would be inclined to put collar ties on in that section, with bolts and star washers in between any meeting faces, + plus a couple of 4.5mm galv nails.

Whist it makes a good space for storage, take it from me, once you start storing stuff up there, you really don't need it any more.

Catching up on you last post don't spoil it all be trying to recylce old bricks that have been lying around, more than likely be all different sizes, covered in algae, and possibly frost damaged, & if you haven't done much brick laying could be very challenging.
 

Latest posts

Back
Top