Butler's table

UKworkshop.co.uk

Help Support UKworkshop.co.uk:

This site may earn a commission from merchant affiliate links, including eBay, Amazon, and others.

gasman

Established Member
Joined
14 Nov 2006
Messages
1,011
Reaction score
337
Location
Near Oxford
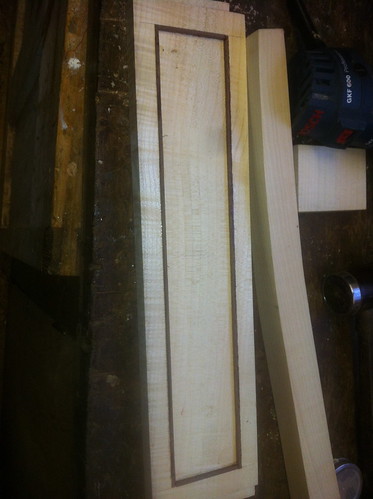
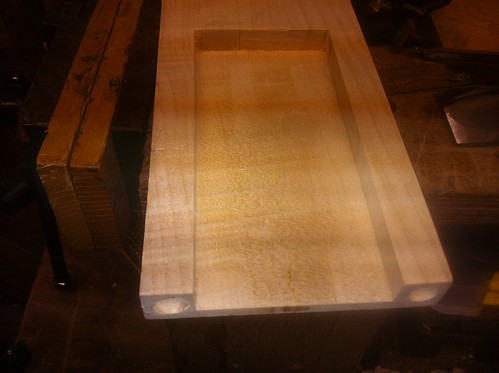
Not really a traditional butler's table - but the client wants a side table with a removeable tray on top. There is going to be some fancy marquetry in the form of a college crest - plus inlays all round the sides as follows:
Butler's table curved legs.jpg

I am toying with putting a secret drawer in the back by drilling out one of the rear legs and replacing the inlay with a drawer with the inlay as the drawer front - not sure yet I need to think this through very carefully
Butler's table curved legs2.jpg

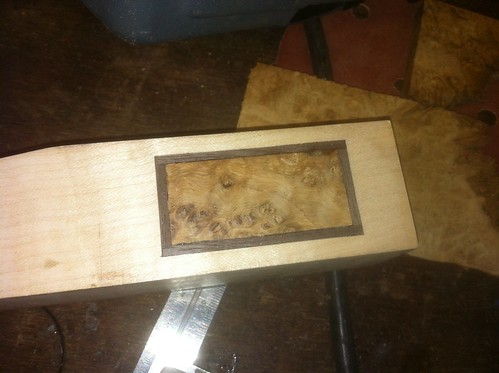
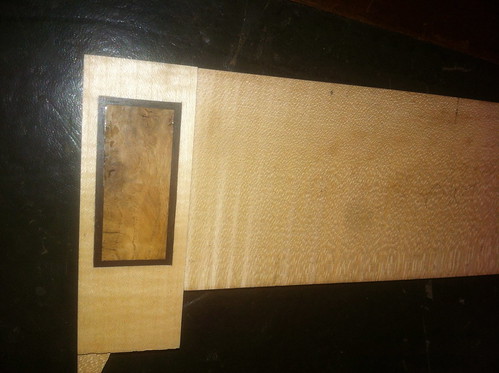
This is a bit of a rip off of the Linley writing desks - but what the heck... so I mocked up a corner piece to see what it looks like as follows:
8389454559_b046030b1f.jpg

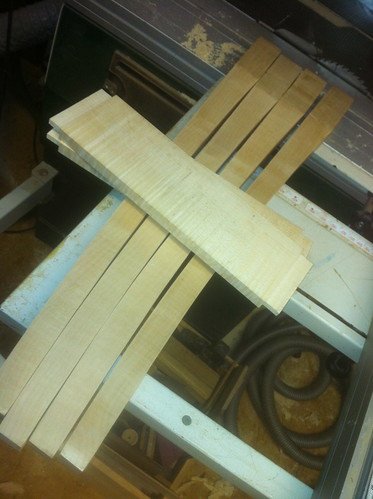
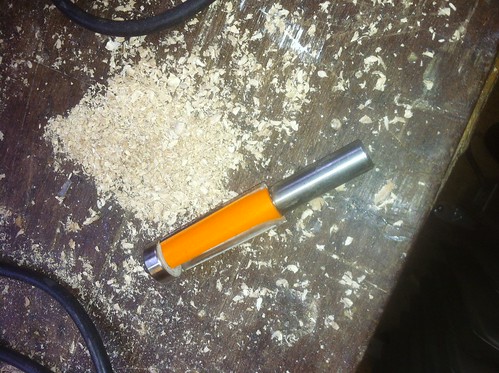
Also started on the legs and side pieces - from some nice quartersawn sycamore. The legs were made after shaping a template and double-side taping it to the 45x45mm leg blanks using a CMT bearing-guided spiral router cutter
8390540830_a6b85b5897.jpg
[/url]
I will do this as a WIP if people are interested
Best regards
Mark
 

Attachments

  • Butler's table curved legs.jpg
    Butler's table curved legs.jpg
    231.6 KB
  • Butler's table curved legs2.jpg
    Butler's table curved legs2.jpg
    151.4 KB
I love the idea of secret drawers but so far I've chickened out of giving it a go.. how would the hollow style/rail (?) be made & jointed to the leg ?? I'm imagining secret side made up as if for a drawer.

I'm also busy convincing myself I could never make matching legs..
1) how did you make the template/jig - sketch out shape & freehand through a bandsaw.. & finish it how??..or some other way?
..that gets you 1 face/side shaped
2) how do you shape the other faces if the side facing down is not flat?
3) does 1 template do all the sides of a leg?

Thanks
Togs
 
Thanks everyone for the interest
The legs were far easier than you might imagine
First I found a 'curved table leg' using the sketch up online resource
untitled.jpg

Then replaced the square but tapered legs which I had in my early model and fiddled a bit to get the scale, sizes and positioning OK
The beauty of this is that it is all chopped out of a 45x45x720 square piece. The top 100mm of each leg is square - then it is just 2 edges which have a long concave curve cut out of them, whilst the other 2 have a convexity cut off from the lower 1/3 - which makes it fairly straightforward
So then I cut a template out of an old bit of 1/4 inch ash which was lying around
8398279824_9b070bd698.jpg

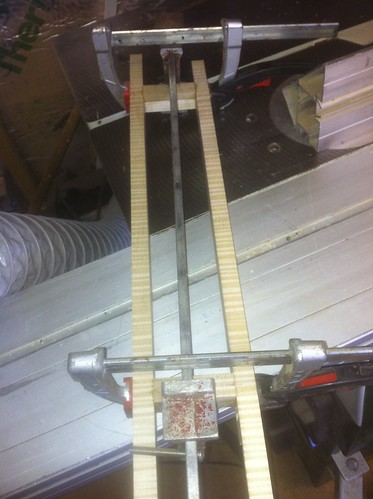
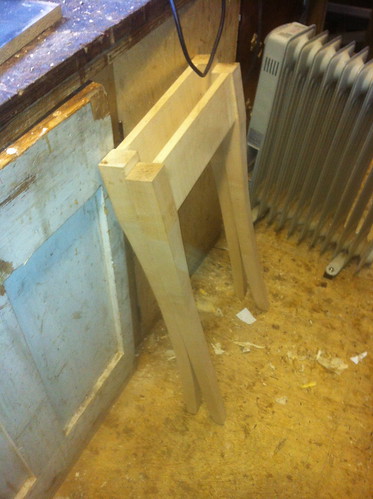
After squaring up all 4 legs, I double-side taped the template to each one in turn, marked round it, cut it roughly on the bandsaw outside the line, then using the bearing-guided cutter below I ran both sides past going very carefully and trying to take light passes but keeping it absolutely 'grounded' at all times. Then took the template off and replaced it on an adjacent face
8397191959_e1a7180524.jpg

Then I morticed the tops for the side rails of the table so at the moment, loose fitted I have 4 legs and two sides
8398278394_f871952ef6.jpg

And that is as far as I can go today - waiting for the limewood burr to arrive which they want the inlays on the legs to be from
Thanks for all interest
Mark
 

Attachments

  • untitled.jpg
    untitled.jpg
    26 KB
Yep, keep it coming Mark, excellent stuff. Although I don't comment in here very often I am pretty much always lurking and going through the Projects board mostly. There is a lot of excellent stuff here from all of you, so thanks to all for making this site probably the best woodworking site in the World (and much tastier than Heineken too)!!! ;~)
 
Despite the cold (so wish I had better heating in the workshop) I made some progress over the weekend.
I made a start on the inlays for the legs and 'rails' of the table.
The layout is quite straightforward. Each leg is 45x45 for the top 100mm, so an inlaid panel will be central horizontally and vertically in each of the 2 outer faces of each leg. The inlaid panel will be composed of a 59x27 piece of burr oak with a 3mm american black walnut edge to it - thus there will be a 6mm gap at the sides of the legs and 17.5mm top and bottom.
The technique for each is easy - mark 17.5mm (top) and 82.5mm (bottom) the lines in pencil. Then with a double marking gauge score the side lines, then cut the line with a 36mm map chisel top and bottom. Following that, I routed out out to 2mm depth within this rectangle using a straight spiral 6mm bit before cleaning up the corners etc with a chisel.
For the walnut 'lines', I cut a piece of ABW on the bandsaw to 4mm and then took it carefully and slowly down to 3mm on the thicknesser. Sliced this up into 2.5mm widths and then carefully went round each rectangle slowly, inlaying the 4 pieces one by one as shown below - actually this is a side rail of the table not a leg but the principal is the same.
8422741317_2b3c59ee59.jpg
.
I used CA glue with an activator to save some time to glue these little strips in. Then planed those inlaid walnut strips back to the surface and cut a piece of 3mm thick inlay to size, dropping that in and, when dry, planing flush using the lovely QS low angle plane with a 46 degree angle on the blade - impressive result on such figured wood.
Here's a finished side of a leg - also showing in the background some of the burr oak
8423829242_2747d44f71.jpg
[/url]
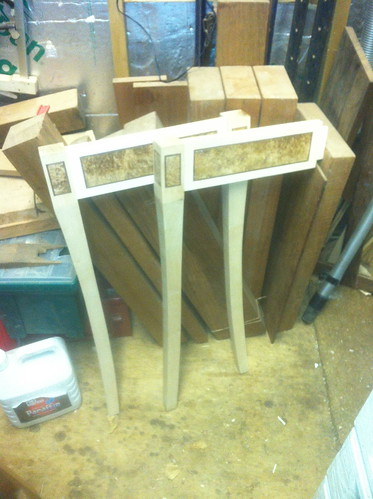
So after doing the same process for 7 sides of 4 legs (the 8th will be the secret compartment) and 2 sides I had this:
8423825610_571d736914.jpg
[/url]
By that stage I was cold so called it a day
Thanks everyone
Mark
 
Sorry about the delay folks - have been inundated with other types of work etc (not woodwork tho :-(
The table has made some progress albeit in fits and starts
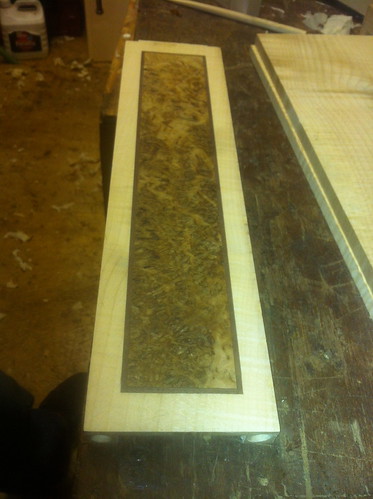
I made the back and front rail of the table in the same way as the sides, except that the back needs to have a cutout for where the secret drawer will go:
So here's the front of the back (as it were) showing 2 x 10mm dowel holes with which it will attach to that leg - to allow the space for the drawer between them
8480359665_5a287cebff.jpg

And here's the other side of the back with the cutout for the drawer
8480355803_cd4aca9bf8.jpg

The front has a drawer in it which is the size of the inlaid burr so I made up the frame, carefully matching the 'ripples' of the sycamore and glued up
8481445686_a483ca455d.jpg

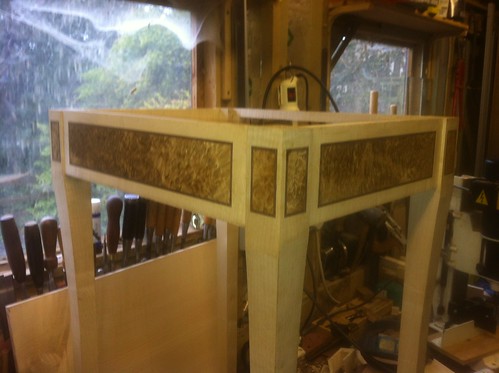
Then I dry-assembled the legs and rails so far
8480359287_ef9a5ca7a5.jpg

Need to work on the compartment for the secret drawer next
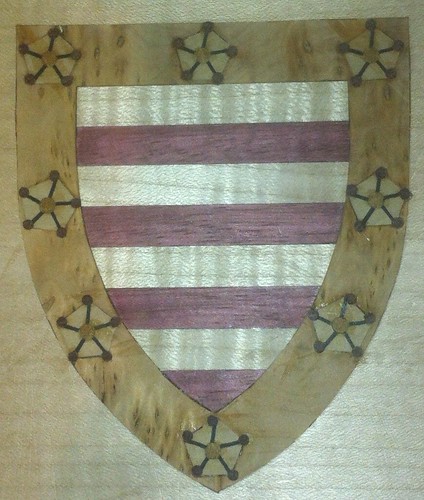
Meanwhile I had glued up an 8mm thick 500x400 piece for the base of the tray and started the inlaid crest
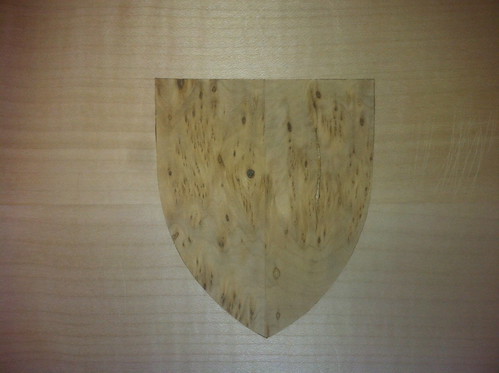
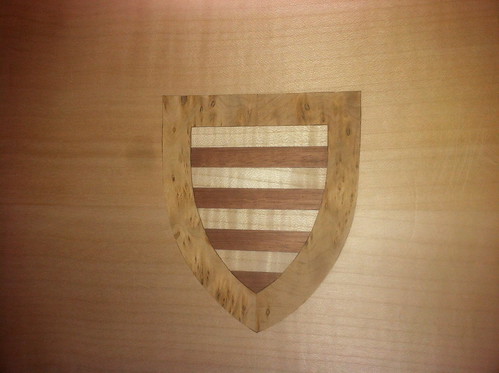
First inlaid 3mm depth of burr lime in 2 halves which roughly matched - an exact match is not required as you will see
8481449040_1b39c9417d.jpg

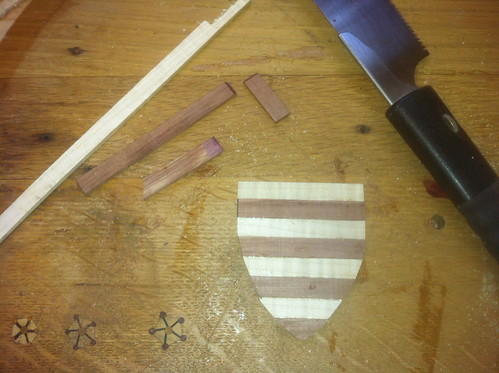
Added an alternating sycamore / purpleheart centre.
8481448664_08529ef759.jpg

This is done by glueing up the 10mm strips of sycamore and purpleheart alternating, then using a print out of the crest to shape this as required, then 'tracing' round this using a number 11 scalpel blade onto the actual piece, then scoring this deeper, before using a 6mm router bit on my bosch palm router to cut almost exactly to the line, before finishing with a very sharp chisel. This image also shows some trial versions of how the 'stars' will look
8480357627_9c9efd1d3e.jpg

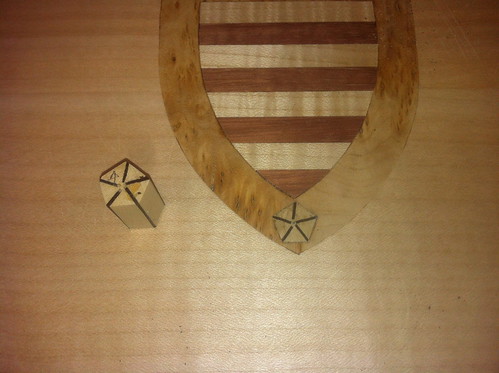
Added 'stars' by turning a 15mm sycamore dowel, cutting a 30mm length, then inlaying 1.5mm strips of ebony into a radial saw cut, before planing the sides to form a pentagon and then tracing round the outside and cutting in as follows:
8481447316_3e5d3f664d.jpg

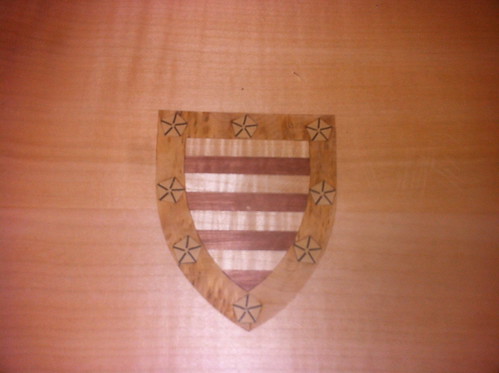
After doing this 8 times I ended up with this:
8480356189_91a4178e34.jpg

As I am sure you all know, the purple colour needs sunlight to come through. Thanks for looking
Mark
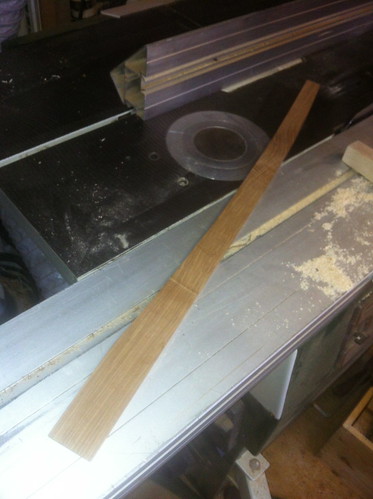
 
I spent another hour at the weekend adding detail to the crest - so to start with I made a 4mm rod from yellowheart by hammering a 4mm square piece through a LN dowel plate, then cut 4mm holes in the centre of each rose with a very sharp lip and spur 4mm bit and inserted the yellowheart rod into each - then trimmed off with one of those saws without any kerf on one side from Veritas.
Then I decided that 3mm would be too big for going round the outside of each rose - so I made myself a kind of dowel plate by drilling a 2.4mm hole in a spare piece of lignum vitae, hollowed out the other side as a cone so it acted as a dowel plate, then made a 3mm rod of purpleheart using the LN dowel plate as before , but after put it though my new 2.4 mm dowel plate. Interestingly I think it ended up crushing the fibres rather than cutting them - but that was fine by me as I ended with a very shiny round looking 2.4mm - and using a 2.5mm drill put 5 little holes round each rose, and with a dab of CA glue inserted the end of the rod, trimmed off, on to the next etc etc
Ended up with this - now I have the complex Griffin to do on this
The size of the crest is 115x98mm
8486891932_a62e720a72.jpg

Thanks for looking
Mark
 
My apologies for all the delays. Have had to break this project to make a 50th birthday / 25th anniversary present for 2 old friends - so decided on a Butler's tray!
This seemed to get more and more complicated as it evolved. Decided to carry on using my stash of ripple sycamore (running out :-( though) I designed a large tray 700 x 450 x80 which has splayed sides so the dovetails have complex angles - it was quite fun actually - daunting at first but there are quite a lot of internet resources and videos. There are some videos on Youtube by a 'murrican called Chad Stanton whose patter and presentation I found irritating but the methodology is sound and easy to follow. His dancing is particularly irritating but each to their own!
http://www.youtube.com/watch?v=kk3tV_WvKlU
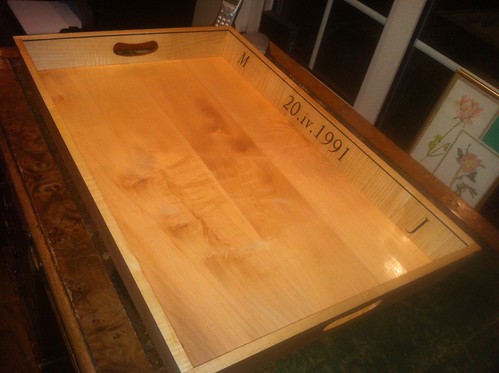
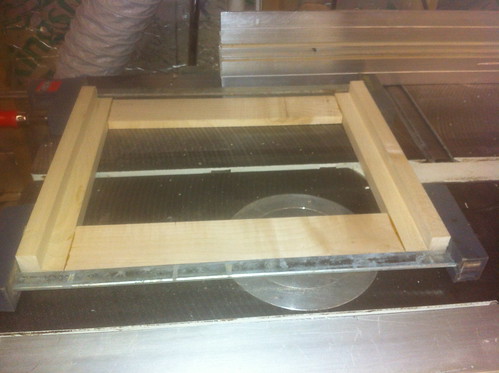
The sides of the tray are 12mm sycamore, the base is 8mm. The angle the sides splay out is 10 degrees. The channels in the 4 sides were cut on the router table using an 8mm cutter - but I double-side taped a 14mm thick piece to the router table so the channel was at the correct 10 degree angle.
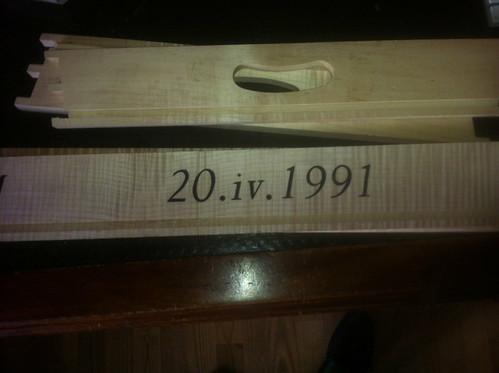
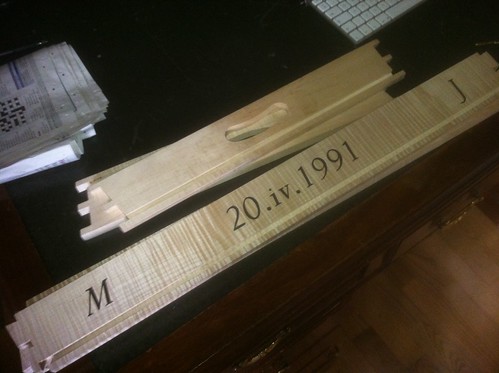
I also decided to inlay their initials and the date they got married in one side (I checked it many times with quite a few mutual friends!)
8505794001_72f9532602.jpg

8505777915_0c9c4c6007.jpg

I put a band inlay round the top of the whole thing and glued it up yesterday so will take some proper photos later today

Back to the main Butler's tray / table. I have been struggling with the secret drawer a bit but made a major breakthrough in terms of the mechanism. This is a bit complicated but hopefully will become clear...
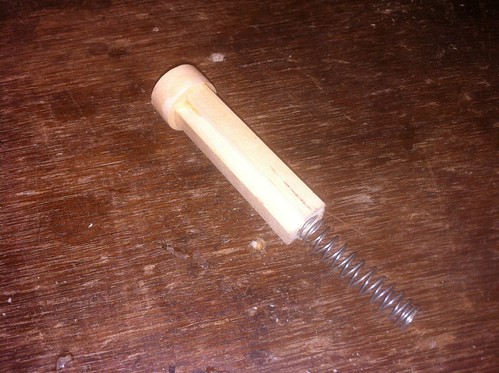
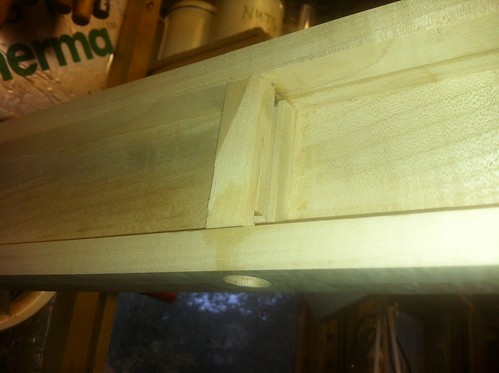
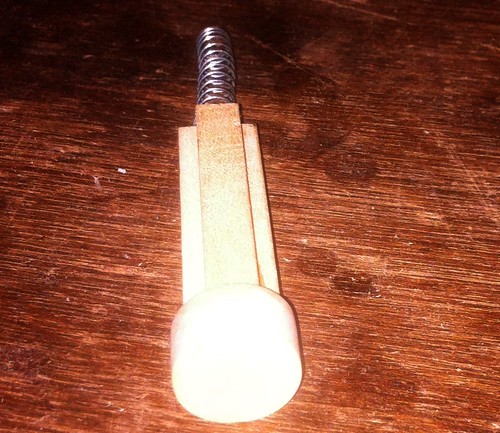
I am going to use rare earth magnets to hold the secret drawer in - and also to push the drawer out. So, on the back of the drawer will be the N pole of a 6mm diameter rare earth magnet. This will be attracted to the S pole of a corresponding magnet at the back of the drawer - but that magnet will itself be on a spring-loaded wooden sliding bar like this (I have not drilled the holes for the magnets yet - need to make the drawer etc first
8505757699_5819173ee0.jpg

There is a corresponding channel cut in the piece of wood which makes up the back of the drawer frame (this was done using a keyhole cutter on the router table). The channel is waxed, the spring (which is 7.5mm diameter) is wedged into a 7mm hole drilled in the upper rail of the back of the table to hold it in, the lower rail of the back has a 20mm circle drilled in it, so the sliding bar has a 19mm button which will be accessed from the bottom of the rear rail of the table to push in.
8506863594_f3066c7d6d.jpg

Thus, mounted on this sliding bar will be TWO magnets. At rest the S pole will engage the N pole on the drawer back to hold the drawer in place. When the button is pushed it this will mean that the S pole 'disengages' and the N pole of another magnet located 20mm lower in the sliding bar will then become opposed to the N pole of the drawer - thus pushing the drawer out. I have tried it and it seems to work but it has been fiddly working it all out
More this week. Thanks for looking. comments always welcome. We are spoled for choice with WIPs at the mo due to the box competition - good to see as I love this part f the forum the best
All the best
Mark
 
Last night I tidied up the 50th birthday / anniversary tray gift with the QS low angle jack plane, with a 45 degree blade freshly sharpened and polished and the mouth closed right down. It really is a fantastic plane for tricky timber like this ripple sycamore - which has a huge tendency to tear out at the first opportunity. The finish from the plane is the final finish - I did not use sandpaper or anything else except some 400G paper to take the sharp corners off . Then added a coat of Liberon finishing oil
8510060804_54c5887af7.jpg

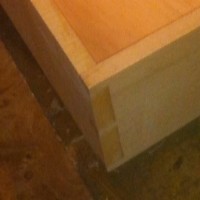
Details of one of the compound dovetails
8508955107_db59fccedf_m.jpg

For the butler's table - I made some more progress with the internal structure
So this will be what the front drawer runs in
8508942651_616a77f805.jpg

And this is another photo of the sliding bar which the magnets will be mounted on - I think it is a bit more clear
8510056486_abec50eab0.jpg

Mark
 
Back
Top