Trimming Shoulders

UKworkshop.co.uk

Help Support UKworkshop.co.uk:

This site may earn a commission from merchant affiliate links, including eBay, Amazon, and others.

Andy Kev.

Established Member
UKW Supporter
Joined
20 Aug 2013
Messages
1,364
Reaction score
127
Location
Germany
At the weekend I cut some dovetails and sawed off the shoulders. It is of course conventional to pare them down after sawing. I always cut the shoulder lines with a bit of depth so as to have the shiny edge to help with the paring. As we all know, the idea is to bring any scruffy bits above the shiny lines down to the same level. David Charlesworth covers the technique for this quite precisely in his DVD on the subject ("Feel for horizontal, lay the tip on the line" etc.) and of course his ideas work as you would expect.

I've stumbled on a variant to this in a fit of absent-mindedness: I put a small square in the behind the joint as a vertical reference for the back of my normal chisel and lightly tapped to the middle of the shoulder and than did the same from the other side and checking with the square showed results as good as Mr C's. I'm putting this here for comment as I can't recall having seen it recommended anywhere (although I'm sure it can't be anything new) and because it proved to be a quick, easy and reliable method. it would of course, also work for tenons.

Any thoughts?
 
Could you take a photo? I can't work out which way round everything is from your description.
 
Shoulders?
As with Andy, not sure.............. I'm interpreting this as the half-tails at either side of the line of tails?

If so, I guess that some of us - me in particular - don't have the skills to reliably and repeatedly cut to a scribed line with a perfectly sharp saw giving a visible-dove-tail-quality finish time after time.
In practice, I usually cut away from, or slightly adjacent to a scribed line, then pare down with a very sharp chisel by hand from each side, meeting in the middle and finishing with very light cuts at the line. It all depends on the lines being square and parallel each side.

I'm always interested in personal tricks, so some pics would be an advantage.
 
Could you take a photo? I can't work out which way round everything is from your description.
I feared that might happen!

I'll see if I can do a pic when I get home but in the meantime, here's another go at a description.

I'm talking about the tail board. The tails have been sawn and the coping saw taken to the bits between the tails. That leaves the shoulders at the ends (where the half-pins at the end of the pin board go.) and they're the bits that are very similar to the end bits of the shoulders when you cut tenons (as opposed to the long bits running along the cheeks of the tenons).

When I saw the shoulders off, I am determined not to go below the marked line so my cuts leave a shoulder which rises slightly to the base of the tail / tenon. I'm relaxed about that because I know that I will simply pare it flat.

When you pare the shoulders normally, the boards are held vertically in the vice. Imagine them instead laid flat on the bench. That means paring from one face then the other towards the middle. Clearly the chisel cuts from above vertically. It's the vertical bit that could be iffy but if you put a square behind the chisel, you can get on vertical fairly precisely. That means that with two light taps towards the middle, you've not so much pared as chopped. However, it's quick and remarkably precise and there's no need to fish the paring chisel out of the tool box.
 
That makes sense, and if it works for you keep doing it. I would have thought the square would be a bit fiddly and unnecessary though as the scribed line (that would be across the 'thickness of the board) would give you your perpendicular reference? I normally just pare by eye and then check with a small square for perpendicular - watch any of the Japanese craftsmen.
 
Last edited:
Andy, I get what you mean now.

I reckon there's a lot of scope for variations in dovetailing technique. I also think that although YouTube demos are useful, they naturally tend to show work on short pieces of wood, arranged to be visible to the camera.

If making something like a 6 foot tall bookcase, you have to pare vertically, down onto the bench.
 
I also cut them, but just cutting to the mark freehand. you can see the front side of the line, and you can lean over the workpiece to see the back side. Just cut slower and look back and forth a time or two to make sure that the cut is right at the line on both sides. If it's wandering, then stop and correct.

There are a lot of techniques advocated by different gurus, but the results are all that matters. If you get good results one way and someone else says you don't, all you can do stare at your good results in front of you. I know which one has more credibility.

On really junky wood (like if you're making something large and cutting tenon shoulders - in pine with knots - something you may seldom do but at some point you'll probably have the opportunity), it's easier to use a fine saw and cut the entire tenon shoulder to the line rather than fighting marshmallow wood with anomalies in it. Inconsistent compression and crushing of wood makes for a much larger error.
 
Andy, I get what you mean now.

I reckon there's a lot of scope for variations in dovetailing technique. I also think that although YouTube demos are useful, they naturally tend to show work on short pieces of wood, arranged to be visible to the camera.

If making something like a 6 foot tall bookcase, you have to pare vertically, down onto the bench.
Phew!

Am I excused photography practice now?
 
This sounds a bit like the technique David Barron showed on his YouTube channel. He cut the shoulders in one go from the edge of the board to the tail. He recommended to put a small square on the edge of the board until you learn to "see" 90 degrees with your chisel.

I have had good results with this, but sometimes ended up undercutting. Doing it from either side may reduce the margin of error, or maybe compound it, I'll have to try haha!
 
When I saw the shoulders off, I am determined not to go below the marked line so my cuts leave a shoulder which rises slightly to the base of the tail / tenon.

Andy, and all, I have a simple and highly reliable method ... my wife does it for me ... and you thought it was all me ... silly buggers ;)

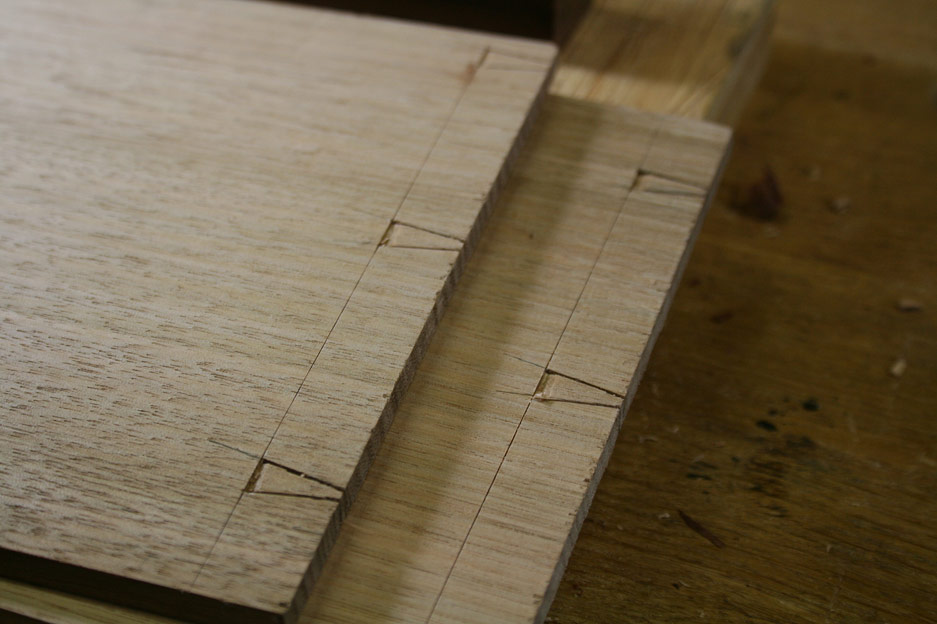
OK, what you do is saw the tails or pins but do not remove any waste just yet.

Now undercut the baseline ...

ThroughDovetails3_html_1c5285f4.jpg


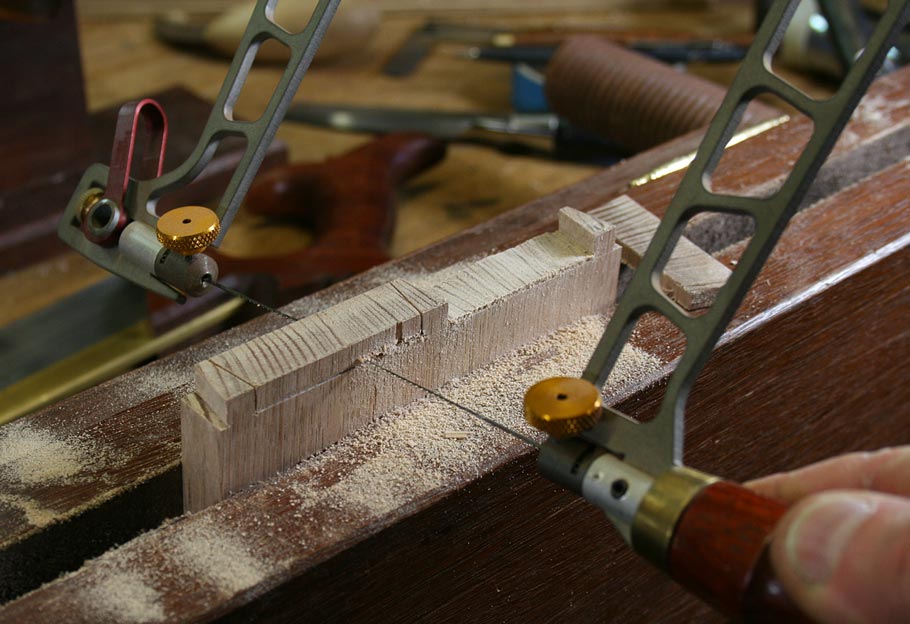
Only then remove the waste. Above is a tail board, but it goes for pins as well ...

ThroughDovetails3_html_m46d81eff.jpg


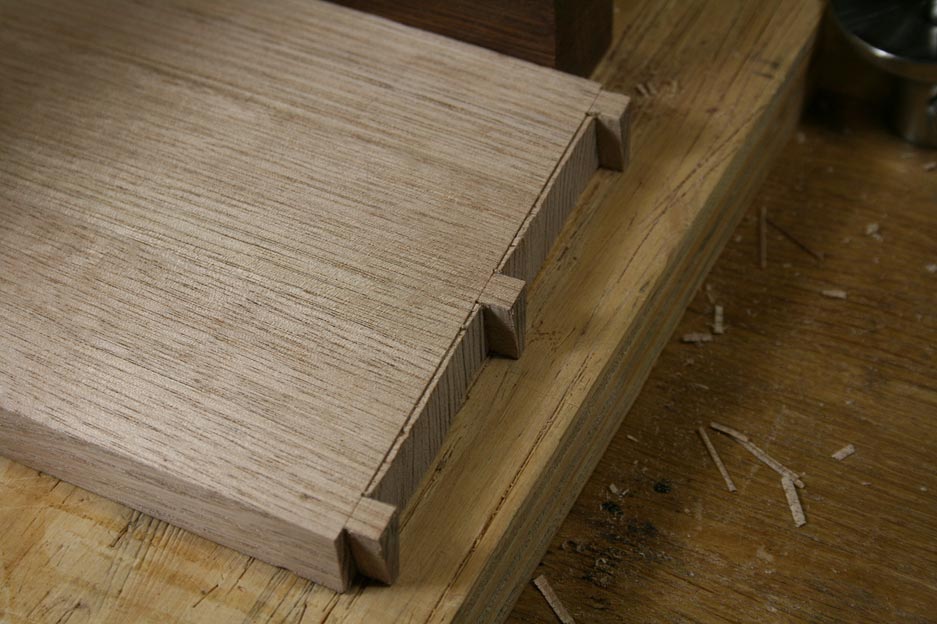
This is what you are left with ...

ThroughDovetails3_html_236c5ff2.jpg


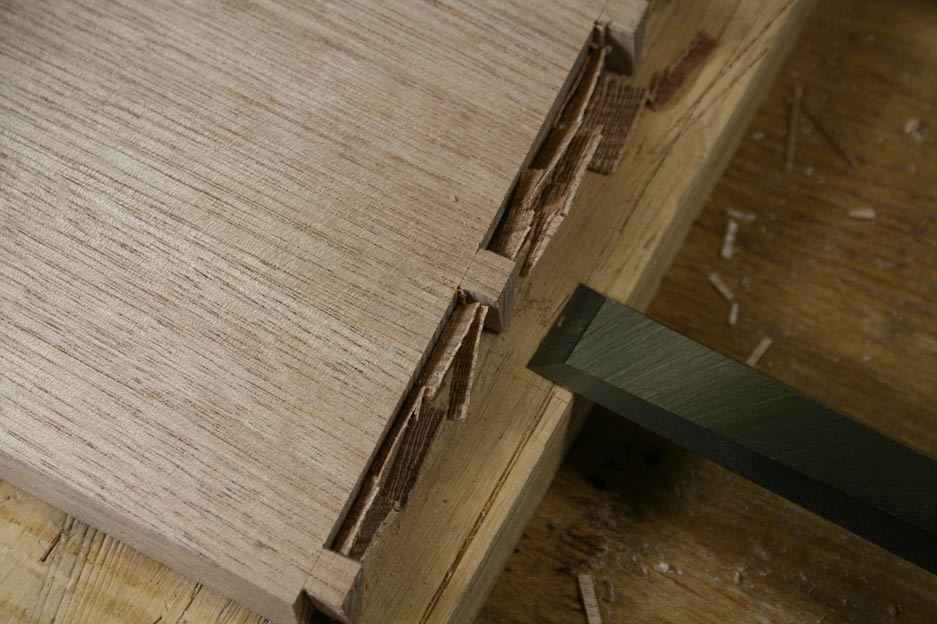
And now you cannot go back over the baseline ...

ThroughDovetails3_html_2a161e0e.jpg


Regards from Perth

Derek
 
Derek,

thanks for the clarity of the pictures and that is precisely the method I use for tails and pins. But, with shoulders, what I had always done, because it seems to be the "official" way, was to put the tail board in the vice to pare the shoulders from the narrow sides towards the outer bases of the outer tails. In a fit of absent mindedness I chopped down as described above and as per your pics. I found that it actually goes a lot quicker than chopping out between the tails as the tenon or small crosscut saw has been used to remove the shoulders and it is typically possible to get that cut much closer to the line than I would dare when using coping a saw between the tails/pins.

What this then means (I discovered) is that provided the shoulder lines are marked moderately deeply to give the shiny bit of wood, only a couple of the lightest chisel taps from each face are needed to produce a very good result and that is a lot quicker and more controlled than the "official" paring of the shoulders.

All the best,

Andy.
 
Back
Top