Top or Bottom bearing router bit?.

UKworkshop.co.uk

Help Support UKworkshop.co.uk:

This site may earn a commission from merchant affiliate links, including eBay, Amazon, and others.
jhwbigley":2czi55uf said:
DSCN0128.jpg

What you really want is something with a taller fence, like this:

4391921509_2987341e44.jpg


Otherwise, if a lump breaks off while you're routing against the grain, it could fly up and hit you in the face! :wink:

Bench cookies - yes, I've also seen Andy's article in GWW on how to make your own. Rockler's cookies have a much finer mesh, which seems better for gripping oiled or dusty workbenches and doesn't 'stain' a freshly-sanded surface.

Just don't buy the poxy shelves they now sell in the US!! :D
 
On the subject of climb cutting, I saw a video recently (on the Wood Magazine site maybe?) where the guy showed a climb cut technique he called "bump cutting". Basically all he did on the part he had to climb cut was instead of keeping the bearing in contact with the template, he literally bumbed the router directly into the piece and back out again and moved along al little and did it again until he had a sort of scalloped edge. He then went back and made the full climb cut to remove the rest of the material. He claimed that this greatly reduced tear out...not tried it yet but I will give it a go. If I can find the link any time soon I'll post it here.

Here's the link
http://www.youtube.com/watch?v=-l4suyL84-w
 
You really need a top and bottom bearing cutter for template work, depending on which side you fix the template, it's not critical apart from the consideration of grain direction.
So if you have a piece which is too deep for the router doc, start with a top bearing cutter and machine the first half. Then flip the wood over and change the cutter to a bottom bearing and use the machined surface on the wood to guide the bearing. Simples :lol: - Rob
 
woodbloke":2d1f9j55 said:
So if you have a piece which is too deep for the router doc, start with a top bearing cutter and machine the first half. Then flip the wood over and change the cutter to a bottom bearing and use the machined surface on the wood to guide the bearing. Simples :lol: - Rob

Used that method myself with the Wealden Multitrim, just slip off the bottom bearing and run one side, replace bearing and do the rest, works on material upto 4" thick


b2.jpg


Jason
 
OPJ":2mb4oqrb said:
jhwbigley":2mb4oqrb said:

What you really want is something with a taller fence, like this:

4391921509_2987341e44.jpg


Otherwise, if a lump breaks off while you're routing against the grain, it could fly up and hit you in the face! :wink:

You shouldn't need to be taking massive amounts of in one go with a ring fence, thats whats so great about them!

so hopefully shouldn't have lumps breaking of and hitting me in the face, i wouldn't want to lose my modeling contracts :lol:

some people climb cut on the spindle moulder.....


JHB
 
woodbloke":2gpzj1cn said:
You really need a top and bottom bearing cutter for template work, depending on which side you fix the template, it's not critical apart from the consideration of grain direction.
So if you have a piece which is too deep for the router doc, start with a top bearing cutter and machine the first half. Then flip the wood over and change the cutter to a bottom bearing and use the machined surface on the wood to guide the bearing. Simples :lol: - Rob

Thats a great tip Rob and Jason, but with a spindle moulder you can just keep winding up the block 8)

JHB
 
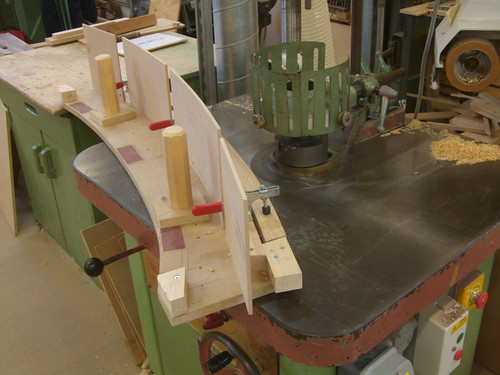
I have made some templates that you can flip over to machine with the grain. These are used with a spindle moulder and bearing but could easily be used on a router table or handheld router.

jig-02.jpg


used to make the curved parts of these doors

Oak-04.jpg


cheers

jon
 
I'd just like to emphasise the point about taking off tiny amounts if you are climb-cutting. I wouldn't try climb-cutting on the RT and would be wary of doing it by hand.

When I do this, I have a top-bearing cutter in the router table (so the bearing is closest to the table, the template runs over the table and the workpiece is on top).

To rough-cut the workpiece, I set up a notched single point fence on my bandsaw and run the template against that. I can get a consistent cut to within 1mm of the line this way.

Then I can flush trim (either on the RT or by hand) whilst the template is still screwed to the blank. Job done.
S
 
Steve Maskery":3ljc9sbz said:
I'd just like to emphasise the point about taking off tiny amounts if you are climb-cutting. I wouldn't try climb-cutting on the RT and would be wary of doing it by hand.
I agree with Steve....'climb cutting' is to be avoided. Small cuts with a sharp bit in the right direction don't normally provide me with any problems - Rob
 
Thanks all for your input. I have gone for the Wealden Multi Trim.
4403328219_b02da3f2cc_o.png

Will come back here to have a proper read before I commence on the work.
Cheers.
 
You won't regret it, they cut really well, I use mine alot.

Jason
 
Chems":1mrrnoqj said:
Thats not a bearing guided cutter, THIS is a bearing guided cutter!

Untitled-1copy.jpg

Is that thing even legal in this country?. I take it you don't use that 'thing' with....
4403784563_2d31596c07_o.jpg
 
I spotted a 1/2" round over/raised panel cutter in Axminster in High Wycombe the other day and I couldnt help saying out loud f*****g hell. This thing was huge I couldnt believe it. :lol: :shock:
 
Mreagleeyes":1lrb4mu2 said:
Chems":1lrb4mu2 said:
Thats not a bearing guided cutter, THIS is a bearing guided cutter!

Untitled-1copy.jpg

Is that thing even legal in this country?. I take it you don't use that 'thing' with....
4403784563_2d31596c07_o.jpg


Lol, Its custom made in america from what I know. I don't think it would fit in that trend, maybe the next model up!
 
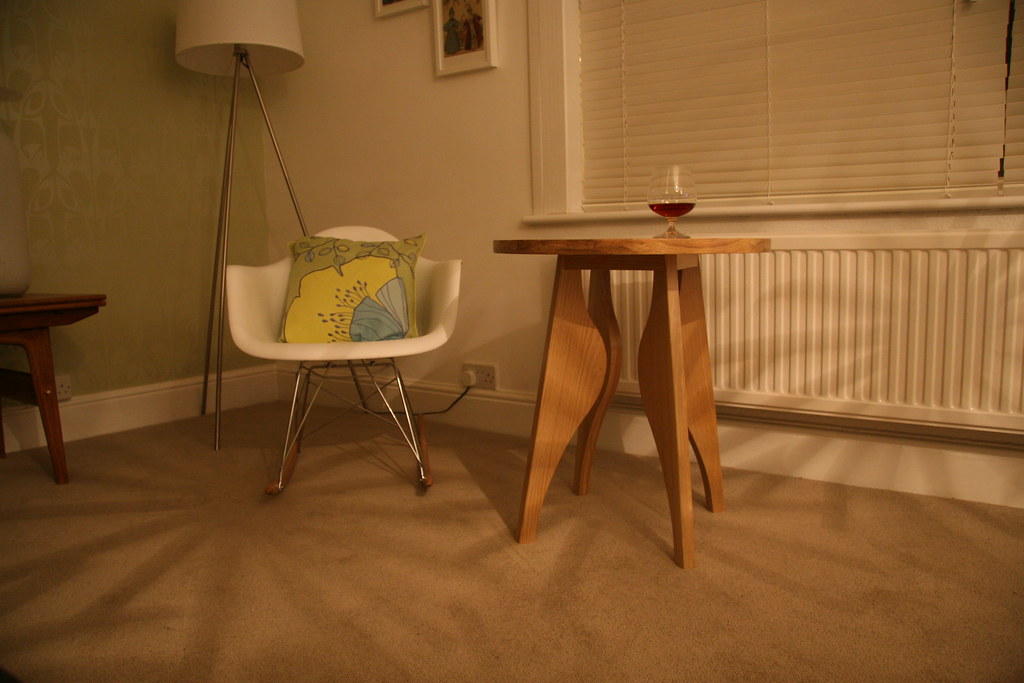
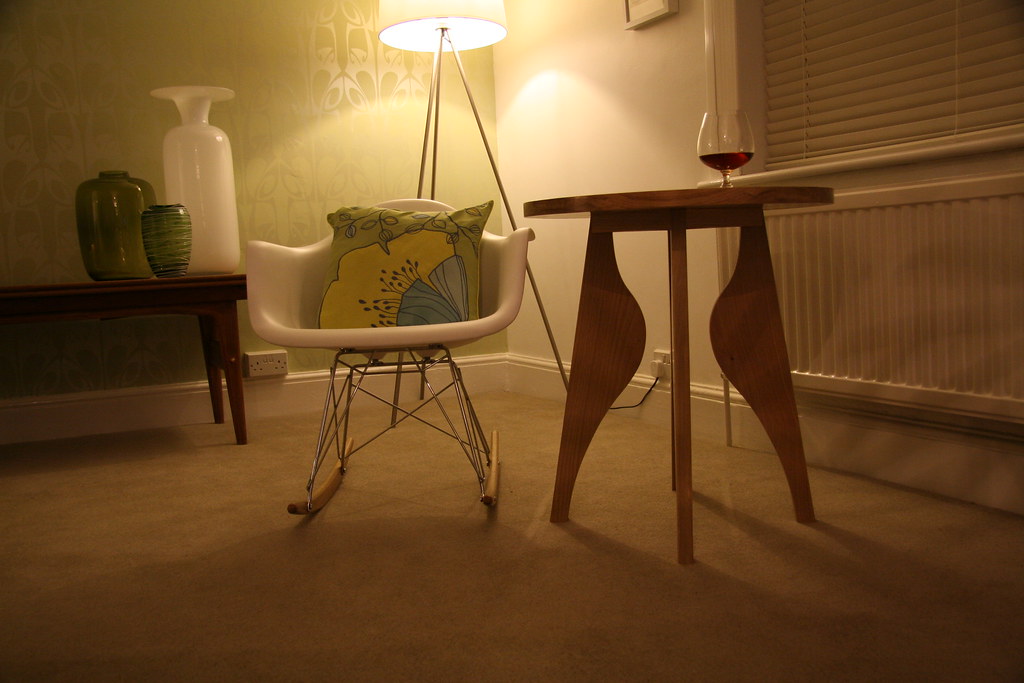
Well here it is, delivered in the girlfriends flat.
First words where, "It's big isn't it?".
4414726857_4b74795e37_b.jpg

4414721771_5e1c9d4df1_b.jpg


Some things that I encountered.

-The new top/bottom router bit was razor sharp so tare out was not an issue, took my time and made sure I moved the bit away from the work when I needed to change position so as to prevent that burn mark I usually get. When I routed the circle for the table I found that the cutter could not be plunged down on to the piece so I had to sort of juggle it into position whilst it was spinning, not recommended but I don't have a straight plunger that would have allowed me to get the first cut started and I didn't want to try and do this cut by hand.

-Once again the old saying of check all measurements twice and then do the cut proved too late. I somehow Domino'd the legs before putting the angled cut on them so when it came to attaching the legs to the base of the table they just sat at 90 Degrees to the piece so had to re-plung at 5 degrees into the bottom of the table, fortunately there was enough room in the base so my mistake was hidden.

-Wax. Not a good idea to apply a heavy first coat and leave in a freezing workshop over night. It was like a thick varnish when I returned the following morning and had to rub it down with some 0000 steel wool and then apply another coat.

-Don't let the dog dribble on the newly applied wax!!. Those lovely white marks that water leaves on fresh wax is not the look I wanted so once again, lightly 0000 wired and then re applied.

Thanks for your help guys.
 
Nice table. :) Do you have any more photos of the top?

I didn't realise you were going to plunge straight in like that - I assume you would've cut most of the waste away with a jigsaw or bandsaw.
 
OPJ":1c4w38o5 said:
Nice table. :) Do you have any more photos of the top?

I didn't realise you were going to plunge straight in like that - I assume you would've cut most of the waste away with a jigsaw or bandsaw.

Hang on, I'm not mental. I'm not about to plunge a 20,000rpm bit into a solid bit of Oak by hand. I've done some stupid things in life but nothing like that. LOL.

I ran the jigsaw round first on a self made compass thingy.
With the top/bottom router bit, once you remove the bottom bearing you are still left with the shaft that supports the bearing and this is what I sort of had to juggle down before I could get the router into position before commencing on the circle.
 
Usually you would just come in from the side until the bearing touches the template and run up against that, no need to plunge anything. What sort of template did you use? You only need to take the bottom bearing off if you are working material thicket than the cutting edge.

Jason
 
Back
Top