Sliding dovetail, easy and repeatable method for cutting male tenon's

UKworkshop.co.uk

Help Support UKworkshop.co.uk:

This site may earn a commission from merchant affiliate links, including eBay, Amazon, and others.

Simon A Wells

Established Member
Joined
1 Jan 2025
Messages
22
Reaction score
1
Location
Fort William
I have a number of projects that need / I would like to have sliding dovetails:

  • Large heavy bench / shoe storage from 2 inch pine that would need about 18 slidding dovetail, exposed at both ends, so not stopped.
  • Book cases / office storage.
plus some bedroom furniture.

I am a hobby woodworker in a double garage with a contractor table saw 255mm, record morticer, makita trim router (240V) and rather to many hand saws and planes.

I have looked at a number of soloutions, lots of youtube and am wondering if there is a simple, repeatable way to cut the male tennon piece?

The female part seems pretty straight forward with a router.

I have just finished a 6ft by 6ft table saw work bench with matchfit microjig dovetail groves on top and on two of the side panels, so no problem with routing dovetail grooves!

I have looked at:

I wondered what your expierence might be of cutting the male dovetail tenons efficiently and accurately?

I don't mind investing in a tool / jig system, but would rather buy wood....

I have anther thread on woodrats for a hobby workshop / sliding dovetails here: https://www.ukworkshop.co.uk/threads/woodrat-for-hobby-woodworkers.150971/
 
Last edited:
There's a plane specifically designed for this joint called a "Grathobel" in German.
1737056355202.jpeg
 
How long are the sliding dovetails you envisage? The main problem with them is that, no matter how accurately you machine them, the wood insists on moving before you come to final assembly. The longer joint length, the worse the problem. I've had bookshelves of 10" width where I've had use cramps to force them in. Glue often helps acting as a lubricant. In theory you don't need glue, it being a mechanical joint, in which case candle wax is the standard wood lubricant.
If you're looking at jigs, I would recommend going down the router table route as it will useful for a myriad of other processes.
Brian
Bookcase width and then 12" / 30cm for the bench.

I had looked at table router jigs but they all seem to involve putting the male piece vertically against a fence? Or have I missed something?
 
Well, when I last did a few I built a DIY router table, with the router mounted where the fence normally is on a router table, or in other words the router was horizontal. This allows the material to be flat on the bed that has the male dovetail cut into it.
 
Well, when I last did a few I built a DIY router table, with the router mounted where the fence normally is on a router table, or in other words the router was horizontal. This allows the material to be flat on the bed that has the male dovetail cut into it.
Yes, that makes sense, thank you.
 
Bookcase width and then 12" / 30cm for the bench.
For that width I see no problem* to run it vertical on a router table. For short pieces a clamping jig holding the workpiece so it doesn't tilt is almost nessecary, but not for these dimensions.

A horizontal router table is good for special tasks, but a "normal" one is more allround and useful also in other projects.

Edit. *Sorry forgot to ask about the length. If very long (and heavy), running vertical could be a problem. If semi long and not too heavy a tall fence will give enough stability.
 
Last edited:
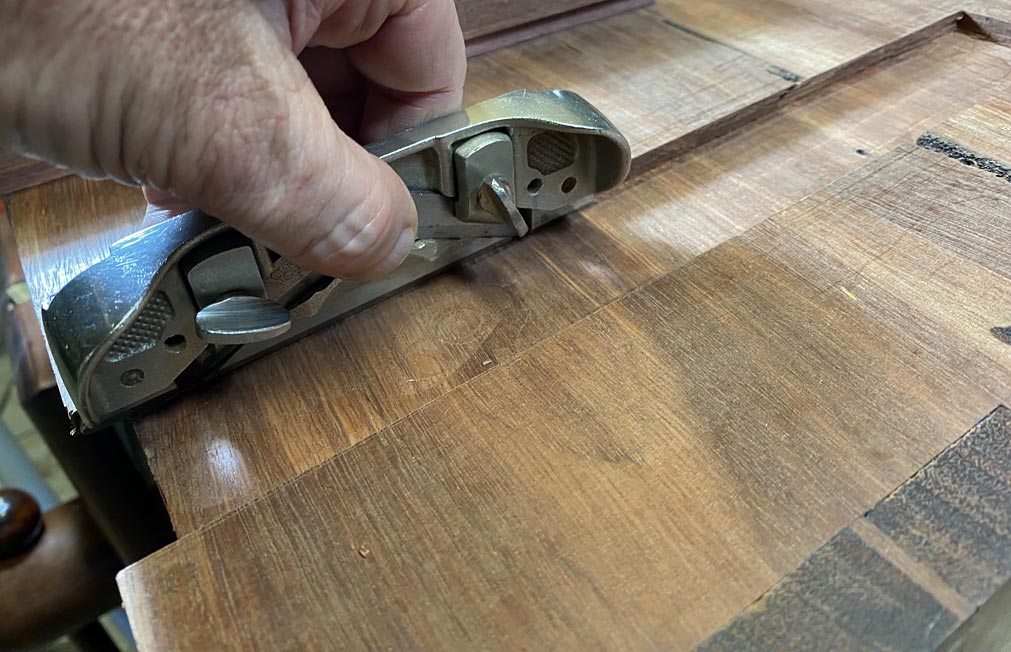
The Etsy mod for the Stanley #79 is someone using my design. It looks nicely printed. This method should would well and be repeatable - hand work is always dependent on how carefully you pay attention to the lines.

I would also aim to create tapered sliding dovetails if the length goes over 150mm.

Here are tips for the #79 ...

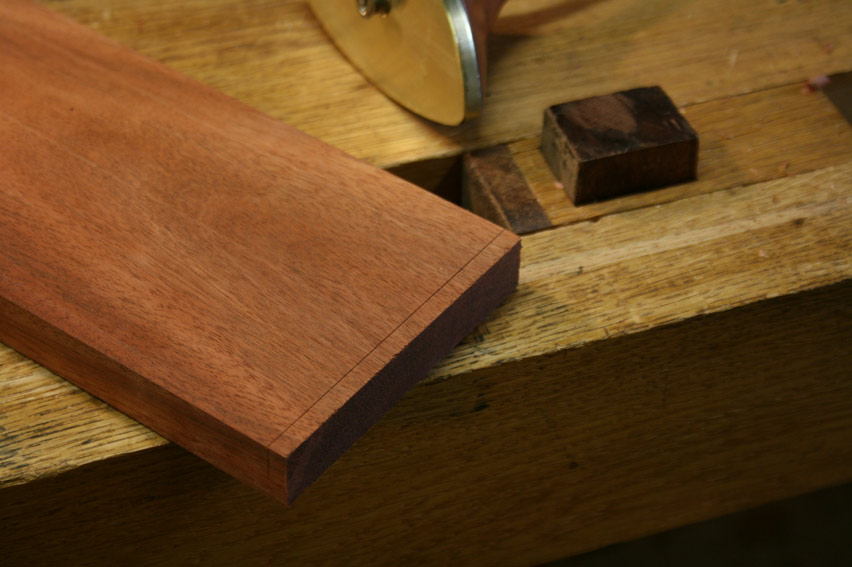
Mark the depth of the dovetail (same as the socket/housing)...

SlidingDovetailsWithTheStanley79_html_m4de8998e.jpg


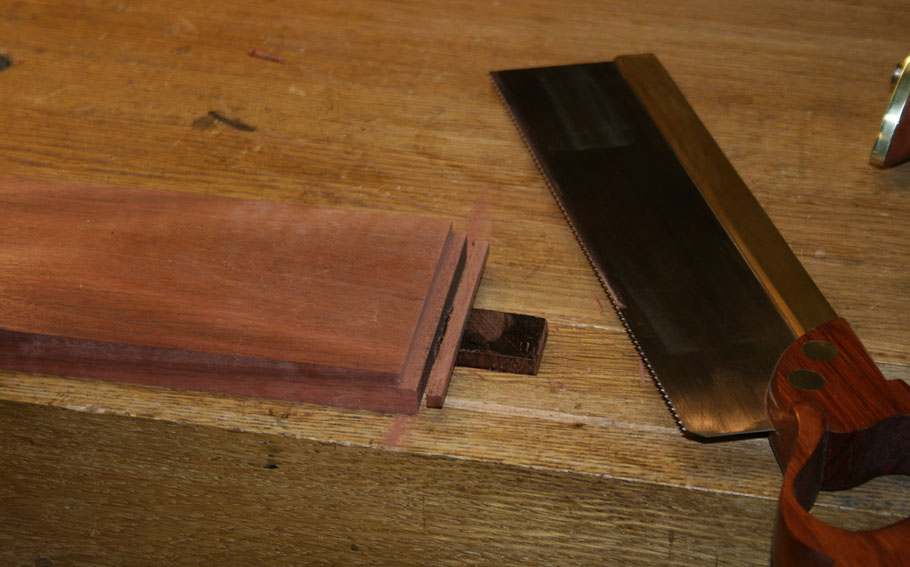
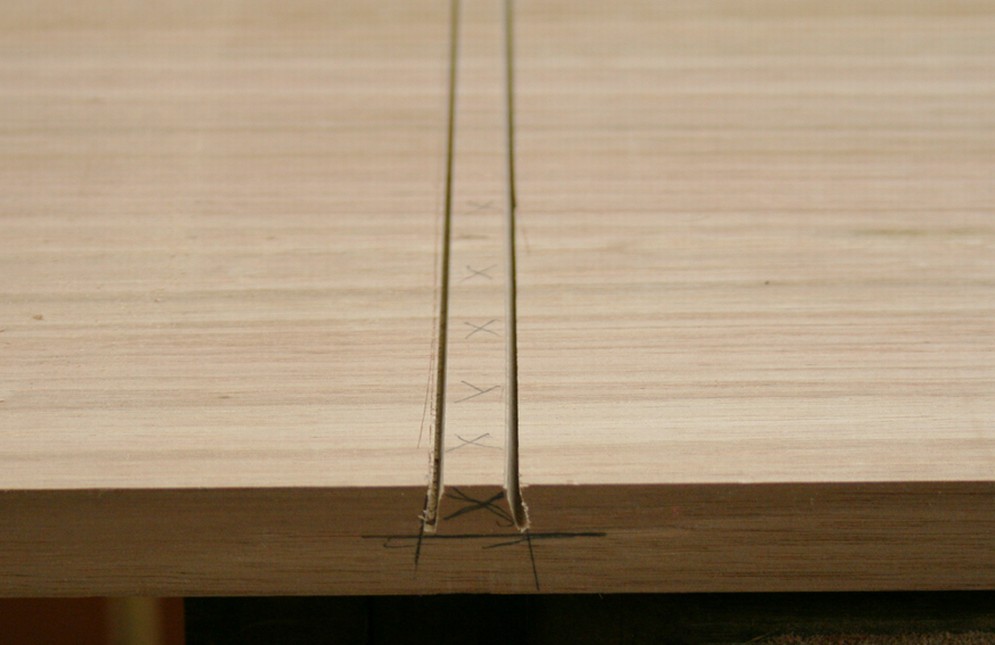
Saw to depth. Note that at this stage it is just a square rebate ...

SlidingDovetailsWithTheStanley79_html_6958602b.jpg


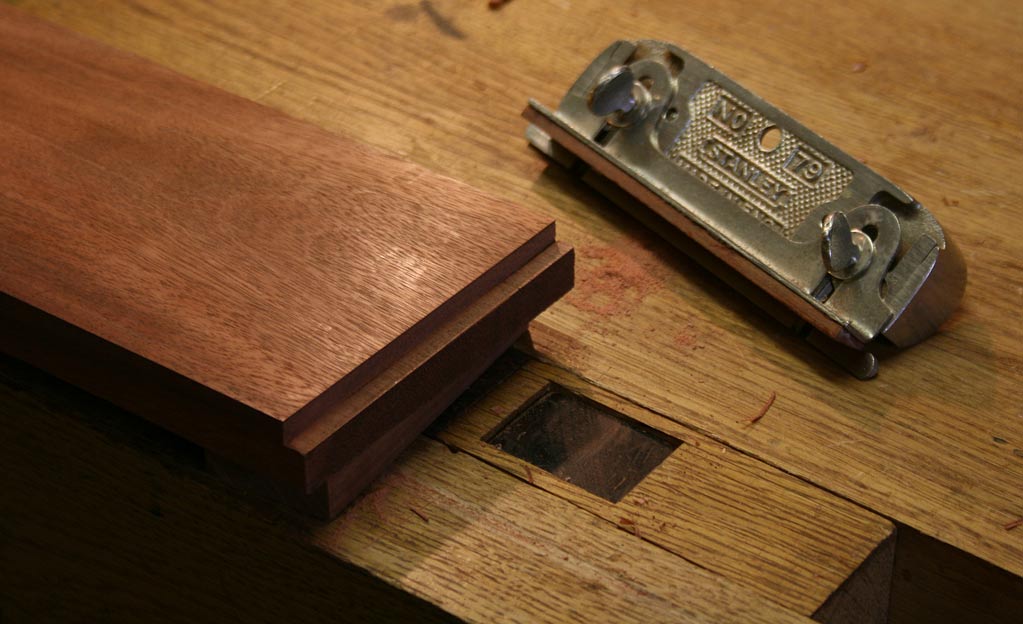
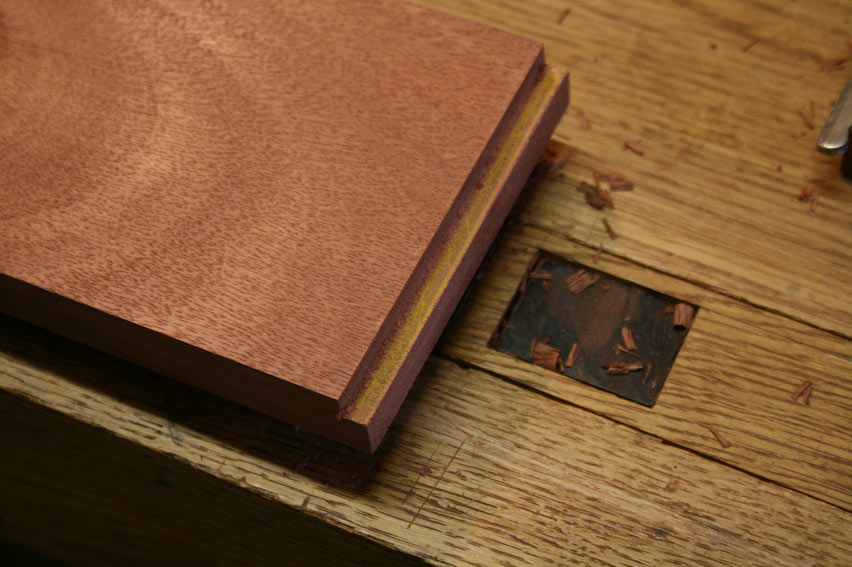
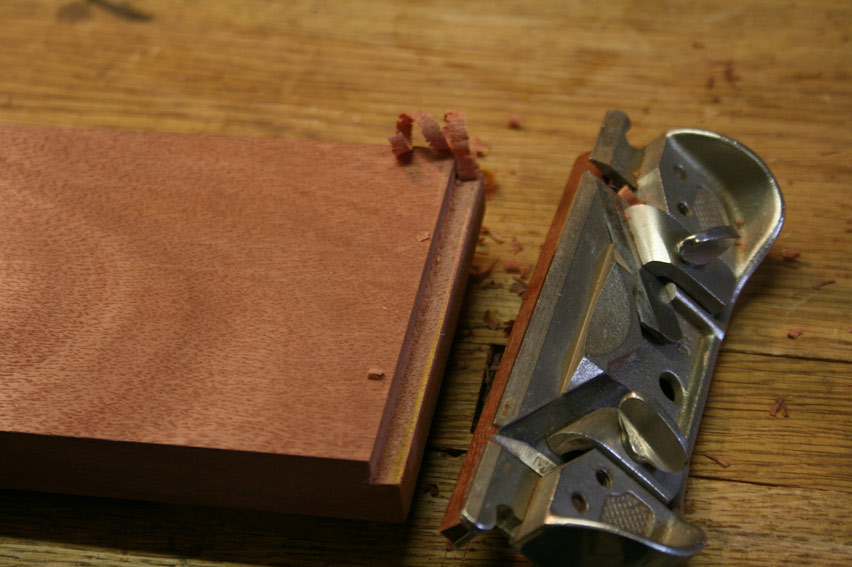
Now turn the square rebate into a dovetail ...

SlidingDovetailsWithTheStanley79_html_a837b5a.jpg


SlidingDovetailsWithTheStanley79_html_m6e04e7ad.jpg


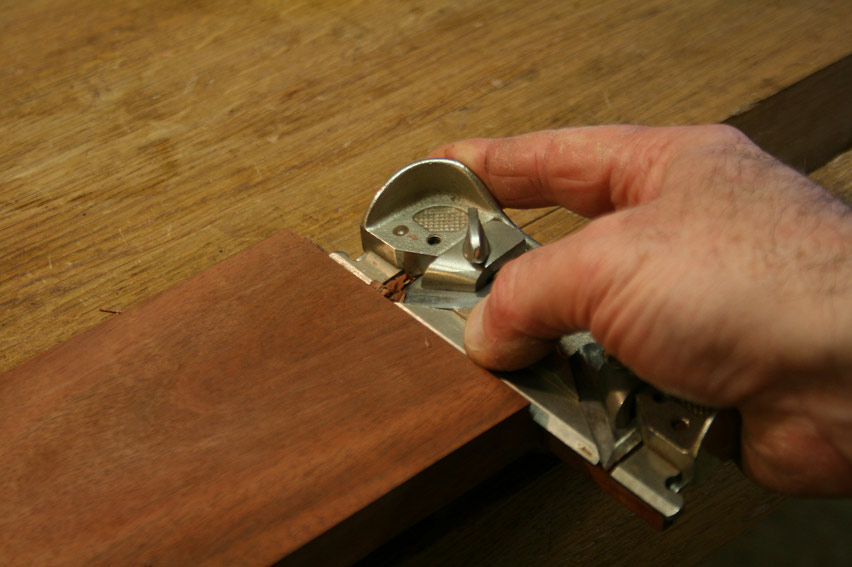
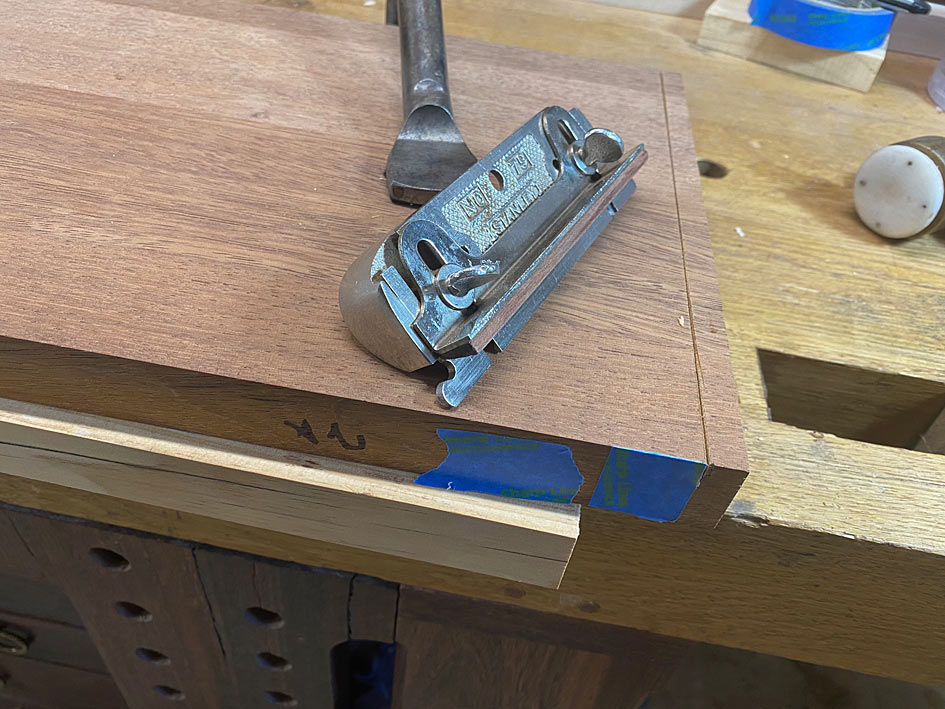
Set the lower edge depth stop flush against the edge of the board. This tilts the plane at the correct angle. Set the blade for a fine shaving. This is a low cutting angle and will pare away the wood quite quickly. The tip of the blade is left pointed and extends slightly below the body. This works in the same way as the blade of a rebate plane extended a fraction beyond the body to ensure that the corner is removed.

This plane does not stop cutting when it reaches the desired depth (as the original dovetail plane does). This is a manual process, which is described below.

SlidingDovetailsWithTheStanley79_html_m5b3696e0.jpg


First step is to scribble a contrasting colour on the surface to be removed. This makes it easier to see where- or where not the cut has been made.

SlidingDovetailsWithTheStanley79_html_m3ba3b0af.jpg


There is an alternative method, with a detailed pictorial, here: https://www.ukworkshop.co.uk/threads/benches-for-a-table.150248/#post-1789048

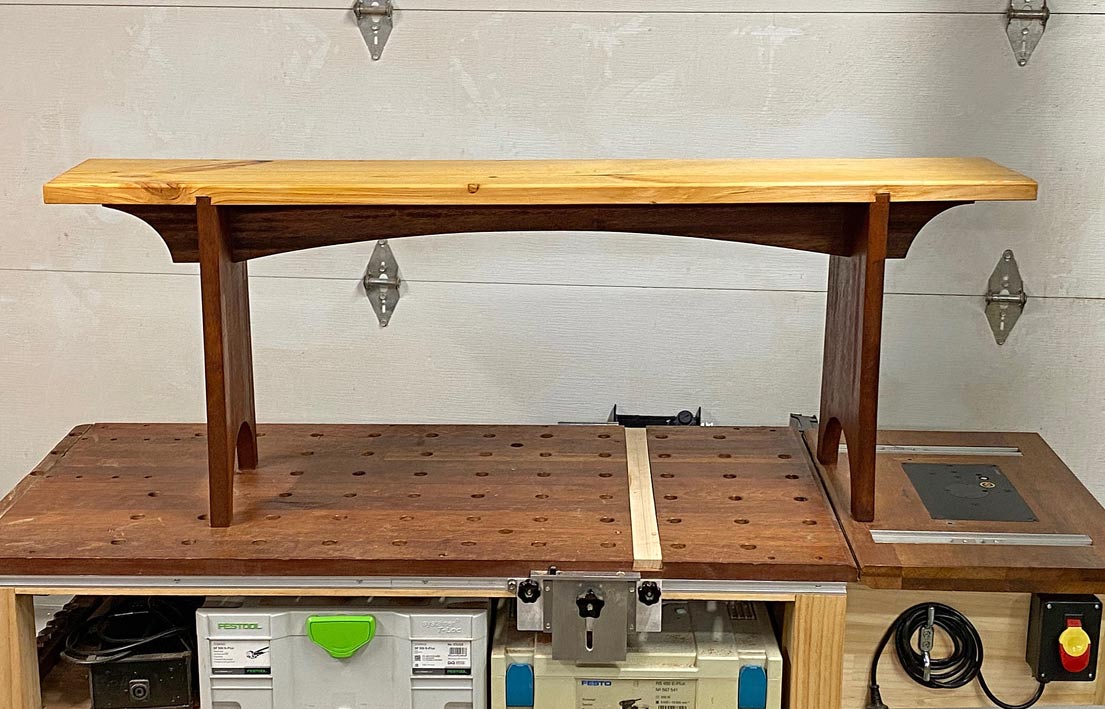
This depicts building bench with legs attached with tapered sliding dovetails

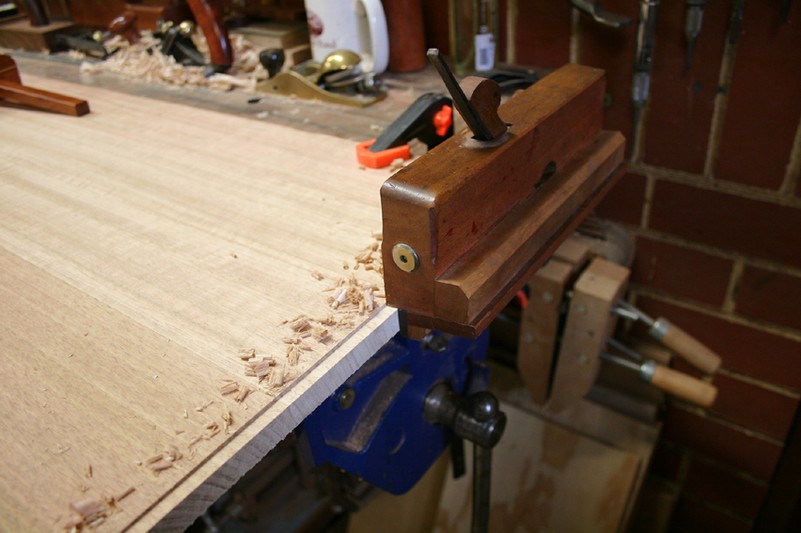
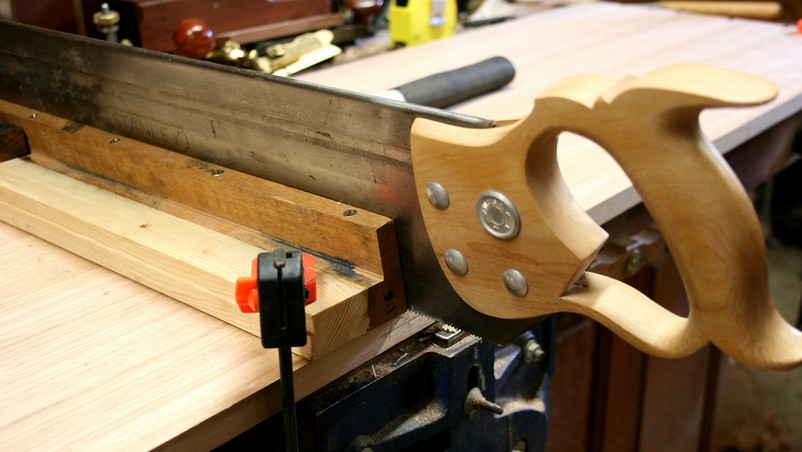
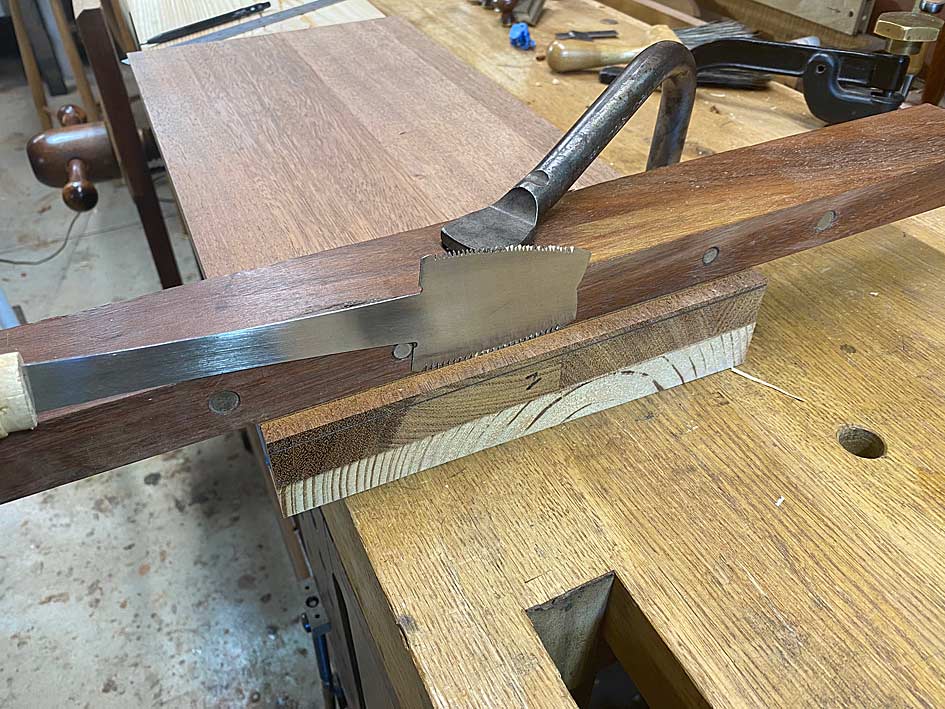
An azebiki saw is used against a vertical fence to cut the square shoulder ...


The reason for the azebiki saw is that it has a curved blade, which makes it possible to hold the handle higher up than a standard pull saw (or Western saw), and above the fence.

Once the shoulder is sawn, the remainder is down to the dovetail plane ...


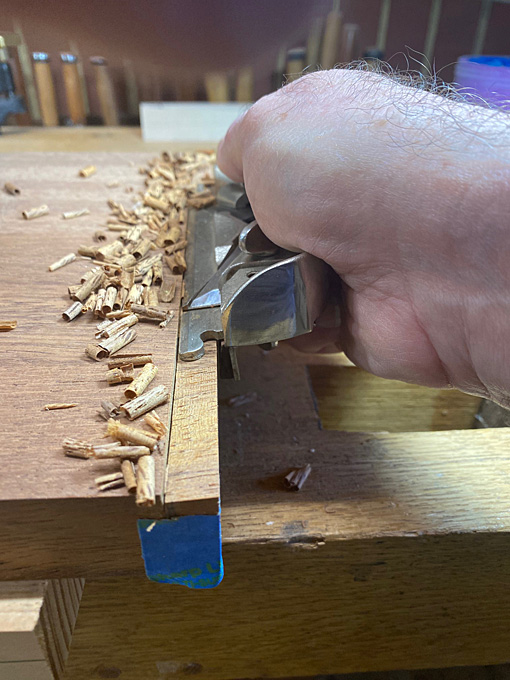
Note that the fence has been modified to angle at a 6:1 ratio. The other advantage of the #79 - which is the reason I based mine on this plane - is that it has two ends and can cut in either direction.

With a sharp blade, it makes very quick work of the dovetail ...


1737071944958.jpeg


Regards from Perth

Derek
 
Thank you for taking the time to put together such excellent instructions.

I very much appreciate the help, especially the tip on using a tapered slab in dovetail if the joint is longer than 150 mm.

Very helpful.
 
Hi again Simon

Note that there are two "shapes" for sliding dovetails.

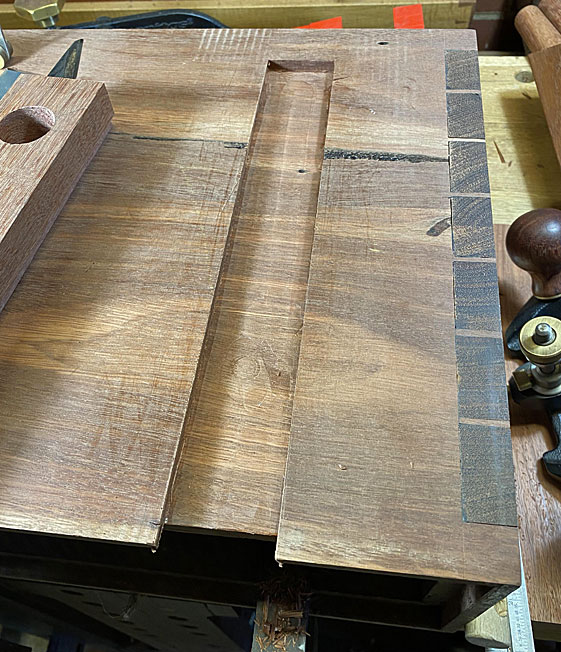
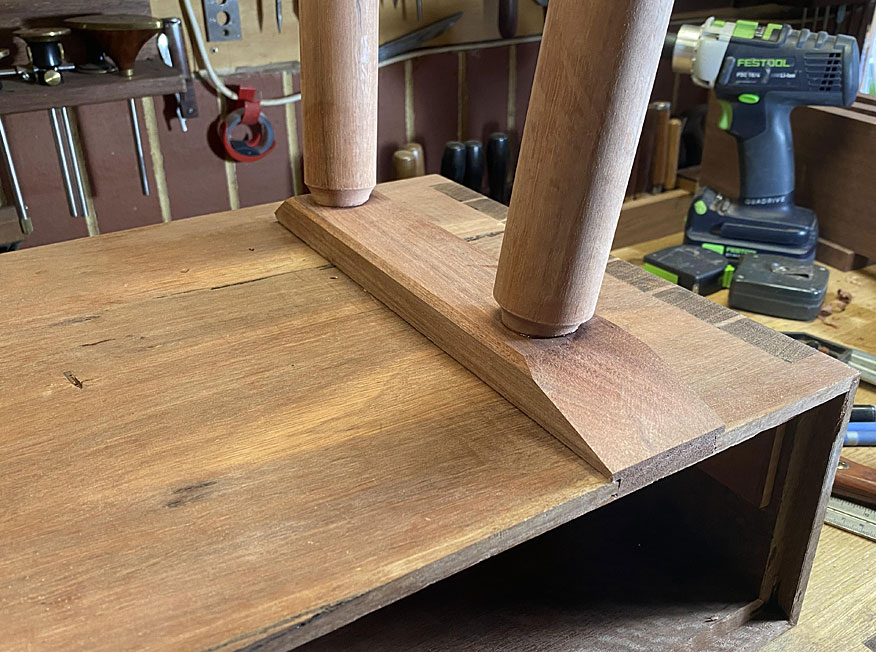
The first is the double-sided slope ...

EntryHallTableForANiece8_html_37d507e2.jpg


EntryHallTableForANiece9_html_37354dbb.jpg


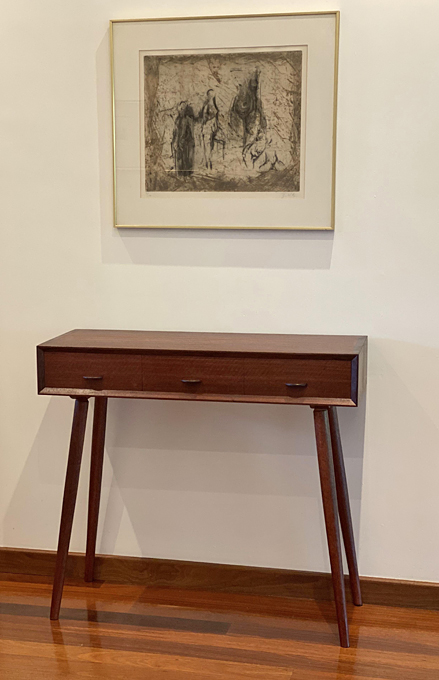
This is needed in this design as the legs are part of a entry hall table, and must resist side-to-side stresses.

EntryHallTableForANieceFinal2_html_m1bf5306a.jpg


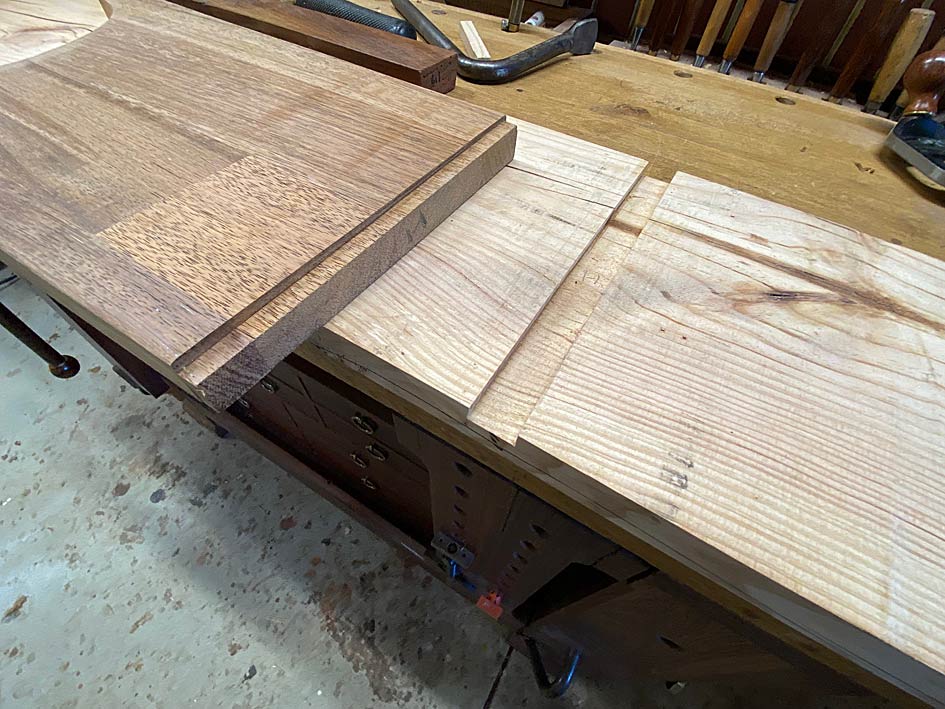
The second shape of sliding dovetail is the one-sided variety, which I showed earlier: One side is square and the other is angled.

Bench10.jpg


This is sufficient for strength here as the tapered sliding dovetail clamps the legs firmly, while a stretcher prevents any racking ...

Bench14.jpg


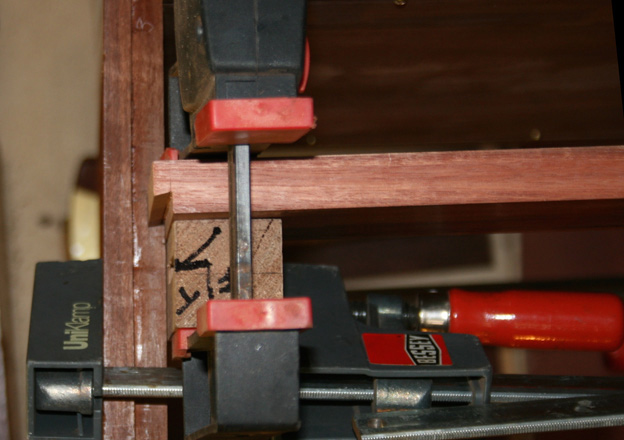
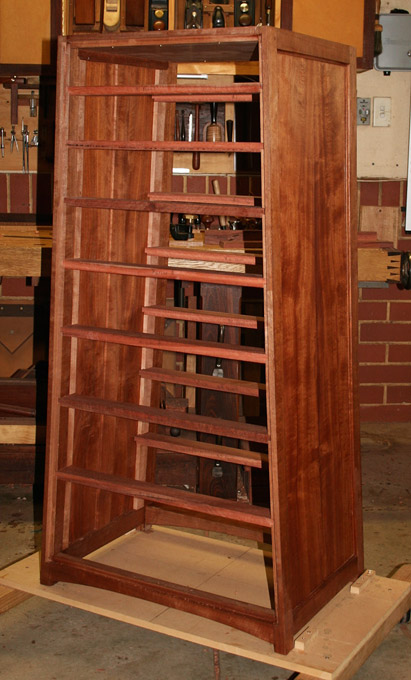
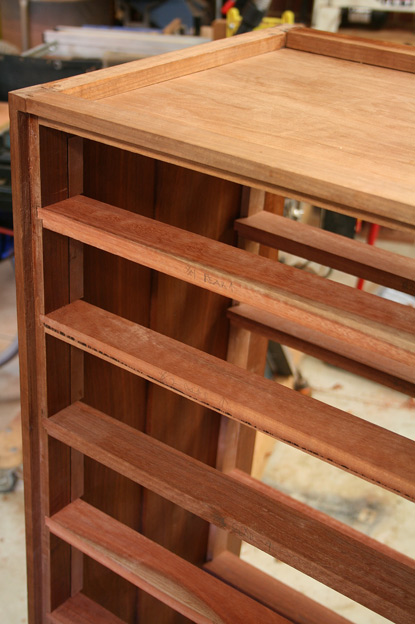
This style sliding dovetail is also useful in cabinet dividers and shelving.

Dividers being fitted to a cabinet ....

SlidingDovetails-LC_html_bcb2049.jpg


TheProofOfThePudding_html_m62cac893.jpg
TheProofOfThePudding_html_m63da203f.jpg


Note that the angled side faces down and into the angled housing. All angles are 1:6

More than you probably need to know :)

Regards from Perth

Derek
 
I'm still on my first coffee so this might be a daft idea, but could you cut the male/tongue side with a standard dovetail router bit and a tilting router base? There's a thread here about tilting bases (tho not for dovetails)...
 
The Etsy mod for the Stanley #79 is someone using my design. It looks nicely printed. This method should would well and be repeatable - hand work is always dependent on how carefully you pay attention to the lines.

I would also aim to create tapered sliding dovetails if the length goes over 150mm.

Here are tips for the #79 ...

Mark the depth of the dovetail (same as the socket/housing)...

SlidingDovetailsWithTheStanley79_html_m4de8998e.jpg


Saw to depth. Note that at this stage it is just a square rebate ...

SlidingDovetailsWithTheStanley79_html_6958602b.jpg


Now turn the square rebate into a dovetail ...

SlidingDovetailsWithTheStanley79_html_a837b5a.jpg


SlidingDovetailsWithTheStanley79_html_m6e04e7ad.jpg


Set the lower edge depth stop flush against the edge of the board. This tilts the plane at the correct angle. Set the blade for a fine shaving. This is a low cutting angle and will pare away the wood quite quickly. The tip of the blade is left pointed and extends slightly below the body. This works in the same way as the blade of a rebate plane extended a fraction beyond the body to ensure that the corner is removed.

This plane does not stop cutting when it reaches the desired depth (as the original dovetail plane does). This is a manual process, which is described below.

SlidingDovetailsWithTheStanley79_html_m5b3696e0.jpg


First step is to scribble a contrasting colour on the surface to be removed. This makes it easier to see where- or where not the cut has been made.

SlidingDovetailsWithTheStanley79_html_m3ba3b0af.jpg


There is an alternative method, with a detailed pictorial, here: https://www.ukworkshop.co.uk/threads/benches-for-a-table.150248/#post-1789048

This depicts building bench with legs attached with tapered sliding dovetails

An azebiki saw is used against a vertical fence to cut the square shoulder ...


The reason for the azebiki saw is that it has a curved blade, which makes it possible to hold the handle higher up than a standard pull saw (or Western saw), and above the fence.

Once the shoulder is sawn, the remainder is down to the dovetail plane ...


Note that the fence has been modified to angle at a 6:1 ratio. The other advantage of the #79 - which is the reason I based mine on this plane - is that it has two ends and can cut in either direction.

With a sharp blade, it makes very quick work of the dovetail ...


View attachment 196112

Regards from Perth

Derek
Interesting methods, I can see you put a lot of thought and practice into it. It does seem, however, to be a bit more complicated than the traditional method with the sliding dovetail plane.


If I understand correctly, you do it like this (for crossgrain sliding dovetails):


1. Saw the shoulder line (preferably with a fence)

2. (optional) saw out a square rebate

3. Plane the angle.


Using the traditional method with a continental "Grathobel" plane, it goes like this (for crossgrain work):


1. Adjust the fence on the plane for the desired width, and set the crossgrain nicker.

2. Hold the plane vertically (a guide is optional) and plane the sliding dovetail joint, always pressing the fence of the plane against the workpiece.

3. Once the shaving is as wide as the joint (you've planed a slope from the shoulder line to the edge of the board), stop planing. If the whole joint is stopped or tapered, take a few more shavings off the front of the joint to avoid it getting stuck as you insert it.


Once the plane is correctly adjusted, you can plane a whole series of joints without needing any other tools. In theory, you can just secure the workpiece and start planing away without needing to mark anything (though I still do).


Here you can see a guy make the joint at 0:38 (with the grain) and 0:46 (across the grain).
It takes about 2 minutes to do each time (with explanations).


I should start a new thread one of these days in this joint and this tool, I don't want to go too off topic, but it's an interesting joint in any case!

That is great thank you, I do love hand planes.......

How do you think the Grathobel compares to the Philly dovetail plane?
http://www.phillyplanes.co.uk/dovetail.html

The main difference seems to be the depth stop on the Philly plane....and the price. But it is comparing the price of the beautiful mass production Grathobel plane to the made to individually made Philly.

From your description it seems the Grathobel does not need the depth stop as you just monitor the width of the shaving?

Thank you!
I can't really comment on that plane, but it's beautiful and I'm sure it works very well!

Here on the continent the Grathobel is (or was) a fairly common joinery plane. I got mine second hand for 10CHF (about 9£), but I often see them sell for 20-40CHF second hand on ricardo.ch.

For use, yes, you just monitor the width of the shaving. Once it reaches the end you're done. I suppose you could hypothetically you want it to be deeper, in which case you could plane to a line.

The other advantage of not having a depth stop is the ability to easily taper the joint, which you're supposed to do in any case to avoid it getting stuck halfway. You plane until the width of the shaving reaches the edge, and after that you take a few shavings off the front of the joint (for example a shaving off the last 5cm, then one off the last 10cm, and another for the last 15cm).

There is also a corresponding saw that goes with this joint, the "Gratsäge". As far as I know, it's the only traditional western saw that is used on the pull stroke.
 
Interesting methods, I can see you put a lot of thought and practice into it. It does seem, however, to be a bit more complicated than the traditional method with the sliding dovetail plane.


If I understand correctly, you do it like this (for crossgrain sliding dovetails):


1. Saw the shoulder line (preferably with a fence)

2. (optional) saw out a square rebate

3. Plane the angle.


Using the traditional method with a continental "Grathobel" plane, it goes like this (for crossgrain work):


1. Adjust the fence on the plane for the desired width, and set the crossgrain nicker.

2. Hold the plane vertically (a guide is optional) and plane the sliding dovetail joint, always pressing the fence of the plane against the workpiece.

3. Once the shaving is as wide as the joint (you've planed a slope from the shoulder line to the edge of the board), stop planing. If the whole joint is stopped or tapered, take a few more shavings off the front of the joint to avoid it getting stuck as you insert it.


Once the plane is correctly adjusted, you can plane a whole series of joints without needing any other tools. In theory, you can just secure the workpiece and start planing away without needing to mark anything (though I still do).


Here you can see a guy make the joint at 0:38 (with the grain) and 0:46 (across the grain).
It takes about 2 minutes to do each time (with explanations).


I should start a new thread one of these days in this joint and this tool, I don't want to go too off topic, but it's an interesting joint in any case!


AJ, I have no issue with a "traditional" dovetail plane for the male joint. I used one for many years ...

SlidingDovetailsByHand1_html_252ed74a.jpg


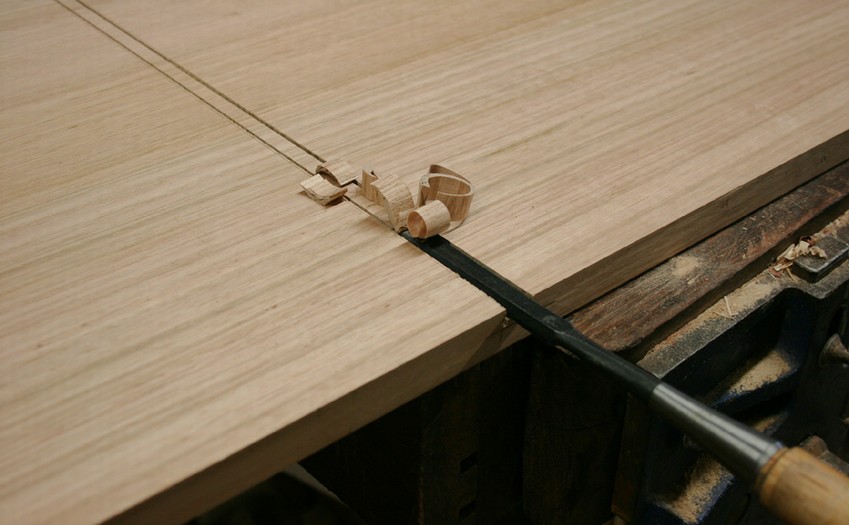
The male end is the easy part. The one that I sweated on was the female joint ... to cut this with a hand plane, that is. One can saw the angle and use a router plane to clear the waste - which is what I used to do ...

SlidingDovetailsByHand1_html_57d533b3.jpg


1737116492420.png


SlidingDovetailsByHand1_html_m617e64da.jpg


... then remove the waste, first with a chisel …

SlidingDovetailsByHand1_html_m2471ba9f.jpg


Then a router plane …

1737116608043.png


With the #79, one can make a dado/housing, and then shape the sides.

EntryHallTableForANiece8_html_7f13090c.jpg


Regards from Perth

Derek
 
AJ, I have no issue with a "traditional" dovetail plane for the male joint. I used one for many years ...

SlidingDovetailsByHand1_html_252ed74a.jpg


The male end is the easy part. The one that I sweated on was the female joint ... to cut this with a hand plane, that is. One can saw the angle and use a router plane to clear the waste - which is what I used to do ...

SlidingDovetailsByHand1_html_57d533b3.jpg


View attachment 196124

SlidingDovetailsByHand1_html_m617e64da.jpg


... then remove the waste, first with a chisel …

SlidingDovetailsByHand1_html_m2471ba9f.jpg


Then a router plane …

View attachment 196125

With the #79, one can make a dado/housing, and then shape the sides.

EntryHallTableForANiece8_html_7f13090c.jpg


Regards from Perth

Derek
Yes, it was your tutorial that inspired me to get the Stanley 79 plane and the dovetail shims. Thank you.
 
Back
Top