Sliding dovetail, easy and repeatable method for cutting male tenon's

UKworkshop.co.uk

Help Support UKworkshop.co.uk:

This site may earn a commission from merchant affiliate links, including eBay, Amazon, and others.

Simon A Wells

Member
Joined
1 Jan 2025
Messages
18
Reaction score
1
Location
Fort William
I have a number of projects that need / I would like to have sliding dovetails:

  • Large heavy bench / shoe storage from 2 inch pine that would need about 18 slidding dovetail, exposed at both ends, so not stopped.
  • Book cases / office storage.
plus some bedroom furniture.

I am a hobby woodworker in a double garage with a contractor table saw 255mm, record morticer, makita trim router (240V) and rather to many hand saws and planes.

I have looked at a number of soloutions, lots of youtube and am wondering if there is a simple, repeatable way to cut the male tennon piece?

The female part seems pretty straight forward with a router.

I have just finished a 6ft by 6ft table saw work bench with matchfit microjig dovetail groves on top and on two of the side panels, so no problem with routing dovetail grooves!

I have looked at:

I wondered what your expierence might be of cutting the male dovetail tenons efficiently and accurately?

I don't mind investing in a tool / jig system, but would rather buy wood....

I have anther thread on woodrats for a hobby workshop / sliding dovetails here: https://www.ukworkshop.co.uk/threads/woodrat-for-hobby-woodworkers.150971/
 
Last edited:
There's a plane specifically designed for this joint called a "Grathobel" in German.
1737056355202.jpeg
 
How long are the sliding dovetails you envisage? The main problem with them is that, no matter how accurately you machine them, the wood insists on moving before you come to final assembly. The longer joint length, the worse the problem. I've had bookshelves of 10" width where I've had use cramps to force them in. Glue often helps acting as a lubricant. In theory you don't need glue, it being a mechanical joint, in which case candle wax is the standard wood lubricant.
If you're looking at jigs, I would recommend going down the router table route as it will useful for a myriad of other processes.
Brian
Bookcase width and then 12" / 30cm for the bench.

I had looked at table router jigs but they all seem to involve putting the male piece vertically against a fence? Or have I missed something?
 
Well, when I last did a few I built a DIY router table, with the router mounted where the fence normally is on a router table, or in other words the router was horizontal. This allows the material to be flat on the bed that has the male dovetail cut into it.
 
Well, when I last did a few I built a DIY router table, with the router mounted where the fence normally is on a router table, or in other words the router was horizontal. This allows the material to be flat on the bed that has the male dovetail cut into it.
Yes, that makes sense, thank you.
 
Bookcase width and then 12" / 30cm for the bench.
For that width I see no problem* to run it vertical on a router table. For short pieces a clamping jig holding the workpiece so it doesn't tilt is almost nessecary, but not for these dimensions.

A horizontal router table is good for special tasks, but a "normal" one is more allround and useful also in other projects.

Edit. *Sorry forgot to ask about the length. If very long (and heavy), running vertical could be a problem. If semi long and not too heavy a tall fence will give enough stability.
 
Last edited:
The Etsy mod for the Stanley #79 is someone using my design. It looks nicely printed. This method should would well and be repeatable - hand work is always dependent on how carefully you pay attention to the lines.

I would also aim to create tapered sliding dovetails if the length goes over 150mm.

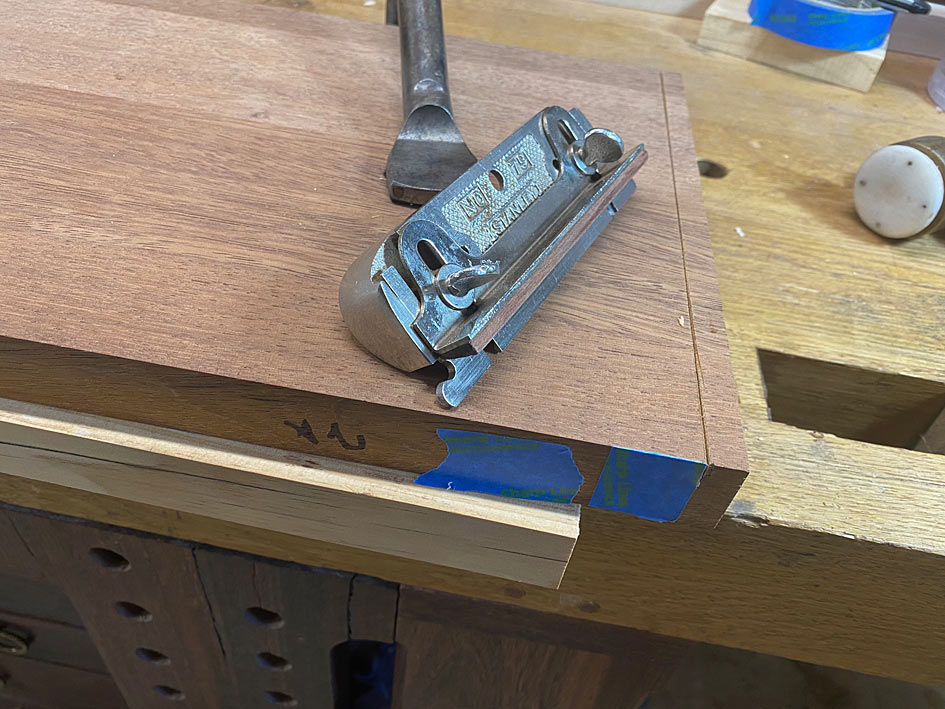
Here are tips for the #79 ...

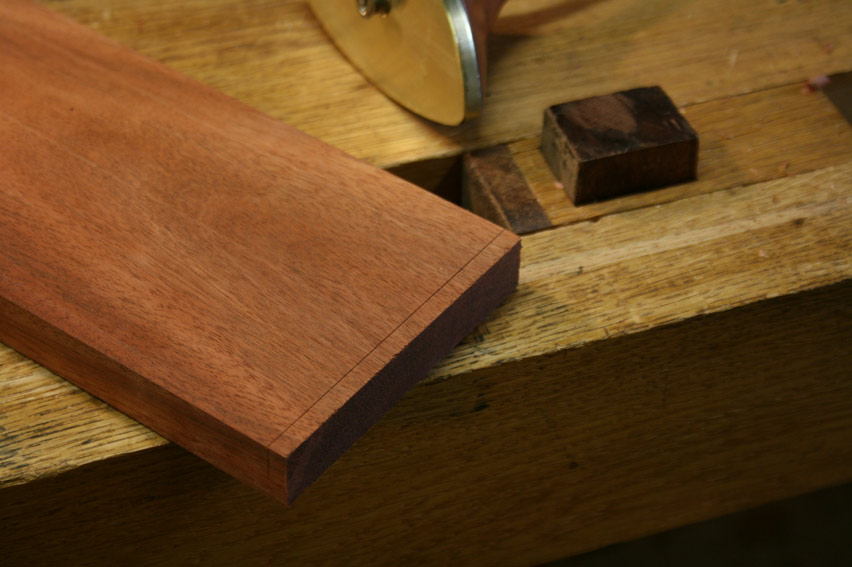
Mark the depth of the dovetail (same as the socket/housing)...

SlidingDovetailsWithTheStanley79_html_m4de8998e.jpg


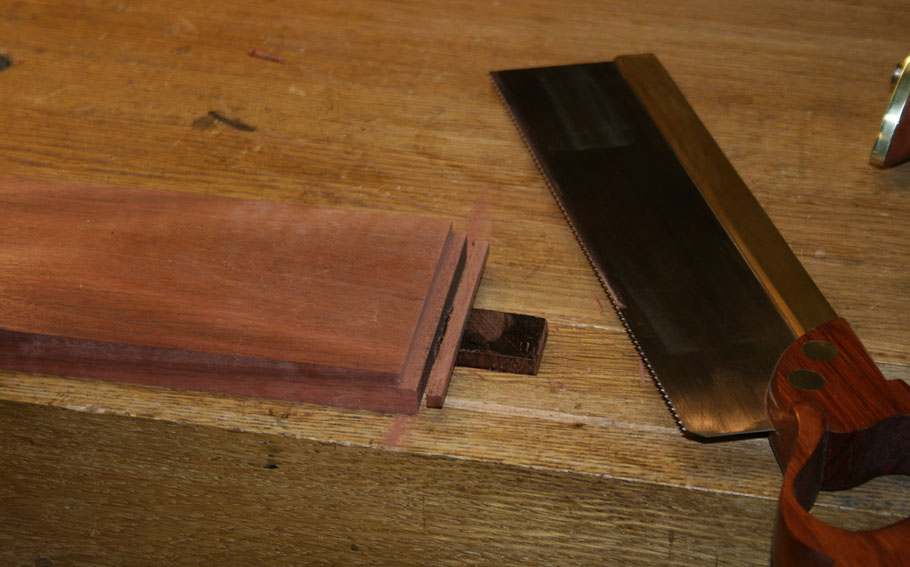
Saw to depth. Note that at this stage it is just a square rebate ...

SlidingDovetailsWithTheStanley79_html_6958602b.jpg


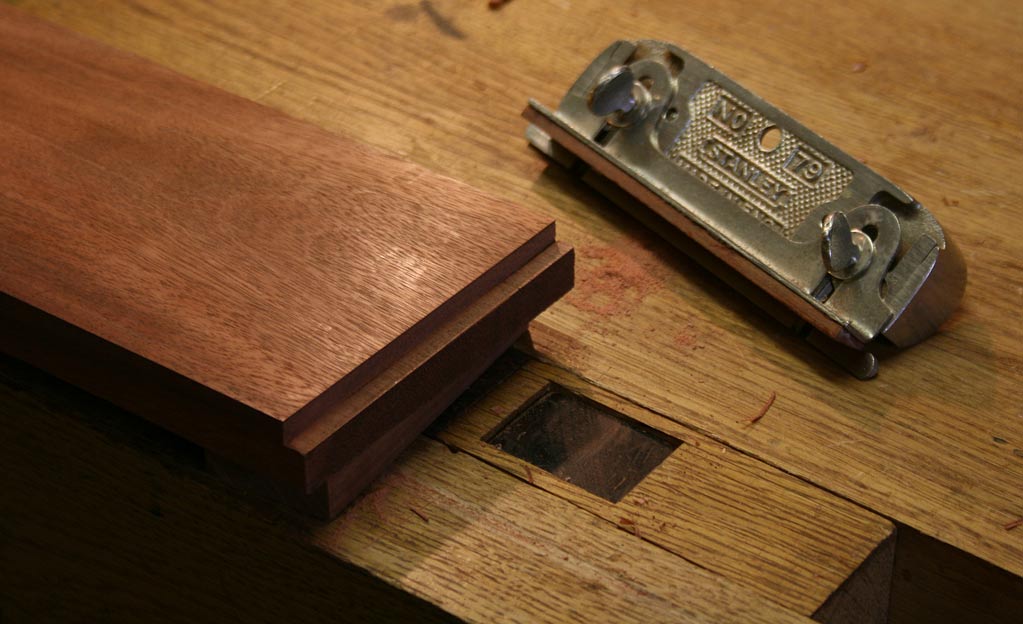
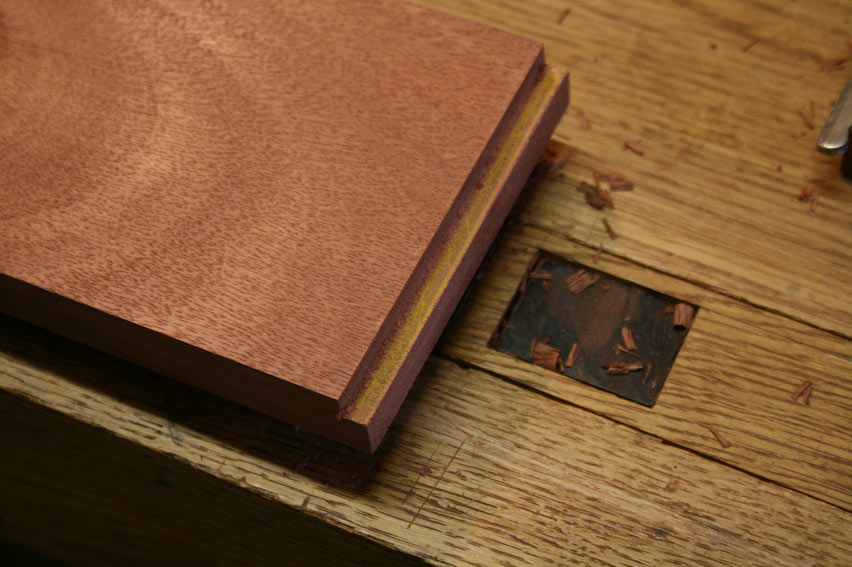
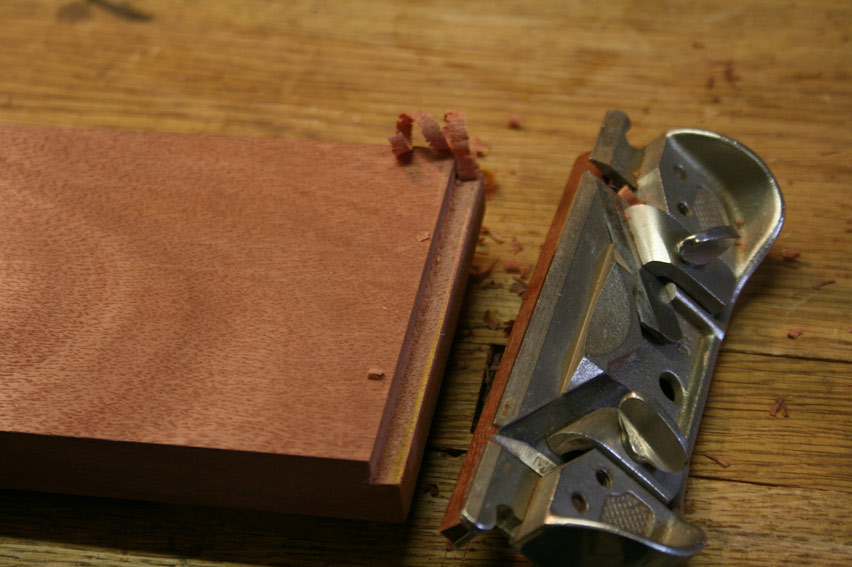
Now turn the square rebate into a dovetail ...

SlidingDovetailsWithTheStanley79_html_a837b5a.jpg


SlidingDovetailsWithTheStanley79_html_m6e04e7ad.jpg


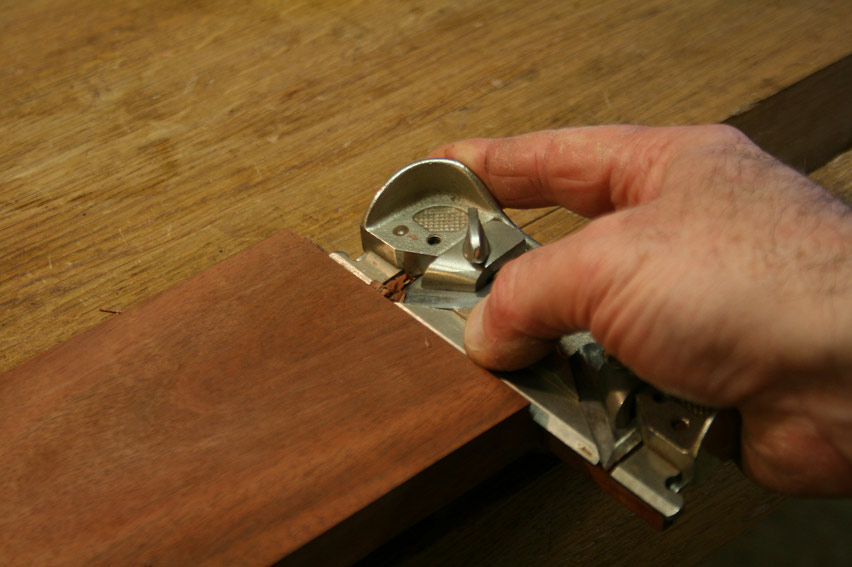
Set the lower edge depth stop flush against the edge of the board. This tilts the plane at the correct angle. Set the blade for a fine shaving. This is a low cutting angle and will pare away the wood quite quickly. The tip of the blade is left pointed and extends slightly below the body. This works in the same way as the blade of a rebate plane extended a fraction beyond the body to ensure that the corner is removed.

This plane does not stop cutting when it reaches the desired depth (as the original dovetail plane does). This is a manual process, which is described below.

SlidingDovetailsWithTheStanley79_html_m5b3696e0.jpg


First step is to scribble a contrasting colour on the surface to be removed. This makes it easier to see where- or where not the cut has been made.

SlidingDovetailsWithTheStanley79_html_m3ba3b0af.jpg


There is an alternative method, with a detailed pictorial, here: https://www.ukworkshop.co.uk/threads/benches-for-a-table.150248/#post-1789048

This depicts building bench with legs attached with tapered sliding dovetails

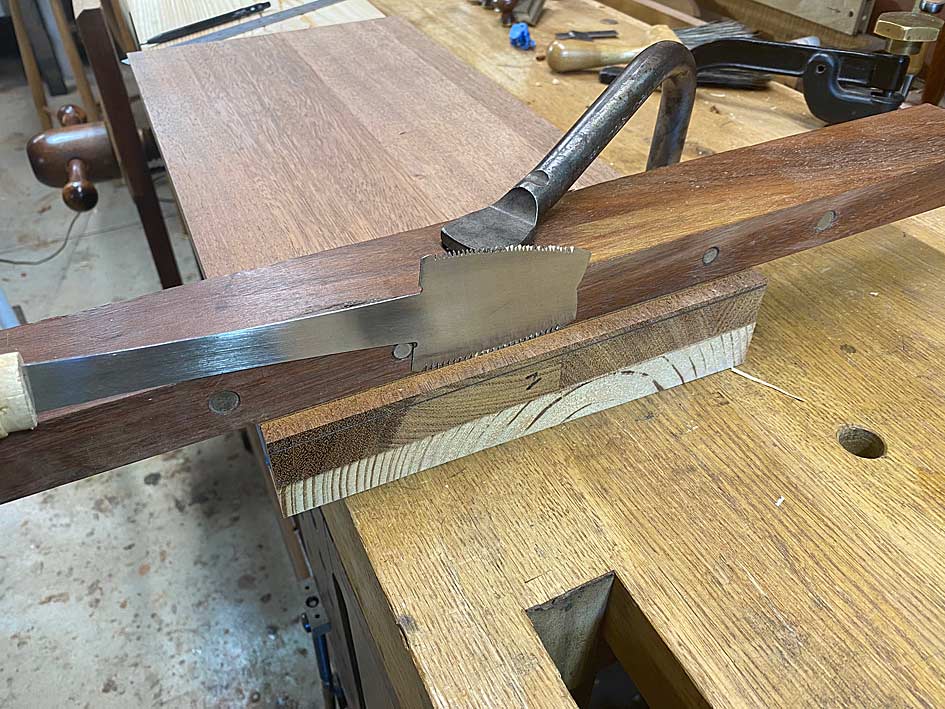
An azebiki saw is used against a vertical fence to cut the square shoulder ...


The reason for the azebiki saw is that it has a curved blade, which makes it possible to hold the handle higher up than a standard pull saw (or Western saw), and above the fence.

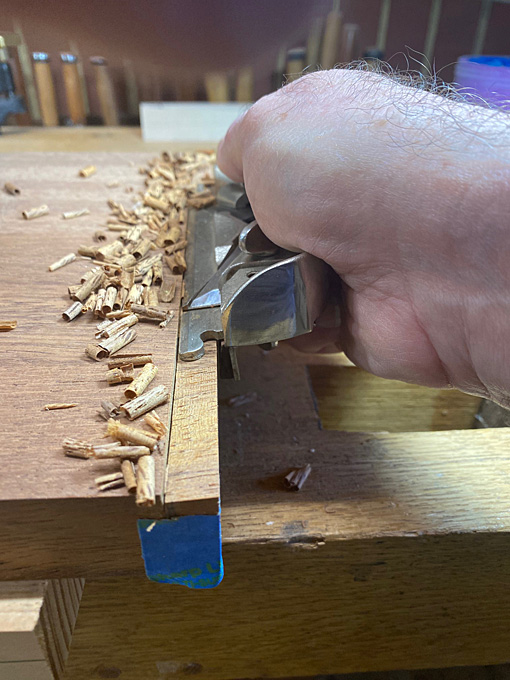
Once the shoulder is sawn, the remainder is down to the dovetail plane ...


Note that the fence has been modified to angle at a 6:1 ratio. The other advantage of the #79 - which is the reason I based mine on this plane - is that it has two ends and can cut in either direction.

With a sharp blade, it makes very quick work of the dovetail ...


1737071944958.jpeg


Regards from Perth

Derek
 

Latest posts

Back
Top