Signals From The Bunker

UKworkshop.co.uk

Help Support UKworkshop.co.uk:

This site may earn a commission from merchant affiliate links, including eBay, Amazon, and others.
Gill Very nice piece, I can't begin to imagine how you managed that turn. I would have been tempted to take the blade out and turn it round.

Andy
 
I'm pleased you like it :) .

Andy, you're right - I did remove the blade and rotate it. Nevertheless, the turn was still a formidable challenge and I used a technique that I'm not sure many people will be familiar with. I pressed the wood lightly against the back of the blade, turned the wood very slightly, then pressed the wood lightly against the side of the blade whilst moving forward and turning. The blade barely cut the wood but it created enough space for me to be able to repeat the process again several times and thereby create a very tight turn.

Gill
 
Gill,
What size is it?

At what point did you realise you would need to do that? I guess that there was the possibility of it going wrong at that point? On that basis did you make that one of the first cuts as it must have been nerve wracking to leave it until last.


Andy
 
Hi Andy

It measures about 20 cm from the tip of the stalk to the leaf point furthest away.

I was stack cutting two pieces secured by glue in the top right hand corner, so I made several cuts closer to the bottom left of the piece and I was moving inwards before I tackled the mouth. I suspect other scrollers might criticise this approach, but it had the virtue of giving me practice with the blade on other cuts. This in turn gave me the confidence to make the tight turn when I came to it.

I can't remember at which point I realised that the turn was going to be so formidable - probably after 6 or 7 piercing cuts towards the left hand edge of the project. I always study a pattern and look for difficulties before I start cutting, but this particular cut escaped my notice.

Gill
 
Gill, Wonderful looking piece.......You are getting darn good at those intricate cuts.......between the lion and this one your accuracy on the turns is top notch. I like the looks of the maple over ones I've seen done in red oak.
I have yet to cut any of the leaf patterns......Is this your first?
Lin
 
Hi Lin

Thanks for the comments. Yes, this is the first leaf pattern I've cut - I'm sure there'll be others.

Gill
 
Hi Gill,
You did a great job on the leaf pattern. The cut around the mouth was done like a pro would do it, you should be proud of yourself.

Bob
 
My goodness, it's been cold today!

I picked up some router lettering templates at Stoneleigh and my first task has been to make a new house sign. I've tried to make something a bit more respectable than my usual efforts, although I reserve the right to produce customised signs for seasonal festivals :twisted: .

The first step was to take a plank of wood (oak),then cut and plane it to size. The template was clamped into position and the lettering was cut. According to the instructions, you're not supposed to go more than 2 or 3 mm deep, but I found that was quite adequate anyway:

Template1.jpg

  • Cutting the 'M' (the'E' has already been cut)

Next, I trimmed the sign to its final dimensions using the tablesaw, routed the edges with a roundover cutter, and gave it a good sanding. I picked out the letters with a couple of coats of black enamel paint before applying two coats of Danish oil. The result is disconcertingly presentable and it's visible from several hundred yards at night (and probably in thick fog, too :roll: :) ):

Template2.jpg


I've fastened it onto the wall with a French cleat.

The templates were extremely simple to use. I had thought of making my own but it would have probably been more trouble than it was worth. Still, it would have been nice to have had lower case lettering too. All in all, a very quick and simple project that'll be very useful and will hopefully prove to be more durable than some of my previous efforts.

Gill
 
Gill,

You know now why I like having the wood burner in the shop. :D

Nice looking sign, I think I would put a couple more coats of oil on before leaving it out for winter to attack.

Are your templates from Trend? Is there any guide for the letter spacing, I vaguely remember making labels with a stencil that looked very odd due to my poor spacing. :roll:
 
Hi Dave

Another couple of coats, you say? Okay - will do :) ! Thanks for the advice. I wasn't sure how many coats would be enough but the back of the tin said two would suffice. I was hoping someone here would chime in if more were needed ;) :).

Yes, the templates are from Trend and the only advice given for letter spacing is on the instruction sheet which isn't much larger than a floppy disk [-( . That simply says the letters should be about 10mm apart. Perhaps my previous experience in making signs gives me a slight advantage when it comes to judging the distances between letters.

There's no space for a wood burner, I'm afraid. Still, my little electric heater is doing a sterling job (even if it's very electrickery hungry) and will keep me going until Santa delivers the oil-filled radiator which I believe is in his sack.

Gill
 
Pssst.... 8-[ :-$ wanna see a fretsaw cut sideways? Here y'are:

Diamondsideways.jpg


I'm still getting used to the Diamond and since the one I'm using is not brand new, I think it would be unfair to give a detailed report on how it performs. I must say, however, I do like the ability to be able to turn the blade through 360° rather than turning the workpiece. I'm making a festive doorsign which will be bigger than the Diamond's 24" throat :!: and I simply couldn't have done it on my Hegner 2. Blade changing is nowhere near as quick as on the Hegner but it's surprising how long the blades seem to last in the Diamond. The Diamond has a different cutting action to most parallel arm saws too, almost like a pendulum. As a result, the blade moves away from the workpiece on the upstroke when cutting in the conventional direction. I worried that this might make cutting at 90° inaccurate, but there doesn't seem to be a problem.

I just wish I had longer arms and a giraffe neck so that I can see what I'm cutting. It's quite an experience cutting a board more than 24" away from the blade and having to manoeuvre it as well!

Gill
 
Gill, The saw is soooo cool. I understand what you mean about seeing what you are cutting when working on a large piece......you are standing so far away holding the board......I can just see you on your tippy toes...trying to stay on the line..... :D
That feature of turning the blade any direction..........now that could be very useful......
Lin
 
Gill, I don't know how you are off for being able to support the far end of your work piece but something we used to do in a similar situation was to place the workpiece on a thin sacrificial panel (double sided tape or spray mount) protruding beyond the working end sufficient to have a small handle attached and guide from there. This allowed the operator to guide and adjust the cutter without the risk of dropping or lifting the work whilst leaning over to see the profile lines. We supported the 'far end' on ball roller guides and of course were working with metals.
 
That's an interesting idea, Chas, and I would certainly consider using a roller ball guide if the workpiece was heavy. However, this one is only 4mm plywood, thank goodness.

I'm not sure the sacrificial board would be necessary, though, because if I needed a handle I could simply put a clamp on the edge of the board and use that. One of the problems with cutting large boards on a fretsaw is that you've got to feed the workpiece directly into the blade whilst manoeuvering it, so simply attaching a handle won't resolve the problem. I find my hands are continuously moving all over the workpiece to ensure the correct feed whilst manouevering it. It's a difficult concept to describe, but it's the feel in your hands that gives you control of the cut; I can see why you've made your suggestion, but I don't think it's in the nature of fretsaw blades to be that accommodating.

Gill
 
We took our Christmas decorations out of the loft today :ho2 . I seem to recall that last year I was asked about our tree after I said that it was decorated completely with home-made 'baubles'. At the time, I didn't have a digital camera but Santa obliged me this year so here's a selection of stuff we hang from the tree:

XmasTree.jpg


Snowman.jpg


PlumDuff.jpg


Holly.jpg


Candle.jpg


Since neither of us are religious, we top the tree with a snowflake rather than a star or an angel:

SnowFlake.jpg


Here are some other bits and bobs:

XmasDoggies.jpg


Sleigh.jpg


These decorations are all very very simple to cut out on a scroll saw and are all my own design except for the sleigh (Patrick Spielman). Anyone with youngsters could give them lots of fun by asking them to do the colouring.

I would show you them hanging from the tree, but unlike the supermarkets I refuse to have the decorations up this early!

Gill
 
Hi Gill,
just wondering if you have a foot switch on the saws ? :?:
I find on long ,or awkward pieces it allows you to stop without taking your hands off the work, also you can stop the saw momentarily, whilst
you turn your workpiece and sort yourself out again.!!!!!!!
---therefore not cutting the bits of that you want , and having to start all over again :roll: --- :twisted:
what i need for the long bits is better eyesight! :D ( or an eye on a stick!)
-------Frank---------
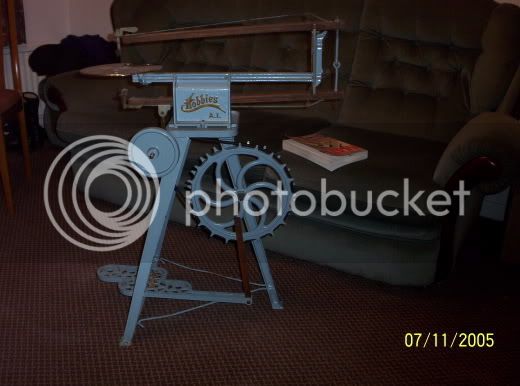
PS i too have a "new" scroll saw
flissscards001.jpg
 
Hi Frank

Foot switch? 'Fraid not, although one would be useful. It's not easy groping for the power switch underneath 24" of plywood.

There doesn't seem to be much paint-loss on the treadle of your saw so I'm guessing you've got something of a bargain there :) . I'm also hoping that your camera's going to show us what the saw's capable of ;) :) !


Gill
 
Gill

I love the tree decorations, with the grand Children around anything unbreakable has got to be a bonus.

Wonder if Santa will bring me a Scroll Saw?
 
Back
Top