Yojevol
Clocking on
This is a metalworking project on a woodworking tool, so I hope it's posted in a suitable forum
My old Elu MHB90 Belt Sander is a bit of a beast to use and after 15mins or so sanding down an old oak dining table (more of that in a later post), my arms were in need of a rest and my head a coffee. On switching off the machine I noticed a wisp of smoke emerging. So after downing the coffee I decided it would be wise to discontinue the sanding and have a look inside. I stripped the whole machine down as far as I could:-

I concluded it was just bunged up with years of accumulated dust and had overheated due to lack of airflow. So, clean it up and reassemble. All went well until refitting the drive belt.......SNAP. Oh dear – or words to that effect.
Abandon workshop. Get on the Net and find a replacement.
Problem – this sander came in 5 versions and toothed belts are only available for marks 4 & 5. There is no telling on the machine's label which mark mine is. Anyway, a spares supplier agreed to send me a belt, returnable if not correct. It came and went straight back! Tried a few other suppliers – same story.
Back on the Net. Could I find a generic belt that would do the job? No, the tooth form is obsolete.
Any other possibilities? I found that I could get a Poly-V Belt that would do but that would mean modifying the pulleys. In fact I would have to make them larger as the chosen belt was a bit longer than the original.
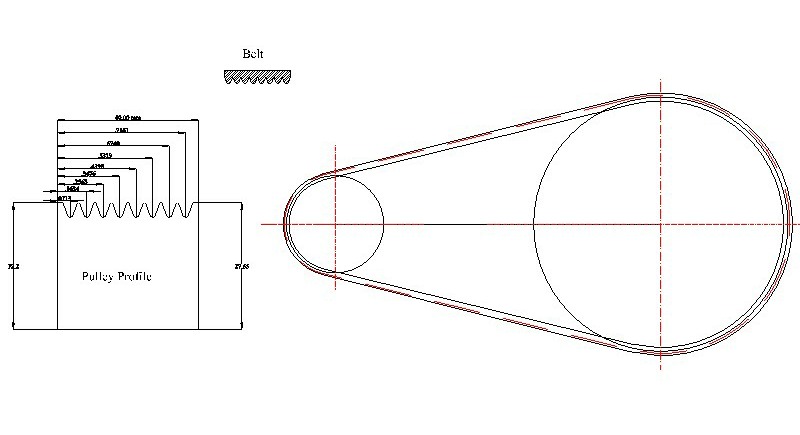
A quick chat with my mate Bill who just happens to own a very nice Myford 7. Yes – Game on. Ordered the belt and a lump of 3” dia ali. Opened up my TurboCad software and designed the pulleys to give the same ratio as the original:-

Not an easy matter as all the parameters are fixed apart from the pulley sizes. However after several iterations and a lot of design info from [url=http://www.powerparts.it/contitech_pdf/CONTITECH_multirib.pdf]this document[/url] I was ready to start cutting metal.
Stage 1, cut away the teeth:-

to leave clean surfaces to take new sleeves (sorry about the focus):-

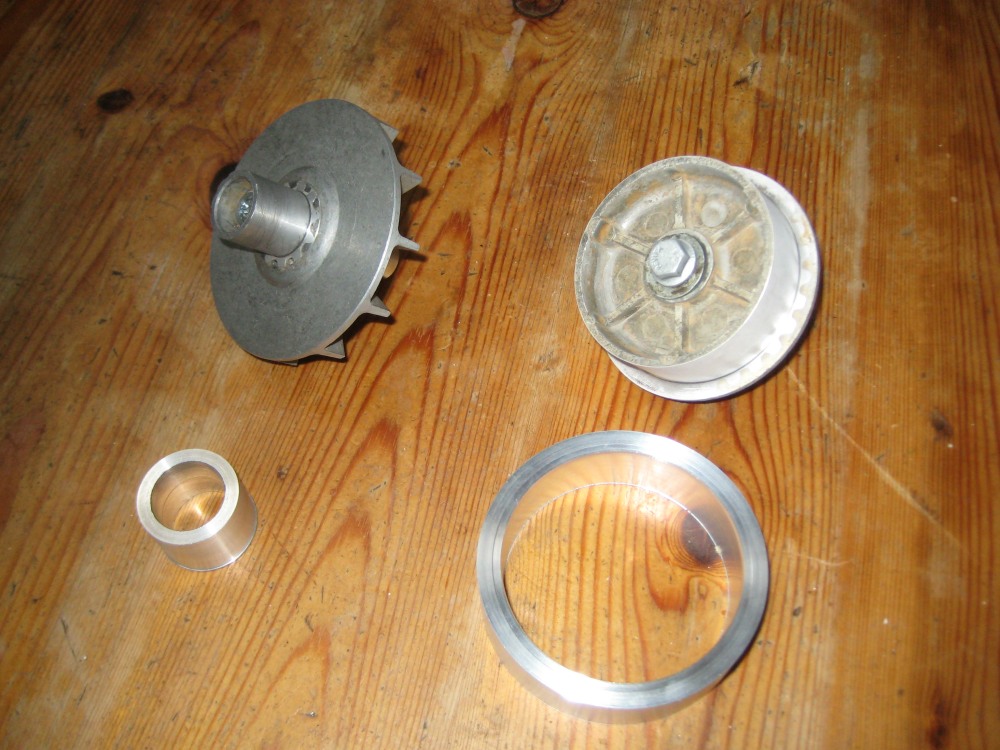
Stage 2, Machine sleeves:-

Ready for assembly using Loctite:-

Stage 3 Machining 8 grooves
Some very accurate tool positioning required. The grooves are on a 2.34mm pitch. There was a complication here in that the design was metric but the Myford is imperial. What's more , the travel leadscrew has a 0.125" pitch and its position indicator is divided into 100, ie, 1.25 thou. so I had to convert all my dimensions accordingly. It was very easy once I got it sorted in my head:-


Stage 4 Reassembly:-

I'd been apprehensive about putting it back together. Had my calcs been correct? Was my machining accurate? Would I be able apply enough force to stretch the belt by 1mm and at the same time get the pulleys on to there respective shafts? In fact it was very easy as the shafts had been cleverly designed such that the small pulley could be partially assembled prior to the large pulley being located. Both were then seated down by inserting their retaining screws.
Stage 5 Power up.
Yes it runs beautifully
Stage 6 Modify the plastic cover

Unfortunately the belt now fouls the inside of the plastic cover. I'm planning to chop off the pulley/belt section and replace it with a brass fabrication. Materials ordered. Watch this space.....................
Brian
My old Elu MHB90 Belt Sander is a bit of a beast to use and after 15mins or so sanding down an old oak dining table (more of that in a later post), my arms were in need of a rest and my head a coffee. On switching off the machine I noticed a wisp of smoke emerging. So after downing the coffee I decided it would be wise to discontinue the sanding and have a look inside. I stripped the whole machine down as far as I could:-

I concluded it was just bunged up with years of accumulated dust and had overheated due to lack of airflow. So, clean it up and reassemble. All went well until refitting the drive belt.......SNAP. Oh dear – or words to that effect.
Abandon workshop. Get on the Net and find a replacement.
Problem – this sander came in 5 versions and toothed belts are only available for marks 4 & 5. There is no telling on the machine's label which mark mine is. Anyway, a spares supplier agreed to send me a belt, returnable if not correct. It came and went straight back! Tried a few other suppliers – same story.
Back on the Net. Could I find a generic belt that would do the job? No, the tooth form is obsolete.
Any other possibilities? I found that I could get a Poly-V Belt that would do but that would mean modifying the pulleys. In fact I would have to make them larger as the chosen belt was a bit longer than the original.
A quick chat with my mate Bill who just happens to own a very nice Myford 7. Yes – Game on. Ordered the belt and a lump of 3” dia ali. Opened up my TurboCad software and designed the pulleys to give the same ratio as the original:-

Not an easy matter as all the parameters are fixed apart from the pulley sizes. However after several iterations and a lot of design info from [url=http://www.powerparts.it/contitech_pdf/CONTITECH_multirib.pdf]this document[/url] I was ready to start cutting metal.
Stage 1, cut away the teeth:-

to leave clean surfaces to take new sleeves (sorry about the focus):-

Stage 2, Machine sleeves:-

Ready for assembly using Loctite:-

Stage 3 Machining 8 grooves
Some very accurate tool positioning required. The grooves are on a 2.34mm pitch. There was a complication here in that the design was metric but the Myford is imperial. What's more , the travel leadscrew has a 0.125" pitch and its position indicator is divided into 100, ie, 1.25 thou. so I had to convert all my dimensions accordingly. It was very easy once I got it sorted in my head:-


Stage 4 Reassembly:-

I'd been apprehensive about putting it back together. Had my calcs been correct? Was my machining accurate? Would I be able apply enough force to stretch the belt by 1mm and at the same time get the pulleys on to there respective shafts? In fact it was very easy as the shafts had been cleverly designed such that the small pulley could be partially assembled prior to the large pulley being located. Both were then seated down by inserting their retaining screws.
Stage 5 Power up.
Yes it runs beautifully
Stage 6 Modify the plastic cover

Unfortunately the belt now fouls the inside of the plastic cover. I'm planning to chop off the pulley/belt section and replace it with a brass fabrication. Materials ordered. Watch this space.....................
Brian


