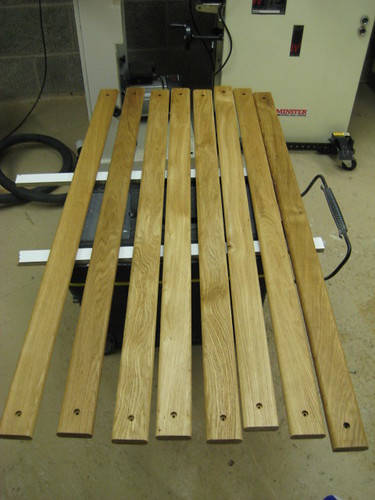
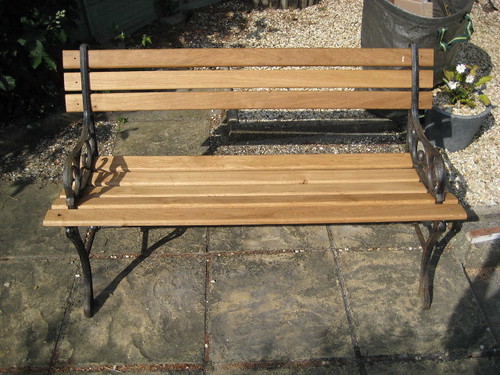
Project Number 1 - Garden bench - COMPLETED

UKworkshop.co.uk

Help Support UKworkshop.co.uk:

This site may earn a commission from merchant affiliate links, including eBay, Amazon, and others.
I've just re-read the advice given by Shultzy and Slim previously and have noticed one potential flaw when thicknessing one wide board before ripping it down and cutting out the individual slats...

As you cut in to any length of timber, because of the moisture on the inside (dry to the outside), natural stresses from within can be released - hence the reason why we use a short or withdrawn fence on the table saw.

As you run this wide board through your saw then, there is a chance the timber will curl up and bow as these stresses are therefore released. If you're already at find thickness and therefore cannot remove any more timber, you're stuffed!

In your case, Paul, you're using air-dried timber for an outdoor project; therefore, the moisture content will be slightly higher still (increased chance of movement, etc.). If you haven't started work already (you may be okay if you have...) I'd advise you to cut the individual slats out over size for of all before ANY planing.

This'll also save you the hassle of having to switch back and forth between planing and thicknessing modes several times.

:)
 
good point olly, i will plane one narrow edge, then table saw and then carry on with the thicknessing e.t.c. (when I get over my holiday)

:D
 
You picked a good time to go away - apart from the last couple of days (excluding today), the weather's been absolutely ***** over here! :x

Have a read through WiZeR's "Finger Tearout" thread before you go near the planer again, that'll teach you to keep your wits about you when you get around to it! :? :shock: :wink:
 
This isnt the same method Ive seen used. What Ive understood it as:

1. Plane one wide edge
2. Plane one narrow edge
3. Thickness other wide edge
4. Plane final Narrow edge

Thats just for a single board, is that right?
 
Let's say the piece was 76mm x 51mm in section.
If I needed to get 2 pieces 18mm thick out of the original 51mm then I would always rip the board down before I did any planing.
After I ripped it down I would end up with 2 pieces 76 x 23.
Then I would face and edge it (face=76mm edge =23mm)
Then pass it through the thicknesser to achieve 70 x 18.
Thickness down to 70 first, not the 18.

Matt
 
MooreToolsPlease":3ts0msdj said:
Let's say the piece was 76mm x 51mm in section.
If I needed to get 2 pieces 18mm thick out of the original 51mm then I would always rip the board down before I did any planing.
After I ripped it down I would end up with 2 pieces 76 x 23.
Then I would face and edge it (face=76mm edge =23mm)
Then pass it through the thicknesser to achieve 70 x 18.
Thickness down to 70 first, not the 18.

Matt

following the same logic, my understanding is :
If original wood is 150mm wide and 30mm thick
i want two boards out of it which are 60 wide and 20mm thick
then I should plane one of the narrow edges first, then use that as a reference to cut the board in half (so taking it from 150mm wide to 2 x 75mm wide)

then plane and thickness the remaining edges to end up with my final pieces
 
I've got a very similar job on right now. 20 Iroko slats cut ready to reburbish two benches and a matching table.
Must remember order some stainless steel bolts and find somewhere to shot blast and powder coat the cast iron frames.
Bob
 
With those sizes Paul, I wouldn't bother about planing one edge first.
If you need 60mm wide then I would rip the board down twice at about 66mm unless it was very bent.
If I had apiece that was 102mm wide and I want a piece thats 80, I would first edge it and then rip it down at 82mm so only one pass is needed through the thicknesser at 80mm.
I'm a joiner by trade though, so speed is always of the essence in my way of doing things.
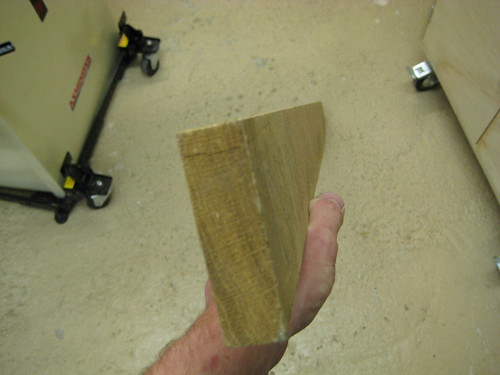
 
Always taking in to account the saw kerf before you think about how you're going to rip a length "in half".
On a circular saw/table saw, the kerf is likely to be around 3.2mm (1/8"). On the bandsaw however, I wouldn't have thought it would be any more than 2mm, perhaps only 1.5mm?

This can be an important consideration if you're trying to get the most out of one board with the least amount of wastage.
 
Ok so an update on progress :

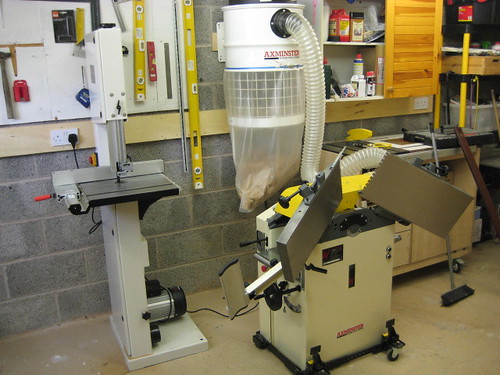
Got the workshops new tools set-up (sort of) :
2571481736_a8316c2bd4.jpg


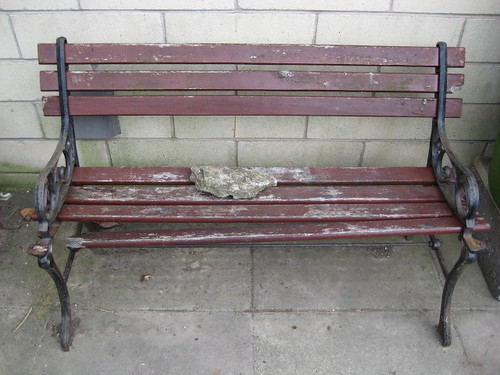
The original bench :
2570661431_21f20161a1.jpg


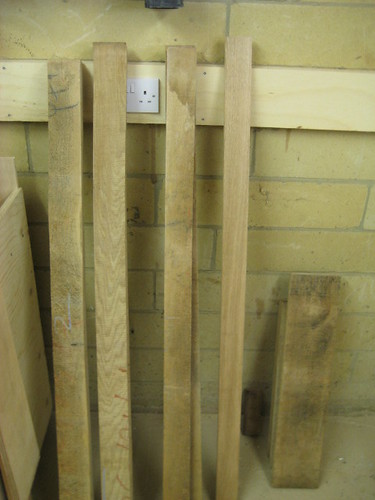
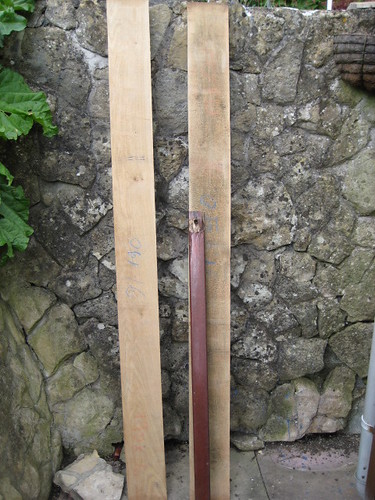
Went to interesting timbers and bought some oak to replace it :
2570661559_d968a2cbac.jpg


So had a barbeque on the weekend, on the friday night it dawned on me that we might not have enoough seats so it finally spurred me into action. First job was to cut the planks from 6ft down to 4ft 6 inches (the final slats would be 4ft, left the 6 inches as slack in-case of tearout (as recommended on the forum, thanks guys :D )

Then first proper use of the bandsaw to saw the 6 inch wide planks down to three inches :
2570655343_cb863ed19d.jpg

there was a very good learning point here, before i cut the planks down the middle I first tried running one through the p/t. Immediately discovered that the board had so many twists that if i did the whole thing in one go it would end up too thin. So therefore I ran it all through the bandsaw.
Then all the planks were run through the p/t, took a lot longer than I expected (about an hour) but got a system going in the end (feed one and then feed the next before the previous one leaves the machine).
this is a pre-pt shot :

2571481476_f9e83f9bd7.jpg


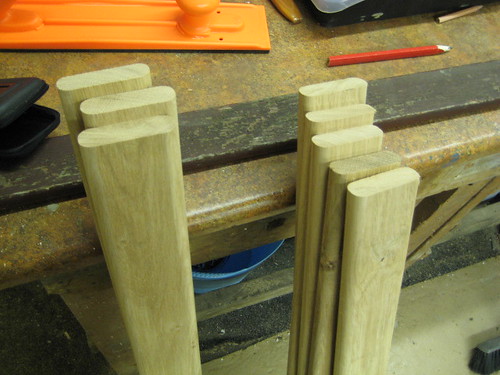
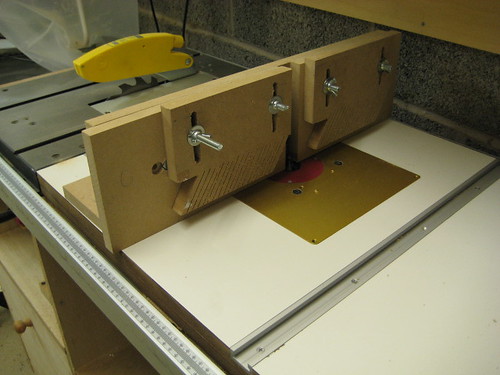
once they were all through and matched the originals I then needed to round them off. That meant I got to use the router table and my new fence that I have built again :
2571482200_cc0a715fa6.jpg

i was chuffed to find how well it worked and how quickly i got them done :
2571481988_8d9cd001f4.jpg


then it was a quick trip up to B&Q to find something to treat it with. Settled on a Ronseal wipe on laquer that promised to bring out the natural beauty of the wood, and I think it did what it said on the tin :
2570656405_e1814e4764.jpg

two more coats of the laquer and I fitted the slats on the saturday morning :
2571482480_3a5d322692.jpg

not bad compared to the original :
2570661431_21f20161a1.jpg

One mistake I made was drilling holes in the back slats. So can anyone tell me the best way to fill 6 holes, all of 5mm diameter ?
 
Paull , if you have a scrap/spare wood, you could knock up a couple of dowels and fill the holes that way, gluing them in the holes allowing to dry then flush cut, sand and finish...

other then that your stuck with wood filler :(

HTH
 
Fantastic work, the P/T is really easy when you get into isnt it? Looks like you have a lovely workshop too!
 
good job !

as for the holes - dowels .

make some up from some of cuts and glue them in.

I wouldn't go for the wood filler thing - If you dont have any oak left , I think even stock softwood dowel from b&q would look better
 
Paul

It look as if there is a bit extra in width overall so if the offcut is not of any use it would pay to straighten both edges then rip down the centre this gives you extra to play with if the boards warp when ripped.

Dennis
 
thanks all for the comments. Daft question - how do I make dowels ? Is there a specific tool I need ?
 
rip some square strips and round them over in your router table. keep the end you are holding square so you have a positive flat face on the table and fence.

or - you can turn them if you have a lathe.

or you can round over the edges with a hand plane / block plane

you can mount the square blanks in a drill (make a rough round on the end to fit in the chuck.) and use various grades of sand paper

etc etc
.....
 
Tusses":104ztrqd said:
rip some square strips and round them over in your router table. keep the end you are holding square so you have a positive flat face on the table and fence.

or you can round over the edges with a hand plane / block plane

won't a 6mm strip of wood disintegrate on a router table ? (because of the fast moving blade) ? Same with a plane ?


Tusses":104ztrqd said:
you can mount the square blanks in a drill (make a rough round on the end to fit in the chuck.) and use various grades of sand paper
sounds like my best option.
 
PaulR":3ul3gdhj said:
Tusses":3ul3gdhj said:
rip some square strips and round them over in your router table. keep the end you are holding square so you have a positive flat face on the table and fence.

or you can round over the edges with a hand plane / block plane

won't a 6mm strip of wood disintegrate on a router table ? (because of the fast moving blade) ? Same with a plane ?

I've dont it with oak ok . just dont try and cut too much at once.
 
Paul

You may wonder what I was going on about with my last post well this morning I was brousing the forum and realised it was almost time to set off for work, I thought I,ll just look at one more topic and saw yours, I got to the bottom of page one and for some reason thought I,ll shove my twopennyworth in so I submitted my post then realised that there was two more pages, looked at the clock and it was time to set off thought,what a plonker and went to work.What I was pointing out in my initial post is that it sometimes pays to waste a little wood in the cutting out stages than to waste even more plus your time and efforts later on.

Dennis
 

Latest posts

Back
Top