Dan has posted some useful (at least for me) WIP photos and posts of some of his recent alcove units. I had some to make and fit last week. Things went very smoothly thanks to some of the tips Dan shared. No WIP photos of the build but some of the installation.
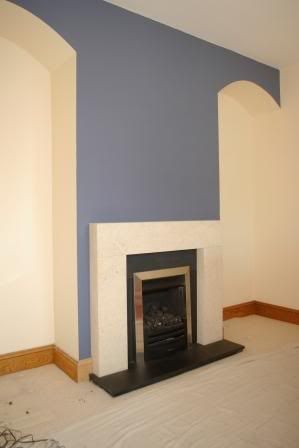
The scene of the crime

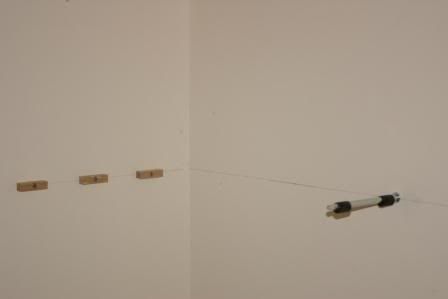
I use a cheap screwfix laser level to mark out the shelf positions so that they are the same both sides of the alcove. I see that the price has gone up to £50 - I paid £30 for mine - but I wouldn't hesitate to get another one if this broke.
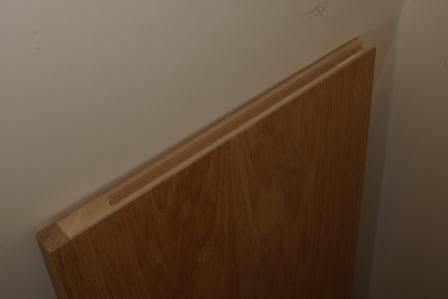
The customer wanted floating shelving but on the left hand side the shelves were 400mm deep. To provide support to the front edge of the shelf I routed a 12mm stopped groove in the shelf side (26mm Oak veneered mdf) and then cut some 12mm x 12mm square pieces of wood that I fixed to the sides of the alcove. This had the added benefit that I could install the concealled shelf support pins into the shelf, slide the shelf onto the side supports and use the threaded portion of the support to mark the wall for drilling. This worked very well. The shelves were scribed using two pieces of 6mm mdf screwed together to make a template.
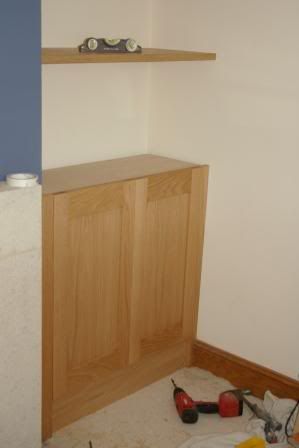
The bases were assembled and finished in the workshop - the only thing that I needed to do on site was scribe the face frame and the top and fix the plinth. The customer wanted the cupboards to be flush with chimney breast which made scribing them in a bit trickier but no real problem. I used my festool saw and rail with a newly fitted splinter guard and the finish was perfect.
The units were fixed in place by plugging and screwing into the wall on both sides. I did this top and bottom making the hole behind the hinge mounting plate so when the hinges were fitted no fixings could be seen. The units needed to be removable to enable access to the gas fire connection and this can be done simply by removing the four screws.
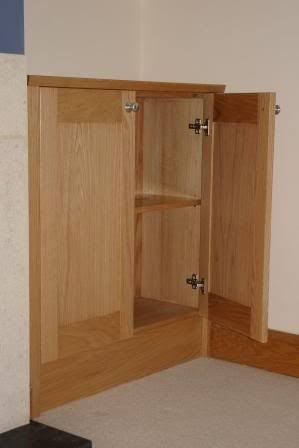
Using blum clip on hinges made everything so simple. Although it isn't very easy to see, I used the drill in type blumotion soft closers which I think look neater than the clip on ones - cheaper too!
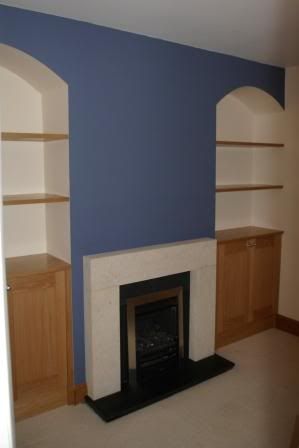
Everything fitted with a second coat of osmo polyx on the shelves and top of the cupboards - the doors and inside of the cupboards had 2 coats in the workshop.
Build time 4 days - including preparing the sawn oak for the doors etc. Fitting time 7 hours.
Once again thanks to Dan and others who've taken the time to post their work. In turn, I hope this post is helpful to someone else.
Steve

The scene of the crime

I use a cheap screwfix laser level to mark out the shelf positions so that they are the same both sides of the alcove. I see that the price has gone up to £50 - I paid £30 for mine - but I wouldn't hesitate to get another one if this broke.


The customer wanted floating shelving but on the left hand side the shelves were 400mm deep. To provide support to the front edge of the shelf I routed a 12mm stopped groove in the shelf side (26mm Oak veneered mdf) and then cut some 12mm x 12mm square pieces of wood that I fixed to the sides of the alcove. This had the added benefit that I could install the concealled shelf support pins into the shelf, slide the shelf onto the side supports and use the threaded portion of the support to mark the wall for drilling. This worked very well. The shelves were scribed using two pieces of 6mm mdf screwed together to make a template.

The bases were assembled and finished in the workshop - the only thing that I needed to do on site was scribe the face frame and the top and fix the plinth. The customer wanted the cupboards to be flush with chimney breast which made scribing them in a bit trickier but no real problem. I used my festool saw and rail with a newly fitted splinter guard and the finish was perfect.
The units were fixed in place by plugging and screwing into the wall on both sides. I did this top and bottom making the hole behind the hinge mounting plate so when the hinges were fitted no fixings could be seen. The units needed to be removable to enable access to the gas fire connection and this can be done simply by removing the four screws.

Using blum clip on hinges made everything so simple. Although it isn't very easy to see, I used the drill in type blumotion soft closers which I think look neater than the clip on ones - cheaper too!

Everything fitted with a second coat of osmo polyx on the shelves and top of the cupboards - the doors and inside of the cupboards had 2 coats in the workshop.
Build time 4 days - including preparing the sawn oak for the doors etc. Fitting time 7 hours.
Once again thanks to Dan and others who've taken the time to post their work. In turn, I hope this post is helpful to someone else.
Steve


