Nice Little Sorby Backsaw - Bootfair today

UKworkshop.co.uk

Help Support UKworkshop.co.uk:

This site may earn a commission from merchant affiliate links, including eBay, Amazon, and others.

jimi43

Established Member
Joined
12 Mar 2009
Messages
6,921
Reaction score
15
Location
Kent - the Garden of England
Hi All

We have had bootfairs next door since Friday so it was no surprise that this morning the number of stalls had dwindled to just two little rows.

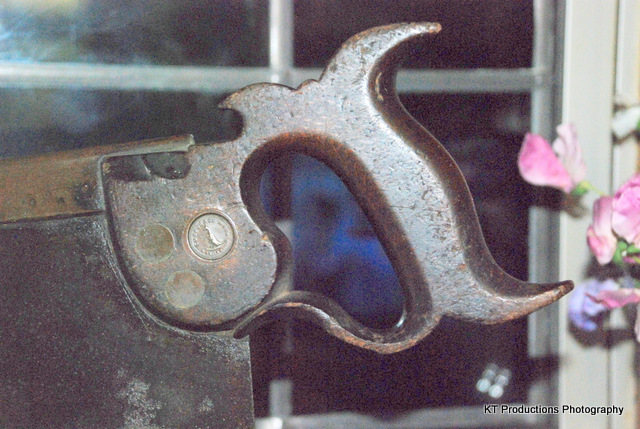
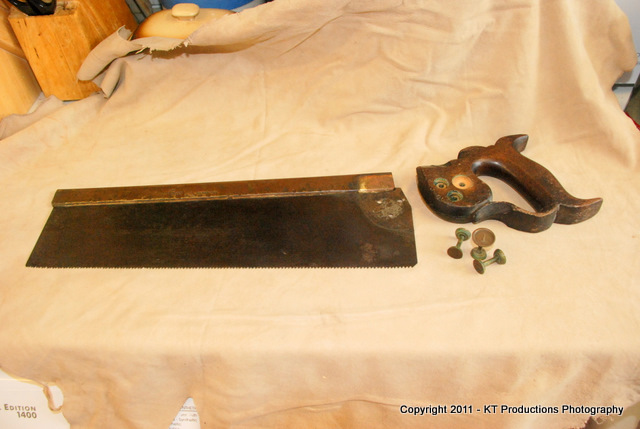
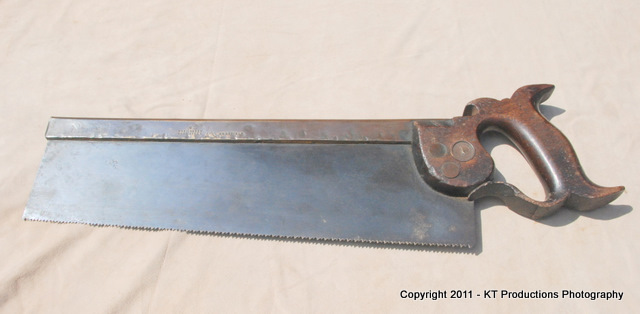
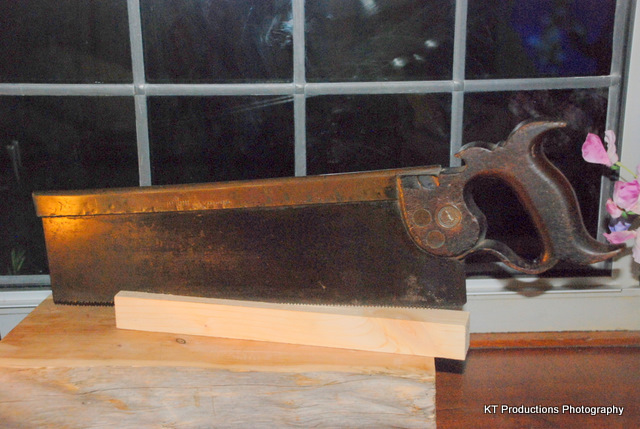
That being said...it was quality not quality...and amongst the dozens of finds that I found this weekend was this lovely little Robert Sorby backsaw:
DSC_0321.JPG


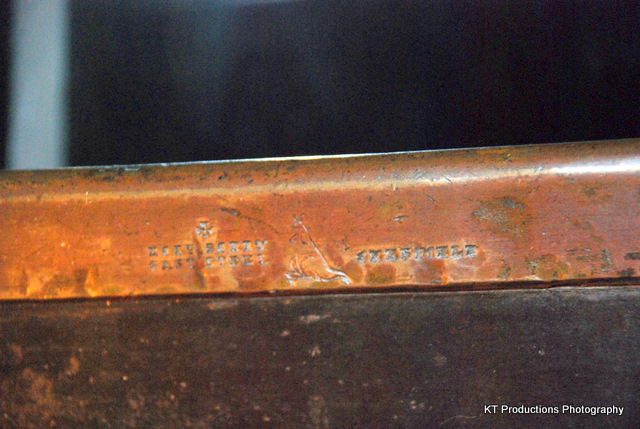
Not very clear pictures as it is quite dark outside now but the logo is very clear and crisp...
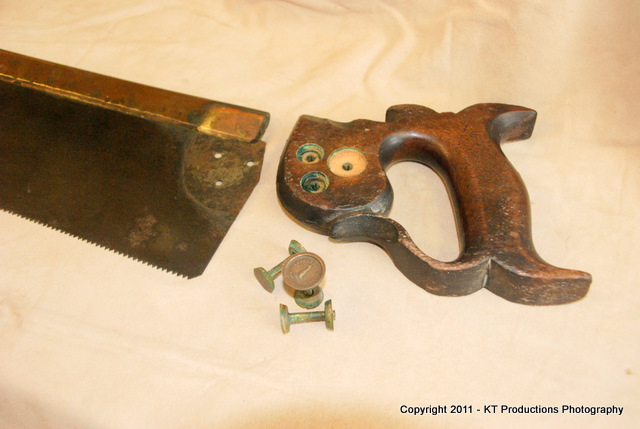
DSC_0320.JPG


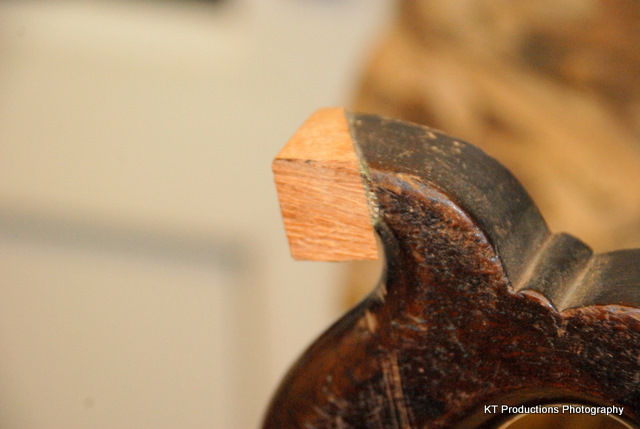
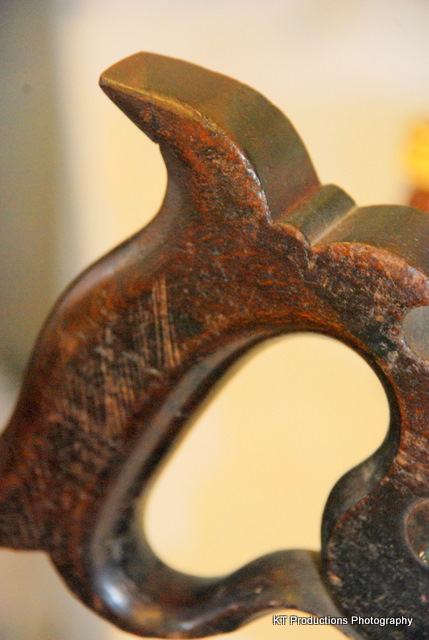
The handle is simply gorgeous....

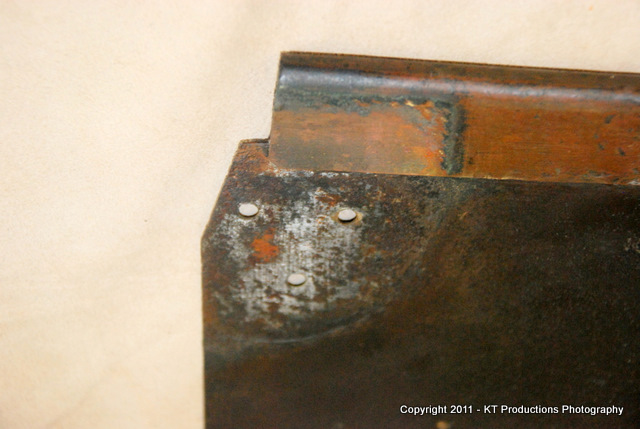
DSC_0318.JPG


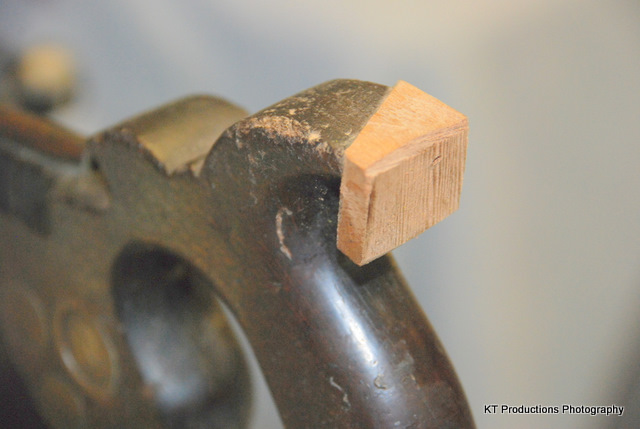
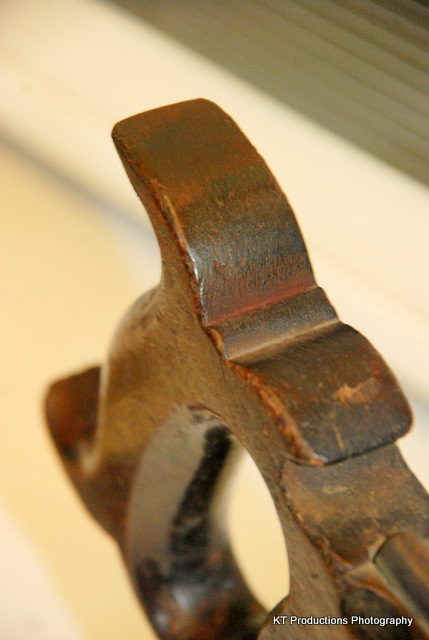
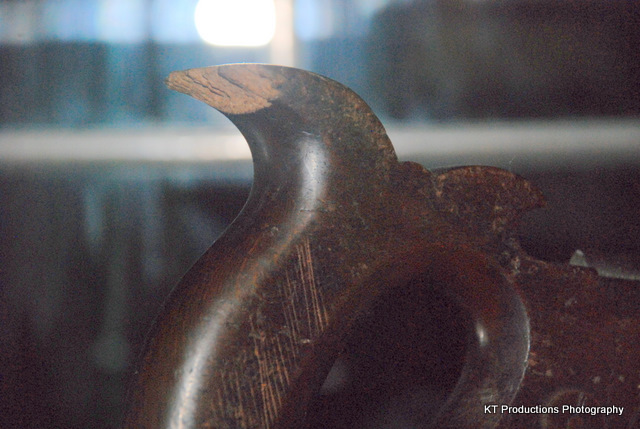
....but the only issue is a tiny chip out of the back of the top horn...
DSC_0319.JPG


Any expert out there with any suggestions as to what I should do with this damage..I am tempted just to leave it.

The saw is nice and straight...and it cuts very cleanly...it could do with a little sharpen and set but I ain't touching this one...I am not that practiced at that skill yet. Although I will consider sending it off to be done by a reliable artisan! I think it is worth more than the £1 already invested! :wink:

Pedder....what do you think mate?

Jim
 
I'd file down the damaged area ,gently, with a straight cut smooth file ... taking it back to just matching ....then wire wool.
 
Nice find jimi....i picked up anice old saw on ebay recently and was wondering about the bestway to restore it a bit as well. The handle is a bit loose on the blade, not sure how to sort this. The whole saw is pretty dirty as well, but i think it should clean up nicely.

Cheers, mark
 
jimi43":3qq7n0eh said:
Pedder....what do you think mate?

Jim


Know what, Jim? I'd pay you 1000% of your invest and even cover the shipping costs. :)

Serious: The guys over in Amrica, Daryl Weir, Marv Werner, cut away the horn and glue some matching wood on. Than stain until the cut is invisible. I've never done that and I think it is ok for a saw to have dents until the don't disturb in using.

The most difficult question when i got an old lady is to remove the handle or not. Blade restoring is much easier without the handle but the screws don't like it to be hmmm screwed. :) If you decide to make sure your Split nut driver fit the nuts 100,5%. I've a growing collection on SND from spade drill bits. It is much easier to make another new SND than a new old looking SN.

Cheers Pedder
 
Hi Richard....the chip is a tad more than that picture shows....I have decided to splice in a matching piece as the chip sharp edges rubs the inside of the hand in use. I shaved the rough wood back flat with my infill chariot...first blood for her and she whizzed through it perfectly. I then found some matching wood...got the orientation of grain as best I can and pin registered it and glued and clamped with Titebond Original.

In a day or so I will tell you how it came out!

Hi Mark...thanks mate! Yes..these bargains can be had...you just have to get to bootfairs early if you want them this cheap and of course...know what you are looking for!

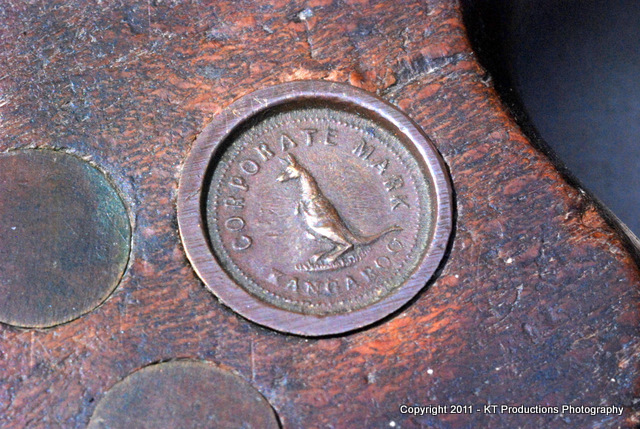
Hi Pedder....thanks for confirming that this is a bit of a gem. I can easily see how the screw nuts would not want to come out and this one has a beautiful Kangaroo which has not been polished at all with wire wool...indeed the whole saw has that beautiful patina of untouched...just used for 100 years - look.

Just ONE tooth is broken...I am going to leave this. And I don't think I will be removing the handle. I will check around to see if someone can just touch it up a bit without removing the handle...or I might just leave it...you never know. The set seems fine.

I will post some more pictures once the annoying horn repair is complete.

Cheers for your comments guys!

Jim
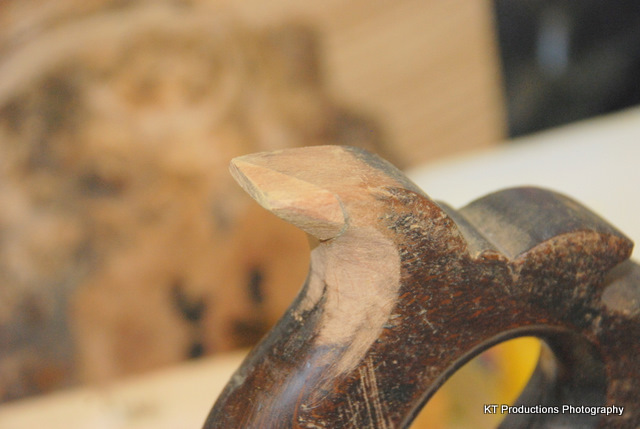
 
That is a beauty, especially the handle design. I agree, where that chip is would really aggravate my hand. I think you are right to fix it. I have a couple of saws that I quit using until I do a similar repair.
 
Hi Henry and Pedder...

As I said earlier...I bit the bullet on this one as it was affecting the comfortable use of the saw.

I am accutely aware of any intrusion into the patina of a saw of this age and beauty and, following my experience with vintage guitars...try to apply the same principles when restoring such a gem.

The initial stages can be quite brutal...flattening and keying new wood in gives a sense of fear...but I try to remember this stage is necessary and must be done right with patience...I simply hate waiting 24 hours for the Titebond to cure but experience has shown me that failure to do so..is suicide...

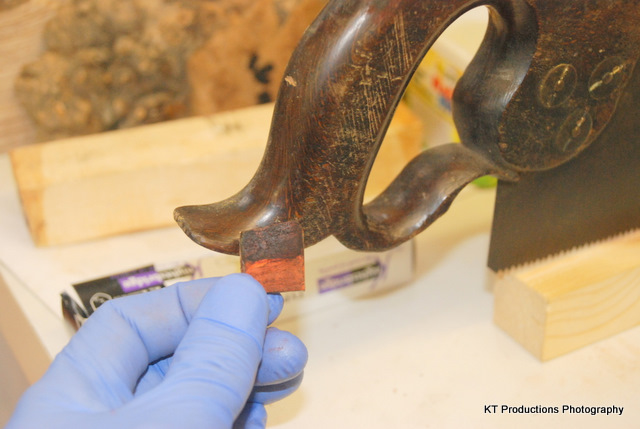
Anyways...here we go...select the wood...cut a blob...get the grain right...key it in and glue and clamp and then after 24 hours release the clamp and inspect...

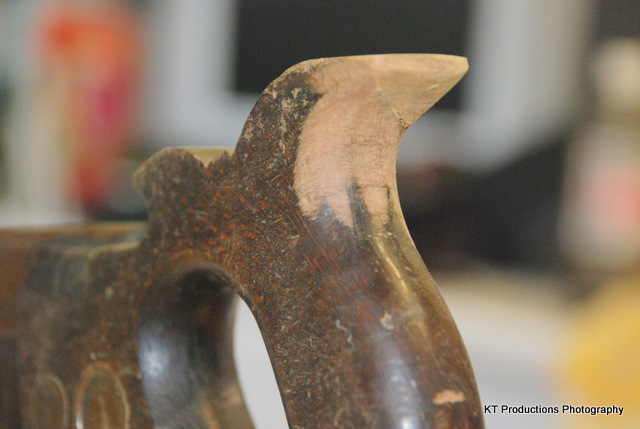
DSC_0347.JPG


As can be seen, it was quite a chunk that was missing...and at a critical point...

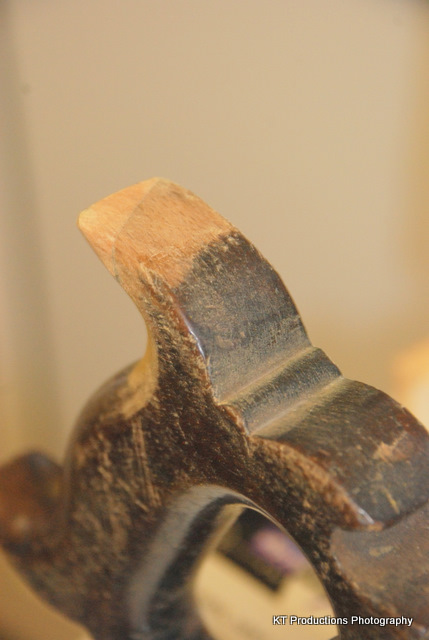
DSC_0348.JPG


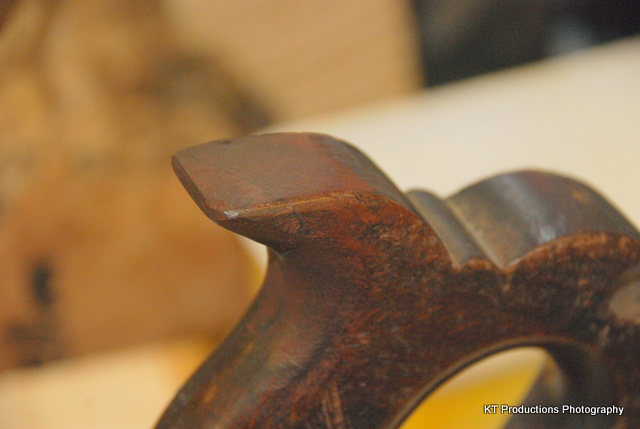
Then it's a case of taking a rasp to it...

DSC_0349.JPG


I want to keep this quite rough...so that it matches the war wounds of the rest of the handle. It would be a mistake to take this down too smooth...as you can see...it would stand out like a sore thumb to be too perfect..

DSC_0351.JPG


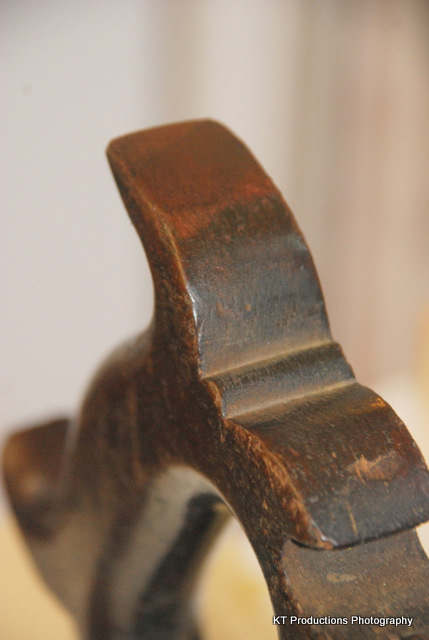
Much more important is the shape...it is important to continue the beautiful flow of the original curves and bevels...

DSC_0353.JPG


The wood and grain are not a bad match...it would be impossible to get a perfect one at this stage...

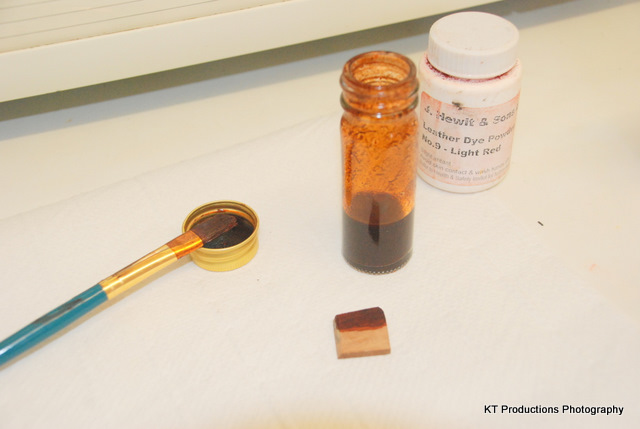
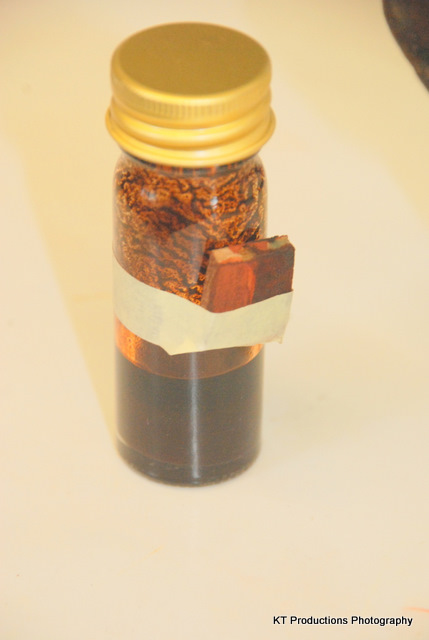
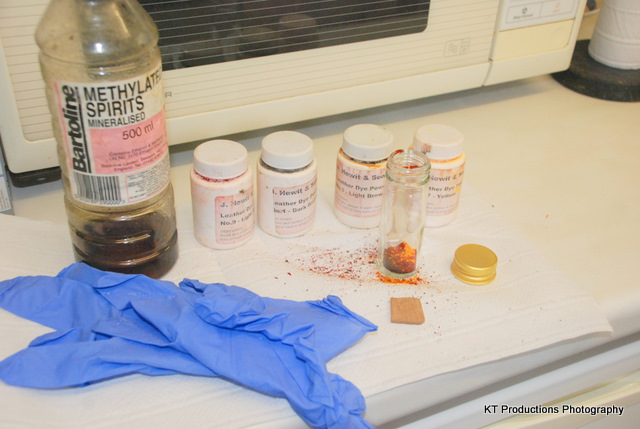
Then on to the staining. Now I prefer to mix my own as there are an infinite number of old original stain colours out there and multiply this by the various ages and patinas and you need to match carefully if you want the job to be close to disappearing. I use an offcut of the patch wood as a swatch...and mix leather powder dyes with meths...nothing else betters this method IMHO experience..So the kit is...

DSC_0355.JPG


You MUST use nitrile gloves as this stuff stains everything....

I have loads of tiny little glass jars that I got from a bootfair for 10 for a pound...these are ideal and you can keep the mixed stain for quite a while afterwards...if you need to darken the area later...

DSC_0356.JPG


Try to stain the lighter patch wood first...and get it close to the old wood and then coat over both when dry. This helps match the two colours in tone at least...

Spend some time matching the colour content with the swatch against a test area...

DSC_0358.JPG


You'll be surprised how much red and yellow will need to be mixed in...only small amounts (as these are potent colours..) but this tinting is vital in making a good match...

DSC_0359.JPG


One trick here to bridge the join is to make this a wear area...

DSC_0360.JPG


This is a lighter area which is created as if it were hand wear at that point...this disguises the transition...

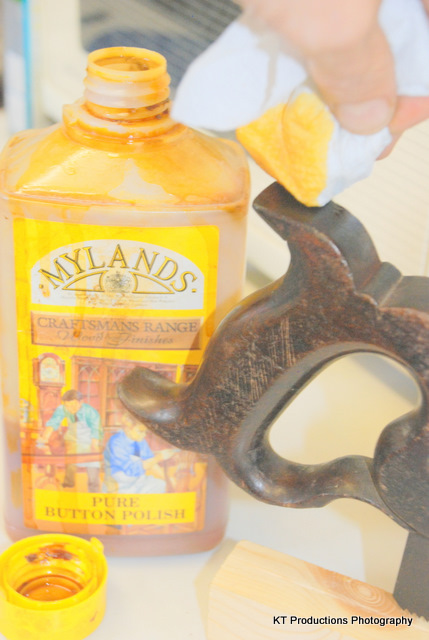
Powder dyes do not like to be rubbed...you have to seal them with a dab coat of Button Polish....

DSC_0368.JPG


Carry this down onto the old wood...

DSC_0363.JPG


Once dry (minutes later)...smooth this in with a cotton cloth to blend the patina and gloss...

Later you can add a few scars and dents to match those on the original handle...but I am happy at this stage how this turned out!

DSC_0366.JPG


There is just a tiny nick...which you can see...and I can fill this with hard wax later and buff in. These little blemishes are not a problem and actually add to the patina.

Remember to save the swatch with the remaining mixed stain....

DSC_0362.JPG


Hopes this helps if you are doing repairs of this kind to your treasures...

I love these little jobs...

Jim
 
jimi43":240ukgxm said:
I shaved the rough wood back flat with my infill chariot...first blood for her and she whizzed through it perfectly.

Any tips on how you got a good flat glueing surface on such a small area?

BugBear
 
bugbear":mjj0bx90 said:
jimi43":mjj0bx90 said:
I shaved the rough wood back flat with my infill chariot...first blood for her and she whizzed through it perfectly.

Any tips on how you got a good flat glueing surface on such a small area?

BugBear

Hi BB

I just used the wide cut of the infill chariot with the handle clamped in a vise and took enough passes to get it down to no chips cavities. The new bit was rough cut on a bandsaw and then run against a circular sander (when still attached to the rest of the stock for safety).

I banged a copper pin into the handle near centre about halfway. Cut of the head with a pair of side cutters to create a point and then clamped the two together using a grip cramp until it was aligned and flush. I then pulled it out a bit..coated with Titebond and re-cramped.

24 hours later...released the cramp and then trimmed as close as possible to each edge with a Japanese cross-cut saw (cutting into my finger in the process...boy those saws are sharp!).

Then using my tiny Isaac infill chariot...I planed the block near to each bevel and finished with a pair of rasps...flat for the planes and round for the contour.

Titebond Original is the key to new cut wood joining. I use it for almost everything and it never lets me down (as long as you leave it clamped up 24 hours and have huge patience!)

Hope this helps

Jim
 
Hi Jim,

Just thought you might like to see your saws close cousin

Robt Sorby backsaw.jpg


This came to me about as a gift from fellow journeyman Patternmaker, but unlike yours it is a working tool for me.
I first had to re-cut the teeth, which were in a bad state of alignment and set also the handle was loose, I managed to get the cup & screws loose by applying very fine oil and jambing the cups against the handle countersunk screw holes, the cups have 4 no. square lugs similar to the heads of coach bolts, these had worn a bit and with the tightness of the old threads they were a long slow slackening. I seem to remember curing a spot of Araldite resin on one of the cup heads, which wouldn't budge, but that provided enough torsion to get the screw loose, after that it was sharpened and set and has been a valuable tool ever since.
I don't know which of the two is older, your closed handle design might give a clue, perhaps one expert in the know may be able to shed some light on this? Like yours it has the indented brand kangaroo logo, it is also marked No. 43!!...bosshogg

even a stupid man can get it right sometimes
 

Attachments

  • Robt Sorby backsaw.jpg
    Robt Sorby backsaw.jpg
    15.7 KB
Cheers Henry...those are very kind words my friend.

BH...thanks for posting your backsaw...it is indeed a cousin. I may be wrong but I think we are talking grandad and great cousin...but I am by no means an expert on these things. I think the Kangaroo logo came in around the 1840s so they are both post that date.

I am absolutely sure that there are experts here as you say...

Oh..and mine will definitely be a user by me...I have been looking for a good one of these for ages. It is fairly sharp already as I found out trying to hold it during the handle fix....but not as sharp as I would like.

Jimi
 
Hi Jim,

I sharpened mine recently to a rip saw configuration...in the fashion of that sage, guru - Tage Frid (I don't know if you've heard of him) he taught woodwork at RIT in the USA back in the !950's and had some fascinating techniques that he brought over from his native Denmark. His book "Tage Frid Teaches Woodwork, both volumes) is an absolute cracker, and he extols the virtue of the bow saw (his no. 1 saw of choice) and shows how much better the rip teeth cut, on dry and seasoned timbers used for fine furniture making, as opposed to general construction timbers, which can be quite wet sometimes. Anyway I decided to take the plunge and re-cut the teeth on my backsaw this way and would certainly recommend it, to one and all, this goes both for cutting cross grain and with the grain.
Your work to the handle looks very good so far and if indeed it's to go into productive use, as you state, you may want to consider getting that handle off sometime soon, as the point of intersection between the brass connectors and the steel blade, in my experience, can be very rusty and left to it's own might start destroying the blade at this point, this is due to electrolysis, and left to it's own devices could harm something of both value and beauty...bosshogg
 
jimi43":jwkugr6o said:
bugbear":jwkugr6o said:
jimi43":jwkugr6o said:
I shaved the rough wood back flat with my infill chariot...first blood for her and she whizzed through it perfectly.

Any tips on how you got a good flat glueing surface on such a small area?

BugBear

Hi BB

I just used the wide cut of the infill chariot with the handle clamped in a vise and took enough passes to get it down to no chips cavities.

Interesting. I always find doing accurate work when the work surface is much smaller than the plane sole tricky. Many people recommend disc sanders for the task.

When I've repaired plane tote tips, I just hold the tote in the vise, and use a jointer plane whose heel runs on a bit of scrap on the bench top. When taking the required short strokes, the whole plane stays well supported, and creates a nice "flat".

Clearly, it's not worth buying a jointer for such a task, but if you happen to have one (*) around, it works well.

BugBear

(*) or more, obviously :D
 
Hi BB

I guess I do it quite a bit with headstocks and such....you get the rhythm.

I will say though that, having built the little infill chariot....

DSC_0589.JPG


...it is kinda like an extention to my hand now. The technique I use is to stick two fingers out the side and down to act as a fence and keep the angle consistent. To be honest, I have never thought that much about it before.

The scrap bit was flattened on a disc sander though.

Cheers

Jim
 
Ok...I am in love with this saw to such and extend that I have decided to get it sharpened professionally and use it daily.

General concensus is that the handle would ideally have to come off. I am not a great fan of disturbing vintage nuts and bolts...they have a tendency to bite back...but I was pleasantly surprised. The right custom screw nut driver (bit of 01 steel and a file), a quick twist et voila!

DSC_0382.JPG


No tear out of slot...no snapping of shaft...just release...

DSC_0383.JPG


There wasn't even any chipping of surrounding wood...

There is surface rust underneath but not much pitting...the hidden steel is at least as good as the exposed steel if not better...

DSC_0386.JPG


Now my next job...to find the very best artisan to sharpen this up...anyone any suggestions near to Kent?

Cheers

Jimi
 
......Now my next job...to find the very best artisan to sharpen this up...anyone any suggestions near to Kent?

I know it's not near to Kent but a little place in Germany was just calling me....and our dear friend...and now blinkin' genius (officially!)....Pedder offered to sharpen little "Roberta" for me.

Now I say "Roberta" because apparently ALL saws must be feminine...I didn't know that...and there was me calling her "Robert"...oh well...you live and learn.

NOW...to the serious stuff and the reason I resurrected this old thread....I sent Roberta off to Germany...as Pedder tells me although he doesn't publish the service of resharpening...he will do so for people in love with old saws...nuts like me and friends here...oh and of course..customers of TLT! And those of you who have just joined us....THIS is the work they do...


:shock: :shock: :shock: :shock:

So you see why I was keen to get this little gem of mine...treated by experts!

Anyway....Roberta came home today and all I can say is WOW!

Now...on the face of it...it doesn't look any different...

DSC_0001.JPG


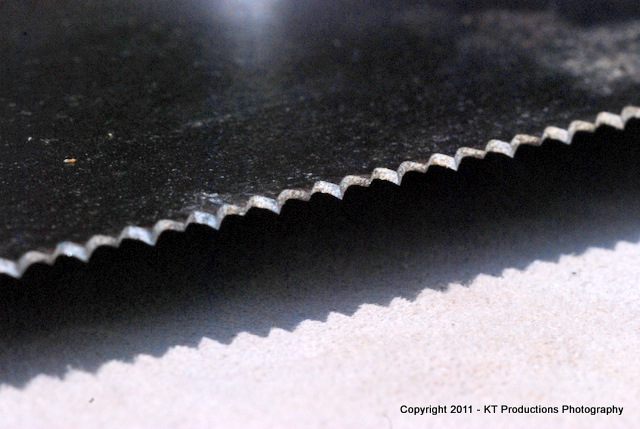
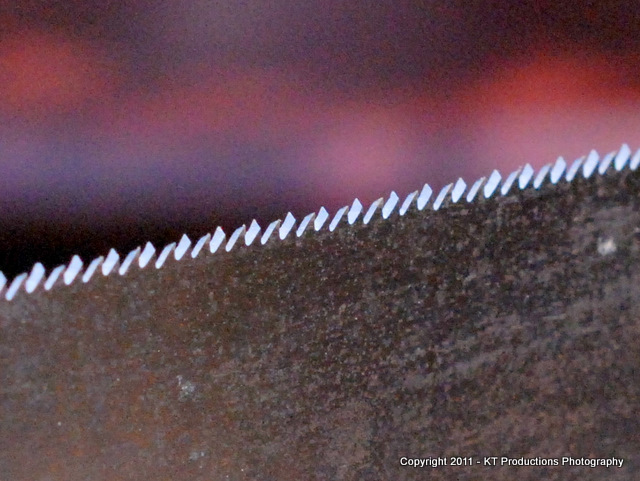
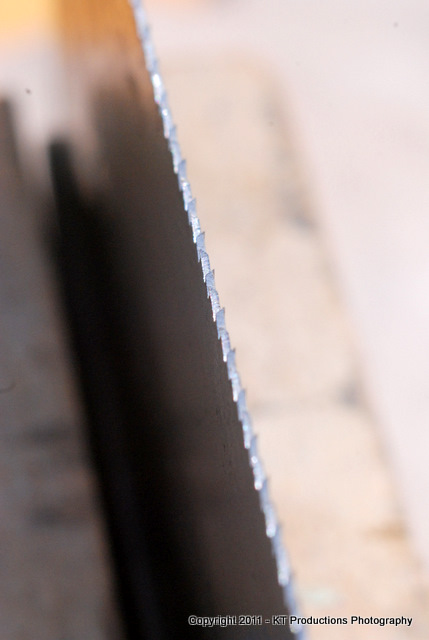
..until you take a close look at the teeth...

DSC_0004.JPG


They are sharp as razors and absolutely...and I mean absolutely...in line...

DSC_0011.JPG


It wasn't until I got me old 105mm micro out that I realise how beautifully in symmetry they were....

DSC_0009.JPG


..perfect alignment...perfect kerf...every one...perfect....

I have a huge smile on my face now...I knew that this little "lady" would be good but I had no idea how perfect it would be...and now I have a treasure from over 100 years ago...from a factory that shone in their day...even to today...

DSC_0005.JPG


...and ready for another 100 years of work....

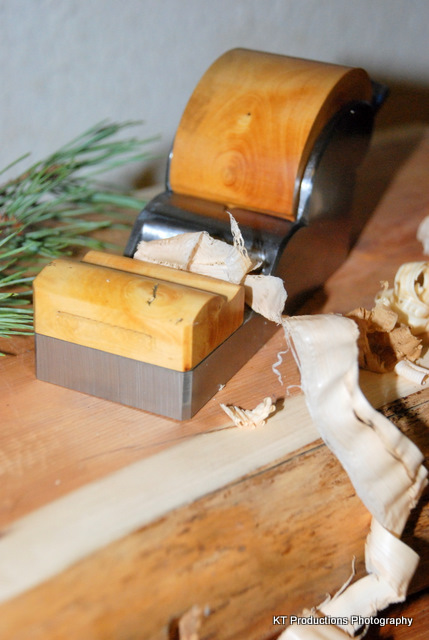
I am hopping about with glee....just like Robert's kangaroo! (I thought I would make use of the micro lens before I put it away for the day! :mrgreen: )

And....before you ask...it cuts like a dream!

Now all I have to do is keep my eye out for a dovetail saw at this weekend's bootfair!!!

Thank you so much Pedder for returning this lady to her former glory...I think I know what I want for Christmas now!!! :wink:

Jim
 
Hi Jim,

thank you much for the pictures! I've never seen so good pictures of "my teeth". Was a funny hour before breakfast last Saturday. Roberta (all old ladies are female :lol: ) wasn't hard to work on, her teeth were quite even spaced. The handle repair is well done and now there is no reason why she should not live another 100 years.

And I really like the little treasures, that ar mine now.

Cheers
Pedder
 

Latest posts

Back
Top