


SkinnyB
Established Member
I picked up another one of these small Multico Planers a few months back. With lockdown I have managed to get through a few machines I had waiting to be stripped and re-built.
This is the original thread for the first one I rebuilt. Im only really going to include anything that was a little different this time around.
multico-b2-planer-restoration-t113265.html
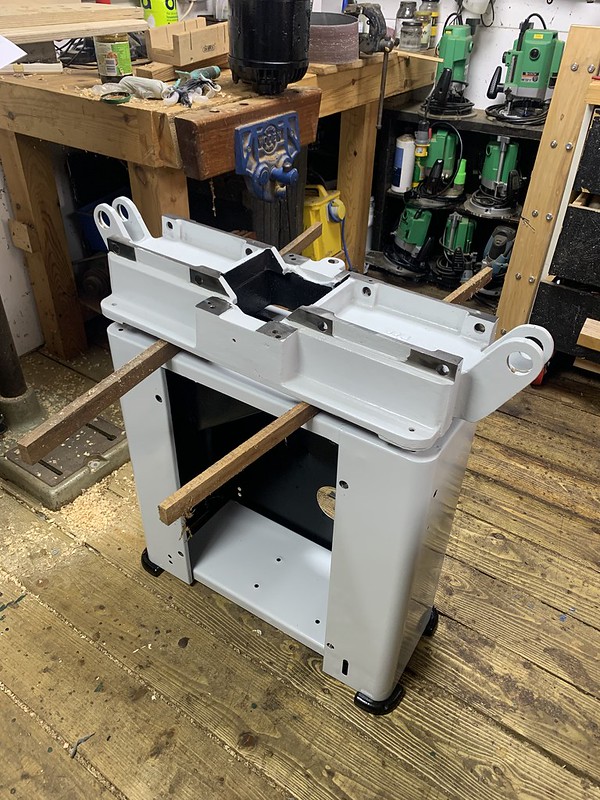
So here is what I got. Looks to be in good shape, few knobs missing here and there and the belt guard missing. So those will need to be replaced.
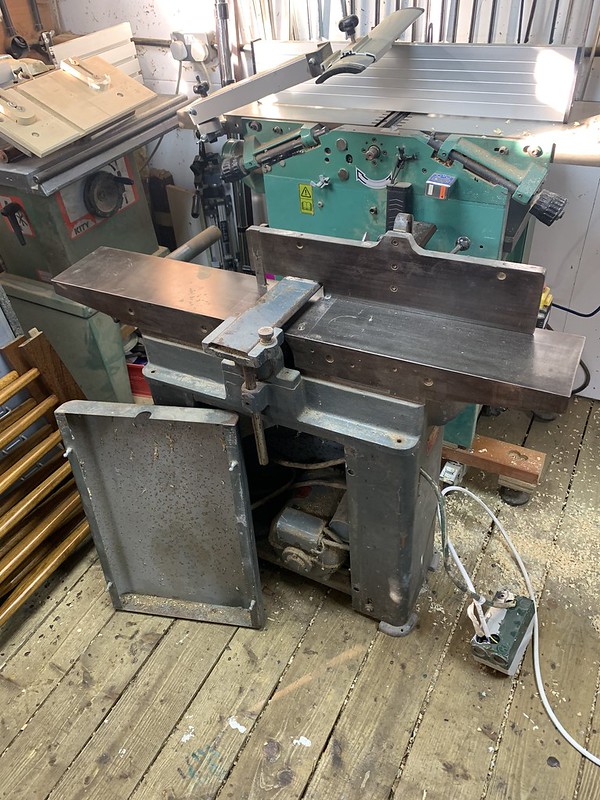 Multico planer 2 by jamie skinner, on Flickr
 Multico planer 2 by jamie skinner, on Flickr
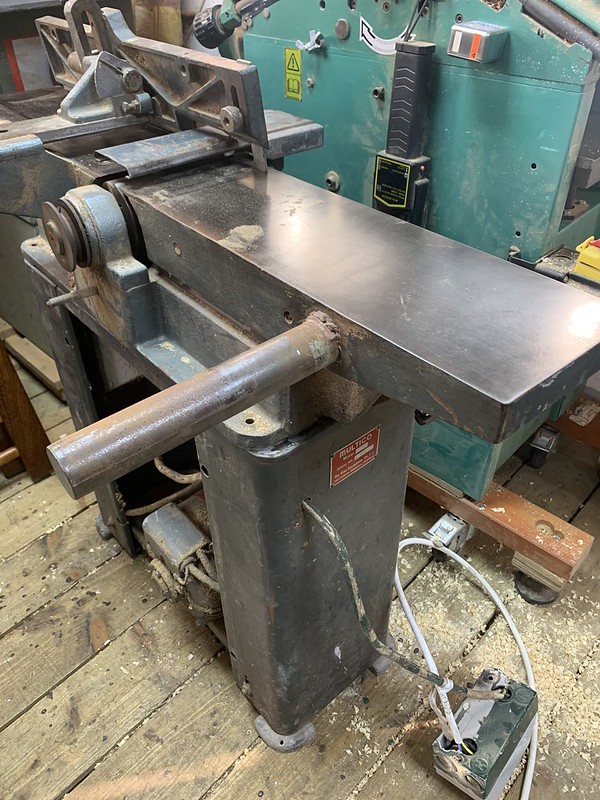
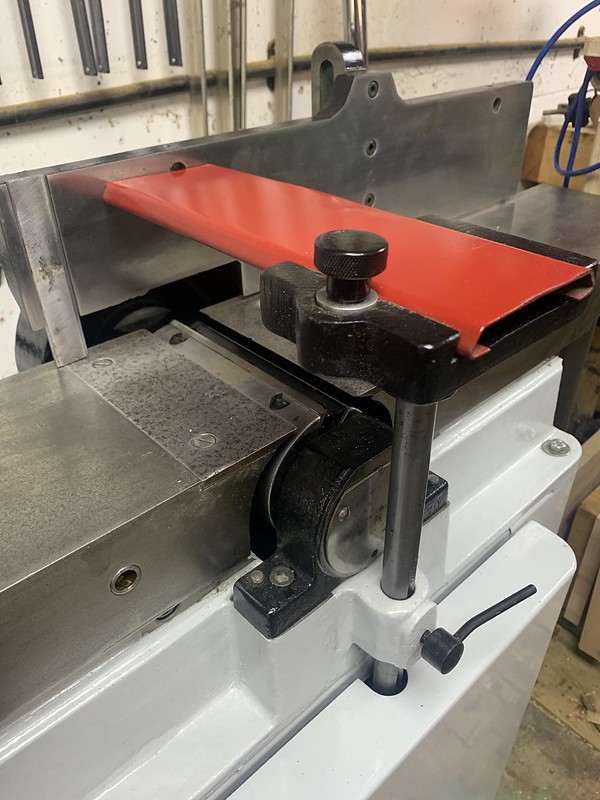
The Fence is different from he previous one I did up. This one uses a dovetailed bar whereas the other used a round bar for the fence adjustment. This design is much nicer as the table cannot rotate left or right.
 Multico planer 2 by jamie skinner, on Flickr
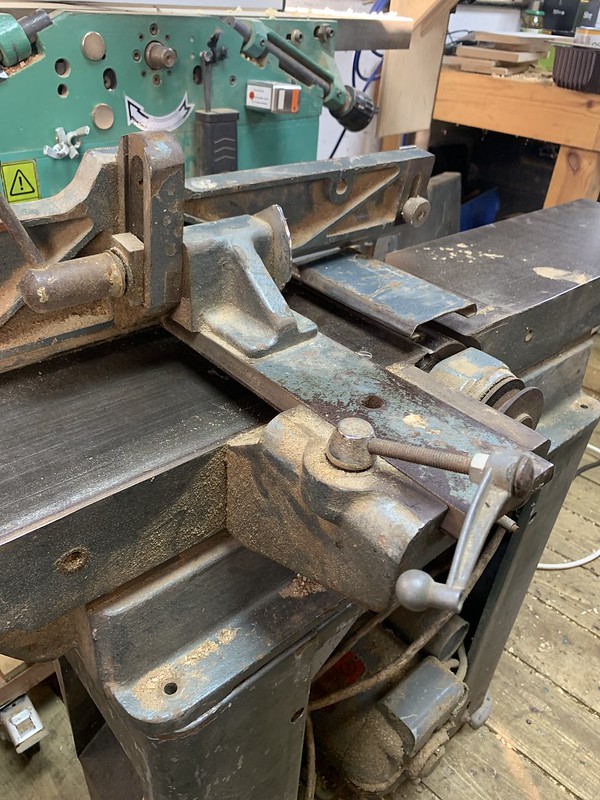
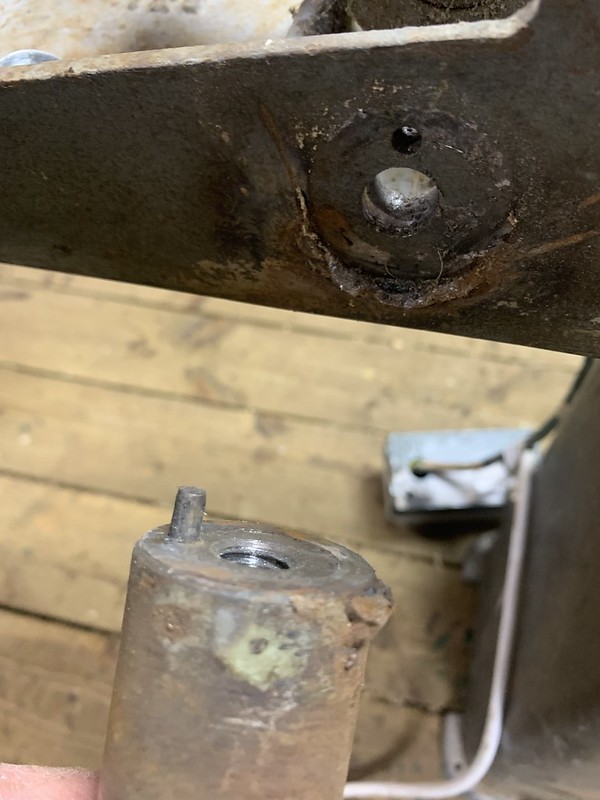
Not sure if this is original... Maybe support for bolting to wall?
When I took it off it was well made on and had a pin to stop it from rotating when bolted from under the table. Then it was very badly welded on...
 Multico planer 2 by jamie skinner, on Flickr
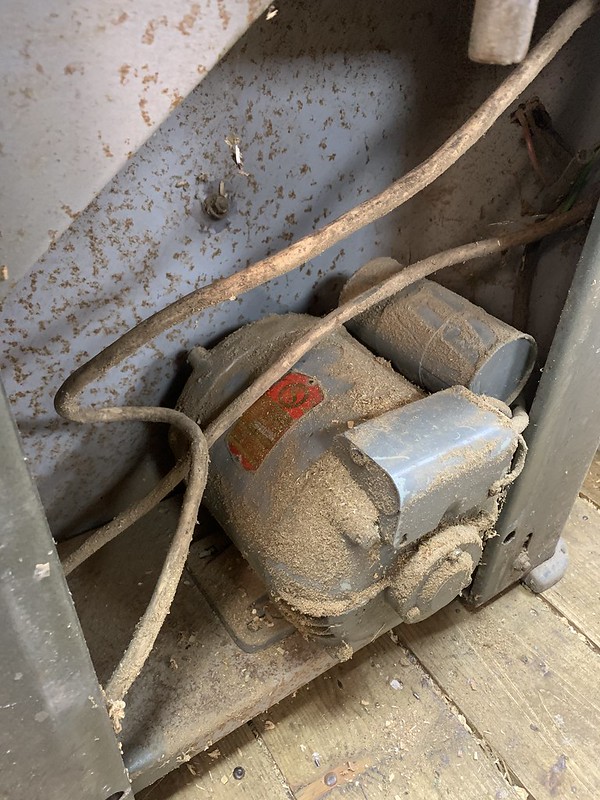
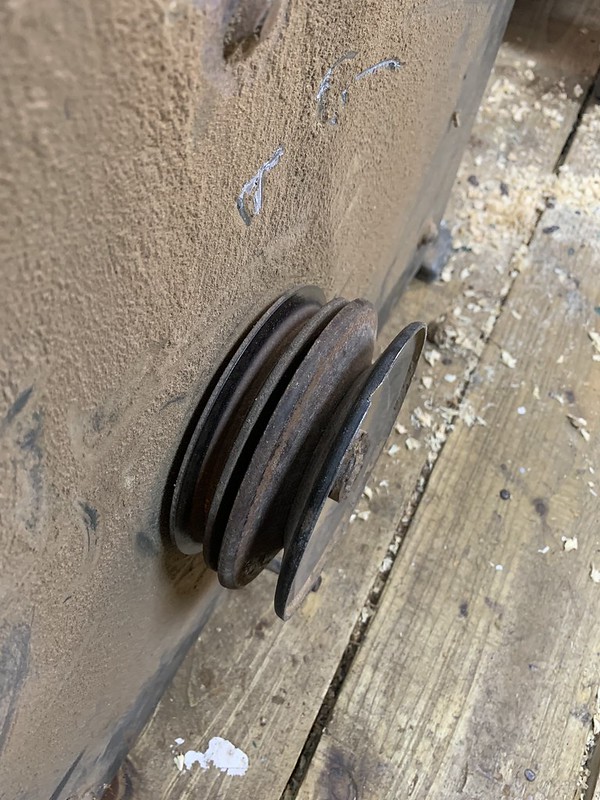
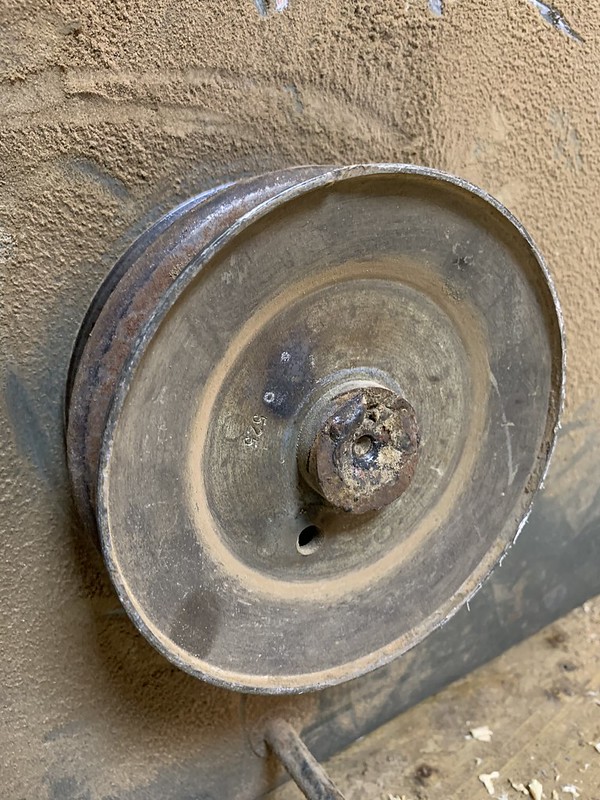
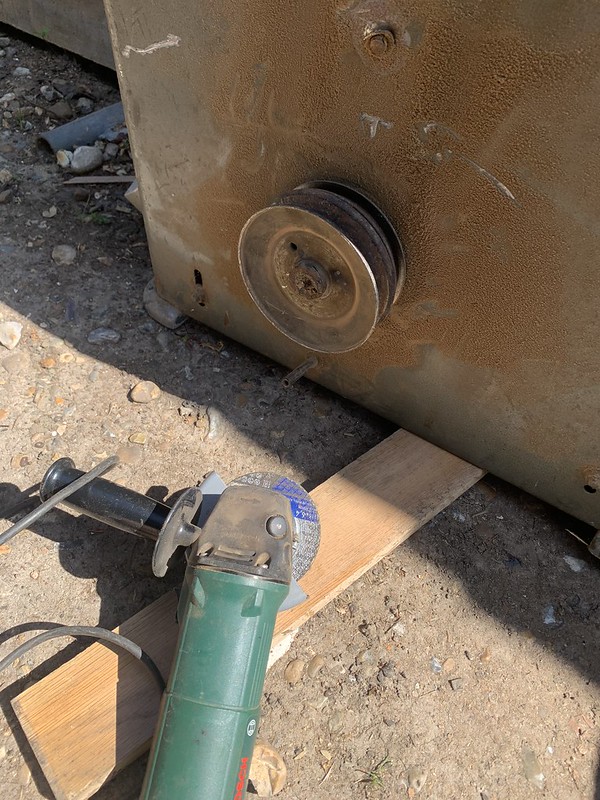
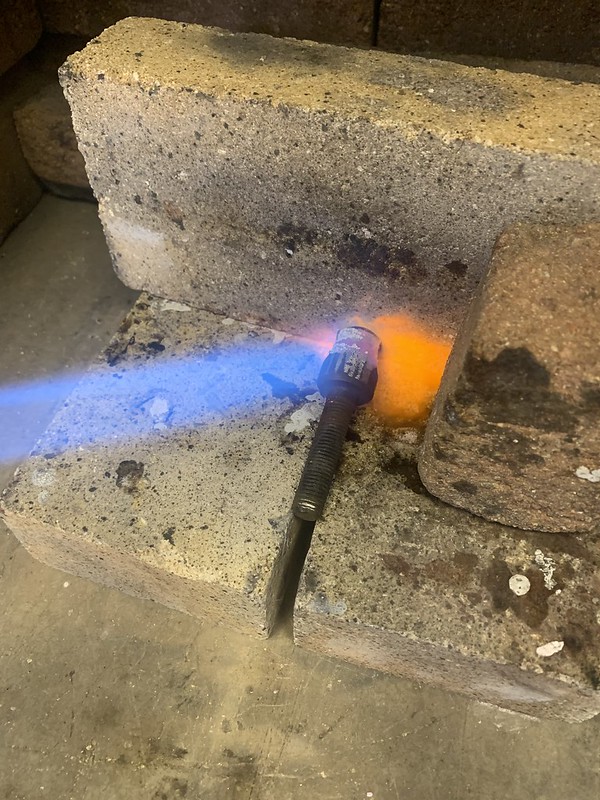
Perhaps they were lacking a pulley puller? I can only imagine the pulley was stuck on and in the wrong place so this was considered a quick fix. Someone decided to weld a pulley right onto the motor shaft...
 Multico planer 2 by jamie skinner, on Flickr
 Multico planer 2 by jamie skinner, on Flickr
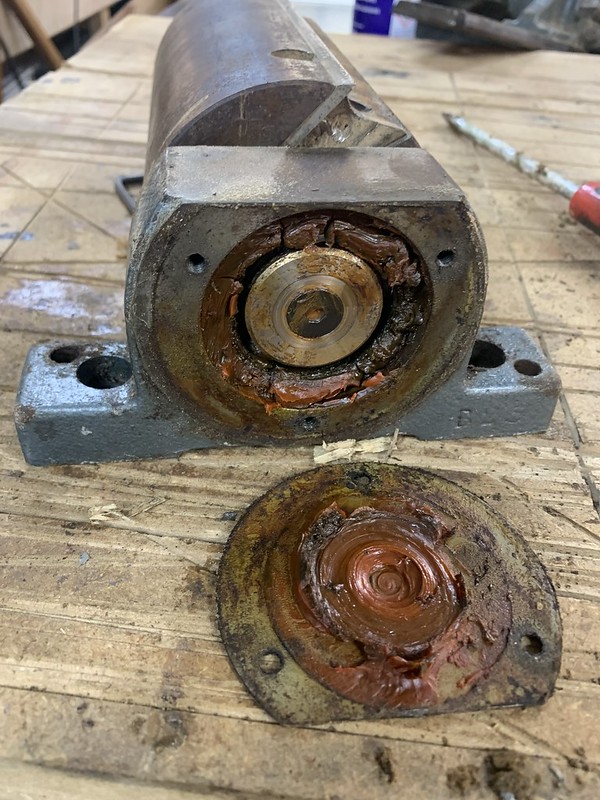
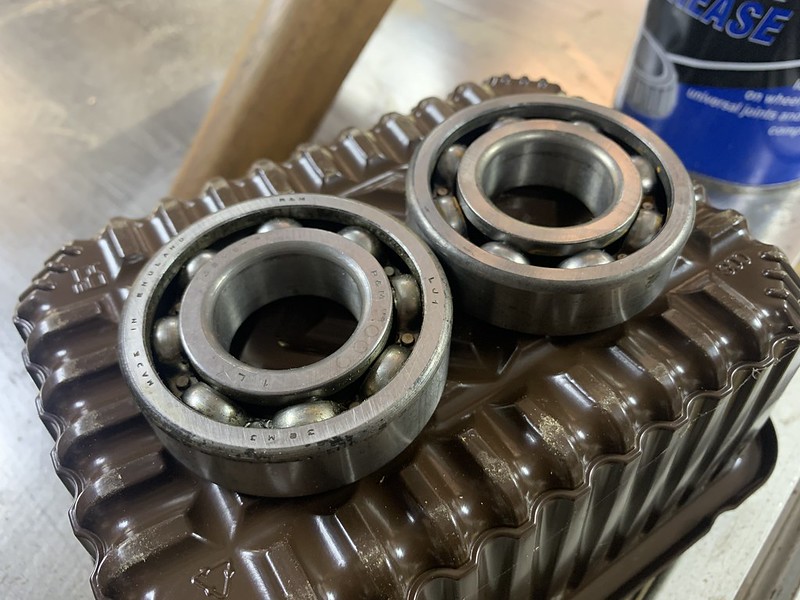
Starting to break it down. Bearings came out easily.
 Multico planer 2 by jamie skinner, on Flickr
 Multico planer 2 by jamie skinner, on Flickr
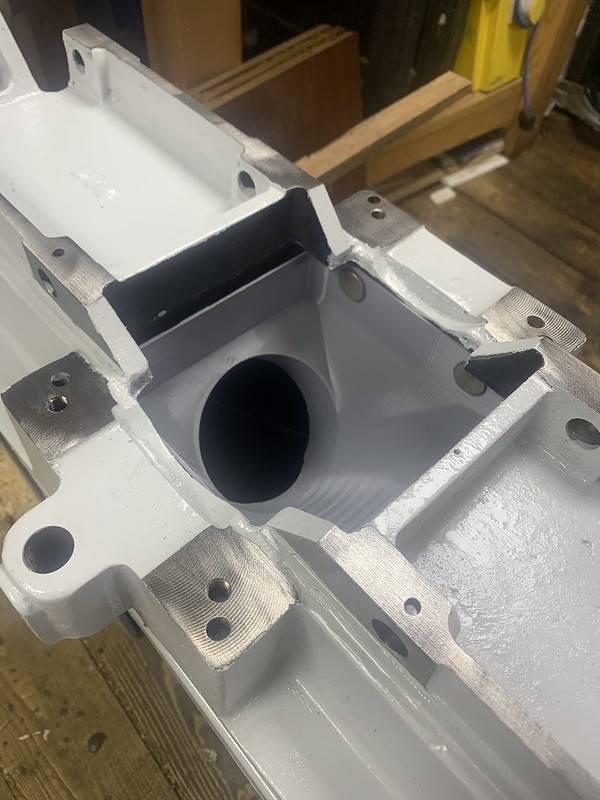
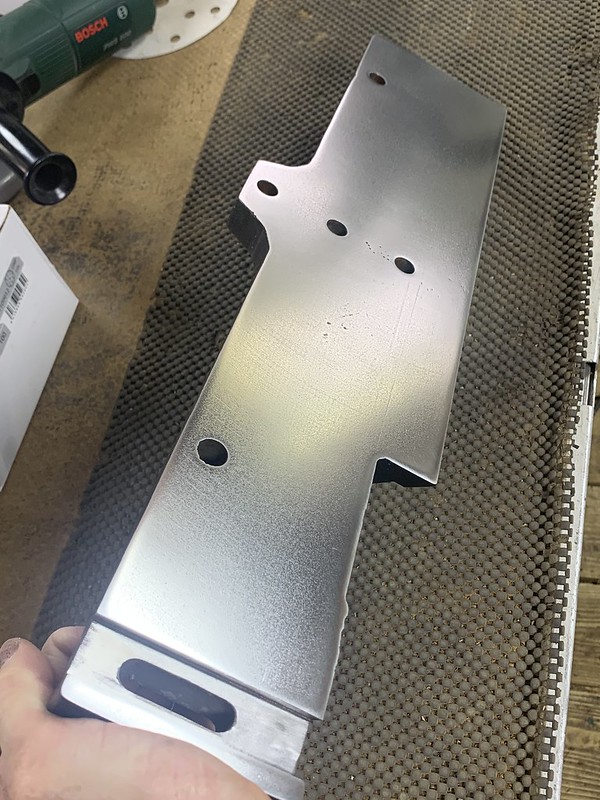
This is the metal bar attached to back of the machine I mentioned earlier.
 Multico planer 2 by jamie skinner, on Flickr
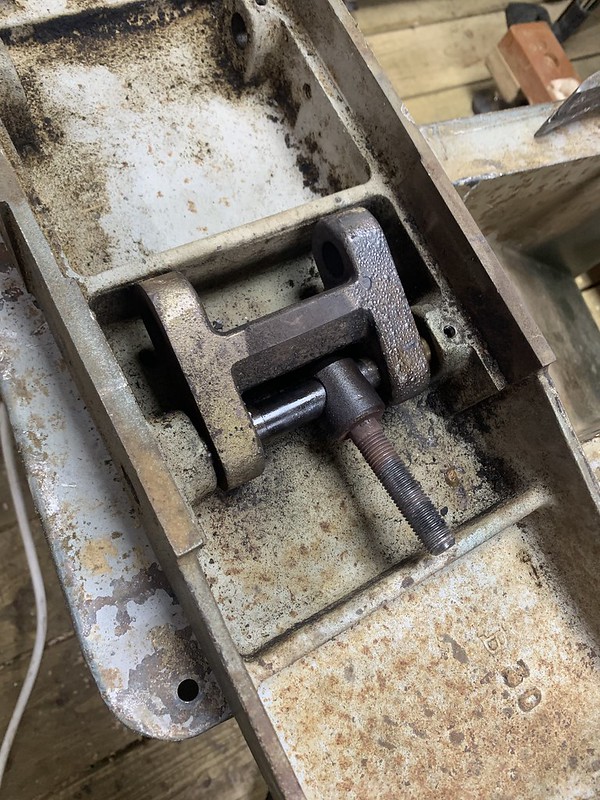
A member had asked how to get these pins out so here is how I think I remember I did it...
Remove the grub screws holding the lower 4 pins in to the main casting of the planer and soak with penetrant.
I think 4 grub screws are under the casting and 2 are at each end.
Remove grease nipples from pins and give a good spray of penetrant in there to.
Using a hammer and a long blunt ended rod tap each pin out. Careful not to damage the threads in the pins and not to dome over the ends.
Once those 4 lower 4 pins are out the table should lift off, oh you need to remove the handles too. they have pins in and are very hard to get out. I drilled them in the end.
The next 4 pins have grub screws under the table, again soak the whole pin in penetrant.
Tap the pins out as before.
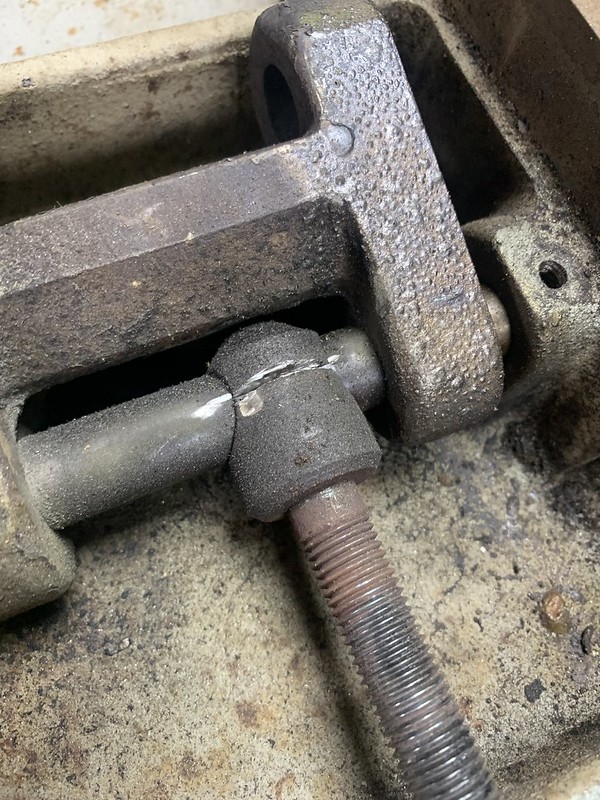
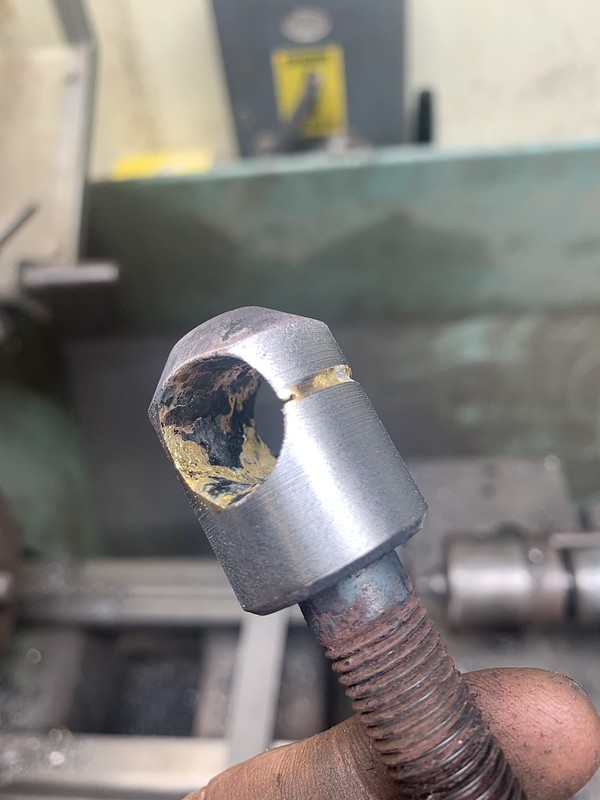
I managed to get all the pins out except this one. The threaded part you see wrapped around the pin was so tight it would not budge. I tried penetrant, heating, big hammer to no avail.
 Multico planer 2 by jamie skinner, on Flickr
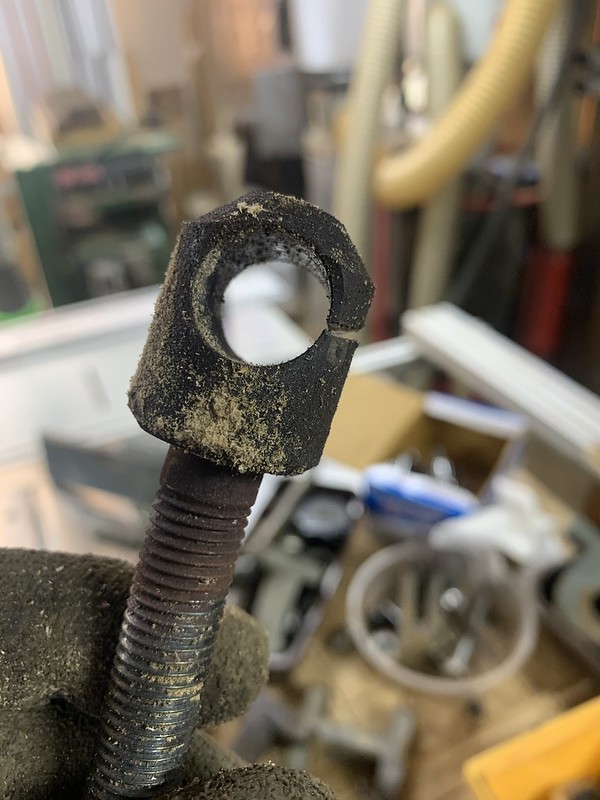
So went with the Dremel grinder instead and carefully slit it open.
 Multico planer 2 by jamie skinner, on Flickr
You can see where I bent the thread too... Fix that later.
 Multico planer 2 by jamie skinner, on Flickr
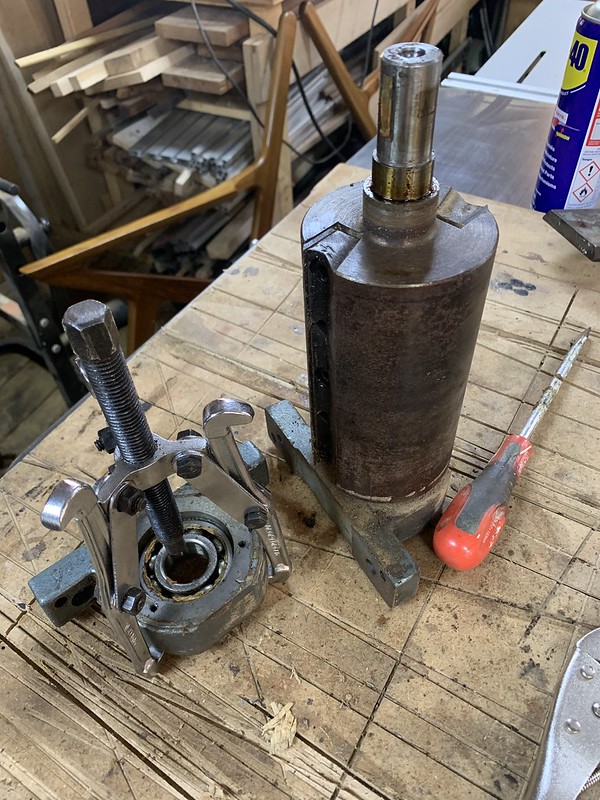
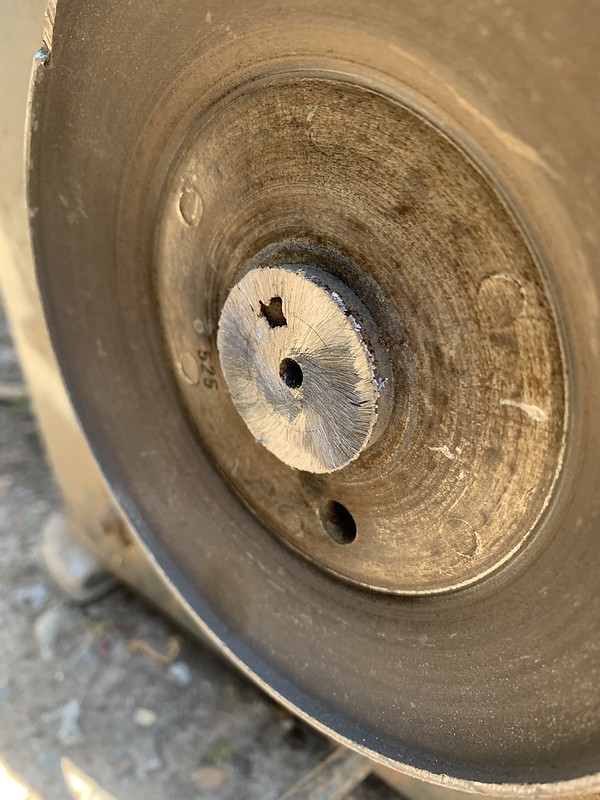
To tackle the extra pulley I resorted to running the motor and holding the angle grinder to it until I could see the shaft.
 Multico planer 2 by jamie skinner, on Flickr
 Multico planer 2 by jamie skinner, on Flickr
Pulled off easy.
 Multico planer 2 by jamie skinner, on Flickr
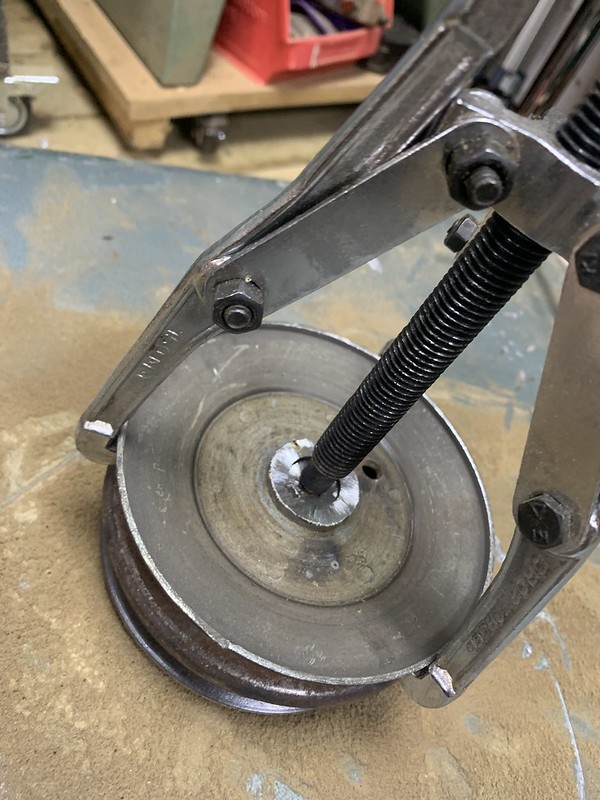
Thought I was going to have real trouble with the original pulley put pulled off nice and easy.
 Multico planer 2 by jamie skinner, on Flickr
Bearings cleaned up, little grease and seem to run well.
 Multico planer 2 by jamie skinner, on Flickr
Paint removed.
 Multico planer 2 by jamie skinner, on Flickr
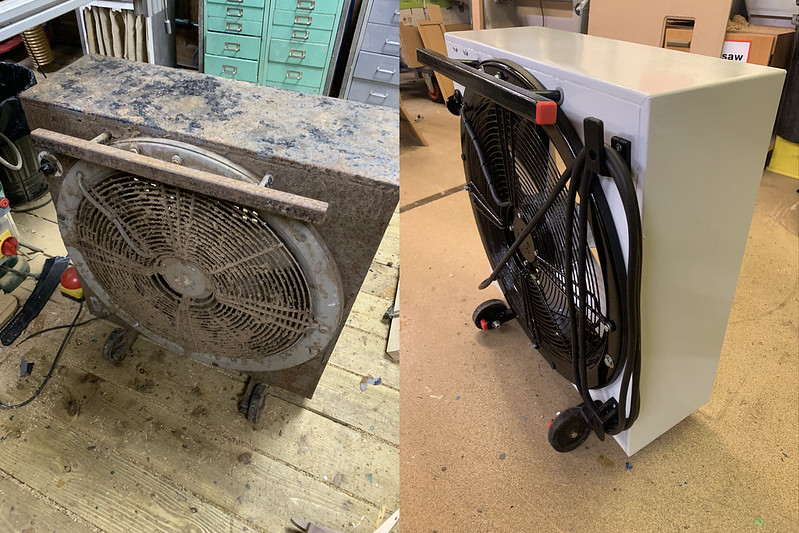
Going for a black and white look for this planer. I did a air cleaner a while back and though the combo went well.
animal-cooler-to-air-filter-wip-t119698.html
 IMG_6093 by jamie skinner, on Flickr
Masked, primed, sprayed and top coat.
 Multico planer 2 by jamie skinner, on Flickr
Some parts which weren't dimensionally critical like the motor pivots I cleaned up on the lathe as they were rusted heavily. Also took out the slight bend it had.
 Multico planer 2 by jamie skinner, on Flickr
Something didn't show earlier... To remove the grease nipples deep inside the pins that hold the table on I ground down a driver bit of the correct size to fit it inside and remove the nipple.
 Multico planer 2 by jamie skinner, on Flickr
 Multico planer 2 by jamie skinner, on Flickr
Time to tackle the piece I had to cut off.
 Multico planer 2 by jamie skinner, on Flickr
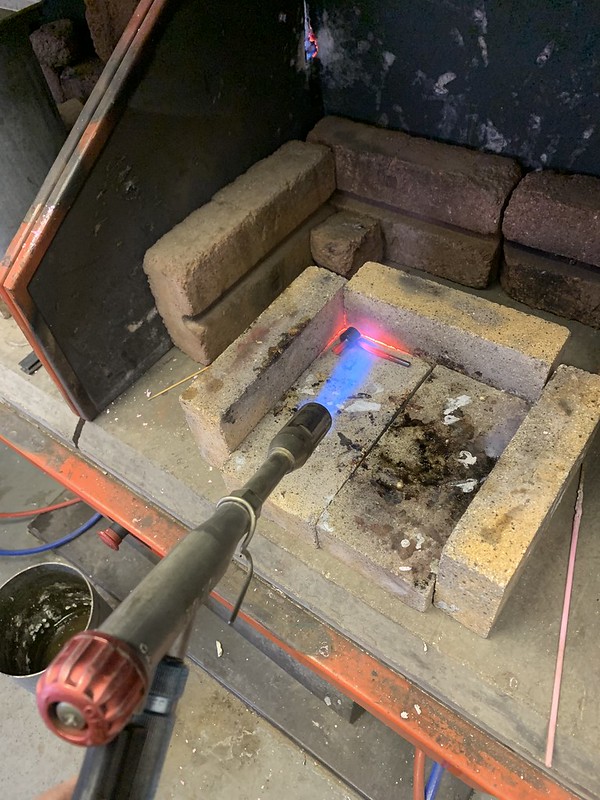
I am going to try brazing at this point I have never touched a welder. (I now have and that would have probably been easier.) Ground down the two sides. I think I should have had some kind of dam in there to stop the braze falling through. Had to deal with he clean up afterwards.
 Multico planer 2 by jamie skinner, on Flickr
 Multico planer 2 by jamie skinner, on Flickr
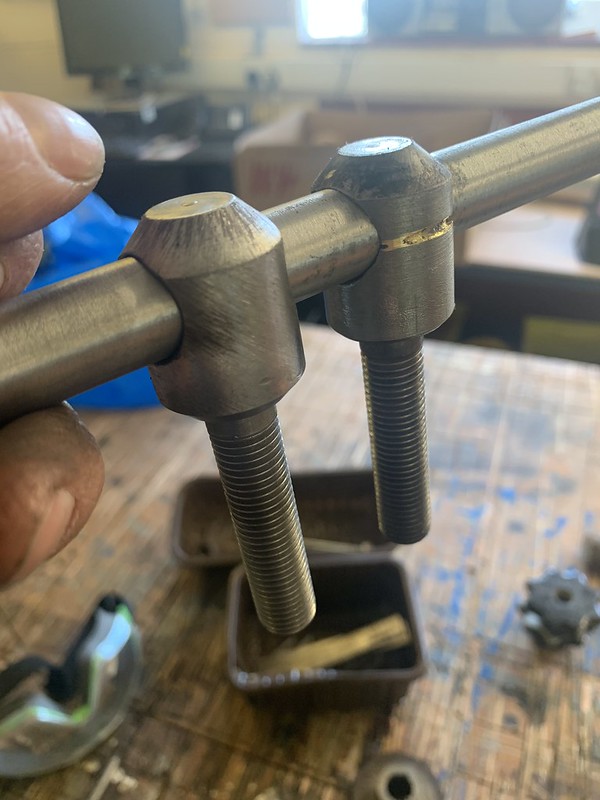
Turned on the lathe, you can see the braze right where I didn't want it to go. Should be enough to hold it together at least.
 Multico planer 2 by jamie skinner, on Flickr
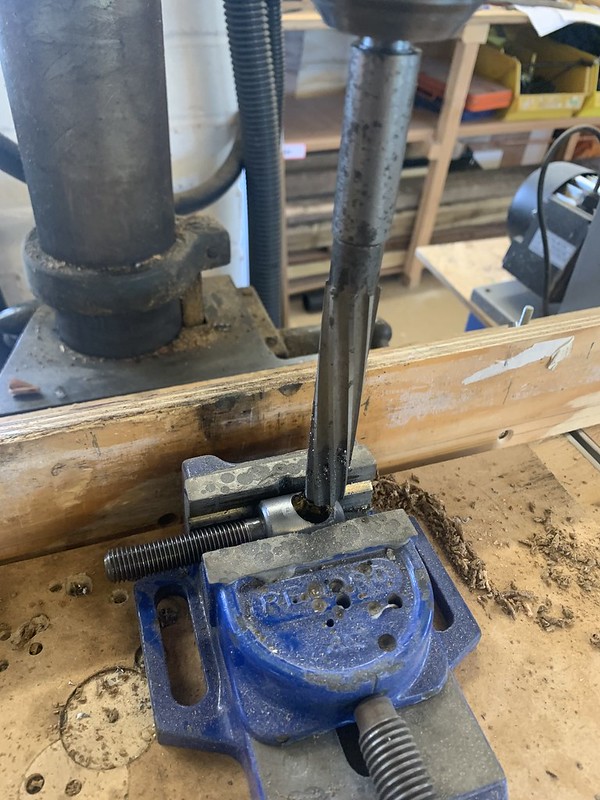
No drill the right size but a reamer... Bit of a hack but it worked well enough...
 Multico planer 2 by jamie skinner, on Flickr
 Multico planer 2 by jamie skinner, on Flickr
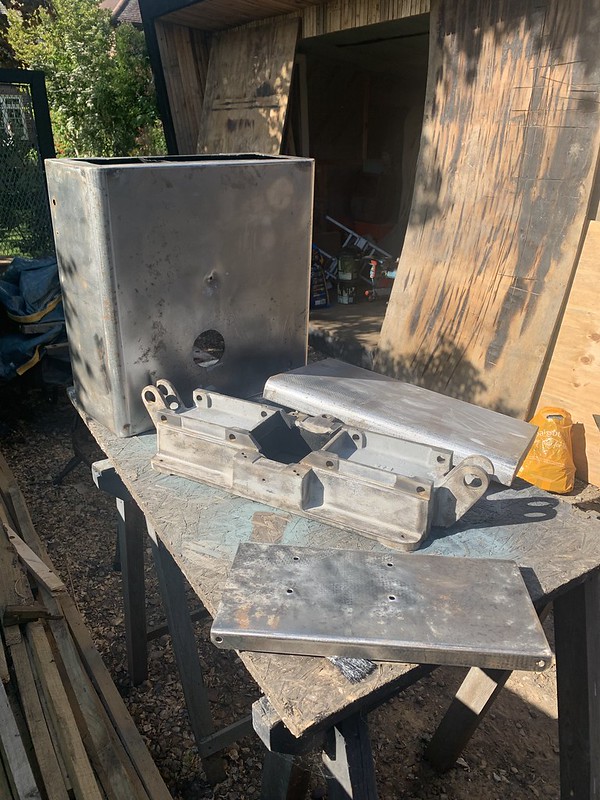
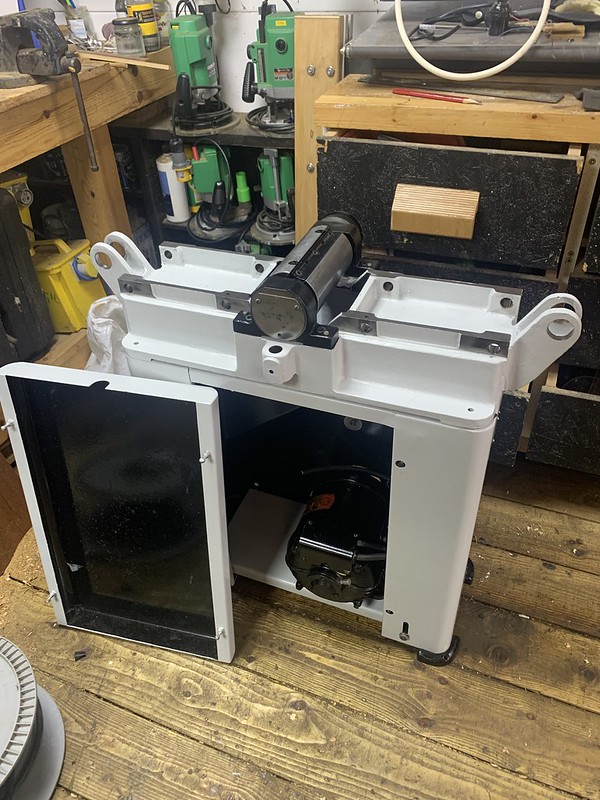
Getting the main part back together.
 Multico planer 2 by jamie skinner, on Flickr
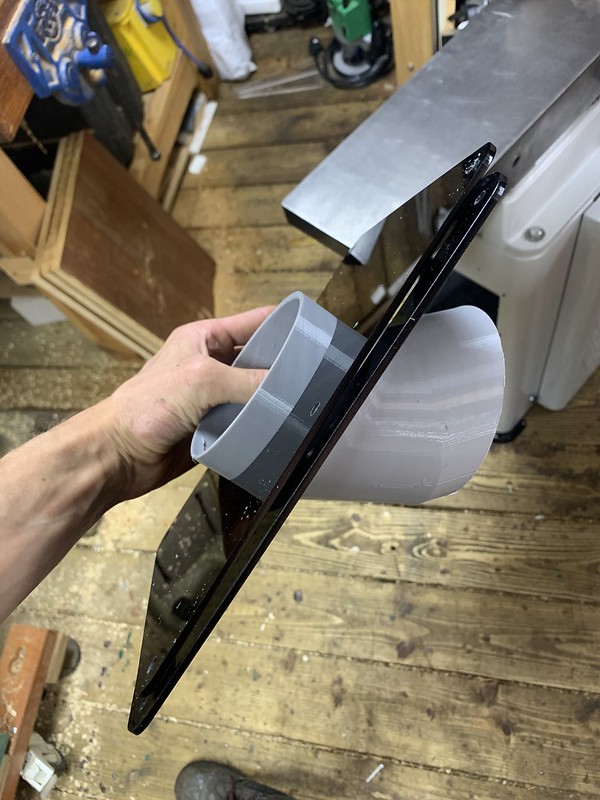
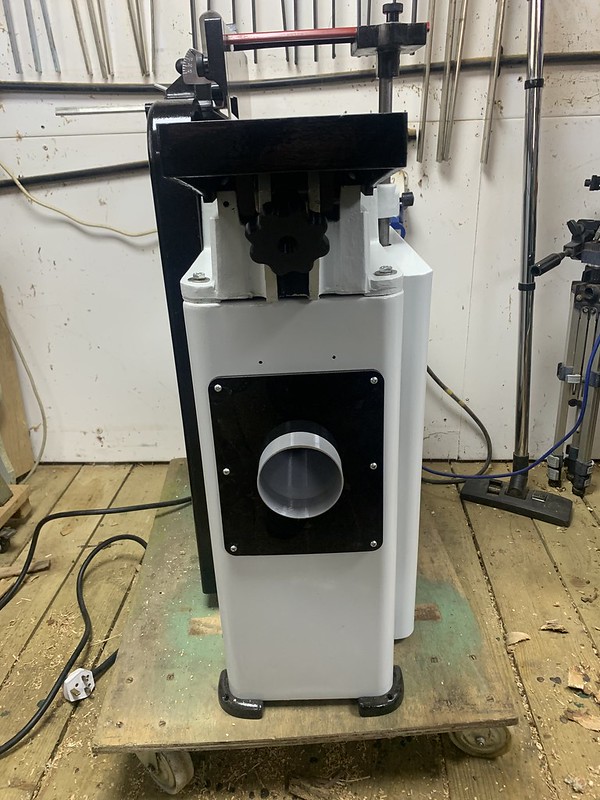
3d printed funnel in place for the extract upgrade. Magnets worked well while it was glueing in.
 Multico planer 2 by jamie skinner, on Flickr
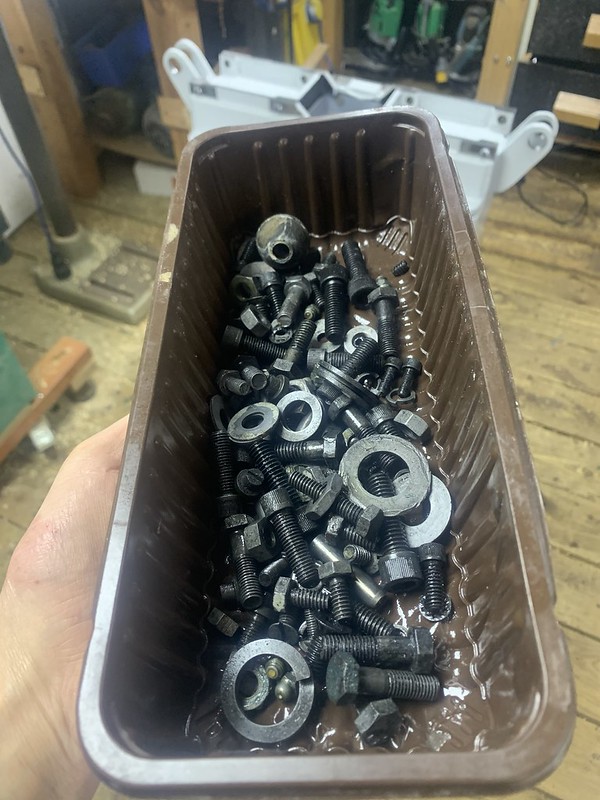
Lots of nuts and bolts de greased.
 Multico planer 2 by jamie skinner, on Flickr
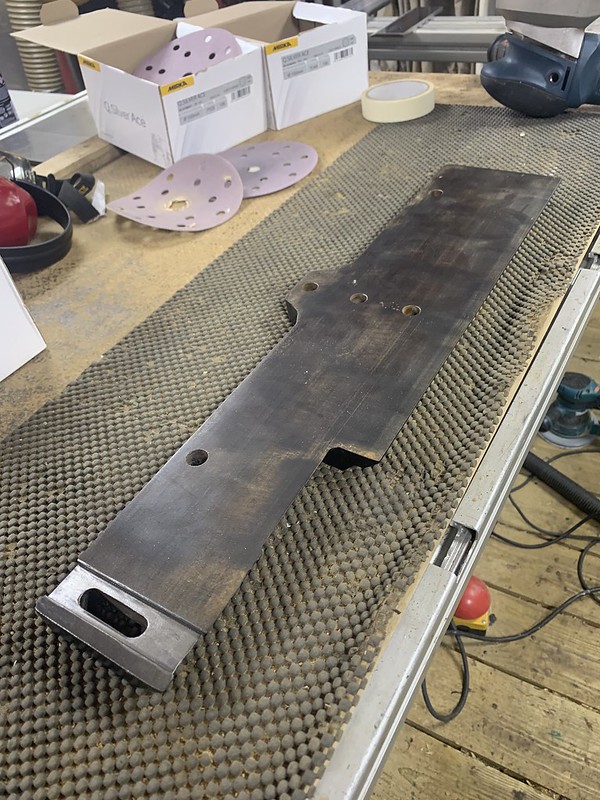
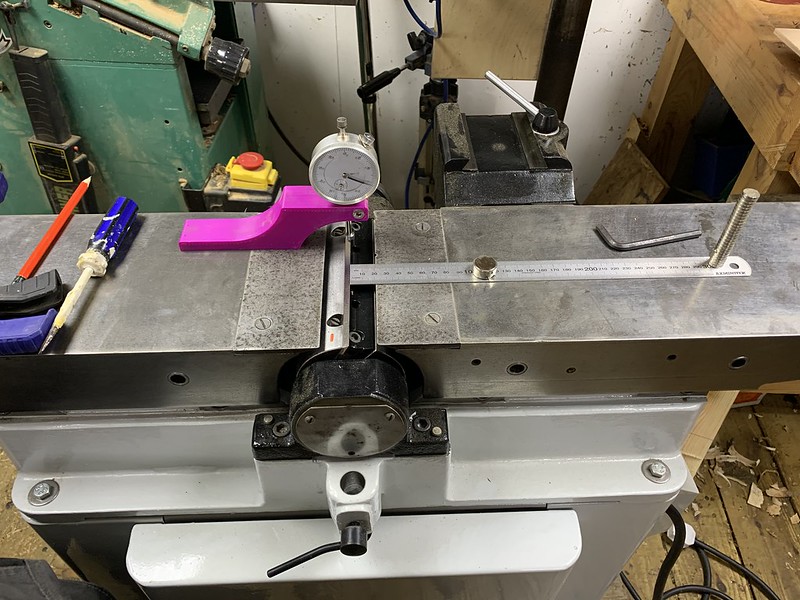
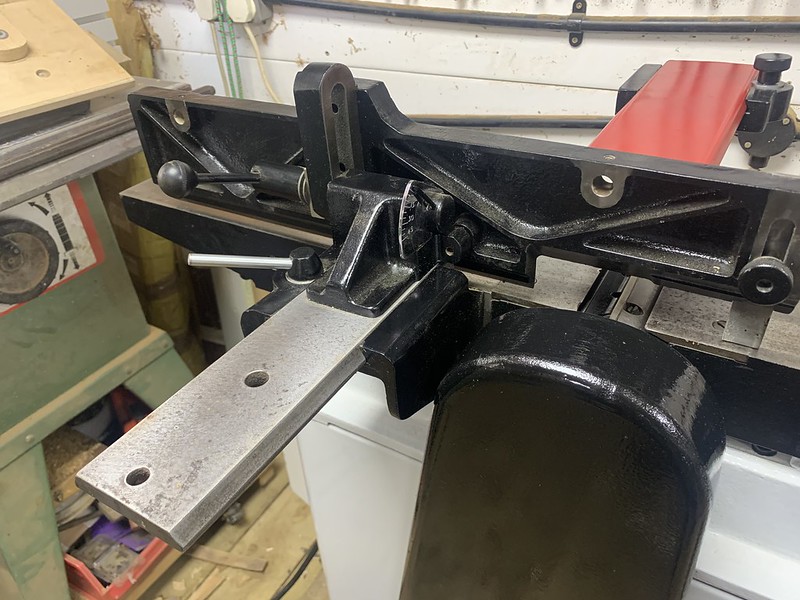
Fence polished up.
 Multico planer 2 by jamie skinner, on Flickr
 Multico planer 2 by jamie skinner, on Flickr
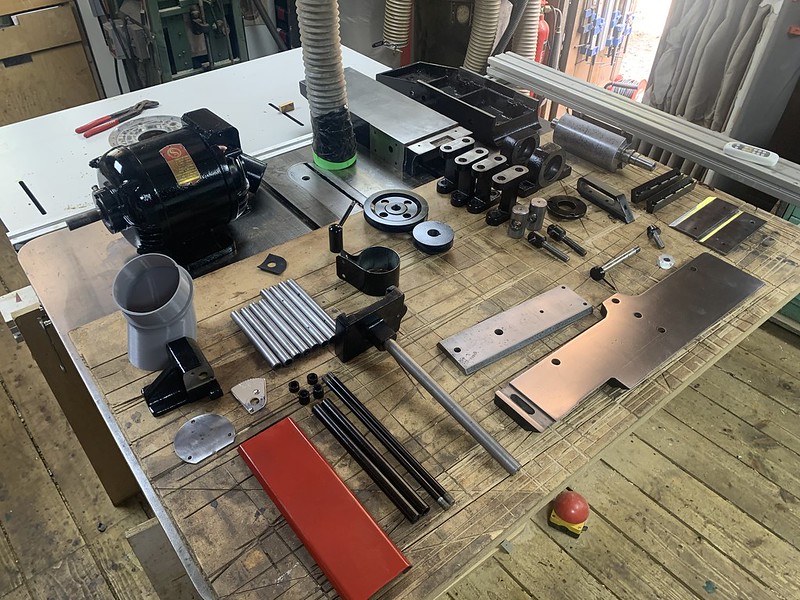
Most of the parts ready to come together.
 Multico planer 2 by jamie skinner, on Flickr
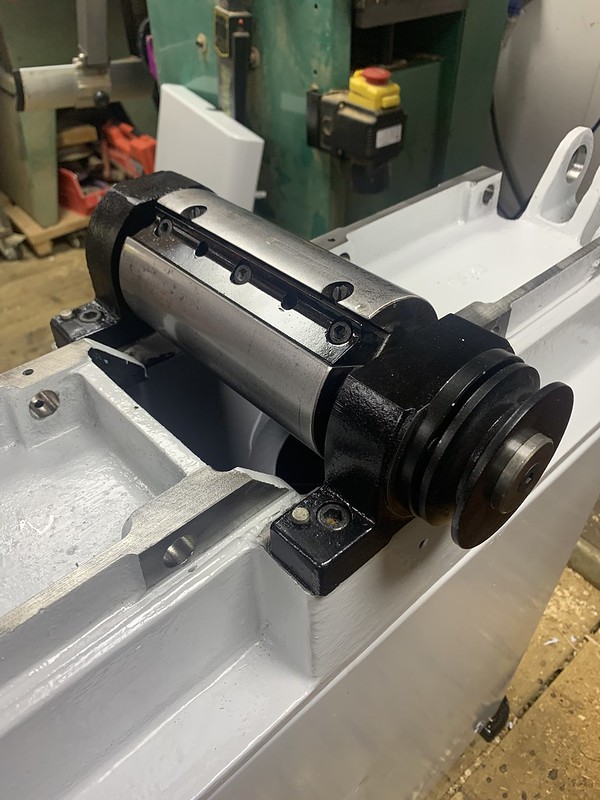
Cutter block cleaned up and greased.
 Multico planer 2 by jamie skinner, on Flickr
More assembly.
 Multico planer 2 by jamie skinner, on Flickr
 Multico planer 2 by jamie skinner, on Flickr
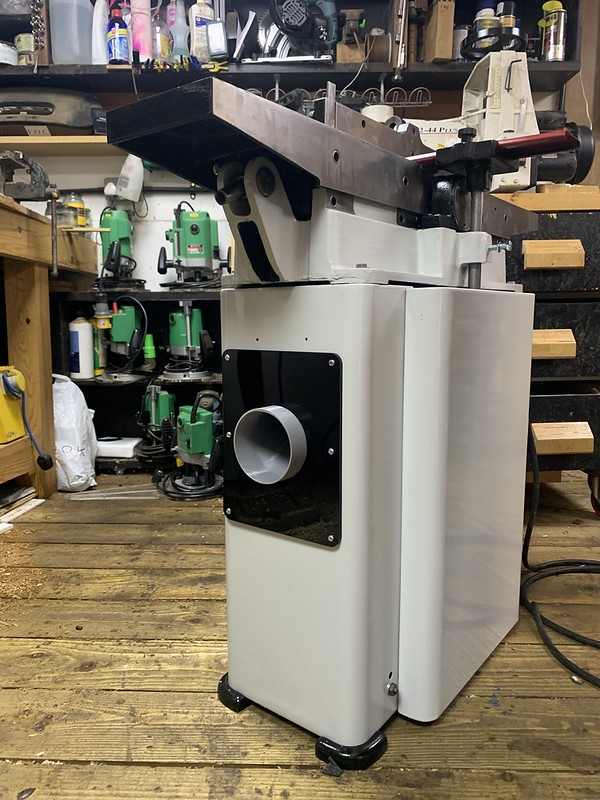
Lower dust shoot made on laser cutter and 3d printer.
 Multico planer 2 by jamie skinner, on Flickr
 Multico planer 2 by jamie skinner, on Flickr
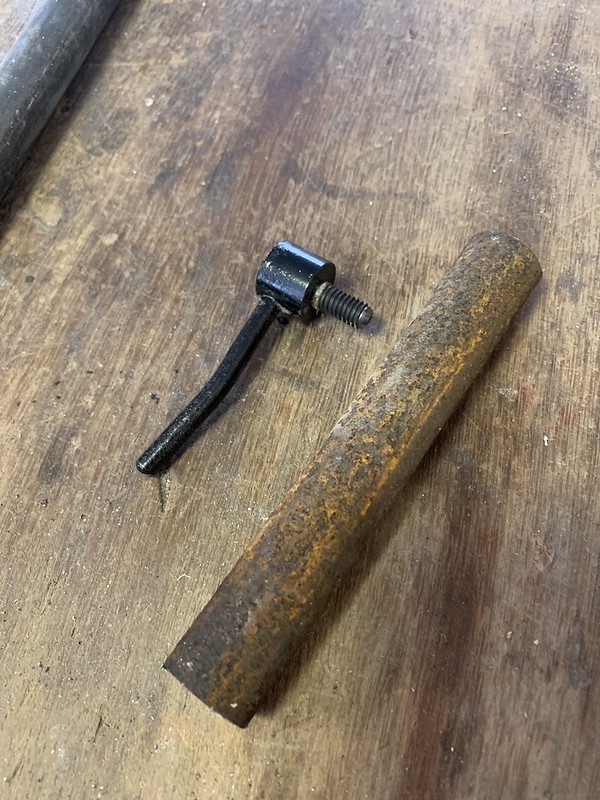
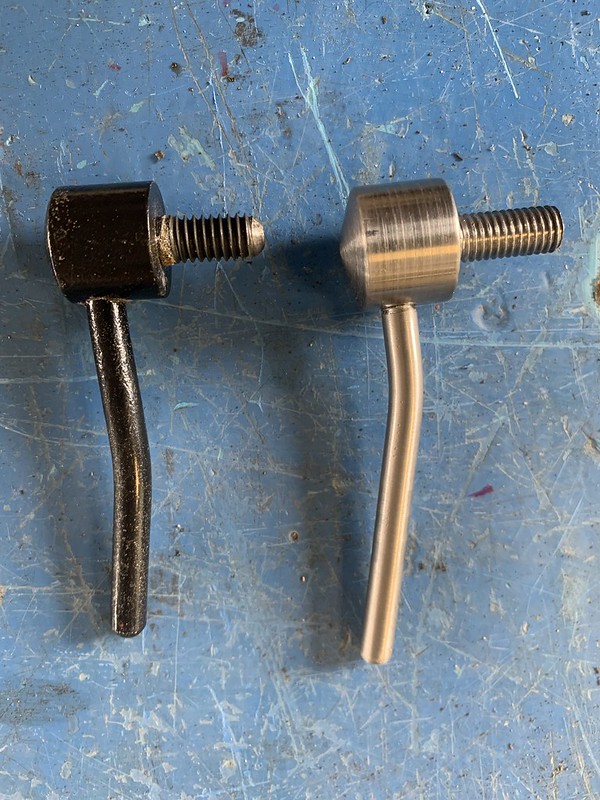
The aluminium handles were damaged quite badly, lots of flaky plastic and I had to drill them to get them off. So I printed some new ones around a metal core.
 Multico planer 2 by jamie skinner, on Flickr
Replaced some handle parts.
 Multico planer 2 by jamie skinner, on Flickr
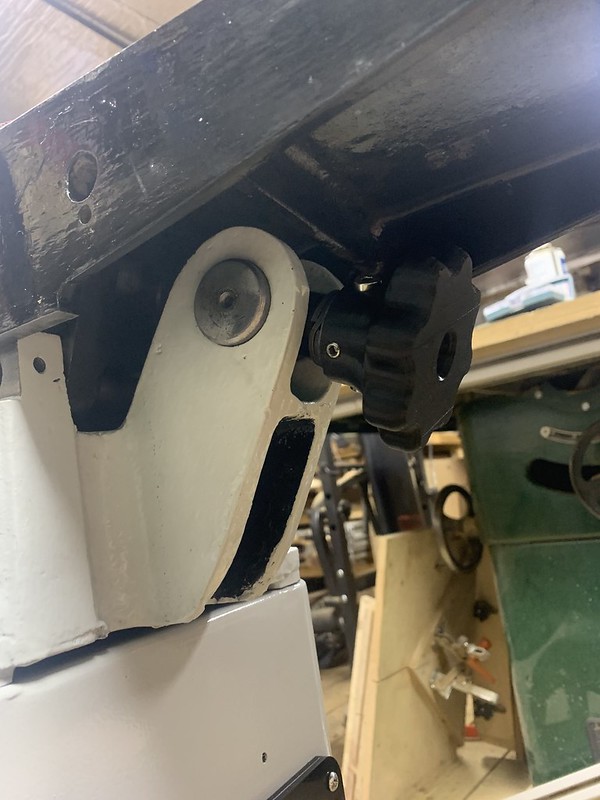
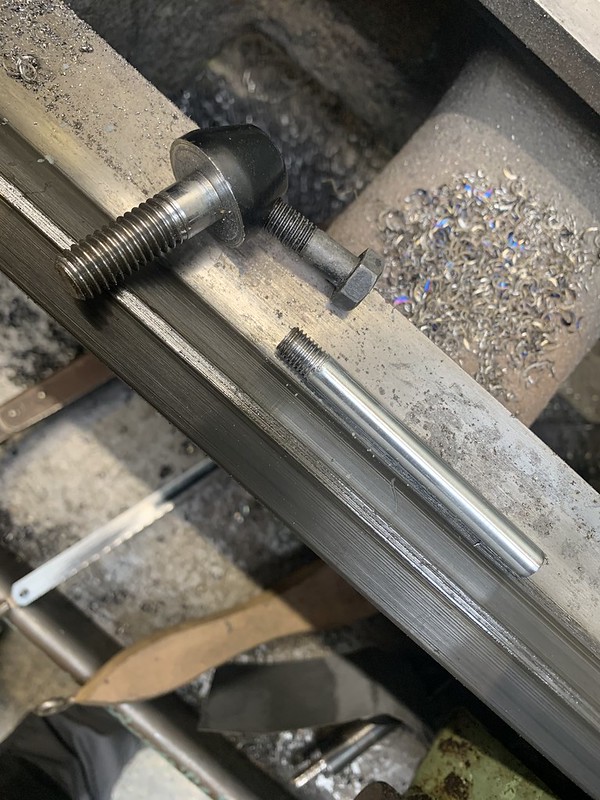
This knob was missing. Its from the part that holds the guard up and down. I have one on another machine so copied that.
 Multico planer 2 by jamie skinner, on Flickr
 Multico planer 2 by jamie skinner, on Flickr
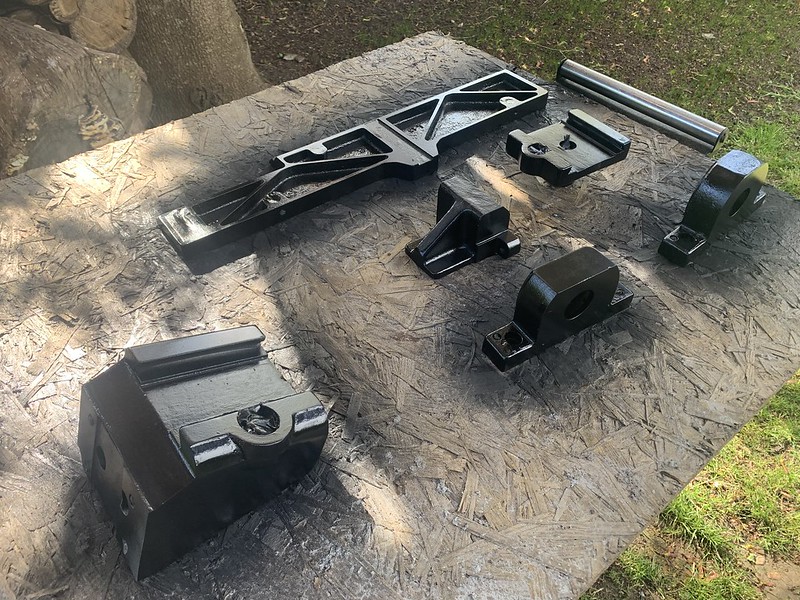
Lil bit of oil blackening. Maybe should have finished the surf a little better looking at that photo.
 Multico planer 2 by jamie skinner, on Flickr
 Multico planer 2 by jamie skinner, on Flickr
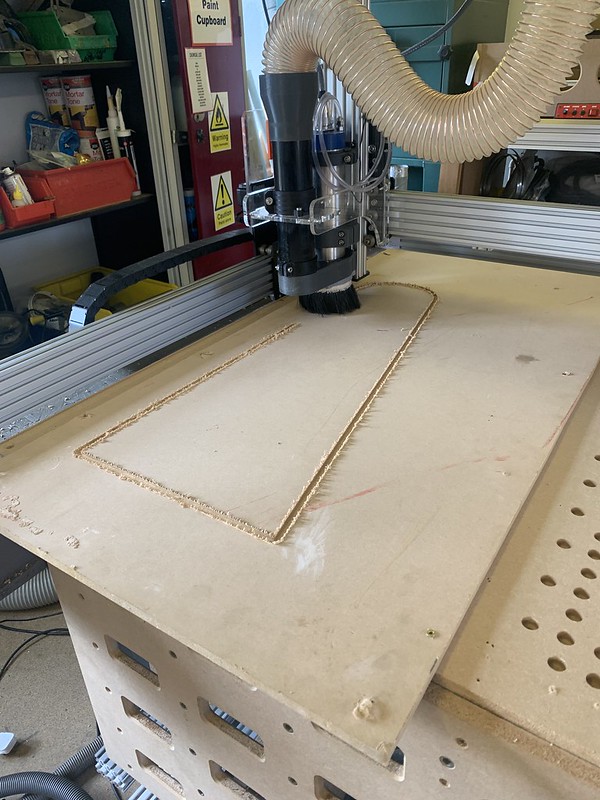
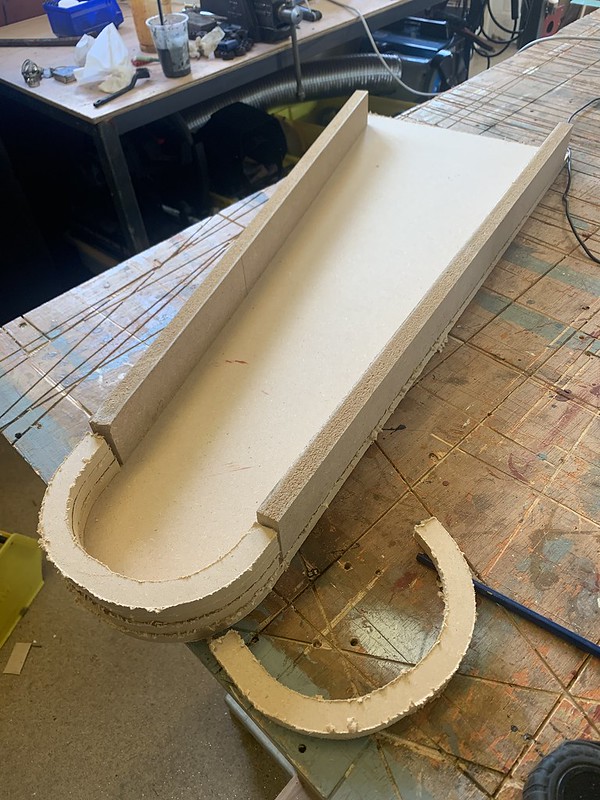
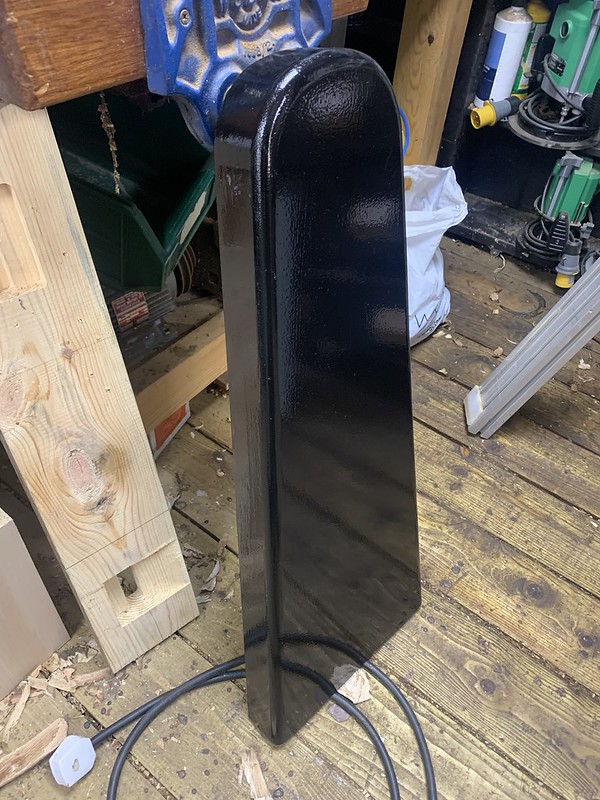
Next to tackle the missing belt guard. I used my new cnc to cut the parts from Mdf.
 Multico planer 2 by jamie skinner, on Flickr
Nice the fluffy edges due to using an up cut bit...
 Multico planer 2 by jamie skinner, on Flickr
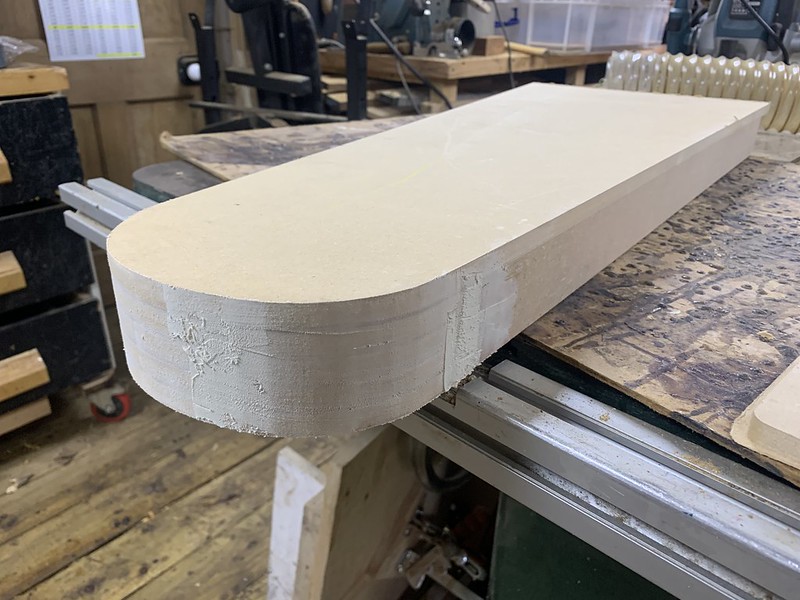
Bit of bodge.
 Multico planer 2 by jamie skinner, on Flickr
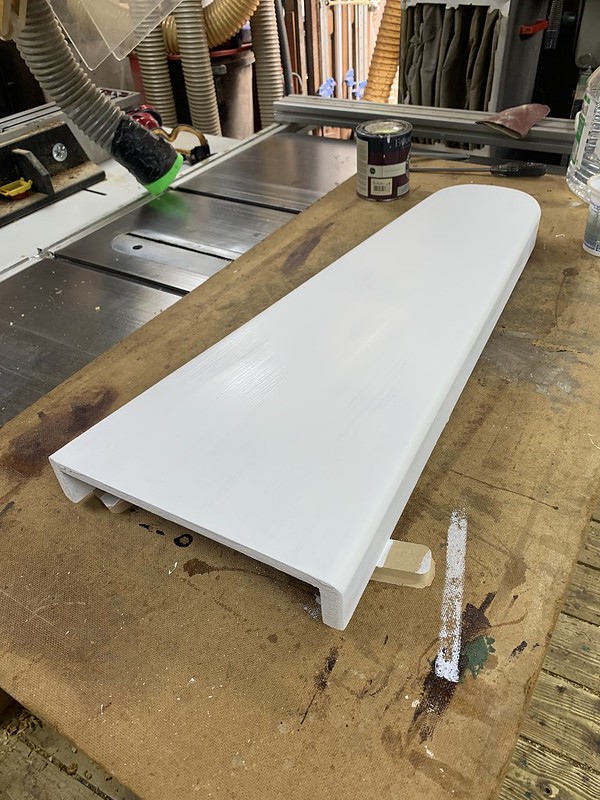
Undercoated.
 Multico planer 2 by jamie skinner, on Flickr
While I waited for that I set the knives after sharpening them on my homemade sharpener.
drum-sander-planer-blade-sharpening-jig-t110129.html
Got them within a thou of each other. Glass like finish when I planed up some oak afterwards.
 Multico planer 2 by jamie skinner, on Flickr
Coat of black on the guard.
 Multico planer 2 by jamie skinner, on Flickr
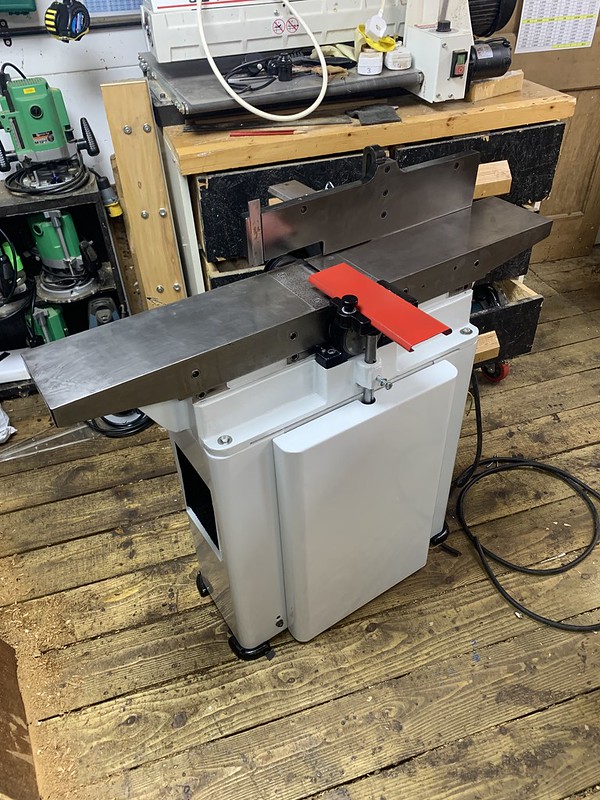
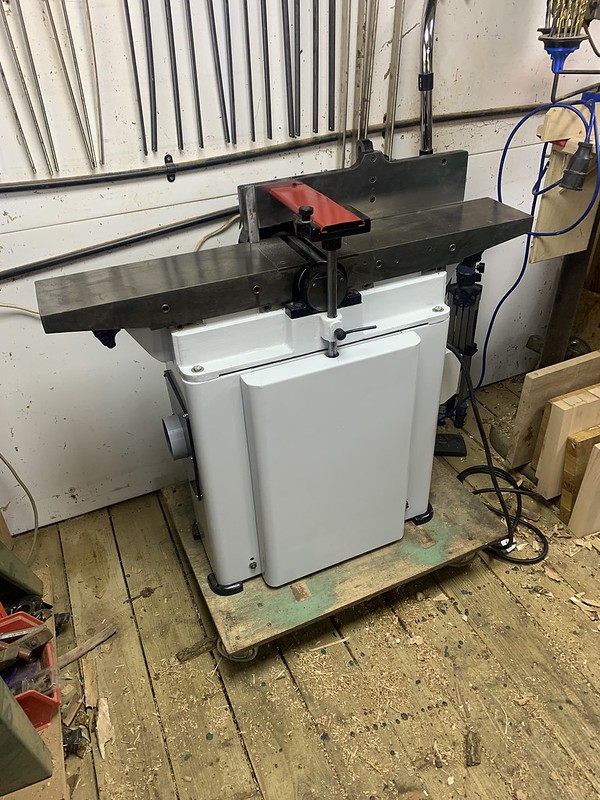
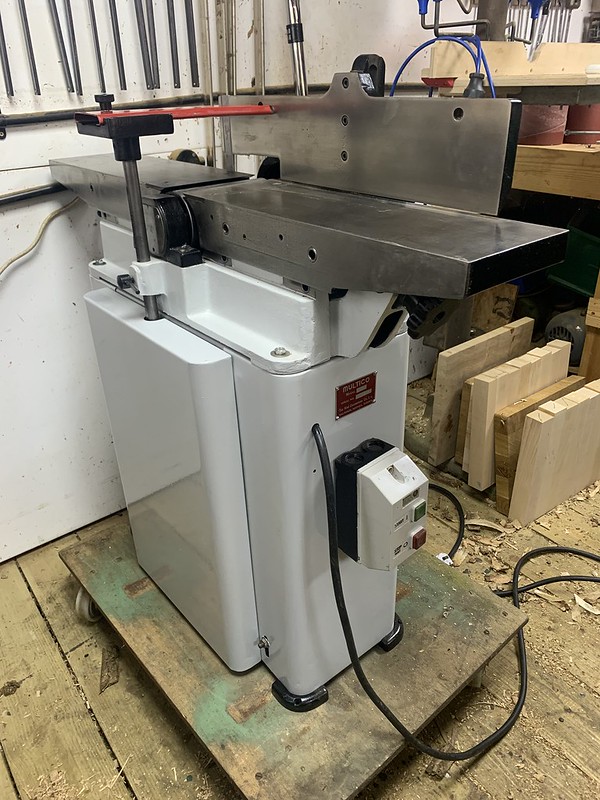
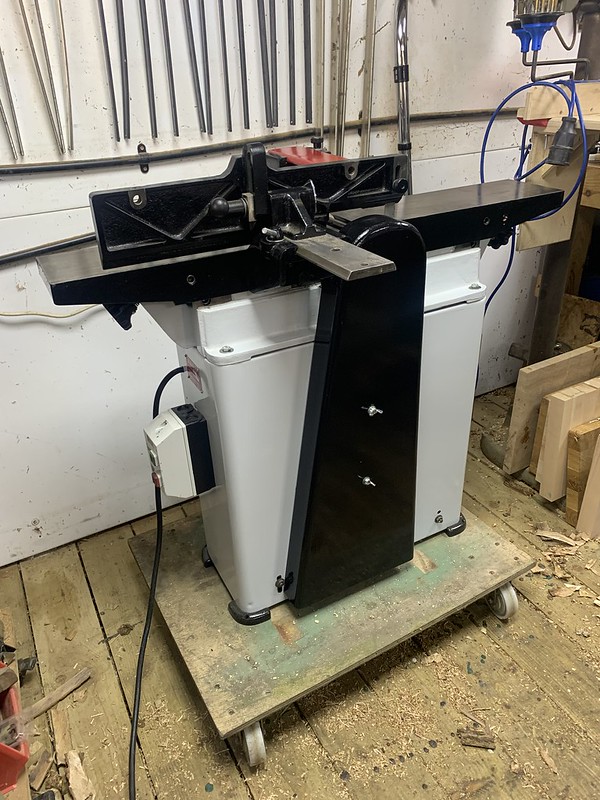
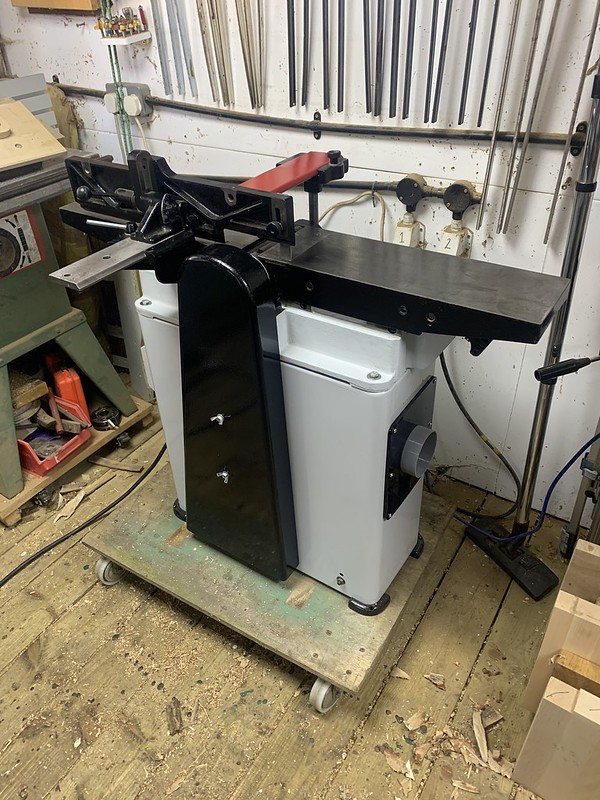
And we are done!
 Multico planer 2 by jamie skinner, on Flickr
 Multico planer 2 by jamie skinner, on Flickr
 Multico planer 2 by jamie skinner, on Flickr
 Multico planer 2 by jamie skinner, on Flickr
 Multico planer 2 by jamie skinner, on Flickr
 Multico planer 2 by jamie skinner, on Flickr
 Multico planer 2 by jamie skinner, on Flickr
Thanks for reading!
This is the original thread for the first one I rebuilt. Im only really going to include anything that was a little different this time around.
multico-b2-planer-restoration-t113265.html
So here is what I got. Looks to be in good shape, few knobs missing here and there and the belt guard missing. So those will need to be replaced.
Multico planer 2 by jamie skinner, on Flickr
Multico planer 2 by jamie skinner, on FlickrThe Fence is different from he previous one I did up. This one uses a dovetailed bar whereas the other used a round bar for the fence adjustment. This design is much nicer as the table cannot rotate left or right.
Multico planer 2 by jamie skinner, on FlickrNot sure if this is original... Maybe support for bolting to wall?
When I took it off it was well made on and had a pin to stop it from rotating when bolted from under the table. Then it was very badly welded on...
Multico planer 2 by jamie skinner, on FlickrPerhaps they were lacking a pulley puller? I can only imagine the pulley was stuck on and in the wrong place so this was considered a quick fix. Someone decided to weld a pulley right onto the motor shaft...
Multico planer 2 by jamie skinner, on Flickr
Multico planer 2 by jamie skinner, on FlickrStarting to break it down. Bearings came out easily.
Multico planer 2 by jamie skinner, on Flickr
Multico planer 2 by jamie skinner, on FlickrThis is the metal bar attached to back of the machine I mentioned earlier.
Multico planer 2 by jamie skinner, on FlickrA member had asked how to get these pins out so here is how I think I remember I did it...
Remove the grub screws holding the lower 4 pins in to the main casting of the planer and soak with penetrant.
I think 4 grub screws are under the casting and 2 are at each end.
Remove grease nipples from pins and give a good spray of penetrant in there to.
Using a hammer and a long blunt ended rod tap each pin out. Careful not to damage the threads in the pins and not to dome over the ends.
Once those 4 lower 4 pins are out the table should lift off, oh you need to remove the handles too. they have pins in and are very hard to get out. I drilled them in the end.
The next 4 pins have grub screws under the table, again soak the whole pin in penetrant.
Tap the pins out as before.
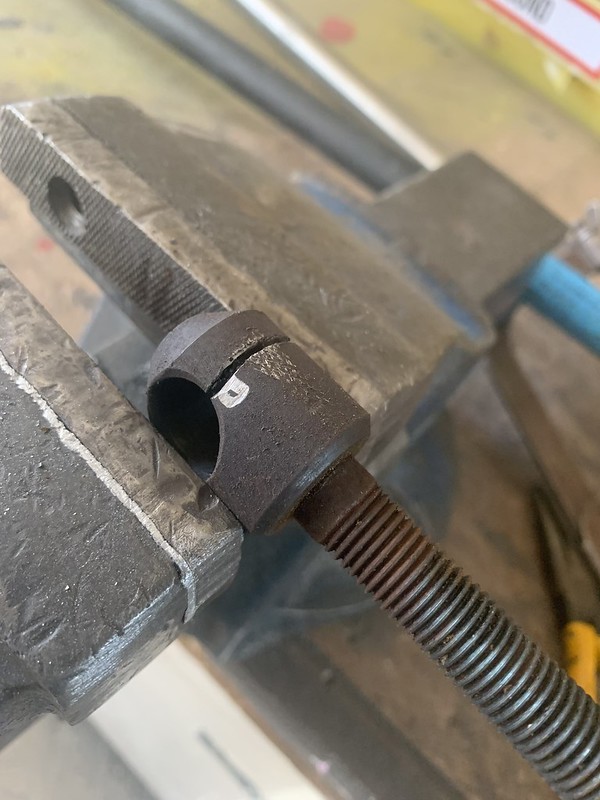
I managed to get all the pins out except this one. The threaded part you see wrapped around the pin was so tight it would not budge. I tried penetrant, heating, big hammer to no avail.
Multico planer 2 by jamie skinner, on FlickrSo went with the Dremel grinder instead and carefully slit it open.
Multico planer 2 by jamie skinner, on FlickrYou can see where I bent the thread too... Fix that later.
Multico planer 2 by jamie skinner, on FlickrTo tackle the extra pulley I resorted to running the motor and holding the angle grinder to it until I could see the shaft.
Multico planer 2 by jamie skinner, on Flickr
Multico planer 2 by jamie skinner, on FlickrPulled off easy.
Multico planer 2 by jamie skinner, on FlickrThought I was going to have real trouble with the original pulley put pulled off nice and easy.
Multico planer 2 by jamie skinner, on FlickrBearings cleaned up, little grease and seem to run well.
Multico planer 2 by jamie skinner, on FlickrPaint removed.
Multico planer 2 by jamie skinner, on FlickrGoing for a black and white look for this planer. I did a air cleaner a while back and though the combo went well.
animal-cooler-to-air-filter-wip-t119698.html
IMG_6093 by jamie skinner, on FlickrMasked, primed, sprayed and top coat.
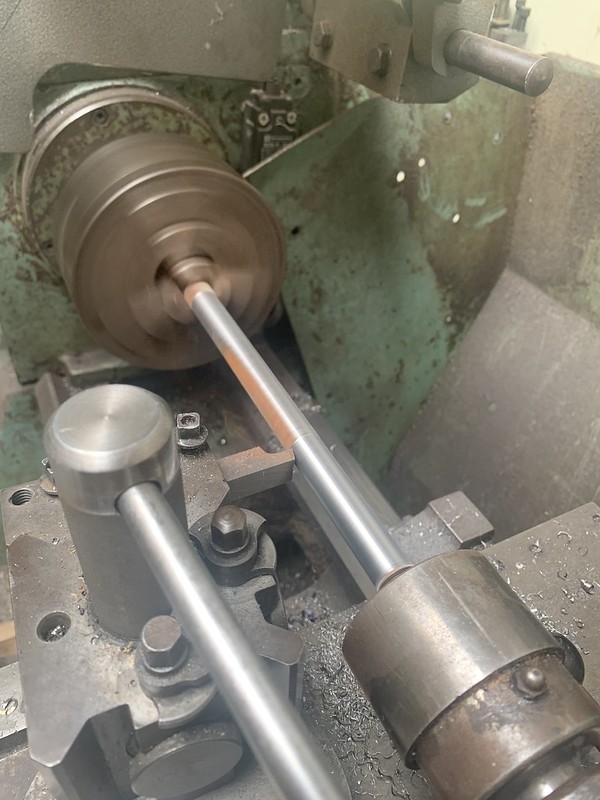
Multico planer 2 by jamie skinner, on FlickrSome parts which weren't dimensionally critical like the motor pivots I cleaned up on the lathe as they were rusted heavily. Also took out the slight bend it had.
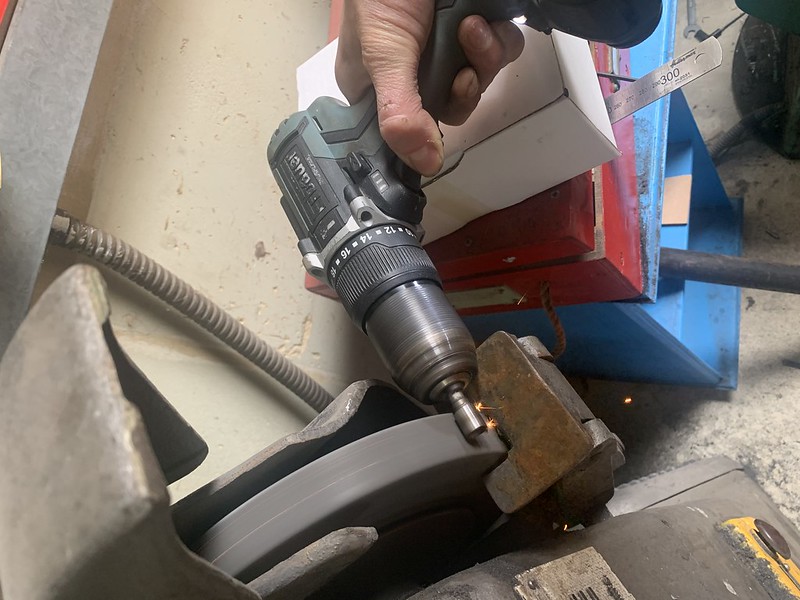
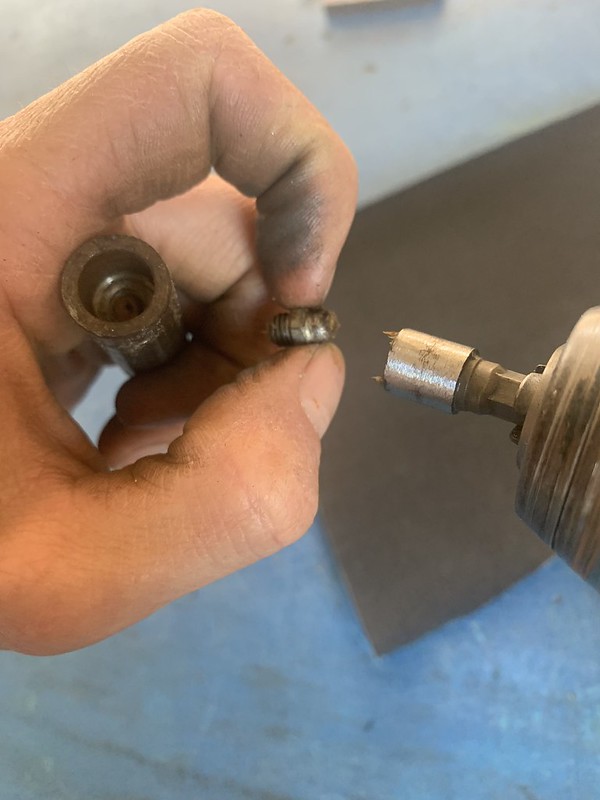
Multico planer 2 by jamie skinner, on FlickrSomething didn't show earlier... To remove the grease nipples deep inside the pins that hold the table on I ground down a driver bit of the correct size to fit it inside and remove the nipple.
Multico planer 2 by jamie skinner, on Flickr
Multico planer 2 by jamie skinner, on FlickrTime to tackle the piece I had to cut off.
Multico planer 2 by jamie skinner, on FlickrI am going to try brazing at this point I have never touched a welder. (I now have and that would have probably been easier.) Ground down the two sides. I think I should have had some kind of dam in there to stop the braze falling through. Had to deal with he clean up afterwards.
Multico planer 2 by jamie skinner, on Flickr
Multico planer 2 by jamie skinner, on FlickrTurned on the lathe, you can see the braze right where I didn't want it to go. Should be enough to hold it together at least.
Multico planer 2 by jamie skinner, on FlickrNo drill the right size but a reamer... Bit of a hack but it worked well enough...
Multico planer 2 by jamie skinner, on Flickr
Multico planer 2 by jamie skinner, on FlickrGetting the main part back together.
Multico planer 2 by jamie skinner, on Flickr3d printed funnel in place for the extract upgrade. Magnets worked well while it was glueing in.
Multico planer 2 by jamie skinner, on FlickrLots of nuts and bolts de greased.
Multico planer 2 by jamie skinner, on FlickrFence polished up.
Multico planer 2 by jamie skinner, on Flickr
Multico planer 2 by jamie skinner, on FlickrMost of the parts ready to come together.
Multico planer 2 by jamie skinner, on FlickrCutter block cleaned up and greased.
Multico planer 2 by jamie skinner, on FlickrMore assembly.
Multico planer 2 by jamie skinner, on Flickr
Multico planer 2 by jamie skinner, on FlickrLower dust shoot made on laser cutter and 3d printer.
Multico planer 2 by jamie skinner, on Flickr
Multico planer 2 by jamie skinner, on FlickrThe aluminium handles were damaged quite badly, lots of flaky plastic and I had to drill them to get them off. So I printed some new ones around a metal core.
Multico planer 2 by jamie skinner, on FlickrReplaced some handle parts.
Multico planer 2 by jamie skinner, on FlickrThis knob was missing. Its from the part that holds the guard up and down. I have one on another machine so copied that.
Multico planer 2 by jamie skinner, on Flickr
Multico planer 2 by jamie skinner, on FlickrLil bit of oil blackening. Maybe should have finished the surf a little better looking at that photo.
Multico planer 2 by jamie skinner, on Flickr
Multico planer 2 by jamie skinner, on FlickrNext to tackle the missing belt guard. I used my new cnc to cut the parts from Mdf.
Multico planer 2 by jamie skinner, on FlickrNice the fluffy edges due to using an up cut bit...
Multico planer 2 by jamie skinner, on FlickrBit of bodge.
Multico planer 2 by jamie skinner, on FlickrUndercoated.
Multico planer 2 by jamie skinner, on FlickrWhile I waited for that I set the knives after sharpening them on my homemade sharpener.
drum-sander-planer-blade-sharpening-jig-t110129.html
Got them within a thou of each other. Glass like finish when I planed up some oak afterwards.
Multico planer 2 by jamie skinner, on FlickrCoat of black on the guard.
Multico planer 2 by jamie skinner, on FlickrAnd we are done!
Multico planer 2 by jamie skinner, on Flickr
Multico planer 2 by jamie skinner, on Flickr
Multico planer 2 by jamie skinner, on Flickr
Multico planer 2 by jamie skinner, on Flickr
Multico planer 2 by jamie skinner, on Flickr
Multico planer 2 by jamie skinner, on Flickr
Multico planer 2 by jamie skinner, on FlickrThanks for reading!