jimi43
Established Member
I have long since admired the old cutting gauges....the ones with the brass wedge parallel to the cutter...simple brass face and hardwood back with a brass shaft.
With this in mind I decided to design one with a slightly more modern look but with all the best features of the tried and tested version.
So here are the prototypes...the first I always keep and the second, Douglas (condeesteso) has ordered and has offered to review shortly.
So here they are....
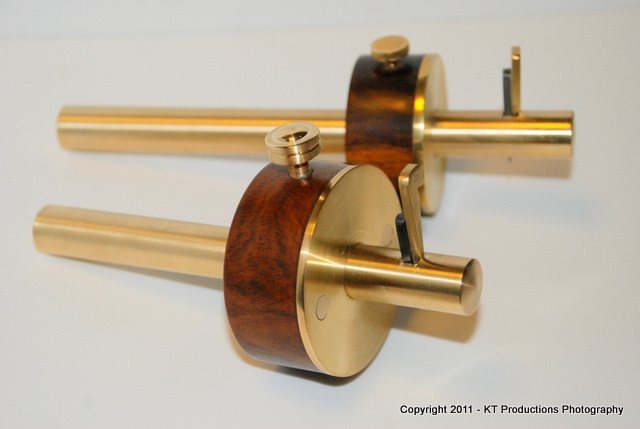
The hardwood is...yes you guessed it...lignum vitae. This is a wonderful choice for the back since it is extremely hard-wearing and self lubricating so it slides beautifully without binding whilst allowing close tolerance machining. This minimises slop in the movement now...and in the future.
The brass elements are CZ121 high quality stock, the face being epoxied to the back and also studs are also sunk deep into the wood for added strength and to further prevent parting of the two. The cutter is 01 tool steel, tip hardened and then ground and honed.
Douglas has ordered a slightly shorter shaft...radius ends to the shaft to prevent dents to the bench on micro adjustment tapping and a custom thumbscrew.
Short and long shaft:
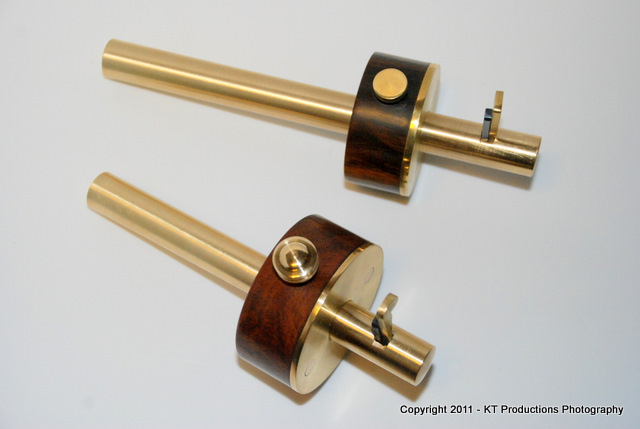
The slight radius is clearer in this shot...
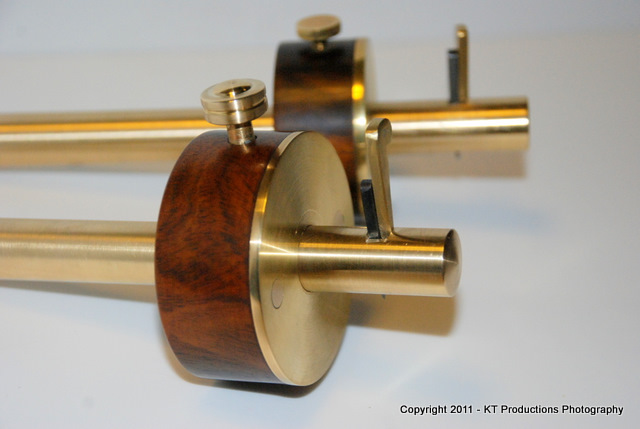
As you can see...the wedge is solid brass...and fits parallel to the cutter....
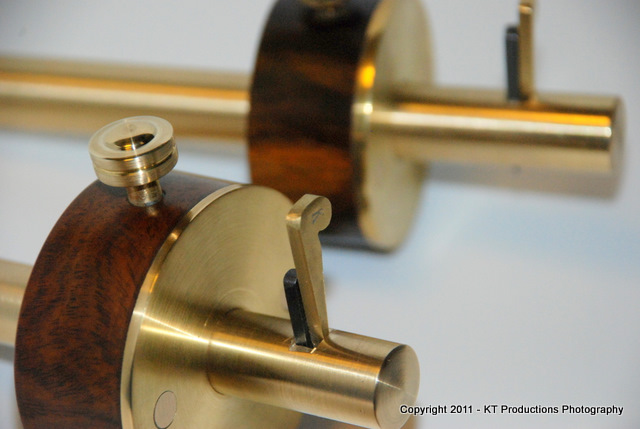
...which is hardened at the cutting edge...double bevelled on one side only and positioned with the flat on the face side to give a more accurate reference edge.
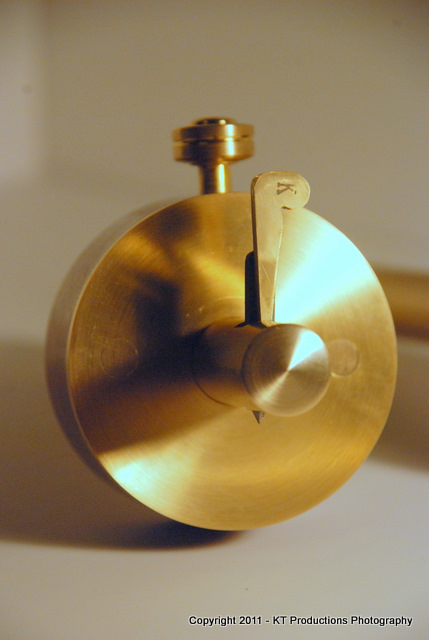
Internally is a captive nut...the brass thumbscrew cap is brazed to a steel threaded rod for strength and longevity and a soft brass insert is fitted between the end of the screw and the shaft mating surface to reduce damage to the latter.
I have also been playing around with Corian off-cuts and made a presentation case for the original....
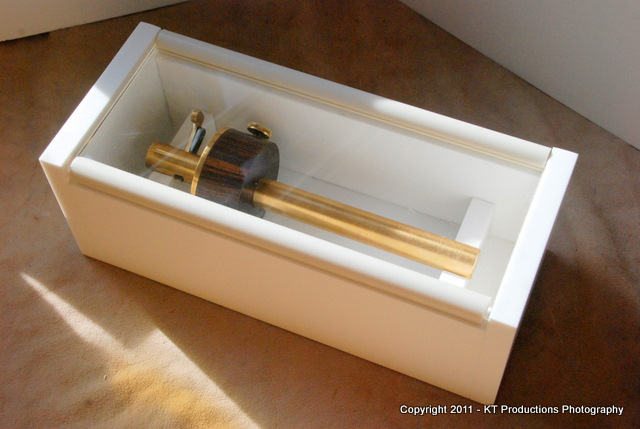
I really like that stuff...it is so versatile and now that I have solved the monomer welding technique....it is strong too!
I think I have a few refinements to make and short production once I have worked out viability but for now...another prototype in the KT Tools range.
Cheers guys and gals
Jim
With this in mind I decided to design one with a slightly more modern look but with all the best features of the tried and tested version.
So here are the prototypes...the first I always keep and the second, Douglas (condeesteso) has ordered and has offered to review shortly.
So here they are....

The hardwood is...yes you guessed it...lignum vitae. This is a wonderful choice for the back since it is extremely hard-wearing and self lubricating so it slides beautifully without binding whilst allowing close tolerance machining. This minimises slop in the movement now...and in the future.
The brass elements are CZ121 high quality stock, the face being epoxied to the back and also studs are also sunk deep into the wood for added strength and to further prevent parting of the two. The cutter is 01 tool steel, tip hardened and then ground and honed.
Douglas has ordered a slightly shorter shaft...radius ends to the shaft to prevent dents to the bench on micro adjustment tapping and a custom thumbscrew.
Short and long shaft:

The slight radius is clearer in this shot...

As you can see...the wedge is solid brass...and fits parallel to the cutter....

...which is hardened at the cutting edge...double bevelled on one side only and positioned with the flat on the face side to give a more accurate reference edge.

Internally is a captive nut...the brass thumbscrew cap is brazed to a steel threaded rod for strength and longevity and a soft brass insert is fitted between the end of the screw and the shaft mating surface to reduce damage to the latter.
I have also been playing around with Corian off-cuts and made a presentation case for the original....

I really like that stuff...it is so versatile and now that I have solved the monomer welding technique....it is strong too!
I think I have a few refinements to make and short production once I have worked out viability but for now...another prototype in the KT Tools range.
Cheers guys and gals
Jim


