You are using an out of date browser. It may not display this or other websites correctly.
You should upgrade or use an alternative browser.
You should upgrade or use an alternative browser.
laptop and console stand
- Thread starter devonwoody
- Start date

Help Support UKworkshop.co.uk:
This site may earn a commission from merchant affiliate
links, including eBay, Amazon, and others.
devonwoody
Established Member
Yes you are right, why give myself the stress, make it a square rebate and alter the drawings. :wink:
9fingers
Established Member
If you want to use the angled rebate, then why not angle the TS blade and cut all angled components at this setting either running the workpiece on the table or against the fence as necessary.
Bob
Bob
devonwoody
Established Member
Cut out the final bit of maple (for contrast in table top) now can put lumps of timber away and start carpentry.
Decided to make my own tenon jig using my sled.
Set the blade depth on a piece of waste timber to 1/4" by trial an error.
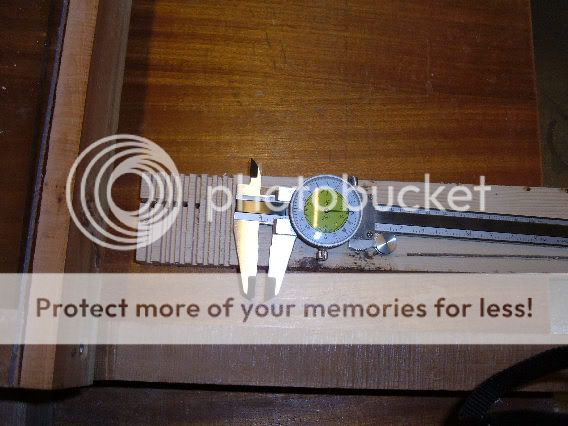
Screwed down a stop block on to my sled table to set shoulder tenon cut for all rail pieces. Then cut shoulders of end rails. After cutting shoulders on all pieces I then did the Triton tenon trick, kept running the tenon tongue across the blade on the sled until I had created the joint.
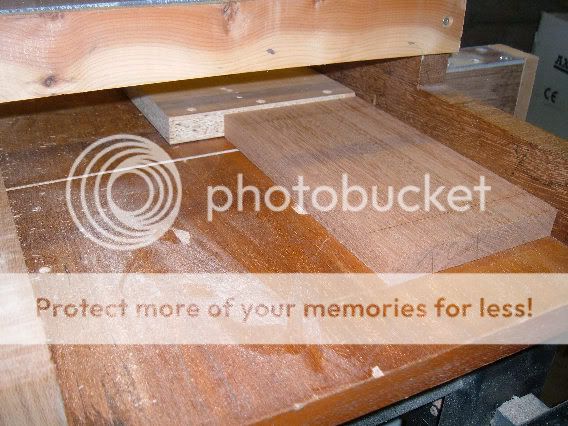

Tenon of end rail completed and cleaned up also marked out for tenon tongues.
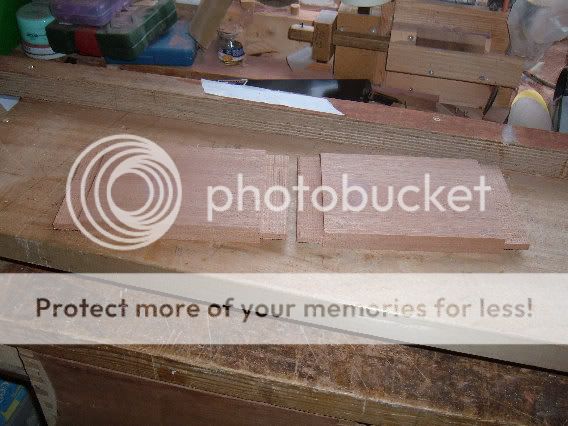
That end rail definitely has an angled rebate, if you look at the plan drawing above at the bottom lefthand corner of drawer profile an angle can be seen at bottom of rail. Will decide at a later date what to do there.
The job will now have to be left a few days, house duties pending.

Decided to make my own tenon jig using my sled.
Set the blade depth on a piece of waste timber to 1/4" by trial an error.

Screwed down a stop block on to my sled table to set shoulder tenon cut for all rail pieces. Then cut shoulders of end rails. After cutting shoulders on all pieces I then did the Triton tenon trick, kept running the tenon tongue across the blade on the sled until I had created the joint.


Tenon of end rail completed and cleaned up also marked out for tenon tongues.

That end rail definitely has an angled rebate, if you look at the plan drawing above at the bottom lefthand corner of drawer profile an angle can be seen at bottom of rail. Will decide at a later date what to do there.
The job will now have to be left a few days, house duties pending.
devonwoody
Established Member
Had a bit of luck, able to do a couple of hours today because my hospital appointment went well. Seen ten minutes earlier than appointment time and then given a clean bill of health. However I do have another appointment for a participant vascular program/experiment coming up.
So machined the balance of rail tenons on the sled and worked the tenon shapes on one piece.
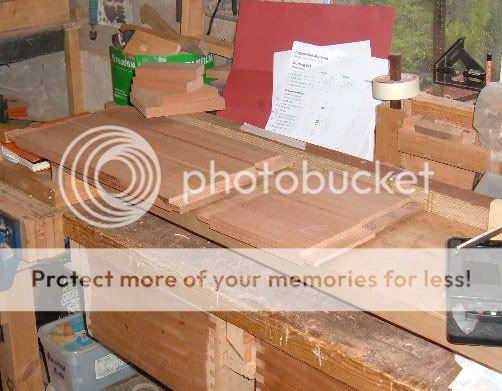
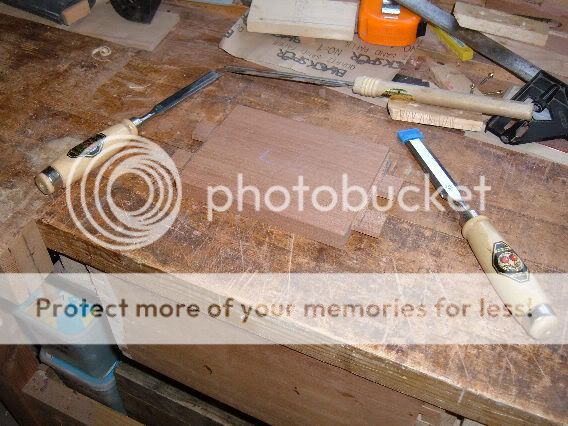
So machined the balance of rail tenons on the sled and worked the tenon shapes on one piece.


devonwoody
Established Member
Oh dear, oh dear, oh dear. Is it time to hang up my tools.
I have cut the front top and bottom rail shoulders as tenons and they shouldn't be.

Done a quick run round and I can supply new pieces with some fiddling and without doing machine jobs.
Why didn't you tell me?
I have cut the front top and bottom rail shoulders as tenons and they shouldn't be.

Done a quick run round and I can supply new pieces with some fiddling and without doing machine jobs.
Why didn't you tell me?

£12.50 (£1.25 / count)
£14.45 (£1.44 / count)
JSP M632 FFP3moulded Disposable Dustmask (Box of 10) One Size suitable for Construction, DIY, Industrial, Sanding, dust protection 99 Percent particle filtration Conforms and Complies to EN 149
Amazon.co.uk

£13.99 (£2.80 / count)
VEVOX® FFP1 Dust Mask - Set of 5 - Valved Face Masks - Respirator - Protection e.g. for Construction, Building Work, Sanding, Woodworking, Fine Dusts, Aersoles or Particles
SLSK Ventures GmbH (UK)

£96.56
£101.95
O'SKOOL Mortise and Tenon Jig is Ideal for cabinets, Chairs, and Table Construction Using a Plunge Router
Amazon US

£17.99 (£1.80 / count)
£27.44 (£2.74 / count)
3M 8822 Disposable-fine dust mask FFP2 (10-pack)
Amazon.co.uk
Ironballs
Established Member
Ah... the ones that should be dovetails. Easy to get carried away in the early stages when there are so many parts knocking about
devonwoody
Established Member
Had what I call a good session in the workshop Saturday.
Made up some replacement pieces for rails from left over machinings of earlier rails.
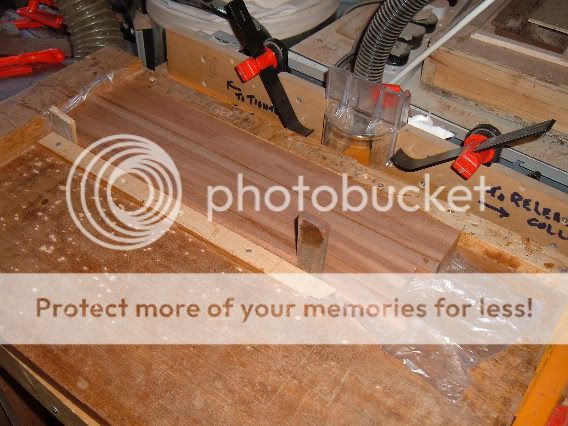
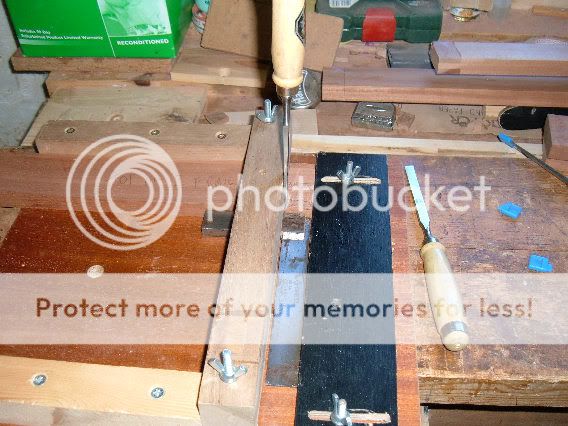
Did all the marking up of joints and got out the old shoulder jig,(Derek Cohens idea) and set up ready for dovetail and tenon shoulders that could not be machined.
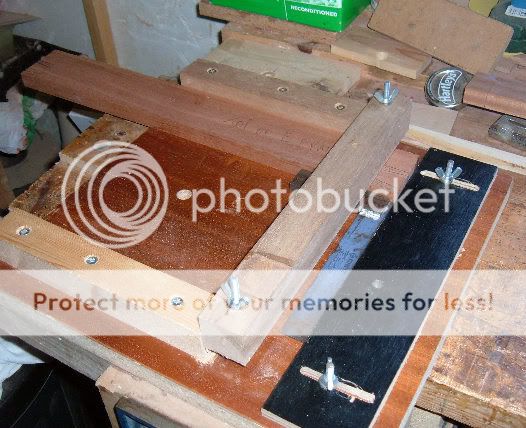
For those that have not seen this in operation before, the cross piece of timber on jig maintains the shoulder line for all pieces and a chisel marks the cutting line.
The dovetails on the rails are cut with a Japanese saw, I have to be so careful with these saws because its so easily to cross the cutting line.
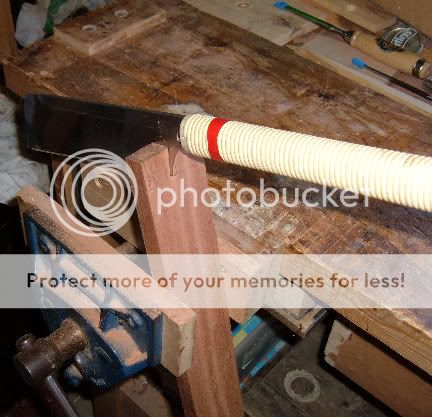
Finished off the dovetails on the rails with a chisel.

Cut the leg dovetail . Perhaps they should have been half tails, but being away from this type of carpentry for three years things at my age slip.

Thinking ahead, I normally use Titebond 3 but I am a little bit slower these days assembling, do you think I would be better off switching to a longer grabbing time with perhaps a pva type glue.
Made up some replacement pieces for rails from left over machinings of earlier rails.

Did all the marking up of joints and got out the old shoulder jig,(Derek Cohens idea) and set up ready for dovetail and tenon shoulders that could not be machined.

For those that have not seen this in operation before, the cross piece of timber on jig maintains the shoulder line for all pieces and a chisel marks the cutting line.

The dovetails on the rails are cut with a Japanese saw, I have to be so careful with these saws because its so easily to cross the cutting line.

Finished off the dovetails on the rails with a chisel.

Cut the leg dovetail . Perhaps they should have been half tails, but being away from this type of carpentry for three years things at my age slip.

Thinking ahead, I normally use Titebond 3 but I am a little bit slower these days assembling, do you think I would be better off switching to a longer grabbing time with perhaps a pva type glue.
devonwoody
Established Member
For those interested this was the way I cut joints on the front and legs for this table.
The waste in leg dovetails were first drilled out with a 1/4" forstner bit, as was the mortice for the lower frame.
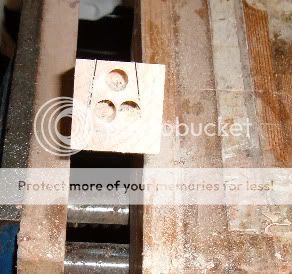
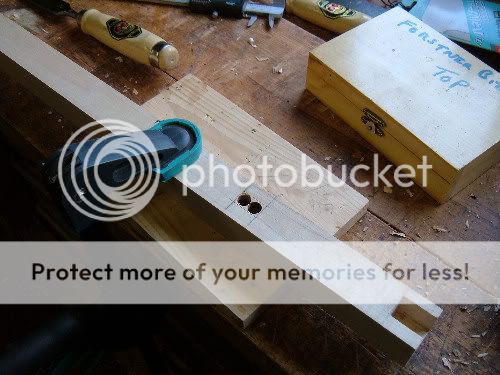
Then finished with appropriate sized chisels.
A picture of front frame with joints completed.
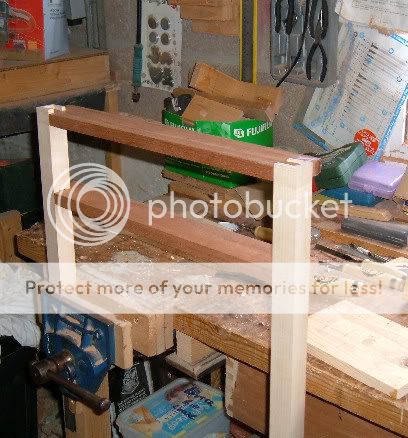
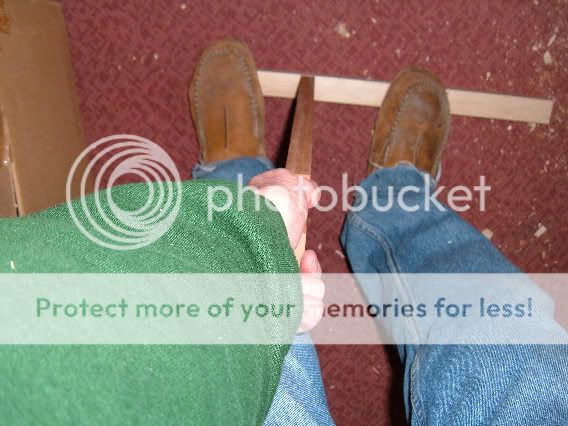
And to separate the tenon joints this is a happy situation, the feet have to hold the frame whilst pulling out the rail, just tight enough for me.
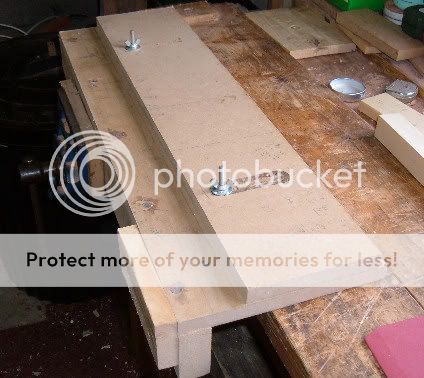
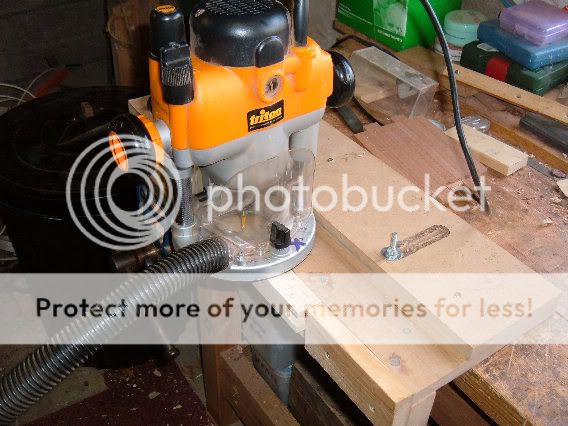
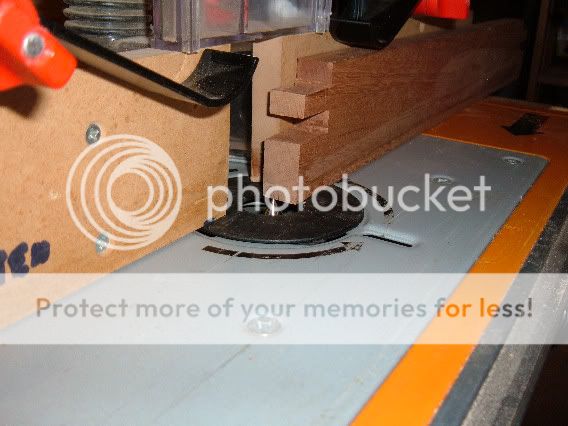
To cut the long mortices (six of them) I got out my jig for the router which I think I last used over 4 years ago. A description on how I operate is shown in following pictures.
I clamp on stops to limit travel of router.
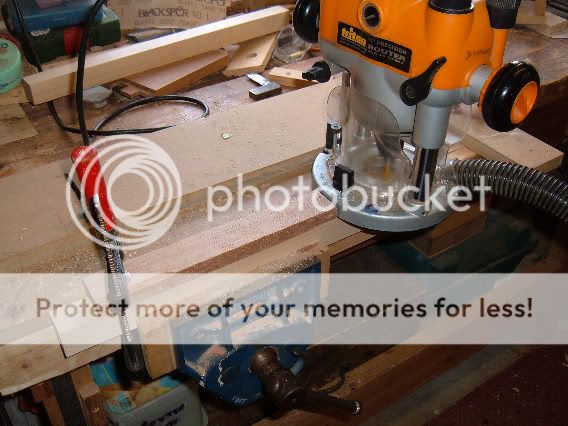
And the end result.

My workbench at the end of the day, disgusting.
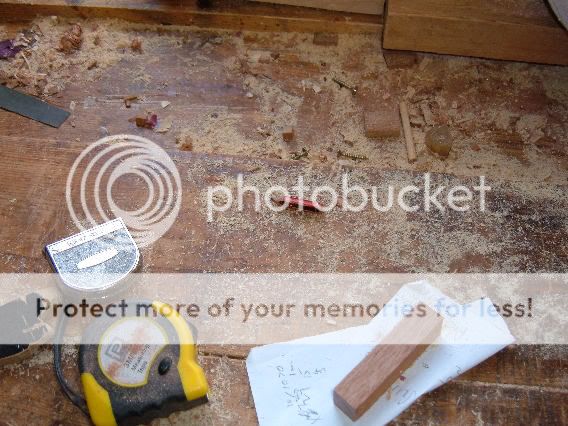
The waste in leg dovetails were first drilled out with a 1/4" forstner bit, as was the mortice for the lower frame.


Then finished with appropriate sized chisels.
A picture of front frame with joints completed.

And to separate the tenon joints this is a happy situation, the feet have to hold the frame whilst pulling out the rail, just tight enough for me.

To cut the long mortices (six of them) I got out my jig for the router which I think I last used over 4 years ago. A description on how I operate is shown in following pictures.


I clamp on stops to limit travel of router.

And the end result.

My workbench at the end of the day, disgusting.

devonwoody
Established Member
The stand is progressing, however there are some problems.
Bloody book plans are up the creek. The drawer divider on the cutting list quotes 6" and frames are 3/4" so the opening should have been 4 1/2" but the end and back rails were quoted 5 3/8 deep.
This means that drawer rails are not hidden at sides and back. I shall most probably do a cover up later.
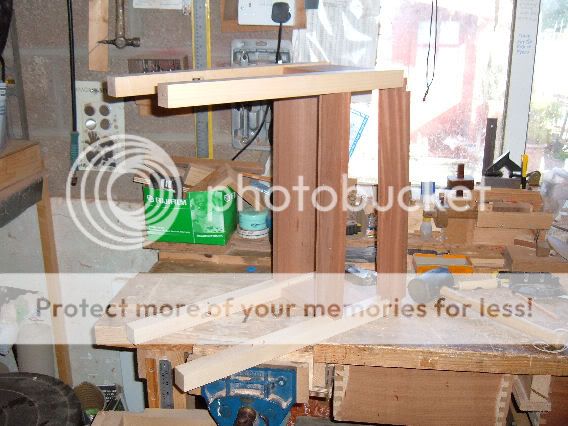
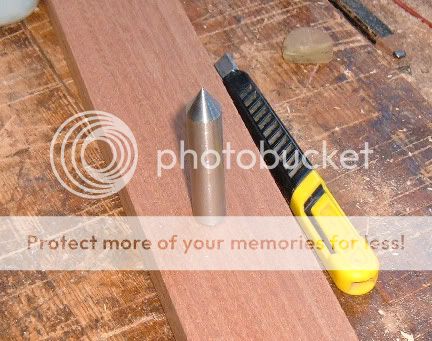
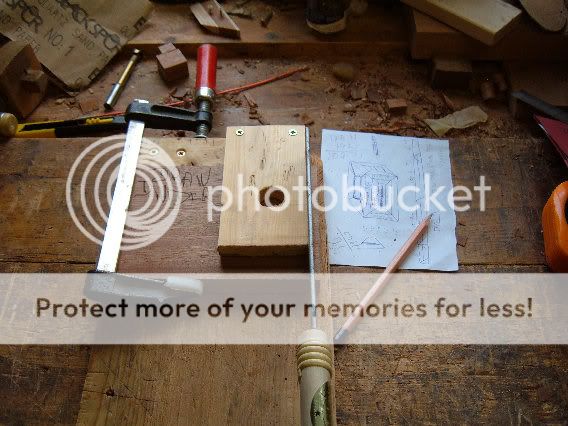
I am putting a 1/4" dado in drawer rails for drawer runners and ply dust sheet and to find the centre point of timber for 1/4" router bit I mark the centre pint of timber and put in a centre point bit I had made to line up and the exchange for the 1/4" bit as per pictures.
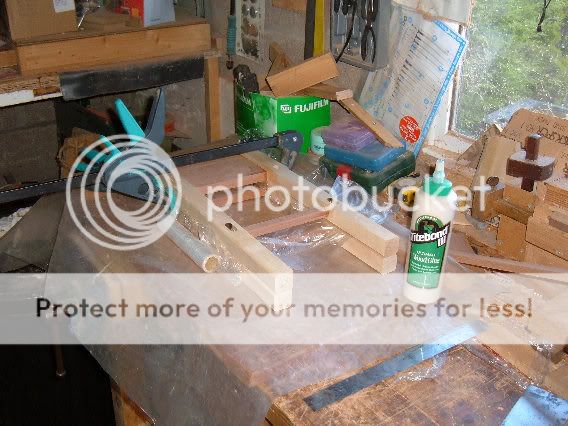
I decided to glue up end frames to cut gluing time by half..
Bloody book plans are up the creek. The drawer divider on the cutting list quotes 6" and frames are 3/4" so the opening should have been 4 1/2" but the end and back rails were quoted 5 3/8 deep.
This means that drawer rails are not hidden at sides and back. I shall most probably do a cover up later.

I am putting a 1/4" dado in drawer rails for drawer runners and ply dust sheet and to find the centre point of timber for 1/4" router bit I mark the centre pint of timber and put in a centre point bit I had made to line up and the exchange for the 1/4" bit as per pictures.


I decided to glue up end frames to cut gluing time by half..

devonwoody
Established Member
Its 9am and its cold (around 7C) condensation everywhere and I have still got a weeks work to do to complete this tablestand.

So had to get this bit of equipment out.


So had to get this bit of equipment out.

devonwoody
Established Member
Things have been a bit slow on this lately, 2 days gardening, two shopping trips, visitors today and the cold weather is coming in.
However got this far.
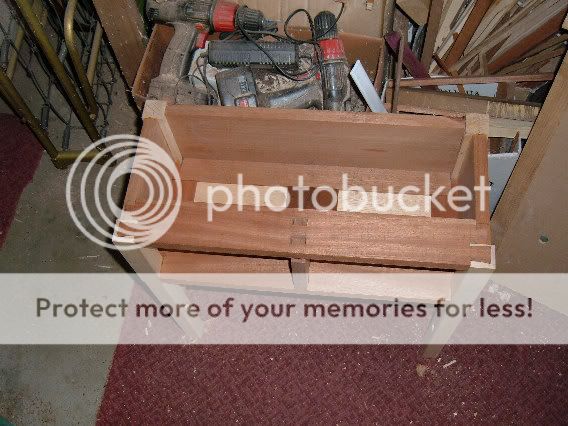
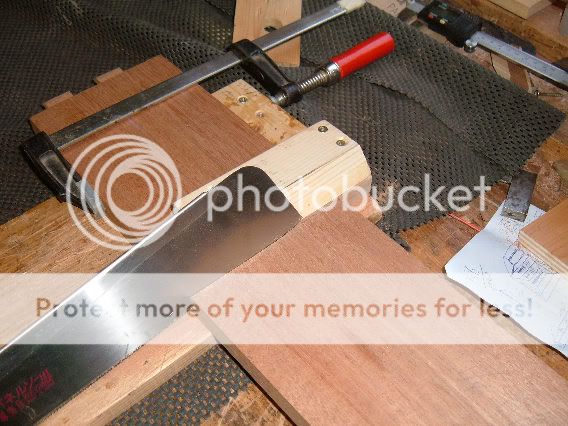
I have had some wide sliding joints to do and if interested I did them this way.
A sliding tenon was made by putting the timber on my sawbench and screwing a guide to the bench for the blade to follow across 5".
A similar set up used for the sliding dovetail but I made an angled former which I screwed to the bench for saw to follow.
And now for a bit of bling. A Stanley 271 router cutter.
There are some on Ebay but only in the USA current bid nearly $60.
Mine is over 30 years old and hasn't been used for years.
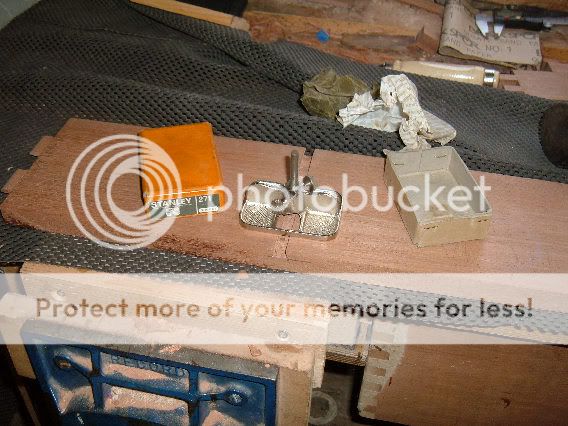
Used to clean out the sliding dovetail on back rail again 5" wide.
However got this far.

I have had some wide sliding joints to do and if interested I did them this way.
A sliding tenon was made by putting the timber on my sawbench and screwing a guide to the bench for the blade to follow across 5".

A similar set up used for the sliding dovetail but I made an angled former which I screwed to the bench for saw to follow.

And now for a bit of bling. A Stanley 271 router cutter.
There are some on Ebay but only in the USA current bid nearly $60.
Mine is over 30 years old and hasn't been used for years.

Used to clean out the sliding dovetail on back rail again 5" wide.
devonwoody
Established Member
Another good session of fiddling accomplished Wednesday.
Bad weather two days and another bad one today (Thursday) keeping me out of the shed.
However got all my carcass joints together and fitting reasonably well and did the glue up,
Left in front of the radiator overnight to help the glue along.
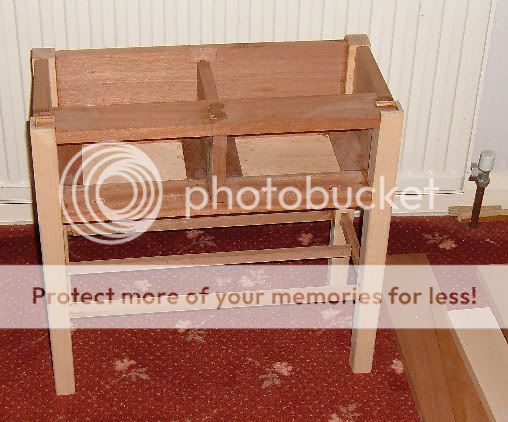
Going to start on the drawers next, hand making and going to attempt colour patterns. Oh and the bottom shelf to be made, a torsion box I think is the name given to this type of shelf.
Bad weather two days and another bad one today (Thursday) keeping me out of the shed.
However got all my carcass joints together and fitting reasonably well and did the glue up,
Left in front of the radiator overnight to help the glue along.

Going to start on the drawers next, hand making and going to attempt colour patterns. Oh and the bottom shelf to be made, a torsion box I think is the name given to this type of shelf.
OPJ
Established Member
devonwoody":1q8t5l7q said:And now for a bit of bling. A Stanley 271 router cutter.
There are some on Ebay but only in the USA current bid nearly $60.
Mine is over 30 years old and hasn't been used for years.

Used to clean out the sliding dovetail on back rail again 5" wide.
All's looking good so far, DW. Plus, I bet even Waka doesn't own a classic router plane like that - that's your own personal bit of Tool Gloatage, right there!!
Ironballs
Established Member
That's coming along quickly, looking good so far
devonwoody
Established Member
Thursday, I said bugger the weather and went out to the workshop, making drawers is not something I do everyday.
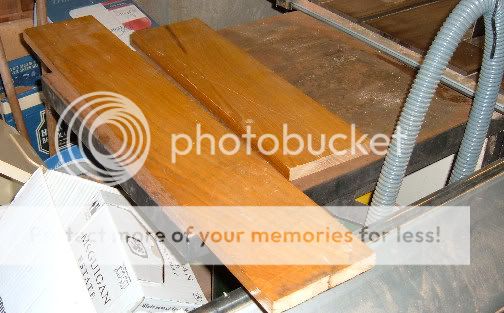
But located these boards of Sweet Chesnut, these were purchased 40 years ago to make bookshelves for our childrens bedrooms, they eventually left home and timber was put in the loft as planks to walk on..
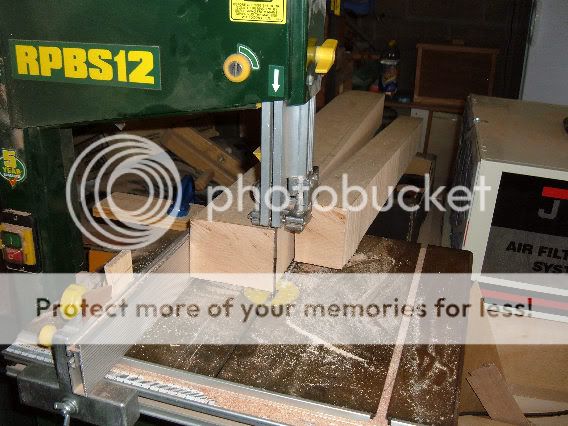
20 mm thick and I managed to get a clean cut on bandsaw and finished with boards planed up at just over 9mm each.
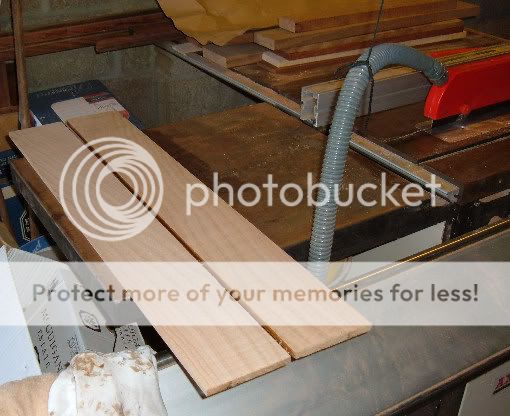
Cut them all to size for fronts and sides and got out some of my LN's, the gauge I purchased with a fellow known as Wongo of the ubeaut forum at Carbatec, in Sydney.
Wongo had come to our rescue after my wife had an unfortunate
accident and generous hospitality was given to us both.

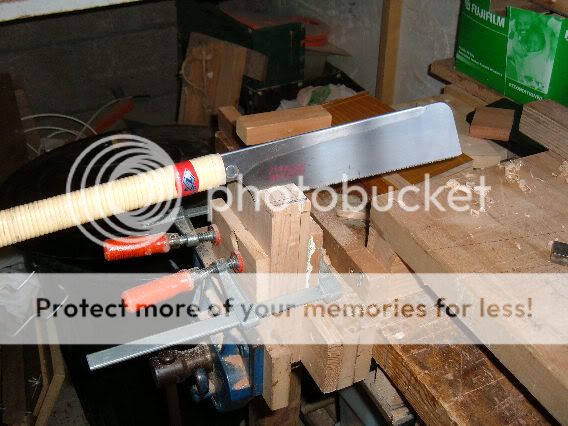
Cut the pins in a batch of four, never done this before, and I will never cut pins separately again even if I have to put some waste timber in the vice and clamps.
The thickness makes it so easy to cut accurately, the saw doesn't want to wander the same as single cut pieces.
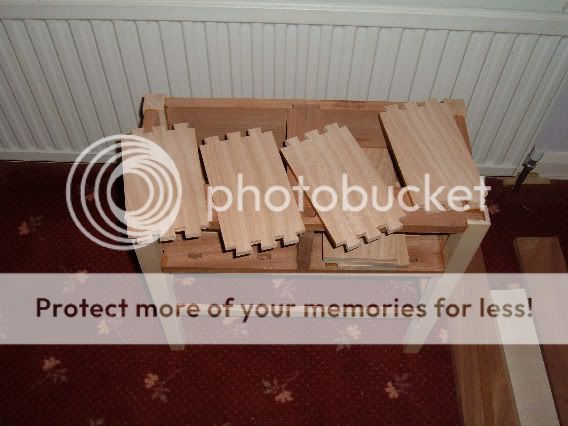
So thats four sides cut and brought inside to keep comfortable for the night.
But located these boards of Sweet Chesnut, these were purchased 40 years ago to make bookshelves for our childrens bedrooms, they eventually left home and timber was put in the loft as planks to walk on..
20 mm thick and I managed to get a clean cut on bandsaw and finished with boards planed up at just over 9mm each.


Cut them all to size for fronts and sides and got out some of my LN's, the gauge I purchased with a fellow known as Wongo of the ubeaut forum at Carbatec, in Sydney.
Wongo had come to our rescue after my wife had an unfortunate
accident and generous hospitality was given to us both.

Cut the pins in a batch of four, never done this before, and I will never cut pins separately again even if I have to put some waste timber in the vice and clamps.
The thickness makes it so easy to cut accurately, the saw doesn't want to wander the same as single cut pieces.

So thats four sides cut and brought inside to keep comfortable for the night.

devonwoody
Established Member
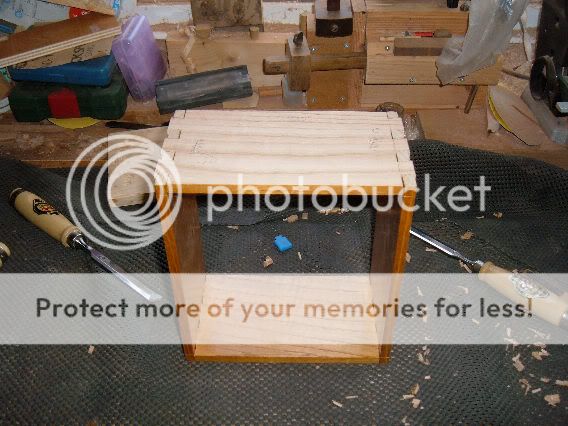
I decided to put some screws (they are on the plans) into back and side rails to hold the dust drawer board more secure marked with crosses) but had problem with the shelf rails fouling the drill whilst drilling pilot holes and screwing in.
So hows zat?
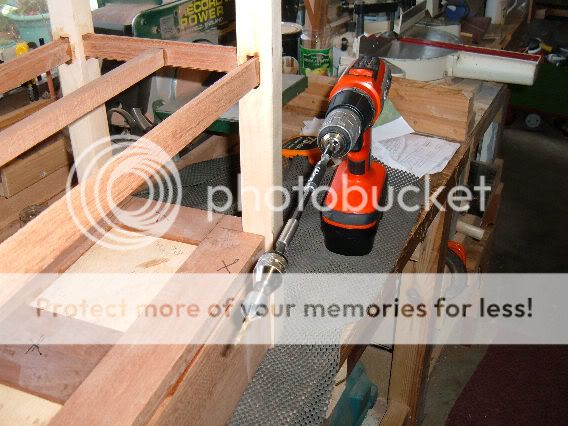
All the bit holders I had got and must measure over 300mm in length.
Got one drawer carcass underway, btw I am going to make slips for the drawer bases because the carcass is quite thin.
See you again I hope in under a week but visitors (half term time) will be wanting visits to the zoo etc.
So hows zat?

All the bit holders I had got and must measure over 300mm in length.
Got one drawer carcass underway, btw I am going to make slips for the drawer bases because the carcass is quite thin.

See you again I hope in under a week but visitors (half term time) will be wanting visits to the zoo etc.
devonwoody
Established Member
Yep, that was seven days out of the workshop. Introduced the grandchildren to Watership Down video and tears started to appear when Violet was gone 

So got back in yesterday afternoon and finished making up and gluing up the drawer carcasses.
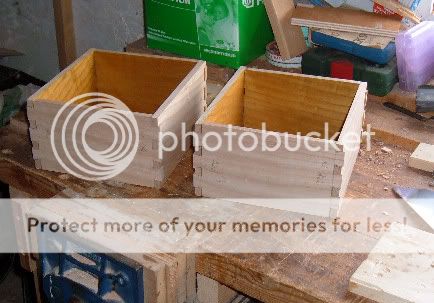
Started to fit them in table frame.
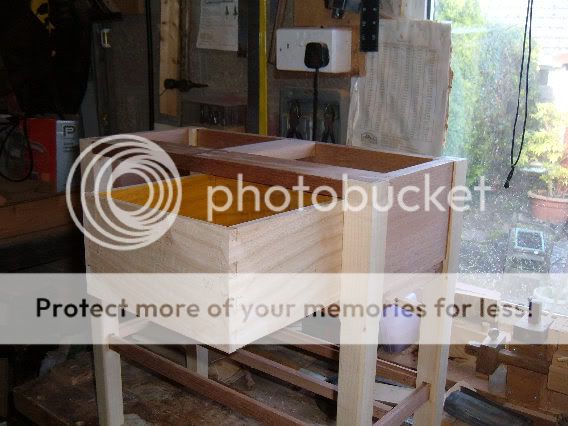
However disaster struck, running the drawer sides over the planer to thin down and fit, the adhesive had not set hard enough and the joints started to wobble, so separated, cleaned up and also stripped off the varnish which had not helped and will reglue tomorrow.
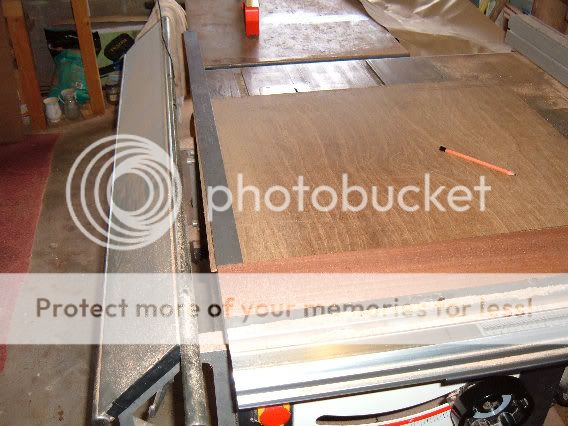
In the meantime I found some old 4mm oak veneered ply that I got from a skip 5 years ago but needed to get a straight edge. I solved the problem for myself by using the tablesaw table top which has a good 90 %corner and marked up and hand planed one edge straight for the rip cuts later.
Fitted the first shelf (another to go under to make a torsion box effect)
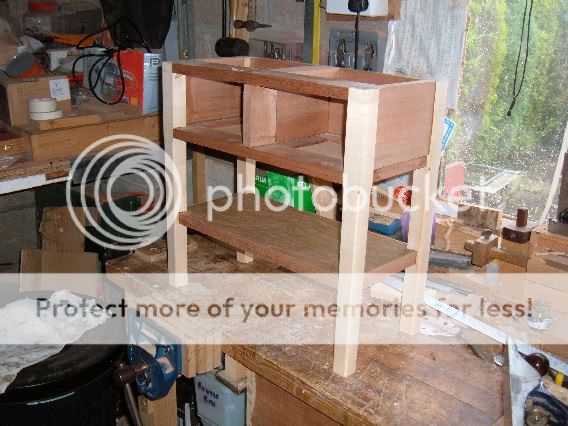
Oh. and BTW one of my chisels was losing its keen edge so I stroked it on my sanding block and saved me getting out all the paraphernalia
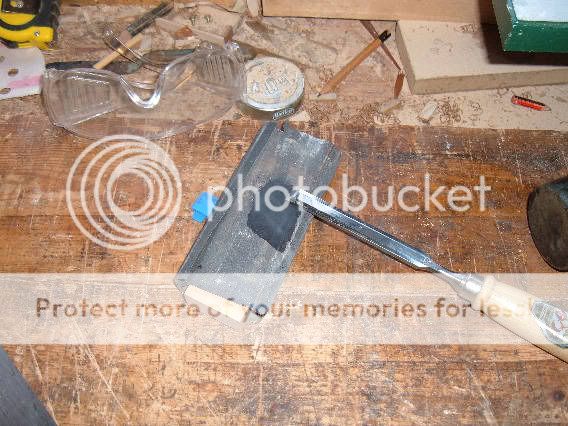
So got back in yesterday afternoon and finished making up and gluing up the drawer carcasses.

Started to fit them in table frame.

However disaster struck, running the drawer sides over the planer to thin down and fit, the adhesive had not set hard enough and the joints started to wobble, so separated, cleaned up and also stripped off the varnish which had not helped and will reglue tomorrow.
In the meantime I found some old 4mm oak veneered ply that I got from a skip 5 years ago but needed to get a straight edge. I solved the problem for myself by using the tablesaw table top which has a good 90 %corner and marked up and hand planed one edge straight for the rip cuts later.

Fitted the first shelf (another to go under to make a torsion box effect)

Oh. and BTW one of my chisels was losing its keen edge so I stroked it on my sanding block and saved me getting out all the paraphernalia

DaveL
Established Member
Just remember not to use that bit of abrasive on the job or you will rub the metal from the chisel into the timber pores. :xdevonwoody":2upredss said:Oh. and BTW one of my chisels was losing its keen edge so I stroked it on my sanding block and saved me getting out all the paraphernalia

devonwoody
Established Member
Davel, Yes you are right. 
Similar threads
- Replies
- 3
- Views
- 3K
- Replies
- 41
- Views
- 15K
- Replies
- 6
- Views
- 2K


