LancsRick":3nk7l1ig said:
What is your recommended clamping approach?
You make a very good point, it doesn't matter how good your edge jointing is if the glue-up goes pear shaped!
I guess the first thing to say is that hide glue has a lot of advantages for edge jointing, and you don't even need the original hide glue that you heat up in a double boiler. Easy to use liquid hide glues, like this one,
https://www.axminster.co.uk/titebond-li ... ue-ax22595
work just as well for a rubbed joint.
The advantages are you don't need any cramps, you just put one component in your vice and apply a decent wiggly bead of liquid hide glue along it's length, rub the joint together to even out the glue and expel any excess. Soon you feel it start to "bite", then get the two components lined up exactly as you want and leave them in the vice for a few minutes. After that you can take them out of the vice and prop them up in an out of the way location for a couple of hours while the glue cures. It's absolutely 100% strong enough for virtually any furniture making application, squeeze out clean up is dead easy, and if by any chance you're unhappy with the result it's fairly straightforward to undo the glue joint with a damp rag and a steam iron, fix the problem and try again.
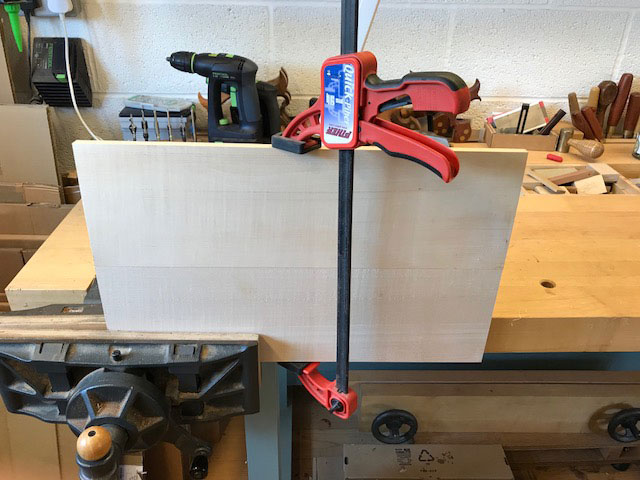
Staying with the notion of using your vice as a glue-up aid, there's a trick that's often used in professional workshops for lightly stressed, edge-jointed components, such as panels for frame and panel work, or small tops for occasional tables.
Step one is to place one component off-centre in your vice,
Step two is to apply the glue then place the second component on top, like this,
Then finally you use one, lightweight cramp in the centre, like this,
Your edge jointing needs to be pretty accurate, with a minute hollow to give you a slightly "sprung" joint, and you also have to have the knack of tightening up a cramp without twisting the components out of line. But if you can do all that, then this is a super fast method. With a fast setting glue like Titebond 1, you can store the glued and cramped components in an out of the way location for 30-40 minutes, and as long as you're careful they'll then be ready for the next stage in your build.
But if you want to do the full monty glue-up then here's how I go about the job. I'm not saying this the best or only way, but it is an approach that consistently delivers first class results for me.
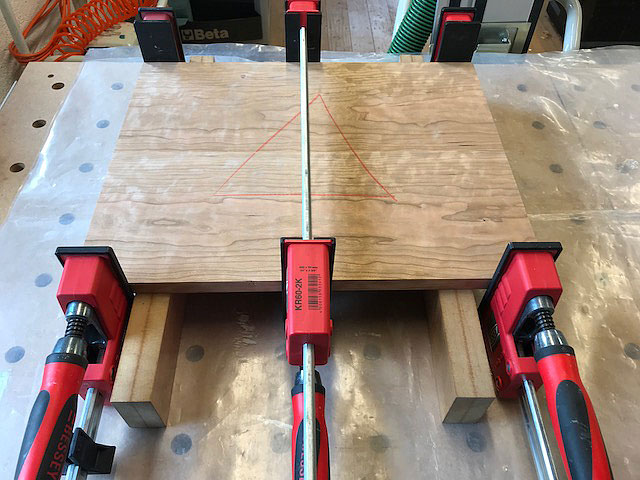
The first thing is that I always use bearers rather than resting the workpiece direct on the sash cramps.
These bearers are either waxed or covered in parcel tape to prevent the glue sticking to them, and they bring two huge advantages. Firstly you can shim them so the bearers form a totally flat plane for the work to sit on, which prevents any twist or wind being introduced at the glue-up stage. Secondly they're sized so they're a bit deeper than the "spines" of your sash cramps. This keeps the work floating above the sash cramps, which makes glue squeeze out removal much easier, plus it also prevents the risk of "iron stain", which is what happens when a timber like Oak, high in tannins, touches steel in the presence of moisture (which most glues will provide plenty of!).
You then do a dry glue-up. You
always do a dry glue-up, no matter how experienced you are and how many times you've done the job, this final dress rehearsal is the last chance to check you've everything you need, it's all working properly, and the workpiece lines up exactly as you need.
Next step is to apply a thin layer of glue to both components to ensure they're thoroughly "wetted out"
You then apply cramp pressure, starting in the centre and working out, checking for a bead of squeeze out all the way along as you go,
Now, if you want, you can carefully lift the glued-up assembly off the bearers and check for an even bead of squeeze out underneath,
And the gaps left by the carefully sized bearers mean you have full access for cleaning up squeeze out,
With all the squeeze out removed (on critical jobs I usually do three repetitions of scrubbing with clean, boiling water) you can set the piece back down and do a final check for straight and flat,
Finally, a couple of little wrinkles that may be useful.
Sash cramps rarely apply pressure at exactly the angle you expect. The "shoes" sometimes angle back, or the "spine" bends upwards under pressure. Having cramps top and bottom helps. But sometimes you'll need cramping blocks on the outer edges with a "D" shaped profile, this profile automatically adjusts for out of true sash cramps, and delivers the pressure perpendicular to the joint.
Another point is that I hardly ever use biscuits, dowels, splines, or dowels. I don't believe they add any useful strength and they bring with them a load of hassles. The exception might be if I'm working single handed on a really big job. Then I might use one or at the very most two biscuits, inserted dry, in the centre of the workpiece, and this is purely to assist in alignment. If you've edge jointed properly you really don't need anything else.


