How to do this moulding...

UKworkshop.co.uk

Help Support UKworkshop.co.uk:

This site may earn a commission from merchant affiliate links, including eBay, Amazon, and others.

RogerS

Established Member
Joined
20 Feb 2004
Messages
17,921
Reaction score
276
Location
In the eternally wet North
I'm making up this pair of steps to manage the transition in level between two floor levels thus.
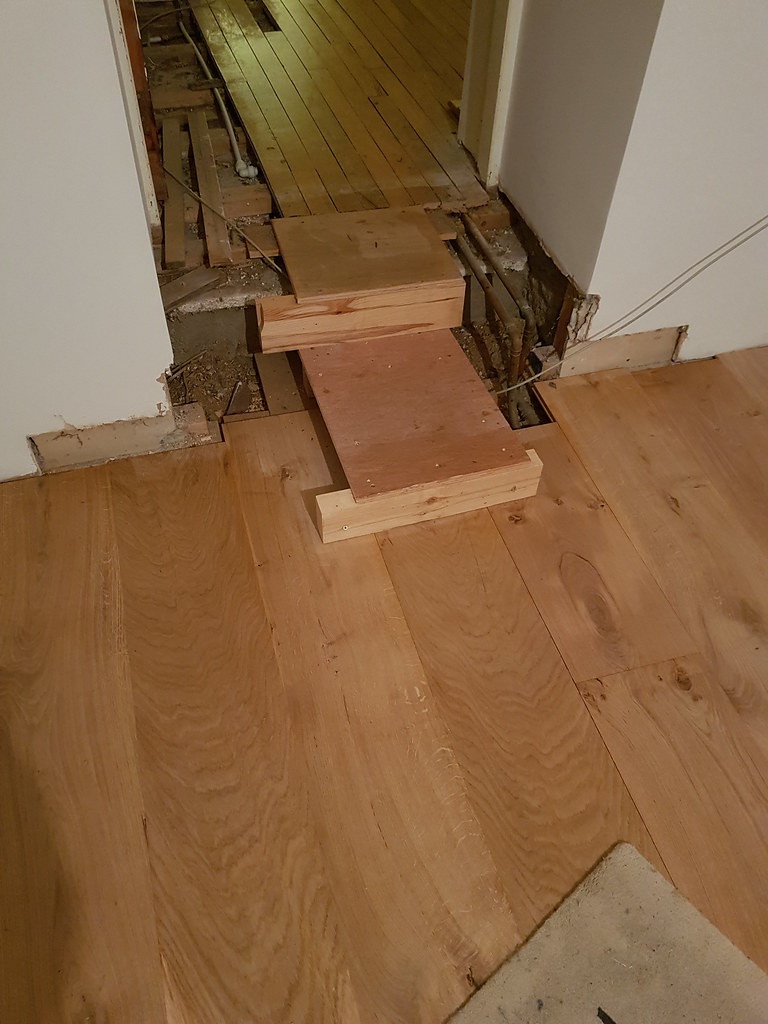

Please note...that ghastly colour of the floorboards is not like that in real life !

This was my original design but veto'd by CD (Chief Designer)
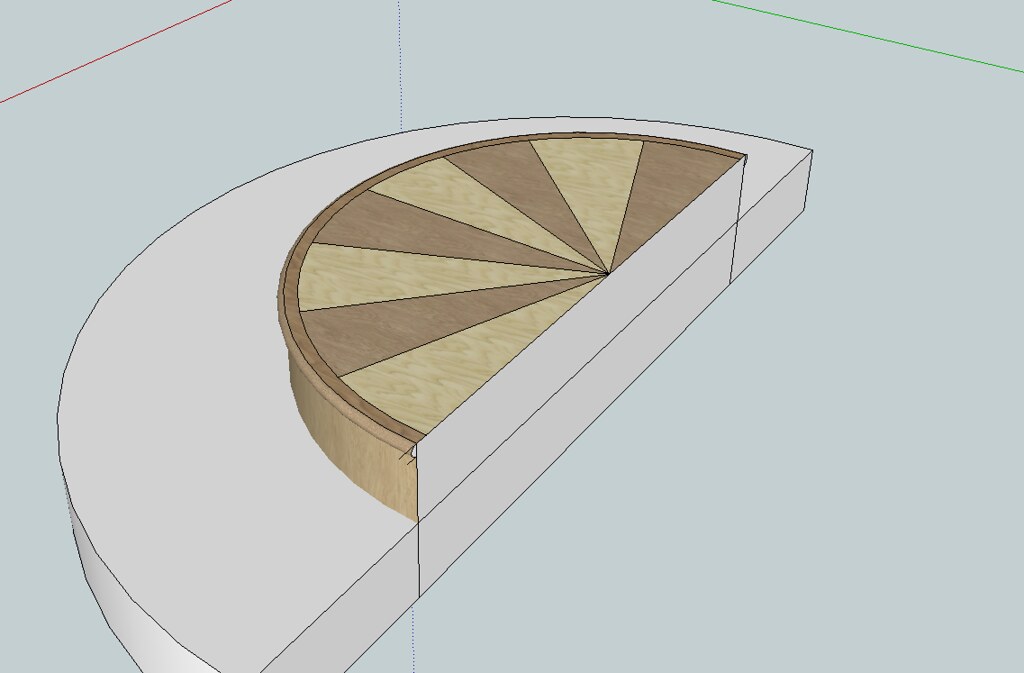

and now the idea is to continue the new floorboards on the higher level continuing through and into the top step as here
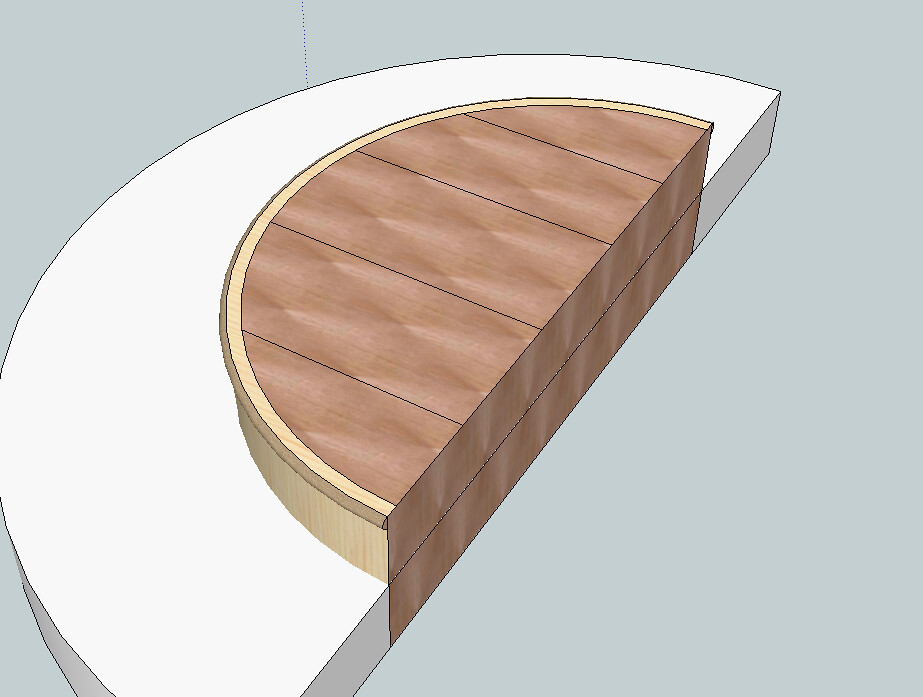

NB The floorboards won't be all cutoff in a straight line at the RH side....

I like the idea of that transitional semi-circle to indicate or draw attention to the edge of the step. I planned to have a half-round oak bead then applied on the outer face. All repeated on the lower step. Radii of steps being 550mm and 850mm. Pretty sure that beading off-the-peg could be bent round to fit those radii without too much bother.

But I'm coming round to thinking that beading will look too 'skinny' and that I should have a bullnose moulding instead.

But here's the rub. The overhang of the bullnose doesn't want to be that great otherwise fixing it solidly becomes problematic IMO as there will be leverage from bodyweight. But if I make it too small then I'm struggling to see how I'd make it up (segmented obviously but in as large size segments as I can manage to minimise seeing the breaks ...ideally it would be one single piece. I do have a quote for it to be steam bent but it's a bit eye-watering.

I can mould the half -round using either the spindle moulder or a template trim router bit and a suitable template affixed. But then how do I achieve a smooth curve on the inside radius.....unless the front-to-back width of the bullnose is several cm to give me some sort of flat area to fix down.

But if I make that too large then that transitional half-circle mentioned above gets pushed back inwards towards the centre of the step which then upsets the aesthetics IMO.

Hope this lot is making sense !
 
I'll just put here what I also said at WH2...... don't do semi-circles! They always look odd. Just chop them off 9" or so further back, and have 3/8ths of a circle, not half. That will save space in the room you're entering, too.

I'd be very wary of a planted-on moulding in that location, Roger. Every time anybody climbs those steps they'll be treading on it with their full weight. I'd make those steps out of solid timber and put a shape on the overhang.
 
MikeG.":1ugz08ic said:
I'll just put here what I also said at WH2...... don't do semi-circles! They always look odd. Just chop them off 9" or so further back, and have 3/8ths of a circle, not half. That will save space in the room you're entering, too.
Sorry Mike,,,that's an old drawing above ...I've taken on board what you said about not using semi-circles and you're bang on the money

MikeG.":1ugz08ic said:
I'd be very wary of a planted-on moulding in that location, Roger. Every time anybody climbs those steps they'll be treading on it with their full weight. I'd make those steps out of solid timber and put a shape on the overhang.

You've explained better than I did the constrictions on using a moulding in that place. But with your suggestion, won't you then see the endgrain of the floorboards though ?
 
CD has vetoed ebony...too black. Since the vertical skirts are going to be veneered European walnut (which I already have) and which CD likes, that was what the 'transition' marker was also going to be made from. So, if I bring it in towards the centre of the circle then that will leave me a little room to widen that edge moulding piece to about 40mm depth and a 10mm overhang. Which then gives me a reasonable flat area as support during the machining process.


What can go wrong ?
 
RogerS,

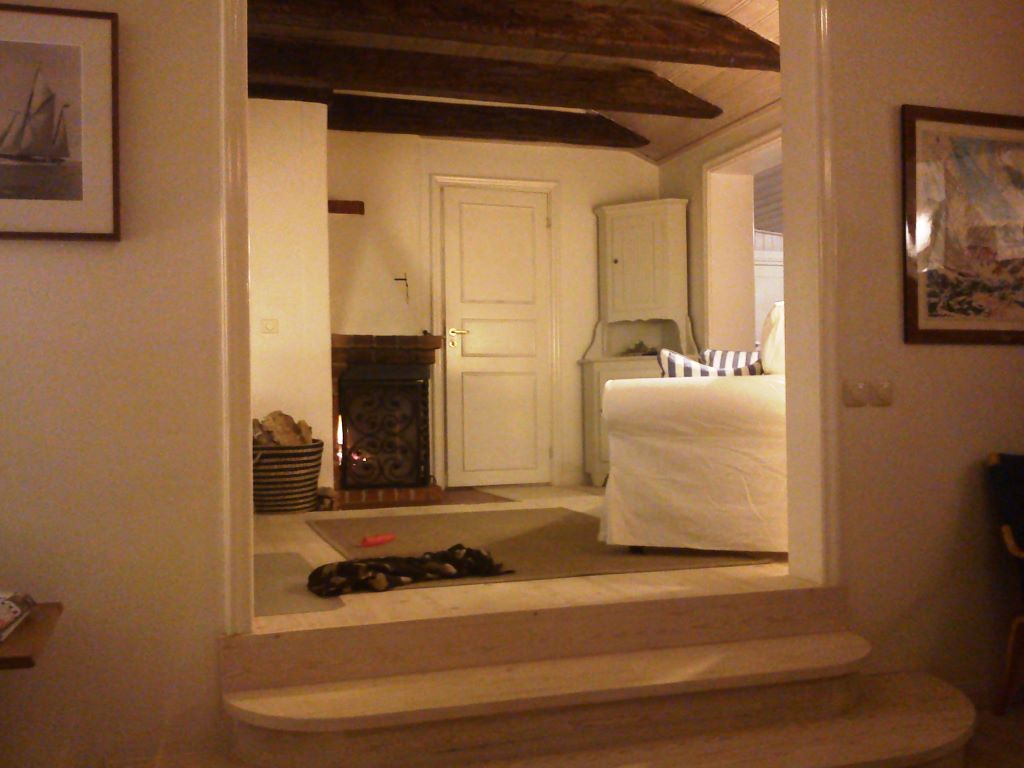
this is from our house in Sweden. Another way of treating the transition. But, I think a wider opening, perhaps. Functional, and repairable. Obviously the picture wasn't taken to highlight the steps. In fact I don't know why it was taken. Maybe the hound is being photo-shy behind one of the side walls.

Breviksvagen mid room.jpg
 

Attachments

  • Breviksvagen mid room.jpg
    Breviksvagen mid room.jpg
    88.2 KB
So, Roger, are you homing in on bullnosed moulding 40 x 25(say) supported on walnut veneered blocks which will also support the floorboard ends?
My instinct would be to laminate the moulding with 8 off 5 x 30mm (to allow for clean up) strips. These can be in varied timber to give the colour contrasts. I would make a male former for the lamination process which could also be used as a pattern for shaping the floorboard ends. When the lamination is cleaned up I would machine the bullnose on the spindle moulder with suitable fence support. I haven't got a bullnose cutter so I would use my vary-angle cutter in stages to get an approximation which would then be finished by hand sanding.
A couple of things to keep in mind:-
1. spring back as the lamination is release
2. possible splintering as the bullnose is machined - use good straight grained timber

I look forward to seeing which way you're going with this. It's quite a challenge.
Brian
 
Personally, I think I would make the front edge out of wider segments so that it comes back over and sits on top of the riser, which would solve any breakage risk from being right on the edge of the board. Basically it would be a 50-100mm border around the front of the tread. You wouldn't need to worry about breakages behind the riser as you can build it up underneath with some CLS or something.
 
Trevanion":3u76o6r0 said:
Personally, I think I would make the front edge out of wider segments so that it comes back over and sits on top of the riser........

Yes, this. If you have to have a curved moulding, make it 80/ 100/ 120mm wide plus a good rebate to take the ends of the boards. Support that on something underneath (wooden blocks, brackets, whatever). Have an extra joist supporting the floorboards now that the riser isn't doing that job.
 
RogerS":mv7tk0pw said:
CD has vetoed ebony...too black. Since the vertical skirts are going to be veneered European walnut (which I already have) and which CD likes, that was what the 'transition' marker was also going to be made from. So, if I bring it in towards the centre of the circle then that will leave me a little room to widen that edge moulding piece to about 40mm depth and a 10mm overhang. Which then gives me a reasonable flat area as support during the machining process.


What can go wrong ?

Personally, I would do the following if using an inlay pattern.
a. for the step edge I would create it using straight sections that are as wide as the step edge to inside edge of the inlay and coopered at the end grain butt joint and re-enforced with a loose tenon.
created after everything else is done to enable it to be stopped and hidden

b. The inside edge where the inlay would be going would have a rebate that was wide enough to have screws used to then secure the moulding to the base. The inlay then being inserted having been made up using 10mm thick pieces. This would then cover the securing method of the step edge and could then be planed down
c. the front edge then treated to a kiss by a router to create what ever mould feature I wanted
 
Some nice ideas there, Droogs. I particularly like the rebate idea although in this case I don't think screws will be necessary as the 'top level' stuff will be sitting/glued onto an 18mm ply substrate.
 
Before starting to make this can I suggest you cut the shape out of some cheap ply just to see how it looks before you go to all the trouble. I have a feeling it would look better with straighter steps just with the corners rounded off.
 
Why not make the whole step out of planks, finishing the ends with a bullnose, and then rout a shallow groove to let in your stringing?
It would be faster, stronger etc
 
OK ..decisions made.

Design….Owen, it’s a Georgian house and I think that for the width of the opening that part-circle steps are better. We do have another double door that needs similar treatment and that one will look better the way that you and Phlebas suggested.

Peter - not sure if you’re suggesting just floorboards going through and leaving the endgrain exposed at the nosing. If so I’m not too keen on that. Strength is not an issue as I will be building a subframe. Chief Designer has vetoed stringing.
 
But...we have a plan.

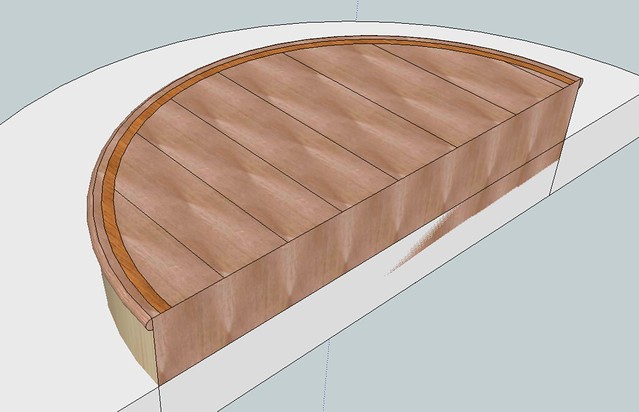
This is the final design.


The nosing (or edge moulding) …the one thing that was causing me grief …has been resolved by making it from coopered segments. It will be 40mm deep (ignore that extra line on the image that makes it look like a planted on half round)

The steps are NOT semi-circles but circular segments - as proposed by MikeG and they do look much better than semi-circles. I’ve done very little curved work especially on this scale and so decided to breakdown the steps into the individual components and consider :

if there were any critical relationships with adjacent parts
how easy or even how to make them
fixing them
any requirements for strength

1) subframe. 18mm ply. This will be from two segments per step and separated by verticals using pocket screws and glue.

SketchUp is your friend and allows me to mark out where I need to make the cuts to get the required pieces and squeeze it all out from just two boards of 18mm ply.


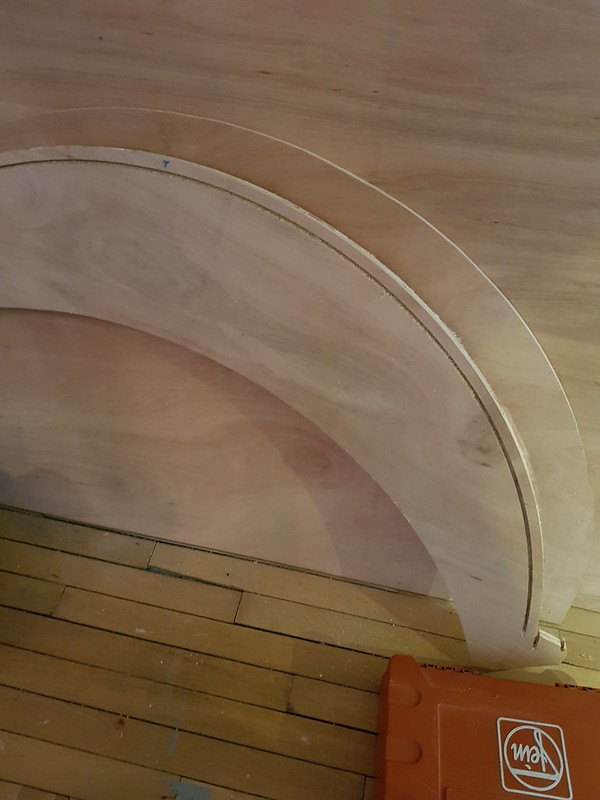
2) veneered ‘transition’ marker. This is the one critical piece as both the outer nosing (3) and floorboards (4) can be more easily tweaked to fit. (It says here ‘in theory’ !). I have made two templates (one per step) but will keep them stable by leaving them attached to the ‘motherboard’.


The ply + veneer thickness is slightly under that required to match the thickness of the floorboards and so I’ll be using some more constructional veneer on the other side to get the required thickness.

Fitting this to the subframe will be glue and small dominos.

3) nosing (moulding) - solid oak. I have a template made up from ply for the whole piece but don’t have the width of oak to do it in one piece. So it will need to be coopered. I can use a bearing guided router trimmer and the template. Only concern is safely handling pieces past the router bit. Needs more thought.

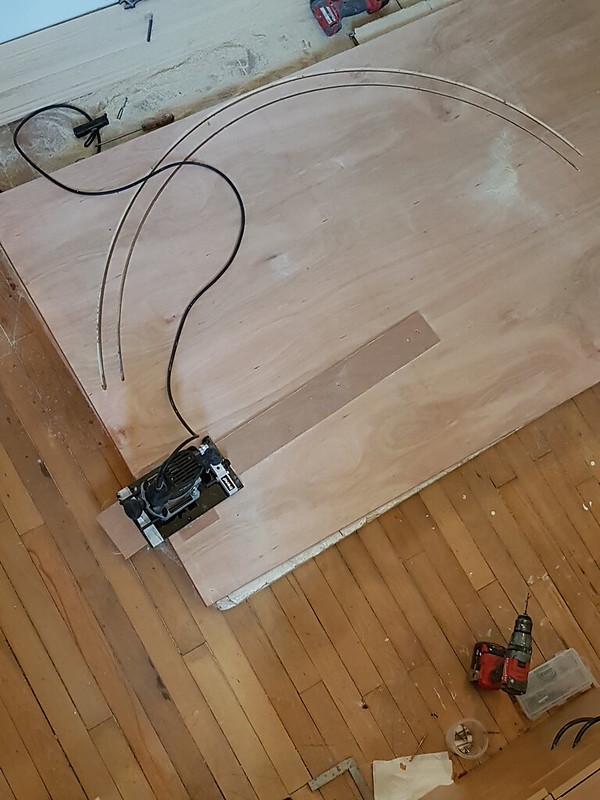
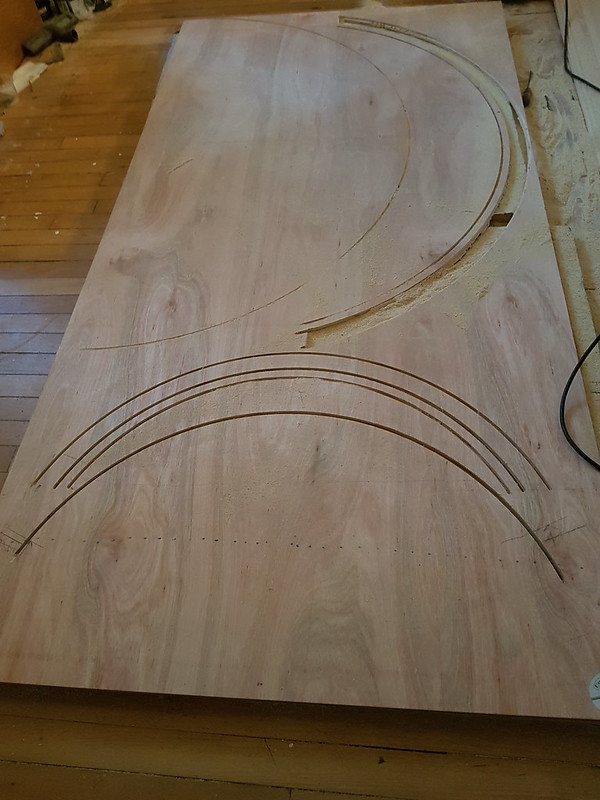
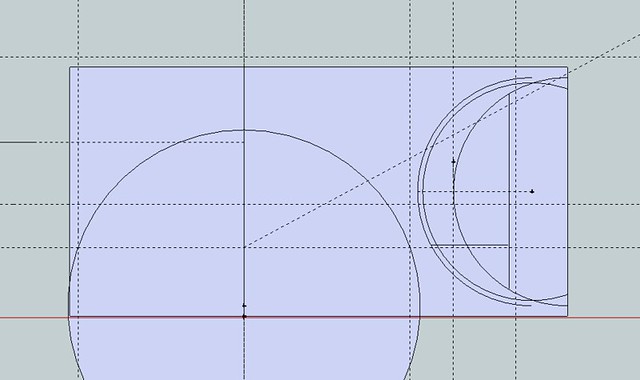
Here I’ve started to cut the template for the nosing using a long trammel and router. In hindsight completely cutting out the template for this wasn’t a good idea as there was a little springback…even though it’s a manmade board.


I also decided, after advice from Steve Maskery, to only partially cut through with the router cutter (because you need to make many, many shallow cuts) then rough cut the remainder with a jigsaw and then use a bearing guided trimmer to make good using the profile cut with the router bit as the guide. Certainly speeded things up.

4) risers. The benefit of making a subframe is that I don’t need to do anything clever …such as laminating the riser. I can veneer onto 6mm MDF and fit it to the fronts of the subframe. Concerns are veneering it with the correct bend and maintaining that bend while I fit it.

But we're getting there ....

 
peter-harrison":2aouhk83 said:
Why not make the whole step out of planks, finishing the ends with a bullnose, and then rout a shallow groove to let in your stringing?
It would be faster, stronger etc
Well yes. Planks glued up as one, going across rather than to and fro, so the front edge would be mostly long grain and end grain around the sides.
In other words a conventional traditional tried and tested bullnose step construction, risers - kerfed boards around a rough block.
 
Jacob":2ql8lw1z said:
peter-harrison":2ql8lw1z said:
Why not make the whole step out of planks, finishing the ends with a bullnose, and then rout a shallow groove to let in your stringing?
It would be faster, stronger etc
Well yes. Planks glued up as one, going across rather than to and fro, so the front edge would be mostly long grain and end grain around the sides.
In other words a conventional traditional tried and tested bullnose step construction, risers - kerfed boards around a rough block.

That would look absolutely horrible. A right pig's ear ! You'd have oak floorboards running in a straight line 'away from you in the hall', then transition to a few bits at right angles for the steps and then back to running in a straight line away into the room.
 
Back
Top