February Challenge ( Rules and Requirements ) ENTRIES

UKworkshop.co.uk

Help Support UKworkshop.co.uk:

This site may earn a commission from merchant affiliate links, including eBay, Amazon, and others.
Status
Not open for further replies.

Blister

Established Member
UKW Supporter
Joined
10 Nov 2006
Messages
7,762
Reaction score
542
Location
Boston Lincs
Hi everyone , out project for the 2012 February Challenge is A Suspended Ball ( from above or below )


Our Judge for February will be Richard

Must be New work for this Challenge

The suspended ball must be a minimum of 50mm and a maximum of 100mm ( 2" - 4" )

No restrictions re size or amount of components used in the construction of the means of suspension ( from above or below )

No part of the ball is allowed to sit on the ground / base , It mist be suspended

All components are to be lathe turned and made of wood , NO metal items to be used ( screws , nails , chain etc )

You are allowed to use glue for the assembly of your entry

You are allowed to drill holes , any size and angle , any amount, as long as it is for construction purposes only and not for decorative features

Any wood type


No colouring / texturing / burning / piercing allowed

Any entry's that are outside the rules and requirements will not be judged

Richards Criteria:
I will be looking for creativity in meeting the brief, quality of the execution including "roundness" of the ball and quality of finish and appropriate use of the timber.


The Judges decision is final ( Any negative comments re judging must be via PM only and not on the open forum )

NO Critique or comments on any work until March Please, After the Judging and results.

Please state wood type if known, dimensions and a little about how you made it and what tools and finish you used ( this helps the judge )

Please post 3 images of your work / entry

1 showing all elements of you entry prior to assembly / construction
1 showing your entry assembled ( With the ball suspended ( from above or below ) in position
1 showing your assembled entry with the ball not suspended but standing next to the assembly

Image size please use image size 640 x 480 0.3 mp, same previous months

When your entry is ready please go to our new scoreboard http://ukwturningcomp.co.uk/

Log in to your account and mark yourself as ready by 10 pm on the 25th February after this time the scoreboard will be locked

Entry’s to be uploaded from 10pm on 25th February up until 10pm on the 27th February. after this time the thread will be locked for Judging

Results will be given on or before 29 February ( Leap year :mrgreen: )

I hope you all have fun with this challenge , Good luck :p
 
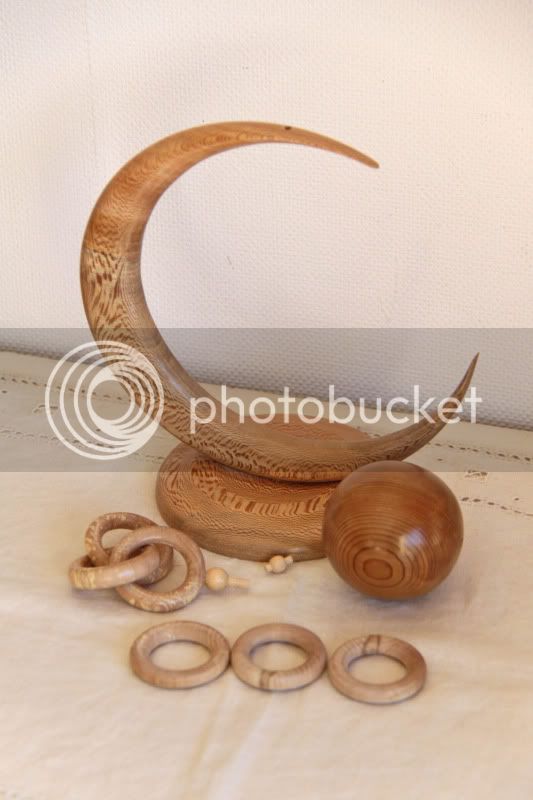
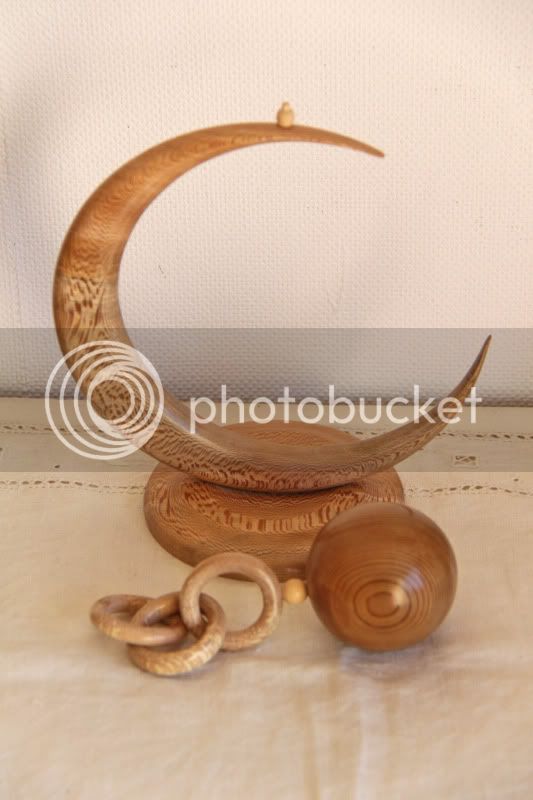
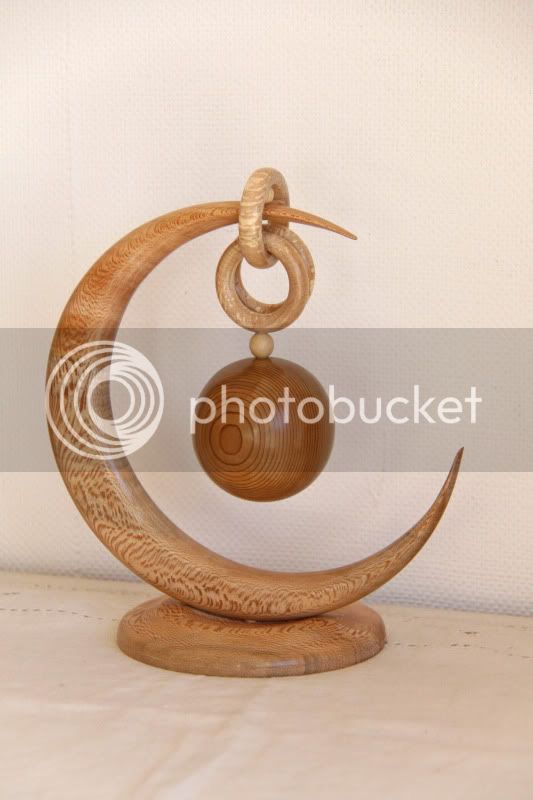
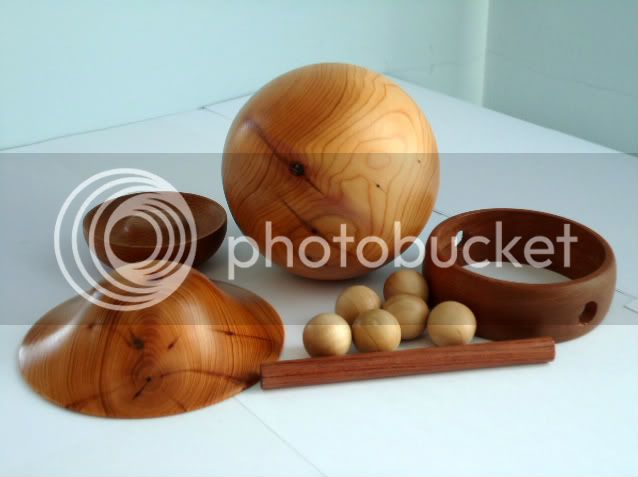
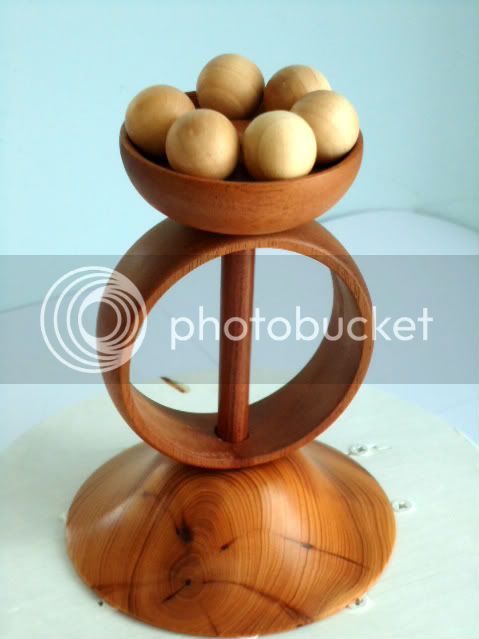
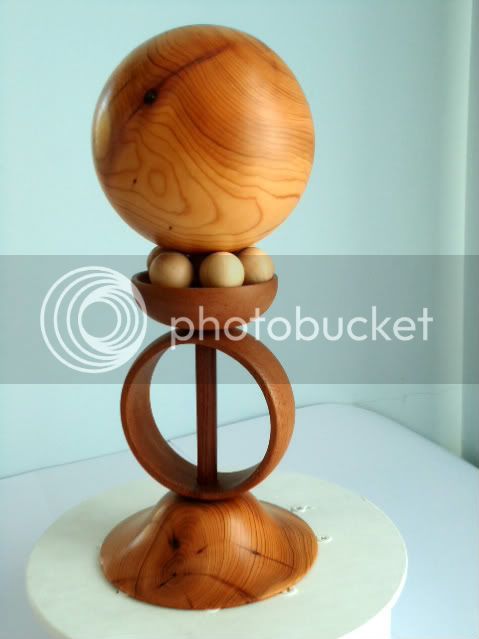
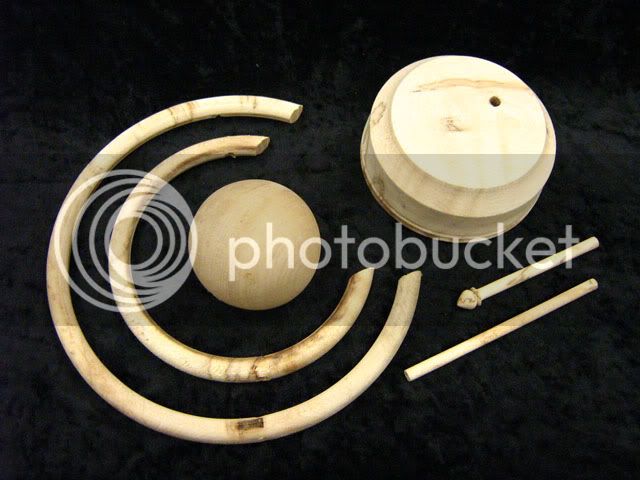
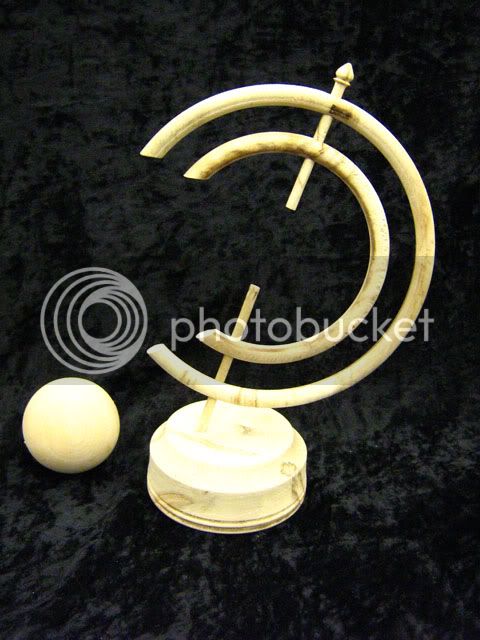
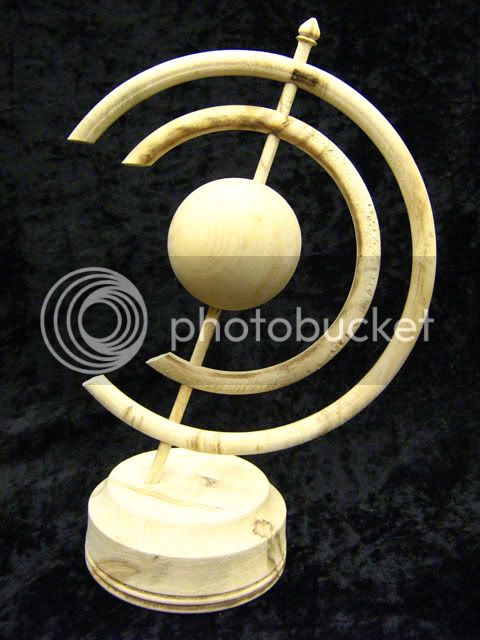
For my Feb challenge, well to say it was a challenge is a great understatemant! I had no idea as to what to do and on my second attempt, after a couple of weeks of no turning due to the extreme cold and a return I came up with the idea of what I think is a 'Moon Ball'.

Because of the late start I had forgotten one of the regs, about photographing everything before assembly. Probably because this is the first time this rule has appeared? I have tried to back track and follow the spirit of that rule by turning 3 more rings for my chain to show unconstructed, but there is no way that I am going to either break the base/crescent assembly or the chain that I had already constructed. I can't remake the base/crescent, because I just don't have the wood to do so, so I hope that a tiny bit of lee way will be allowed.

Materials. The ball is cedar which I liked due to the lovely grain rings it gives. The ball blank was turned to a cylinder between centres and a dovetail tennon turned on one end for mounting in my O'Donnal chuck jaws. This gives the advantage that there is only one knib to remove when it was remounted between the 2 cups I had turned so as to be able to remount the ball to turn the small knib off.

The base/crescent are turned from the same piece of beech by turning the outer edge of the crescent and finishing it whilst held on a hot glue chuck. Then the disk was remounted about 1/2” off centre, still hot glue, and the crescent carefully turned from each side with a 1/4” spindle gouge. The crescent was trimmed off and hand sanded and the base turned using the 'centre' from the crescent. A 5mm hole is drilled part way into the base to take the 5mm dowl, turned from ash, to mount the crescent and a 5mm hole drilled into the crescent.

Chain is French cherry and is formed by mounting a spindle turned cylinder of said cherry onto my trusty O'donnal jaws and a 1” hole drilled with a flat plate drill. The outer turned down to the required diameter and the outer for the ring formed along with the inner that's showing, then parted off with a 1/8” parting tool. The other 2 rings the same. The 3 rings were each mounted with the unfinnished side showing in my 100 year old box wood pinch chuck and finished. Two of he rings were then broken and reglued to form the chain! I made 3 rings on the chain so that the ball can either be shown in the middle of the crescent with 2 links, as shown, or near the bottom using all 3. Just depends on your mood? Drilling the 3mm hole part way into the centre of the 2 upper links was good fun!

The small balls, one to connect the main ball to the chain and the other to lift the chain from the 'moon' are turned, between centres, from ash with 5mm dowels on each end to mount them between the ball/chain and the chain/moon. The moon to chain dowel is not glued to allow the height change.

After a couple of coats of celulose sanding sealer and de-knibbing everything was buffed with my Beal buffing system and carnuba wax to finish.

Moonball1.jpg


Moonball2.jpg


Moonball3.jpg


I really enjoyed this months challenge and it certainly got me thinking..
 
Here is my entry for the February competition – a suspended ball. A difficult challenge which needed much "thinking outside the box"!!

The ball was turned from green sycamore using a 3/8” spindle gouge. It is 64mm in diameter. The hole through the ball is 7mm in diameter.

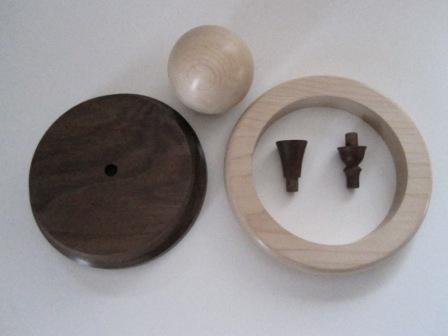
The ring and base plate are also in sycamore, but seasoned stock this time, turned with a ½” bowl gouge with a fingernail grind, finishing cuts being made with a traditional grind ½” bowl gouge. The ring was parted off with a 3mm parting tool. The ring is 110mm internal diameter and 140mm external diameter, with a 7mm hole to take the spike. The ring is 12mm thick (front to back). The base plate is 150mm in diameter on the top surface.

The “towers” are in alder, turned partly between centres and partly held in the chuck jaws, using the 3/8” spindle gouge. The height of the 20mm wide “towers” follow the Fibonacci series (starting at 2mm because I couldn’t part off or saw off 1mm without it splitting!!) The “towers” are 2, 3, 5, 8, 13, 21, 34, 55, 89 and 144mm in height, approximately).

The spike which pierces the ball is in oak, designed to look like a lance, and was turned between centres using a ¼” spindle gouge. The hole through the lance for the peg is 3mm in diameter.

The peg that supports the ball is made of holly, designed to look like a clove, and was also turned with the ¼” spindle gouge. The small piece of holly to make this was glued to a scrap of wood held in the chuck jaws.

All items were sanded on the lathe from 120 to 400 and 2 coats of clear Chestnut Woodwax applied by cloth, also on the lathe. The only work done off the lathe was to hand sand and wax the parted or swan off pieces, and a final buffing of all parts with a buffing mop held in a jacobs chuck mounted in the headstock. The hole drilling for the ball, ring and spike were all done on the lathe (the ball using a jacobs chuck in the tailstock, the other piercings using a cordless drill while the pieces were on the lathe).

After taking the first photo of the constituent parts, the tallest tower was glued to the centre of the base (the inner groove on the base matching the diameter of the tower) and the ring glued to its top. The other towers are positioned on the base in a spiral loosely derived from the Fibonacci series. The spike, ball and peg are not glued, allowing the ball to be removed as required for the third photo. The overall height of the work is approx 340mm.

Mike
 

Attachments

  • P1020528.JPG
    P1020528.JPG
    91.8 KB
  • P1020520.JPG
    P1020520.JPG
    89 KB
  • P1020515.JPG
    P1020515.JPG
    94 KB
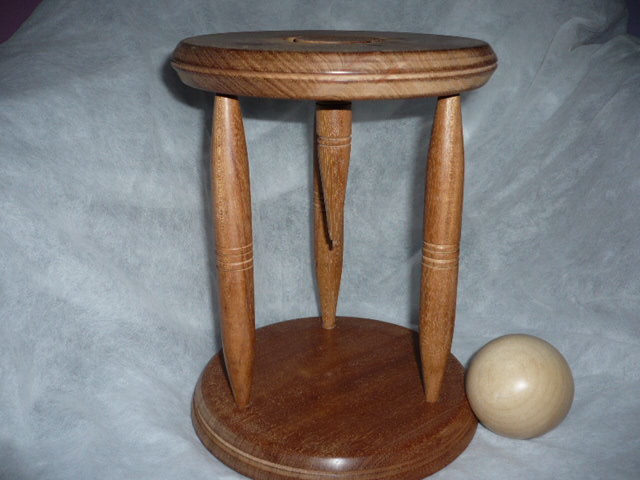
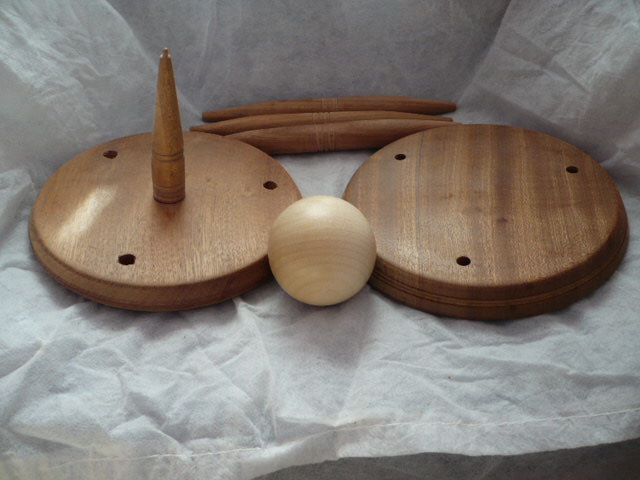
Here's my effort:

Like many I guess I had lots of different ideas (including giving up) before settling on this design.

I made the ball (approx 4") first and left it for a while to contemplate the support. The ball started between centres and when it was mostly round I used a pair of wooden supports (one in the chuck, one threaded onto the live centre in the tail stock) to support it.

I'm very keen of the art of MC Escher, and so the support for the ball is sort-of inspired by weird plants in one of his drawings, about 12" long, tapering to 3/8".

Once the support was done I again left it to contemplate the base, which is really a very shallow but thick and heavy bowl about 8" diameter and over 1" thick with a 3/8" hole through the middle to take the support.

I used a variety of tools - bowl gouge, scraper, roughing gouge, even a skew!

The ball and support are finished using the Chestnut buffing system, the base using Chestnut microcrystalline wax.

The three pieces can be assembled in a variety of ways. To stick within the rules of this challenge I've used the base as the base, but the support can be inverted and used as the base - and the base can be used either way up. There's more pictures here, not that these are to be used for judging obviously ;) :)

Anyway, here are the pictures:
 

Attachments

  • ball off.jpg
    ball off.jpg
    39.8 KB
  • assembled.jpg
    assembled.jpg
    38.1 KB
  • Separate.jpg
    Separate.jpg
    36.2 KB
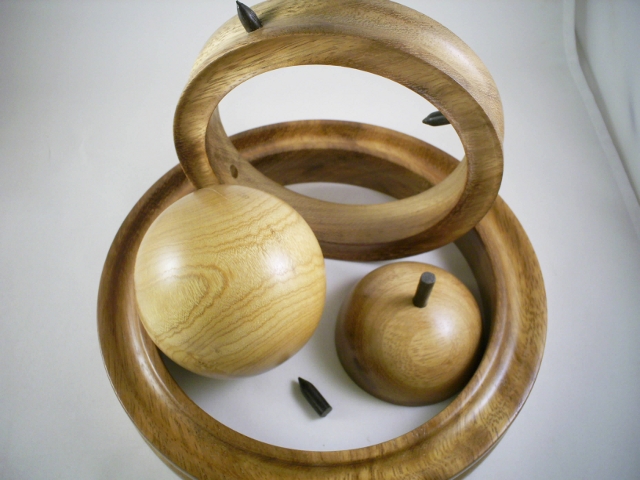
I shall refrain from all the ball puns, but i did sort of it up! I also put it together before reading the photo requirements :oops: so here's hoping not to disqualificated :(

The most challenging challenge yet methinks! I could only come up with one idea, so after a few mock ups here it is.

After various attempts i ran out of pretty and /or usable timber so had to use a blank of iroko (possibly) for the rings and laburnum for the ball.
The ball ended up at approx 75mm diameter and is finished with cellulose sanding sealer and soft wax. the entire project is finished with the same. It has two small dimples at the poles for mounting between pins.

from the approx 190 x 25 bowl blank mounted on a faceplate i shaped and parted the outer ring, then the inner and then the base.
the base is a bit small due to the fact that the plonk operating the lathe forgot he needed the middle bit of the blank for the base and mounted it with screws #-o , so i had to remove the holes!
I did remake it in a bit of mahogany, but the colour was all wrong so settled for the lesser of two weevils.

the pegs / points were turned to fit in a 5mm hole from a tiny piece of bog oak from the back of the drawer (knew it'd come in handy one day!) The needed to be hard so as not to squish when it was all assembled.

the inner ring was then drilled from the outside x2 to 7mm deep, and the same on the inside but i had to do this with various increasing sized drill bits twiddled in my fingers in order to get the hole straight. so drill bits but no drill!

one inner and one outer peg were then glued in place.the other two pegs are a tight push fit so that i can push them 'too far' into the holes place the rings together then pull the 'loose' peg into position with a small pair of long nosed pliers to produce a tight fit between ring and ring , and ring and ball. I had to do this because there is no flex in the hardwood rings to allow me to squash it together.

The whole lot fits together to form a 360 degree spinney thing like a world globe. you can spin the inner ring in the outer and the ball in the inner, and both at the same time (see here -RICHARD DONT LOOK! TILL AFTER THE JUDGING - http://youtu.be/cNueXFHpIwg)


disassembled.jpg


ballfront.jpg


ball out.jpg
 

Attachments

  • disassembled.jpg
    disassembled.jpg
    204.3 KB
  • ball out.jpg
    ball out.jpg
    200.9 KB
  • ballfront.jpg
    ballfront.jpg
    174.9 KB
Jupiter
Started by gluing 2 8" x8" x 3/4" pieces of maple together with the grain alternated?Mounted it in the screw in the Stronghold lathe. Turned the ring out and drilled for support post and support posts. Turned the ball out of a piece of scrap newel post left over and it didn't turn out too bad for my first ball effort. Turned the base out of the middle of the ring leftover and then turned various pieces out of leftovers. I was going to make a globe and then draw and carve out the continents, but no fenestrations so I decided it kind of looks like Jupiter. Soft maple for the ball and hard maple for all else. The ring is too big for the ball but that is way Jupiter goes round. Turning the ring was the most fun. I used a parting tool, 3/4" x 1/2" scraper, spindle gouge, and 1/2" bowl gouge. Lacquer finish. The ball is 3 5/8" in diameter and the ring is about 7" in diameter. Also Jupiter spins at about 3-4 degrees off vertical so that is what this is at as well. Thanks, this was fun.
 

Attachments

  • P1010897.JPG
    P1010897.JPG
    176.5 KB
  • P1010888.JPG
    P1010888.JPG
    157.3 KB
  • P1010887.JPG
    P1010887.JPG
    159.5 KB
Feb. challenge 089.jpg
Feb. challenge 087.jpg
This is my entry for Feb. Challenge. I found this a very difficult piece to make not from the turning aspect but from the design part of it. after many BAD days at the office and numerous efforts I have settled for this one I dont have a name for it,at least one that I can print.
It is made from Mahogany , the base and top are 175 mm x 25mm. the three support pieces are 25 x25 mm as is the suppension piece turned to round, The ball is made from a 150 mm cube of scyamore . I hope all had a good time good luck to all.
 

Attachments

  • Feb. challenge 087.jpg
    Feb. challenge 087.jpg
    85.6 KB
  • Feb. challenge 089.jpg
    Feb. challenge 089.jpg
    85.2 KB
  • Feb. challenge 091.jpg
    Feb. challenge 091.jpg
    81.8 KB
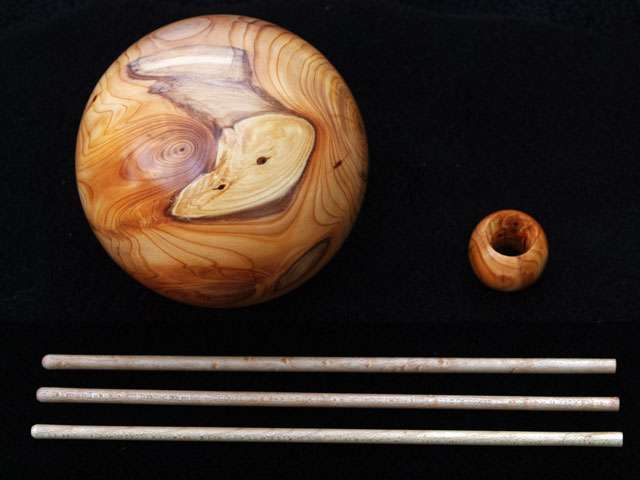
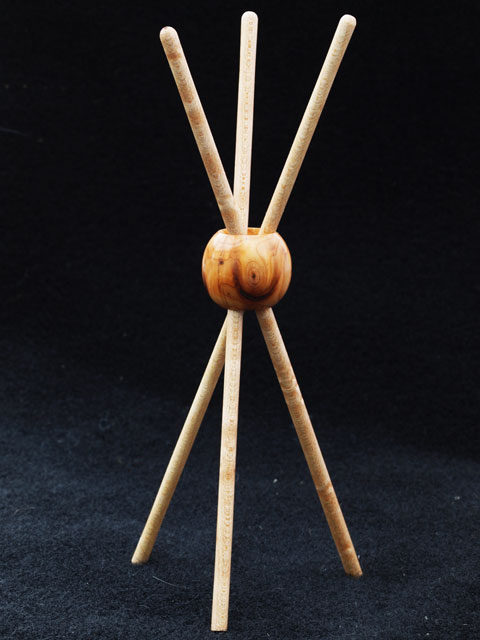
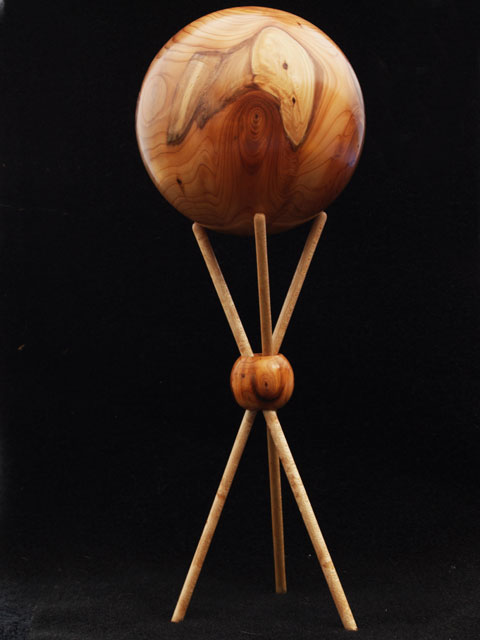
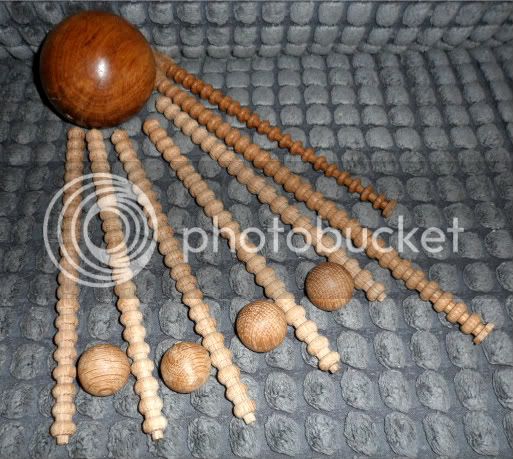
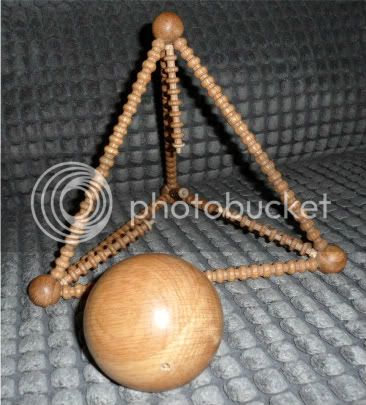
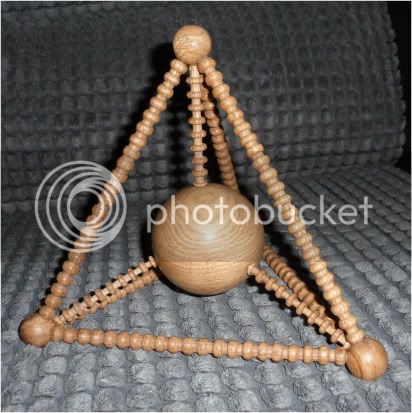
The opportunities presented by this challenge suggested I could head off in a number of possible directions; so of course I did Many balls and ancillary components later I had three ‘working combinations’ and this, with the least components, was the final choice.
Birdeye maple was used for the rods, as a contrast for the yew used for the ball(s). Suspended ball is 90mm diameter.
Balls turned between centres with a skew, then finished between a pair of turned wooden ring centres, sanded (240 through 600 Rhino) and microcrystalline wax to finish. Smaller ball drilled on lathe, mounted on a turned stub chuck and chamfered with a point tool to enable the construction to work.
Rods were turned between centres using a simple drilled wooden block as drive, supported mainly between my fingers whilst ‘cutting’ with a skew . Cellulose SS and m/wax to finish.
The rods are the same length – despite the photo perspective suggesting otherwise...
6779949172_a4d58c21d8_o.jpg

An early decision not to take advantage of Blister’s kind offer of glue led to some challenges, but the suspension system was eventually tuned to hold on it’s own; just...
6779949332_c1f7fc228f_o.jpg

Finally complete with ball
6779949546_878b1501c7_o.jpg
 
Like all other comments the Key word was Challenge - between the weather and the subject matter it was an interesting project. A bit mean for only the second challenge! What happened to breaking us in gently?

For inspiration I reverted to a thread that was running last year in which Phil Streeting was given us ome tutoring on the creativity side of things. I had promised to do a piece with the subject of "balance" and the ball theme was behind my first project so this has become an evolution of that theme making it fir these rule requirements. I did a few seconds of movie which I will put on the creativity thread to avoid breeching rules.

My 4" ball and the base is in Yew. The ring and the ball race were from my old garden swing seat so I think Iroku but may be Teak the spindle is rosewood as I found the Iroku too soft. The ball race bearings are beech. It was all finished in microcrystalline wax and hand finished. I went for the microcrystaline as I figured it needed to be hardwearing as it lends itself to being handled quite a bit

So many processes made this a real challenge!

DSC02037.jpg


DSC02052.jpg


DSC02056.jpg
 
Boy oh boy what a challenge. I lost count of how many ideas would have probably fallen outside the rules.

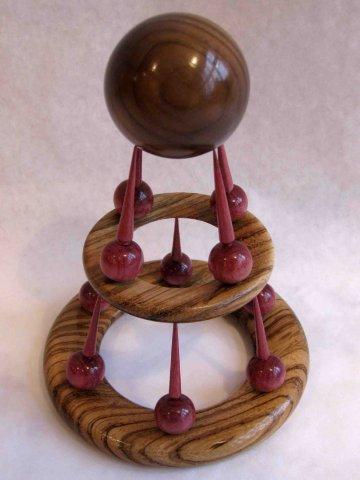
Here is my entry, spiky balls. Not too sure how I got to the final design, but it started by trying to suspend the main ball onto spikes. I tried to incorporate the ball theme into the rest of the design, hence the spiky balls!

The wood is Zabrano for the rings, purpleheart for the spikes and American black walnut for the ball.

The project is 180mm high, 140mm diameter and the main ball is 50mm diameter.

The bottom ring has a 15° slope to the top face to set the angle for the spikes. The second ring has 15° slope to top and bottom to locate the spikes from below and continue the angle to the ball.
I don’t think I used anything but the roughing & parting gouge and 3/8 and ½ spindle gouges.

The project was finished with S/S, two coats of friction polish and then carnuba wax.

Fantastic challenge, cheers David

Pre-Assembly.jpg

Suspended Ball.jpg

Un-suspended Ball.jpg
 

Attachments

  • Pre-Assembly.jpg
    Pre-Assembly.jpg
    34.2 KB
  • Suspended Ball.jpg
    Suspended Ball.jpg
    24.8 KB
  • Un-suspended Ball.jpg
    Un-suspended Ball.jpg
    69 KB
Hi all

Here's my effort the ball is approx 65mm dia and the whole project is made from a piece of sycamore, it has been sanded but no finish applied. like everyone else found this really challenging and I enjoyed it a lot, but wish I had more time to develop this idea as I feel I've ended up with more of a work in progress than finished product.

BeforeAssembly.jpg


AssembledWithoutBall.jpg


CompletedFebComp.jpg


Dave
 
Here's my entry for this months challenge and it was just that. My first real attempt at multi piece turning and I have to say I thoroughly enjoyed it. Anyway here's how it was completed:

Tools Used:
3\8” and 1\4” Spindle Gouge
Long Ground Bowl Gouge
Roughing Gouge
Point Tool
Skew Chisel (used as a shear scraper)

This piece consists of seven separate components turned from Jarrah and Beech. The rings were turned first, followed by the base and bottom pin which allows the piece to swivel changing the angles between the rings. Once the ball was turned the hanger was turned matching the circumference of the ball and this is rebated into the top button. All parts are sealed using chestnut sanding sealer and then polished using the Chestnut polishing system.

Sizes:
Ball: 3 1\2" Diameter
Outer Ring: 8"
Total Height: 9”
 

Attachments

  • DSCN0139.JPG
    DSCN0139.JPG
    133.8 KB
  • DSCN0130.JPG
    DSCN0130.JPG
    117.5 KB
  • DSCN0113-1.JPG
    DSCN0113-1.JPG
    129.1 KB
And here is my attempt at this months entry
As you can see LOL I followed the KISS method
Wood was a piece of Pine that i was going to throw out as it was too short for anything
Laminated it to make a 120mm square block
Ball finished size is 68mm

Roger
 

Attachments

  • SANY0780.JPG
    SANY0780.JPG
    55.7 KB
  • SANY0779.JPG
    SANY0779.JPG
    69.3 KB
  • SANY0778.JPG
    SANY0778.JPG
    68.8 KB
Oak was used throughout this project (it was a table top). It is an equilateral triangle 8.5” in height. The large ball is 3”.
There are 6 sides 8” long. The ball supports are 3.25”. There are 4 small balls at 1” these hold the large ball 1” above ground no matter which way the triangle is placed
Two coats sanding sealer denibed in between and finished with Centenary wax friction polish, all on the lathe.
Tools used skew and spindle gouges.
The idea came quite easily after putting it to the wife. The hard part was putting it into practice.

SAM_0033.jpg


SAM_0036.jpg


SAM_0038-1.jpg


Terry
 
Here's my entry for this months challenge. The ball, which is 70mm dia, and the outer ring, 160mm outside dia, are both made from Maple. The base,140mm dia x 30mm high, and the 2 supports are both made from American Black Walnut. The main tools used were Roughing Gouge, Spindle Gouge & Parting Tool.
All of the parts were finished with Burnishing Cream followed by a couple of coats of Beeswax and buffed using a mop mounted in the chuck.
Cheers for now, Dave
IMG_0956.jpg
IMG_0946.jpg
IMG_0941.jpg
 

Attachments

  • IMG_0956.jpg
    IMG_0956.jpg
    23.3 KB
  • IMG_0946.jpg
    IMG_0946.jpg
    22.8 KB
  • IMG_0941.jpg
    IMG_0941.jpg
    24.9 KB
Sorry, I think that I have missed this one. I mixed up my dates, so here is a simple concept and bad pics. Pepperwood, BLO. finish and a simple push fit/balance. but my ball is round and by hand, no rounding jig thingies.

The stand is streight, the picture makes it look wonkie.....!!!!!! honest !!!!!
 

Attachments

  • P2260002.JPG
    P2260002.JPG
    28.8 KB
  • P2260003.JPG
    P2260003.JPG
    23.3 KB
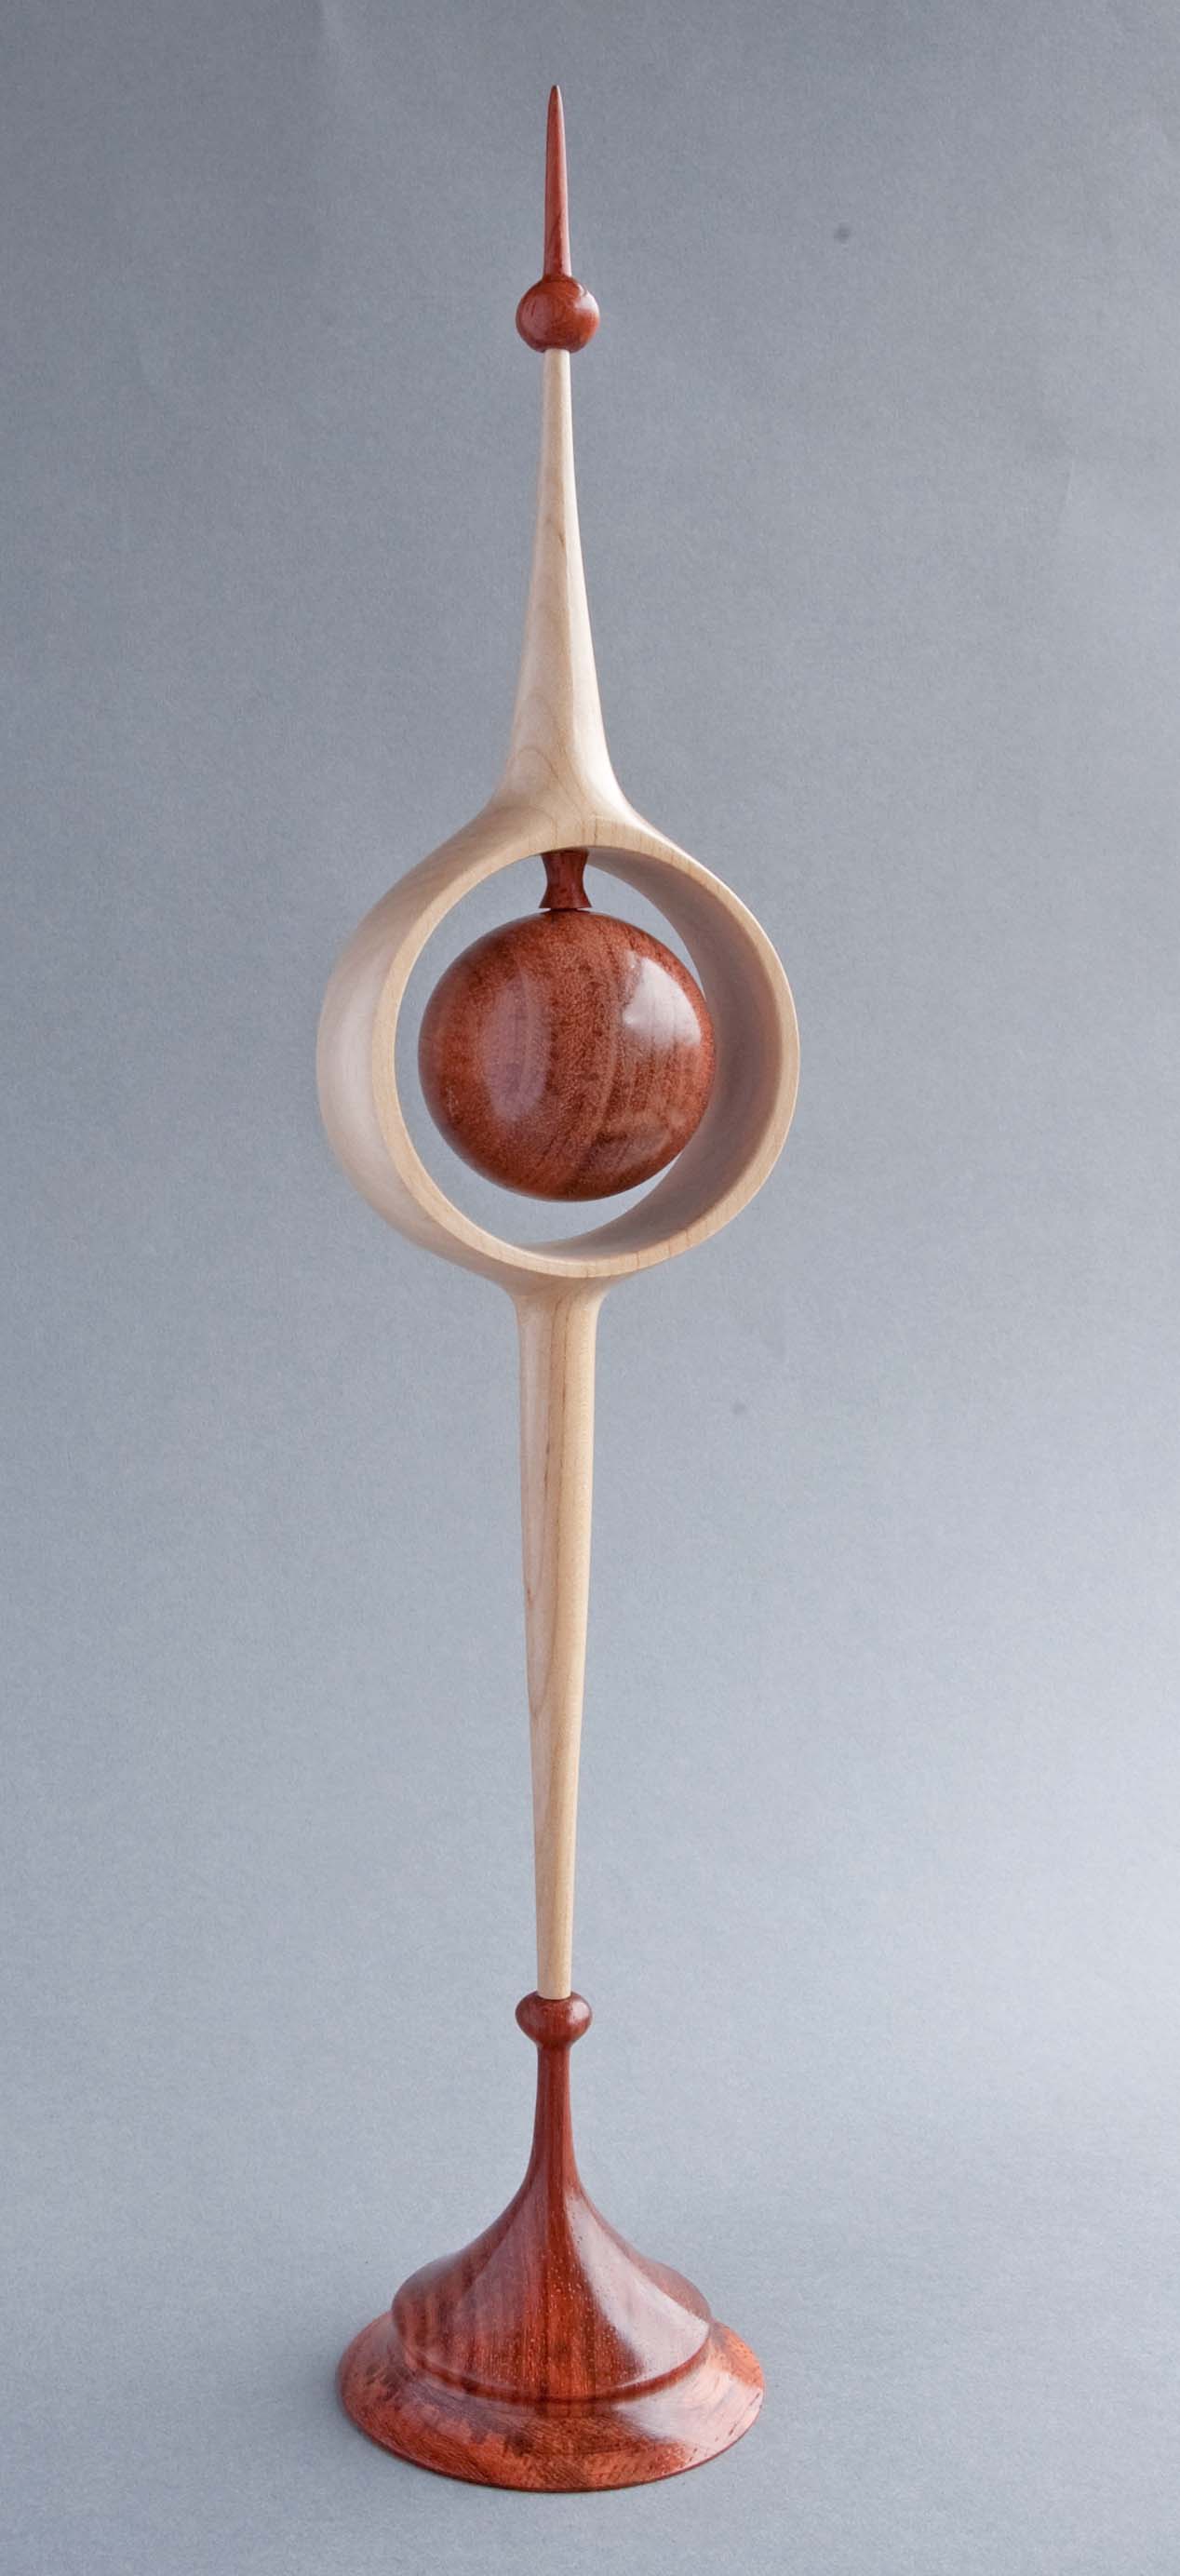
Hi, here is my entry:
Ball diameter 2", overall height 16 1/2", turned from sycamore and padauk.
The ball was turned freehand, using an improvised wooden cup chuck and tail centre. Next, the sycamore section was
turned, first between centres, then remounted on an MDF faceplate with double sided tape to cut the central hole. Finally, the base, finial and little suspension piece were turned between centres.
I used spindle gouges, skew and parting tools. All the components were sanded to 600 grit, finished with cellulose sealer, waxed and buffed.
Ian
ball1.jpg

ball3.jpg

ball2.jpg
 

Attachments

  • ball1.jpg
    ball1.jpg
    221.8 KB
  • ball2.jpg
    ball2.jpg
    174.4 KB
  • ball3.jpg
    ball3.jpg
    187.8 KB
I had a lot of ideas but in the end after watching an episode of mythbusters on the netwons cradle I decided to go with this idea which concept is a desk toy.

The outer rings are made from English Ash and was turned using a faceplate and parting tool. There around 6" in diameter 20mm depth and have a wall thickness of around 8mm.

The "finial" is Iroko, turned between centres mostly using a srew tool. Its around 2-1/2" long and about 3/4" in diameter.

The ball is AW Oak. Single piece that started off 3" square. This was my first and only attempt at the ball and its 2-1/2" in diameter : insert sumg smiley : :lol:

I did the ball between centres without use a jig or other holding devices. I used calipers to ensure each bit was round and true. I used a parting tool to make steps then finished off with the srew, slowing attacking each side, taking off mm's until there was only a few mm keeping the ball between centres and one gave away. Its not perfectly round but for a ball thats been turned using maths and eye work its fairly good and rolls nicely.

Come the last day im sitting at the dinner table at 6:30 thinking I have a few hours to get a finish on it and she tells me shes going out and will not be back till 9:30. She told me ages ago apparently :roll: So I rushed into the shop and got 1 coat of Danish Oil on it and thats all its currently finished with.

As a concept it worked just as I visioned. I made the ball heavy and hanging under the centre line on purpose, to rock back and forth to which it does: http://youtu.be/q-8GhDnjBKw

The chunk missing on the left ring in the first picture isn't a chunk missing its the half hole that holds the finial.
 

Attachments

  • sBall3.jpg
    sBall3.jpg
    60.9 KB
  • sBall2.jpg
    sBall2.jpg
    59.7 KB
  • sBall1.jpg
    sBall1.jpg
    68.6 KB
Here's my entry.
All parts lathe turned by hand...

The ball is ash 75mm diameter. Turned between centres then between cup chucks using a gouge (no jig!). Cardboard template used to check roundness. Sanded to 600. To drill the holes I held the ball in a cup chuck

Tthe main leg struts are from ebony piano keys - flattened the base of them with abrasive then glued paitrs together using a paper joint (newspaper and CA glue). These were turned round between centres. Once round then were then held in a custom compression chuck (I think thats the right name) tightened by hose clamps so that I could round off each end. Then split each pair (taking a long time to scrape off CA glue - last time I'll do that!) and drill hole in each end.
the pins to join the components were turned from piano keys between centres then held in a jacobs chuck to clean off each end.

The 'knee' joins were turned from ebony

The feet and leg/body connections (I guess you could call them hips) were the most problematic parts. To create the tenon I turned discs with a raised cylindrical centre and base (kind of like 2 wide brimmed hats glued together with their domes facing opposite directions. Each one gace 2 parts so I had to make 3 in total. Once turned they were cut in 2 with their edges trimmed off and then held between centres to make round. Once round the compression chuck was used to clean up the ends and drill the holes for hip connection.

All ebony parts sanded to 1200.

All 37 parts buffed and waxed.

The leg joints are a fairly tight fit and hold their position. However, they can be moved to put the legs into different positions. If required the ball can be supported from below as in the photo or can be suspended from above.

R0012939-3.jpg

R0012944.jpg

R0012951.jpg
 

Attachments

  • R0012939-3.jpg
    R0012939-3.jpg
    84.2 KB
  • R0012944.jpg
    R0012944.jpg
    66.6 KB
  • R0012951.jpg
    R0012951.jpg
    73.9 KB
Here is my entry for the Feb suspended ball challenge

Size are ( In inches )

15" wide
10" high
2" thick

Timber used

Burr Elm for the bridge ( as you can see this was machined prior to use , I cut a bowl blank out of it 2 years ago and this natural edge piece was too nice the throw away )

I turned it at 600 rpm on a screw chuck ( Have a youtube video of this that I will post after the Judging ) to true up the front and rear faces as they were both quite rough

Sanded from 120 to 600 grit , brushed out all the nooks and crannys then treated with one coat of Woodoc 10 Velvet Finnish , No need for a high gloss finish as the wood is quite spectacular without it

The Ball ( 2 1/2" dia ) was turned from banksia nut , I love the intricate mechanics of these nuts , Turned between centers by hand ( No jigs used ) each seed removed by hand one at a time with tweezers

The center support piece was turned from a pen blank ( Tiger wood I think )

All parts are a push fit ( No glue needed )
 

Attachments

  • IMG_1456.JPG
    IMG_1456.JPG
    102.7 KB
  • IMG_1457.JPG
    IMG_1457.JPG
    110.1 KB
  • IMG_1458.JPG
    IMG_1458.JPG
    100.2 KB
Status
Not open for further replies.

Latest posts

Back
Top