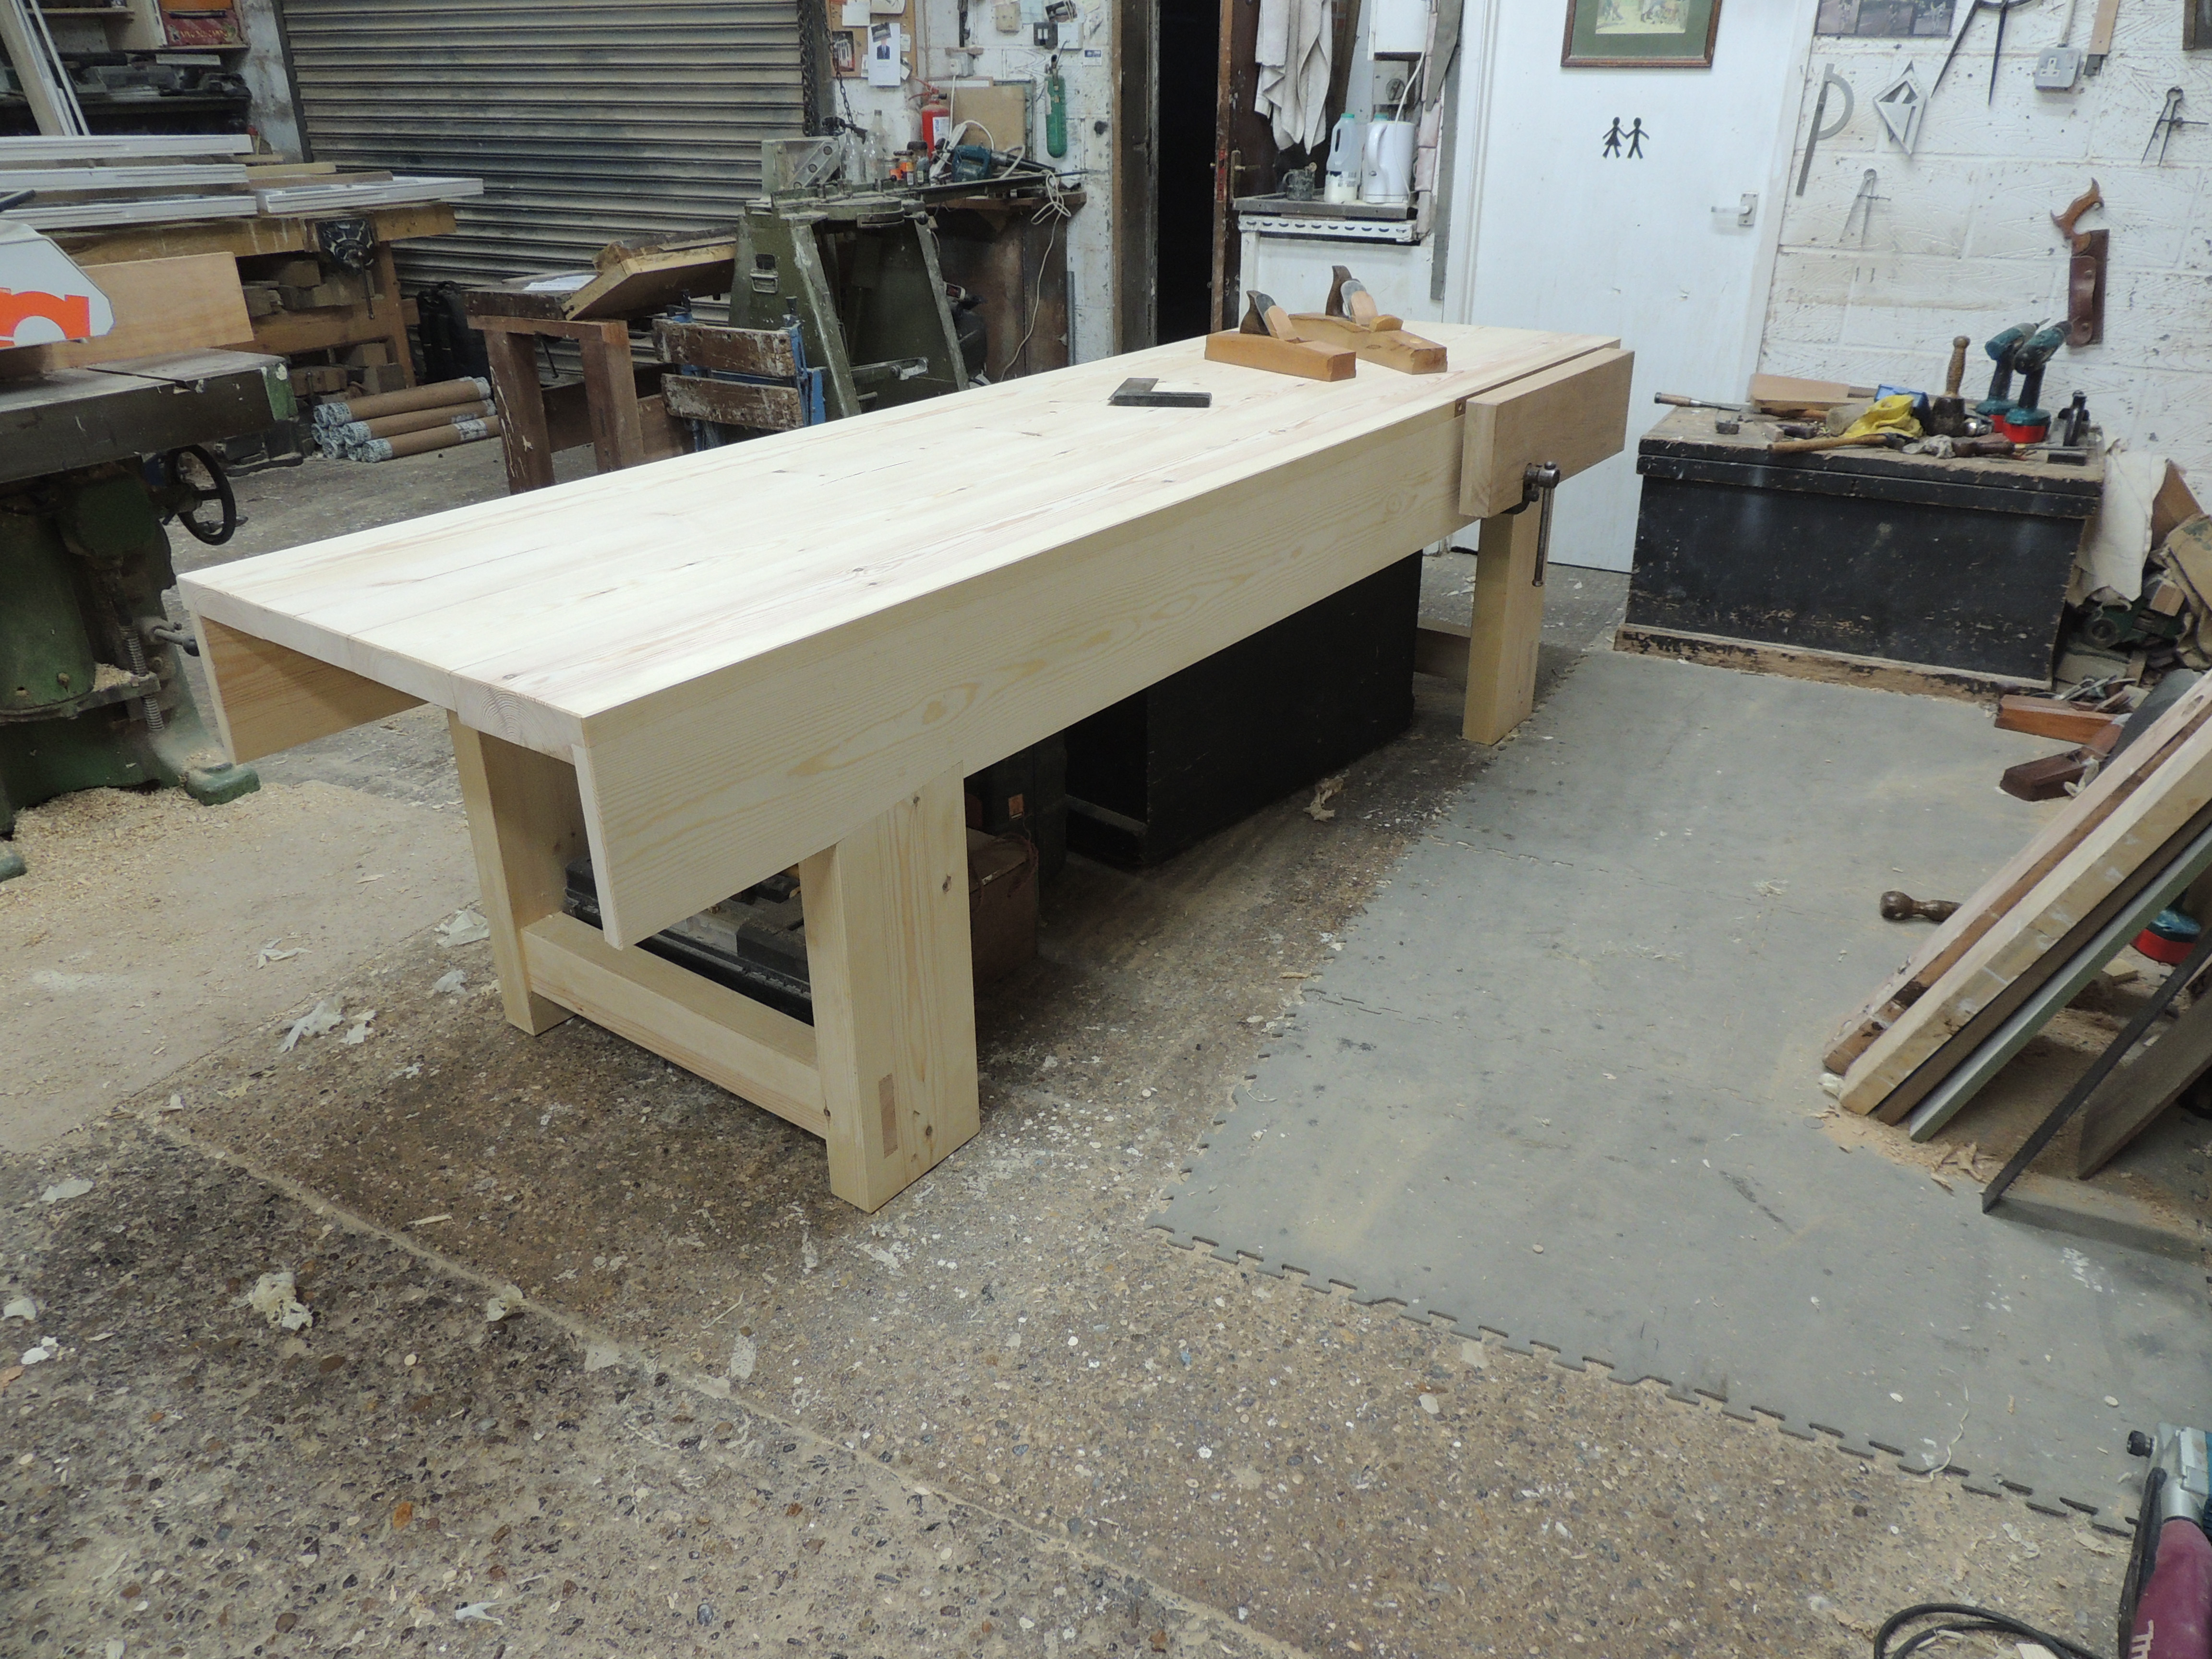
English Workbench Build

UKworkshop.co.uk

Help Support UKworkshop.co.uk:

This site may earn a commission from merchant affiliate links, including eBay, Amazon, and others.
Jacob":11mdqp7y said:
phil.p":11mdqp7y said:
....
You wouldn't need to thread the wood, just inset inset nuts on the underside. .....
You don't even need to do that. Just find a piece from the scrap pile* which you can prop under the end of the workpiece. If necessary clamp it to the apron or leg.
These things get over thought and make life more difficult!

*PS if too long - saw a bit off. Hope that helps.

He's talking of bolting something down as a cheaper alternative to buying holdfasts. Where does the piece of scrap come into it?
 
El Barto":1murjf9h said:
richarnold":1murjf9h said:
memzey":1murjf9h said:
Richard's efforts at linking to images are drawing a blank but as someone who has seen his bench in the flesh (wood?) and tried it out, I can attest to everything he has said. Including I might add, his complete lack of aversion to screwing or nailing stops into the top! It looks great and works even better. Richard also cleverly added turn buttons on each corner which act as planing stops - a brilliant idea I hadn't thought of that might come in useful for you Nick (hopefully Richard sorts the pictures out as I'll have a terrible time explaining them).
Thanks for your kind comments.
Having a real struggle to find a new way of adding images. The google link works for me, but not for anyone else apparently!
Photobucket now want hundreds of dollars a year for me to be able to have 3rd party sharing, so that's not going to happen!!!!.
Anyone got any other ideas for someone who isn't very computer savvy?

Try imgur.com. You just drag and drop images and it uploads them automatically. Once the images are uploaded if you hover your cursor over it a little drop down menu will appear that gives you sharing links, such as the type this forum uses. I've attached a couple of screenshots of what I mean. It's very quick and simple to use.

qqoNXEv.png


rzDMBWQ.png
hope this works!
http://imgur.com/F2Yi6r9
http://imgur.com/IsI5Tc9
http://imgur.com/oNh2Aqr
http://imgur.com/ZwDSZbU
 
phil.p":2dl7h4q8 said:
Jacob":2dl7h4q8 said:
phil.p":2dl7h4q8 said:
....
You wouldn't need to thread the wood, just inset inset nuts on the underside. .....
You don't even need to do that. Just find a piece from the scrap pile* which you can prop under the end of the workpiece. If necessary clamp it to the apron or leg.
These things get over thought and make life more difficult!

*PS if too long - saw a bit off. Hope that helps.

He's talking of bolting something down as a cheaper alternative to buying holdfasts. Where does the piece of scrap come into it?
oo ar I thought it was about a deadman! People do like over-fancy solutions!
 
Nice plane, Rich!

I grew up with a bench that has an apron. It's still at mum's bungalow, not a hard edge left on it, it's so worn. But I have a Roubo-style bench and really like it. It's the Fortune bench from Landis' book. I find the apron idea just gets in the way. I like to be able to clamp stuff down along the front edge.

I've lost over an inch in height in the last few years and now my bench feels a tad high for comfort, and as it has sled feet it is not easy just to chop off an inch or two.. It also has some woodworm, and although I've treated it, I not happy having it. So I think a new bench build is on the Tuit list.

I think the bottom line is, build what suits your style. If you are used to working with an apron, and have the gadgets to make use of it, then that is the right solution for you. But when I remake mine I shall change very little. There certainly won't be an apron.

And as for "English" bench? I've never seen one with splayed legs in the flesh. And I tend to be of the mind that if something dies out, there is usually a good reason for it.
 
right, I'm afraid I need to return our enjoyable discussion on bench design to the far less entertaining real world and report a minor catastrophe on my bench build. Remembering I had some cut brads left over from when I did the floorboards in the spare room I nipped out earlier this evening to do the glue up on the legs.

No doubt exacerbated by the daft choice of nails, existing cracks in the top of two of the legs widened significantly - the one at the back in the pic (on the left) is the least bad: the crack pushed the inside corner towards the rail so that the shoulder of the half lap no longer connects with the face of the leg, and that the leg is pushed out of square. Sadly I did not notice until I had driven the first nail completely home, at which point I decided I had little choice but to continue.

The one at the front looked okay until I banged in the last nail when the crack suddenly opened up. At first sight this one looked correctable in as far as the outside edge was pushed away from the rail and could be chiseled/planed back to where it should be, but the split is very wide and presumably the joint is no longer any good as the nails have nothing solid to hold on to in the rail part. Also, this bit of leg has to receive nails from the apron and bearer which I fear might cause it to shatter all together.

I have a horrible feeling these are 'start again' errors, but any advice gratefully received.

I am so despondent that I can't even muster the energy to reply to Jacob's latest grumbles :(

drzTAH2-rf2Onm6nTUm1qXMIHhhbq1ceZgTqHRXuWAM_giT8VU6Ngg
 
Richard, use BBCode box. When you add your link. click on it then right click on here to add the link. will display your pics. You can reduce/edit the pic size in imgur before you share. This helps on here because imjur displays regular size pictures. Umlike Nabs ones lol :D

Regards
Chris
 
Nabs. You're doing great mate. Don't get knocked back. Onwards and upwards fella! Have to add, in my tiny opinion at least, if youre using wood classed as fencing it will have been treated like fencing during drying etc. I could well be wrong but i'm not sure I would put in the effort on that. By the time you have paid a bit more multiplied buy your labour multiplied by your time.... evalauations on a piece of paper....
 
ha ha! out of curiosity BM, do my pics look huge before you click them? In my browser they shrink to fit the window and the open up big when clicked.
 
no. pics are normal size mate. lol. im very guilty of it myself. :D
But it makes some ppls view spaz out. :-" :-"
 
Can you not just drive a few screws in perpendicular to the cracks to tighten them up?

Sent from my ONEPLUS A3003 using Tapatalk
 
Bm101":33h9sbl5 said:
Richard, use BBCode box. When you add your link. click on it then right click on here to add the link. will display your pics. You can reduce/edit the pic size in imgur before you share. This helps on here because imjur displays regular size pictures. Umlike Nabs ones lol :D

Regards
Chris
Is this any better.
ZwDSZbU.jpg
 
nabs":36r71xpt said:
right, I'm afraid I need to return our enjoyable discussion on bench design to the far less entertaining real world and report a minor catastrophe on my bench build. Remembering I had some cut brads left over from when I did the floorboards in the spare room I nipped out earlier this evening to do the glue up on the legs.

No doubt exacerbated by the daft choice of nails, existing cracks in the top of two of the legs widened significantly - the one at the back in the pic (on the left) is the least bad: the crack pushed the inside corner towards the rail so that the shoulder of the half lap no longer connects with the face of the leg, and that the leg is pushed out of square. Sadly I did not notice until I had driven the first nail completely home, at which point I decided I had little choice but to continue.

The one at the front looked okay until I banged in the last nail when the crack suddenly opened up. At first sight this one looked correctable in as far as the outside edge was pushed away from the rail and could be chiseled/planed back to where it should be, but the split is very wide and presumably the joint is no longer any good as the nails have nothing solid to hold on to in the rail part. Also, this bit of leg has to receive nails from the apron and bearer which I fear might cause it to shatter all together.

I have a horrible feeling these are 'start again' errors, but any advice gratefully received.

I am so despondent that I can't even muster the energy to reply to Jacob's latest grumbles :(

drzTAH2-rf2Onm6nTUm1qXMIHhhbq1ceZgTqHRXuWAM_giT8VU6Ngg
Start again.
You are on a learning curve. What you have learned is that cr&p wood is cr&p and you can't make a silk purse with a sow's ear, which is a valuable lesson! :lol:
Further to that - if you value your time at all, and adding the value of the finished product (zero so far and going nowhere), you would save a fortune by buying some good timber.
Very good quality 4x4" redwood is available from any good timber yard - it's specially selected and kept for newel posts.
 
thanks Jacob - good advice, put with oodles of tact and sensitivity as usual! I do agree, mind you, and will start again.

It was indeed a false economy to try and use those terrible old fence posts. Although they are not completely to blame, I can see now that just getting the hang of the basic techniques is enough of a challenge without having to work around the additional problems caused by poor materials.

I think I have learned a bit about how wood behaves in the process. For instance I now see, with the benefit of hindsight, that both the spits happened where I had borrowed the original cut ends - although I did this to avoid cutting into the bits of the posts that had been in concrete, it meant I was using the part with the most cracks and checks in it.

Re. time vs money, obviously I'd prefer to waste neither, but once I got over the initial disappointment I realized this cock-up was not an complete waste of time since I learned a bit in the process and hopefully will go quicker on the 2nd attempt as a result.

I will report back once I get some better quality wood for the legs and rails - I may be some time since in a further galling turn of events my car has broken down.

toodles
 
Richard's bench is incredibly beautiful ... but unless you're building a bench to support giant redwood logs while you hollow out canoes it's far heavier and larger than the vast majority of us would ever need.
 
Jacob":1ksjcgt5 said:
oo ar I thought it was about a deadman! People do like over-fancy solutions!

Well yes, it's mostly fun and entertainment and a bit of being able to do stuff around the house without getting a man in for me.

I hadn't thought about tapping the legs for a deadman though, thanks for that!

It's the work of a few seconds to move a bolted down component with the impact driver, it would take me quite a bit longer to find a suitable off-cut as I run a tidy ship, not that that's a consideration really.

When I designed my bench I tool Sellers advice about the apron and didn't bother with one; you can use a spacer, a deadman or a sash cramp in the tail vice to support a long piece and not having the apron makes it easier to clamp to the bench top on the over-hang as well as easier to clamp bowed timber.

That said, as a lover of overly complicated solutions, a bolt-on apron would give the best of both worlds. Or the otherway around, if oyu have an apron, you just need to add a spacer inside the vice to move the work piece away from the apron if you wanted to do that.

I think that split post is recoverable with some glue and the right joint with the next stretcher; you want to bolt the two perpendicular stretchers to each other such that they hold the post in compression. If you fix the top to the stretchers such that the top is providing the stiffness the joint there can be made to have no load on it fairly easily.
 
phil.p":3qk2e1cq said:
Richard's bench is incredibly beautiful ... but unless you're building a bench to support giant redwood logs while you hollow out canoes it's far heavier and larger than the vast majority of us would ever need.
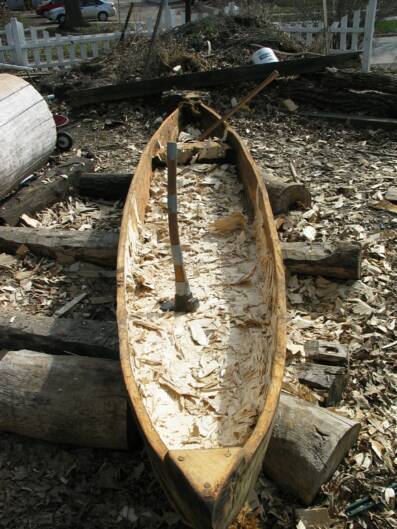
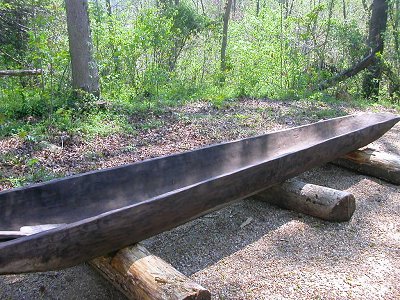
Actually you wouldn't need a bench at all.

henricuscanoe.jpg


MakinADugoutCanoe~~element120.jpg


In any case a beautiful bench could be a distraction - some people polish them up and worry about scratches! :lol: :lol:
 
paulrockliffe":q9dby0rd said:
..........That said, as a lover of overly complicated solutions, a bolt-on apron would give the best of both worlds. ........
The main point of the apron is that it braces the whole structure, stiffens and adds mass to the front beam. You could think of the beam plus apron as a unit and the essential part of the bench. It's usually fairly hefty - ex 1 1/2" and housed to the legs. Then it doubles as a vertical work surface - dog holes, G clamps, deadman clamped on, etc etc
The trad bench is very cleverly and purposefully designed (by tradition). The others are just over-weight tables :roll:
 
That's true, but if you preferred to work without an apron all of the structural strength provided by the apron can easily be designed in in other ways.
If you've not got an apron you would only need two 90 degree brackets between leg and stretcher to give the same bracing. I think the extra mass is irrelevant as if you were designing for mass you would want the mass as low as possible so you wouldn't add it at the apron unless you wanted an apron. And if it was really important you'd bolt the bench to the concrete floor anyway and incorporate all that mass.

There are so many ways to skin a cat that it's always design following use and preference rather than the other way around.
 

Latest posts

Back
Top