DBT85s Workshop - Moved in and now time to fit it out

UKworkshop.co.uk

Help Support UKworkshop.co.uk:

This site may earn a commission from merchant affiliate links, including eBay, Amazon, and others.
DBT85":270cht53 said:
If I need a double top plate I need to know before I start nailing things together. Rafters will be on top of studs which is why I haven't had a double top plate until now.
You don't.
 
Just as well as I'd already started.

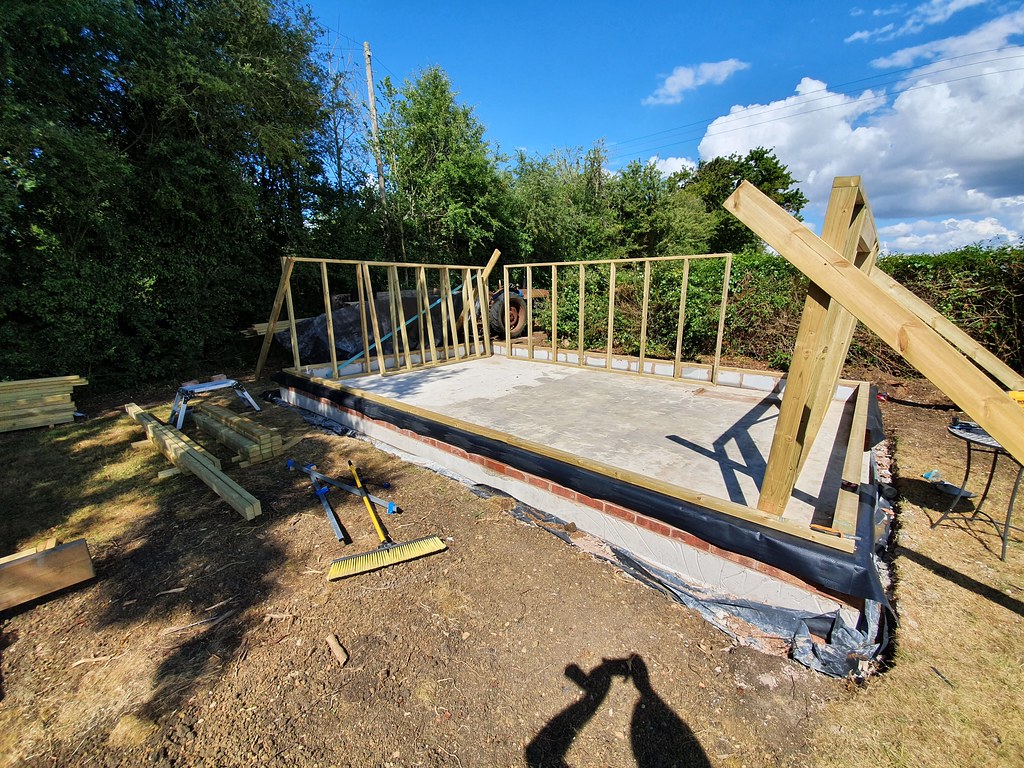
Early finish today. 4 of the 6 frames are done, just the 2 for the window wall to go and I can't do those till I have more timber. Hopefully that will be tomorrow.

Just using some of the 2x6 that will soon be rafters to hold the frames up out of the way for tonight. I braced the short sides square with a batten and will do the long sides tomorrow with the OSB that will be going on.

EVerything mostly went ok. I had a couple of bits that were very bendy and needed persuading into shape but I got there in the end.

The nailer isn't that heavy when you just pick it up, but it feels it in the hand. It would probably need a 12ah battery to really balance it out and feel good. But it sunk everything nicely.

50005631632_2dd3088df0_b.jpg


Lets hope I can get timber tomorrow. Just need 5x 3m 50x100.
 
It's a bit too late now, but it might be worth checking what size OSB your supplier actually stocks (if you haven't already done so). I recently bought 12 sheets of 9mm OSB for a roofing project and my supplier only had 1200x2400, he mentioned it up front, and for me it wasn't an issue, but it would be a pain in the proverbial for your workshop, IIRC Steve Maskery had a similar issue when building his workshop.

Jon
 
My plans were all scalable depending on what got delivered and it turned out to be standard 1220*4+2440. Well nearly. Its 2445. No idea why.
 
If you shop around you may well find you can get a first and second fix De Walt nailer battery kit for under £600, including batteries, case etc.
 
DBT85":320p5fwv said:
These frames will be secured to the first sole plate (beded on the mortar and dpc and strapped down)

have you put mortar on the top ( 2nd course ) of bricks then dpc and then the timber?

OR

dpc on top of bricks then mortar between dpc an timber?

Either way whats the idea behind the mortar? And not just bricks / DPC / Timber?
 
Cracking on now, nice one; but cant help thinking why didn't you just leave the walls laying down until your ready to fix them in place? They're likely to twist being proped like that. Can't believe this thread has 25 pages and the walls haven't even been built yet :lol:
 
Fil":20tw4f9o said:
Either way whats the idea behind the mortar? And not just bricks / DPC / Timber?
Its to take any unevenness out between the bricks and the wood and bed the DPC so there is no gaps between it and the bricks which would let water through. It gives a solid even bed and is used to make sure everything is level, if you’re a few mm out it can Level it all up with the frames sitting perfect.

We were told as boys by builders In the 60’s that the mortar isn’t to stick bricks together, it’s to keep them apart. When we were puzzled, he laid a wall with just sand, no cement , and one with no filling. Only a few courses, but the one with nothing was all over the place and rickety, the one with just sand was really solid.
 
DBT85":2g4lledo said:
Just as well as I'd already started.

Early finish today. 4 of the 6 frames are done, just the 2 for the window wall to go and I can't do those till I have more timber. Hopefully that will be tomorrow.

Lets hope I can get timber tomorrow. Just need 5x 3m 50x100.
Great progress things starting to take shape. Nice to get away from the cement trades.
 
Some timber has been ordered, just waiting to find out which century I can click and collect.

Fil":21pzvota said:
These frames will be secured to the first sole plate (beded on the mortar and dpc and strapped down)

have you put mortar on the top ( 2nd course ) of bricks then dpc and then the timber?

OR

dpc on top of bricks then mortar between dpc an timber?

Either way whats the idea behind the mortar? And not just bricks / DPC / Timber?[/quote]

DPC stapled to the underside of the plate, (buy a hammer tacker), mortar on the top of the 3rd course of bricks and blocks, then plate down DPC side first so that its sitting on the mortar. It actually works well as the DPC sticks well to the mortar and doesn't slip around.

Mortar just there as a gap filler if I recall. I believe you could use some some from a caulk gun but you'd need buckets of it. I used about 10kg of cement and 60kg of sand to make that bed, for reference.

owen":21pzvota said:
Cracking on now, nice one; but cant help thinking why didn't you just leave the walls laying down until your ready to fix them in place? They're likely to twist being proped like that. Can't believe this thread has 25 pages and the walls haven't even been built yet :lol:
Ha yeah its a bit long now, that's why I'm putting in the link in the OP so people can jump through it.

Walls were al on the floor until I was about to start the 5th frame. Basically had to lift them as I had no space to work. They are propped both ends and hopefully by the end of today some or all will be up.
 
Fil":3kh7cxg3 said:
DBT85":3kh7cxg3 said:
These frames will be secured to the first sole plate (beded on the mortar and dpc and strapped down)

have you put mortar on the top ( 2nd course ) of bricks then dpc and then the timber?

OR

dpc on top of bricks then mortar between dpc an timber?

Either way whats the idea behind the mortar? And not just bricks / DPC / Timber?

Its mainly because there is inevitably a high point in the brickwork on which a frame will otherwise pivot. The bricks I use (Weinerberger Rennaissance) are deigned to look like reclaimed hand-made bricks, and so have random curves. Sitting a frame on that would mean a very small area of contact. They also enable leveling if you haven't got the brickwork perfectly level, and finally it reduces air infiltration (draughts). There is a minor element too of raising the timber above any moisture that gathers on the top of the plinth.

I don't know why this is an issue as it is one of the quickest and simplest little steps in the whole build process, and produces a higher quality result than the alternative.
 
I don't think it's an issue Mike, just people like me who've never done anything like this trying to understand.

Collecting timber at 10.30. 5th frame already finished and just about to cut the OSB that I've nailed to it.

Only the small window wall frame to do now. Should have walls up by the end of play and maybe (outside chance) a ridge beam up.
 
MikeG.":lslubtiu said:
I don't know why this is an issue as it is one of the quickest and simplest little steps in the whole build process, and produces a higher quality result than the alternative.

DBT85":lslubtiu said:
I don't think it's an issue Mike, just people like me who've never done anything like this trying to understand.

DBT85s hit the nail on the head ( well fired it in with his nice new toy )

The answer makes perfect sense, and obviously will be applying it to my own build, now im aware and understand the need for it.

Cheers both of you :D
 
Chunky Monkey":z1kgtptx said:
It's a bit too late now, but it might be worth checking what size OSB your supplier actually stocks (if you haven't already done so). I recently bought 12 sheets of 9mm OSB for a roofing project and my supplier only had 1200x2400
Just a note about 9mm OSB, you will probably find its actually 1197 X 2397mm and was generally used for external sheathing for timber frame construction, where a 6mm gap was left between boards.
 
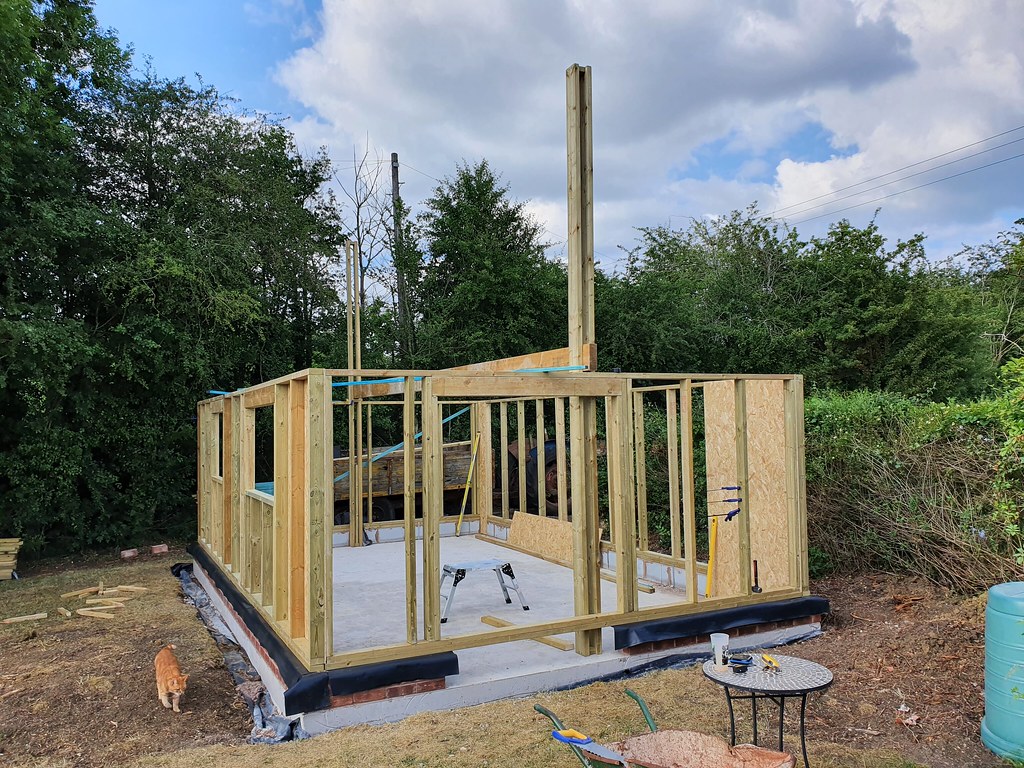
A good day on site. Travis had the timber in so I picked it up at 10:30 by which time I'd already done the large window panel. Got back and made up the small window panel and then got that, the empty side and the smaller of the 2 panels for the backs side up and clamped together before Mike appeared to help with the bigger lifts. Getting the large window panel up with OSB sticking out the bottom by nearly 30cm was a treat, as was then remembering to cut a notch in the OSB for the service conduit once it was upright.

Got all frames up and squared, secured together and down on the plates. Then we started making the temporary supports for the ridge. Its 7.2m long and 220x70 so not too light. With some supports made from future rafter ties to prevent side to side motion and a spacer in between, we secured them to the middle of the gable walls and then decided we might as well get the ridge up to top palte height and move on tomorrow.

While the ridge is heavy, when it can't move left or right its actually just a dead lift and no trouble at all to lift one end up about a meter and stand it on an offcut, so the same at the other end, then raise again up and over the plated at both ends. We did need my Mk10 hammer to persuade it back over the second plate as it was too high to push it easily.

Tomrrow I'll be raising it in smaller sections and placing something under it each time to hold it up, with all lateral motion prevented its an easy enough lift. Once in place I can start on cutting the rafters.

These ridge supports are 4.8m and the ridge only needs to go to about 3.6m, so they are a bit longer than needed, but were on hand.

It's feeling like a nice big workshop at the moment. While the space will be more than double my current space, the extra headroom will give me a lot more volume than I have now so it will feel even bigger.

If anyone wants pics of anything else just ask.

50009970806_e15c939b28_b.jpg
 
That's looking absobloodylutely brilliant. Just be careful with that lift tomorrow, and always have a plan in case something happens. Like your back suddenly goes half way through a lift......know what you are going to do. Also don't fix the ridge permanently at its height....let it take the location given by a pair of rafters. =D> =D> =D>
 
Yep that's the plan Mike. It can only go up and down and there will be support under it to prevent it dropping more than a foot or so. It'll be boosted to the correct height above plate and then the rafters will hold it in place.

Once it's happy I'll secure a stud under it at each gable like we talked about before.

Apparently it's due to bucket down here tomorrow. Yay.
 
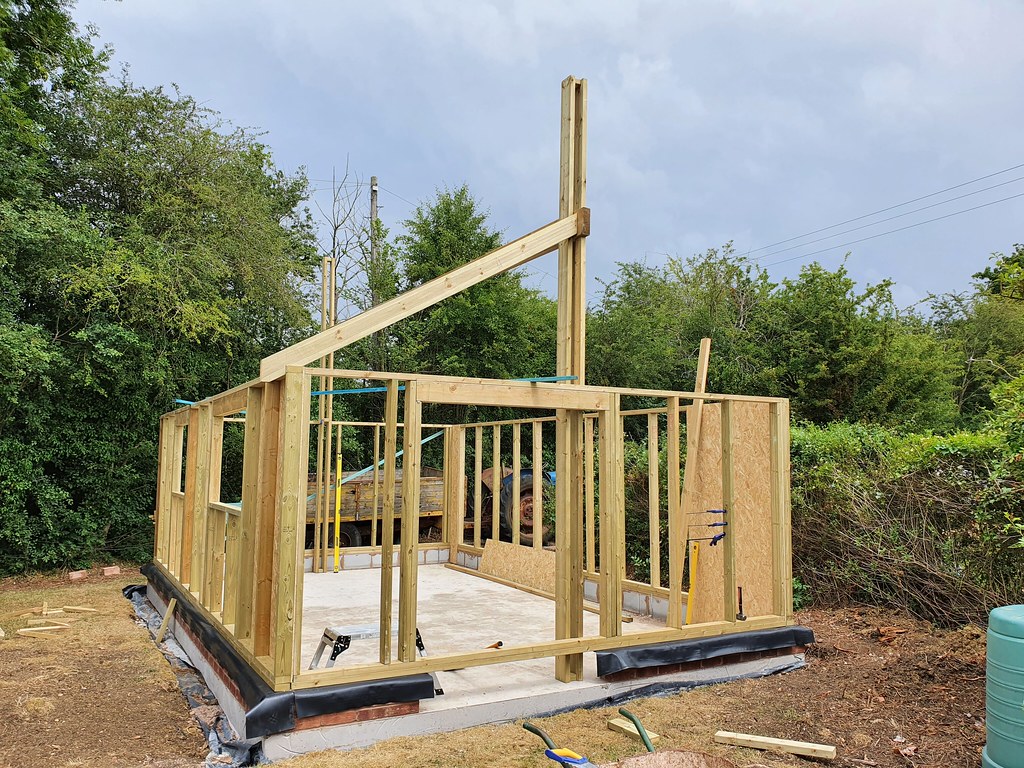
Lift complete alone and without any issues. The joy of limiting its movement to vertical only. I used a series of offcuts placed on the top the plate to raise it up about 400mm at a time to the final height. Just used other longer offcuts and then my 1.8m level as something to put under it and lift with the legs as it's too much to lift with arms above your head.

First rafter is cut to plan using a speed square and offered up.

50011878333_ffcf447eb2_b.jpg


Thunderstorm brewing so we'll see how much more I get done.

Planning on using something I saw on skillbuilder to cut the remaining 25 rafters.
 

Latest posts

Back
Top