A couple of new shooting boards

UKworkshop.co.uk

Help Support UKworkshop.co.uk:

This site may earn a commission from merchant affiliate links, including eBay, Amazon, and others.

Derek Cohen (Perth Oz)

Established Member
Joined
2 Mar 2005
Messages
3,397
Reaction score
1,906
Location
Perth, Australia
I thought I'd post this here since there was a recent thread on building shooting boards.

I was asked to build a ramped shooting board for a WoodNet forum member, so I built two to choose from.
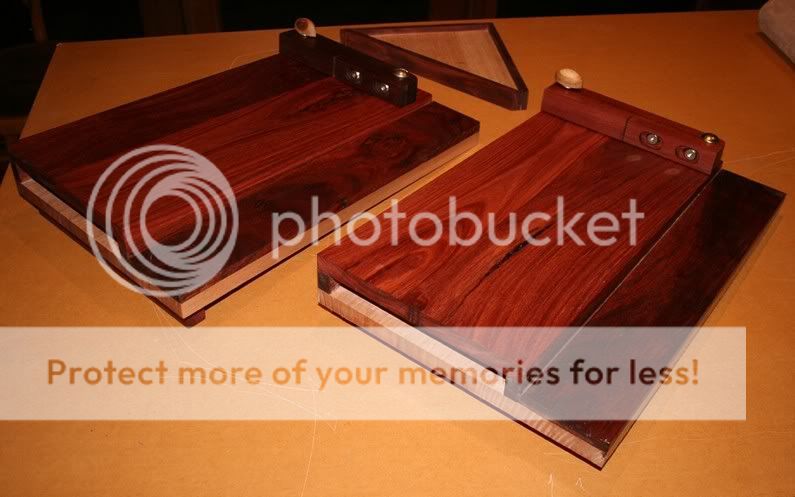
Chuteboardsx2.jpg


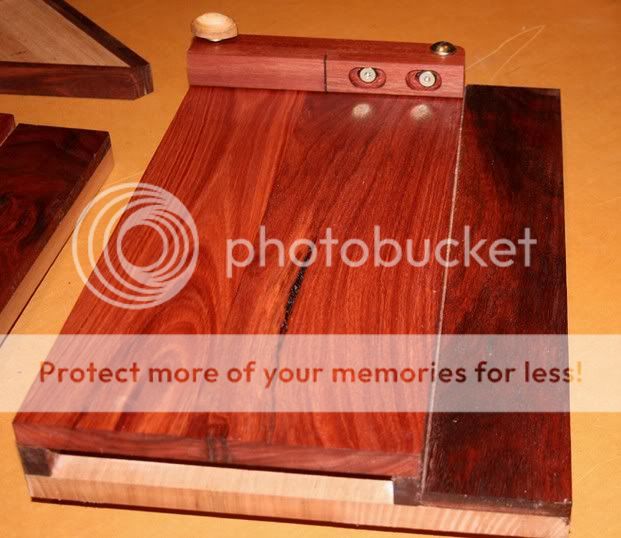
Both boards use Jarrah as the primary wood and Tasmanian Oak as the secondary wood.

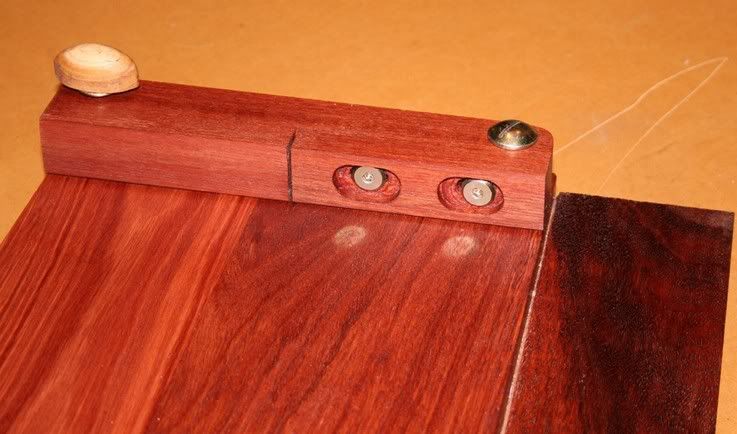
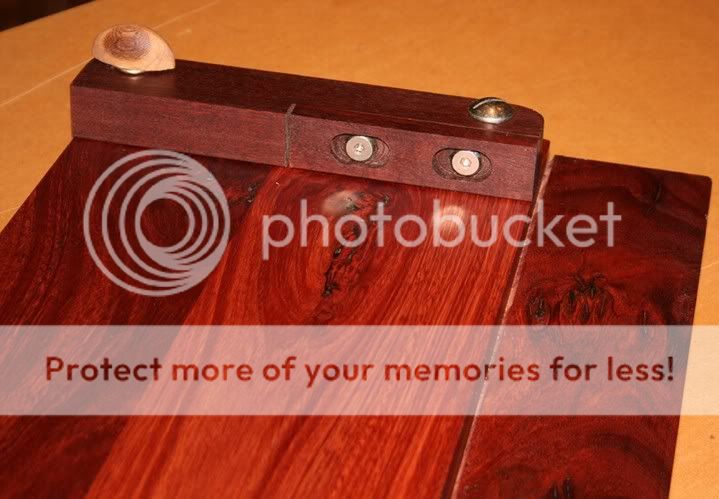
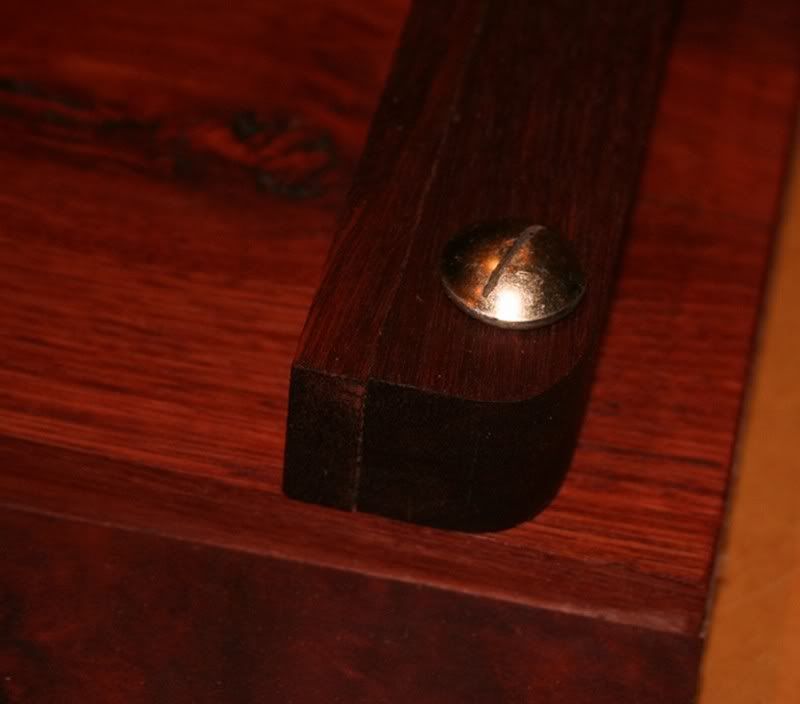
These boards have a few small improvements over previous ramped shooting boards. The fence continues with microadjustability, but now it also has a sliding secondary fence that may be used when worn. The rear of the fence is no longer square but rounded to prevent breakout.

Here is board #1:
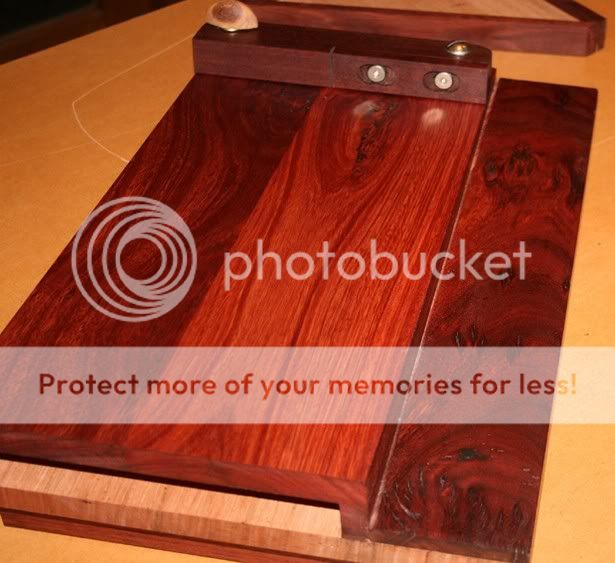
Chute1.jpg


And a close up of the fence. Not the adjustment knob in Elm.
Chute1Fence1.jpg


Board #2:

Chute2.jpg


And its fence:

Chute2Fence1.jpg


A close up of the rounded section of the fence:
Chutebreakout2.jpg


And what happens when the fence is square:

Chutebreakout1.jpg


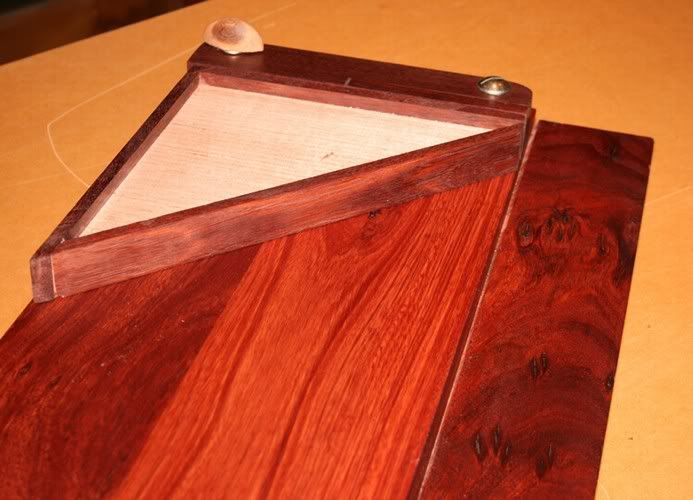
There will be a mitre fence for each. It will attach with a bolt from the rear of the main fence (as I have done previously). This allows the mitre fence also to have microadjustability.

Here is a mock up:
Chutemitrefence1.jpg


Why microadjustability and not a fixed fence? The adjustment allows not only for fine tuning of the fence, which is necessary after the board becomes worn and is re-planed, but it also permits one to do away with shims. The adjustment is 1/8" each way.

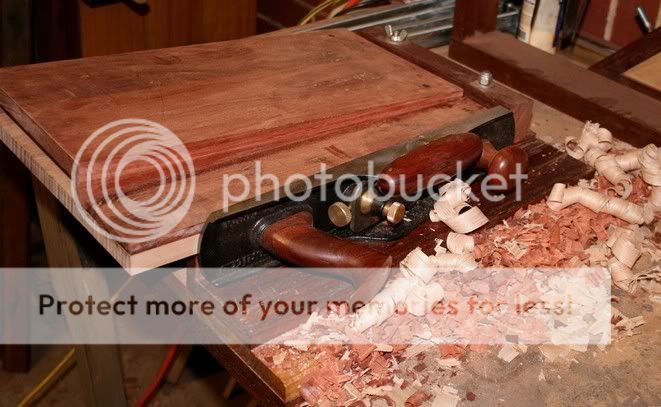
One last picture. I always wanted to post this .. a shooting board shooting a shooting board :grin:
Chutebeingshot.jpg


Regards from Perth

Derek
 
These put my offcuts of MR MDF to shame, I must get round to making both a ramped board and a hot dog, pity that wonderful looking wood is not so freely available over here. :roll:
 
I put a large lounge floor down with solid t&g jarrah about 15 years ago it looked well when it was sanded up and finished,I cant remember what it was finished with though.

Dennis
 
very nice Derek, how much is postage from Oz? ;)

I do wonder with the ramped design, is it hard to hold the work piece against the square fence? i.e won't it be angled to there is a gap at the bottom between piece and fence?
 
No, the fence is square to the ramp - if that makes sense- so the board sits flat and square relative to both ramp and fence but the whole thing is on an angle.

It's a neat idea - uses more of the width of the cutting edge so you should be able to go for longer before you have to touch up the iron. I like the rounded back on the fence too, you've really put some thought into these Derek - I wish I'd read this before I made a new flat one last week!!!
 
Hi Chris

I don't have any pics to hand of the microadjuster at work. However it is so simple and basic that a description should be enough.

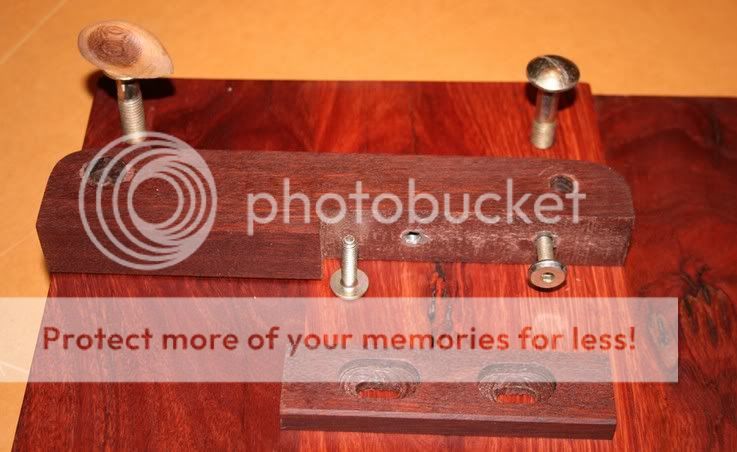
Essentially, the bolt on the side of the runway is fixed and tight. It is a pivot point. The other bolt, with the knob, is for adjustment. The fence at that point has an oversize hole and this permits movement forwards and backwards by 1/8" (1/4" in total).

This is a small amount of movement but enough to set a fence precisely when the board is built and later again when the board is planed or "adjusted" (wood moves). Also it means that small, thin shims are unnecessary to square up a fence or support a board that need to be planed at a very slight angle.

About the "skew" - the amount here (4-5 degrees in this case) is not significant if you are comparing it to a plane with a skewed blade. Howerver it does make a difference to the cut. There is some evening of wear across the blade plus a reduction in the jarring forceas the blade hits the wood.

For comparison of the above I can cite my flat shooting boards and a shooting plane with a skew blade used on a flat board (Stanley #51/52).

Regards from Perth

Derek
 
Derek":3hyye25r said:
The fence continues with microadjustability, but now it also has a sliding secondary fence that may be used when worn.

Derek - why didn't you make the sliding fence full width? Your solution seems to require a more complex shape in the main face (making the recessed area accurately flat seems to present difficulties), and making the sliding fence face coplanar with the corresponding face of the main fence also seems tricky.

A full width sliding fence is easy to make, and fully circumvents these issues.

I'd have added that a removeable false face also allows adjustment via taking careful shavings (thus voiding the need for microadjustment), but I fully accept your exploitation of the adjustment for tweaking both square and mitre shooting configurations.

Gotta' love that Jarrah though!

BugBear
 
Hi BB

The short sliding fence is really easy - really! The harder part was drilling out the mortices for the screws as I do not have power routers, etc available until an office addition over the garage/workshop is complete. At present I am 99% handtools only.

Mainly that part of the design was aesthetic - you do have a point about a full length fence, but it ain't purtier!

First cut out the section from the main fence. Once this is returned to the main fence with the screw holes/mortices added, then it is just a matter of planing down the excess from the main/original fence. This takes a few plane strokes with a trying plane.

Swings and roundabouts: I'd rather make two saw cuts than add one or two extra screw mortices.

When I arrange grain I look at it with a little alcohol rubbed on the wood. But this never brings out the beauty of the timber as well as a finish. It is always such a wonderful moment when I apply a little oil or shellac and see the grain and colour come alive for the first time. These boards are finished in Danish Oil for durability and wax for slide.

Regards from Perth

Derek
 
Derek... great work, as always. I do love the woods you use! Jarrah is indeed inspiring... one of my Aussie favourites.

Shooting boards have long fascinated me, and I have made a few... though none that could compete with what you have made. When I was using one of my first 'issues', I kept on dropping the miter plane on to my bench when the blade had passed the fence. Probably never happens anyone other than me!... but very annoying when it does. So my next SB did not have the fence at the end of the board, but approx. 15cm short of the end. The 'extension' served as a 'runoff' section, where I could bring the plane gracefully to a halt. I appreciate that this makes the SB larger (longer), but the advantages helped me a lot.

I do like your idea of rounding off the back of the fence. There is indeed, little more annoying than the 'chips' that peel off the back of the fence and get in the way.

-gerard-
 
Lovely boards Derek

I suppose these come more into their own when long lengths are shot - the raising feature less effective on small widths?

Whose going to perfect the ultimate board - one that raises slightly with each stroke?
Now there's a challenge! :)

Rod
 
Hi again Chris

Here are some pictures of the fence - if you anyone wants to make one.

The breakdown ...

Fence-brokendown1.jpg


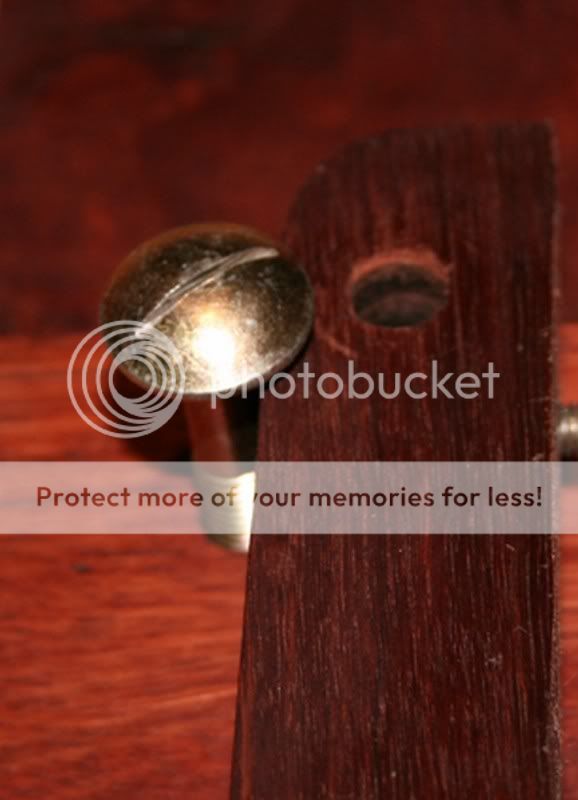
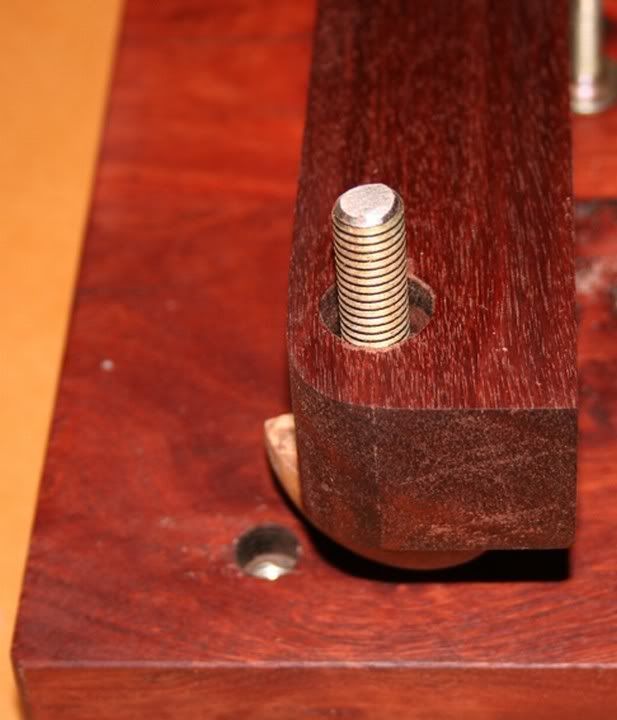
Close up of fixed side. Note that this fit is very tight. There is no play at all. I cut a groove for a bladed screwdriver so that the bolt may be inserted and removed.

Fence-fixedend.jpg


Close up of the adjustable side. Note that there is 1/8" movement to front and rear.

Fence-adjustableside.jpg


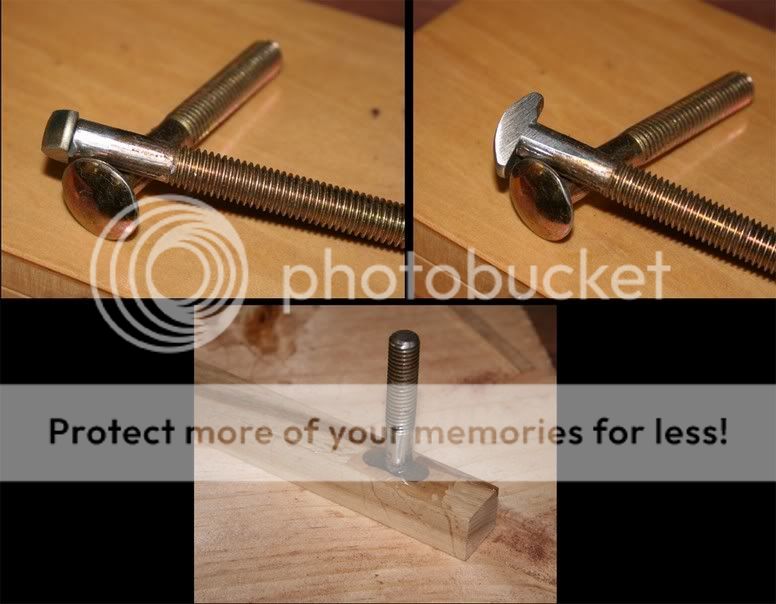
All bolts are held by nuts recessed and epoxied in place on the other side.

Fencescrewandinsert1.jpg


And a breakdown of making the adjustment knob prior to shaping with rasps.

Fenceknobforshootingboard.jpg


Hope that someone finds this useful.

Regards from Perth

Derek
 
Will someone please put me out of my misery?

I've heard of this ramping technique before as a substitute for a skew and I can't for the life of me see it. Skewing is when the angle of the blade is skewed to the line of the cut. Here the blade is still square to the cut ,it's just that the cutting takes place from corner to corner rather than edge to edge.

I do appreciate the point about spreading the wear on the blade and the sole, and that in itself may be very advantageous, but it's not skewed.

By the way Derek, you should have made a few dozen, we all want one :)

Regards
Steve
 

Latest posts

Back
Top