3rd party chipbreakers

UKworkshop.co.uk

Help Support UKworkshop.co.uk:

This site may earn a commission from merchant affiliate links, including eBay, Amazon, and others.
The Lie-Nielsen in my experience made no difference at all and I have just sold it.

Can you say what you did to set it up? How you used it?

I have had excellent results with my LN's.

I believe that David C also epoxied his Clifton :)

Regards from Perth

Derek
 
Ah, so yourself and David C glued the chipbreaker and the rest of the world has to follow. :roll:
You both may have been better served by learning to use the chipbreaker correctly. Takes all of 10 seconds to learn! Almost quicker than reaching out for the epoxy! Certainly quicker than mixing it. Try the instructions given earlier.
You two must try a little harder. Dear me.
BTW Derek: no need to take a Plane blade to a coarse power grinder every time you need to sharpen the blade! That way the upper part of the chipbreaker can remain in the same position, even after you have sharpened it multiple times. Then you can do like the rest of us: take those wispy thin shavings that everyone is so fond of.
 
Mignal,

What an extraordinary post.

I suggested the possibility of using silicone not epoxy. The slop in the joint of the Clifton two part cap iron, is exceptionally unhelpful, when using an ultra close setting to control tear out.

I suspect you may not have tried that? The idea of leaving the top section in place, while sharpening, only suits a particular style of sharpening. One which I choose not to use.

The upper section is never flat and can in some cases, bend the blade all by itself.

David
 
Hi Derek,

I would say without question David C is a much more experienced user of planes than I and I respect the Clifton did not work for him or for you. On how I used the Lie-Nielsen I set it as I usually set a cap iron on my smoother, as close as I can get it to the edge. Sadly I don't measure my set up which is not very useful for illustration purposes! Perhaps I could express it as I can see a trifle of the blade :). I just didn't notice any difference with the LN, yes it's nicely made but for me that's all I could say about it. On the other hand the two piece Record Stay Set Cap Iron (I don't have a clifton but I assume it's very similar) is nice and thick, applied no bending forces to the blade and made the feel of the plane firmer and more solid. Perhaps this is more noticable in a simple Bailey than a Bedrock?
Derek my #4 refinements can be seen here ihttp://gshaydon.co.uk/blog/4-plane f you want to take a look (not up to the standard of your work mind). The main thing I would change next time is not using the abrasive to flatten but try my Diamond plate in the same way described in this thread.
I can appreciate my experiences will not be the same as others but at least they offer another way that will further muddy the water!
 
David,

This has probably been mentioned more time than I've had hot dinners but what is your go to plane. I seem to think a 5 1/2? And iff so do you use a Bailey or a Bedrock or none of the above?
 
Oh I've tried it alright David. Anyway, my post was in response to Derek stating that he epoxied it after the chipbreaker had fallen off 'for the umpteenth time' or words to that effect (see his review). Hardly difficult to correct. I've never had that problem, so clearly someone was doing it right.
BTW It was Derek who stated that you epoxied it on, not me.
Back to the 2 piece though. I have three of them. Two are Clifton and one is an old StaySet. NONE of them have any significant play in them. By significant I mean nothing that would upset the setting of the breaker to an extremely close tolerance. In fact I can barely detect any play at all, in any of them. I've just gone to the workshop and tested them all again. The results are the same: perfectly fine for setting to an extremely close tolerance.
Maybe I have been very fortunate and ended up with the 3 that happen to be very good. In which case maybe the Clifton owners would care to comment. It's also the first time that I've heard that Clifton Planes are only suitable for use on coarse work. I wouldn't know, I've never owned one.
 
MIGNAL":2ixwpgt6 said:
CStanford":2ixwpgt6 said:
rafezetter":2ixwpgt6 said:
Has anyone had experience of these? It sounds like a good way to improve my old record 5 and 7 as they have the "normal" hook(?) style chipbreakers.

Or are there other recommended aftermarket breakers?

ECE have been manufacturing chipbreakers that to my eye appear to meet most of Derek's criteria and have been doing so for longer than virtually any of the manufacturers he mentions by name have even been in existence.

They may not be susceptible to a retrofit, but it might just be cause to own one of their planes outright. They seem to have smoothing covered with a thick iron and thick breaker, 50* bedding, adjustable mouth, no-backlash adjustment, lignum vitae sole. If anything is missing I surely can't think of it.

If you are referring to the Primus? Had one, sold it. Hated the spring adjuster and the method of releasing the blade. I have an ECE that uses the simple wedge and much prefer it. One sharp tap on the back and blade/chipbreaker are out.

Yep, the Primus. The adjuster does take a little getting used to but it's nice they have simple wedged planes in their line as well.
 
MIGNAL":340flmd0 said:
Oh I've tried it alright David. Anyway, my post was in response to Derek stating that he epoxied it after the chipbreaker had fallen off 'for the umpteenth time' or words to that effect (see his review). Hardly difficult to correct. I've never had that problem, so clearly someone was doing it right.
BTW It was Derek who stated that you epoxied it on, not me.
Back to the 2 piece though. I have three of them. Two are Clifton and one is an old StaySet. NONE of them have any significant play in them. By significant I mean nothing that would upset the setting of the breaker to an extremely close tolerance. In fact I can barely detect any play at all, in any of them. I've just gone to the workshop and tested them all again. The results are the same: perfectly fine for setting to an extremely close tolerance.
Maybe I have been very fortunate and ended up with the 3 that happen to be very good. In which case maybe the Clifton owners would care to comment. It's also the first time that I've heard that Clifton Planes are only suitable for use on coarse work. I wouldn't know, I've never owned one.

I have a Clifton two piece capiron paired with a Hock cutter installed in a Record 4 1/2 and it's pretty sublime. It wasn't always so, but it wasn't because of the iron or breaker. I found a little nub of metal on the frog holding the iron off on one corner. Two and a half seconds later with a fine file it was gone and problem solved. The whole thing seems to hold a close setting just fine. Anybody having trouble might want to turn the lever cap screw an eight of a turn to the right for it is the lever cap that bears down on the removable part of the Clifton two-piece arrangement. Just put a little more pressure on it. It can certainly be set very, very close to the edge and stay put -- far from an unsolvable riddle.
 
Not wanting to get embroiled in the arguments about Clifton cap-irons, but I thought I'd mention my experience, mainly because I can't ever remember dropping the nose piece. In fact I sometimes find the damn thing sticks too tightly when you do want it off for sharpening, and needs gently 'persuading'.

I don't think I ever consciously analysed the problem of losing the nose-piece, I just somehow automatically solved the ploblem as follows. When removing the blade for honing, first place the plane heel-down on the bench, with the sole at 45 degrees supported at the toe by your off hand, so that the frog surface is horizontal and facing up. You can either hold the body or the front knob, depending on what size plane you're dealing with. Flick the lever cap off and place it on the bench. Lift out the blade and cap-iron. Place the plane down on the bench. The whole sequence takes about 5 seconds or so (though I confess I've never timed it with a stop-watch).

Reinstallation is the reverse of removal, but takes a bit longer because you don't want to ram the freshly-honed edge into a lump of metal. Handily, the blade 'stays put' as you install and tighten the lever cap.

I now find I do this with one-piece cap-iron bench planes as well. Just seems to work for me. I certainly don't say it's 'right' or 'wrong', but mention it in case it helps someone else.
 
MIGNAL":3re6wgll said:
Maybe I have been very fortunate and ended up with the 3 that happen to be very good. In which case maybe the Clifton owners would care to comment.

I have several Clifton and Record planes all fitted with two-piece, Stay-set style cap irons. They have been my cap irons of choice for several years and, in my view, they are the best designed cap irons ever. None of mine have any significant play in them and present no difficulty in setting close to the edge of the blade.

I've never really understood the nonsense talked about the lower section of the cap iron falling off. Are the experienced woodworkers who complain of this really so lacking in dexterity? In all the years that I've been using them I've never had a problem with the lower section falling off.

The reason that the Stay-set style cap iron is so good is that it keeps the blade flat and rigid. All the other cap irons tend to exert a bending force on the blade (although this is minimised if the blade is a thick one).

Cheers :wink:

Paul
 
. On how I used the Lie-Nielsen I set it as I usually set a cap iron on my smoother, as close as I can get it to the edge. Sadly I don't measure my set up which is not very useful for illustration purposes! Perhaps I could express it as I can see a trifle of the blade . I just didn't notice any difference with the LN, yes it's nicely made but for me that's all I could say about it.

Hi Graham

When I asked you the question I was interested in two factors. The first was that you had moved the chipbreaker to the very edge of the blade. The second was that you had honed a microbevel of 45 degrees to the front of the LN chipbreaker. From your reply it seems that you may have done the first but unlikely that you completed the second. If so, then you really did not get your money's worth from the LN chipbreaker. This would apply to any chipbreaker except the Stanley and the Clifton, since both these come with a 45 degree leading edge. My comments about these two being more difficult to set close to the edge still stand.

Regards from Perth

Derek
 
I'm a long term user/devotee of Record Stay-Set cap irons (I assume Clifton's two-piece cap irons are very high quality replica) and have never experienced problems mislaying nosing sections, or with loose fitting parts, or regarding accurate & fine placement for finish shavings. I tend to keep my Stay-Set planes for finer finishing work and my others for hogging off material. You simply position the two-piece cap iron in the same way as a one-piece example, before tightening the screw and setting it in the plane and - with the cap iron set correctly - there's no real need to use thicker irons.

There shouldn't be any need for faffing around with epoxy or silicon sealant when positioning two-piece cap irons, unless you suffer severely from the shakes or have poor hand:eye co-ordination.
 
Any of the aftermarket cap irons should yield a significant improvement over the original steel pressings - the Achilles heel of the bailey pattern plane design. I agree with Derek that the tendency to stretch as the screw is tightened makes them very tricky to set close with any accuracy. The originals are fine for straight grained white wood, but you don't need to venture far into smoothing European hardwoods before flutter becomes an issue.

Interestingly, some of the current production 'economy' planes from India seem to have deviated from the traditional cap iron length that has been a global standard for over a century. This effectively renders them 'unfettleable' in terms of fitting upgrade cap irons. One that I looked at recently also had a very long Y-lever with the pin installed almost on the trailing edge of the cast wings through which it is driven, rather than in the centre of them. The only way the customer could fit a thicker iron was by brazing up the holes and re-drilling in the correct place.

On the marmitey subject of stay-sets, the reason for the joint between the two parts not being tight, is that it isolates the separate tasks of supporting the iron and transferring pressure from the lever cap. Thus the forces from one cannot interfere with the other. The top part needs to sit fully flat on the blade, effectively laminating it (the benefit of which will be felt more with a thinner iron). If it isn't flat - it won't work, either flatten it or get it replaced.
 
GazPal":3n566w0t said:
I'm a long term user/devotee of Record Stay-Set cap irons (I assume Clifton's two-piece cap irons are very high quality replica) and have never experienced problems mislaying nosing sections, or with loose fitting parts, or regarding accurate & fine placement for finish shavings. I tend to keep my Stay-Set planes for finer finishing work and my others for hogging off material. You simply position the two-piece cap iron in the same way as a one-piece example, before tightening the screw and setting it in the plane and - with the cap iron set correctly - there's no real need to use thicker irons.

There shouldn't be any need for faffing around with epoxy or silicon sealant when positioning two-piece cap irons, unless you suffer severely from the shakes or have poor hand:eye co-ordination.


Exactly my sentiments. I'm baffled as to why some people seem to have trouble with dropping the nose section or positioning it. I've used a Stayset for 30 years, in an old Record No.6 that I acquired. At the time I'm pretty sure that I didn't even know what a Stayset was. I just used it. I can't ever recall having problems with it, even though the 2 piece cap iron was undoubtedly 'new' to me. I've checked mine yet again. What is remarkable is just how accurately the two pieces fit together. Quite honestly, you would have to call in the boffins from NASA to measure the 'play' in any of mine.
 
MIGNAL":3rbokl3l said:
GazPal":3rbokl3l said:
I'm a long term user/devotee of Record Stay-Set cap irons (I assume Clifton's two-piece cap irons are very high quality replica) and have never experienced problems mislaying nosing sections, or with loose fitting parts, or regarding accurate & fine placement for finish shavings. I tend to keep my Stay-Set planes for finer finishing work and my others for hogging off material. You simply position the two-piece cap iron in the same way as a one-piece example, before tightening the screw and setting it in the plane and - with the cap iron set correctly - there's no real need to use thicker irons.

There shouldn't be any need for faffing around with epoxy or silicon sealant when positioning two-piece cap irons, unless you suffer severely from the shakes or have poor hand:eye co-ordination.


Exactly my sentiments. I'm baffled as to why some people seem to have trouble with dropping the nose section or positioning it. I've used a Stayset for 30 years, in an old Record No.6 that I acquired. At the time I'm pretty sure that I didn't even know what a Stayset was. I just used it. I can't ever recall having problems with it, even though the 2 piece cap iron was undoubtedly 'new' to me. I've checked mine yet again. What is remarkable is just how accurately the two pieces fit together. Quite honestly, you would have to call in the boffins from NASA to measure the 'play' in any of mine.

My Stay-Set cap irons "click" tightly together too. :D I've been using them (Numbers 03 - 07) since the early seventies and the question regarding accurate placement tends to be a non-issue during set-up.
 
Hi Derek,

You are quite right, I did not hone a 45 deg micro bevel on the LN Cap Iron. Although you are right, this would of improved things I felt ordering a high quality product for quite a high price I did not feel I should improve further on what has already been branded as "Improved". Especially when the Stanley Pattern or Clifton's are ready to go so to speak. Personally I am more than happy to refine cheap tools or vintage tools but if say I bough a new LN #4 which in Bronze is £300.00+ (for comaprisson usd would be $500> they get to pay $350 on that side of the pond the lucky devils) I would not want to improve on anything, luckily and rightly so the LN quality means selling it was easy. While I raise the issue of the #4, does anyone feel the tote is to close to the lateral lever on the LN #4?
 
Hi Graham

Even two years ago, if asked "what role does the chipbreaker play?", I would have answered, "To stiffen and support the blade". Since then I, along with many others, have learned that it can do much more than this - that is can control the shaving in the same way as a high angle plane does. This is not new information, but seems to have become downplayed and minimised in recent decades to the point that it is new for many.

The thing is that Lie-Nielsen continue to take the stance that the chipbreaker is a cap iron, that is, it supports the iron only. When they brought out their chipbreaker (about 10 years ago - it was the first review I wrote), the rationale was that it did a better job of supporting the iron than the thin Stanley type, which was previously used.

The fact is, the angle to the leading edge of the LN chipbreaker (like the LV) is 25 degrees. This would not be sufficient to deflect shavings from a Type I into a Type II chip formation no matter how close you get it to the edge of the blade. So your experience of the LN chipbreaker under performing is very reasonable. Unless you honed the chipbreaker to 45 degrees (or more - the Kato video suggested up to 80 degrees), all it will do is support the iron.

Now I am not sure - and I would like to hear - how many here deliberately set up the chipbreaker as close to the edge of the blade to minimise tearout in interlocked grain. How many actually work with interlocked grain - unless one does, you will not see the gain.

How to tell if you have set the chipbreaker close enough? the simplest way is to look at the resulting shaving - the "chipbreaker effect" causes the shaving to straighten up. A curly shaving is more likely to reflect a Type 1 chip (where the shaving is breaking ahead of the blade. This is vulnerable to tearout). A straight shaving reflects a Type II chip (where the shaving has undergone a significant and dramatic change of direction, breaking at the blade, and does not tearout).

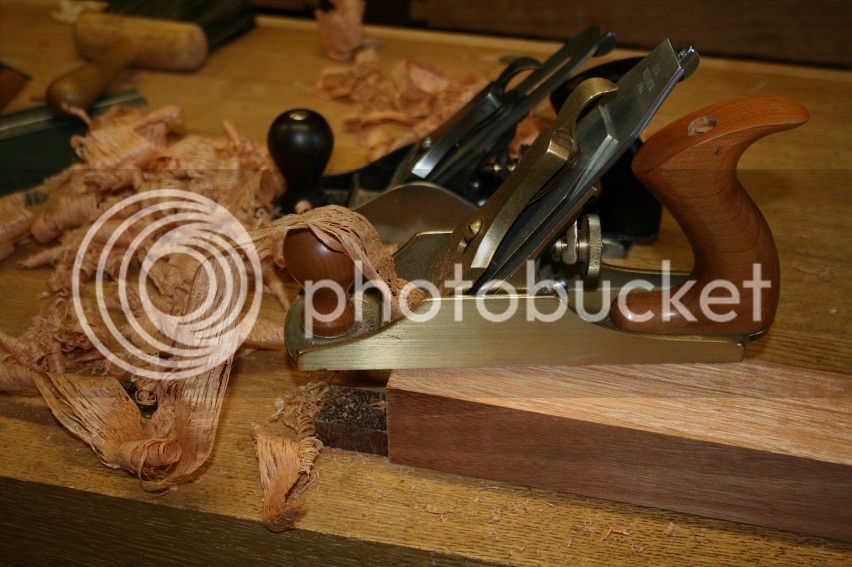
Here is a straight shaving (in the background are curly shavings):

LNsetup1_zps5f8c1de0.jpg


So, who uses the Clifton chipbreaker with interlocked grain and sets it close enough to the blade to produce straight shavings?

Regards from Perth

Derek

Are you able to produce straight shaving after straight shaving (essentially at will) or one or two straight shavings mixed in with some that aren't so straight?
 
Hi Charles

How's tricks?

I can produce whichever shavings I, or you, wish.

That photo was taken a few weeks ago when I was restoring a Stanley #3 and #4 1/2. There were many shavings made during this process. If you look carefully at the name of the blade on this #3, you should see it is a LV (actually a PM-V11) and it has the LV chipbreaker. This was when I also took the time to compare various chipbreakers.

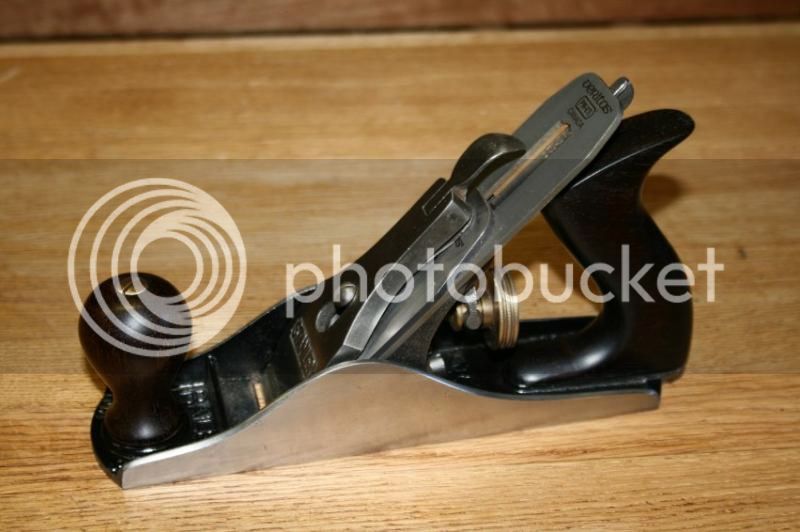
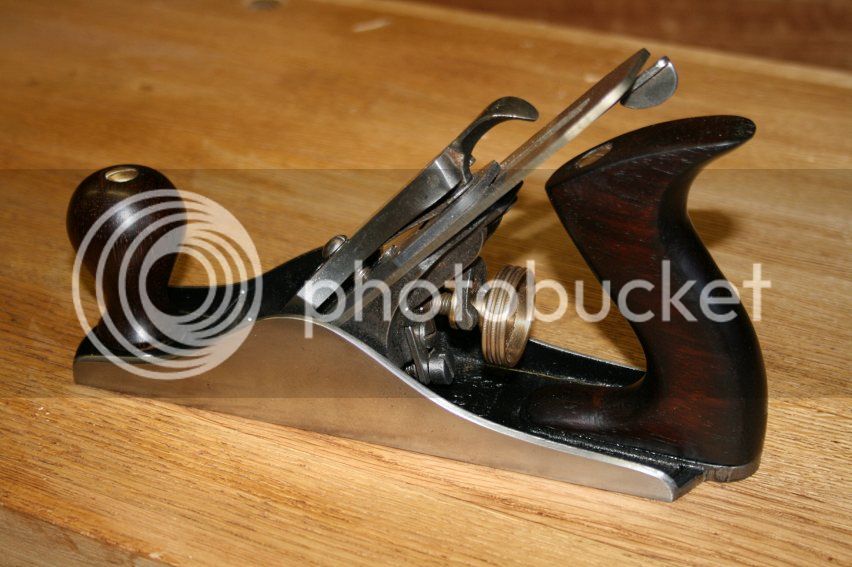
BobsStanley1_zpsfab0b186.jpg


BobsStanley2_zpsbbc0c785.jpg


Regards from Perth

Derek
 
Thanks Derek,

That sheds some light on why the LN needs further work and I respect their stance on this athough I would think they might need to change? That said I am rather impressed that the Stanley version, although rather cheap and cheerful, does have the correct angle to reduce tear out. On when I have used the Stay Set to remove tearout that would be when I made some oil stone boxes.

Final Shot 1.jpg


Sadly the timber used was only as exotic as Sapele! That said there was swirly reversing grain on the lids that did tear out when I got them close using my Jack Plane. My Stay Set was able to remove the tearing without any issue. However, it was only Sapele! It would be nice if you lived a little closer, I could then try some of that knarly Jerrah.

I think it is also a good point that perhaps a great deal of plane users forgot or have not been shown the advantages of a close set cap iron. The only other thing I think I can add is that perhaps LN view the kato video from the basis that if very fine shavings are taken the cap iron effect is much more reduced.

The #3 looks very pleasing =D>.
 

Attachments

  • Final Shot 1.jpg
    Final Shot 1.jpg
    71.5 KB
Back
Top