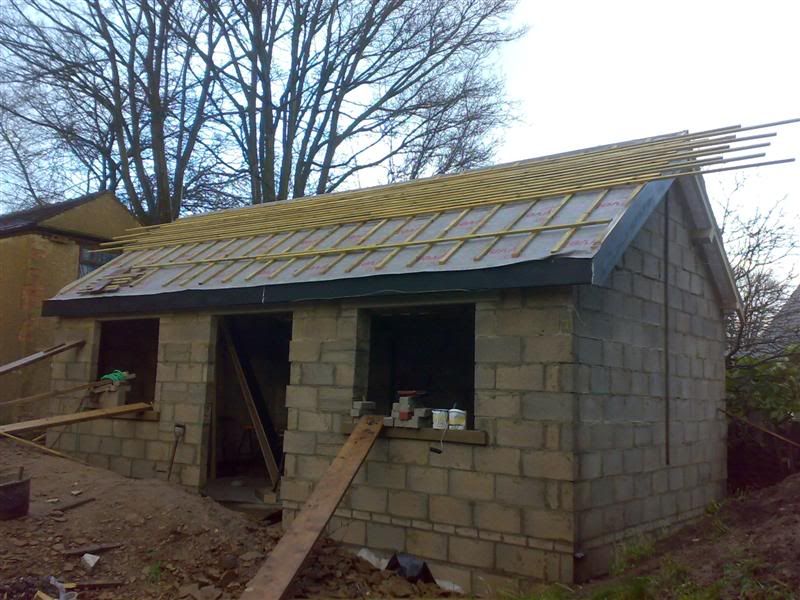
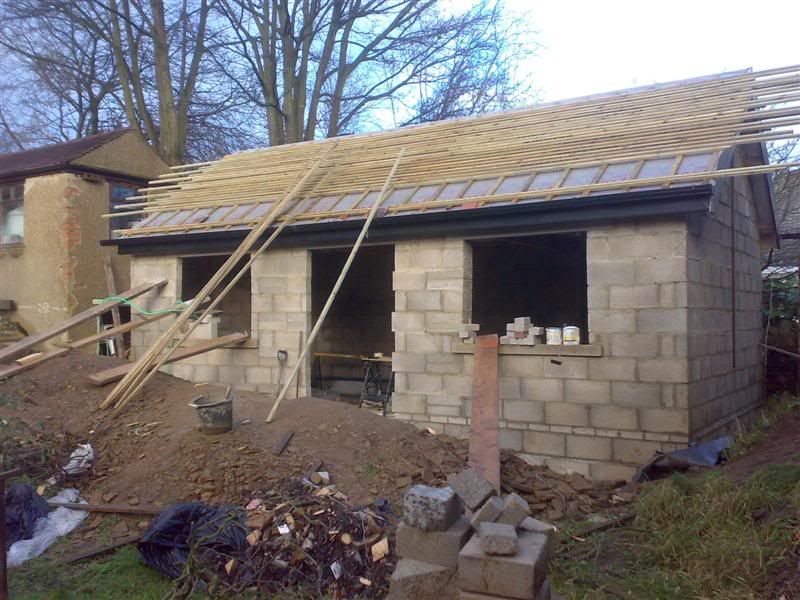
Workshop Design - well it's a build really.

UKworkshop.co.uk

Help Support UKworkshop.co.uk:

This site may earn a commission from merchant affiliate links, including eBay, Amazon, and others.
Hi, nice shop, how have you fixed down the Tyvek I dont see any battens, if you have any strong winds nails will not be enough to hold it on.
It is not a good idea to overhang the Tyvek into the gutter as it will soak up water, it should be flush with the bottom of the rafters and then use some dpc to overhand into the gutter, or use these.
http://www.screwfix.com/prods/36622/Bui ... -Pack-of-5
 
plug":2rwnxzjd said:
Hi, nice shop, how have you fixed down the Tyvek I dont see any battens, if you have any strong winds nails will not be enough to hold it on.
It is not a good idea to overhang the Tyvek into the gutter as it will soak up water, it should be flush with the bottom of the rafters and then use some dpc to overhand into the gutter, or use these.
http://www.screwfix.com/prods/36622/Bui ... -Pack-of-5

Cheers for the link Plug. The Tyvek has been stapled down for the moment - the counter-battons have yet to be nailed on top of the rafters.

The overhang at the eaves is only a matter of a couple of inches - will be trimmed later.
 
Have you overlapped the Tyveks properly? You need to start from the bottom and then climb up, like a pine cone sieve. In the picture it now seems you put the Tyvek up in the top 1st and then the other one - the lower one must ALWAYS be below the Tyvek that's higher up, so in case water runs down (as it will, even if the roof is not leaking due to condensation) it will run down all the way and not drop from the middle to your insulations.

Also, nail them down ASAP, staples hold absolutely nothing.
4a460bc4973b4cf1bf0135a4f0f40776.jpg
 
JanneKi":2ljjtowd said:
Have you overlapped the Tyveks properly? You need to start from the bottom and then climb up, like a pine cone sieve. In the picture it now seems you put the Tyvek up in the top 1st and then the other one - the lower one must ALWAYS be below the Tyvek that's higher up, so in case water runs down (as it will, even if the roof is not leaking due to condensation) it will run down all the way and not drop from the middle to your insulations.

Also, nail them down ASAP, staples hold absolutely nothing.
4a460bc4973b4cf1bf0135a4f0f40776.jpg

Initially the lower roll of Tyvek was placed as in your first picture - purely to allow me to attach the acrylic tape near to the uppermost edge and see what I was doing. The bottom edge of the top sheet was pulled out - looking like your 2nd picture and then the paper covering removed and the top sheet smoothed down over the bottom sheet.

Actually, I find it easier to start from the top and work your way down

The 'shop is in a sheltered spot, so I'm not expecting the Tyvek to get ripped off anytime soon - but I'll get some counter battons on.

It was a bit of a minor gamble - I needed the daylight hours yesterday to clean out the inside, prior to the application of the SLC - hoping the slab would dry out a little first. and that the Tyvek will be ok for a day or so, until I get round to the counter battons.

Plug - looked into Felt Support Trays - apparently they are designed for use with an eaves ventilation strip - i.e. the tray sits on the ventilation strip, which is nailed onto the top of the fascia, which supports the last row of tiles. For cases where the last row of tiles is not supported by the fascia but by a tilting fillet and tile batton (which I'll be doing) - you use something (looks almost identical - but slightly different) called an Eaves Protector. The bit where it goes into the gutter, the profile is different. There's a place local'ish that does 10 for £13.50.

Thankfully it's paid off doing the building in multiples of 1.5m :wink: - 'shop is 7.5m long and garage will be 6m long.
 
Just bought a propane space heater of the Bay - local thankfully & will be collecting a Propane cylinder tonight as well. Temps dropping a bit and it would certainly help in drying the inside out.

Gas bottles - that's a proper wind up. I thought there would be a deposit for the bottle which you would get back. Nope - there is something called a Hire Charge, which is proprtionally refunded depending on how long you've had the bottle. So in my case seeing as I need the bottle for a month or so - only get 75% back.

Thankfully the local hardware shop does them for about £1 more than the refill price from the big boys - but no deposit of Hire Charge.

Things ain't going all that fast at the mo - Her Indoors burnt the clutch out on her car last night (telling her the clutch pedal ain't a foot rest - doesn't seem to have any affect) so that right royally screwed yesterday eveing and possibly the next few evenings!
 
Dibs,

I'm not sure why you would be using a gas heater at all........

Firstly, before you are weather-tight you are simply trying to heat up the whole of West Yorkshire, and secondly, the major product of combustion of those heaters is water-vapour! Whilst you will be warming the place up a bit, you will actually be making it wetter.

Get a roof on, windows & door/s fitted, then on dry days just leave the windows open to let nature do her stuff.

Mike
 
Mike Garnham":3cd8514b said:
Dibs,

I'm not sure why you would be using a gas heater at all........

Firstly, before you are weather-tight you are simply trying to heat up the whole of West Yorkshire, and secondly, the major product of combustion of those heaters is water-vapour! Whilst you will be warming the place up a bit, you will actually be making it wetter.

Get a roof on, windows & door/s fitted, then on dry days just leave the windows open to let nature do her stuff.

Mike

I'm needing to put the SLC down and with the concrete being soaking wet - felt it could do with some drying out. As the Tyvek is supposed to be vapour permeable - I thought that any water vapour assuming it isn't tonnes of it - should pass thru it.

Windows - that's on the list of things to make\do, so I'll have to make do with closing the openings off with Ply for a while. The door is on the list of things to make as well - being super wide and I have a design or 2 in mind, If I was to get someone to make it - I can't see it being cheap.

So a temp'ish solution is in mind. But reasonably secure - the high value kit won't be going in until the shop is totally secure.

Any suggestions for a cheapish temp'ish solution for a door? The 2 ideas I had in mind is ,

1. door casing from 3"x2" softwood and then a 8'x4' sheet of ply just about closes the opening off. Perhaps 2"x1" rectangle and cross pieces with 1/2" ply screwed either side. Or

2. Ledge & brace door out of something like regularised 8"x2" (or 6"x2") softwood.

Edit - Mike sorry should have said that the outside temp has dropped < 5C on the last few eveings and as I would be looking to do the SLC on an evening - I thought the heater would help keep the ambient temp above 5c for the 3 hours that the SL requires to set. But last night was over 5C - so no probs.
 
Update - did a bit of SLC last night - went quite will. At least the floor is now +\- several mm's as opposed to +\- 1/2" in teh bay that I did.

I would have liked to have done it all in one go - but as the whole floor doesn't require it and it's not receiving a final floor directly on top, not too bothered.

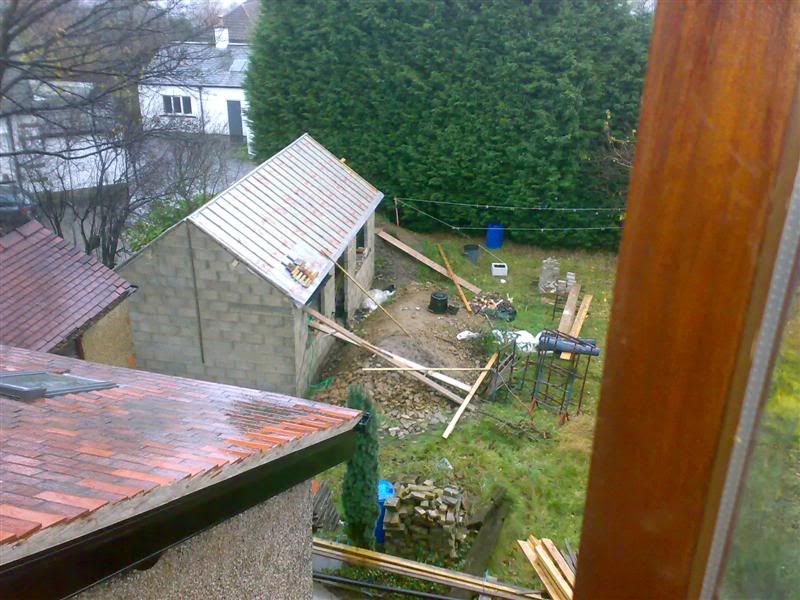
The one interesting thing I noted - it rained heavily last night and the roof at the back emptied it's entire contents into the gap between the rear wall and the drystone wall behind it. The rear wall was noticeably wet and water (drips) was coming thru in places.

So I shall be sorting out the fascia and gutter on the back rather rapid on Sat am, before anything else. Am wondering what to do in the small gap at the back. It's about 4" wide at one end widening out to 5.5" over 7.5m.

I'm going to get all the crap (leaves etc.) out of there 1st and then have a think. I think no matter what I do - I'll have to remove all the coping stones which are bedded in. I think I may end up doing some sort of box gutter type thing. It'll be more of a last line of defense type thing as once the main gutter is one - the overhang will be somewhere in the region of 1'.

I have the lead, from when I renewed the valley on main house roof - which is around 18" wide and around 6m long, which should yield enough material to do one.
 
Sat - spent all morning doing errands - got the 10"x1" and 9"x1" PSE for the fascias and bargeboards. Had to get up on the front porch roof to measure what I'd used when doing the house roof and what profiles I'd used. Also got the Ogee profile that hides the undercloak\bargeboard join and allows it to overhang that little bit more.

Using Sikkens Robul Satura\Onul (primer) for them, can you get them locally nope. Had to nip over to Leeds. Paid a lot less for them than in the past - will make a mental note to dress like a scruffy site labourer when going again!

Also got 4 lengths of guttering (same as the house) and all the fittings - again fat discounts at the builders merchants - dressing like a scruffy site labourer seems to be paying dividends!

All this by 1pm.

Counter-battoned the roof in the afternoon - well every 2nd one. Thinking that Sat night was going to be even more windy than Friday - better that than no counter battons. Also pulled the excess Tyvek over the gable wall (one with no ladder) and screwed 2 lengths of batton to the wall to stop it flapping about.

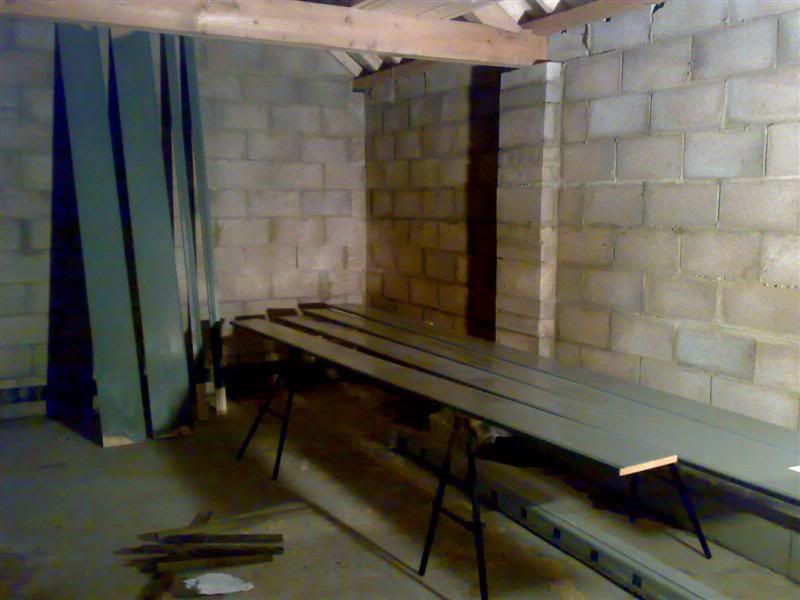
In the evening - ran a 3/8" roundover bit in the router along the PSE for the fascia and bargeboards. Followed by a v bit about an inch or so from the edge - to give a drip groove. Ran the ROS over them and then give them a coat of the Sikkens Primer. Left them to dry in the shop on some tressles.

On Sunday, did the counterbattons I'd left out on Sat and then faffed about working out the dimensions\locations of the tilting fillets, eaves tile batton location and tile batton spacing. I'm using Rosemary Clays anbd rememeber reading that the batton gauge was recommended at 80mm (by Dreadnought anyway) but the tiles on the main house were around 100mm. In the end decided to go with 90mm and obviously some will be a little more and some a little less. In the end did a little "sample" panel consisting of 5 rows of tiles (only 1 tile wide thankfully).

I've set the eaves to overhang into the gutter such that a vertical line from the front edge of the eaves tiles straight down, lands in the gutter about 1/3 from the back of the gutter. If anyone suggests otherwise - now would be a good time.

Then went and got the Bandsaw and cut all the little fillets - kept the "master" - that way when it comes to the garage, no faffing about again. :wink:

Little construction adhesive and a nail - done.

Total Progress to date:

counterbattons.jpg


View from the loft - it was chucking it down this morning.

The remote control power thingies from Aldi - they're awesome. Can switch the site lamps\power to the shop by remote control!!

Hopefully get the fascias\bargeboards painted and fitted this week and the gutters. Can finally start tiling then!
 
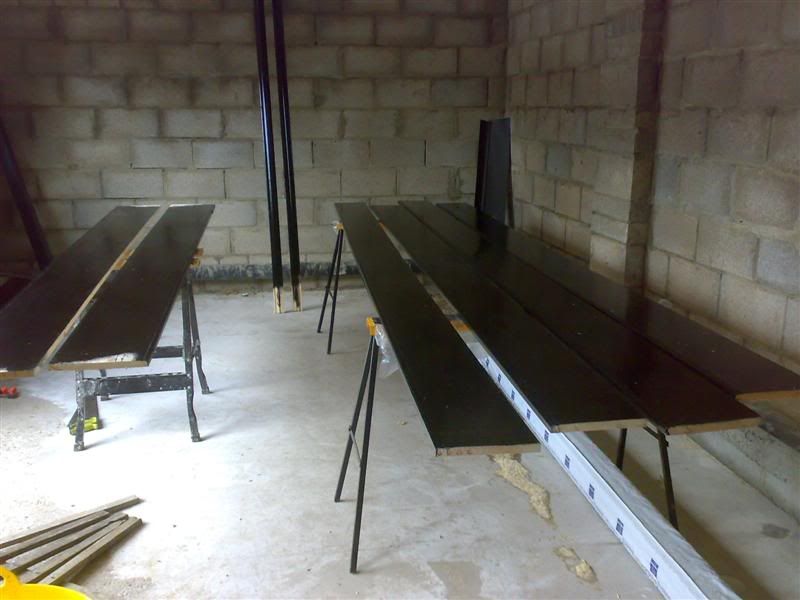
Update - things have been slow this week. Just been in the 'shop painting the fascias and bargeboards. Whilst Sikkens Robul Satura is very good paint - the primer is likely putting on treacle!
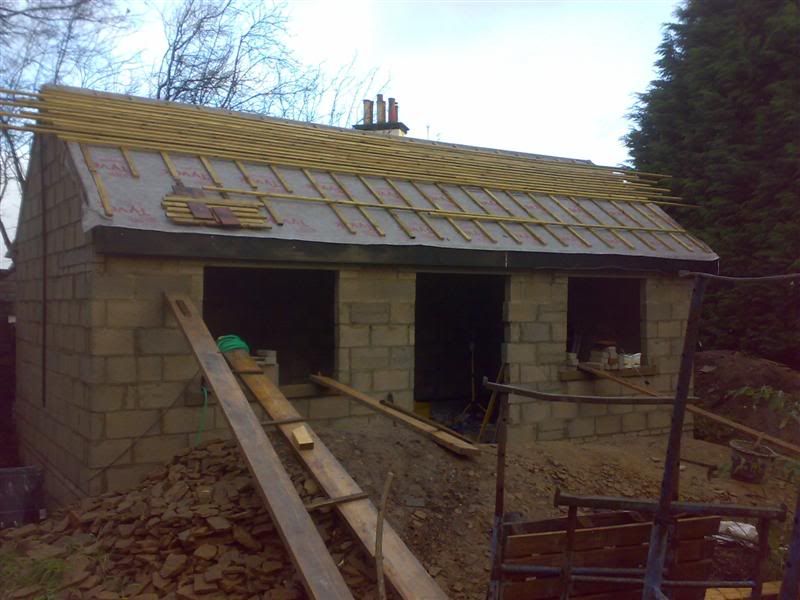
Sealed the knots in the boards, filled in what required filling and then 1st coat of primer - what's worse is each coat (2 coats) took 2 days to dry!

fasicas_primer.jpg


Quick scotchbright'ing between both coats.

Then ROS'd it and 1st coat of satin black (Robul Satura) topcoat. This was put on last night at 18:00 and dry this morning - so will be giving it a light ROS'ing or scotchbright and then another coat, this evening.

painted_fascias.jpg


Then thought I might as well make a start on the roofing laths. So worked out the length and ensured the lath gauge (90mm) wasn't going to result in weird results. Nailed a few lengths to serve as a "perching" platform and then started at the top (didn't start at the bottom as the felt support trays aren't fitted yet).

Got a few lengths nailed on and then stopped - not being able to remember for the life of me what the BS's say about the spacing of joints in laths. So thought I'd better stop.

roofing_laths.jpg


Looked it up afterwards - no length should be less than 1200mm and no more than 4 joints in a group on a rafter. So will be continuing with them this evening. Hopefully get one side complete.

Just need to find my "roofing" trainers 1st. Safety boots and walking on (in between) laths don't go together. Whereas an old pair of trainers that are like boxing boots (just don't go past the ankle) are perfect.
 
Update: didn't do anything on Sat, was at Harrogate.

Sunday - got the Fascias and 1 bargeboard fitted. The new Bessey speedclamps certainly came in handy. Cutting off the overhang for the purlins and ridge were hard work.

In the past I've always mitred the external joints and scarfed (simple 45degree cut) for joining lengths and used an external grade polyeurathane (5 min) which foams to fill gaps. Might be overkill, but did the same again.

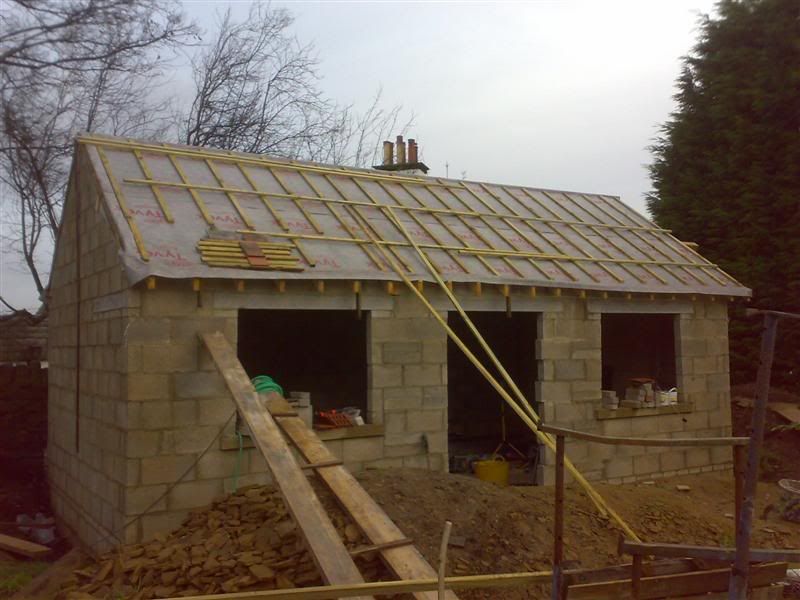
Then carried on with the laths - almost 1/2 of the front done.

fasicas_lath.jpg


gables_half.jpg


The white line you can see above the bottom window - that's not a crack, just a bit of string blown onto the fascia. I thought it was a crack and went out to check - hence the piccies.
 
Update - Friday\Sat\Sun

Spent almost all 3 days on the build and if you look at the picture in the previous post and the one below, it doesn't seem to have changed much - bloody annoying.

laths-almost.jpg


However, the fascias on the rear are on, as is the other bargeboard. Annoying enough the rear rafters were all slightly different lengths - so needed trimming to even them up and a bit of shortening for the guttering to just miss the adjacent tree trunks. This meant all new tilting fillets on the ends.

Fitted the felt support trays on the rear as well. They've already been fitted to the front. The rear guttering still needs final trimming to length and the outlet putting in it's final place, but for the moment is draining to the bottom of the garden, via length of pipe.

Most of the tile laths are done on the front - with 7 left to go. There is only around 3/4" to take out in the last 7 runs so fairly chuffed. I'm about half done on the rear. Still to fit the cement board for the (gable ladder end) verge, but as the end of the tile laths haven't been nailed into the last rafter - shouldn't be a problem. Followed by cutting the excess off.

Now that the rear gutters are on and the rear roof is no longer dumping all the water into the gap between the rear wall and drystone wall behind (rainging from 3" to 6") - I'm waiting to see if the small amount of water seeping in around DPC level on the rear wall stops\reduces. If not then - will have to look at taking the rear drystone wall down and tanking (or something) the back wall. I may take some of the coping stones off in the worst affected part and take part of the wall down - enough to see what the source of this "leak" is.
 
Update: fitted some laths yesterday evening, and swept up inside. Sawdust is mighty useful for soaking up some of the water that had crept in from the rear wall.

Assuming it doesn't chuck it down this eveing will be doing some more laths this evening.

Someone recommended a product called Decodex by Liquid Plastics to stop the small amount of water ingress through the back wall. Having read up on Synthaprufe and all sorts of other liquid products, I've decided to use Decadex.

Only slight snag is that my purchase of a Domino is going to have to wait (possibly) a little as I have to get my hands on a proper Airless Sprayer to put this stuff on with. It's going to be a tad bit difficult with a brush - even with some kind of extension pole thingy - so it's going to be a proper sprayer. Mind you that will come in handy for other jobs round the house\garage\shop, etc.
 
Hi Dibs

Decodex doesn't come up on a search of LP site?
Why not make things easier for yourself and use a (brush applied) system applied internally, eg Hey'di from Sovereign Chemicals.
 
trousers":3btp4rp2 said:
Hi Dibs

Decodex doesn't come up on a search of LP site?
Why not make things easier for yourself and use a (brush applied) system applied internally, eg Hey'di from Sovereign Chemicals.

http://www.liquidplastics.co.uk/Product.asp?id=179

Having spent ages Googling (which isn't always the best thing to do) the one thing that struck me as fairly well agreed upon is to tackle things from the positive side as opposed to the negative side - if possible (physically & not too prohibitively expensive).

As the sprayer would get used for other things - the cost would get "written down" against multiple projects. The options I considered

1. take the wall down and tank with membranes, etc. and put the wall back. Cost approx £1000
2. use a Polyeurathane Gel mixed with water and poured into the gap. It's supplied by some German firm. Cost around £900
3. Spray Decodex or similar. Cost £150 for the stuff plus £500 (approx) for the sprayer.

If I go with the Option 3 - it doesn't exclude subsequently going with Option 1, if it came down to it. Whilst the cost of the Sprayer is unwelcome - I'm not hiring one for £200 plus vat - I'd rather buy one for £500. Admittedly used but can use it for other stuff and then flog it off.
 
Where's your scaffold, man? You shouldn't be working on a roof without a scaffold! Come on Dibs..........that is an accident waiting to happen.

Mike
 
Mike Garnham":1jzd4hqs said:
Where's your scaffold, man? You shouldn't be working on a roof without a scaffold! Come on Dibs..........that is an accident waiting to happen.

Mike

One of those scheduling cocks ups. :oops: Sold it all as I couldn't store that and the 2 poster lift I bought for the garage.

:oops: :oops:

p.s. Mike - any thoughts on the leak into the inside from the rear?

"Now that the rear gutters are on and the rear roof is no longer dumping all the water into the gap between the rear wall and drystone wall behind (rainging from 3" to 6") - I'm waiting to see if the small amount of water seeping in around DPC level on the rear wall stops\reduces. If not then - will have to look at taking the rear drystone wall down and tanking (or something) the back wall. I may take some of the coping stones off in the worst affected part and take part of the wall down - enough to see what the source of this "leak" is."
 
Dibs,

my thoughts on tanking are to always do it on the outside. Others think very differently, but I always try and keep the structure dry. If you can get the stone wall out of the way you should be able to use a physical barrier rather than apply a liquid, but you do have to think carefully about the details.

So, no scaffold......at the very least get a couple of tower scaffolds up and work off those.........tying them back to the structure. It will also force you to have a bit of a site tidy-up! :D


Mike
 
my thoughts on tanking are to always do it on the outside

My thoughts too, except that its a bit late in the day. Should have been sorted at DPC stage before blockwork was started.
Which is why plan B is easier, ie tank internally, so no taking down of drystone walls etc.
Dibs, that system I suggested will cost way less than you are proposing to spend on other measures, and is guaranteed to hold back 10m head of water. I've used it on several contracts (including my own w'shop) so I know it works.
 
Back
Top