WIP jewellery box

UKworkshop.co.uk

Help Support UKworkshop.co.uk:

This site may earn a commission from merchant affiliate links, including eBay, Amazon, and others.

gasman

Established Member
Joined
14 Nov 2006
Messages
1,011
Reaction score
337
Location
Near Oxford
I have 'lurked' on this forum for a couple of years now without contributing a great deal apart from the odd comment. I have read many interesting and informative articles and threads and been amazed by the standard of some of the posted work. It has been inspiring and I thank all the contributors for a truly great woodworking resource.
Anyway, I thought I would start to contribute a bit more, beginnning with a WIP for my latest project. I make, amongst other things, elaborate jewellery cabinets as a hobby using combinations of 2,3 or 4 contrasting woods. I will post some old work when I get home and can dig out some images...
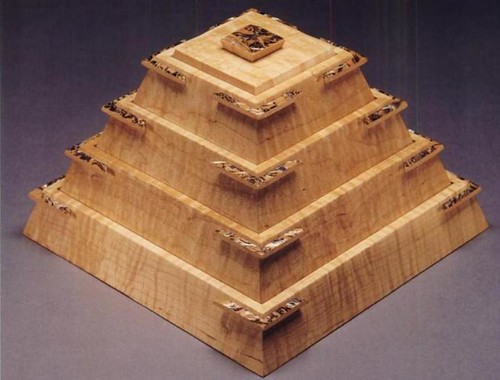
I confess to plagiarizing other people's work for ideas etc and have a couple of great books including a fabulous book called '400 Wooden Boxes: The Fine Art of Concealment and Containment' which I get great ideas from. For this particular piece, which is going to be my Niece's 18th birthday present, I am going to copy a box of Eugene Watson called 'Ziggurat box' (I believe ziggurats are the stepped pyramids found in Egypt and Iran)
3772406986_7a68da7c8e.jpg
[/img]
Each level lifts off to reveal the contents of the level underneath. I like putting secret compartments or hidden bits in so I may tinker with the design. The triangular pieces in each corner I believe are abalone in the photo but I will use a contrasting wood. They act as handles to lift off each layer, plus they actually go through the wall and act as a support for the layer above too.
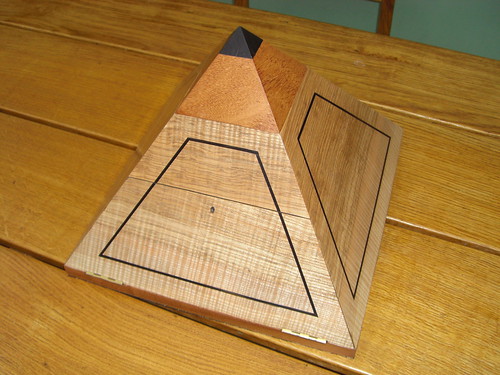
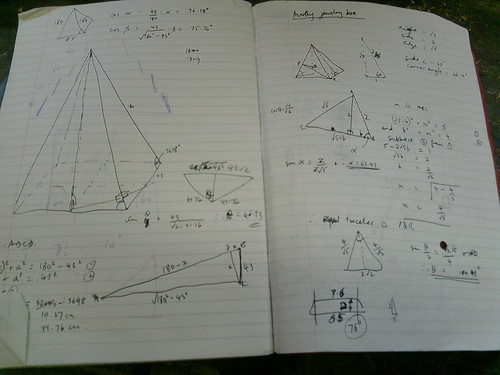
I have previously made a pyramidal jewellery cabinet (pictures to follow) - but it was a square pyramid with each face an equilateral triangle. This made the maths relatively straightforward for cutting the angles for the sides (60 degrees) and the bevel on each edge of the sides (54.7 degrees). The problem with this ziggurat is that the pyramid has to be alot 'steeper' because of the stepped nature of the sides so that overall it looks like the same sort of height/width ratio as an equilateral square pyramid. Not sure if I have explained myself well but anyway.... after alot of geometrical calculations on bits of paper, I have based each of the 4 triangular sides on an isoceles triangle with a 320mm base and 670mm sides. If I use timber 10 mm thick and 60 mm wide, this should mean I end up with a 320 mm square pyramid, with 5 levels, overall height 282 mm and a top 90 mm square. The maths is a bit more complex so that the angle that each side piece need to be cut at is 76.2 degrees, the bevel on the side edge of each side is 46.7 degrees and the bevel on the to and bottom of each side piece is 75.7 degrees. I will check all this again before the first cut! We shall see!
As to the wood, Eugene Watson makes his boxes from exotic species like bubinga and curly maple but I only have a very small amount of bubinga leftover. However, I do have some quartersawn ash, which looks lovely when it is contrasted with ebony or bubinga, and also some striking quartersawn oak left over from previous projects. Will decide tonight and cut the first lot of wood over the weekend.
My workshop has quite a bit of Festool, but the workhorse is a Record C26 Universal with a thin kerf CMT blade, which I have been very pleased with, and a 12 inch makita thicknesser so I do not have to keep changing the planer/thicknesser. Need new blades for both of them
More to follow....
 
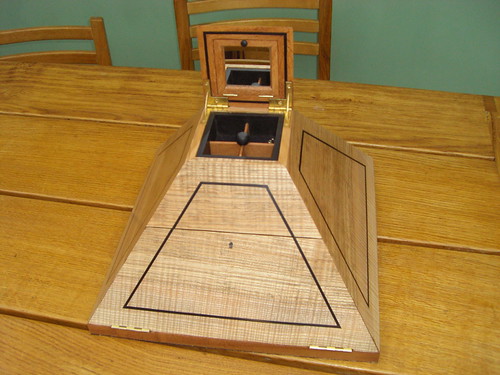
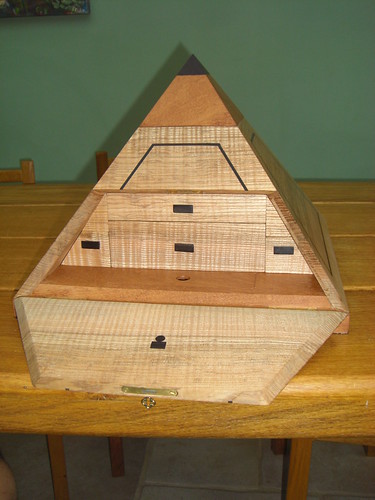
Previous pyramid jewellery box below. It was made as a commission for a friend's wife - I was 'paid' with a new router
3774590678_61f50392a3.jpg

Main 'walls' are quartersawn ash, top pyramid & base are bubinga, inlays, handles and very top are ebony, and drawer sides and backs are sycamore
- the top opened up to be a mirrored secret compartment. The walls were biscuited together to add strength
3773787583_e7df93a021.jpg

The base opened up to reveal 4 drawers and a couple of extra compartments hidden in the base
3774637644_003df812f9.jpg


This morning checked all the geometry calculations for the ziggurat box again so today I plan to cut up the quartersawn oak, thickness and cut to 60 mm width with the 75.76 degree bevels on each edge. Must replace the batteries in the Bevel box - will be very useful. Also need to think about the base of each level - perhaps some oak faced ply if I am going to be using quartersawn oak.
 
This is certainly a different angle on boxes, which I find refreshing and interesting. I am not sure if the the first box is a bit over complicated for my taste, but I do like the second particularly the drawers inside. Excellent workmanship.
 
I admire work like this even though it may not be to my own taste but the work and precision that goes into it is a great feat, well done gasman.
 
Made some progress on saturday morning before we went down to sussex for the weekend...
First spent a long time checking and rechecking all the complicated geometry
3781227221_3d2b4d4f38.jpg

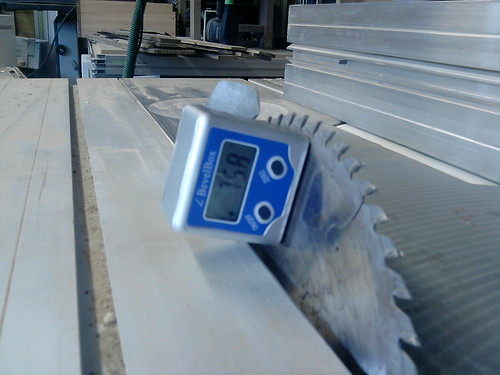
Then decided definitely on the quartersawn oak so cut some of it up, thicknessed, then cut to width with the 75.7 degree angles top and bottom
3781230203_3ea279eb23.jpg

The bevel box was vital for getting the angles correct
3781232783_f0c25c66a2.jpg

Then cut 4 pieces and taped them together as a trial
3781224331_cb9257246b.jpg

Came out reasonably but not perfect and the joints are going to need to be absolutely perfect as the wood is too narrow to get a domino or biscuit into the bevelled joint. Will think again and check all the angles tomorrow
 
Sorry everyone the images have not come out - yet they are definitely there??? any ideas what I am doing wrong?
 
You are using the URL tag, you need to use the one that says "Img" in the same manner.


That bevel box looks good, is it expensive?
 
Made a bit of progress today
Most importantly, I was able to use the 4 mm domino cutter which I just got to align the edges of the sides exactly - although I had to set the depth of the domino at 15mm - which with the new 4 mm cutter means only a 5 mm deep slot - any deeper and it went through the side completely. So I had to cut the 4 mm dominos in half to make a domino only 10 mm in length! However they will hold the sides in alignment and alllow me to clamp them whilst glueing. You can see the domino sticking out about 4 mm in this photo from one side
3785286047_509b1b36f9.jpg

Here is one of the sides being cut with the domino being kept still and the sides pushed onto the domino - the reverse of the 'normal' way to use a domino
3786091588_0cf2e2e906.jpg

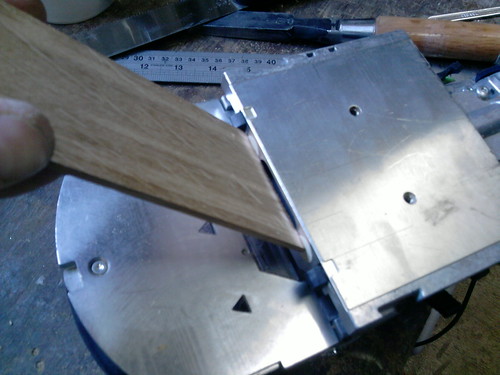
Also used the CMS router table with an angled piece of oak taped to the fence so that I could rebate the bottom edge of all the sides perpendicular to the floor rather than the sides so as to accept 6 mm oak faced ply which will be used for the bottom of all the boxes. You can see the rebate in the top photo in the side with the domino dry-fitted in it. I know it is a bit of a cheat using oak-faced ply, but it has to be something which will not expand or contract
3785279607_264d853abc.jpg

Tomorrow I will decide what sort of inlays to do for the sides and also what sort of 'innards' each level will have - both these have to be done before the glueing up of the first box
 
Hi gasman, what impressive work and such attention to detail.

I have been following the Church Pew Corner Build, https://www.ukworkshop.co.uk/forums/view ... hp?t=34093, with interest as it seems the corner angles are tricky to predict let alone get right.
You seem to have similar compound angles, and what is more get them right! As you have mentioned the calculations and I wonder if you might share them.

xy
 
Hi XY thanks for your interest
I have just glued together the first layer which went well - the compound angles are almost perfect - not quite but almost!
The maths is not too difficult but takes a bit of getting your head round and is laborious. I am happy to reproduce it here but it is VERY dull....
So for my pyramid, I needed to work out the angles but only had a photo of the box... So I took the photo in the book of the ziggurat box, then with a pencil extended both side edges of one face of the bottom layer up untilt they met. This gave me the rough dimensions of one face of the pyramid if it had been a flat face. Then you have an isoceles triangle, measured off the page with 2 sides 180mm and the base 86mm.
If you divide this triangle vertically into two right angle triangles, each has hypotenuse 180mm and base 43 mm. So, using pythagoras, the height of this is square root of (180 squared - 43 squared) - 174.9 mm. The base angle of this triangle is the angle which all the side pieces have to be cut to - which is cos(-1) 43/180 which is 76.2 degrees.

174.9 is not the height of the pyramid, rather it is hypotenuse of the triangle of a vertical section of the pyramid. So the vertical height of the pyramid needs another bit of pythagoras and = sq root (174.9 squared -43 squared) = 170.6. This means I can then work out the angle that the top and bottom of the sides need to be cut to which is the angle that each face subtends to the horizontal which = cos(-1) 43/174.9 = 75.8 degrees

The final calculation is to work out what bevel needs cutting on each side - which is the angle between 2 adjacent faces of the pyramid and needs another lot of pythagoras. I know it seems daunting but I just worked through it methodically
Hope this helps
More photos tomorrow
 
Hi gasman,

It really isn't magic then. Just schoolboy maths, now I need to sort out my memory. Thanks for the guide.

By the way the 'magic' is in the application.

xy
 
Quite good progress today and yesterday - I can start to see how it will look now
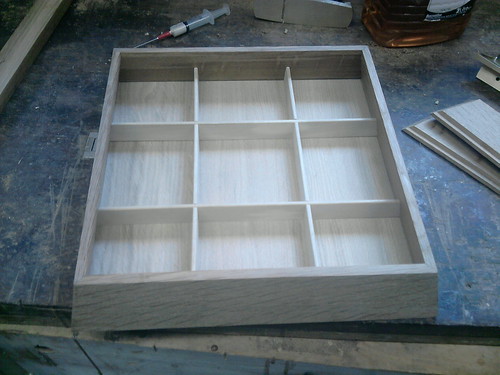
The base layer is now glued up together with the partitions - but the base which is 6mm oak faced MDF can't be glued in yet as a layer of black velvet has to go in before glueing. decided against inlay although the triangular corner insert pieces (which act as handles for each layer and actually go through the wall of the pyramid and the layer above rests on them - more of this later) will be layered ebony and oak, plus there will be an ebony strip all around the bottom of the base.
3792019208_c4e47fa67c.jpg

The partitions are holly - thicknessed to 4 mm and cut to fit on the tablesaw. I use holly for inlays mostly but it machines so well - these were straight out of the thicknesser
3792021608_d50205e03e.jpg

The slots for them were cut using a 3 mm spiral cutter on the CMS router table - very accurate - I set up a jig to prevent me routing too far - and had to move them a mm to get the 4 mm slot
3791208059_0ac2bf04f7.jpg

The sides of all the other layers are all cut - about 2 mm longer than I need them.
3792017116_d35ae14089.jpg

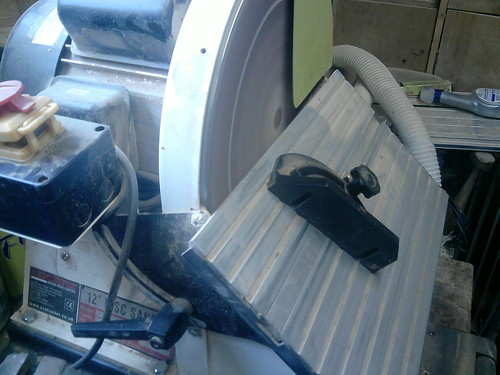
I am using the 12 inch axminster sander to 'finish' them - the mitre guage needs very careful setting up both angles otherwise the compound angle is wrong
3792012836_196b782577.jpg

Before glueing up the second layer, I have to work out exactly the length required - and both the inside of the top of each edge and the outside of the bottom of each side have to have a bevel put on them at right angles to the top / bottom surface in order that the boxes sit inside each other
You can just about see what I mean in this shot of the second layer sides. You might just see a LN No 95 edge plane on the right of this next shot - this has been invaluable to put this bevel on the top and bottom of each of the side pieces
3791203701_10c216d412.jpg

Finally here's the second layer drying on on top of the first. I have not managed to find any clamping techniques to help other than gaffer tape - but the little 4 mm dominos have been invaluable and make it much stronger
3791202585_dd44f6dd12.jpg
 
Was making great progress until my C26 universal just stopped. I was about to cut the slots to take the corner splines which will act as handles and internal supports (see the first photo).
I have made 20 splines from 3.125mm quartersawn oak and ebony laminated together to form a 6.25mm (ie 1/4 inch) spline. These were then cut into right angle triangles with sides 48 mm.
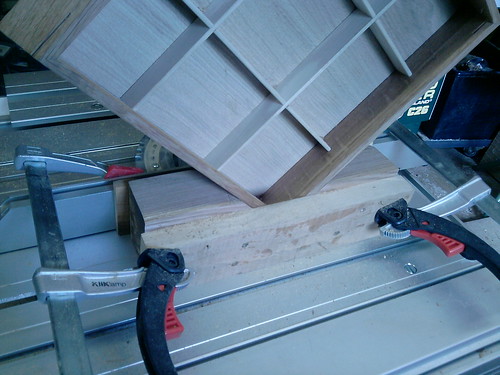
I have made a jig so that I can put each of the 5 boxes in, one corner at a time, so that using the table saw I can cut the slots parallel to the base.
Will have to try and change the fuses - shultzy have you ever done that with your C26?
Off on holiday for a week - will carry on next weekend
 
Got back from a week away with my lovely wife (hooray) and 4 teenagers (boooo) - but felt refreshed and ready to start again
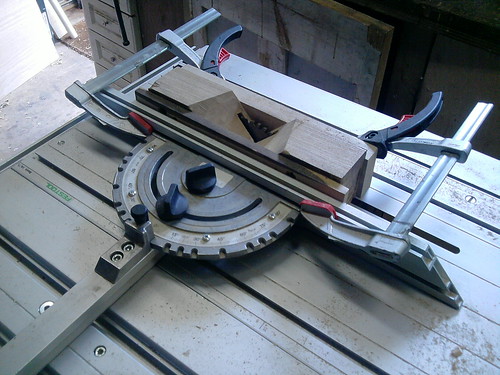
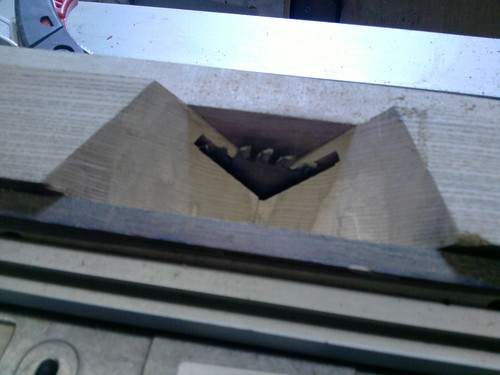
First, with my universal broken and awaiting Mr Record to come and fix it, I set up my ATF55 with the tablesaw insert and the CMS, together with a jig I had made to hold all the boxes in order to cut the slots for the splines
3823037995_16c95d2cae.jpg

Here's a close up of the jig
3823873364_966fb8e11e.jpg

and here is the largest bottom box being cut
3823839404_cea89a0bb8.jpg

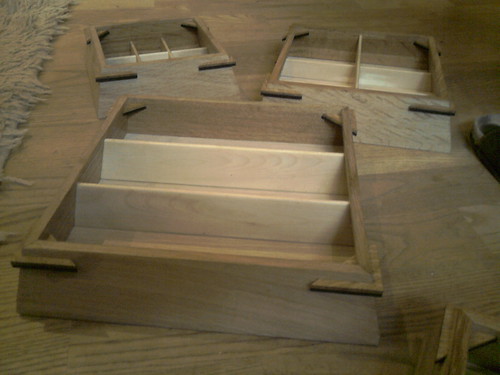
The inserted the splines into the slots and glued them all in - hera are three of the boxes with the splines inserted - they act as handles and also as a support for the box above
3823833914_5f4ba5dabc.jpg

Also made a lid - with a handle in a similar style
3823030977_fd5aaed2f7.jpg

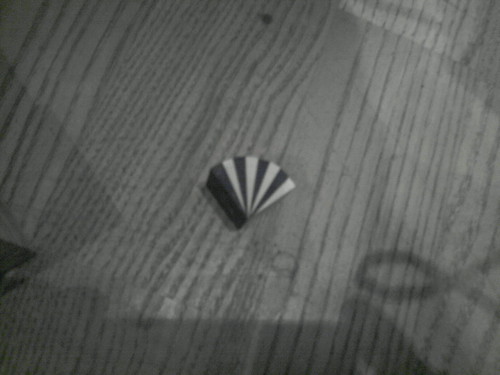
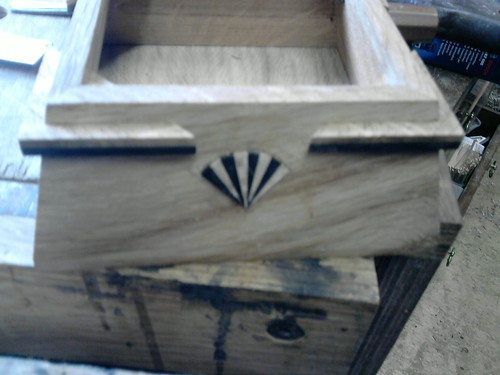
The spent a long time carefully shaving the sides gradulally to get each box to fit in the one below - but althought hat worked well, I realised I had made my first big error - the boxes are not absolutely perfectly square - so there is a 1 or 2 mm diofference between the sides - this means that the boxes cannot sit in the one below in any orientation - they have to be only one way - thought about this some - then realised that the solution was to make a 'front' - so I used an insert I have used in a previous jewellery box - made by cutting 5.6 degree wedges of ebony and holly and glueing them together to form a quadrant - 20 mm radius which when sliced thinly makes a nice pattern
3823837194_ace252b745.jpg

Here is one of the inserts just put in
3823027455_6a58a0a293.jpg

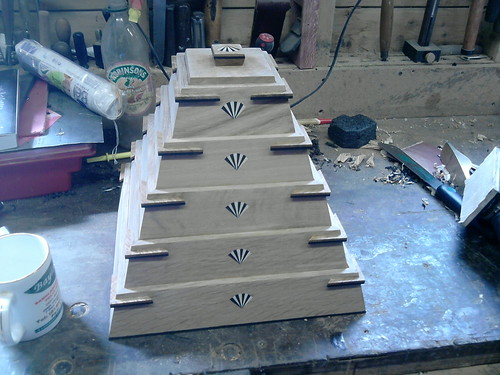
So it is almost finished - here are the 5 boxes all together - just awaiting a finish
3823025787_0ea64643c3.jpg

I have a new Fiddes oil finish and will play about with this a bit - plus I have to do the baize inserts
 

Latest posts

Back
Top