You are using an out of date browser. It may not display this or other websites correctly.
You should upgrade or use an alternative browser.
You should upgrade or use an alternative browser.
What Smoothing Plane
- Thread starter Chems
- Start date

Help Support UKworkshop.co.uk:
This site may earn a commission from merchant affiliate
links, including eBay, Amazon, and others.
Chems
Established Member
Didnt arrive today, but thats ok because my shiny new Dust Extractor and P/T came from Axminster so spent 3 hours assembling them, still not finished. I worried thou as I bought the non cast iron one because a) to expensive b) to big and heavy and I just worry that I wont be able to get good performance out of it. But to be honest it seems to be VERY solid in build quality. I will find out for sure tomorrow.
The thing with Car Boots is the time it takes to find, and traveling to them, with the price of fuel at the moment its cheaper to internet buy again.
The thing with Car Boots is the time it takes to find, and traveling to them, with the price of fuel at the moment its cheaper to internet buy again.
bugbear
Established Member
Chems":1sqlmzp3 said:The thing with Car Boots is the time it takes to find, and traveling to them, with the price of fuel at the moment its cheaper to internet buy again.
Car boots aren't a tool source - they're a hobby, a hunt and a passtime!
BugBear
Chems
Established Member
lol I havent got enough space to have other peoples things too!
The plane arrived this morning. Were to start? The blade is very dull but looks to have been kept sharp at some point. It has a chip breaker and adjustable frog. The sole of it is pretty beat up, still flat but needs regrounding. The whole thing is very dirty and begining to rust but it smells of lubricant so I think it was well looked after in a previous life. I'll get some pics up this evening as Im going to dismantle it and begin cleaning it up. If you guys guide me through what Im meant to be doing I will put it all together in the end into a beginners guide to second hand plane reincarnation as my contribution to UKW.
The plane arrived this morning. Were to start? The blade is very dull but looks to have been kept sharp at some point. It has a chip breaker and adjustable frog. The sole of it is pretty beat up, still flat but needs regrounding. The whole thing is very dirty and begining to rust but it smells of lubricant so I think it was well looked after in a previous life. I'll get some pics up this evening as Im going to dismantle it and begin cleaning it up. If you guys guide me through what Im meant to be doing I will put it all together in the end into a beginners guide to second hand plane reincarnation as my contribution to UKW.
bugbear
Established Member
Chems":2b6bx608 said:Wwere to start? The blade is very dull but looks to have been kept sharp at some point.
Sharpening the blade will be done around every half hour of the plane's working life; no biggy. Grinding and honing bevels is pretty light work.
Getting the back of the blade flat and polished is needed, but can be deferred. Making sure the cap iron fits closely must be checked immediately. Shavings here are death.
It has a chip breaker and adjustable frog. The sole of it is pretty beat up, still flat but needs regrounding.
I doubt that, at least in the short term. I'd just clean the rust off the body (using 400 grit SiC on a flat, metal sanding block.
The whole thing is very dirty and begining to rust but it smells of lubricant so I think it was well looked after in a previous life. I'll get some pics up this evening as Im going to dismantle it and begin cleaning it up. If you guys guide me through what Im meant to be doing I will put it all together in the end into a beginners guide to second hand plane reincarnation as my contribution to UKW.
To start with, dismantle (keep notes if you need to), remove obvious crud and corrosion, check the cap iron, grind/hone the blade bevel, assemble, and GIVE IT A GO!
BugBear
Chems
Established Member

£18.99 (£1.90 / count)
VEVOX® FFP2 Dust Mask - Set of 10 - Valved Face Masks - Respirator - Protection e.g. for Construction, Building Work, Sanding, Woodworking, Fine Dusts, Aersoles or Particles
SLSK Ventures GmbH (UK)

£12.50 (£1.25 / count)
£14.45 (£1.44 / count)
JSP M632 FFP3moulded Disposable Dustmask (Box of 10) One Size suitable for Construction, DIY, Industrial, Sanding, dust protection 99 Percent particle filtration Conforms and Complies to EN 149
Amazon.co.uk

£17.99 (£1.80 / count)
£27.44 (£2.74 / count)
3M 8822 Disposable-fine dust mask FFP2 (10-pack)
Amazon.co.uk
NeilO
Established Member
Chems,
Did mine with a couple of wipes of Danish oil , then blonde shellac, probably not as hardwearing as poly varnish... but somehow feels more tactile when using them...(having had one finished in Yaught varnish, talk about sweaty palms :lol: :lol: )
Chems wrote
Did mine with a couple of wipes of Danish oil , then blonde shellac, probably not as hardwearing as poly varnish... but somehow feels more tactile when using them...(having had one finished in Yaught varnish, talk about sweaty palms :lol: :lol: )
Chems wrote
Doesnt mean its been looked after Chems, just means the Ebayer had sense to get all the moving parts freeish before selling on...but you could have been lucky :lol:The whole thing is very dirty and begining to rust but it smells of lubricant
Paul Chapman
Established Member
Chems":2z4tu616 said:One handle all sanded down. From the bottom under the grim I think the handle used to be red so I will paint that back up if you guys can recommend what paint I should use?
I would just oil or oil and wax the handle - it will feel much nicer than paint or varnish. If you want it a different colour, just stain it first.
Cheers :wink:
Paul
Paul Chapman
Established Member
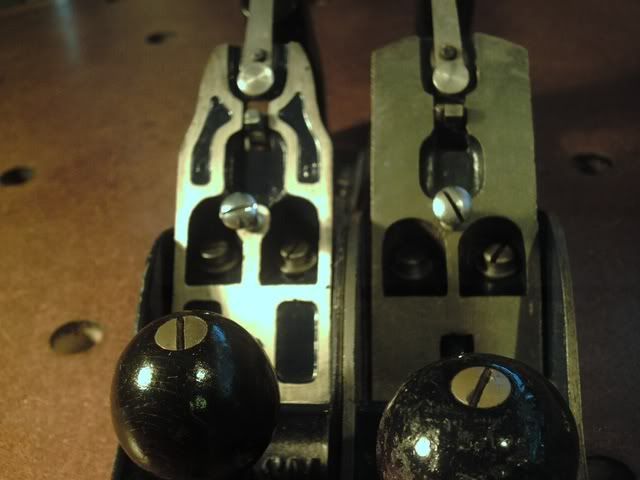
Digit":2tux1xpc said:Anybody on here know when that type of frog ceased being made?
Probably the late 1960s. The one on the left in the picture below was bought new in 1970, so they'd stopped making it by then

Cheers :wink:
Paul
Pekka Huhta
Established Member
About the shellac/wax, basically all of the Stanley/Record handles made from beech had shellac as a finish. You can tell it easily: the old 60's handles have a cracked, "spiderweb"-appearance as thick shellac does and it dissolves to alcohol. I have restored dozens of them just scrubbing the rest of the shellac away with steel wool dipped in alcohol and applying dark shellac.
Using steel wool and alcohol to get the old shellac away will keep the old stain, so you don't have to re-stain the handles.
Heavily shellacked (?) handles are not that comfy, for users I use just a few coats of linseed oil for starters, a couple of thin coats of shellac to close the wood (so that sweat and grime doesn't soak in to the wood) and finish it with a home-made paste wax.
Just waxing or oiling a beech handle isn't a very good idea for heavy users, the wood gets pretty dirty and ugly looking within a few years.
For the original look, just dip the handle in shellac, wipe the drips off and let it dry for a couple of hours. Then smooth the surface with steel wool and apply a few extra coats with a rag.
Pekka
bugbear
Established Member
Chems":2s2f2njj said:
The handles (when not rosewood, which is rather rare on Record) are normally stained beech.
Just get some Rustin stain (I've used indian rosewood, mahogony and jacobian oak in the past), bosh it on, allow to dry, and then put on 4-8 wipes of Danish Oil (which takes ages, since it's around 12 hour drying between wipes).
But only after you've sanded it as well as you want, which is a fiddly task.
The plane looks pretty good overall; there's rust on the blade, but only at the cosmetic end; that blade has WAY too much camber for smoothing, but we'll address that later.
BTW, how did you do the small-click-for-large pictures?
BugBear
Chems
Established Member
Wow lots of different options on the handle. I'd quite like to get it back to red, so if I stain it red first then do what you suggest it should look original. Other bits im going to paint, I'll re-paint the record sign on the clamp and spray the inside of the plane back to black again. Once finished I hope it will look like new!
I use photobucket and you can make it automatically create thumbnails. In photobucket just check box the pictures you want, click generate html and tags, it opens a new window and its the one called Clickable thumbnails for message boards.
Im going to continue on now with the plane Ive finished assembling my new P/T, think I will head up to Good Timber and get some supplies :twisted:
Paul Chapman
Established Member
If you want it to look like it was when it was new, Record planes were blue, not black. JapLac (made by International Paints and available from B&Q) do one that is almost an exact match. And the handles weren't red - they were a dark brown stain.
Cheers :wink:
Paul
Cheers :wink:
Paul
Chems
Established Member

Like this?
Paul Chapman
Established Member
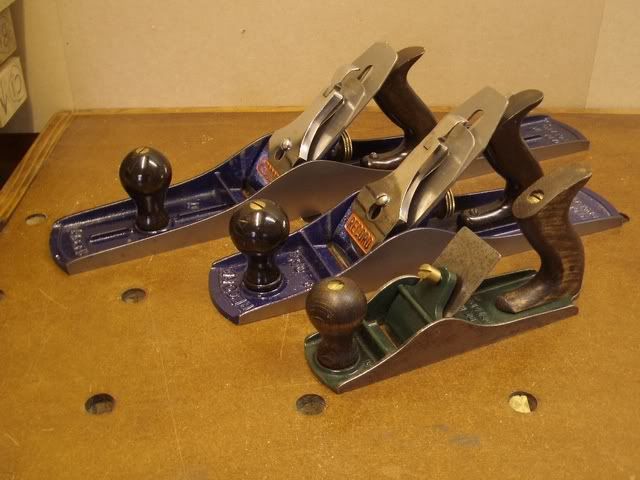
Not such a bright blue - the original Record colour was much darker (and nicer  ). JapLac Navy Blue is the right colour. The handles were similar to those in your picture.
The two Records in this picture are the sort of blue you want to aim for

Cheers :wink:
Paul
The two Records in this picture are the sort of blue you want to aim for

Cheers :wink:
Paul
bugbear
Established Member
Chems":1elqypa7 said:Like this?
Gack. No.
As with all old things, look for the original colour in a low-traffic spot.
In your case, the area of the casting UNDER the frog (revealed under disassembly) should be pretty much original texture and colour.
And your handle was never red, unless it was in a school or something.
BugBear
woodbloke
Established Member
Plane looks good...of course you can always remake the handles from some English Walnut :wink: :lol: :lol: The blue colour is too bright, the original Record enamel was much more subdued - Rob
Chems
Established Member
I thought it was a bit garish. I will try and source some paint tomorrow. I also uncovered the Electric Orange colour on the record badge, thats really nice, if it hadnt flaked off in a few parts a clean up would have done.
What I really want to know is, what do I need to be able to polish these up so they look like mirrors? Ive got 800 Grit, 1000, 1500, 2000 and 2500 grit paper but not sure it will work on the metal and I think I need some sort of abrasive solution.
What I really want to know is, what do I need to be able to polish these up so they look like mirrors? Ive got 800 Grit, 1000, 1500, 2000 and 2500 grit paper but not sure it will work on the metal and I think I need some sort of abrasive solution.
Paul Chapman
Established Member
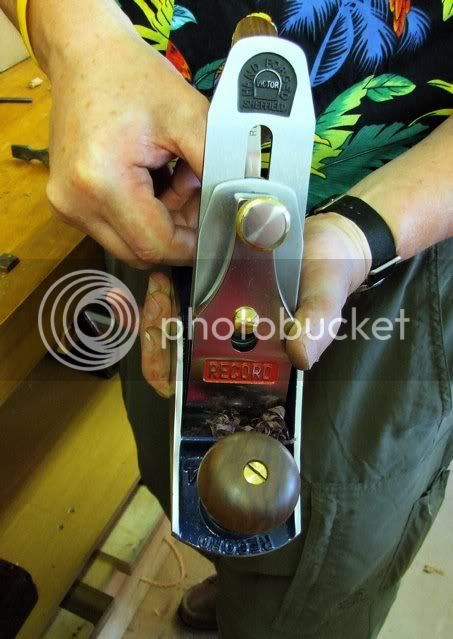
woodbloke":10vqgo07 said:...of course you can always remake the handles from some English Walnut :wink: :lol: :lol:
Wot, like this :wink:


