You are using an out of date browser. It may not display this or other websites correctly.
You should upgrade or use an alternative browser.
You should upgrade or use an alternative browser.
Wadkin AGS10 restoration
- Thread starter Krysstel
- Start date

Help Support UKworkshop.co.uk:
This site may earn a commission from merchant affiliate
links, including eBay, Amazon, and others.
Hi again
I need to change the switch to run the motor on 230VAC 3-phase (which we have in Norway).
Have sourced this switch as being the correct spec CIRCUIT BREAKER . It's the same type as was fitted on the saw when the previous owner ran it on 400V but has a higher current rating.
It's probably fine and will do what I want but it's not very user friendly or really what one would expect to find on a cabinet saw.
Does anyone know of a source for more suitable switches that would do technically the same job but be more user friendly on a cabinet saw ? Ie, big green and red pushbuttons etc !
Thanks
Mark
Time for a status update 
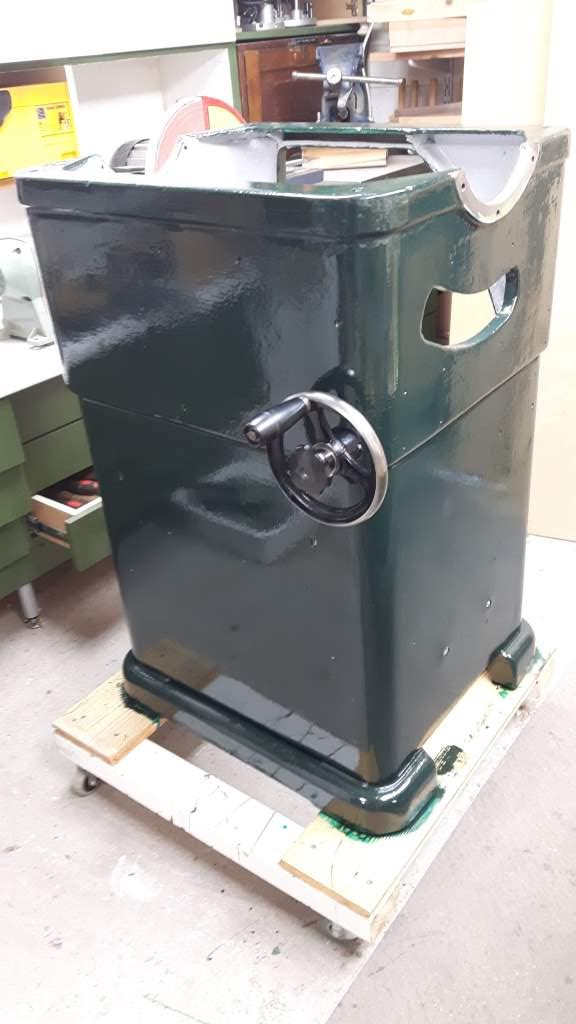
I have new belts, new motor bearings and a new rise & fall worm gear on order. In the meantime I've cleaned and painted everything and have come a good way in the rebuild.
After a bit of experimentation I ended up with a sort of british racing green for the main body with light grey internals. I'm also painting the underside of the tables in the same grey. The handwheels and ripfence will be black + some polished bits.
Mark


Attachments
Looking smart!
misterfish
Established Member
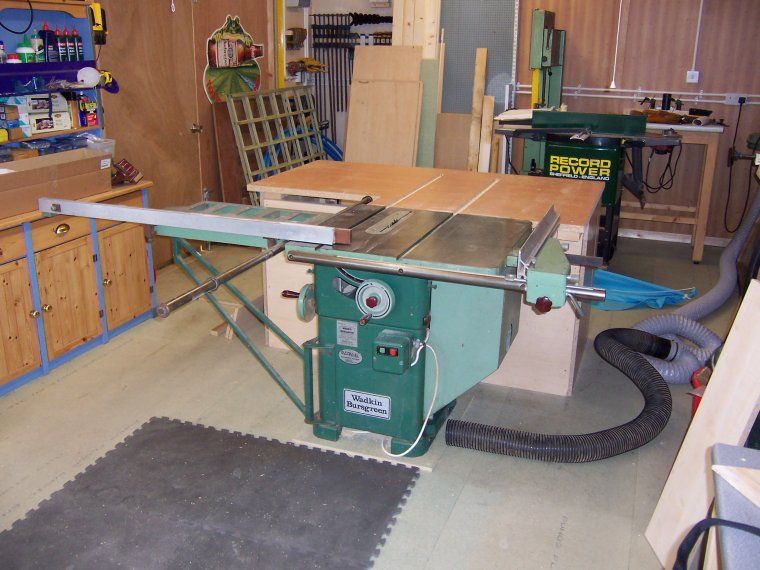
My Wadkin BRT10 - basically an AGS10 with sliding table originally used by a school has one similar. It takes a lot of space and I have removed it for the time being. It fits in place of the left table extension.
Misterfish
Misterfish

£12.50 (£1.25 / count)
£14.45 (£1.44 / count)
JSP M632 FFP3moulded Disposable Dustmask (Box of 10) One Size suitable for Construction, DIY, Industrial, Sanding, dust protection 99 Percent particle filtration Conforms and Complies to EN 149
Amazon.co.uk

£400.66
Trend Portable Benchtop Router Table with Robust Construction for Workshop & Site Use, 240V, CRT/MK3
Qwikfast Trade & DIY Supplies Limited

£96.66
£102.61
O'SKOOL Mortise and Tenon Jig is Ideal for cabinets, Chairs, and Table Construction Using a Plunge Router
Amazon US

£17.99 (£9.00 / count)
JORGENSEN 300mm Professional Woodworking Clamps 2 Pack, Quick Release Clamps for Wood, F Clamps Set
GreatStarTools

£17.99 (£1.80 / count)
£27.44 (£2.74 / count)
3M 8822 Disposable-fine dust mask FFP2 (10-pack)
Amazon.co.uk

£13.99 (£2.80 / count)
VEVOX® FFP1 Dust Mask - Set of 5 - Valved Face Masks - Respirator - Protection e.g. for Construction, Building Work, Sanding, Woodworking, Fine Dusts, Aersoles or Particles
SLSK Ventures GmbH (UK)
Evening all 
Today I received the rise and fall worm gear I ordered from AMS. This is meant to be an original Wadkin spare part but to my surprise (and shock) it does not have a hole in the boss for the locking dowel - see picture below.
I have queried this with the supplier but wonder where I stand with this. Is this normal ? Is it expected that I drill the required hole myself or have they really supplied the wrong part ? Any thoughts ?
Mark

Attachments
wallace
Established Member
Wadkin machines were all hand finished. So one guy would usually assemble it. This is before the days of mass production but of batch production. That gear would of been got from the stores and then the guy would fit it usually with a tapered pin. If you got a gear from another machine the holes would not align.
I had a couple of small RT lathes a while back and restored one of them, when I came to fit the tail stock it would not fit. There was only a miniscule difference. I tried the unrestored one and voila.
I had a couple of small RT lathes a while back and restored one of them, when I came to fit the tail stock it would not fit. There was only a miniscule difference. I tried the unrestored one and voila.
So in other words I have to drill the boss myself and hopefully match tbe hole I drill with the existing hole in the shaft ?
Hmmmm. Should be fun
The worm drive is held on by a straight spring dowel pin, not a tapered pin.
Mark
Hmmmm. Should be fun
The worm drive is held on by a straight spring dowel pin, not a tapered pin.
Mark
With some careful setup and marking I managed to drill out the worm drive without too much trouble and install the locking pin.The whole rise and fall mechanism is now back in the saw and works just fine 
All I have left now is to get the motor reinstalled (with new bearings), new switchgear and mounting the tables.
Oh, and dust extraction :wink: - more later
Mark


All I have left now is to get the motor reinstalled (with new bearings), new switchgear and mounting the tables.
Oh, and dust extraction :wink: - more later
Mark


Attachments
Dust extraction.
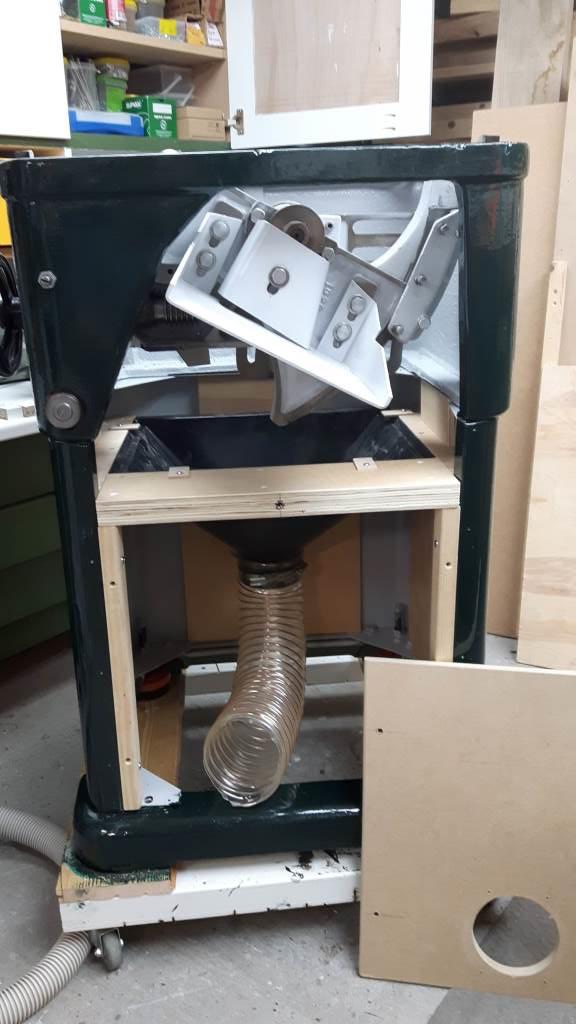
With the help of one of those Axminster funnels and a sheet of 1/2" ply I've started putting something together. When I've got the motor back in I'll also box in the top half, around the motor.
My goal is to make the whole installation free standing without any new holes drilled in the saw body. I can then easily modify or remove it if it doesn't perform.
Mark

Attachments
well done. That's tricky to do.
Yeah, that price isn't very nice.
The old Wadkin AGS10 that I picked up had a very worn worm gear for the rise-and-fall mechanism, and after considering a few options I decided to swap the gear for the one on the blade tilt mechanism. That one was practically mint, and the left tilt doesn't get anywhere near the abuse the rise-and-fall one does.
Switching the two ended up giving me smooth action on both, so now the blade goes up and down nicely, and also tilts perfectly as well.
You might want to double check the comb that interlocks with that worm gear by the way. That can get worn down as well.
I considered the same fix as the worm for the tilt on mine is also hardly worn. But in the end I went for a new one despite the cost.
The rise and fall comb is indeed very worn but with a new worm it seems to now be good and tight with no backlash. In an ideal world I would have liked to change the comb as well. Are they available ?
Mark
The rise and fall comb is indeed very worn but with a new worm it seems to now be good and tight with no backlash. In an ideal world I would have liked to change the comb as well. Are they available ?
Mark
SammyQ
Established Member
Mark, I'm coming back to your thread after an enforced absence. Great progress. Respect. I also did a light coat inside the saw cabinet, made a helluva difference to visibility 'under the hood'.
One query? Have you tried raising/lowering your saw blade WITH THE MOTOR INSTALLED? Does your new dust catcher not impede its downward motion? I had to make a 'scoop' out of an old lorry side, that went the whole way to the base of the cabinet, there was SO little room once the gubbins went down, or worse, tilted.
Sam
Ha-ha ! Yes Sam, you're totally correct.
In my impatience I started on the dust collection before I had the motor ready and installed. I've since had to lower the whole chute affair so the motor clears it when fully down and tilted. I've still managed to use the Axminster chute but have had to take the pipe out of the back instead of the bottom. Had just enough space.
Mark
SammyQ
Established Member
Sorry Mark. I have been known to blister local paint when I 'go at summat too 'ard' and don't think it through. That motor mount is a particular bullocks as you have to support a LOT of deadweight - just above your toes. I managed not to amputate mine - just - by judicious placement of a carjack. Tricky, though. Heavyweight juggling/industrial ballet? THEN you have to strain every finger horsing the belts into place. Meh.
Sam
Sam
Couple of pictures showing what I'm doing with the dust extraction.
They'll be some kind of box around the upper section with the motor etc.
Making it all in 1/2" ply which I'll fill and paint to look as close to the rest of the saw as possible. But I'll probably leave the ply inside unpainted.
Mark


They'll be some kind of box around the upper section with the motor etc.
Making it all in 1/2" ply which I'll fill and paint to look as close to the rest of the saw as possible. But I'll probably leave the ply inside unpainted.
Mark


Attachments
SammyQ
Established Member
Nice one. Will try to get you photos of my 'fix ' over next few days.
A small update 
Dust extraction as good as done. Just need to put a cover on it and a lick of paint
Side tables being cleaned up.
Main table on and new DOL switch from Motor Control Warehouse installed.


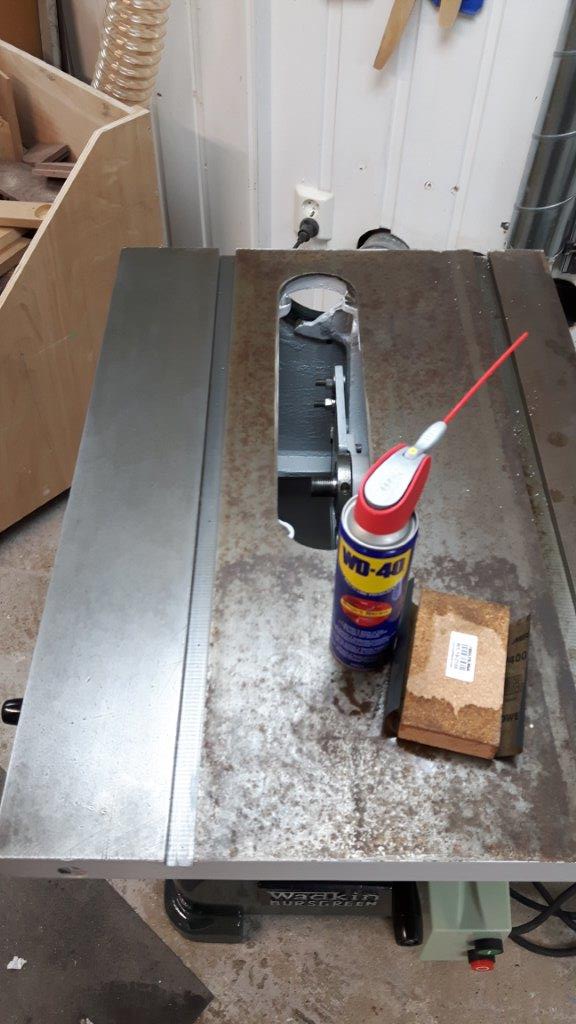
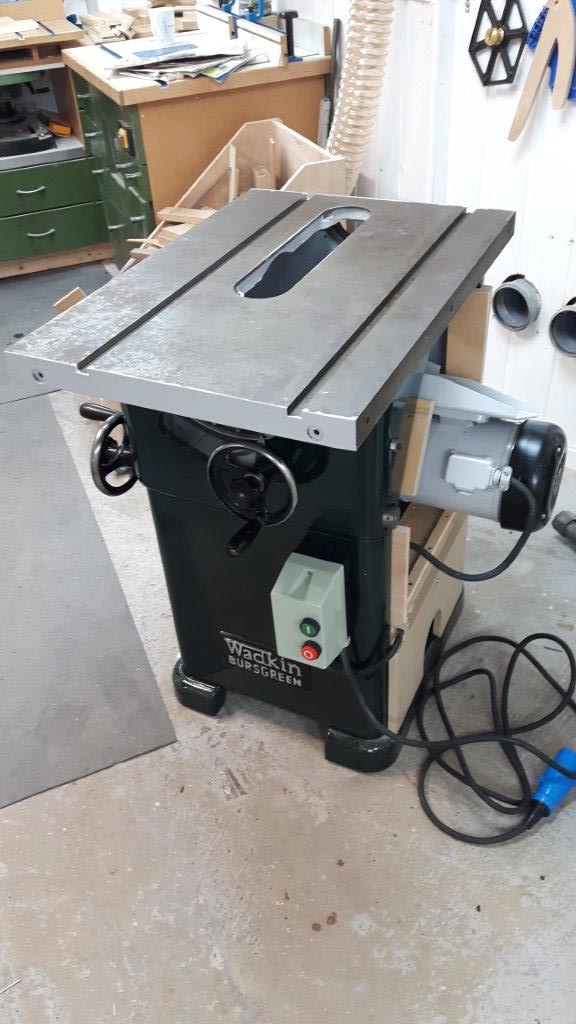
Dust extraction as good as done. Just need to put a cover on it and a lick of paint
Side tables being cleaned up.
Main table on and new DOL switch from Motor Control Warehouse installed.


