Under Development - Garnham style dropout boxes

UKworkshop.co.uk

Help Support UKworkshop.co.uk:

This site may earn a commission from merchant affiliate links, including eBay, Amazon, and others.
Now that's more or less exactly what I am doing - actually started construction earlier this eve - pics tomorrow. I'll be doing the same - cut in 2 and then use some latches to hold the two halves together. I'd not considered the filter mesh/material .. . ..
 
As promised some pics from the start I made last night.

Code:
So here's a pile of materials, some ply, wheels and hardboard:
[img]http://www.mikesaville.co.uk/images/woodwork/IMG_2985.jpg[/img]
Cutting pieces to size with circular saw and homemade guide rail:
[img]http://www.mikesaville.co.uk/images/woodwork/IMG_2986.jpg[/img]
Boards cut to size:
[img]http://www.mikesaville.co.uk/images/woodwork/IMG_2987.jpg[/img]
Test fit and sinking some holes:
[img]http://www.mikesaville.co.uk/images/woodwork/IMG_2988.jpg[/img]
Some silicone in the joints to make it air tight:
[img]http://www.mikesaville.co.uk/images/woodwork/IMG_2989.jpg[/img]
Once I'd screwed together I got silicone squeeze out all along the joints - hopefully means they're airtight!:
[img]http://www.mikesaville.co.uk/images/woodwork/IMG_2990.jpg[/img]
Cutting the hole in the top 'shelf':
[img]http://www.mikesaville.co.uk/images/woodwork/IMG_2991.jpg[/img]
Top 'shelf' fitted:
[img]http://www.mikesaville.co.uk/images/woodwork/IMG_2992.jpg[/img]
Lower baffle installed:
[img]http://www.mikesaville.co.uk/images/woodwork/IMG_2993.jpg[/img]
Batons and hardboard screwed and drilled in place:
[img]http://www.mikesaville.co.uk/images/woodwork/IMG_2994.jpg[/img]
Progress so far:
[img]http://www.mikesaville.co.uk/images/woodwork/IMG_2995.jpg[/img]

That was after a couple of hours last night - much of which spent making decisions >:)

I hope to finish build tonight, but we'll see. For info dimensions are 500x400x600mm (wxdxh). This is max I could have for the space I've got. I could have left the vac off the top and made it taller but I want to fix vac on top and only have to move 1 object.
 
Got another hour in the shed last night to finish this off.

Top and bottom attached, more silicone, sticky stuff.
Code:
[img]http://www.mikesaville.co.uk/images/woodwork/IMG_2997.jpg[/img]
Drilling holes in the upper baffle:
[img]http://www.mikesaville.co.uk/images/woodwork/IMG_2998.jpg[/img]
Front siliconed and ready to go on:
[img]http://www.mikesaville.co.uk/images/woodwork/IMG_2999.jpg[/img]
A solid box:
[img]http://www.mikesaville.co.uk/images/woodwork/IMG_3000.jpg[/img]
Using the guide rail to cut the top off the box:
[img]http://www.mikesaville.co.uk/images/woodwork/IMG_3001.jpg[/img]
In two halves, a lid and the base/bin:
[img]http://www.mikesaville.co.uk/images/woodwork/IMG_3002.jpg[/img]
As luck would have it the door seal I had left over from our front door appears to be exactly 18mm wide, perfect :D  :
[img]http://www.mikesaville.co.uk/images/woodwork/IMG_3005.jpg[/img]
[img]http://www.mikesaville.co.uk/images/woodwork/IMG_3006.jpg[/img]
Catches installed to lock two halves together:
[img]http://www.mikesaville.co.uk/images/woodwork/IMG_3008.jpg[/img]
Castors attached:
[img]http://www.mikesaville.co.uk/images/woodwork/IMG_3009.jpg[/img]
Vac attached. I simply screwed through the base into the top of my box:
[img]http://www.mikesaville.co.uk/images/woodwork/IMG_3010.jpg[/img]
Vac on top and intake hose cut to length:
[img]http://www.mikesaville.co.uk/images/woodwork/IMG_3011.jpg[/img]
Plenty of hot melt glue to attach hose through hole in top of box:
[img]http://www.mikesaville.co.uk/images/woodwork/IMG_3012.jpg[/img]
[img]http://www.mikesaville.co.uk/images/woodwork/IMG_3013.jpg[/img]
Hole drilled in side for main hose to tools:
[img]http://www.mikesaville.co.uk/images/woodwork/IMG_3014.jpg[/img]
More hot glue and hose attached to side:
[img]http://www.mikesaville.co.uk/images/woodwork/IMG_3015.jpg[/img]
Completed:
[img]http://www.mikesaville.co.uk/images/woodwork/IMG_3016.jpg[/img]
In it's new home:
[img]http://www.mikesaville.co.uk/images/woodwork/IMG_3018.jpg[/img]
Finally a first test. It works!!! Shavings in the box and not the bag :D
[img]http://www.mikesaville.co.uk/images/woodwork/IMG_3017.jpg[/img]
 
Well done Mike.....very neat! It will be interesting to see the door off when the box is half-full or so, and to see exactly how much if any makes it through to the vacuum cleaner.

Mike
 
Well, I've got 15 sheets of MDF to cut up into about 100 components in the next few days so that'll be a real test for it :)
 
You all seem to grasp Mike's idea with no problem at all, so I am sorry if the following questions seem stupid with obvious answer's, but here goes anyway.

How did Mike (Saville) decide where to put the baffle's and how many to use?

What are the baffle's for?

How did any of you decide what size box to build?

I have 100mm metal extraction piping around my workshop, but I am very unsatisfied with its performance. Would one of Mike Garnham's box's work with a 100mm system? and if so how big would the box need to be?

Or are these boxes only for power tools and small pipes?

The 100mm piping runs around the workshop at ceiling height, and I have a Scheppach HA 2600 with a fine filter and a Elektra Beckum (Metabo) SPA 1100 connected together (and running at the same time) to one end of the system. And when I use the table saw I have a Camvac twin motored GV386 twin motor connected to the blade guard.
When this was set up we already had the three extractors, and it was thought that they would easily deal with all the dust, but it has really been a let down and even with two of its motors running the Camvac does not clear much the dust from the table saw.

All the joints in the metal piping are sealed with tape and only one blast gate is open at a time.

If I can use a box in this system would you use the 3 extractors with a suitable triple adapter at one end of the system?

Any advice you could give in improving my system will be greatly received.

Cheers

Mike
 
Mike.C":f4bm5c4k said:
How did Mike (Saville) decide where to put the baffle's and how many to use? What are the baffle's for?

How did any of you decide what size box to build?

I have 100mm metal extraction piping around my workshop, but I am very unsatisfied with its performance. Would one of Mike Garnham's box's work with a 100mm system? and if so how big would the box need to be?

Mike,

It should work really well with your system, I'd have thought. The thing is, it can be made of scrap in a few hours for zero cost, so if it doesn't work there is no harm done.

My instinct is that your hose cross sectional area is approx. 9 times mine, so the volume in the box should be roughly 9 times the volume of my box......and the dims of mine are above (page 3). The volume of my current box is .08 cu.m roughly, so I reckon yours should be at least three quarters of a cubic metre.......but the bigger it is, the better it will work.

The baffles are there merely to knock some of the sawust and chips out of the airstream so that gravity can grab them more easily.

The other thing that would make it better, I think, would be if the drop-box was located adjacent to the machine, .....but this probably isn't too important.

The only other thought I have had about your set-up with multiple machines trying to work together to do the extracting, is are they working with each other, or cancelling each other out?

What you are proposing is exactly what I have in mind when I build my next workshop.

Mike
 
Mike.C":3t2vi737 said:
How did Mike (Saville) decide where to put the baffle's and how many to use?

Erm. . . . .guessed. I pretty much copied the topology of Mike Garnham's design and adjusted it to fit the thinner/taller space available to me.
 
Mike Garnham":23gyvxxp said:
Mike.C":23gyvxxp said:
How did Mike (Saville) decide where to put the baffle's and how many to use? What are the baffle's for?

How did any of you decide what size box to build?

I have 100mm metal extraction piping around my workshop, but I am very unsatisfied with its performance. Would one of Mike Garnham's box's work with a 100mm system? and if so how big would the box need to be?

Mike,

It should work really well with your system, I'd have thought. The thing is, it can be made of scrap in a few hours for zero cost, so if it doesn't work there is no harm done.

My instinct is that your hose cross sectional area is approx. 9 times mine, so the volume in the box should be roughly 9 times the volume of my box......and the dims of mine are above (page 3). The volume of my current box is .08 cu.m roughly, so I reckon yours should be at least three quarters of a cubic metre.......but the bigger it is, the better it will work.

The baffles are there merely to knock some of the sawust and chips out of the airstream so that gravity can grab them more easily.

The other thing that would make it better, I think, would be if the drop-box was located adjacent to the machine, .....but this probably isn't too important.

The only other thought I have had about your set-up with multiple machines trying to work together to do the extracting, is are they working with each other, or cancelling each other out?

What you are proposing is exactly what I have in mind when I build my next workshop.

Mike

Mike many thanks for the explanation and the size of the box I need.

As for the 3 extractors cancelling each other out, I will have to do some testing but I think you might very well be right, because if you disconnect and put your hand over the inlet of a single extractor, and then go over and test the inlet pipe by a machine with all 3 extractors running, I am sure the single extractor feels more powerful.
Have you got any tips on positioning the extractors? (the metal piping runs down the complete lenght of a 26ft x 13ft workshop, with several branches running off to my machines) Or would I be better off selling them and buying a single more powerful extractor to do the job?
If so have you (or anyone else) got any recomendations?
What figures should I be looking at? For instance Scheppach claim that their HA2600 has a volume rating of 1000m3 per hour, 1/sec, is this the figure, because I cannot see any other info?
The Elektra Beckum is 842 m3/h and the Camvac gives their's in litres 108 l/sec.

I have this type of blast gate http://www.diytools.co.uk/diy/Main/sp-4 ... oryID1=979 (but not from this company). Can they ever cause a problem by leaking?

Once again any advice will be gratefully received

Cheers

Mike
 
Mike, it sounds like you're after something similar to me - ie one box that can connect to any machine.
I wasn't thinking of having 2 extractors sucking at the same time, but rather just having 2 (chip & dust) connected to a single box and suitable outlets for each machine. Each outlet/inlet would need a blast gate - ideally they'd be linked in someway but that wouldn't really be necessary.
So if I were running the chip extractor I'd have the gate open to the 100mm piping, and likewise for the dust extractor (whatever size piping that'd need).
 
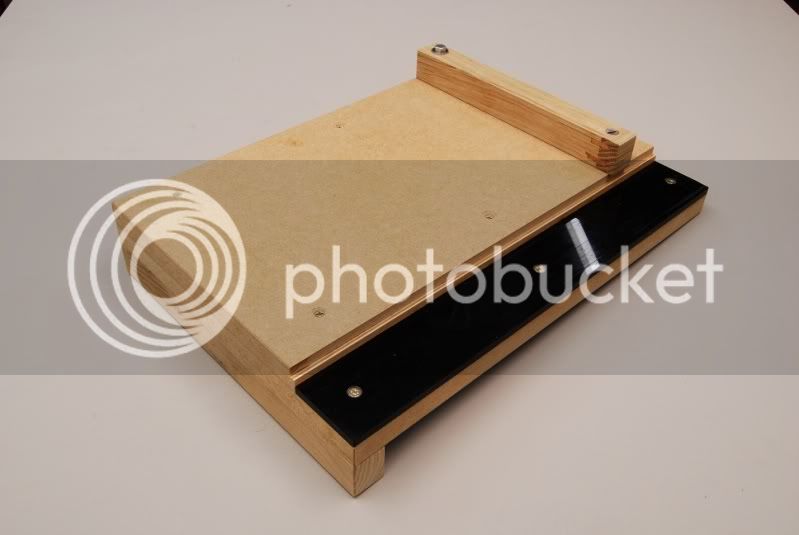
Here's a pic of my effort to date:

001small.jpg


The orientation of the box is vertical, so to lengthen the air passage I've installed a thee way baffle system, so the flow of the air is in a sort of an 'S' shape. Input and outputs have been marked for 63mm tubing from Axminster
Next job is to sort out the door - Rob
 
Looks good Rob. Are you planning on a see-through door, or are you going to do a solid one? The vertical baffle in the main chamber is one you might end up adjusting, maybe. The closer to the inlet hose that it is the more abrupt the shock for the shavings rushing in, and the more likely they are to fall unconscious on the floor.........you get my drift!

Mike
 
Was doing some tidying up with mine earlier today. Got within a couple of inches of a jay cloth - next thing I know it's flying down my 5m hose like one of those dutsers you seen in the demos for central vac systems. :shock:

Took the lid of and there it was lying among all the dust - sorry no pic :oops:

Does show that alls working and no loss of 'suck' 8)
 
Mike Garnham":230l9rvv said:
Looks good Rob. Are you planning on a see-through door, or are you going to do a solid one? The vertical baffle in the main chamber is one you might end up adjusting, maybe. The closer to the inlet hose that it is the more abrupt the shock for the shavings rushing in, and the more likely they are to fall unconscious on the floor.........you get my drift!

Mike
The positioning of that main vertical baffle also occurred to me as soon as I'd fixed it in place. No problem, as everything is just screwed together internally so tomorrow I'll take all the gubbins out the middle and reposition that baffle a lot closer to the input port
The door will be solid with a narrow vertical see through panel made from an oddment of 6mm acrylic...I've worked out a cunning way to fit the door in place with toggles made from 6mm birch ply to give a air tight seal - Rob
 
Wouldn't it be easier to recycle one of the thousands of cyclone's tossed away at the skip? I seen this one on another forum.
755871538_XCoZH-XL.jpg


I think i'll try and make something similar.

Or is the idea to be anti cyclone?
 
woodsworth":3kt4qgb3 said:
Wouldn't it be easier to recycle one of the thousands of cyclone's tossed away at the skip?
What skip is that and where is it? I've never seen anything like that in a skip and I can't resist a quick peek into any one I happen to pass.
Mike's idea is not anti-c but just a cheaper way of achieving the same end result and one which ought to be within the remit of anyone who can use basic tools...and it's a great way of using up gash material - Rob
 
There are loads of those dyson cyclones on the tip. Problem is that I've not found any tips nowadays that let you take anything away :(
I've seen alsorts of potentially useful stuff at the tip - not much use seeing it if I can't have it though. So now I just close my eyes and forget I ever saw all that wood.........
 
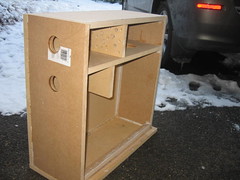
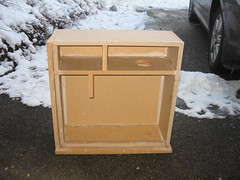
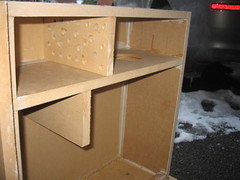
I have half created a dropout box/dust collector/whatever it's called, which I have done a basic test and works very well. I kept it very simple - the same as Mike's original, although I do plan to put a vacuum dust filter (not HEPA- just ordinary) in the top left box just before the exit to the vacuum itself.

4300097817_d880e1aef8_m.jpg
4300097951_f6db89eed0_m.jpg
4300098055_b3e33f0c52_m.jpg


As I said, I started and then got diverted with another project. I bought 5m of Henry Hoover hose from fleabay and I think it should fit, but this is probably my biggest challenge. This took about two hours to knock up and I just used off cuts and bits and pieces. It isn't pretty, but it did seem effective. I'll post more pics and test results when it's finished.

Steve
 

Latest posts

Back
Top