Trouble holding an edge - chisels

UKworkshop.co.uk

Help Support UKworkshop.co.uk:

This site may earn a commission from merchant affiliate links, including eBay, Amazon, and others.
YorkshireMartin":25ib8fi4 said:
Jacob":25ib8fi4 said:
Just a pedantic detail but "paring" isn't something you'd do with the aid of a mallet.
"Paring" means taking off thin shavings with hand pressure alone, for which 25º edge (or even shallower) should be OK. Rather like planing.
You can't make a mortice by paring, though having made one you could pare the sides.
To cut a mortice you need a 30 to 35º edge which will withstand heavy malletting.
The popular hollow-ground plus micro bevel is the weakest possible edge - OK for gentle paring perhaps (or very fine planing) but not for any heavy work.

I should have been more specific. I use a mallet only for the chop cuts. Paring is done with hand pressure. I have a morticer for the umm, mortices :lol:

Since cutting a mortice is similar to chopping shoulders, would it potentially be prudent to have a seperate chisel, at 30 degrees, for that part of the process, then use the 25's for paring out? Just musing.
Saw.
 
YorkshireMartin":2tjtxfvv said:
Since cutting a mortice is similar to chopping shoulders, would it potentially be prudent to have a seperate chisel, at 30 degrees, for that part of the process, then use the 25's for paring out? Just musing.

On chisels set up with different bevel angles, there seems to be a variety of approaches. Some people like to have all their bench chisels set up so they can both chop and pare with them - a cutting bevel of somewhere about 30 degrees, usually. Some like to keep a few chisels with a higher bevel for heavy chopping, and a few (often their finer bevel-edged chisels) at a lower bevel angle for paring and finer chopping such as cleaning out dovetails. Some will re-sharpen a chisel of two for a specific job, perhaps honing a higher bevel angle to cope with a particularly hard wood. Some keep a few long, thin paring chisels honed at a finer bevel for hand paring, and their bench chisels at a slightly higher angle for general work. I'm not sure there's a 'right' answer, just the one that's right for you!

For what it's worth, I have a set of 4 old-fashioned square-sided firmers I use for chopping work, set up with a bevel a bit higher than the nice bevel-edged I use for bench paring and general fitting work. The long parers tend to come out rarely, but I rather like using them when they do, as being set up with lower bevels they pare a bit easier than the bench chisels. There are also a few firmer (out-cannel) gouges set up for use with a mallet (which do get used, rather more than I thought I would) and a couple of scribing gouges (in-cannel) which get used about once every Preston guild - I think these are a specialist tool you either use a lot, or virtually not at all.

In time, you evolve your own way - and don't let anybody tell you you're doing it wrong!
 
bugbear":3pzmcp3n said:
YorkshireMartin":3pzmcp3n said:
Since cutting a mortice is similar to chopping shoulders

I've read about an awful lot of variations on processes, but I've never heard of "chopping shoulders".

They're normally sawn (cross cut), and then pared (or shoulder-planed) if the sawing wasn't dead on.

Could you expand a little please - I'm always happy to learn about a new thing.

BugBear

I've been trying out quite a few different methods. Some of which I'd read about on here and others that I've seen on youtube.

I've found that when I saw the shoulders, I'm getting what appears to be a slight blade deflection (all I have is a rip tenon saw although read this was ok for small shoulder cuts- although this may be why?). I was cutting away from my knife line of course then trying to plane it down. This didn't go too well and I seemed to constantly get a raised area in the center of the shoulder.

Due to the above I then tried something else.

I attempted to make a "fence", chiseling (by hand) along the knife wall at about 30 degrees and removing a little bit of material. I found this helped to guide the saw at the start of the cut, a shallow fence if you will. Still, I found I needed to remove just a tiny bit of material with the shoulder plane. Again it left and uneven shoulder after planing, although the saw cut was much better.

So after all of the above, I concluded that I need to tinker with my shoulder plane. It's sharp, but I think it might be a tad large for this job. It's a 73 and the shoulders were 1cm so quite difficult for me to balance.

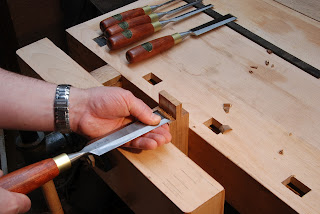
In the end, what I did was to make chop cuts with the chisel along the shoulder knife line, taking great care to ensure the chisel was vertical. I followed the line along the shoulder, then hand pared the chisel from the tenon end in blocks. I found as I got better at it, I could increase the size of the blocks I was removing.

The end result of that was shoulders which were nigh on perfectly square, with a tenon to match, something I hadnt been able to come close to with a saw/plane combo.

I noted that I had to pay attention to the grain direction though, to avoid break out affecting the thickness of the tenon. This was particularly a problem when I encountered what was a previously hidden knot, slap bang in the center of a tenon. Had to patch that one up with some shavings.

The end result isn't too bad, but I need to refine the finish. If I'm going to make any decent furniture, gaps, even fractions of a millimeter, aren't acceptable to me.
 
YorkshireMartin":p51x3pts said:
...
So after all of the above, I concluded that I need to tinker with my shoulder plane.....
I think you need to tinker with your saw until you get it right but use a chisel to clean up shoulders - undercut towards the tenon as this will be out of sight and you only want the outer edge to be seen to fit well. Shoulder planes are really for long shoulders such as you'd get on a door rail but a cheaper rebate plane will do almost as well
 
Jacob":1gg77zyz said:
YorkshireMartin":1gg77zyz said:
...
So after all of the above, I concluded that I need to tinker with my shoulder plane.....
I think you need to tinker with your saw until you get it right but use a chisel to clean up shoulders - undercut towards the tenon as this will be out of sight and you only want the outer edge to be seen to fit well. Shoulder planes are really for long shoulders such as you'd get on a door rail but a cheaper rebate plane will do almost as well

Thanks Jacob. When you say clean up the shoulders, how do you mean? Cutting across the grain, as a shoulder plane would? That is something I haven't yet tried. I would be concerned as to how to start the cut. I have a 6mm chisel which might be suited to this task though. See what you're saying about the outer edge.

Point noted about the shoulder plane.
 
TENTING.jpg


Normally you pare inwards toward the centre of the tenon (from all sides) using a chisel slightly narrower than the edge. Once you've hit the line, lift the handle slightly to hollow the centre of the shoulder by a gnats so that nothing in the middle can hold the joint open.

We are not trying to replicate a machined 90 degree joint with two planar surfaces, rather to make one that is easy to cut by hand, makes perfectly with the other component and is strong.

There is no strength in endgrain as a glue surface, so you only need to glue the cheeks of the tenon.
 
matthewwh":3brsngnp said:
TENTING.jpg


Normally you pare inwards toward the centre of the tenon (from all sides) using a chisel slightly narrower than the edge. Once you've hit the line, lift the handle slightly to hollow the centre of the shoulder by a gnats so that nothing in the middle can hold the joint open.

We are not trying to replicate a machined 90 degree joint with two planar surfaces, rather to make one that is easy to cut by hand, makes perfectly with the other component and is strong.

There is no strength in endgrain as a glue surface, so you only need to glue the cheeks of the tenon.

Makes sense now. I'll give this a go next time.
 

Latest posts

Back
Top