Traditional Drawer Construction (again!)

UKworkshop.co.uk

Help Support UKworkshop.co.uk:

This site may earn a commission from merchant affiliate links, including eBay, Amazon, and others.
Sgian Dubh":wspdl8c3 said:
jimi43":wspdl8c3 said:
Now if I could just get this chisel sharp..... Jim
Easy. Just slop the damn thing up and down the length of a bench stone a few times-- don't forget to work the back face a bit on the stone, and strop the newly sharpened bit on the palm of your hand, ha, ha. Slainte.
Shh don't tell them how easy it is. All that fiddling about gives them something to do and keeps them off the streets!

I see Chris Schwarz is getting back to basics - but how the eff is he going to do a 2/3º back bevel?
 
You'd be really proud of me Jacob...I took the Stanley jig to the bootfair this morning and tried to sell it...no takers...like I said...I blame you totally! :mrgreen: :mrgreen: :mrgreen: :mrgreen: :wink:

Jim
 
jimi43":25s98pli said:
You'd be really proud of me Jacob...I took the Stanley jig to the bootfair this morning and tried to sell it...no takers...like I said...I blame you totally! :mrgreen: :mrgreen: :mrgreen: :mrgreen: :wink:

Jim
Too late I'm afraid. The bottom has dropped right out :roll: . You should have sold about a year ago and bought natural oil stones instead.
Tip: WD40 and old rags are going to go up. :shock:
 
Peter Sefton":288hirkd said:
Just glued with the bare faced tenon into the drawer front and butted up under the drawer back. Use paper fold back clips as cramps (bulldog clips) http://www.maplin.co.uk/bulldog-clips-4 ... 9&t=module
I make my slips .25mm over depth and then plane them down flush to the drawer sides.

Cheers Peter

These are fantastic tips...you simply don't get in books...(well most books!)

Thanks Peter

Jim
 
Sgian Dubh":3vbbipzo said:
A better quality slip form?

The sketches below are for an alternative flush style slip-- this is where the top face of the drawer bottom sits flush with the top edge of the slip. Many consider this to be superior because of the flush appearance on the inside of the drawer, but you do lose a little storage space because of the thicker drawer bottom required. Unfortunately, I don't have an example to hand to photograph, and I didn't photograph the construction of the last drawer I made with this configuration. But hopefully you'll be able to get the general idea from these sketches.

A. With the flush slip the drawer bottom is thicker. With the quadrant slip illustrated above you would use, for eaxmple, a 6 mm thick bottom, in this case you'd use a bottom about 12 mm thick. A tongue is worked on the bottom face of the drawer bottom at either end where they fit into the slip grooves. At the front edge, the tongue is worked into the top face of the drawer bottom, and this tongue fit into the groove worked into the back face of the drawer front. The idea here is that if there's any shrinkage in the width (front to back) of a solid wood bottom it doesn't show as a gap (when viewed from the inside) on the back face of the drawer front.
AltSlipFit-700px-web.jpg


B. Finally, here is a sketch of the rear view of a drawer constructed to set the top face of the drawer bottom flush with the top edge of the slip. The little bead and quirk detail on the top inside corner of the slip is just one decorative option to disguise the intersection between slip and drawer bottom. Slainte.
DrawerSlipAlternative-700px-web.jpg
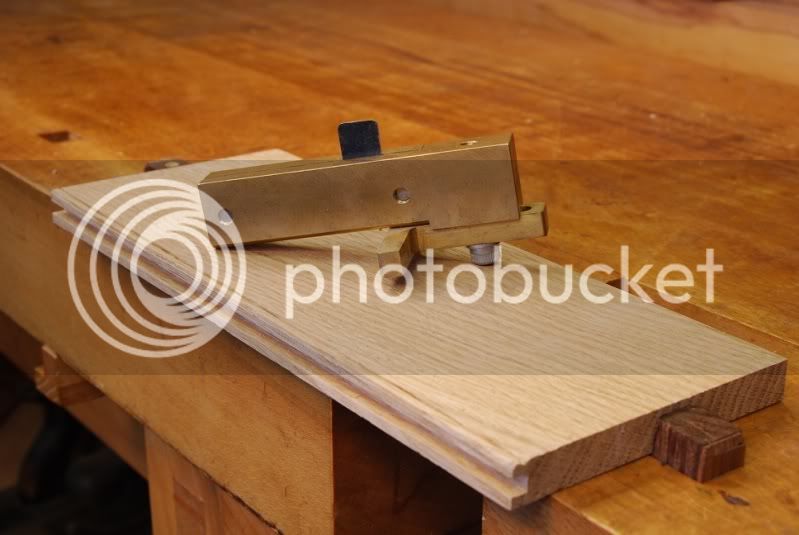
...as shown here, when I can be faffed to do them :mrgreen: Making the slip with the bead moulding cutter in the scratch stock:

7CompletedbeadandscratchstockSMALL.jpg


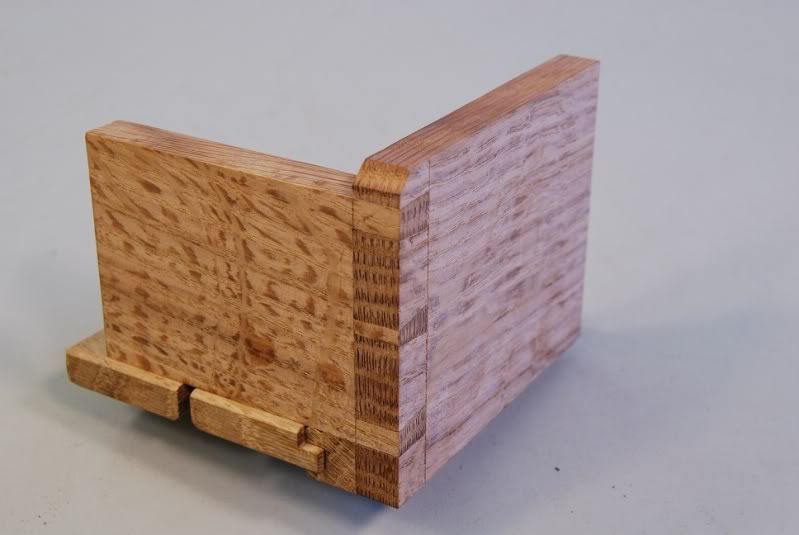
so that when built into the drawer they look like this. The outside corner (illustrative example only)

9Cornerofadawer-outsideSMALL.jpg


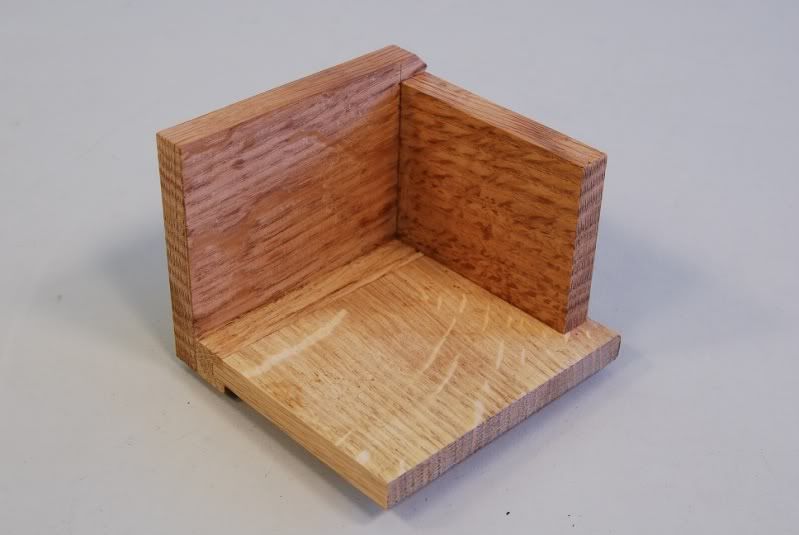
...the inside corner:

10Cornerofadrawer-insideSMALL.jpg


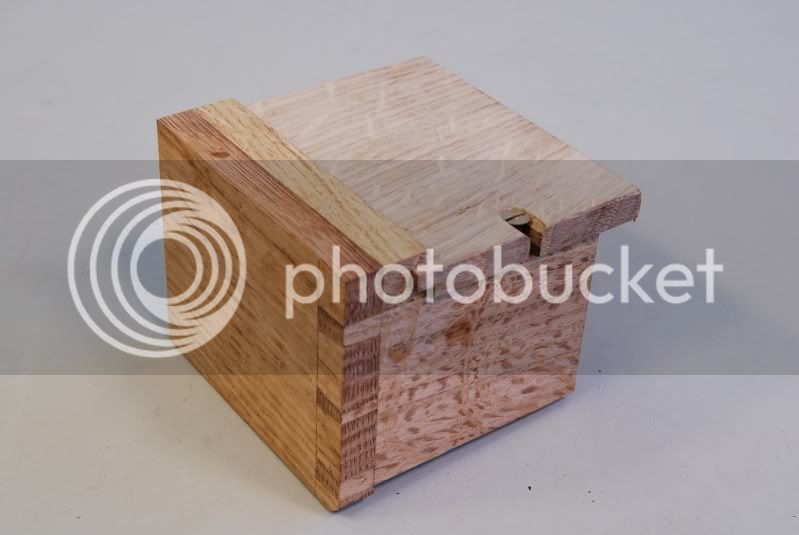
...and the underside:

11Cornerofadrawer-undersideSMALL.jpg


The front section isn't shown where it's tenoned into the front groove - Rob
 
woodbloke":1iw3hbve said:
...and the underside:

11Cornerofadrawer-undersideSMALL.jpg


The front section isn't shown where it's tenoned into the front groove - Rob
OK except the screw - if there is any load at the back of the drawer the screw will bind instead of sliding, if no load then the screw is redundant. No screws or pins of any sort. The bottom glued into the front slot.
It's not obvious but a drawer is basically a board (the bottom) which must be stiff enough for the load. The sides, back, and front, are add-ons which turn it into a more functional tray.

Another less obvious feature is that the term "dovetail" can be deceptive, as the principle features, functionally and visually, are the pins and the pin holes. The DTs are just the bits left between.
Forget DTs, think "pin" and "pinhole".
 
OK except the screw - if there is any load at the back of the drawer the screw will bind instead of sliding, if no load then the screw is redundant. No screws or pins of any sort. The bottom glued into the front slot.
It's not obvious but a drawer is basically a board (the bottom) which must be stiff enough for the load. The sides, back, and front, are add-ons which turn it into a more functional tray.


Jacob, do I dare ask what else you suggest if no traditional screw?

Cheers Peter
 
Peter Sefton":sbbaw3fs said:
...
Jacob, do I dare ask what else you suggest if no traditional screw?

Cheers Peter
Nothing.
If it needs a screw then the bottom is too thin, perhaps in need of a muntin for strength.

PS or if screwed (or pinned/glued) at the back then the bottom needs to be loose in the front slot to allow for movement, as you might do with a wide drawer to save having to put in muntins.
 
Modernist":1dkp9gz3 said:
In the case of a centre muntin how is that attached to the back? A screw?
Screws I think - TBH I've never actually pulled apart a drawer with muntin. The muntin grain goes the other way to the bottom and so doesn't move.
I've seen drawers where the bottom is fixed to the back with pins, glue or screws, so the movement has to be within the front slot - sometimes not deep enough in which case the bottom comes adrift.
 
The muntin is the same profile of the slip but 30 to 50mm wide this again has a bare faced tenon on the front end glued into the back of the drawer front filling in the already ploughed groove. Some tradition drawers have a dovetail at the front and are then glued and screwed not my preferred method of construction. The muntin is then fixed to the back by 1 or 2 screws.

Drawer bottoms should be glued to the drawer front to give the drawer rigidity they are used to pull and hold the drawer into the shape of the carcass, I would use screws in slots as shown by Rob to stop the drawer bottom from sagging and then rubbing on the drawer stops which should be morticed into the bottom drawer rail in quality work.

Some traditional drawer bottoms were glued and pinned into the drawer back but as the drawer bottom shrinks they fall out of the front groove, if this was done with a mulleted bottom they would become loose in the groove and ultimately fail. As for making the drawer bottoms thicker we could apply this concept to all furniture making but having bigger sections is not fine furniture making :( .

Cheers Peter
 
Peter Sefton":1laofy7d said:
The muntin is the same profile of the slip but 30 to 50mm wide this again has a bare faced tenon on the front end glued into the back of the drawer front filling in the already ploughed groove. Some tradition drawers have a dovetail at the front and are then glued and screwed not my preferred method of construction. The muntin is then fixed to the back by 1 or 2 screws.

Drawer bottoms should be glued to the drawer front to give the drawer rigidity they are used to pull and hold the drawer into the shape of the carcass, I would use screws in slots as shown by Rob to stop the drawer bottom from sagging and then rubbing on the drawer stops which should be morticed into the bottom drawer rail in quality work.

Some traditional drawer bottoms were glued and pinned into the drawer back but as the drawer bottom shrinks they fall out of the front groove, if this was done with a mulleted bottom they would become loose in the groove and ultimately fail. As for making the drawer bottoms thicker we could apply this concept to all furniture making but having bigger sections is not fine furniture making :( .

Cheers Peter
Just had a quick ruffle through our drawers, all old, 100+ years.

Chest of Drawers 1, good quality hardwood and veneers:
Muntins fixed as Peter says but held crudely but adequately at the back with 2 nails from below and one nail into the end through the back. I say "adequately" as these are well used drawers in a 100+ year old piece.
The bottom boards are nailed and glued to the back but are lose in the front slot - without any gaps opening in spite of being in a very dry condition.

Chest of Drawers 2. cheapo softwood:
Bottoms again nailed at the back and loose on the slot, with no problem apparent. No muntins even in the full width drawers but the bottoms are thicker. No slips and worn out sides (originally) but the decrepit sides are all repaired by me with slips added.

Chest of Drawers 3. cheapo softwood:
Thick bottoms not fixed at the back at all, but glued to front slots. All working fine.

Posh Georgian davenport, chinoiserie, stained fruitwood, ebony veneers, birds eye maple linings etc:
Drawers classic examples of perfection. No fixing at the back at all, but no wide drawers either hence no muntins.

The only pieces with slotted screws are made by me, before I realised the error of this way!

Could take some photos but this could be an all day job and Mrs G is objecting to my drawer rufflings.
 
Peter Sefton":1nw9mymk said:
OK except the screw - if there is any load at the back of the drawer the screw will bind instead of sliding, if no load then the screw is redundant. No screws or pins of any sort. The bottom glued into the front slot.
It's not obvious but a drawer is basically a board (the bottom) which must be stiff enough for the load. The sides, back, and front, are add-ons which turn it into a more functional tray.


Jacob, do I dare ask what else you suggest if no traditional screw?

Cheers Peter
Jacob, I disagree. I've always fitted my drawer bottoms dry, no glue at the front groove. If at any time in the future the drawer bottom needs to be replaced, you're a bit fubar'd if it's been glued in. Thus far, I've never had any issues with a brass c/s screw moving in a slot and it is the recommended way to secure the drawer bottom - Rob
 
woodbloke":13xfov7l said:
..... If at any time in the future the drawer bottom needs to be replaced, you're a bit fubar'd if it's been glued in.
Does anybody ever need to replace drawer bottoms? Even if you did it wouldn't be impossible. NB I take the glue for granted (not having actually seen it) in that in my "perfect" drawers with no fixings the bottom can't be pulled out, and I'm not going to wreck the thing by trying.
Thus far, I've never had any issues with a brass c/s screw moving in a slot
Nobody has a problem without the screws either.
and it is the recommended way to secure the drawer bottom - Rob
Recommended by whom? St Jim K? :lol:
Obviously nobody told a very large number of highly skilled woodworkers of the past, that this is a good idea. It's a miracle that so much stuff survives to this day!
 
Jacob":1eeiy2hy said:
Does anybody ever need to replace drawer bottoms?

Yes, frequently. In my experience, many people ill-treat drawers by loading them with stuff that is far heavier than the drawers were designed to take. Even if the bottoms don't break, they will often sag with this ill-treatment, making them difficult to open - then they get forced, causing more damage, and so on.......

Cheers :wink:

Paul
 
Paul Chapman":2ejwgcrj said:
Jacob":2ejwgcrj said:
Does anybody ever need to replace drawer bottoms?

Yes, frequently. In my experience, many people ill-treat drawers by loading them with stuff that is far heavier than the drawers were designed to take. Even if the bottoms don't break, they will often sag with this ill-treatment, making them difficult to open - then they get forced, causing more damage, and so on.......

Cheers :wink:

Paul
Spot on again Paul. Without having Joyce's tombe in front of me, I'm fairly certain that a swift delve in the TofFM will reveal that this is the correct way to secure a drawer bottom...could you confirm Paul and quote if necessary? - Rob
 

Latest posts

Back
Top