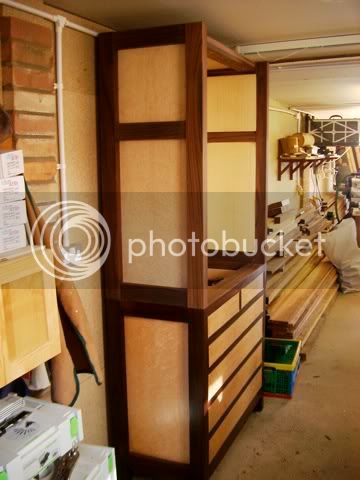
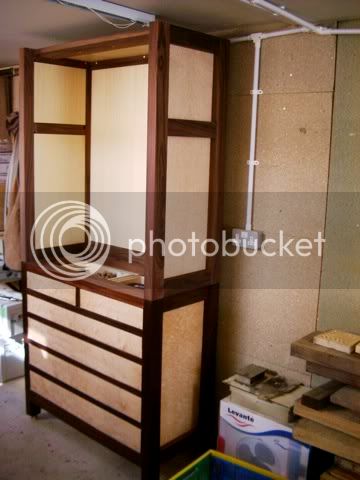
Tool Cabinet - FINISHED

UKworkshop.co.uk

Help Support UKworkshop.co.uk:

This site may earn a commission from merchant affiliate links, including eBay, Amazon, and others.
EdSutton":2l05fxfd said:
I have done the same with mine and found that in some cases the waffle texture of the material left a visible pattern on wooden and steel items that didn't wipe off (I have no explanation as to why). Nothing that major, but irritating on expensive tools.

Flexible plastics - like anti slip mat - contain a lot of plasticizers, typically some phthalate compounds, one key element in the new car smell ;-)

They are actually pretty nasty and reactive, impacting finish, hard plastic and porous metals "making plastic absorb in". Once had a cd disk placed on top of anti slip mat for some time, mat ethced pattern on the disk practically destroying it
 
virtu":mwm5okwn said:
EdSutton":mwm5okwn said:
I have done the same with mine and found that in some cases the waffle texture of the material left a visible pattern on wooden and steel items that didn't wipe off (I have no explanation as to why). Nothing that major, but irritating on expensive tools.

Flexible plastics - like anti slip mat - contain a lot of plasticizers, typically some phthalate compounds, one key element in the new car smell ;-)

They are actually pretty nasty and reactive, impacting finish, hard plastic and porous metals "making plastic absorb in". Once had a cd disk placed on top of anti slip mat for some time, mat ethced pattern on the disk practically destroying it

Maybe I've chosen wrong with the matting, thanks for the advice, thats why this forum is good. I think I'll change to cork matting, really don't want to scar any of my tools.
 
Ooooh! that does look posh :lol: =D> Yes I found that non slip mat does mark planes, thats why I changed to using felt. All I do is make up a piece of thin hardboard slightly smaller than a shelf or drawer bottom then pva it and cover it with felt overlapping the edges. as seen on the shelves in this pic
633230996_7d474f6da7.jpg


Not only does it protect the plane bottoms but I've never had a problem with rust either so it scores in more ways than one.
 
I lined my (metal) tool drawers with bubble wrap sprayed with Camellia oil to "protect" the original rubber lining.

Does anybody know if the wrap causes a similar problem? :?

Rod
 
Thought I'd bring this thread back to life. Flying home tonight so hopefully get at least a few hours in the workshop tomorrow.

First job is to start putting the top cabinet together, hopefully by the weekend I should be ready to start gluing up the top framework and inserting the back and side panels.

Once this is out the way I can start on the insert for the cabinet, not to sure how this is going to work, but I've taken a few tips from LN's cabinet.

Should have some more pic's for you by the beginning of next week, or if I'm lucky before then.
 
Waka":gxvi7vom said:
I have used the moisture resistant chipboard T&G flooring. it comes in 8 ft x 2 ft lengths, with 2" insulation behind it makes the shop nice and cosy, I think it worked out about £6.00 a length.

Couldn't you get your supplier to veneer it in some burr or other, or perhaps more birds' eye maple :wink:
 
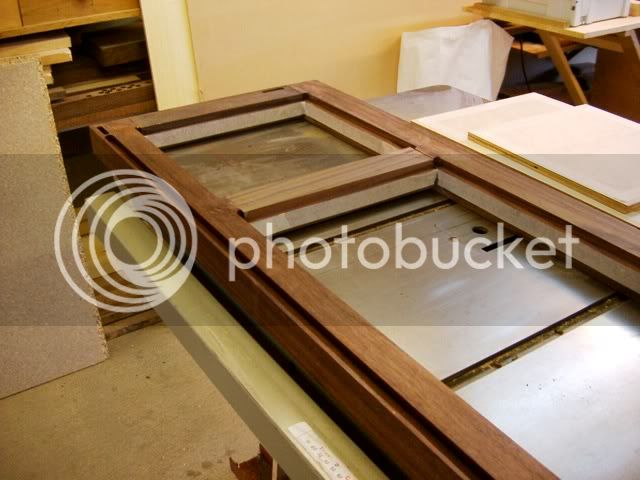
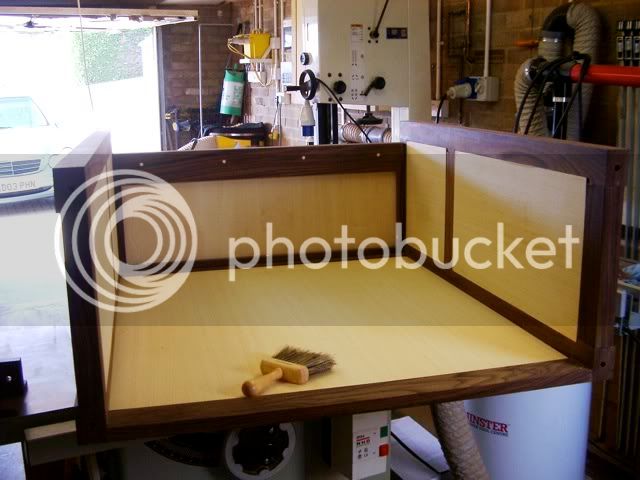
Really had a good week working on the top part of the cabinet, first thing was to put the side framework together. This entailed first routing recesses for the panels.

IMGP2816.jpg


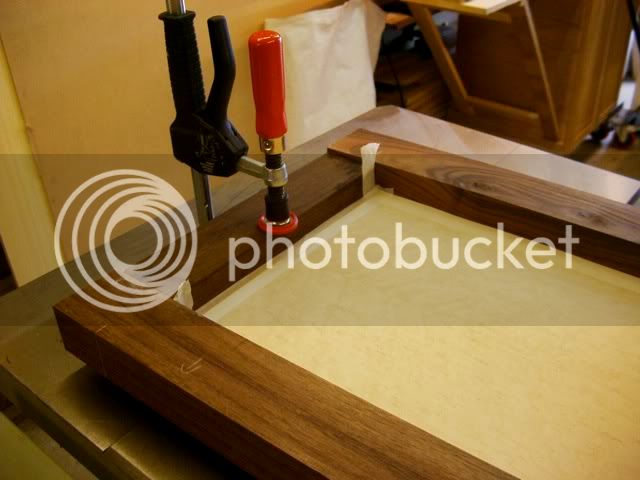
Once this was completed the panels can be trimmed to size and installed.

IMGP2815.jpg


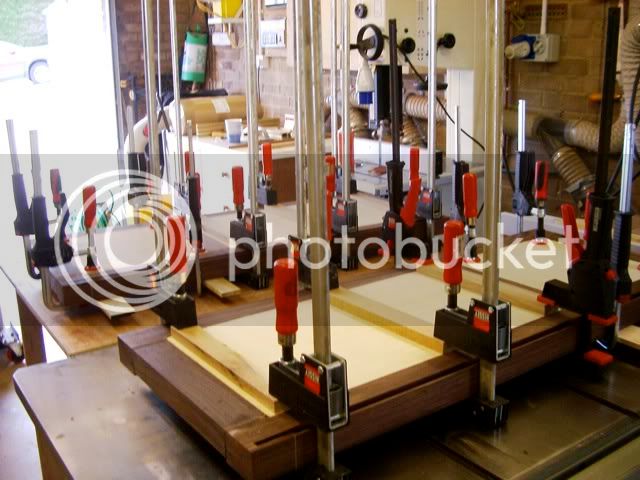
This is where a lot of clamps come in handy, cluing the frame together and the panels, I've use ordinary Titebond here, it seemed to work OK on the bottom panels.

IMGP2818.jpg


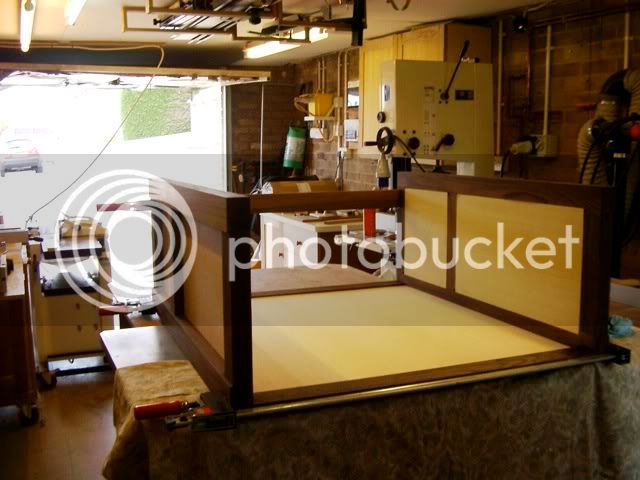
With the side panels all clued and tight its time to assemble the sides with the back panel, this was a bit fiddly for one guy but I managed in the end.

IMGP2820.jpg


I have inserted the top panel on some beading, I found this easier than routing recesses, where I used the dreaded screw I have pugged the hole with mapel, I thought it would add to the look.

IMGP2823.jpg


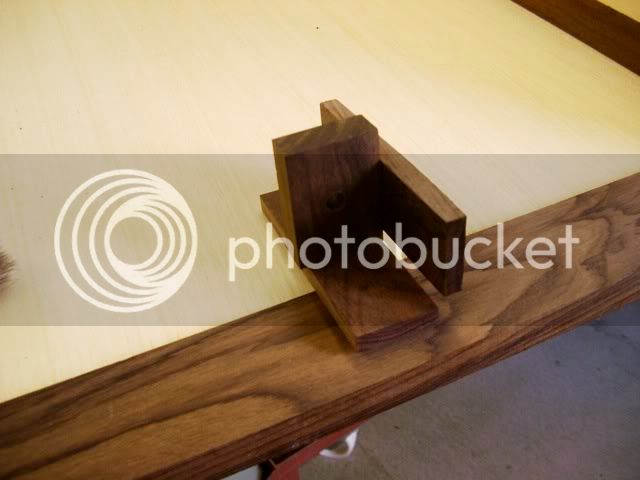
The top sits on the bottom section and is held in place with pins, here I am using brass pins 2" long, this will hold the two sections together with little on no lateral movement. To ensure that I got the guide holes in the correct place for top and bottom I made a little jig.

IMGP2824.jpg


The jig fits over the rectangle of the upper and lower corners, then drill through.

IMGP2825.jpg


Now comes the exciting bit, marrying the top to the bottom, this is where you see if you got all those measurements right. It should be a perfect fit all nicely lined up.

I must have had a really good day when I did the measurements because it lined up nicely.

IMGP2827.jpg


IMGP2828.jpg


Another job I did whilst waiting for glue to dry was line the drawers with cork. I found a place on the internet call Siesta Cork, they do rolls of varying thickness and width. I bought a 10m role 3mm thick 1/2 m wide for just £28.0. I've now got enough cork to do a couple more cabinets, anyway always a handy thing to have in the shop.

Not sure whether I should do the doors next or the inside of the top section, haven't really designed how thats going to look yet, all I know is that there will be a lot of drawers. It will, all ,be made separate from the cabinet and then slotted in.

I'll give it all some thought during the week.

Hope you enjoy the progress report.
 
Waka,
You have really got a move on with this! Looking superb.
What with the hut and the boat and other things it a good job you are retired else you'd have no time to sleep!
Talk soon.
Martin, (currently knee deep in about 180 odd Addis & Herring carving chisels...) :p Good job I'm not a co*****or!
 
Stunning Waka!!!!!

How are you acclimatising now you're back in the land of wind and rain? :lol: (snow here at the moment)
 
That looks absolutely fantastic!!!!
The Rosewood is beautiful and I can see this is going to be one amazing cabinet...... Gobsmacked.... 10-10 +++++
 
Thanks for the comments guys, haven't done anything to it for a week, been to busy refurbishing the beach hut, everything needs to be finished by the summer.

Hopefully get a bit more done next week.
 
I thought I'd better show this again so you guys don't think I've forgotten about it. I have to say I haven't done very much over the last 3 or 4 months, I've been busy on other things.
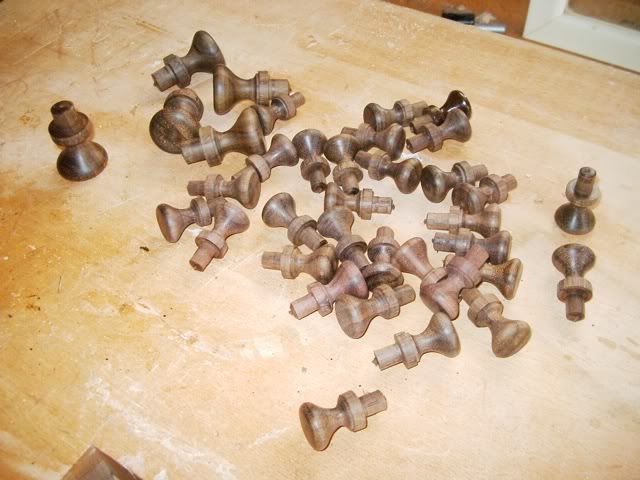
One thing I have had made and thats the drawer handles, these were kindly turned by Tam on the turning forum. I'm very pleased with the end result and a big thank you to Tam for helping me out.

IMGP3044.jpg


I do hope to continue with the top section soon although I've not really finalized the design.

Hope you enjoy.
 
Waka:

I've just seen this thread for the first time - that is amazing!

On thing I'm curious about - have you tested the opening function on the lower drawers when full of planes?

I've only ever used the push to open runners on light duty applications (e.g. kitchen etc.) and and have often wondered how well they would work with a very heavily loaded drawer because of the increased friction factor caused by the weight of the contents.
 
Tony Spear":cclhfsch said:
Waka:

I've just seen this thread for the first time - that is amazing!

On thing I'm curious about - have you tested the opening function on the lower drawers when full of planes?

I've only ever used the push to open runners on light duty applications (e.g. kitchen etc.) and and have often wondered how well they would work with a very heavily loaded drawer because of the increased friction factor caused by the weight of the contents.

Yes, I have tested the drawers with all the big planes in, actually the drawers are pretty full with all sorts of stuff. The drawer runners work a treat much better than I could have hoped for.
 
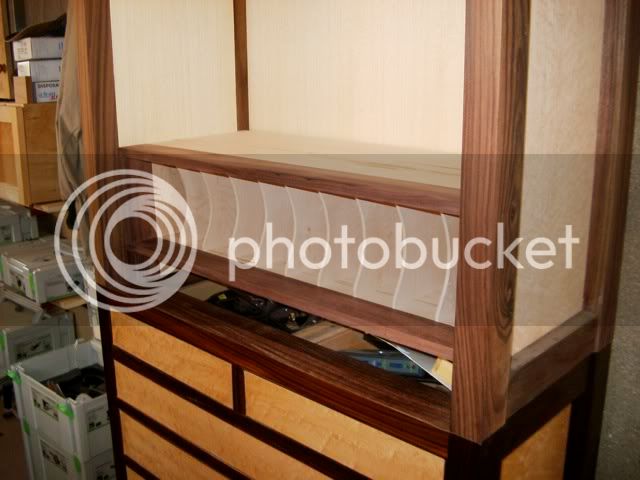
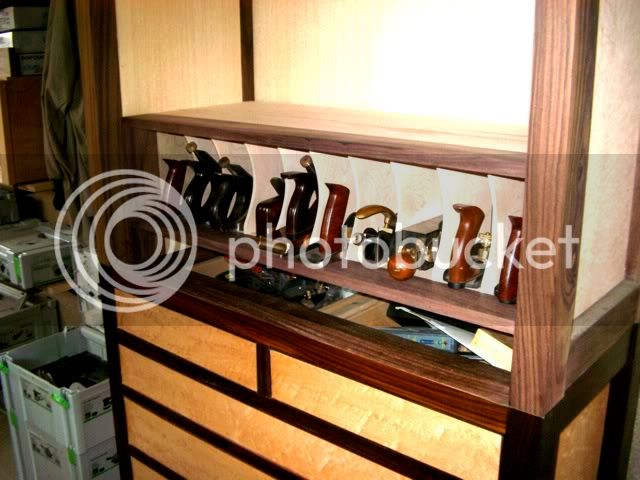
At last I've made some progress on fitting out the top of the tool cabinet, I wasn't too sure how I was going to tackle this, but in the end went along the lines of Andy Rae.

All the top part of the cabinet will be modular, this makes it easier when putting the various sections together. The first part will be to house the larger of the planes with a drawer going the full width underneath. The space for the drawer has been made but the drawer not yet made.

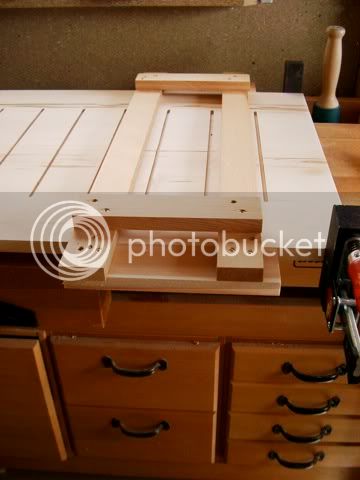
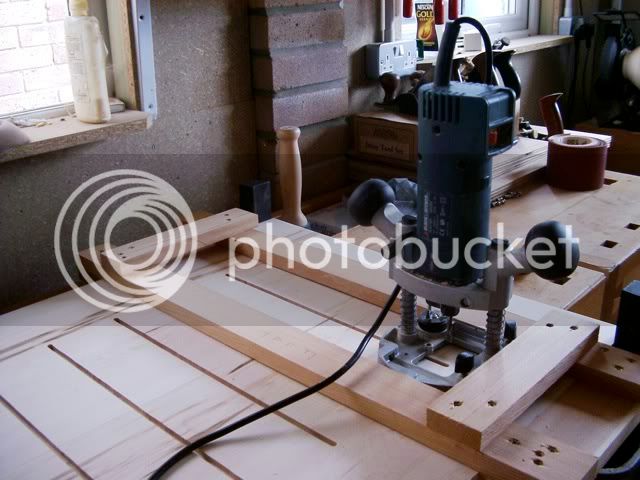
First thing was to make a simple jig that would allow the router to slide over the top and bottom part of the box that will house some of the planes.

IMGP3052.jpg


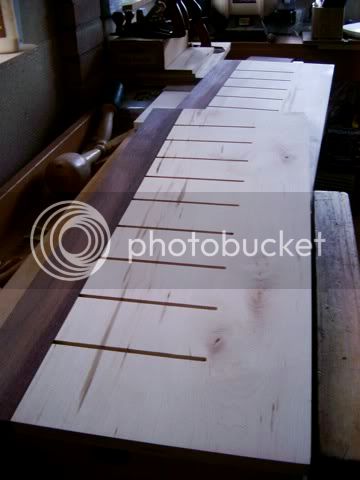
With the bottom and top clamped together I was able to rout the slots for the dividers in both parts, this ensured that when put together I didn't have to worry about them not lining up.

IMGP3053.jpg


You'll notice that the slots don't go right to the back of the sections, this is because the widest mapel I have is only 7 1/2" wide and the depth of this section is 14", so the dividers don't go right to the back, anyway you will not notice this when its all put together.

The next job was to add the rosewood front to the top, bottom and side sections.

IMGP3054.jpg


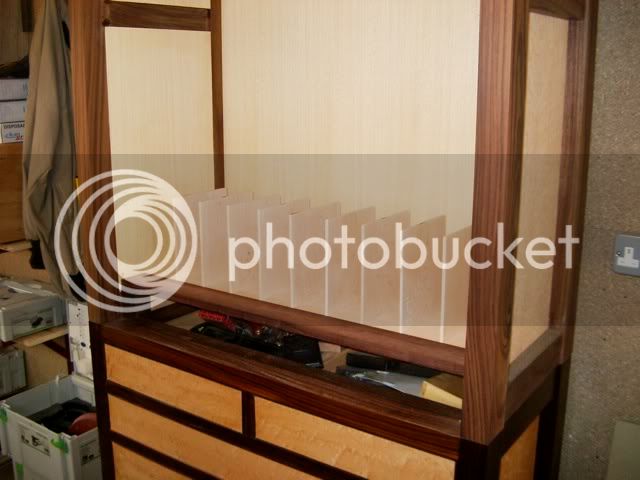
Now that the box is complete its time to make the dividers, these will be 6mm thick.

IMGP3057-1.jpg


They all seem to fit nicely, you will see that the dividers stop 3" form the end, I did this purposely because of the different size planes that will be housed here, I thought it would be easier to get hold of the planes.

IMGP3058.jpg


Originally I wasn't going to shape the dividers but when I put it altogether it looked to boxy, I'm glad I did the shaping because the curve, I think sets it off.

Now to see what it will look like with some planes in.

IMGP3059.jpg


Next job will be to do the drawer, I'll tackle that in the coming week.

Hope you enjoy, all comments are welcome.
 

Latest posts

Back
Top