Tips and Wrinkles

UKworkshop.co.uk

Help Support UKworkshop.co.uk:

This site may earn a commission from merchant affiliate links, including eBay, Amazon, and others.
Ooooerr, Bob... Don't get me started on Metric! :shock:

I just about got to grips with 25mm being approximately an inch!

But metric it is convenient for ordering of course. With care the offcuts are not so big as they could be.

Cheers
John :D
 
Hi Dave,

Indeed you're right. That's how my woodwork teacher showed me of course. But we didn't have Engineers' squares in the school wood-shop. If we had they would have been mangled anyhow!

I love my Starrett!

Regards
John :lol:[/quote]

Someone nicked my Starrett 12" square years ago :( , I'm left with the protractor and centre finder unused as my replacement combination square blade doesn't fit, does anyone know if any of the other (older) cast combination squares do fit, as Starrett replacement bodies and blades are extortionate in price, circa- £60.0 for head and £40.0+ for a blade.
Older, non Starrett, models sometimes come up on flea bay and go for reasonable prices, but Starrett seams to be the magic word for high price, any pointers will be appreciated...bosshogg :)
 
Hi Boss,

Agreed, the new blades are a bit heavy on price.

I am after a 6" blade myself, but I think I am going to have to buy the whole package.
I haven't tried to put my Starrett onto any other blade, so I can't answer your question. But tomorrow, if my hamstring is not too bad, I will go into the shop, and check for you.

regards
John :)
 
This is a great thread which will ron and run. A number of the posts are about measuring, etc using tapes, not using more than one tape. I was taught not to use tapes but to use measuring rods and to produce a reliable rod an engineers square is an essential piece of equipment. Would you believe I purchased mine in 1956 and is still good and true.
 
Some scribing tips for fitted furniture.

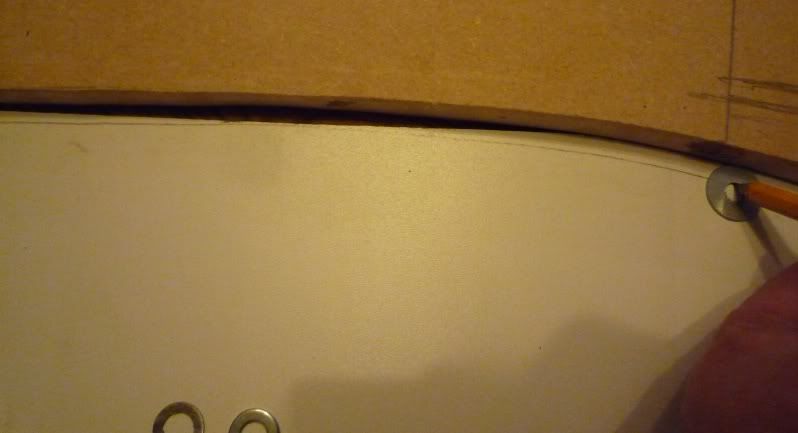
When your scribing to an uneven wall and the largest gap is between 4mm & 5mm just use your pencil put it against the wall and draw a line on the piece that needs to be scribed, if it is a painted pencil remember to put a strip of masking tape on it, or you will leave a mark on the wall.

For larger gaps you can use different sized washers.

washers.jpg


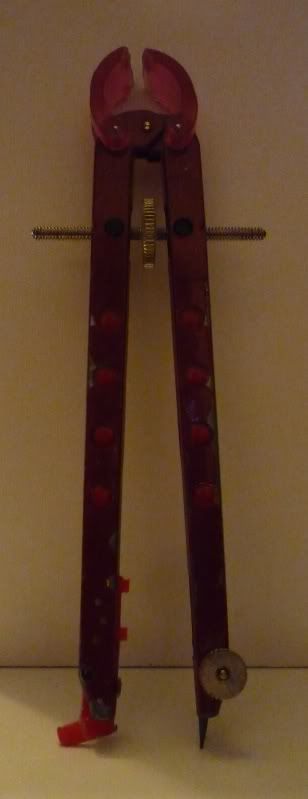
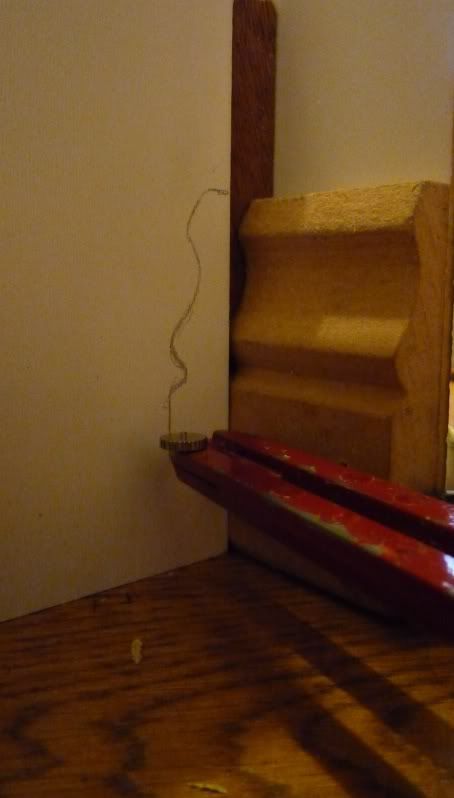
My favourite method for more detailed scribing like skirting boards, panels, dado rail, Picture rail, coving ect… is using a compass, just change the pointy bit for anything that doesn’t leave a mark.

Compass.jpg
Scribing.jpg
 
DOOGYREV":7gvwz10l said:
If you find that nails and pins are bending and/or are not going in straight when normally they would be. (ie not into hard oak without a pilot hole)
Then it may be as simple as some glue or paint on the hammer head, just give it a rub on some sand paper and you will be hammering happily again.

Doh! I was going to say that and have just read through 5 pages to find you've beaten me to it!

As a lad, I was given a pile of plywood shelves to fit lippings to with pins and glue. Seeing I was having trouble with knocking pins in straight, my mentor came over and advised me to wax the face of the hammer. 5 minutes and many bent pins later he came to enquire if the wax had made things any easier.

"Thought not" he laughed after my reply in the negative and then gave me the correct advice, as above. I've been alright at nailing ever since.

It was the only apprentice wind-up I ever fell for.
 
..... Oh yes, my tip:

If you're framing up with mortice & tenon joints and one of the shoulders won't close up. It's not always practicable to dismantle and adjust with a shoulder plane (or you might not have a shoulder plane).

Turn the frame over to the shoulder which has gone up tight, and knock it slightly apart to show a gap the same, or very slightly less than the kerf of your tenon saw.

Lightly run your tenon saw into the gap to clean it out.

Turn the frame back over, locate your saw into the shoulder line and cut down as deep as the tenon. Knock the joint back together and enjoy looking at a nice tight shoulder!

And from the same mentor, who taught me to knock nails in (and a great deal more besides). His parting words to me:
"Always pay attention to your sharpening. Don't try and work with dull tools."

Sound advice indeed.
 
For those annoying splinters that go straight in and snap off below your skin.
The type that don't go all the way through to the other side, and that you cant dig out with a chisel for fear of lacerating something important.
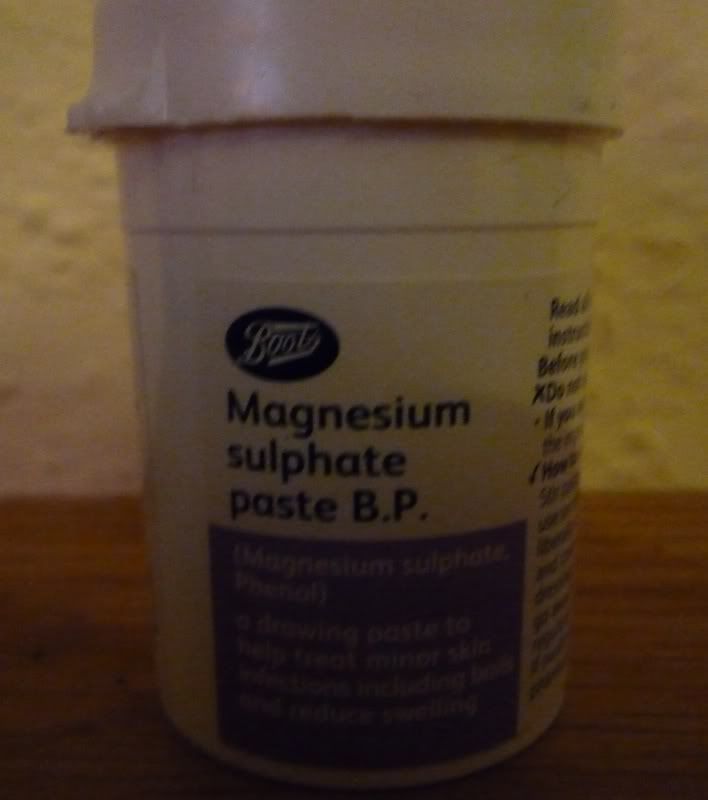
Well this stuff's great, it costs less then a squid, just put some on at night, then in the morning give it a squeeze and out pops the splinter.
P1030284.jpg
 
OK Jimi, Blister and all you other car-booters, here's another one, following on from that OM10 thread earlier...

Give old SLR camera lenses a new lease of life, as magnifying glasses:

Simply turn the lens round so you're looking through the front towards the back (as if you were looking into the camera body). Open up the iris, and voila! You have a really high quality "magnifying glass."

50mm or thereabouts is about the best compromise for magnification versus focal distance - wider-angle lenses give more magnification, but the object needs to be closer, and the lens physically gets in the way. 135mm etc. are too long a focus to be useful (I can only hold something at arm's length, max!).

I use an old Pentax 50mm f1.8. A clear filter on the front stops it getting scratched, and I use its back lens cap as a stand on the bench to return it to, so it stays reasonably clean.

Camera lenses are perfect for looking at edges you're sharpening - you can see very fine scratches and burr easily - and for all sorts of similar jobs. Being usually made of aluminium or plastic, they don't attract filings (but it's still a good idea to keep the lens off the sharpening bench), and most are roughly cylindrical, so easily clamped.

Incidentally, it's the focal length that matters most, so you can also use the lenses from old darkroom enlargers. Although they're physically smaller, optically they're just as good as, if not better than, cheap camera lenses, but the image will be dimmer though.

Cheers, E.

PS: if (when) the filter gets cruddy, wash it with cheap liquid hand soap (the sort without 'moisturizer' in it), rinse under a warm tap, then dry with a clean well-washed hanky (not a new one). Leave it in a warm place for an hour or so, for the last bits of water in the threads, etc. to dry, and it's good as new. It's important to rinse all the soap off, but it works. I've been doing this for years and never damaged a filter yet (nor my glasses either).
 
DOOGYREV":24d5vb4o said:
For those annoying splinters that go straight in and snap off below your skin.
The type that don't go all the way through to the other side, and that you cant dig out with a chisel for fear of lacerating something important.
Well this stuff's great, it costs less then a squid, just put some on at night, then in the morning give it a squeeze and out pops the splinter.
P1030284.jpg

Years ago, we used 'Icthemol' or 'Blackjack', for the same purpose. This looked like very thick, brown treacle. It dealt with boils and other surface infections.

Then H&S decided that Icthemol caused cancer!

I am still waiting, touch wood!

John :)
 
Intrigued by this Ichthammol thingy that I've never heard of was I went to look up what's in it. Seems that it's basically a tar recovered from shale oil distillation. Anyway, you can still buy it if you want, Lloyds Pharmacy sell bandages containing the stuff and there are pastes available too. Seems to mostly be used on animals now though.
 
wobblycogs":1g61wex9 said:
Intrigued by this Ichthammol thingy that I've never heard of was I went to look up what's in it. Seems that it's basically a tar recovered from shale oil distillation. Anyway, you can still buy it if you want, Lloyds Pharmacy sell bandages containing the stuff and there are pastes available too. Seems to mostly be used on animals now though.


As a child in the 50s, I was regularly anointed with tar and lassar's paste for fairly severe eczema and had to wear cotton gloves and socks in bed to keep the filthy stuff off the bedding. I sincerely hope John is incorrect about the cancer linkage both for his sake and mine! :shock:

Bob
 
Bob,

That's what I was told, and I honestly thought it had been 'banned', like Camphorated Oil and other of its derivatives.

Now I know we can still buy the stuff next time I have a stubborn splinter, I will buy some. Although, minor splinters I can't 'dig' out, I leave to fester, then pop 'em! Eeeeuwww! :lol:


John :twisted:
 
Of course measurement works well but now we are blessed with the metric system, it is easier to make a mistake when dividing by two. With fractional measures it was simply a case of doubling the denominator. eg the centre of 7/8" is 7/16".

Bob

Couldn't agree more, Bob, another reason for my eternal point that feet & inches are more user-friendly. I suppose people not used to imperial often don't have the habit of thinking in fractions and find them daunting. But as you show, fractions have some practical advantages and seem somehow more 'human'. Fractions are second nature to me. They weren't daft, those Romans!

I have no choice much of the time, but when left to my own devices, always work in imperial.

Anyway, I digress. Here's another tip:

If using a large drill bit (say 3/8") and hand-held power drill to countersink screw holes, the bit will tend to snatch and slightly tear the surface and may go deeper than intended. Especially unwelcome on any veneered surface. The answer is simply to set your drill in reverse, press slightly harder and presto! No snatch, much better control for depth and a lovely clean countersink.
 
A standard jobber drill point is 118 degree included angle, countersunk screws are 90 degree included. In practice, wood will give a bit and often you can get away with using either. However working in metal, nothing looks worse to me when drills get used to countersink holes.

Bob
 
Sawyer":1f2kj3dv said:
Anyway, I digress. Here's another tip:

If using a large drill bit (say 3/8") and hand-held power drill to countersink screw holes, the bit will tend to snatch and slightly tear the surface and may go deeper than intended. Especially unwelcome on any veneered surface. The answer is simply to set your drill in reverse, press slightly harder and presto! No snatch, much better control for depth and a lovely clean countersink.

Do you mean insted of using a countersink (for whatever reason) you can use a drill bit thats the same size as the screw head but to drill in reverse?
 

Latest posts

Back
Top