Thoughts for my first wood project: side table design

UKworkshop.co.uk

Help Support UKworkshop.co.uk:

This site may earn a commission from merchant affiliate links, including eBay, Amazon, and others.
I think the simplest finish to get right is a wiping varnish. Mix 1/3rd spirit-based varnish, 1/3rd white spirit, one third oil (Tung Oil or Finishing Oil or Danish Oil or Linseed Oil.....in that order of preference). Slap it on with a brush, then wipe it off after 10 minutes max (it mustn't go tacky). Leave for 24 hours, then do the merest wipe-over with a very fine worn old piece of sandpaper, barely touching the surface. Repeat the brushing on/ wiping off. Do this once a day every day for 4 or 5 days or more, and you can build up a really nice finish.

The beauty of it is that you can do this without the spectacular levels of cleanliness required for other finishes, and it produces a robust stain-resistant, water resistant finish which is ideal for a table. Oil and wax finishes are not robust enough for a table as they can be ruined by a cup of tea or a glass of wine.
 
MikeG.":2c6ltzuf said:
I think the simplest finish to get right is a wiping varnish. Mix 1/3rd spirit-based varnish, 1/3rd white spirit, one third oil (Tung Oil or Finishing Oil or Danish Oil or Linseed Oil.....in that order of preference). Slap it on with a brush, then wipe it off after 10 minutes max (it mustn't go tacky). Leave for 24 hours, then do the merest wipe-over with a very fine worn old piece of sandpaper, barely touching the surface. Repeat the brushing on/ wiping off. Do this once a day every day for 4 or 5 days or more, and you can build up a really nice finish.

The beauty of it is that you can do this without the spectacular levels of cleanliness required for other finishes, and it produces a robust stain-resistant, water resistant finish which is ideal for a table. Oil and wax finishes are not robust enough for a table as they can be ruined by a cup of tea or a glass of wine.

That's really useful, thanks. I'll give it a try on a test piece, gradually applying the coats while I finish off the rest of the table.

Can you recommend a good spirit based varnish?
 
They don't need to be good. Any old thing will do. Be aware that the finish will be less glossy than varnish applied in the normal way, so if you want Satin, then Gloss might be best, and if you want Matt, then go for Satin. You can use old tins of varnish with a dried up crust if you've got some, but otherwise, any varnish which specifies white spirit to clean the brushes is good enough. If you want to darken the finish, buy a coloured varnish.
 
Discussion about finishing is always harder than it should be, because of the way that manufacturers name their products.

While I don't disagree with Mike's advice, if I've got the right end of the stick myself, only two of the oils in his list of four are 'straight' oils - tung oil and linseed oil.
Danish oil is a generic name for the sort of wiping varnish mixture he is suggesting. And so is finishing oil - at least, the stuff from Rustin's is.

It gets worse with anything labelled as a stain...
 
AndyT":w5zhmaq9 said:
......Danish oil is a generic name for the sort of wiping varnish mixture he is suggesting....

Yes, but heavier on the oil and lighter on the varnish than my mix, as I understand it.

And so is finishing oil - at least, the stuff from Rustin's is. ...

Interesting. I thought it was a multi-oil mix like Osmo, but mainly based on Tung oil.
 
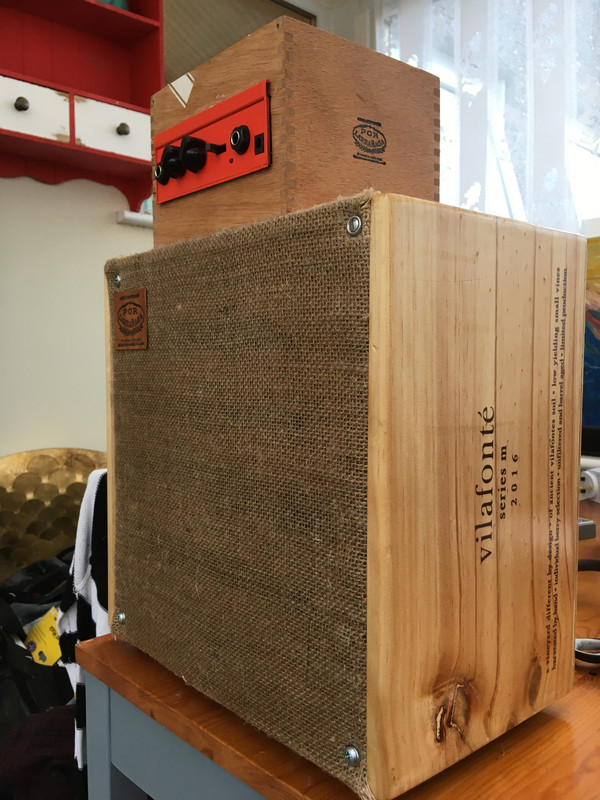
I finished a little wine box guitar speaker using Yacht varnish diluted with some white spirit from Poundstretchers of all places. The mix was roughly 2/3rds varnish, 1/3rd white spirit. Applied in a similar manner to what MikeG describes, although I did initial application with a sponge then wiped off.

FC41-A2-EB-6-B62-4-EFA-9476-49-D732-A33316.jpg
 
Nico Adie":33ck92u2 said:
I finished a little wine box guitar speaker using Yacht varnish diluted with some white spirit from Poundstretchers of all places. The mix was roughly 2/3rds varnish, 1/3rd white spirit. Applied in a similar manner to what MikeG describes, although I did initial application with a sponge then wiped off.

FC41-A2-EB-6-B62-4-EFA-9476-49-D732-A33316.jpg

that's cool, can we hear it? :D
 
MikeG.":2b3qrkdi said:
And so is finishing oil - at least, the stuff from Rustin's is. ...

Interesting. I thought it was a multi-oil mix like Osmo, but mainly based on Tung oil.

I was remembering this thread - which sort of confirms that they are similar but in different proportions.

danish-finishing-oil-t84155.html

But I should have said Liberon, not Rustin's - sorry.
 
A bit more progress today. I did another dry assemble and stared at it a lot with the shelf fitted and with the shelf omitted. Both me and SWMBO eventually concluded it looked better with the shelf so the shelf is staying.

Not completely happy with my cuts in the shelf for the legs: my hand sawing accuracy definitely needs work. The ones that I cut slightly away from the line and finished with chisels look good, the others weren't quite perfect so by the time I'd trimmed them the gaps were maybe getting a little big (about 2 mm). I need to mull on it and decide how much it bothers me, then either remake the shelf or make the rails very slightly shorter.

Anyway, some dry-run photos (table top and shelf are only attached with gravity, so I haven't tried the buttons out yet).

IMG_20200729_165646.jpg


IMG_20200729_165640.jpg
 

Attachments

  • IMG_20200729_165640.jpg
    IMG_20200729_165640.jpg
    72 KB
  • IMG_20200729_165646.jpg
    IMG_20200729_165646.jpg
    64.5 KB
Well I have to say that this is an excellent little piece, and particularly for it being a first-ever project. Well done. =D> =D> =D>
 
Yep, that is looking good.

A chamfer on the edges of the shelf (maybe just round the legs) will make your cutting error appear less.

I recon a chamfer under the table top and the shelf might help too in making them appear lighter

Anyway, it’s all details now, fundamentally that’s a well-proportioned, well-made piece

Aidan
 
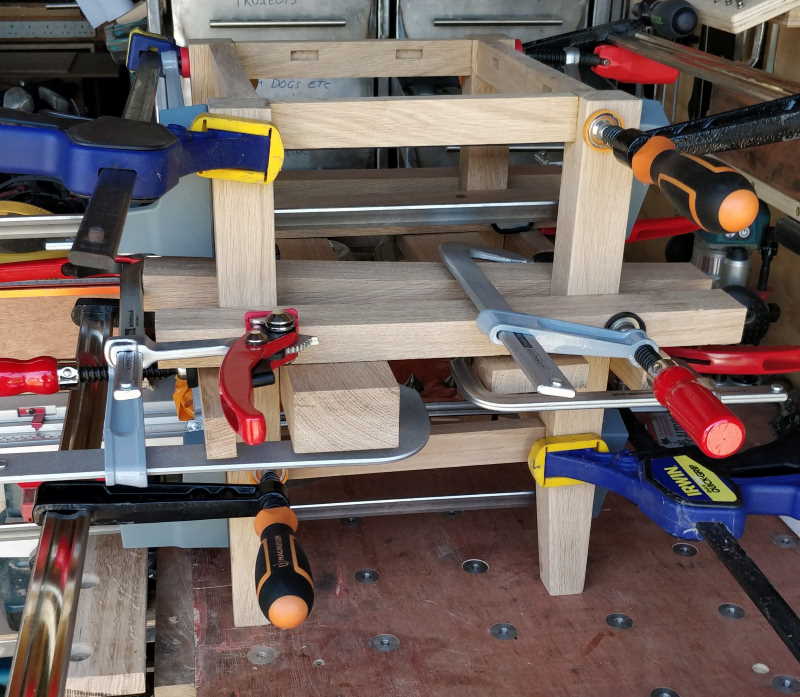
Gave the legs and rail a thorough sanding today (to 240 grit) and then used pretty much every clamp I own while clamping it together.

With hindsight it probably would have been sensible to use Titebond 3: I used Titebond 1 and it was all a bit frantic trying to get it all together and clamped square before the glue got too sticky.

IMG_20200808_124255.jpg


IMG_20200808_124304_01.jpg
 

Attachments

  • IMG_20200808_124255.jpg
    IMG_20200808_124255.jpg
    65.9 KB
  • IMG_20200808_124304_01.jpg
    IMG_20200808_124304_01.jpg
    69.8 KB
I forgot to mention that I also shortened all the rails on Friday afternoon. I checked and double checked the shelf and trimmed the cut-outs in a few places until I was sure the cut-outs were square with one another. I then measured the distance between the cut-outs, added a couple of millimetres and re-cut all the rails to the new length. It means the button slots won't be quite central, but they'll only be off by a millimetre or so, so I doubt anyone will notice even if they do look under the table!

Once I'd taken the clamps off the glue-up, it had twisted slightly, which is a bit annoying given all the clamps to hold it square. As a result, it wasn't sitting flat on the worktop.

I lifted it up on some wedges and adjusted it until it was sitting level and then used a pencil in a magnetic base to scribe lines around all the feet. I then hand-sawed along the lines and cleaned up with a sander and it's now sitting flat.

IMG_20200809_094152.jpg


I then cleaned up the remaining glue marks and gave the shelf and top a thorough sanding (to 240 grit) and now everything's sitting on my welding bench over some spread-out bin bags ready for the finish to be applied.

IMG_20200809_131737.jpg


In the photo you can also see a very simple jig I knocked up today to hold the buttons off the plastic sheet while the finish is drying (just a bit of thin plywood with a load of M3 screws in):

IMG_20200809_131754.jpg


I'll apply the first coat of finish later today, so that I'm leaving a consistent amount of time between coats (most coats will be done after work).
 

Attachments

  • IMG_20200809_094152.jpg
    IMG_20200809_094152.jpg
    56.9 KB
  • IMG_20200809_131737.jpg
    IMG_20200809_131737.jpg
    51.1 KB
  • IMG_20200809_131754.jpg
    IMG_20200809_131754.jpg
    35.1 KB
MikeG.":3s9ifznl said:
Excellent stuff! =D> =D>

You may be the first person I have ever seen to apply a finish to buttons.

:lol: :lol: :lol: :lol:

It did occur to me it was a little daft, but what the heck?
 
... and that's the first coat applied (of 1:1:1 Tung Oil, Ronseal Satin Interior Varnish & White Spirit). I lathered it on thickly, left it for ten minutes and then wiped it all off. Should have put some scruffier trousers on before starting #-o

IMG_20200809_162509.jpg


Close-up of the top and the shelf:

IMG_20200809_162536.jpg


The light bits look a lot lighter in the photo than they do in real life, but I'm really pleased with how it looks after one coat. I guess I've got four more to go now! I suspect the following coats will be slightly more difficult, especially on the frame: for the first coat it was very obvious where I'd applied the oil and where I hadn't.

Next update will probably be next weekend as there doesn't seem to be much point in giving daily photos after each coat!
 

Attachments

  • IMG_20200809_162536.jpg
    IMG_20200809_162536.jpg
    46.4 KB
  • IMG_20200809_162509.jpg
    IMG_20200809_162509.jpg
    55.9 KB
Five coats done over the course of a week (with a rub down with 0000 wire wool in between each coat): the last one was applied yesterday.

A small ordeal today: when fitting the buttons, two of the screw heads snapped off while I was tightening them. I've never had that happen to me before; maybe the Axminster screws were a bit poor quality? I don't think I was being too aggressive with tightening them. Anyway, I managed to get one of the buttons out, had to cut the other one in two to extract it but thankfully I'd made one too many! The remains of the screws came out easily with some mole grips and I was back in business.

Et voila:

1597413034638.png


Thanks again to everyone who contributed to this thread with advice.
 
Back
Top