The Eagle Has Landed!

UKworkshop.co.uk

Help Support UKworkshop.co.uk:

This site may earn a commission from merchant affiliate links, including eBay, Amazon, and others.
I must agree Wizer the rear extension table looks awful, and not much support to the left of the blade. I have a sliding table on my record combi and I use it all the time, which can sometimes be in the way in my small shop.
 
Ok//////

how long have you been a salesman for the product!!!!!!!
Must be on commission??????

As John Lennon sung

'I'm just a jealous guy'

Mike
 
Just a happy customer

I guess I really should make something now, shouldn't I? (especially as I became the owner of 8 Bessey clamps today) :-k :whistle: :D
 
I think I can see why you don't like the outfeed support table. You've got Steve M's DVDs, haven't you? Perhaps a fold-down torsion box table is on the cards - hey, you could even make it your first project with the new saw! I see plenty of sheet offcuts next to your new toy! :D :wink:
 
I do have plans afoot for outfeed, but it will be in the new year when I get a couple of projects out the door.
 
I've never got mine out of the box. On the old kity I had a flip down out outfeed table but I found that I used it so much it quickly became my main working bench so never actually got flipped down. When the Jet arrived I made a fixed one that was more substancial so when the fence is off and blade all the way down with the crown guard off I have effectively a 4 by 4 foot table.
 
wizer":2hx8qfle said:
Just a happy customer

I guess I really should make something now, shouldn't I? (especially as I became the owner of 8 Bessey clamps today) :-k :whistle: :D

Eight Bessey's and a new Jet TS in one week!!!! Oh no, I'm not jealous!! :wink:
 
Wizer

If you do make an outfeed table, and if you do use the torsion-box principle I show in my DVD, can I make a couple of suggestions for improvements?

When I made mine, I was only interested in the outfeed aspect of it. I used the saw almost exclusively for ripping and small sheet work, preferring to use my SCMS for cross-cutting.

But more recently I've been using a crosscut sled, particularly for tenon shoulders, and that, as well as one or two other jigs, relies on a bar to run in the mitre slot. The outfeed table limits its forward travel, so I've routed a couple of channels in the outfeed table to accommodate this. Unfortunately that means routing right through the top skin. I've ended up routing a wider and deeper channel, gluing in a solid piece, then routing that for the channel I need. It doesn't really look very neat,to be honest.

If I were to make it again, I'd put solid pieces inside the torsion box where the channels are going to be and fill the rest with the eggbox supports. Then when it is all skinned with Formica, just rout the channels right into the solid strips. It would be much neater.

To rout them, you can either fit very long fence rods with a fence at each end (the one that comes with the router plus an auxiliary one like I use on my mortising jig) or make a long dado jig like in BW a few issues ago.

The channels do not have to be precise in size, they just have to be big enough so that the bar under the mitre gauge or jig travels clearly, without interference from the outfeed table slots.

I envy anyone who has the space to make a fixed outfeed table! :)

HTH
Steve
 
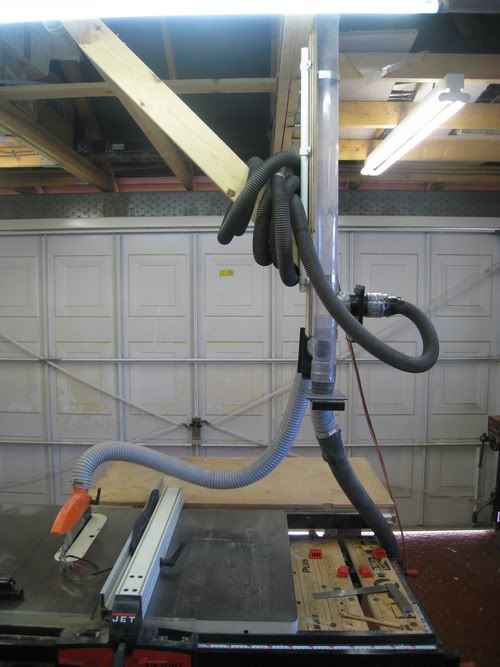
While I'm on there I might have a few more points worth noting about my set up. Firstly the extraction. I notice that you(wizer) haven't yet mounted the bracket which fit's on the end of the rear rail for the crown guard extraction hose. This is another thing that I found to be a pain. One it reduced the max rip width by about 10cm. Two it's sufficiently far away for the hose to dip and catch on the fence all the time which is at best annoying and at worst can grab the hose and bend the riving knife. To get around this I seperated the dust extraction to both the main saw and the top guard like this.
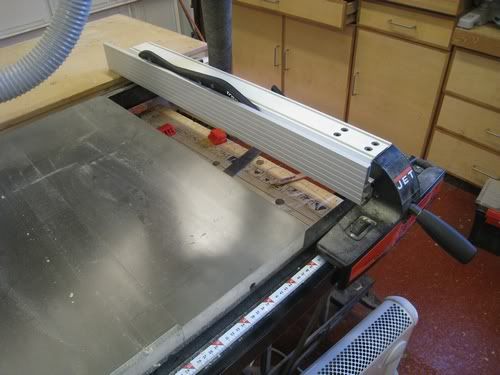
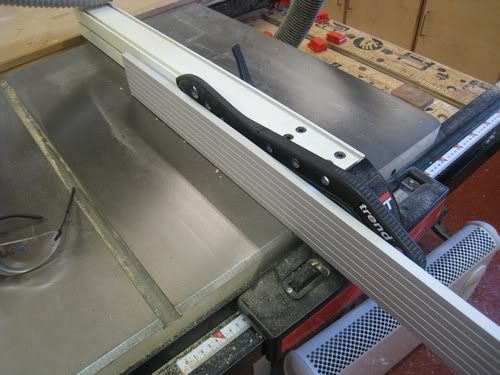
workshop051.jpg


This set up is high enough to resolve the problem with the added bonus that if I'm using the saw without the guard for the tennoning jig I can easily shut off the unused guard extraction to maximist the suck from below (ooer) :oops: .

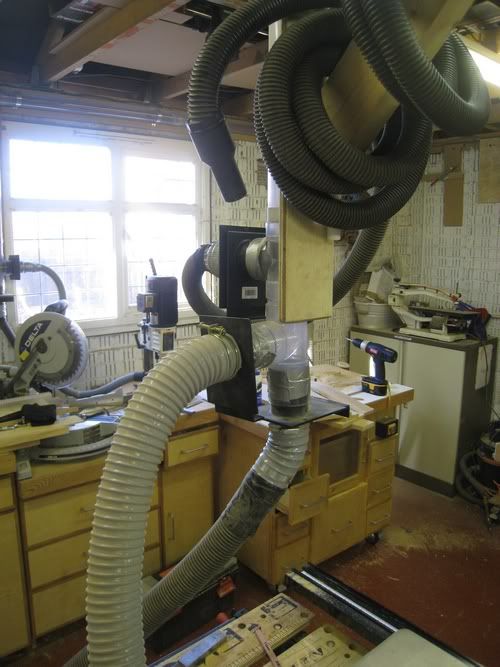
You can also see a third blast gate which is permanently attached to a long hose which I use for everything from powertool extraction to general tidying. It's well placed for the bench behind.

workshop054.jpg


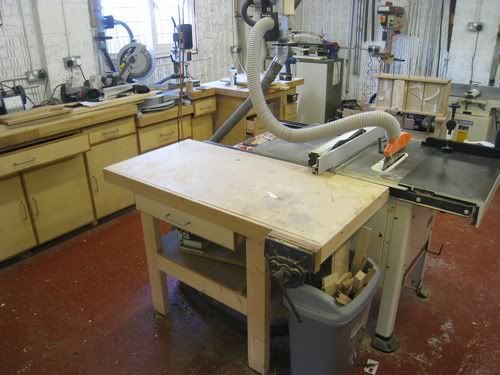
workshop053.jpg


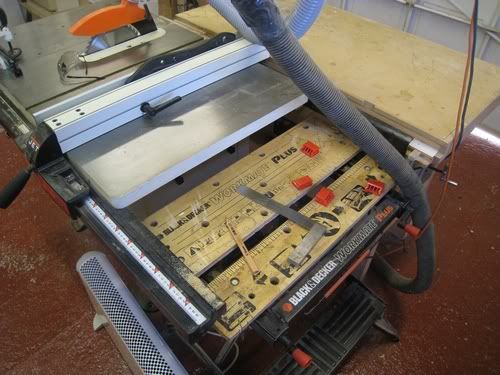
Annother thing that annoyed me was that I was always walking into the rails enroute to the mitre saw but after placed my workmate at the end this solved the problem. It is also very useful to have somewhere to hand to put your pencil, tape measure etc when using the saw.

workshop049.jpg


It's low enought not to foul the fence.

workshop050.jpg


I also use the rebate in the split fence to store my puch stick. You feed the material by hand for max control and pick up the stick on the way past. This way it never gets lost too. :D

workshop048.jpg
 
Thanks for that Steve. Your design had been floating around my head. What I would really like is an assembly table which doubles up as outfeed. But, as you say, space is at a premium.

Dom thanks for taking the time to help out with all the pics, they really do help. I had no intention of fitting the DX support and, like you, was formulating a plan to have it hung above the saw. I really need to think about proper plumbed in DX now, but funds are depleted until I can get a few jobs done.

I like the idea of having a shelf under the fence rails, but was planning on building my router table into that area. It won't be ideal but will save me important space elsewhere. There has to come a point where I realise that I'm not going to squeeze anything else in and to make do with what I have got.

I thought some more about the foot stop and that's a go-er for me, I'm going to get the switch DaveL mentioned. I just need to work out how to wire the thing up now! :roll:
 
Should be really easy. I would have thought that insied the NVR switch the wires would be attached with spade connectors. It should just be a case of opening the box, drilling a new hole and crimping a male and female end onto the new wire. Then just pop off the live connector from the existing live of the saw and connect to the male connector of the new wire. The female connector of the new wire will just go on to the origional live spade of the switch. This will give a feed and return live wire to the foot switch. The trick will be to find a switch that's on all the time and press to break the live loop. I don't think I'll go for a loose foot switch as you could trip over that and put your hand into the saw. I think I'll look for a robust big red button and mount it to the leg of my saw. In your case it would just need to be screwed to the cabinet at the bottom. DaveL's one looks about right if not a little chunky. I'll have a look around.
 
If I understand you right, Dom, you are suggesting a switch that cuts off all the power to the saw? Might need to be pretty hefty? Don't the usual remote stops just cut off power to the relay in the NVR (which only takes a small current to hold in the contactor). Slightly different wiring, but same effect with a smaller switch.
 
dickm":1vnregjj said:
Don't the usual remote stops just cut off power to the relay in the NVR (which only takes a small current to hold in the contactor). Slightly different wiring, but same effect with a smaller switch.

That s exactly how mine is wired, it just drops the feed to the coil and the main contacts break the motor feed. 8)
 
I did take it apart earlier, but decided I knew less than I thought about electrics. I may take it to a local electrical shop and get some advice.
 
wizer":3pqur4uz said:
Thanks Dom that's very clear. I guess the word fence was confusing me. I actually saw in the manual last night that we'd put the mitre guage on too far forward. I wonder why they have given you 2 mounting points?

Hi Wizer - the midway mounting points also allow you to perform taper cuts, as per image below (thanks p11dom - i've used your original) - just place the left hand lock handle into the upper threaded hole (arrowed) and you can swing the fence back to 0 degrees to the blade.

supersawfence2ndpositiosh0.jpg


Hi p11dom too - noticed your comment about the hose holder reducing width of cut ?? Have you put the bracket correctly on the right outside of the rear rails? this way it doesn't interfere with the fence at all.

Best regards to all
Nick
Brimarc Tools and Machinery
 
Jetman":3czegg23 said:
Hi p11dom too - noticed your comment about the hose holder reducing width of cut ?? Have you put the bracket correctly on the right outside of the rear rails? this way it doesn't interfere with the fence at all.

Best regards to all
Nick
Brimarc Tools and Machinery

My fence has a hook at the back hooking over the rear rail. This means that on my saw the bracket would interfear with the max travel of the fence whether it was mounted on the inside or outside of the rail.
 
Reference the swsitching issue and whether I would interupt the direct live or the relay it all depends on what spade connectors there are inside the NVR. If there are spades for the relay then I'd do that but my saw just runs off a 13amp plug with a standard cable probably in the region of a 2mm tripple core flex. It wouldn't make much of a difference to me to run this size of cable to the foot switch or a smaller diameter cable from the relay. What I wouldn't want to do however is to physically have to cut into the inner workings of the NVR. I'd rather keep that complete and wire in an add on that is easily reversable. As long as it's all properly earthed either would be fine.
 
Thanks for that Nick. Obvious I suppose, tho do think it should be in the manual. In fact the one thing I wasn't impressed with most was the manual, it was very very basic. Other than that I am a very happy customer.
 
Back
Top