The “keeper” router plane WIP

UKworkshop.co.uk

Help Support UKworkshop.co.uk:

This site may earn a commission from merchant affiliate links, including eBay, Amazon, and others.

Sawdust=manglitter

Established Member
Joined
14 Feb 2016
Messages
863
Reaction score
653
Location
Nr Cross Hands, South Wales
I know... yet another router plane! But I set out to make myself a keeper of a router plane that’s hard wearing enough to last and also wanted to indulge and making something pretty. (Also couldn’t afford to pay for the Veritas router plane which I really fancied!)

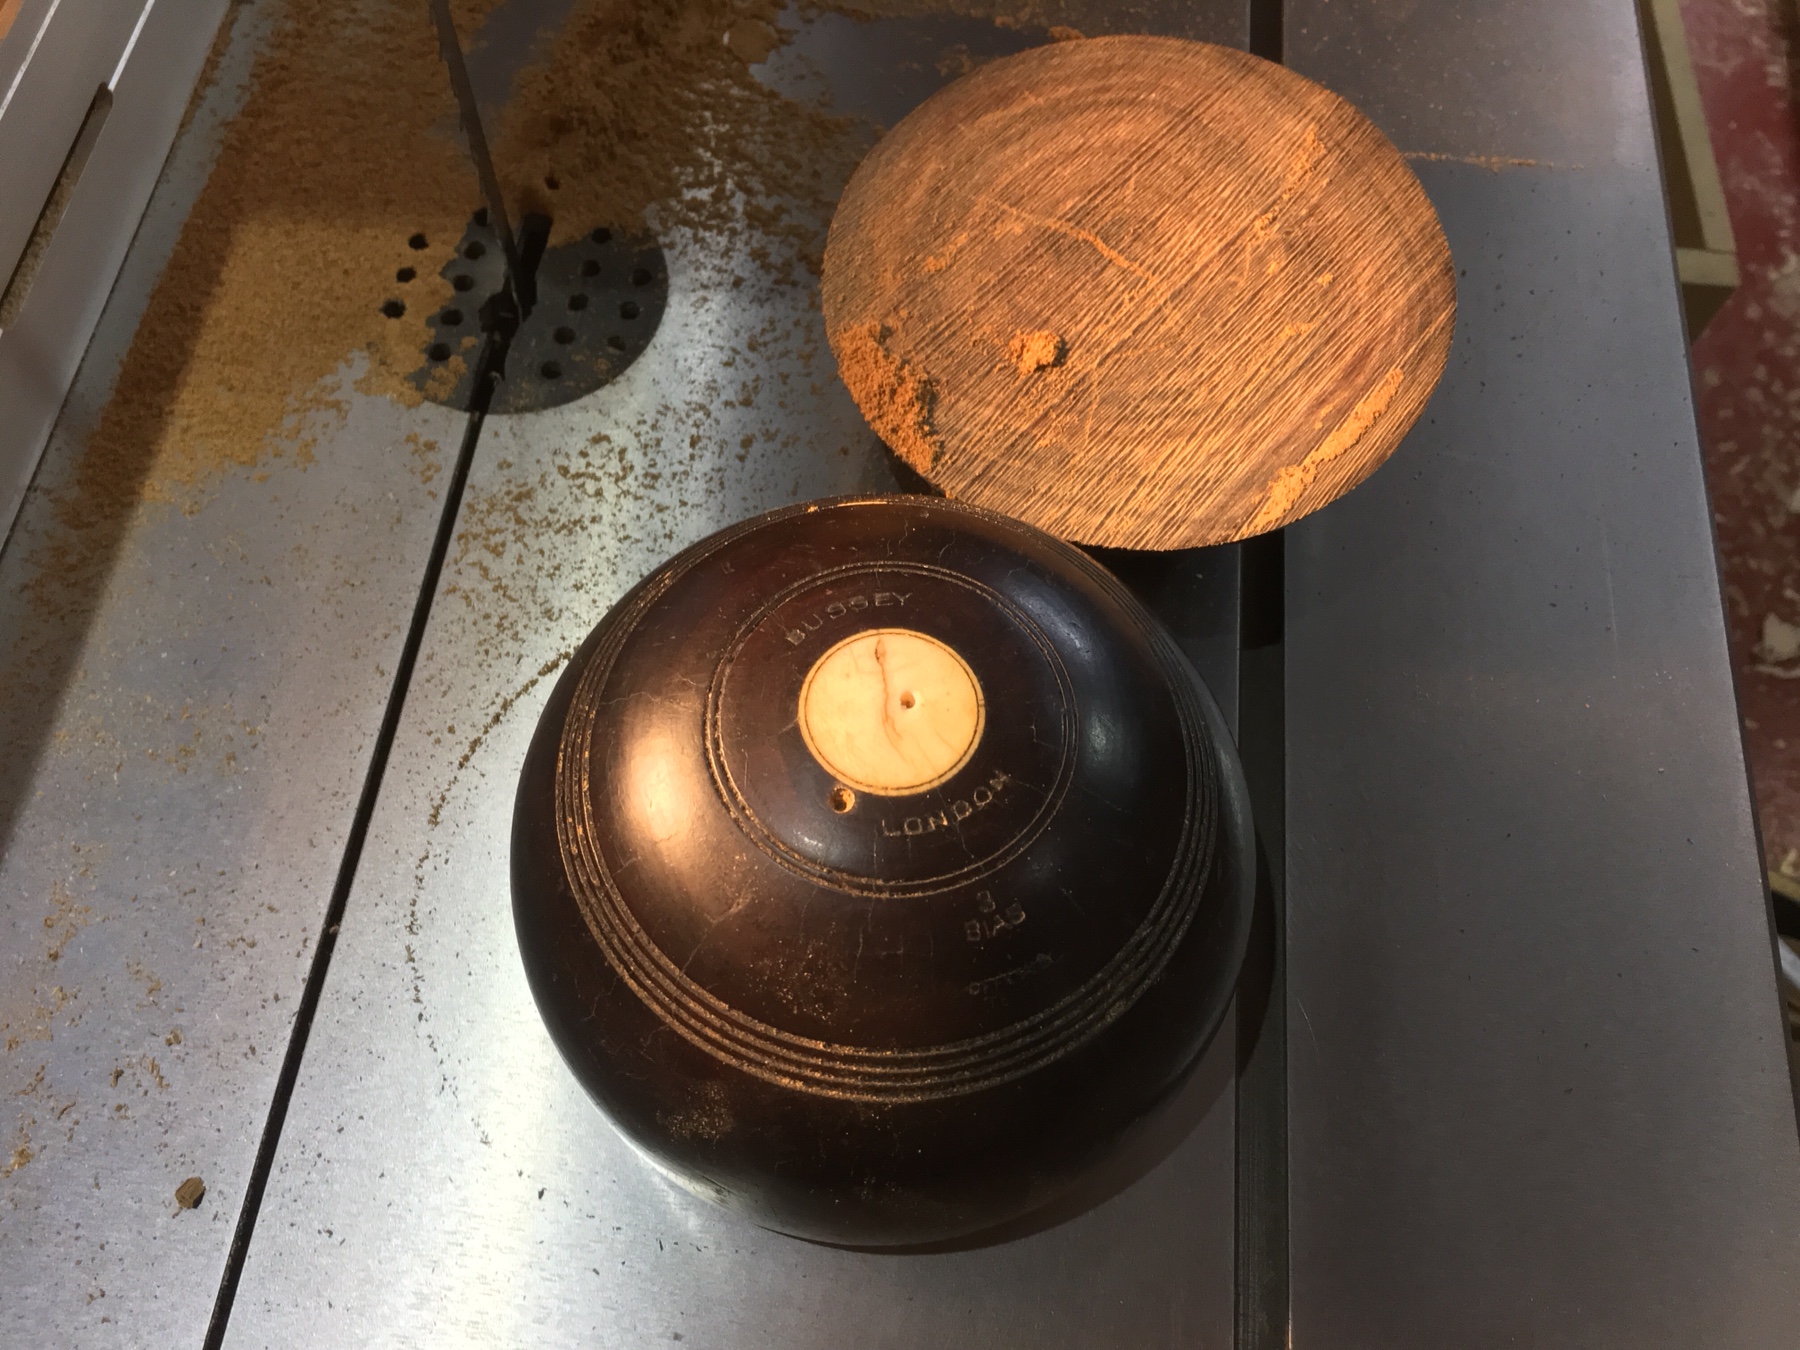
I had an antique Lignum Vitae lawn bowls ball which I won on eBay (turned a mallet out of one already) which I decided to use for the body of the plane. So the first thing i needed to do was to get a flat side to the ball, so in order to safely take the ball through the bandsaw I screwed a piece of scrap through one side of the ball to give it some rigidity and stop it spinning and jamming in the blade.
1dbb15dc5f3c1cf5c7762f48baedd06e.jpg


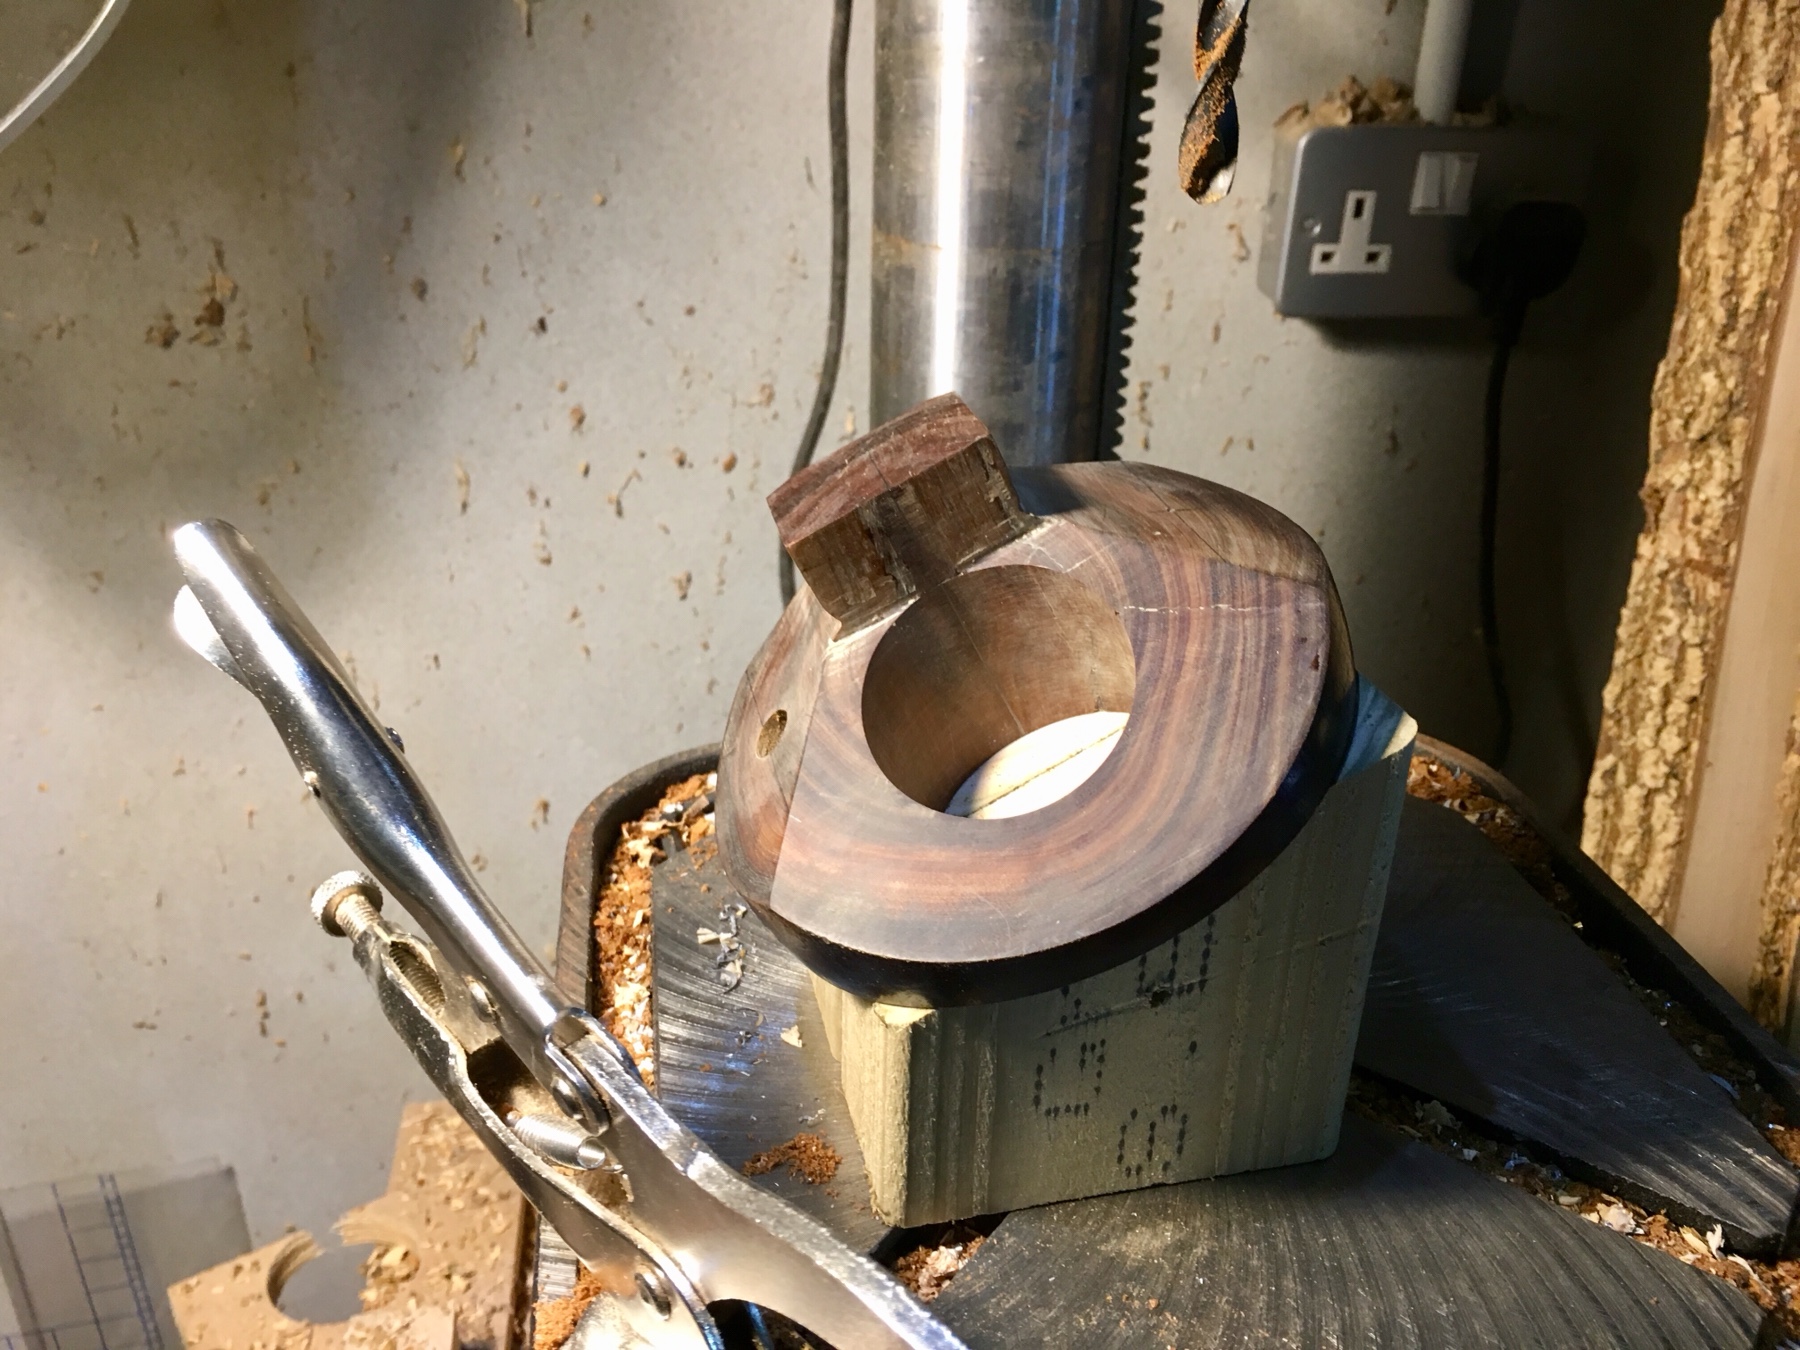
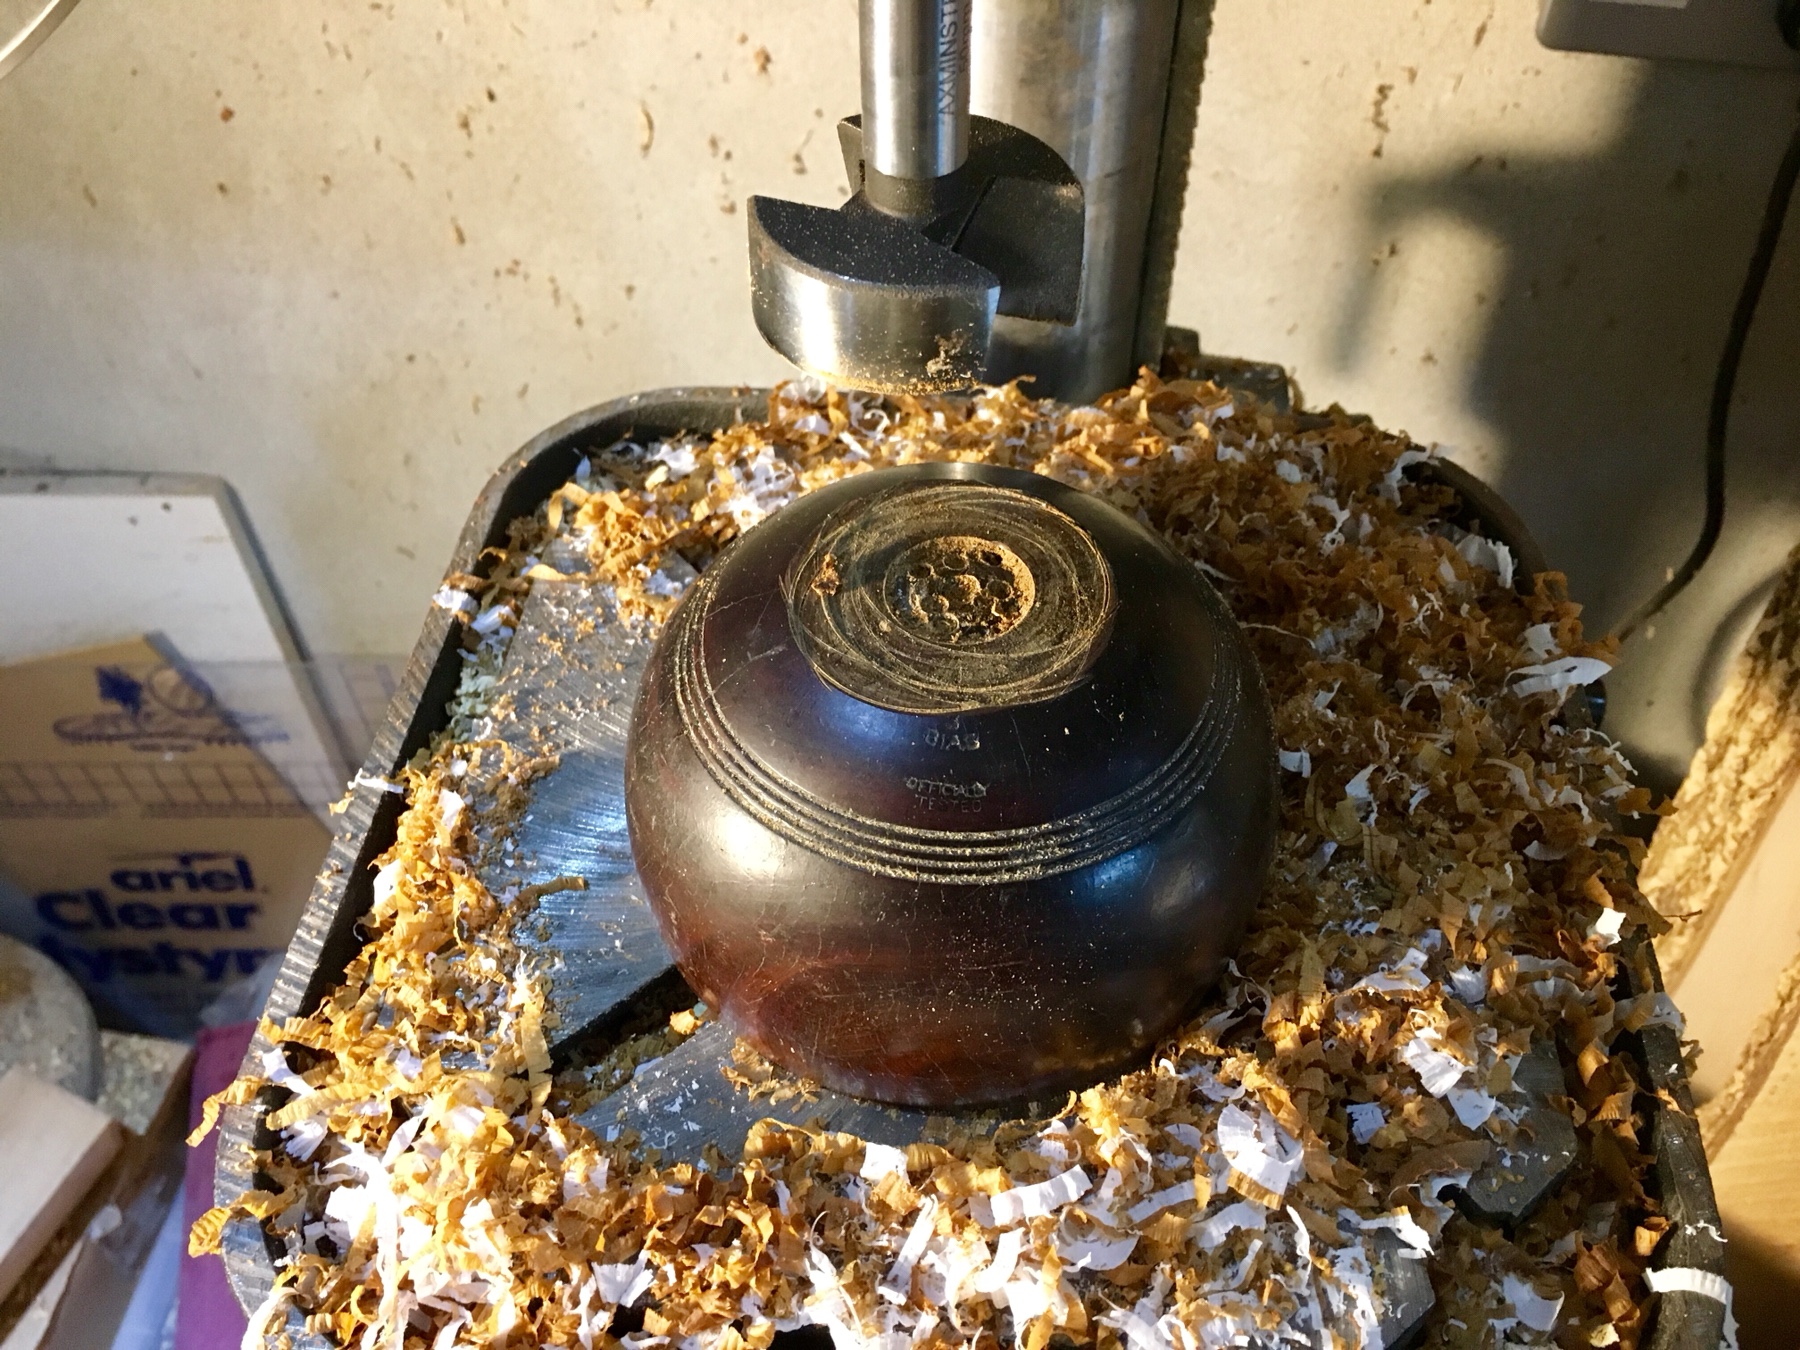
I sanded the bandsaw cut on the belt sander to give me a flatter face to work from. Next step was to get a parallel flat face on the opposite side of the ball, so achieved this with my biggest Forstner bit (50mm) on the drill press.
565fc9a1407c8a7ec3e12c42977b6766.jpg


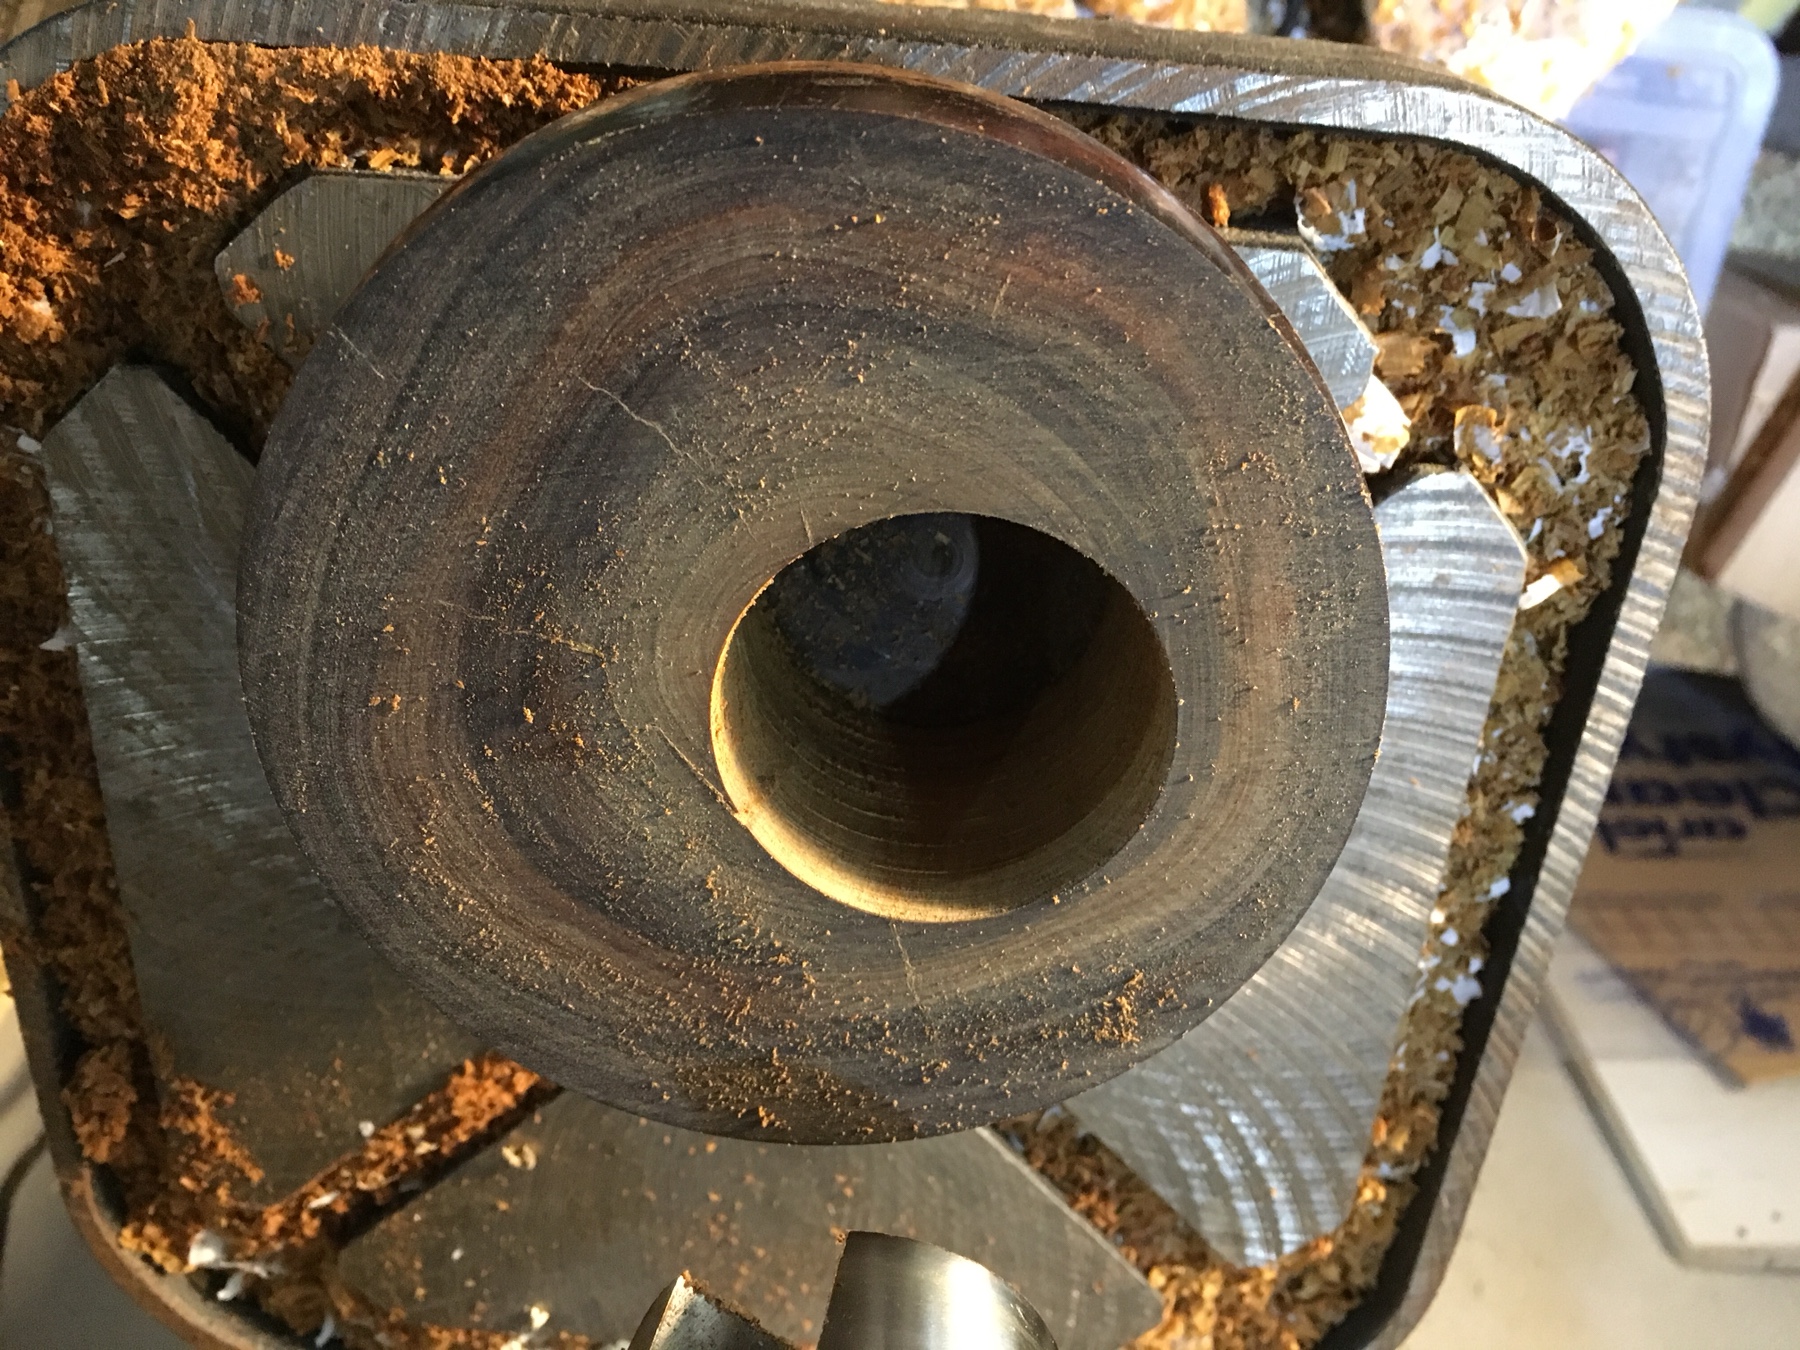
Then used the same 50mm Forstner bit to drill the main off centre hole through the body. (I did drill through pith and the area with the most cracks)

4a26c91ffee649460c98594ea4c56d36.jpg


5b38b5aa9a5d77c9fdf6fdde7f7c8697.jpg


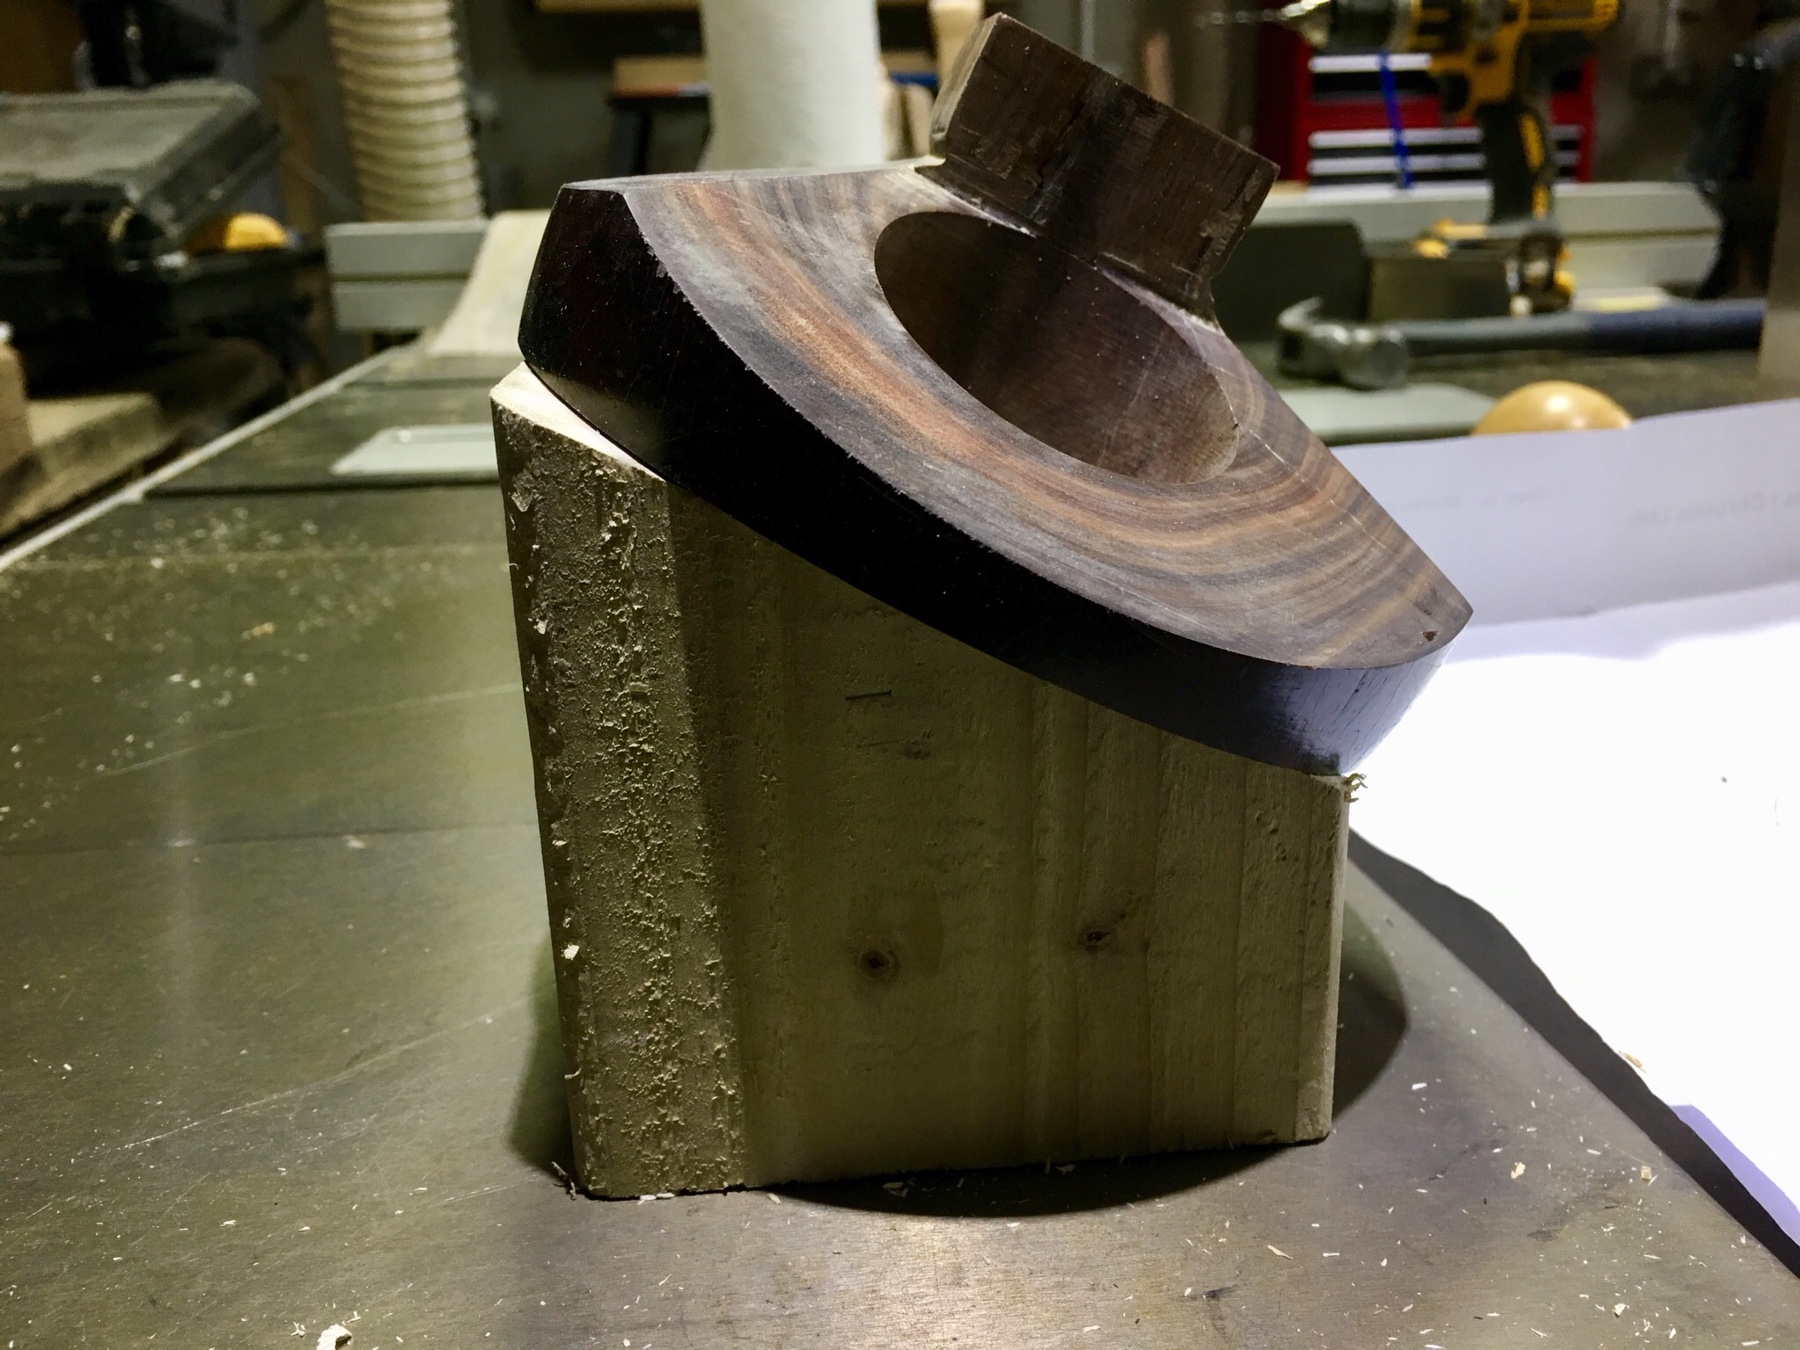
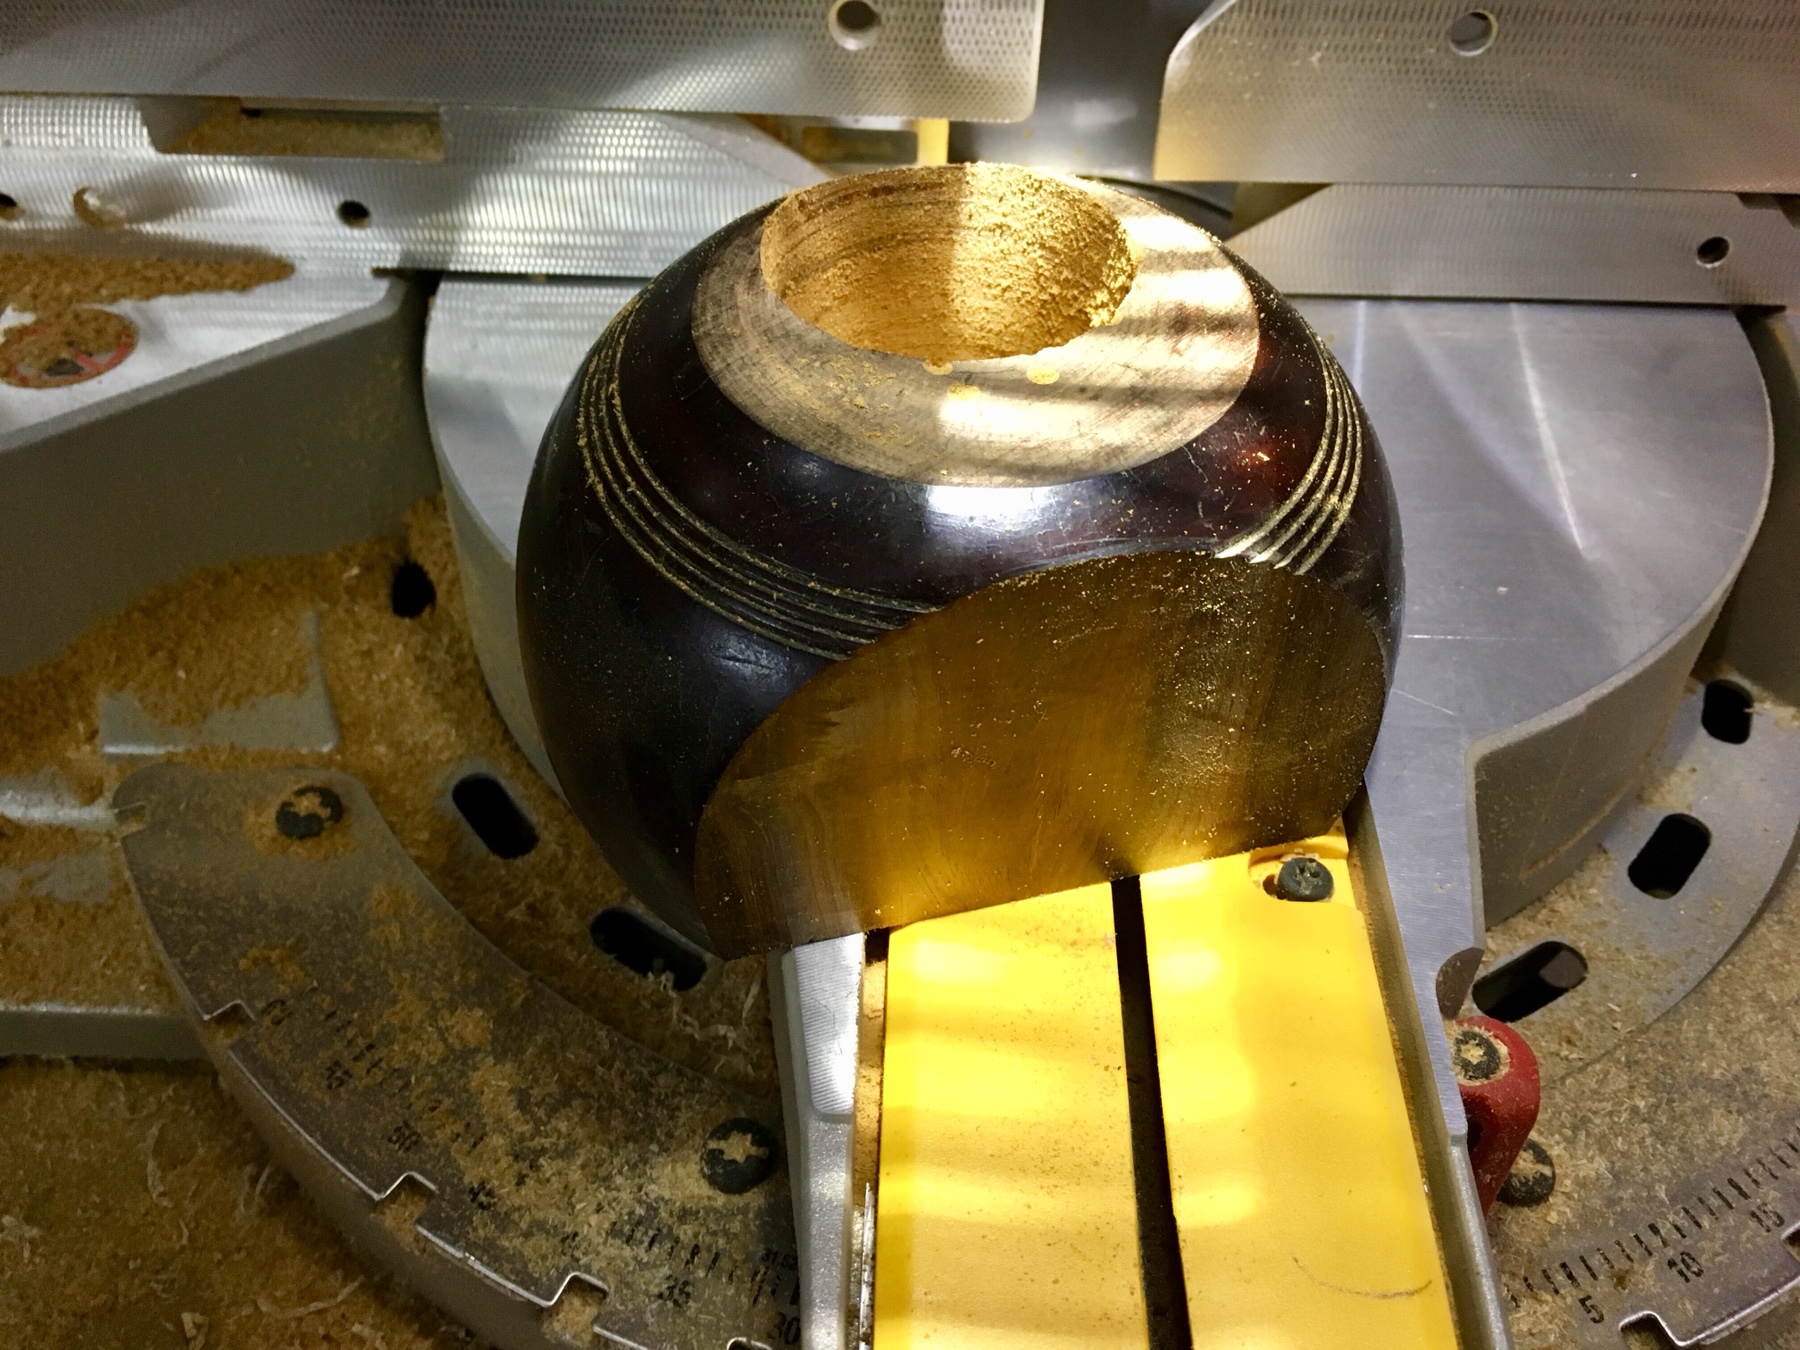
I cut the perpendicular flat rear of the router plane by lining up the off centre hole by eye and cut it on the mitre saw.
37ec74c99205221d503d80d6d20cad71.jpg


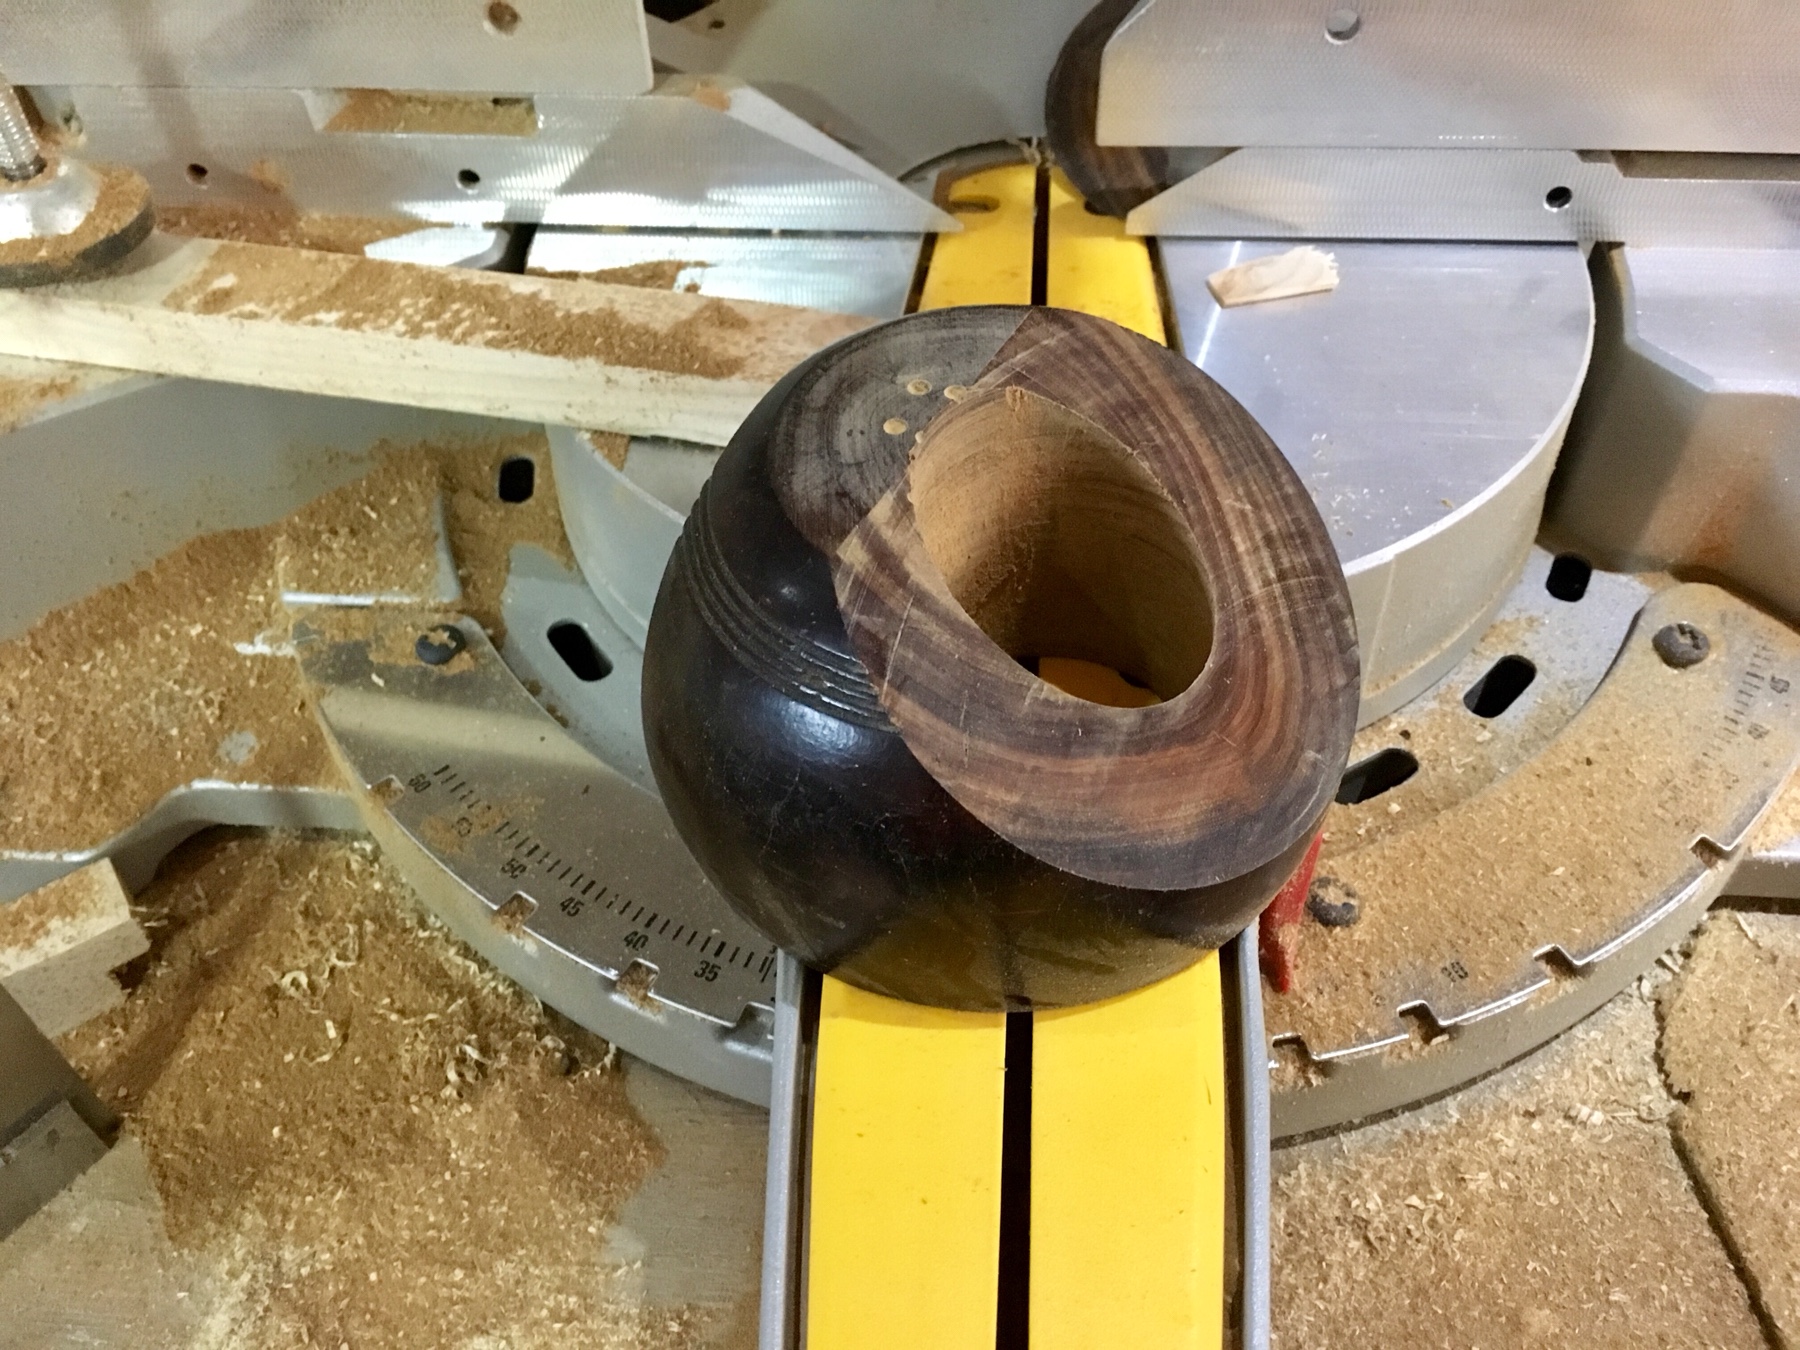
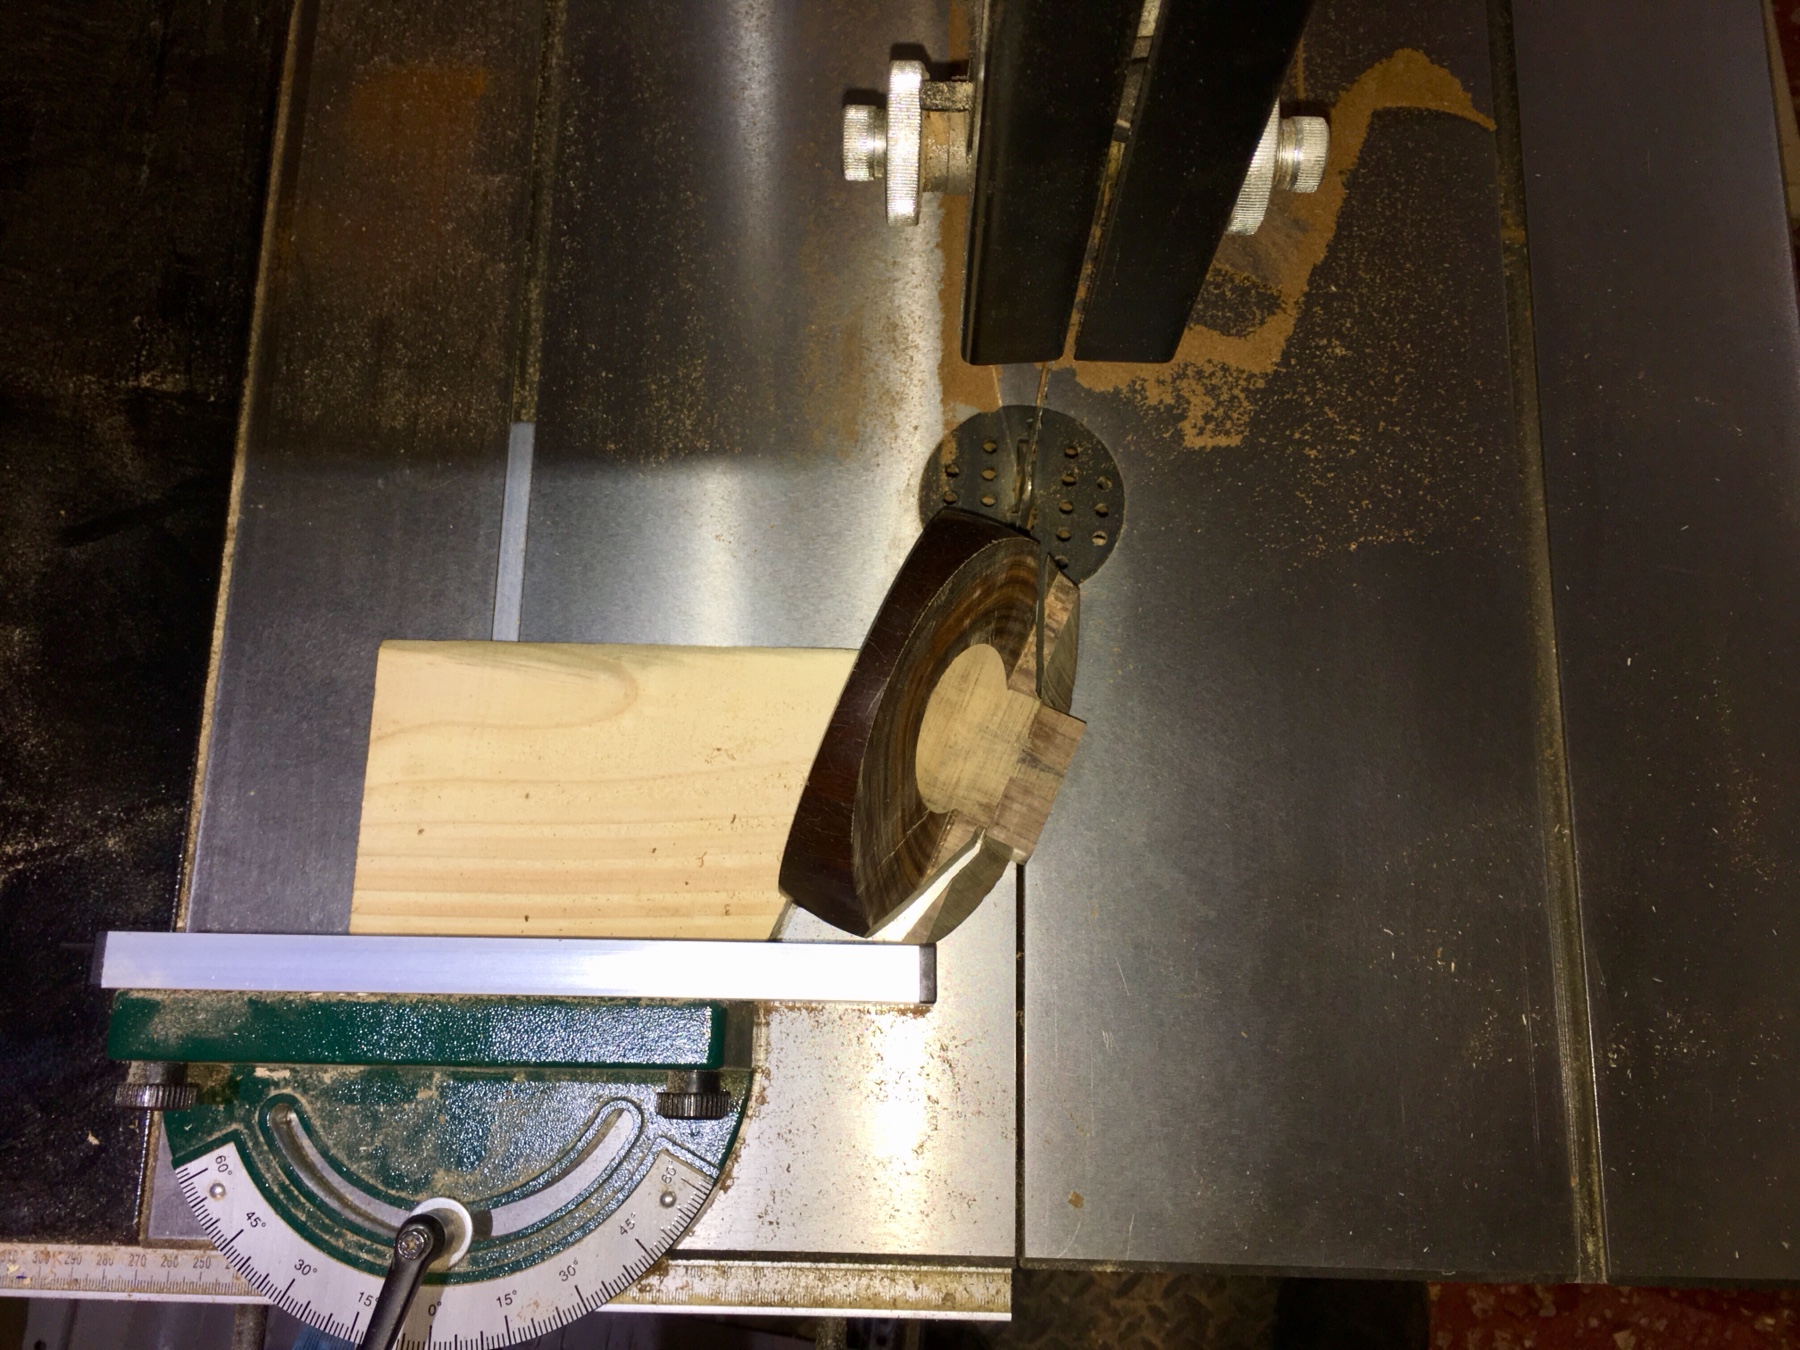
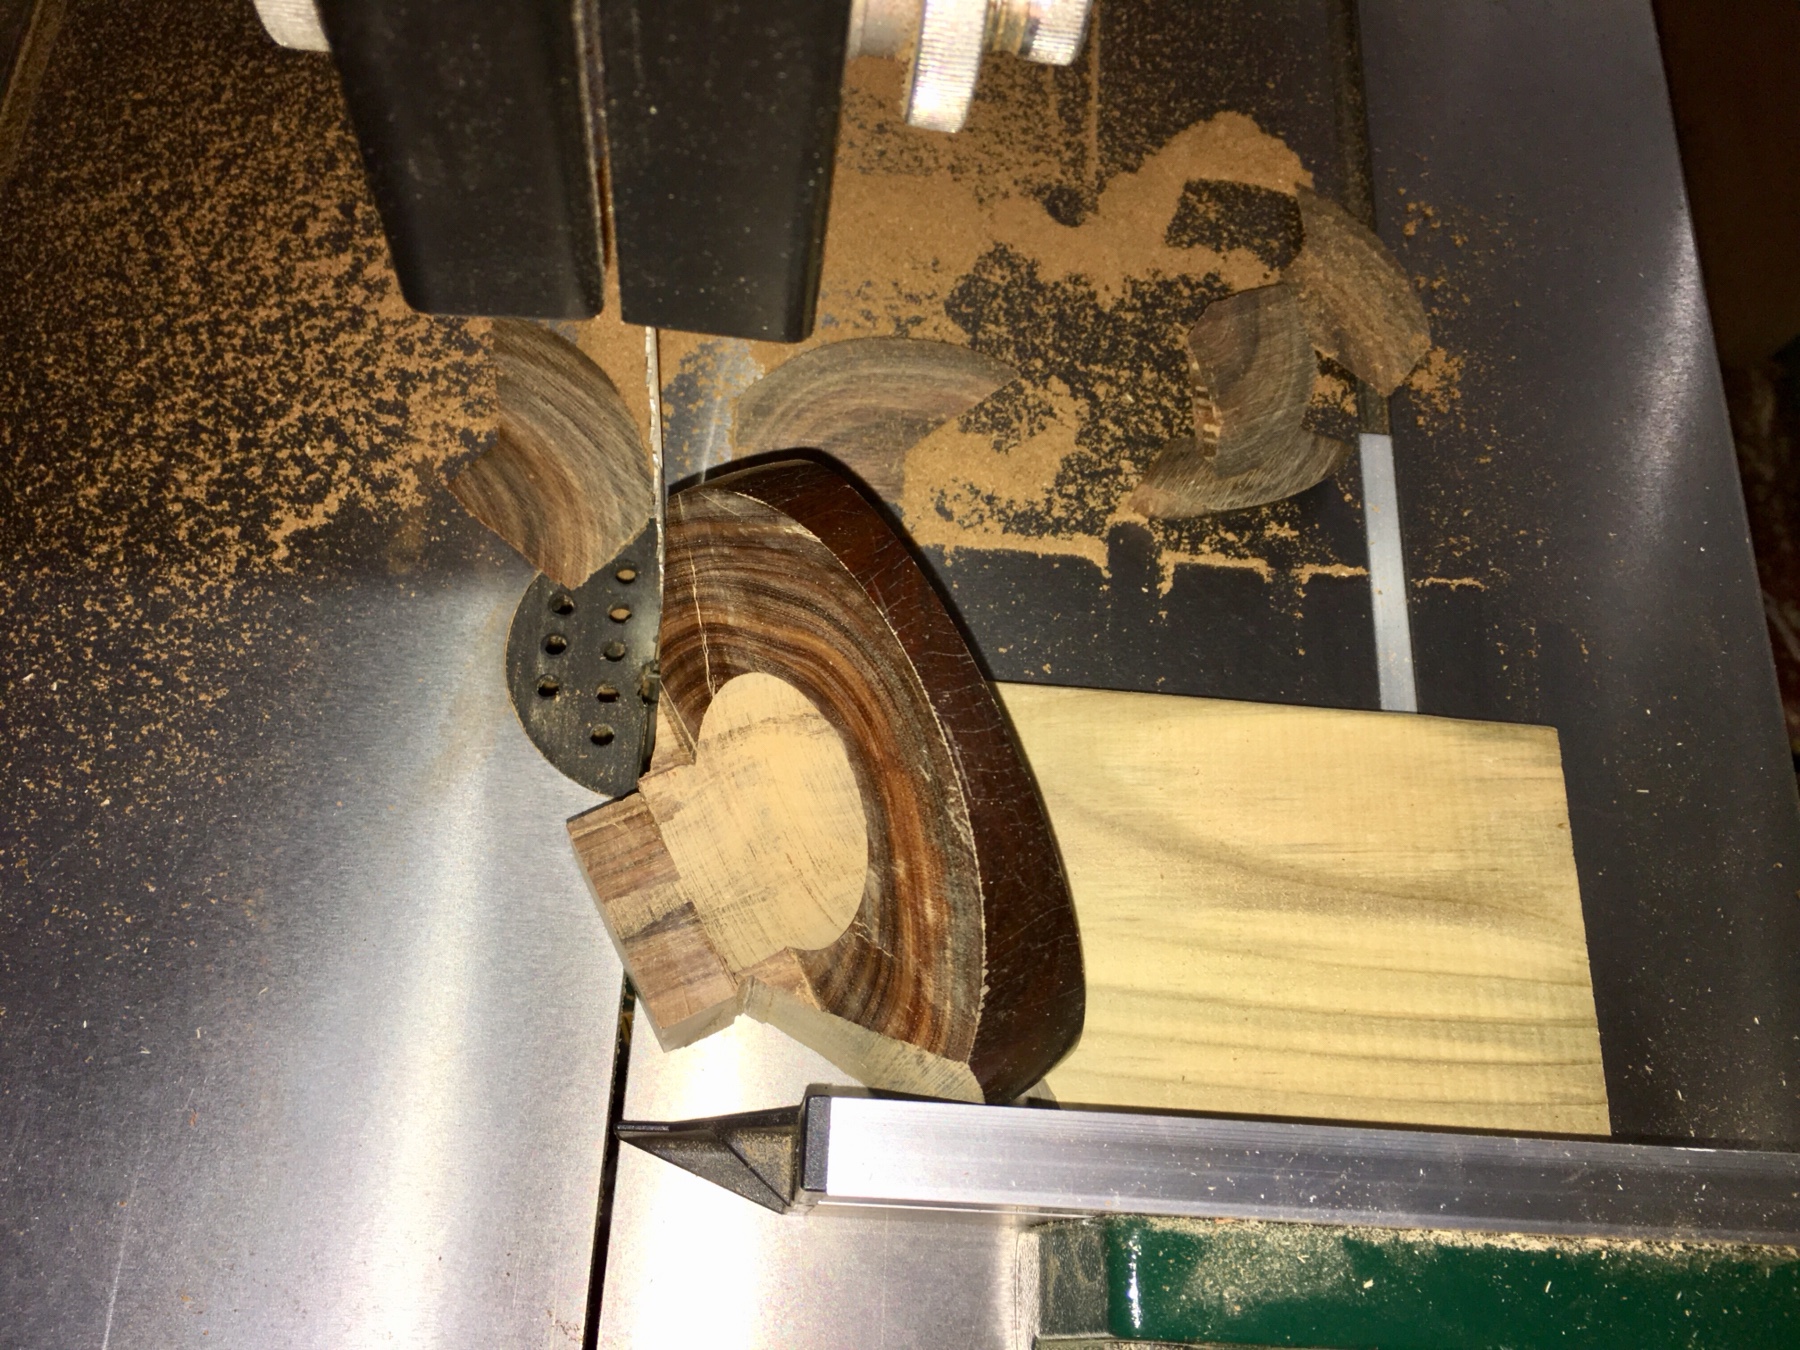
The next bit was a little precarious. Can’t remember the exact angle I cut, maybe something like 22 degrees, but in order to hold the ball safely I had to clamp a piece of wood through the ball, but I did line it up perpendicular to the mitre saw fence with a machinist square before clamping a little harder that I probably should have.
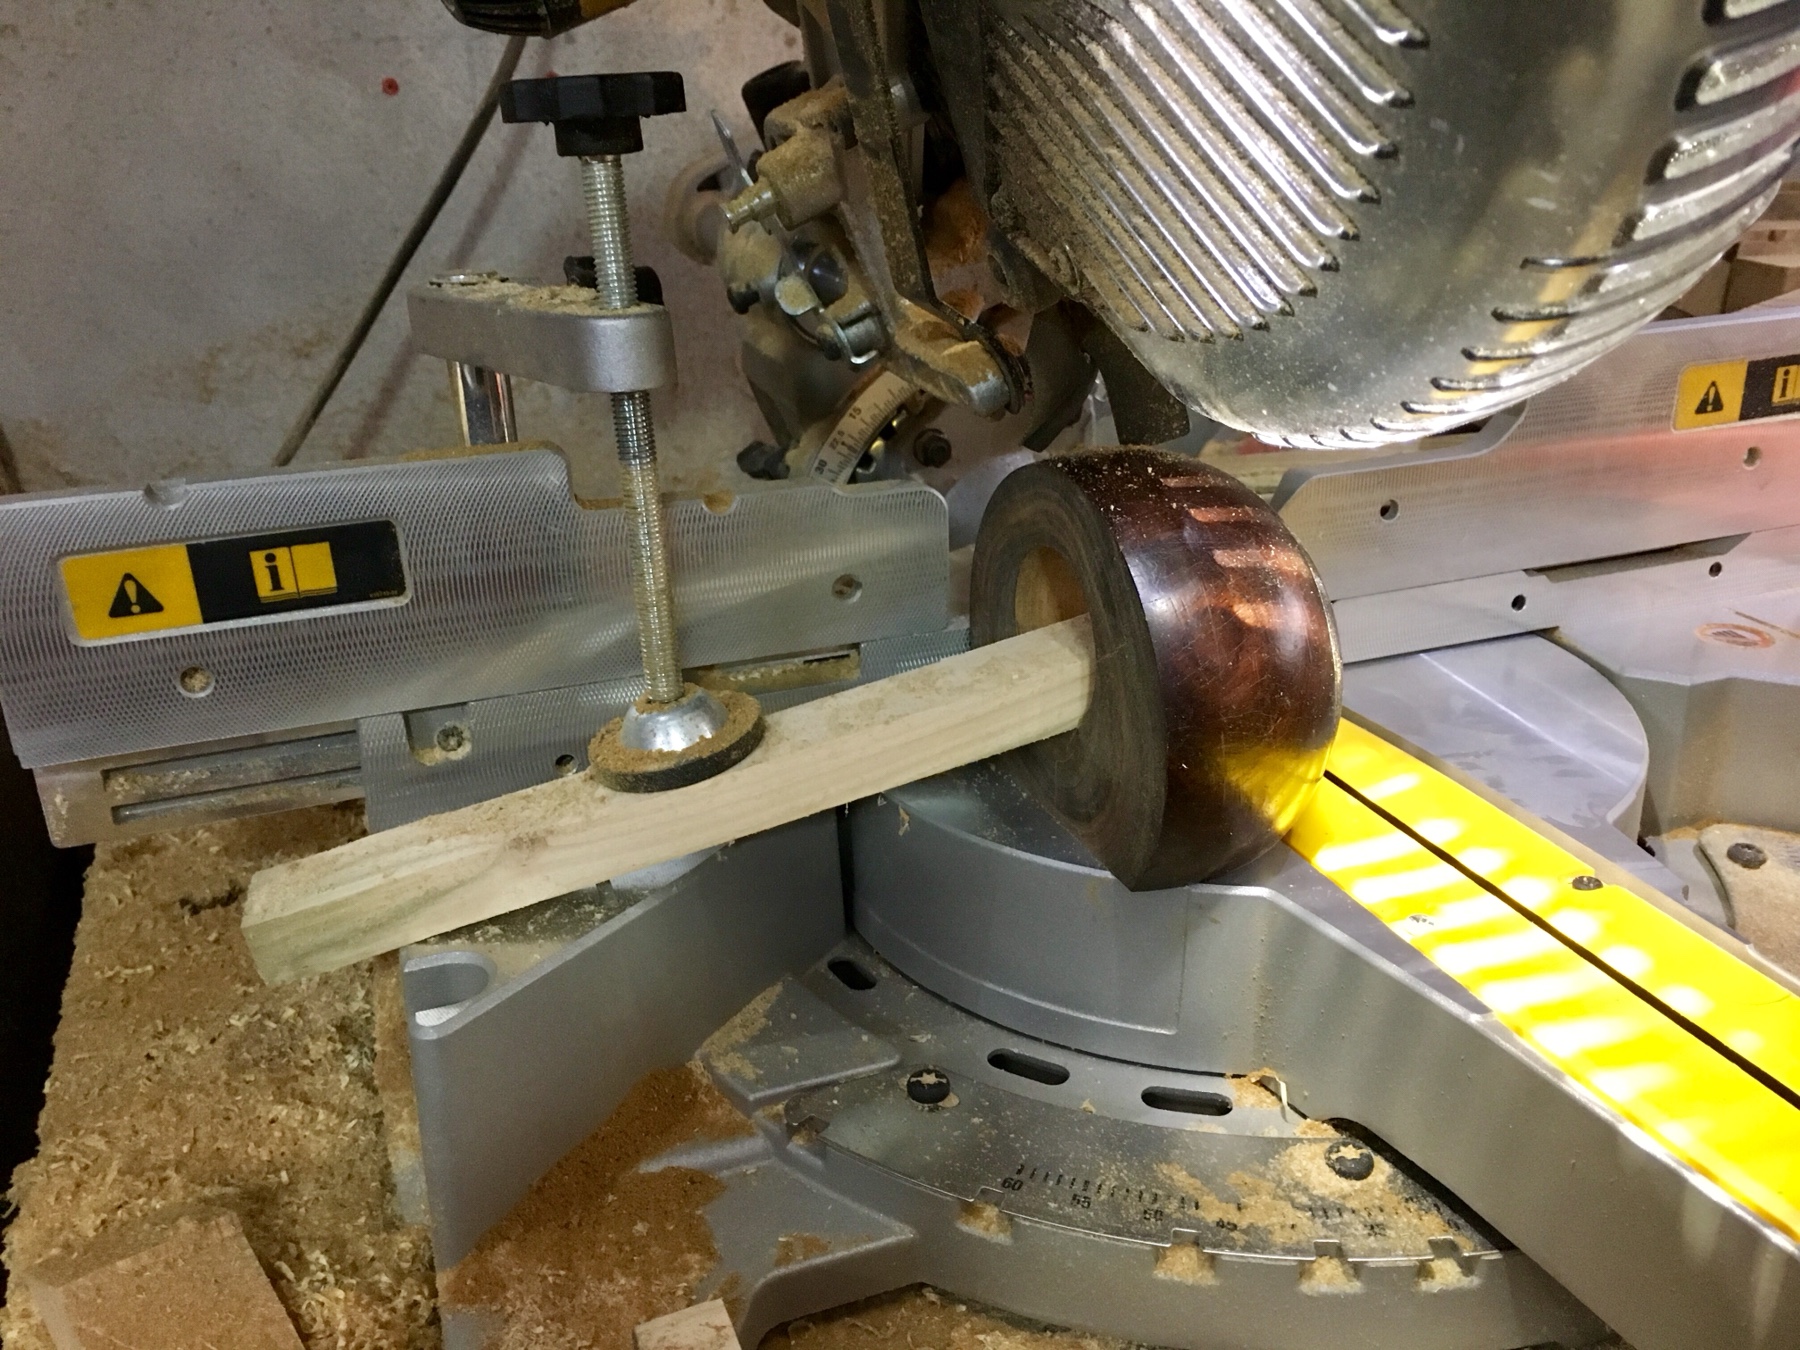
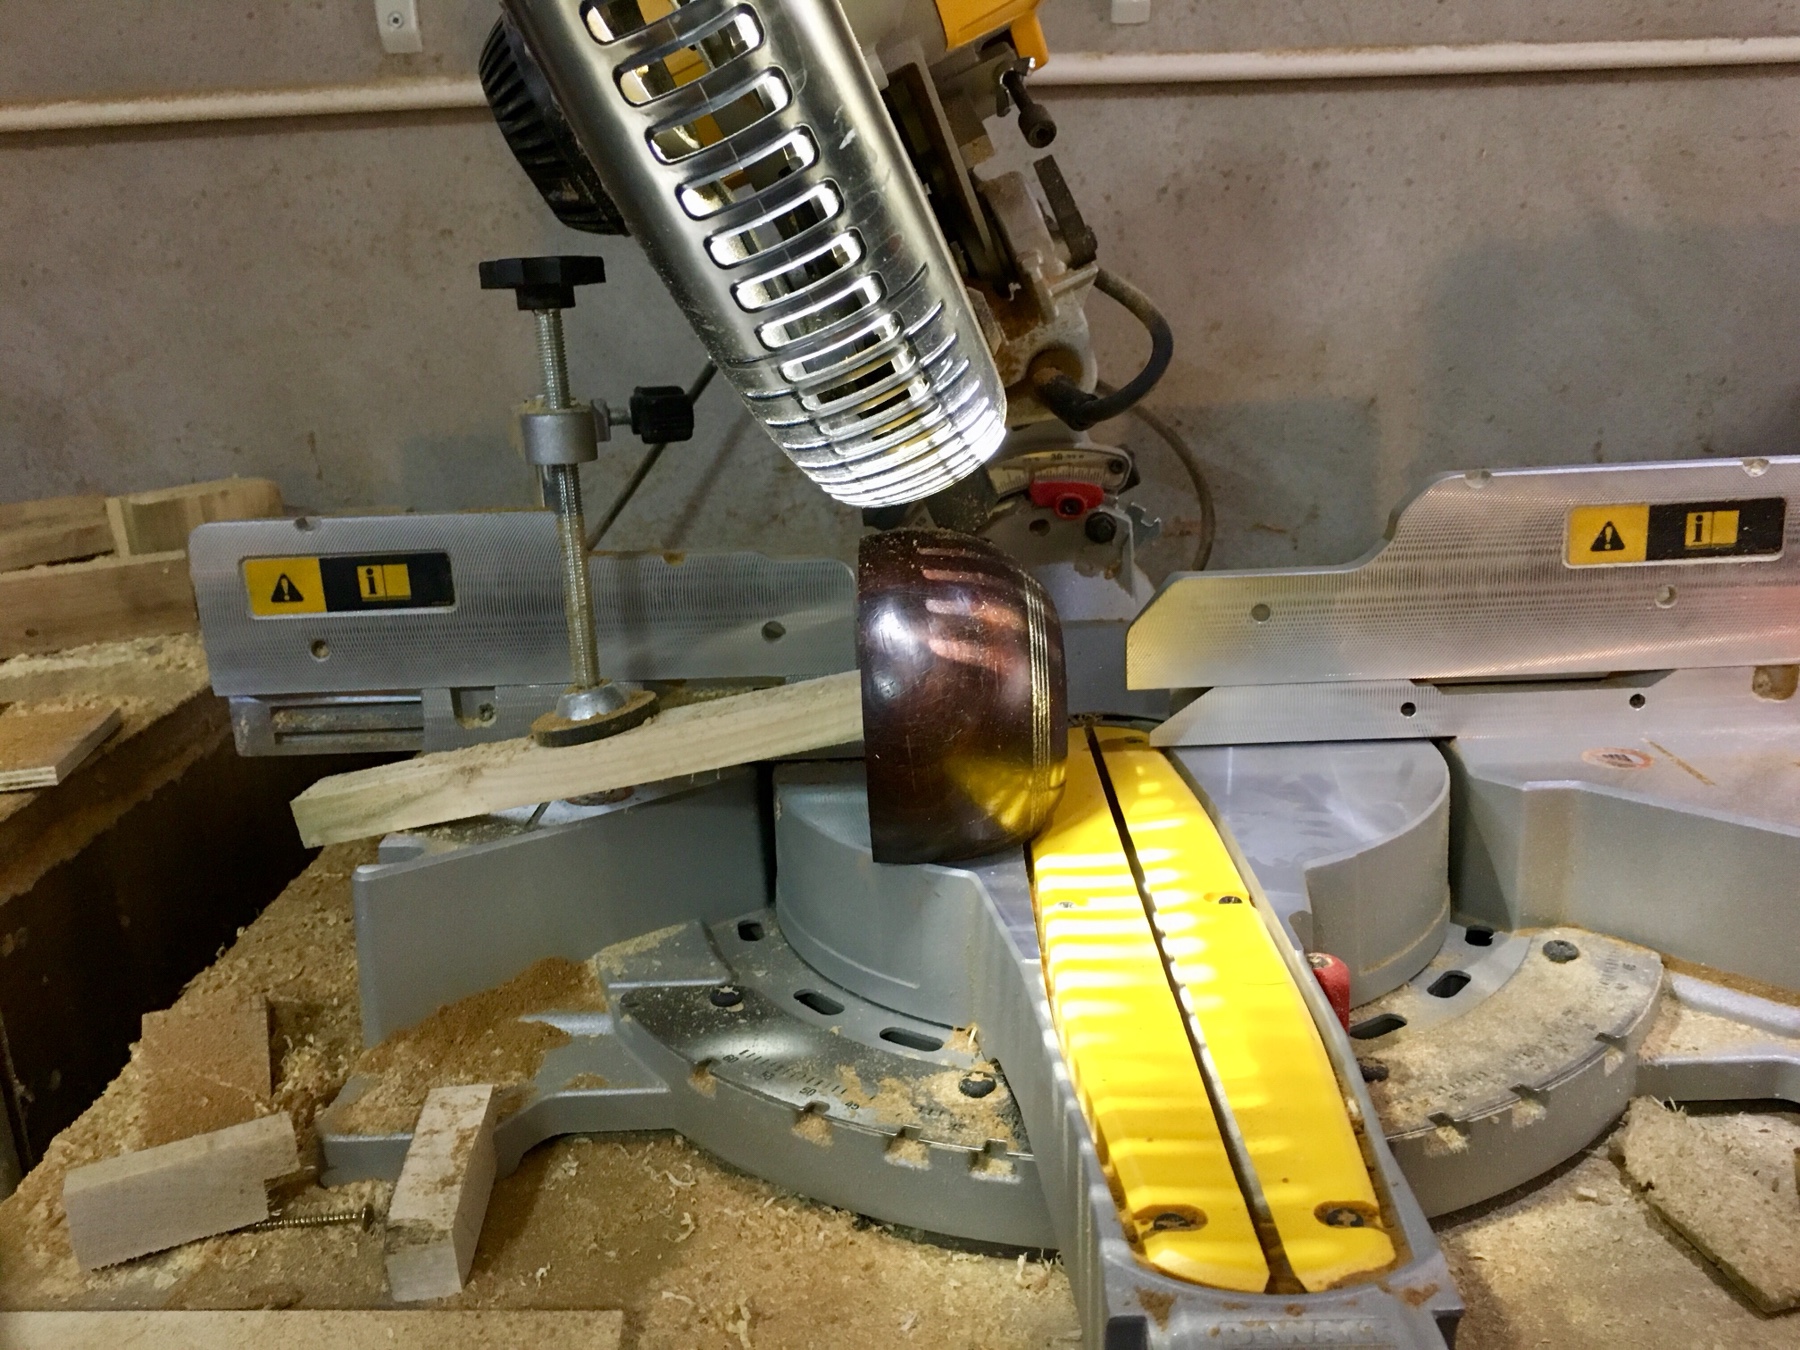
8055db3c717357e02c43d8d98dd1d94f.jpg


060a9e8f25a18eb547b3c38b811c8548.jpg


22518770cff537840569831e11fb6c4c.jpg
 
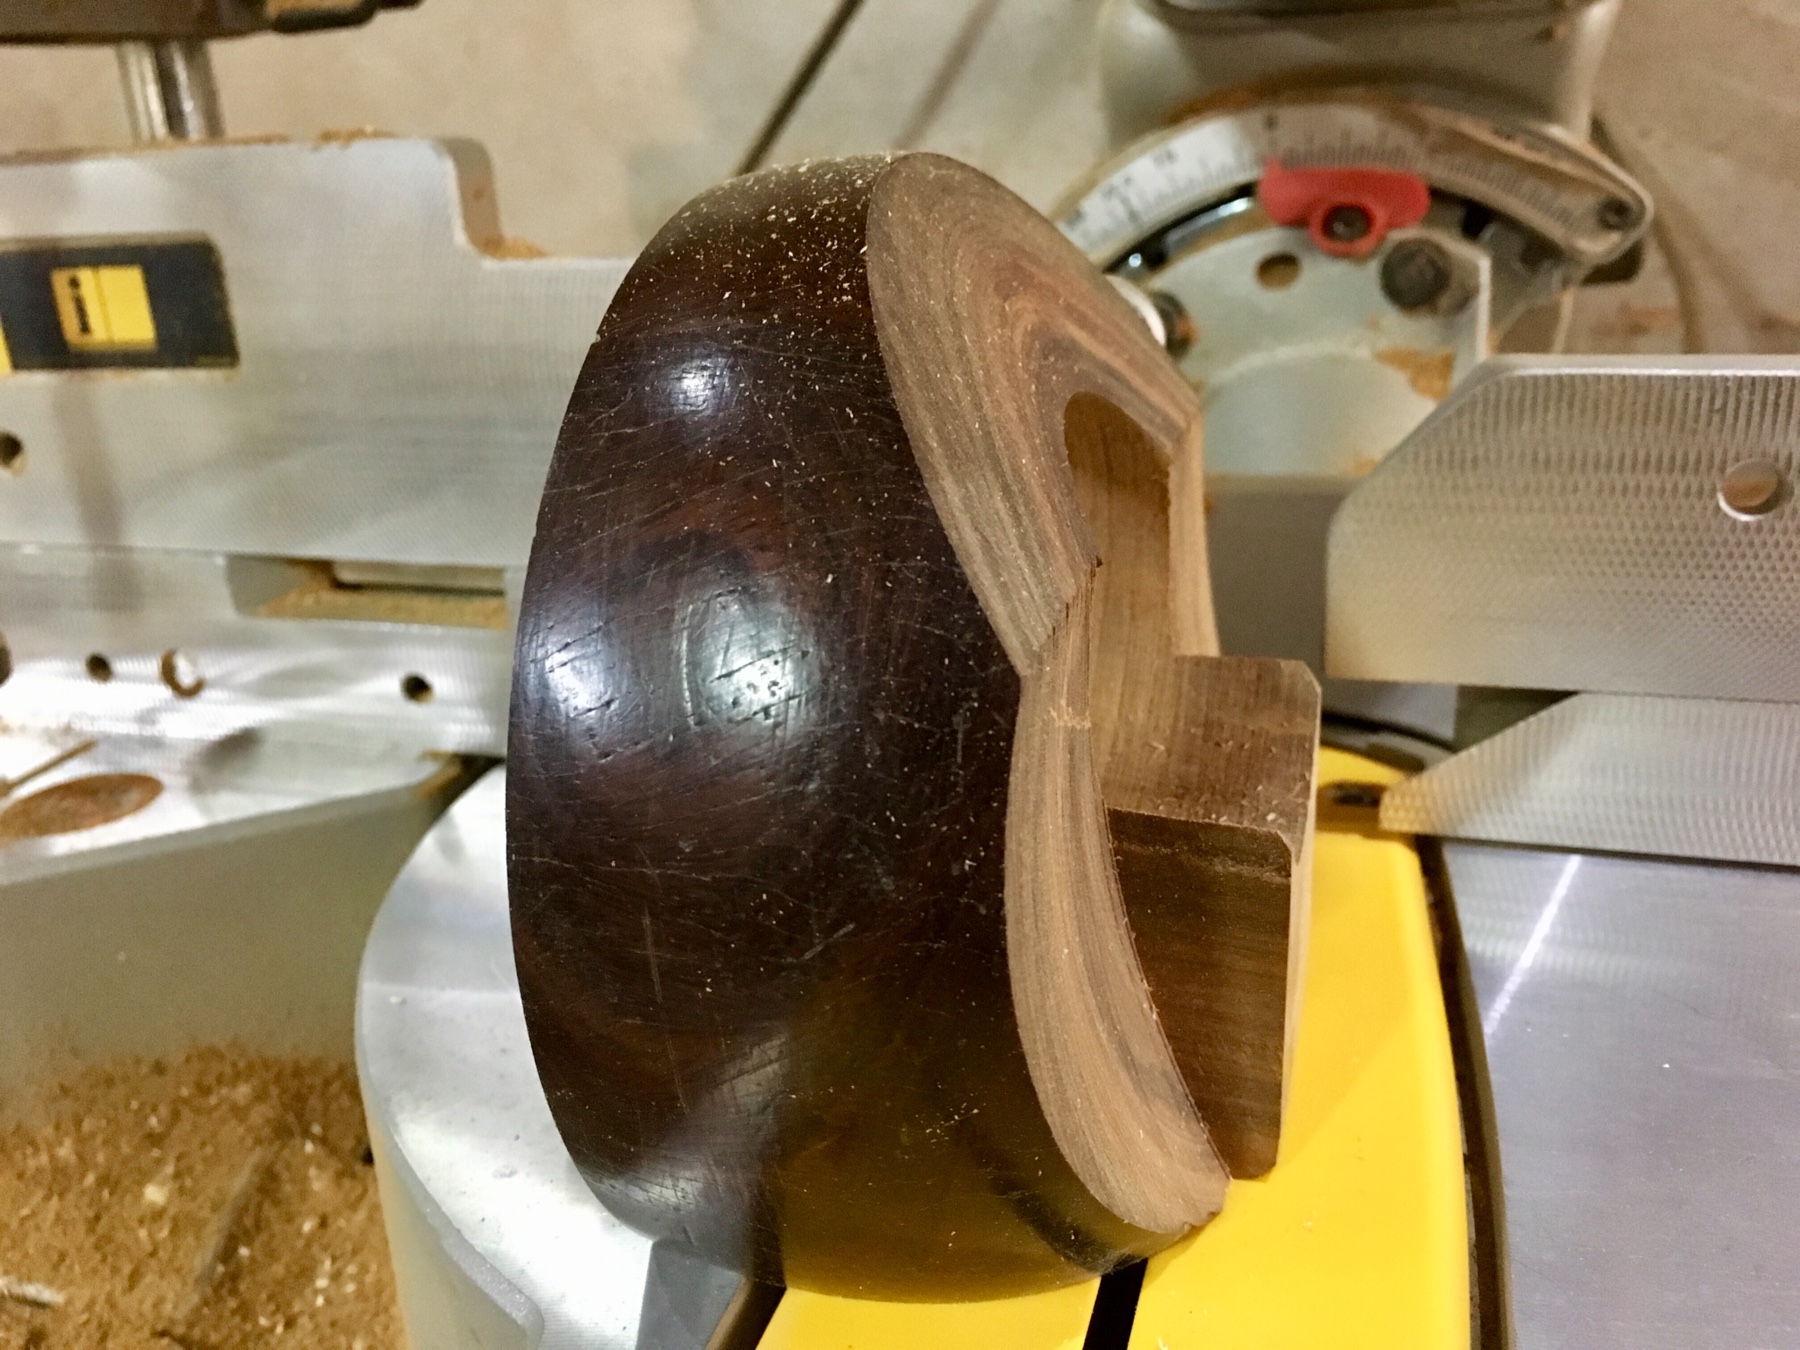
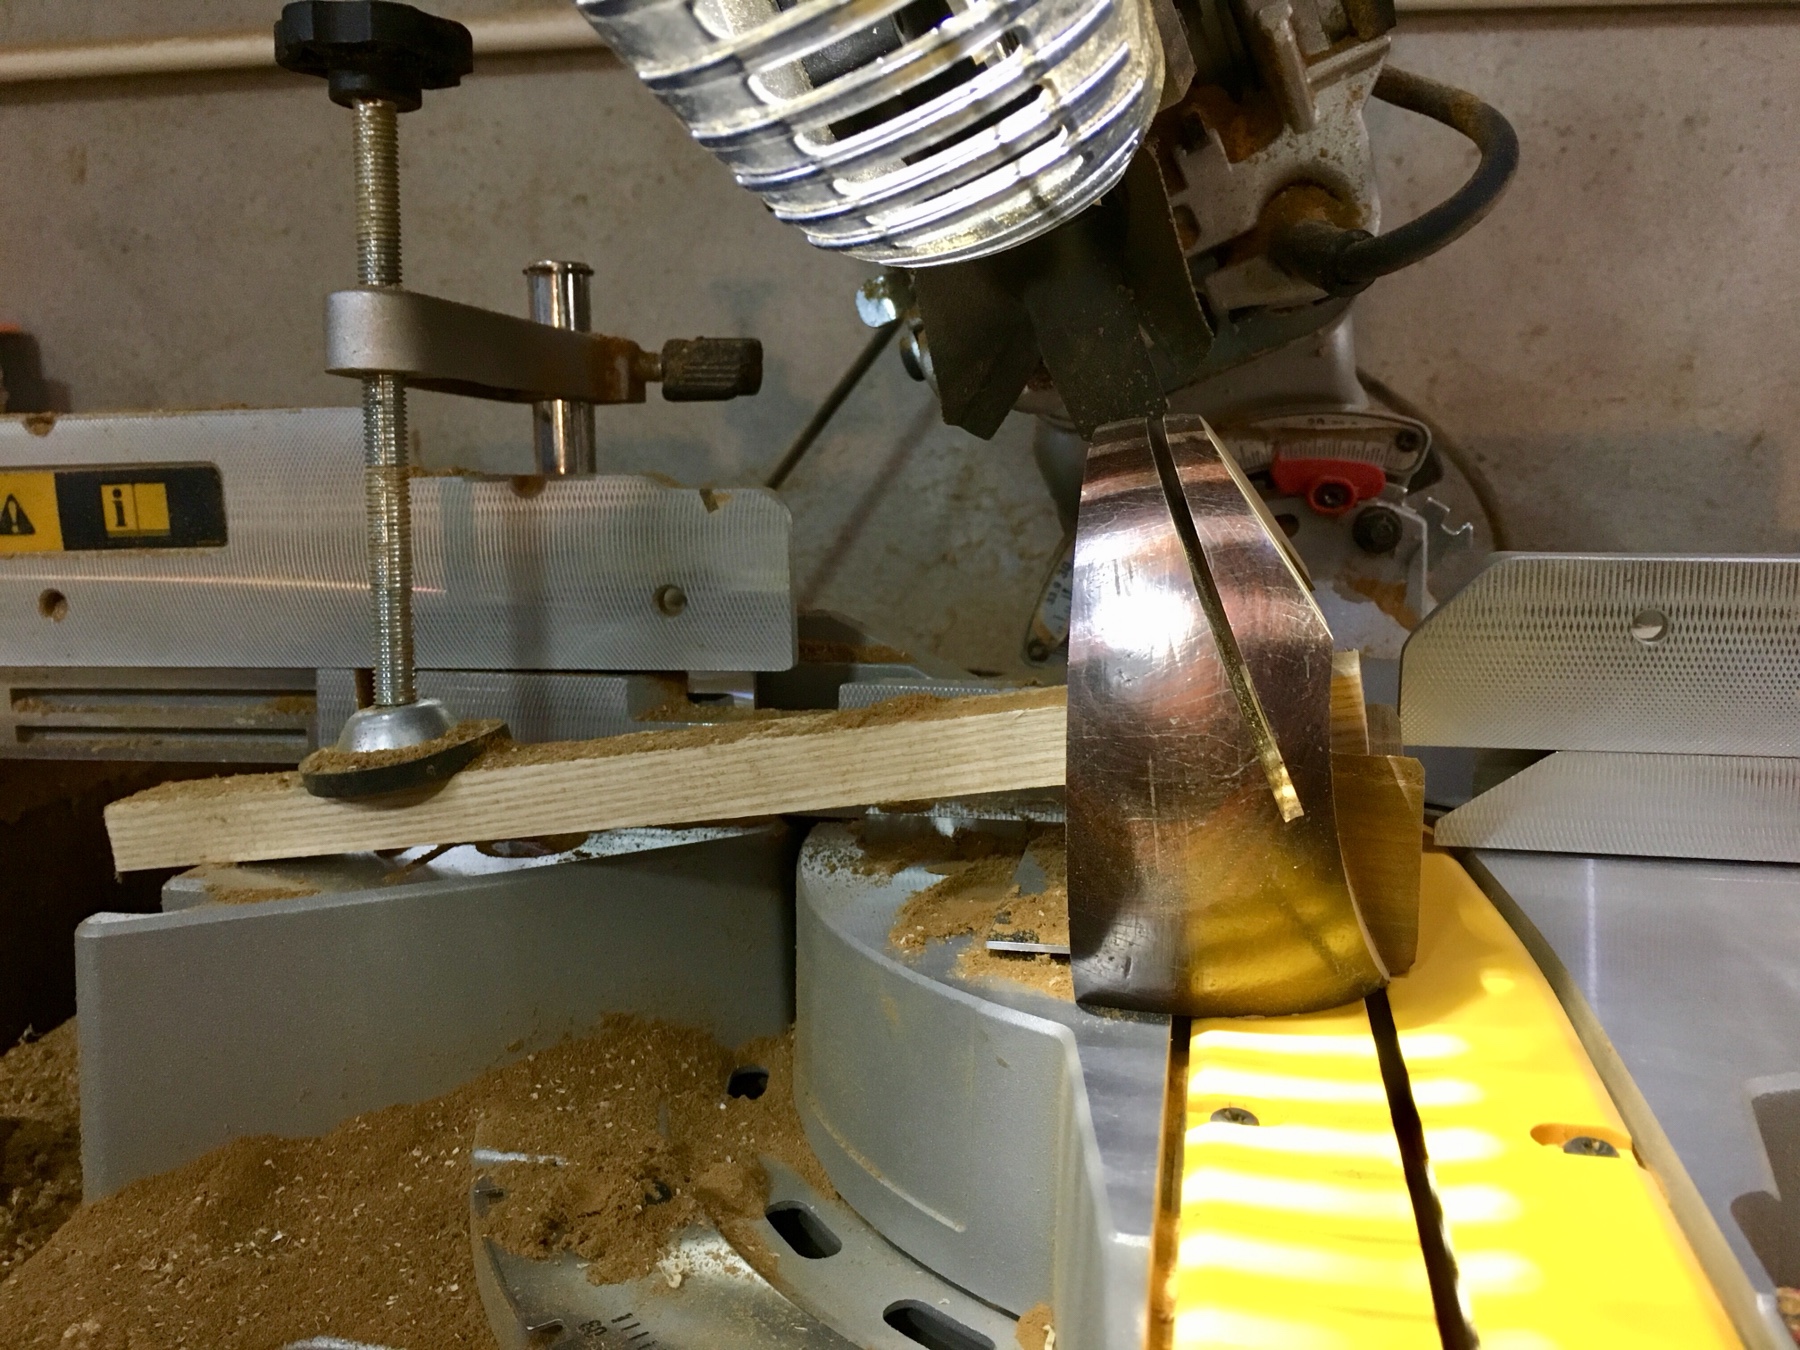
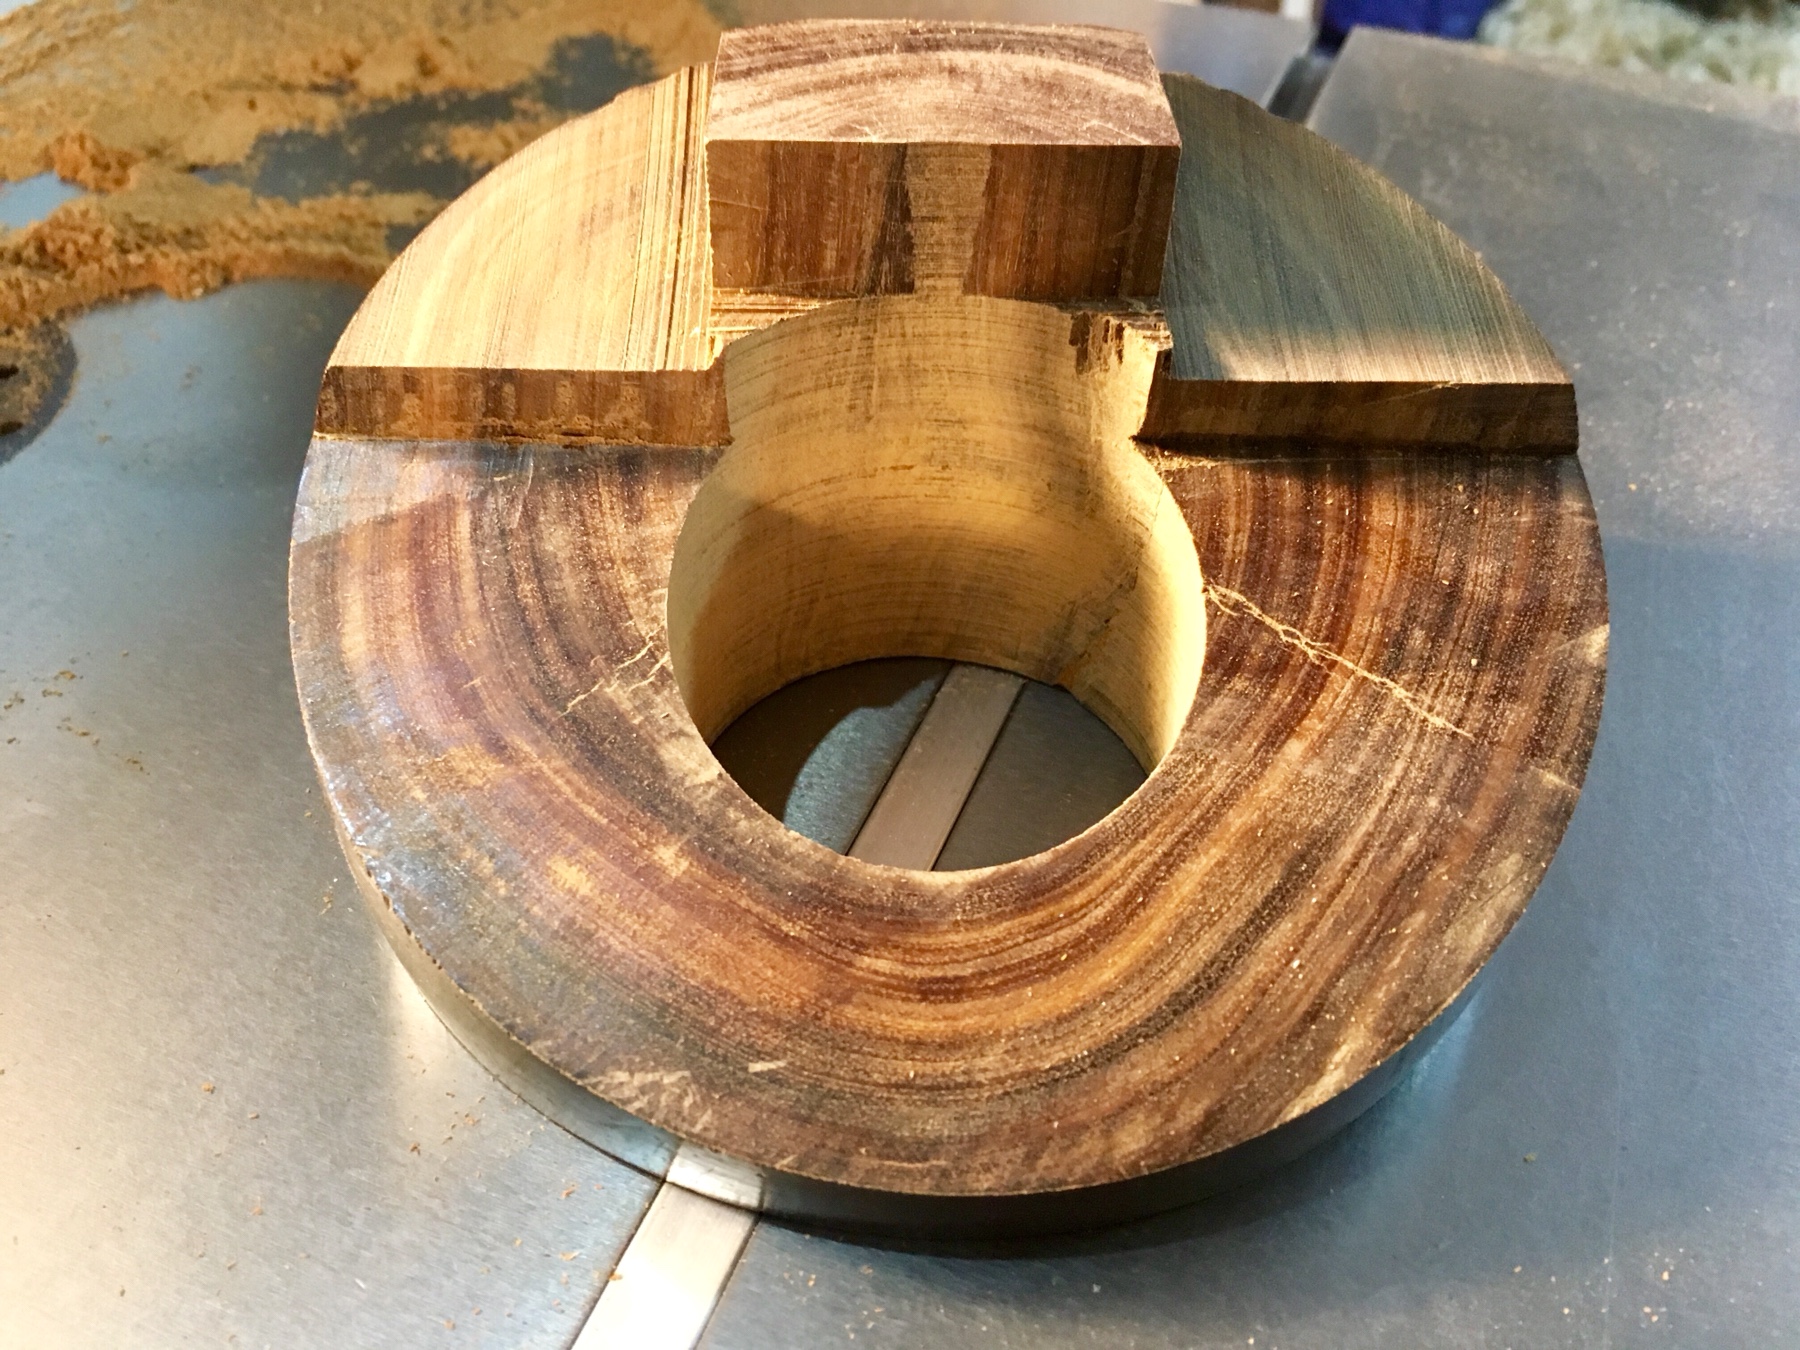
I then measured the approximate width of the blade support ‘tower’ and cut that on the mitre saw too with a depth stop, but the dewalt DW717 doesn’t let the blade back far enough to give me a flat cut all the way, but to be honest this was only rough to form the blade support ‘tower’. (And if I did want a flat cut I could’ve held the ball away from the fence with a spacer scrap)

e9ebb06a4b52c1414b1e01c4e226ed55.jpg


I wasn’t quite happy with the angle of the front cut and wanted to slim it down a bit, so cut that again.

200d4b504e9f00d86c75652f696f26ed.jpg


5f69c2a6fca0fc68ae3f200453cc3a8a.jpg


Next I cut a scrap piece of wood with an angle I though would be pleasing, in order to help cut the side angles on the bandsaw. Can’t remember what angle exactly, but was probably around 22 degrees too.

9a98c2a062b3a87ff57a2ae51118869e.jpg


f167b052c0c1774477ee80f32d0652a2.jpg


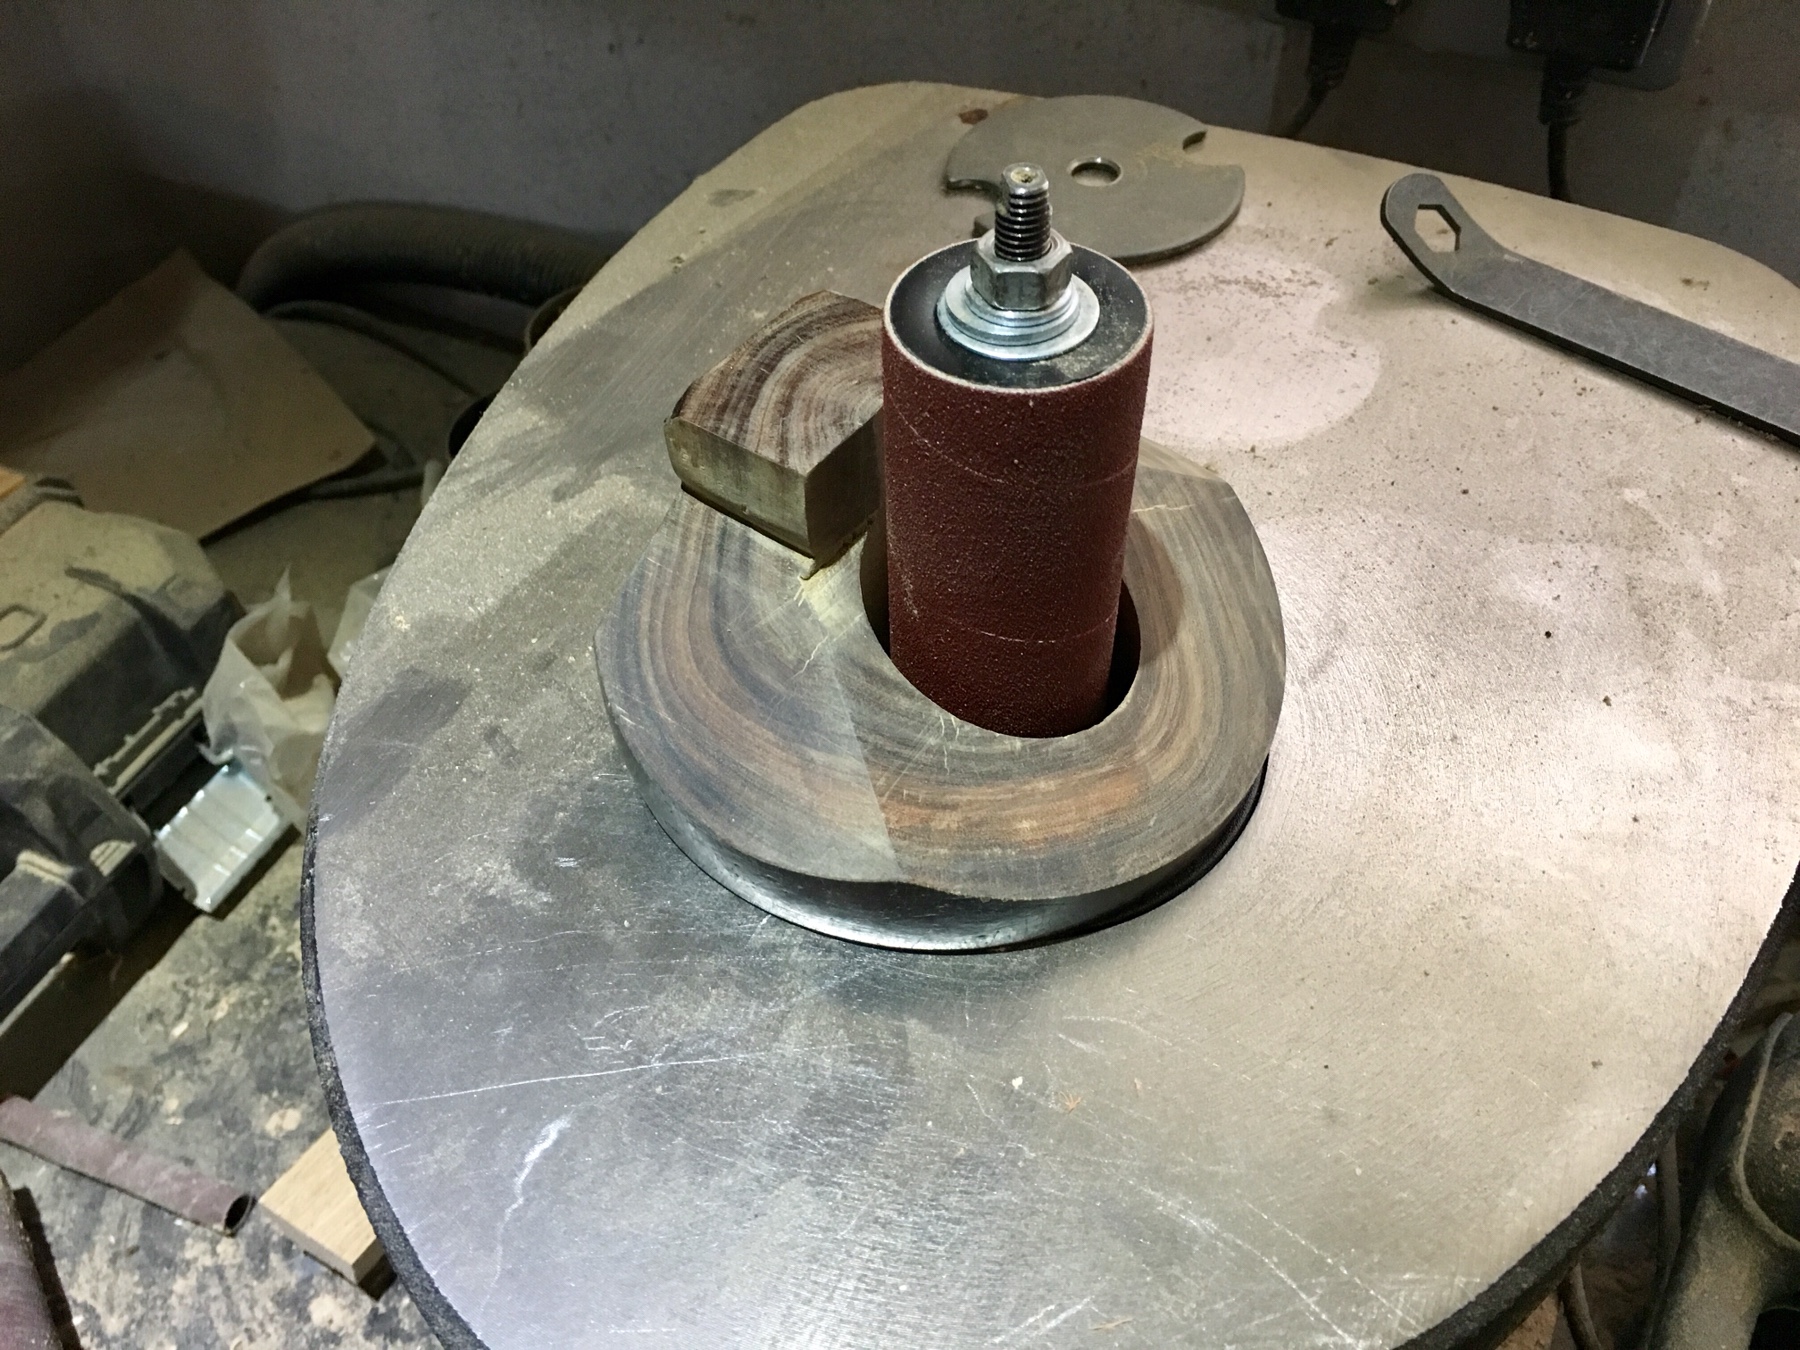
So after a bunch of hand sanding and sanding against the edge of the table saw table i got rid of the bandsaw marks. I then cleaned up the main hole on the bobbin sander.

67eced0993f1cdd04d1956aa16a413bd.jpg


I marked where I wanted the holes for the handles to go, and did my best to mark it evenly.

687b6de77ad84b978b6540780154588a.jpg


Again, I cut some scrap to the same angle as the sides so I could get the sides as perpendicular as I could to the drill press for the handle holes (stuck the body on with double sided tape).

d5ebd06011de8789cc02bb5a37e0a52c.jpg


73c814b8c5ec09e4f17ac638e9e9e068.jpg
 
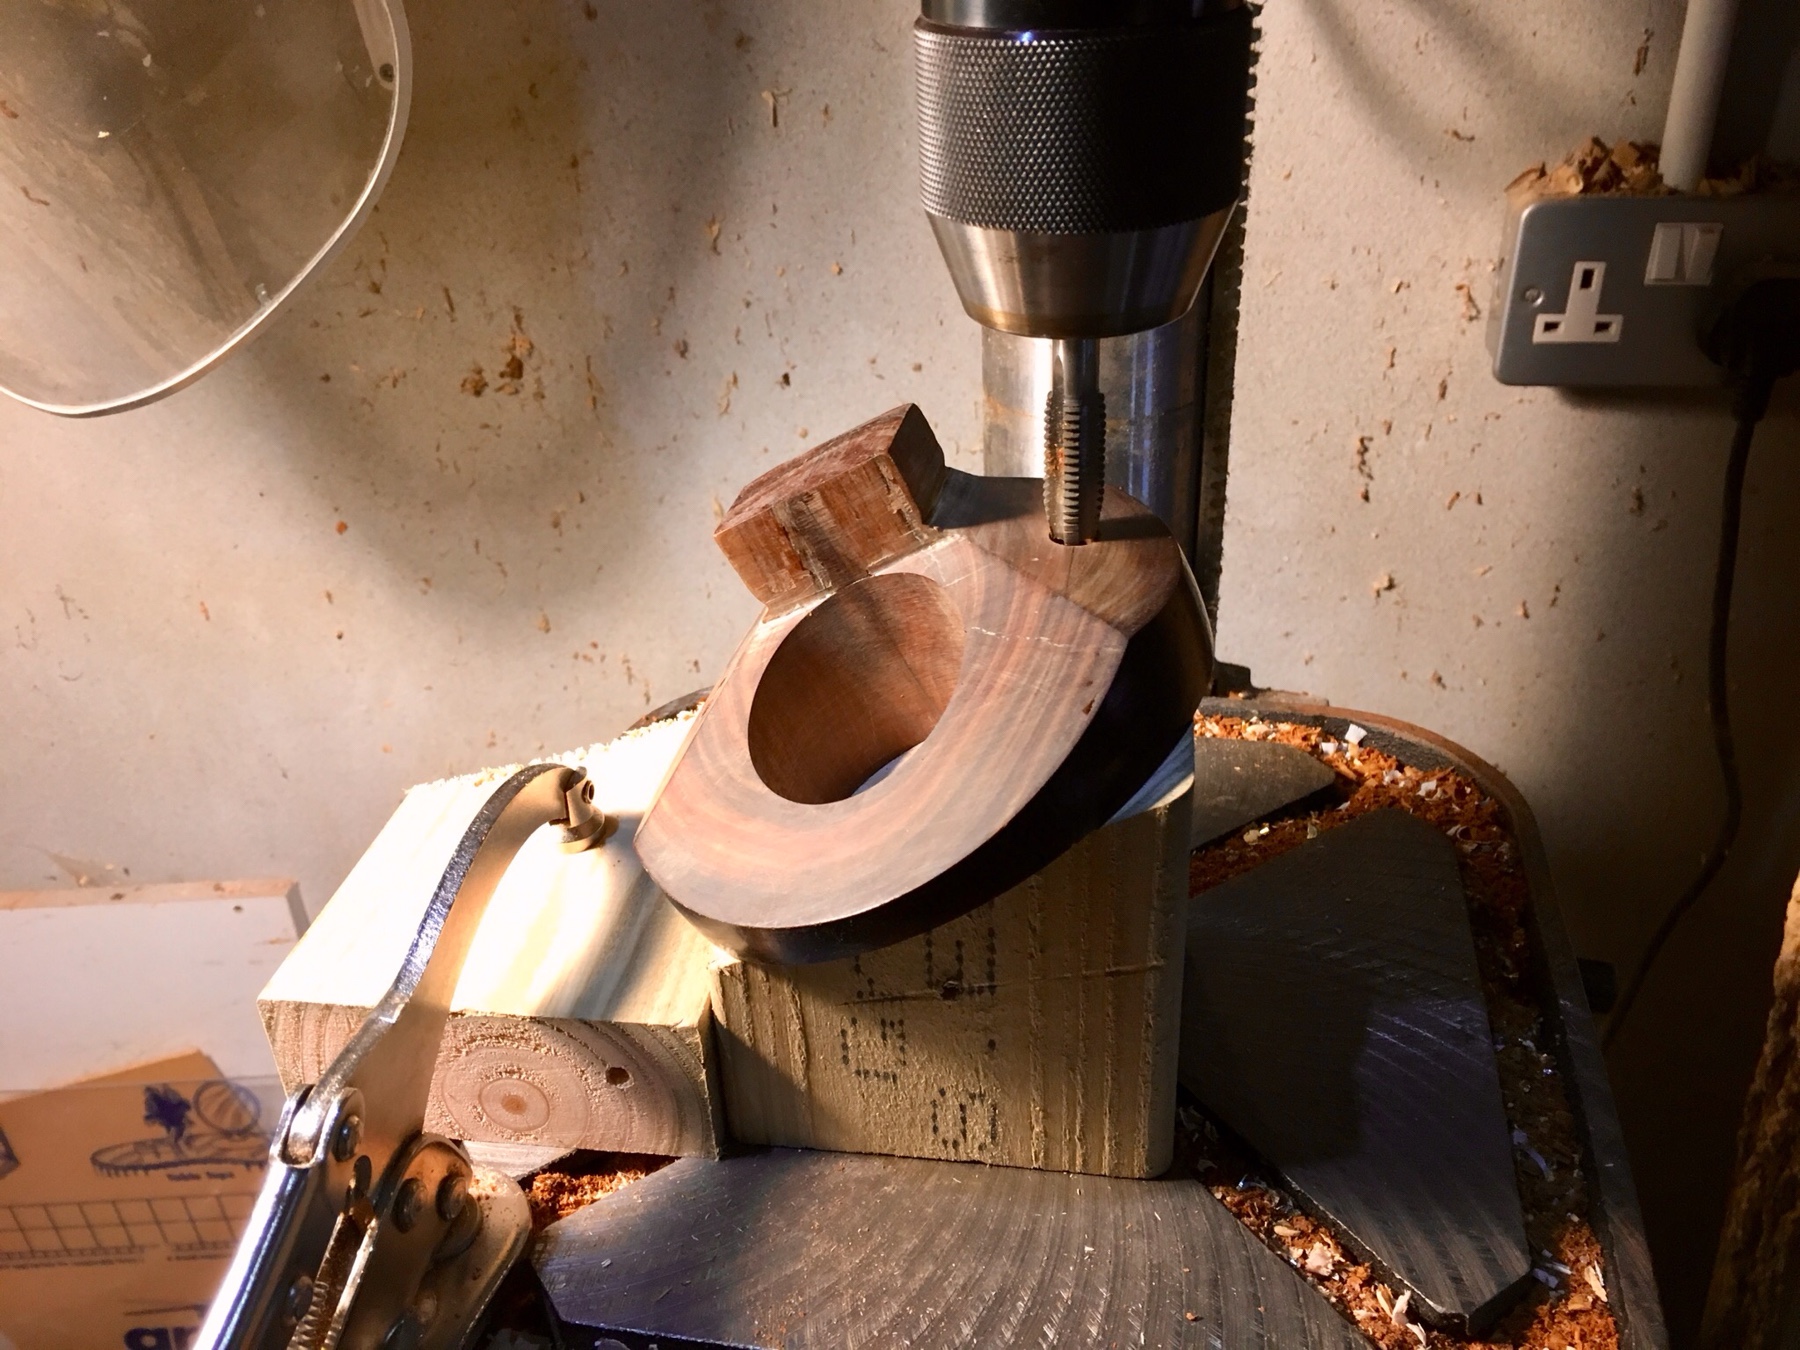
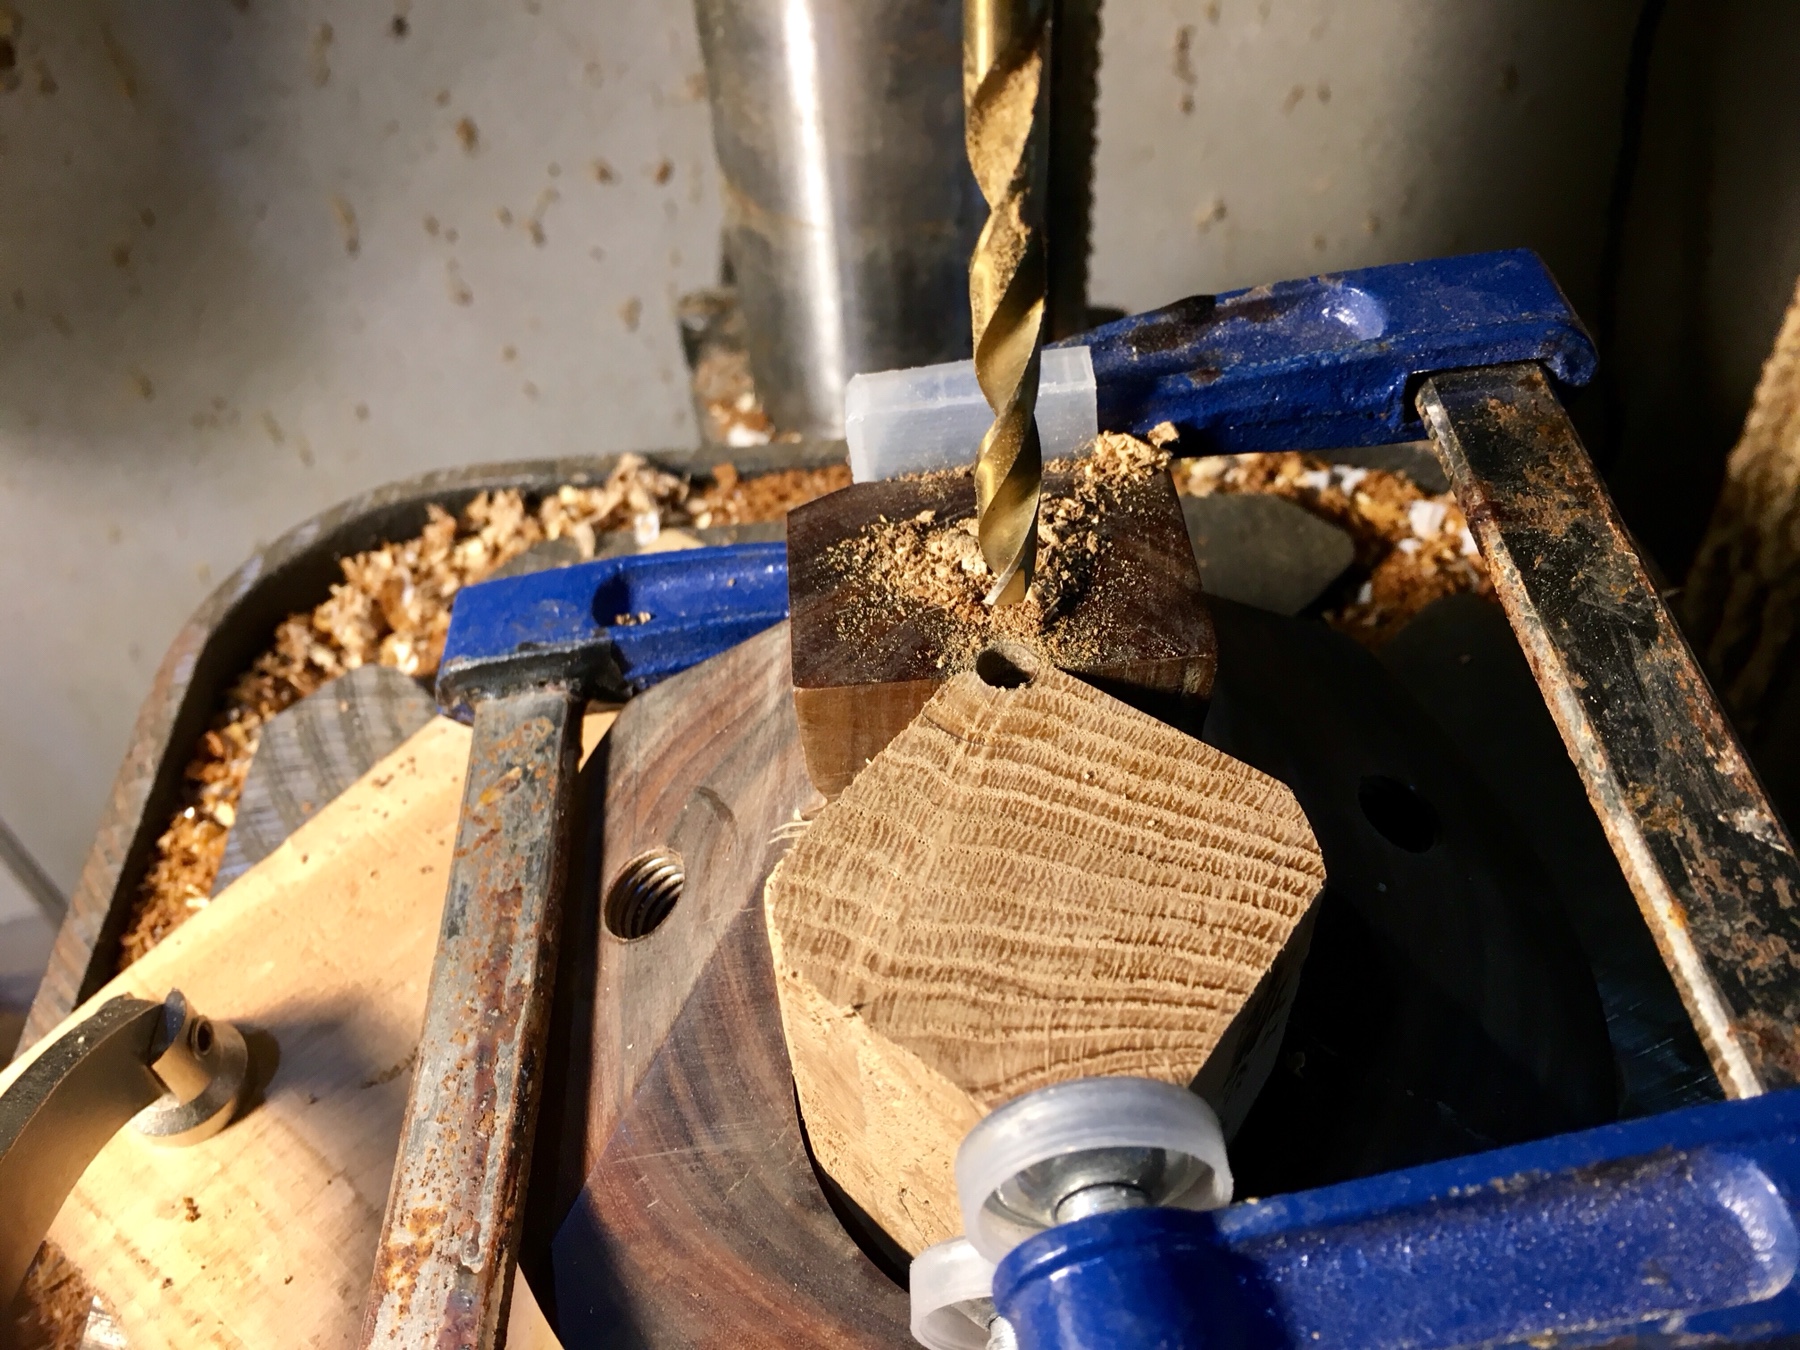
I decided to thread the handle to the body (both Lignum Vitae and boxwood should be petty good woods for threading), so I went with M12 size thread tap, which I did on the drill press to ensure it was threaded perpendicularly.

496a1ddb1369bf29ac96a8e8e506118e.jpg


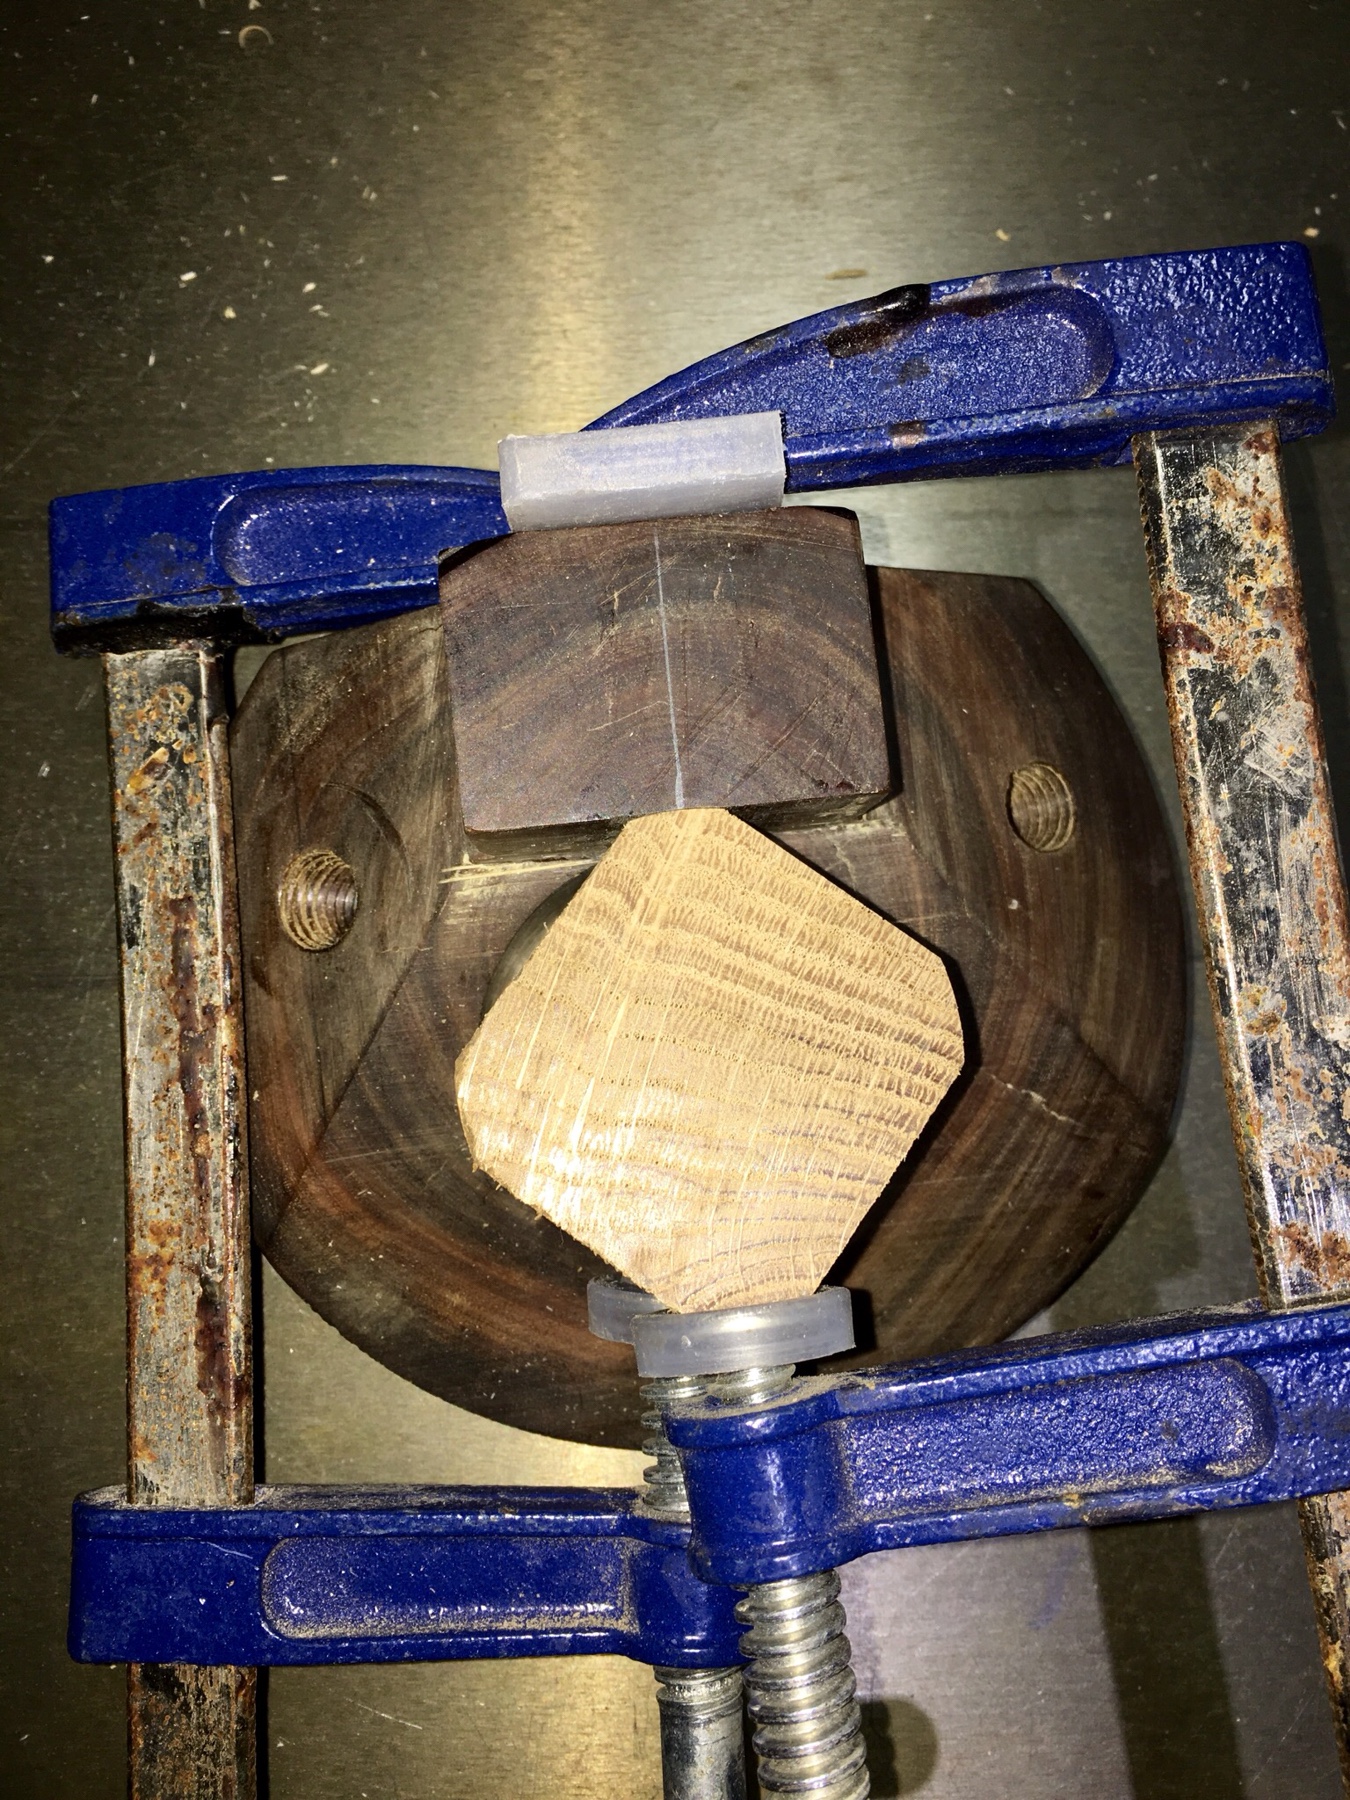
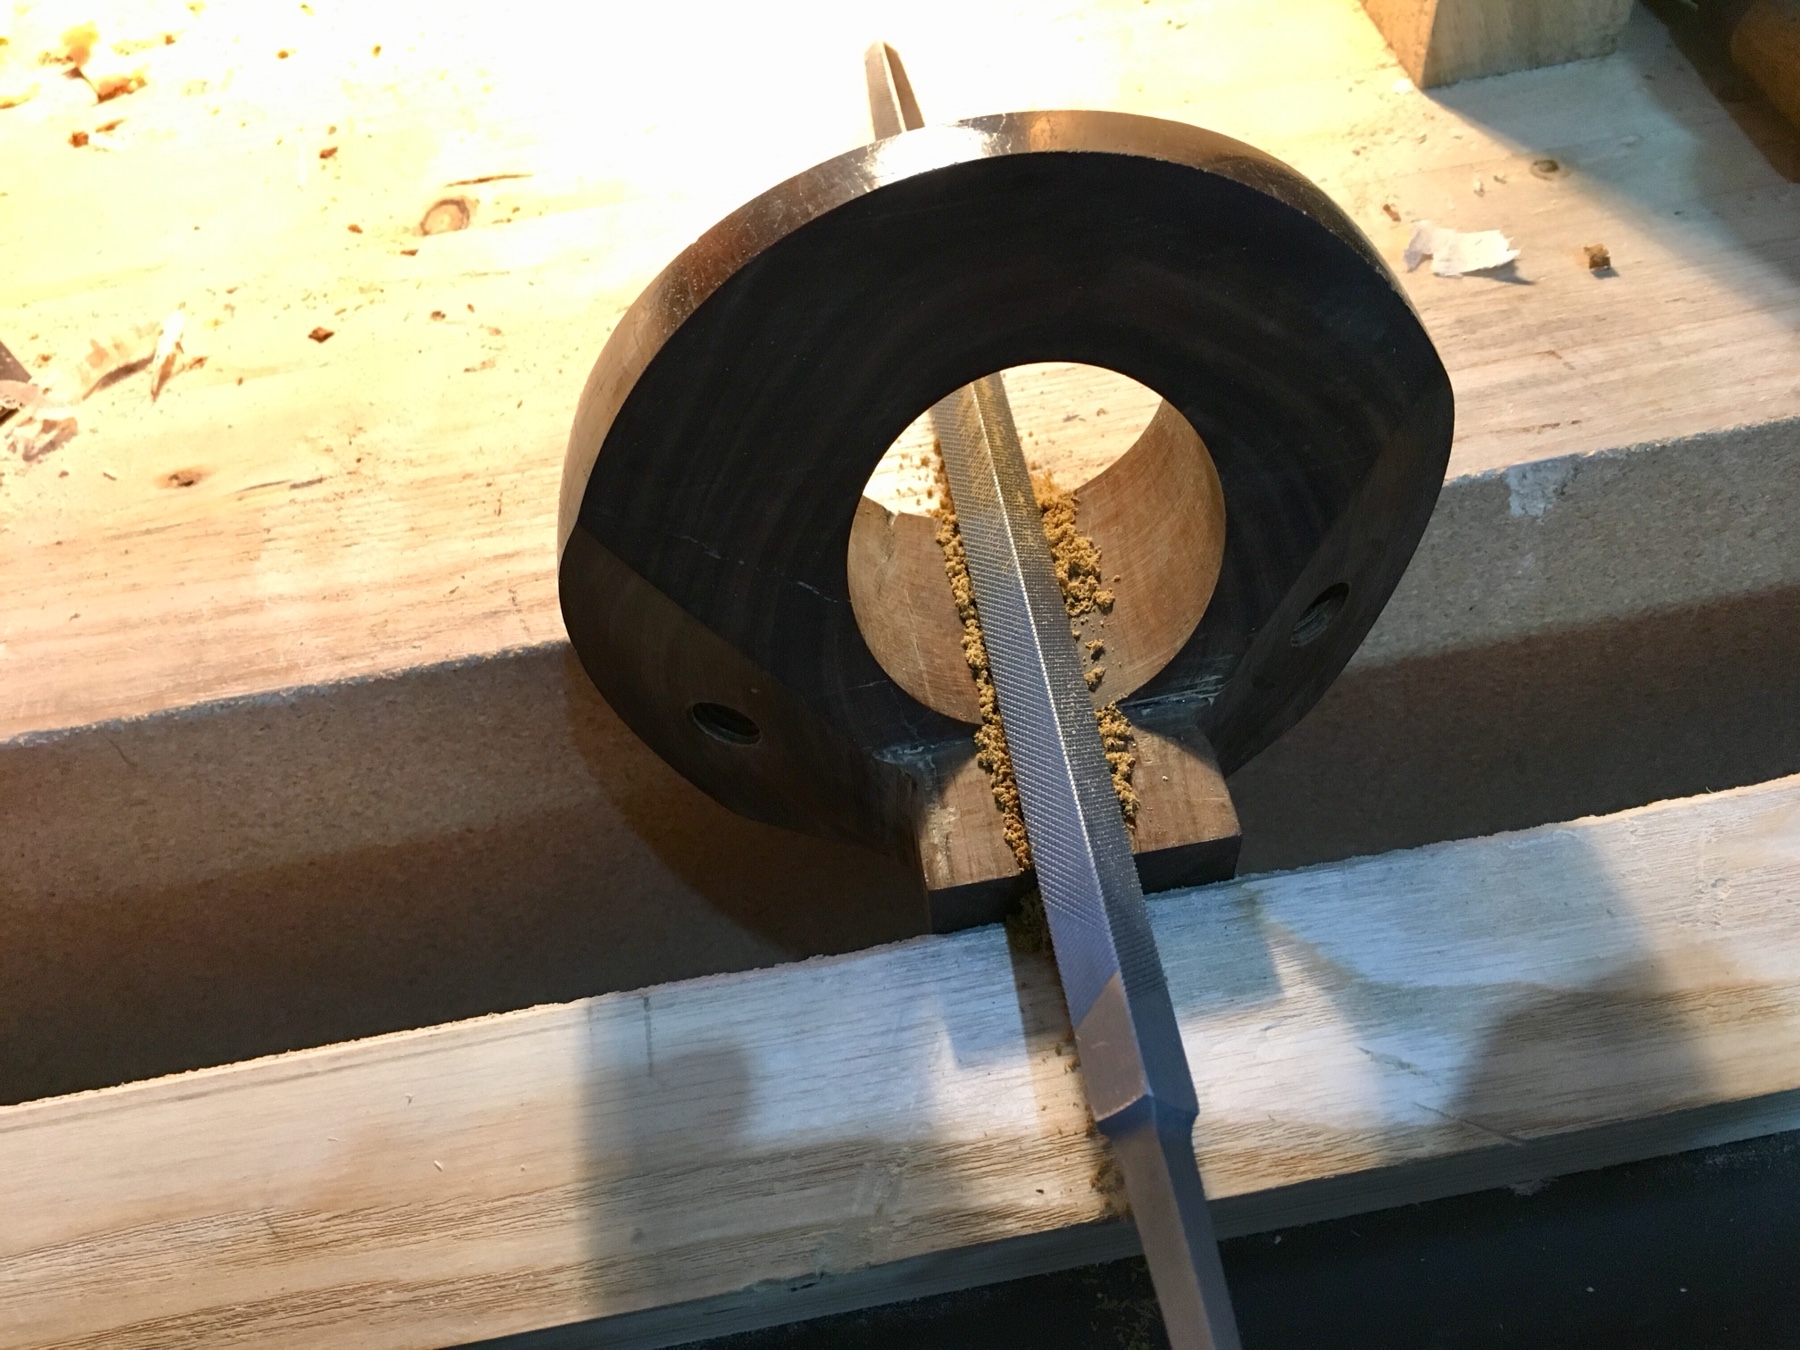
The next step I was dreading as I wanted to cut the tool V-groove as square and accurate as I possibly could. As I don’t have a morticer I throughly maybe the best way to give my a good start with the square hand file was to drill a perpendicular half circle at the drill press, which was done with a correctly sized scrap in the hole (done very rough/quick on the lathe).

21db877a22ce19ef7096f270f9e24b2a.jpg


cc819261b0ef0f3541937d0bfa2d1cd1.jpg


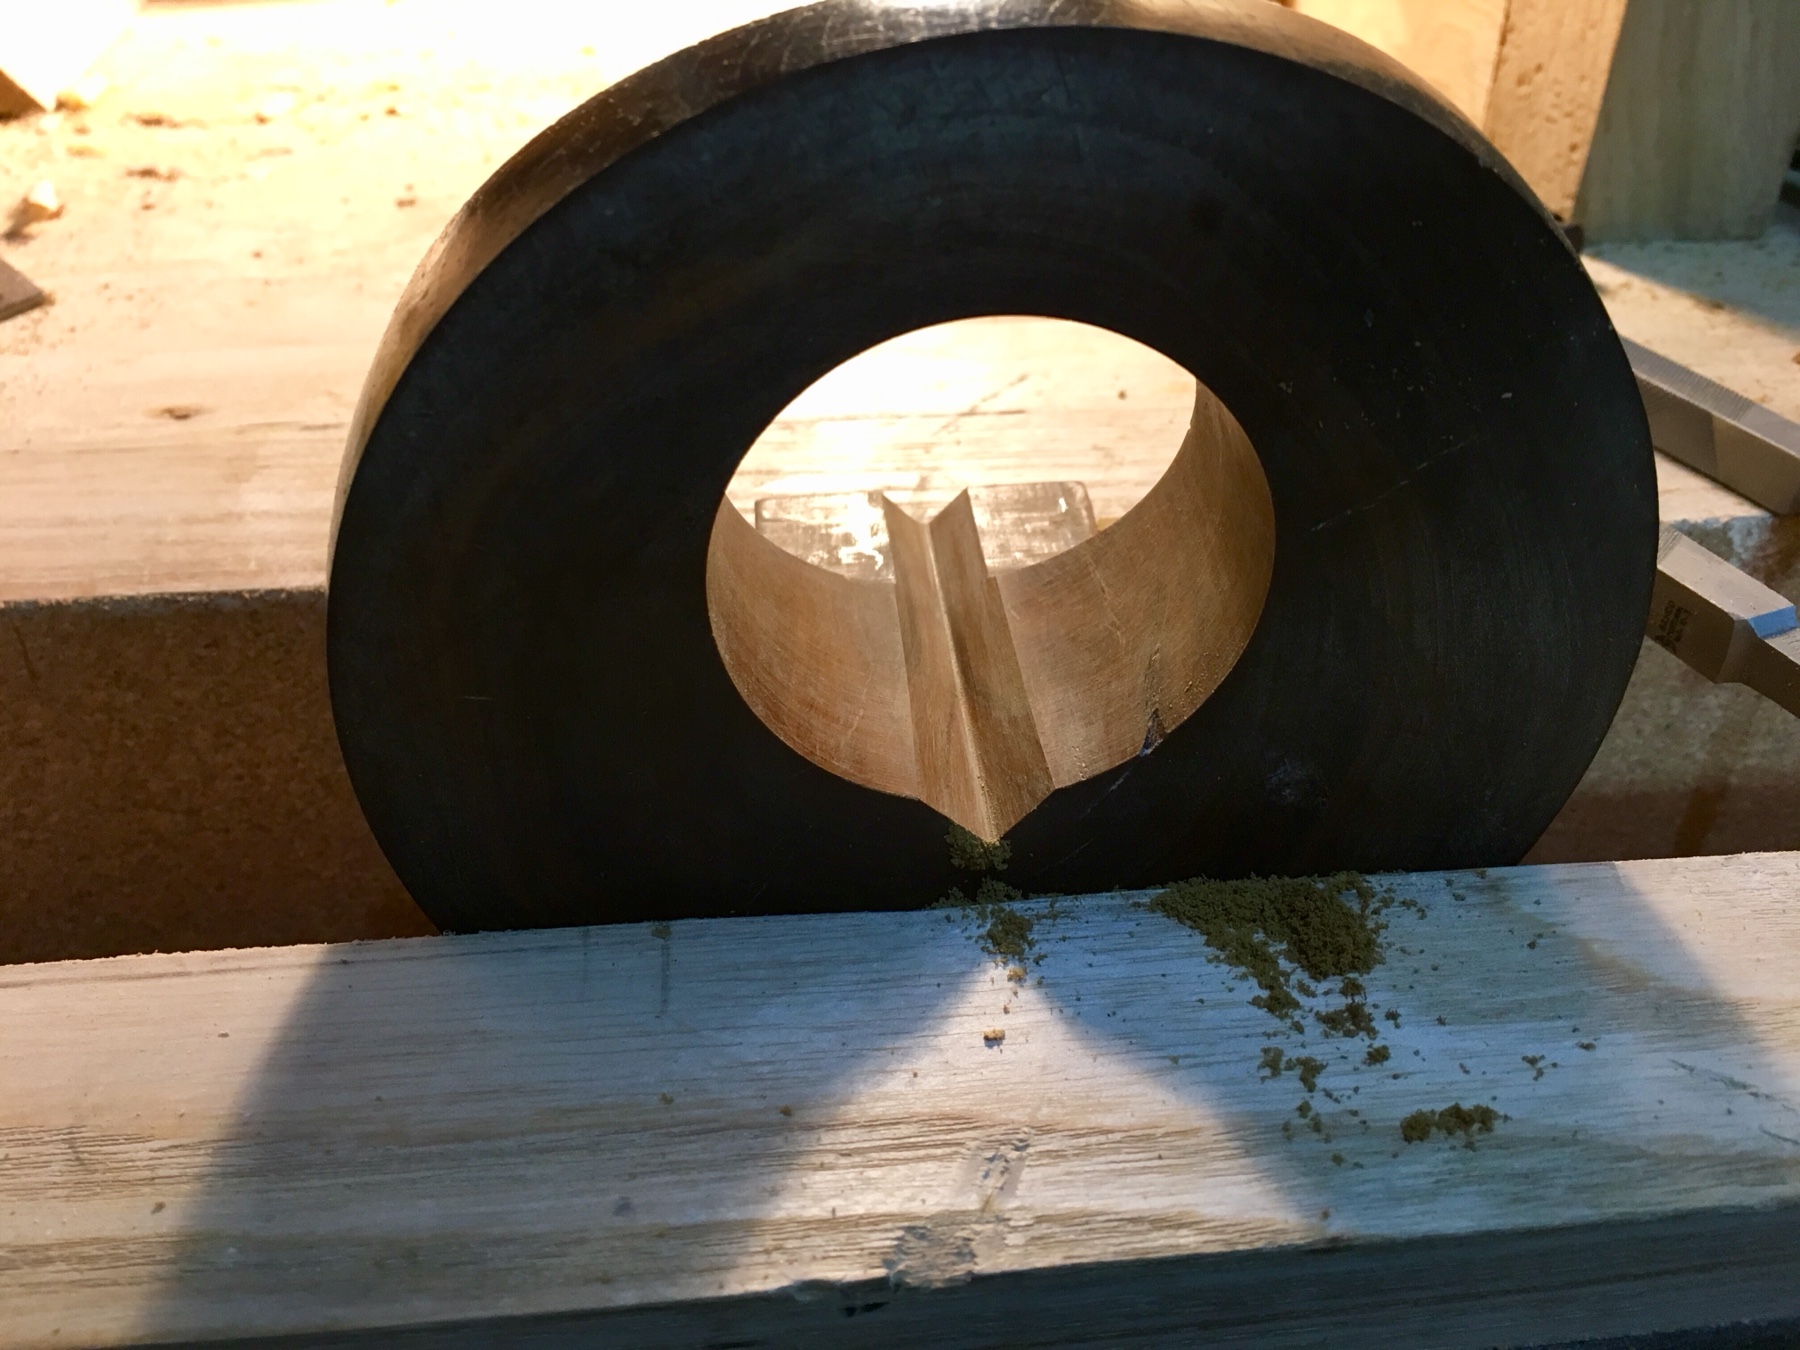
The half circle that I drilled gave the hand file enough support to keep the V-groove as square as possible, and filing the rest by hand wasn’t too bad in the end.

b5145bb8d0d9bcd56693dfa0c1da7e8f.jpg


51da97b40165bf7ca96b3fb886d2bd5d.jpg


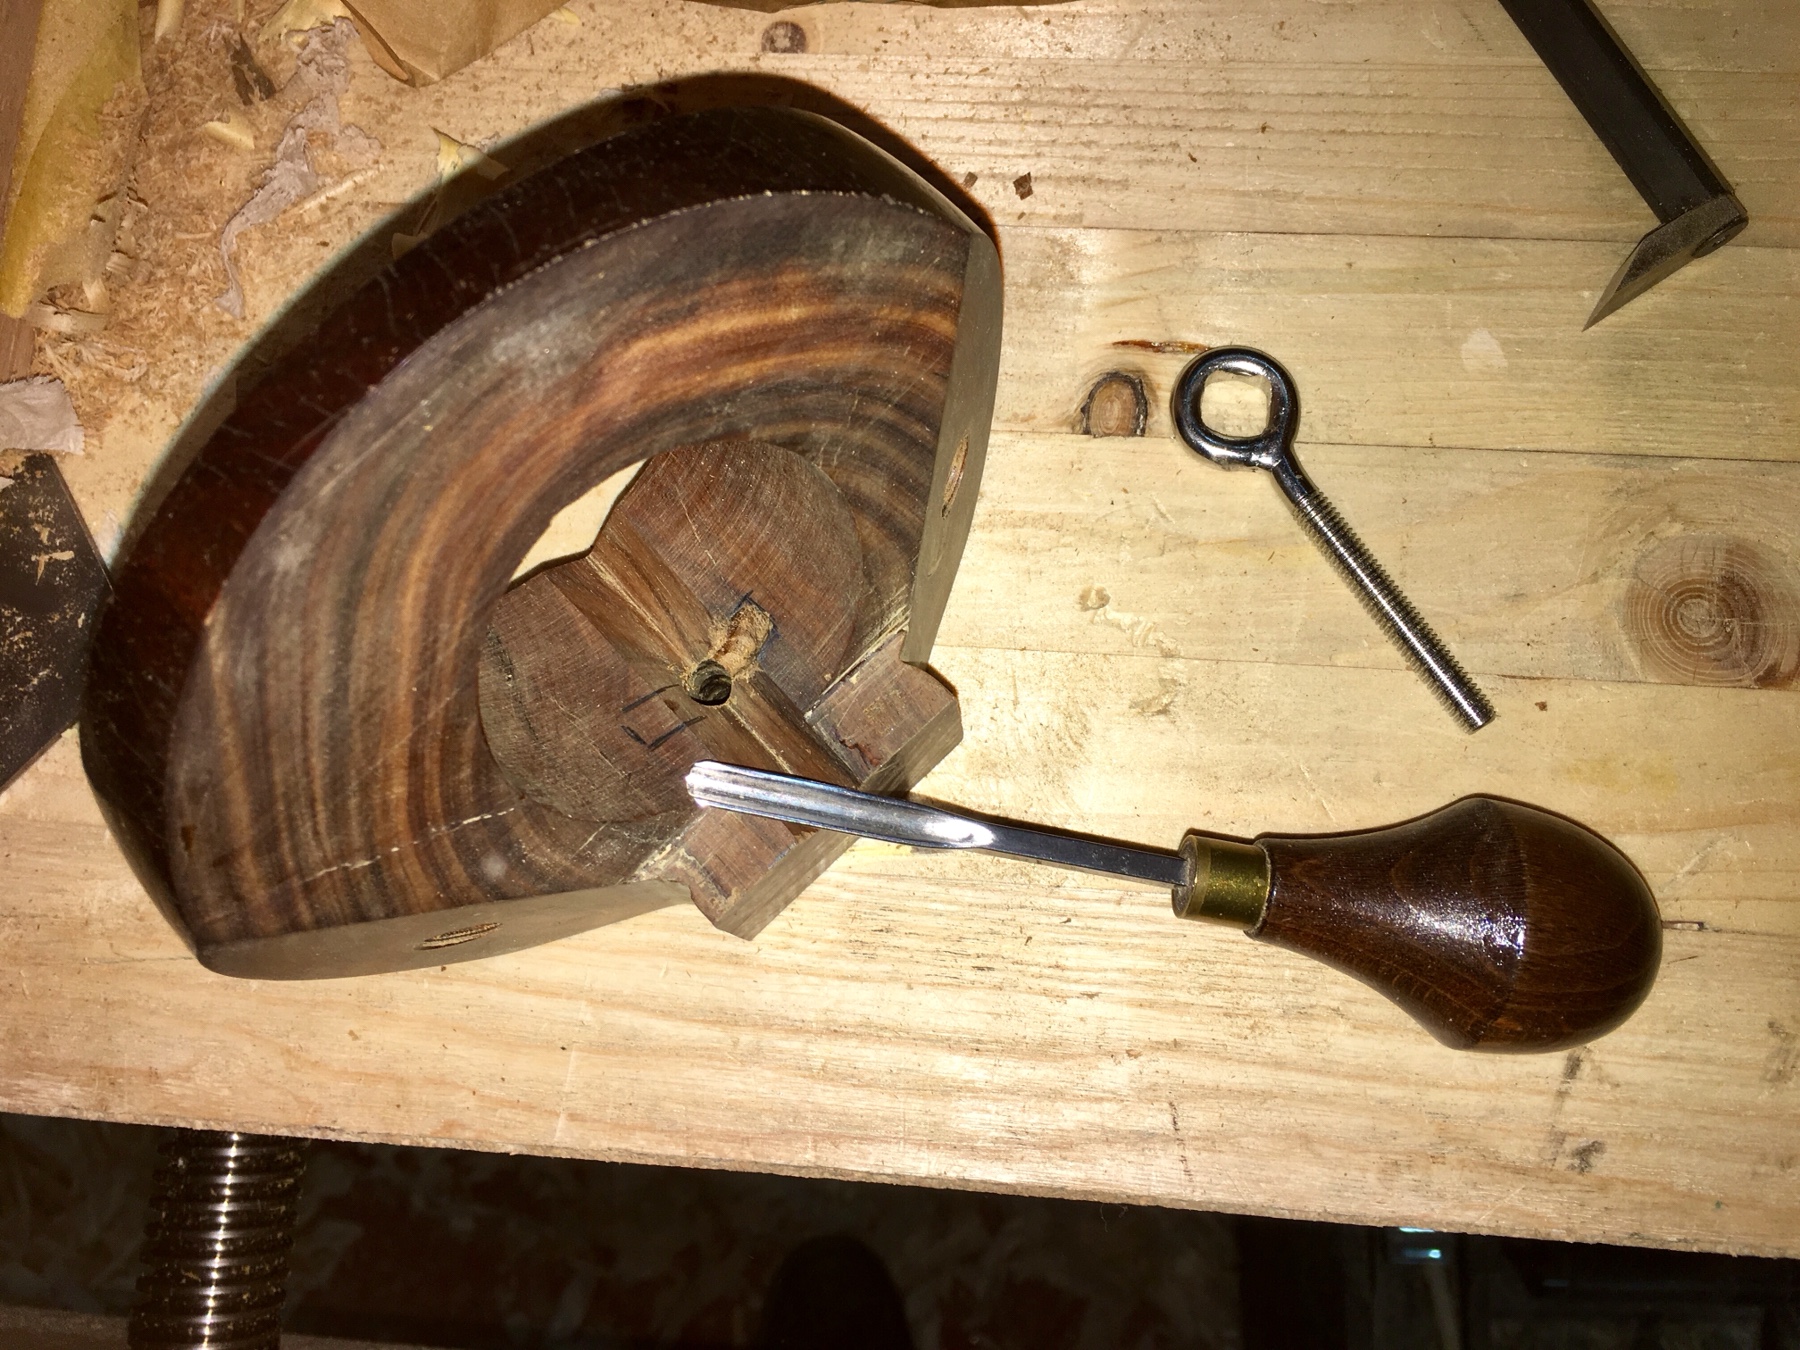
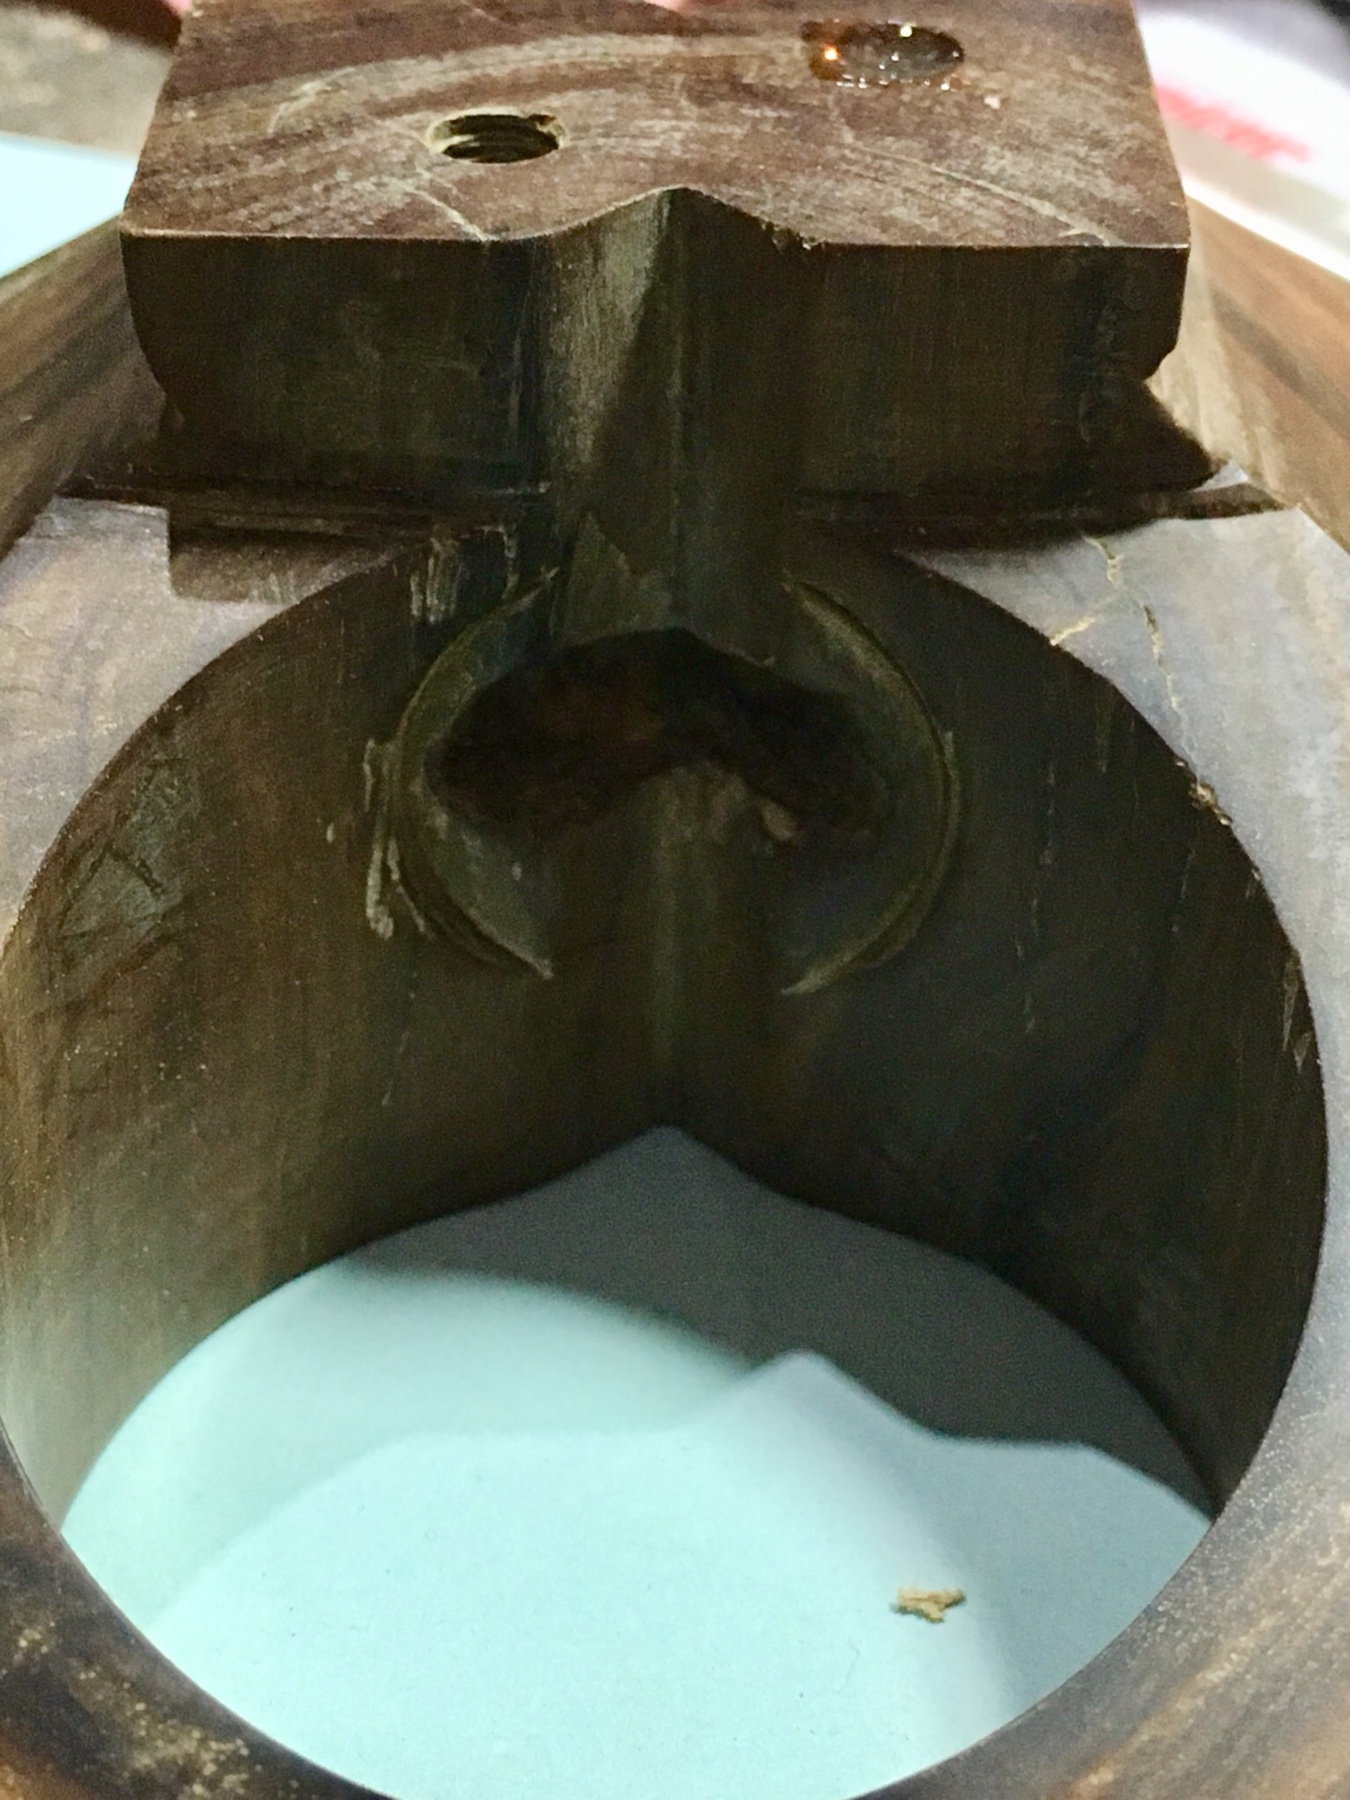
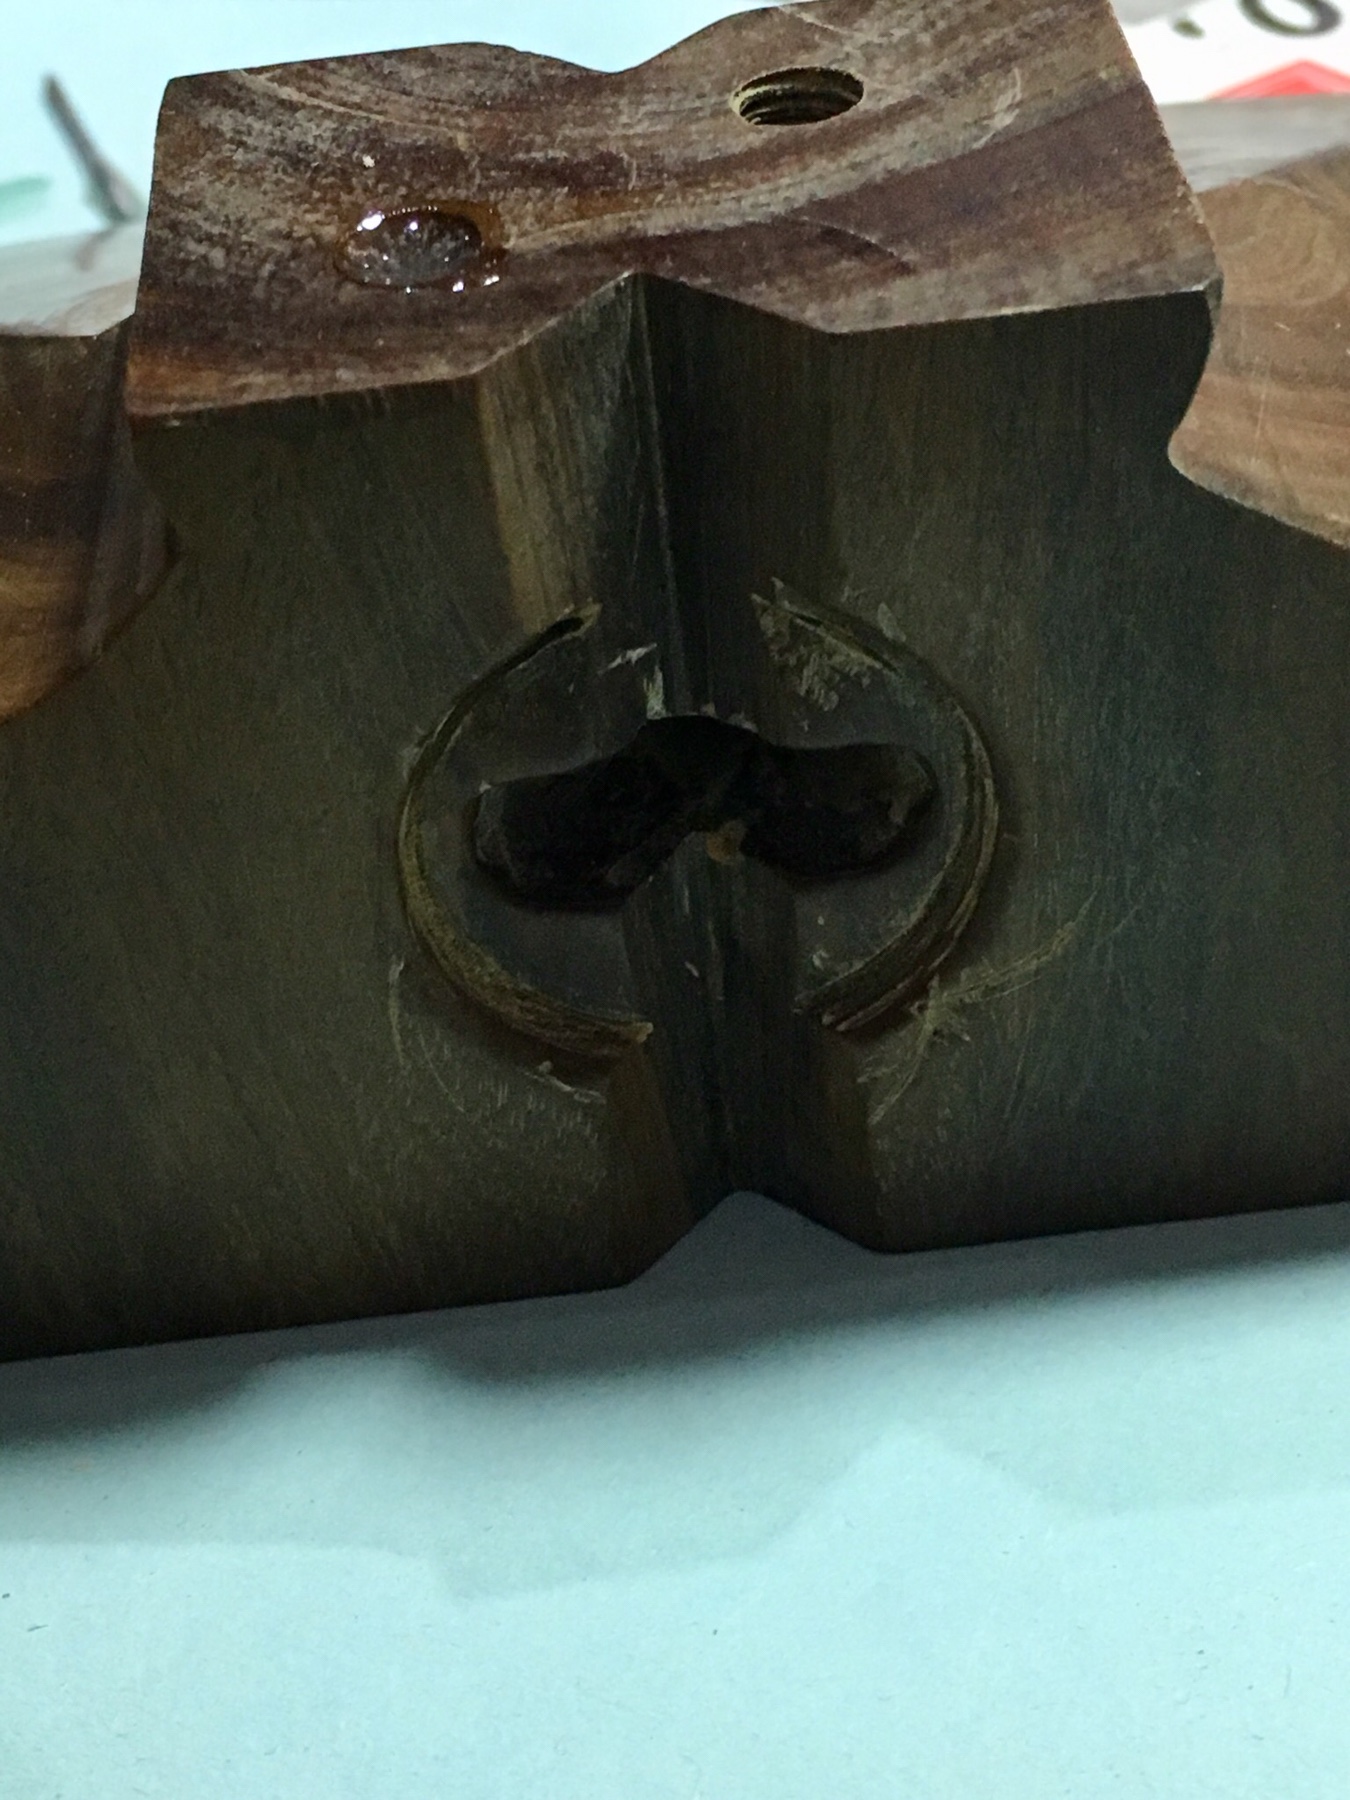
Next was to decide where exactly I wanted the blade clamp eye bolt to go, which I thought exact centre would be about right, so drilled that on the drill press. I then had to cut out a recess to enable the eye bolt to clamp the blade properly, this was done with a small carving gouge.

daee9e1b250ac2f618661597937c557f.jpg


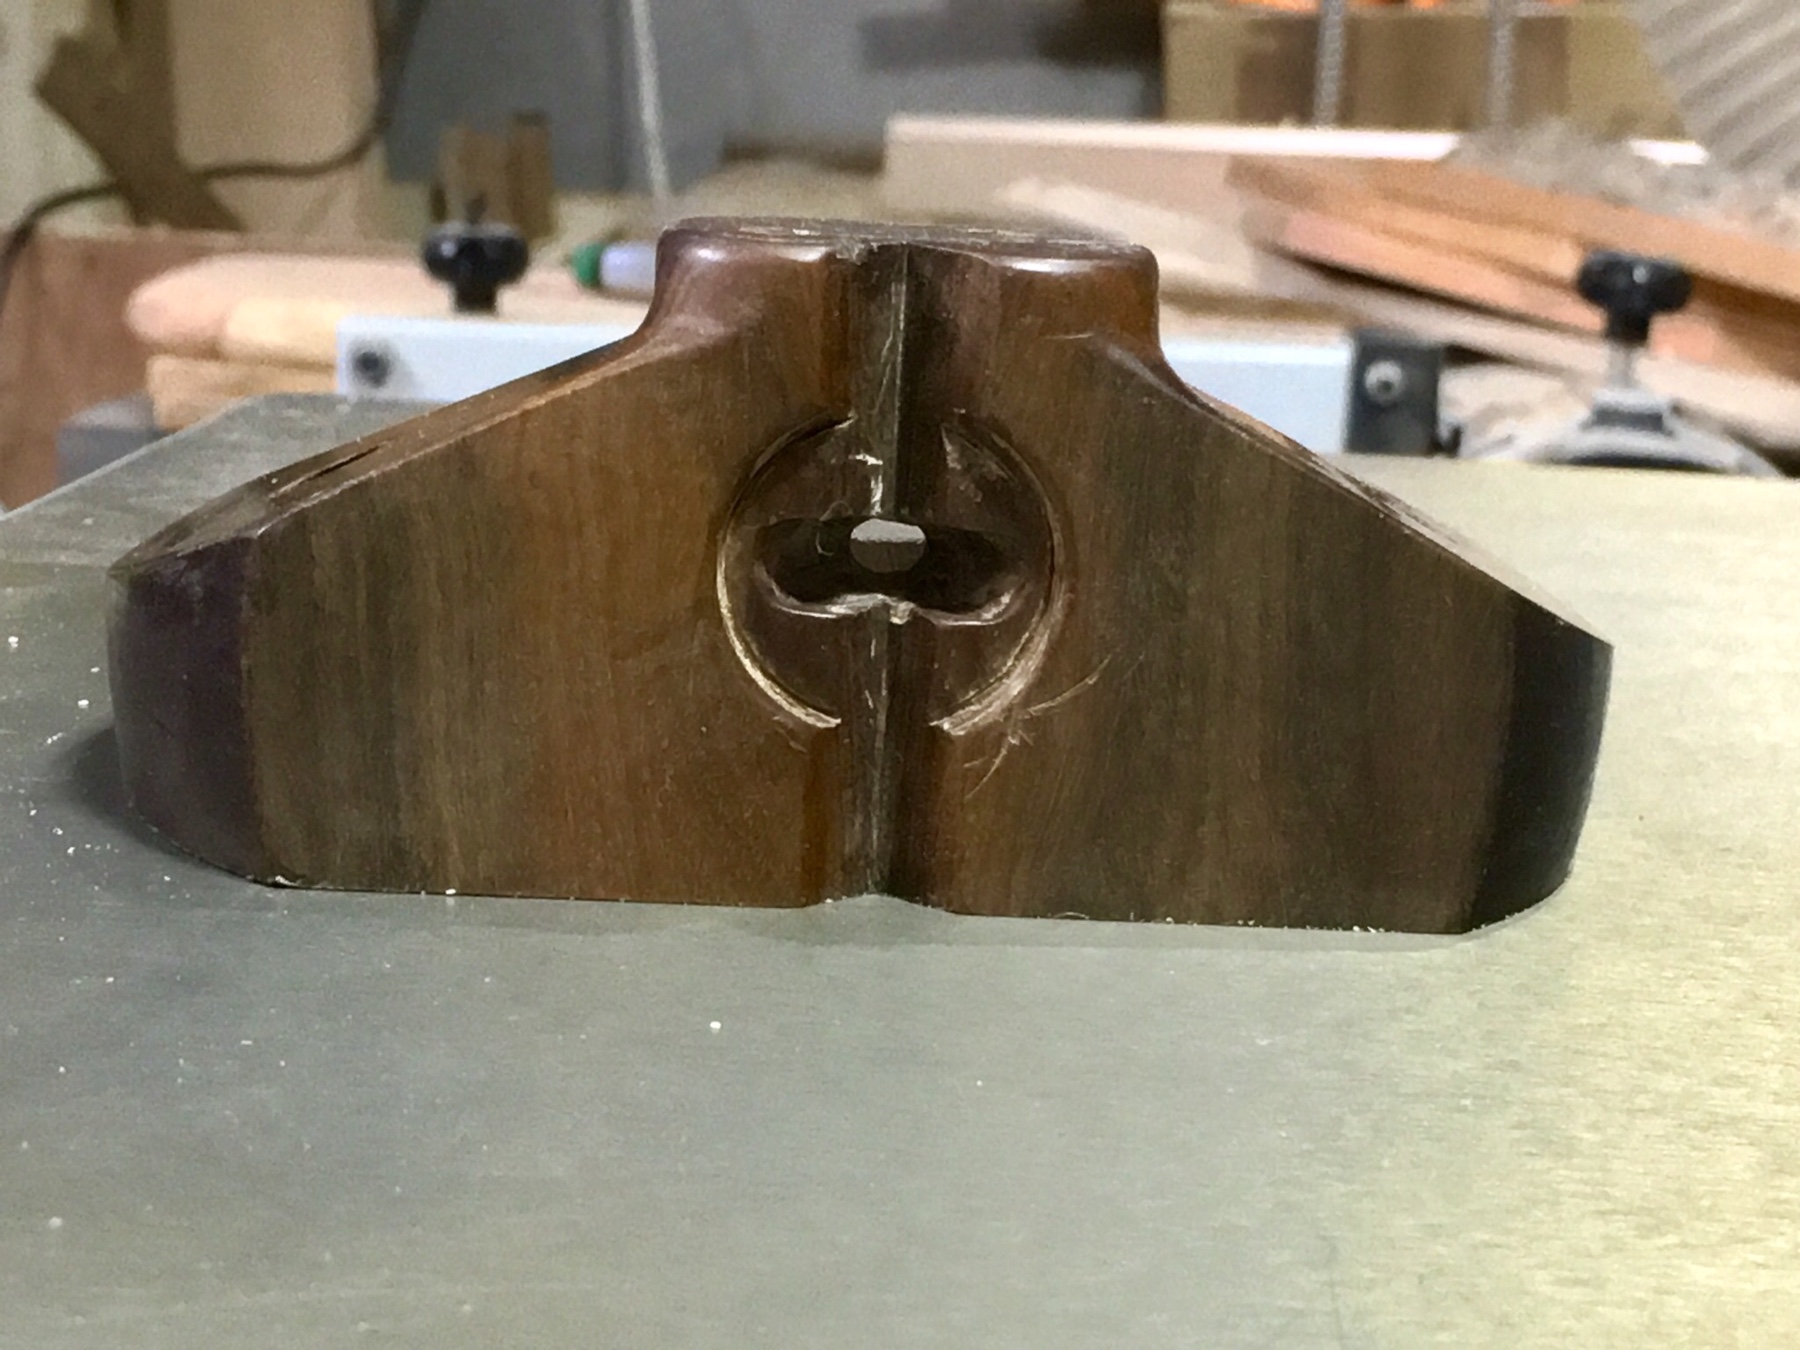
In the meantime I’d actually tried out the Veritas plane in the Axminster store in Cardiff, and realised that you can use the blade on the read of the pane too which would give greater flexibility and provide greater support when cutting over an edge, so thought that would be advantageous and decided to make the plane adaptable to be able to use the blade at the rear too, so cut a V-groove to the rear as well. But in doing that it meant that I would also need a flat surface to be able to register the eyebolt thumb screw to either the inside or the rear, so I used a Forstner bit to cut a flat circular recess for a washer. I also drilled two holes to the top which I threaded to M6 size for the blade fine adjuster (I picked M6 as it’ thread has an exact 1mm pitch, so one full turn of the adjustment knob means a rise or lowering of exactly 1mm).

40ef0b3c3f10743cb0ebacf7b7c0b89d.jpg


be71fe8ee7c2d523289562232301a0be.jpg


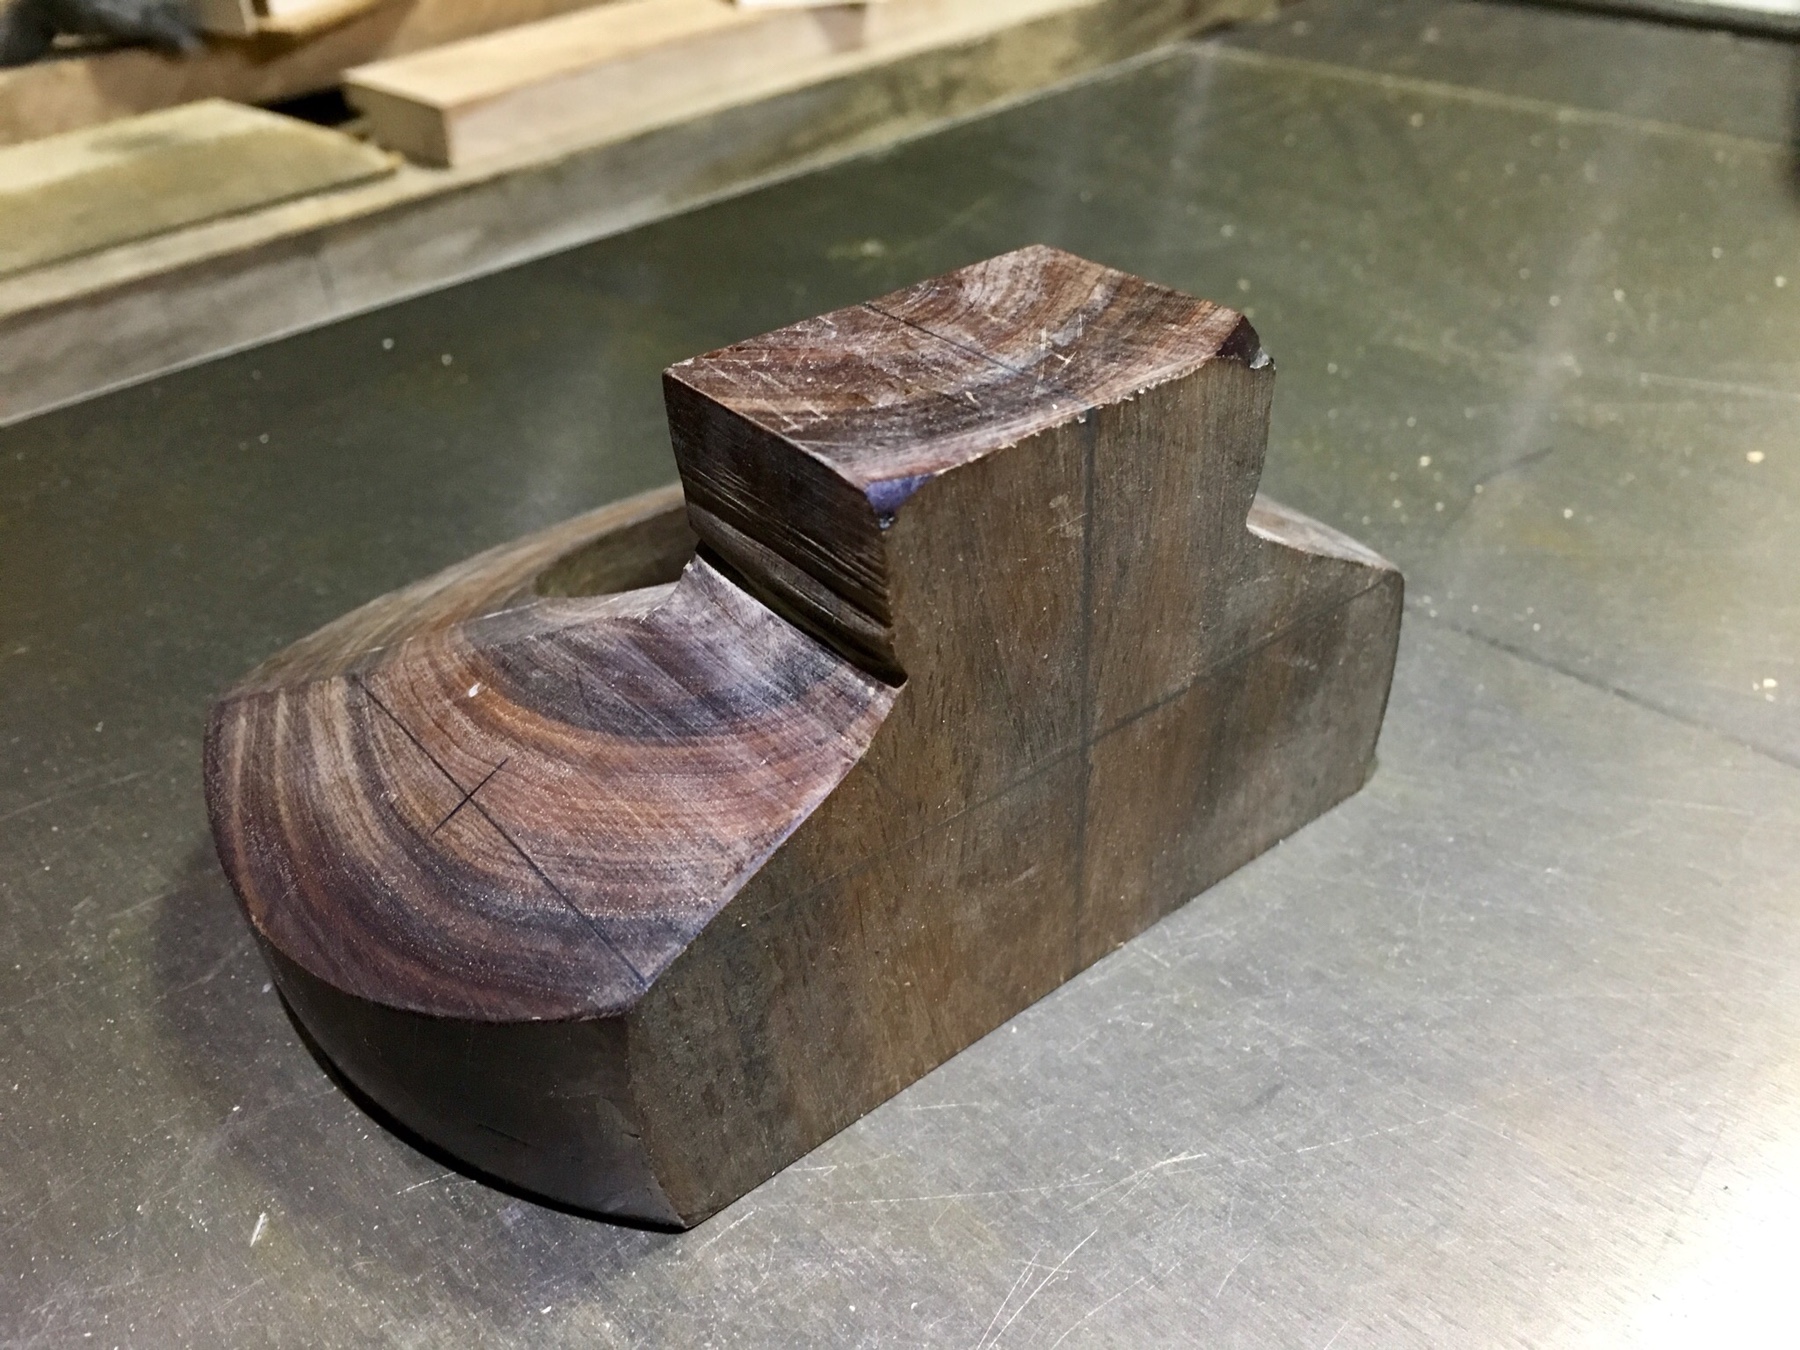
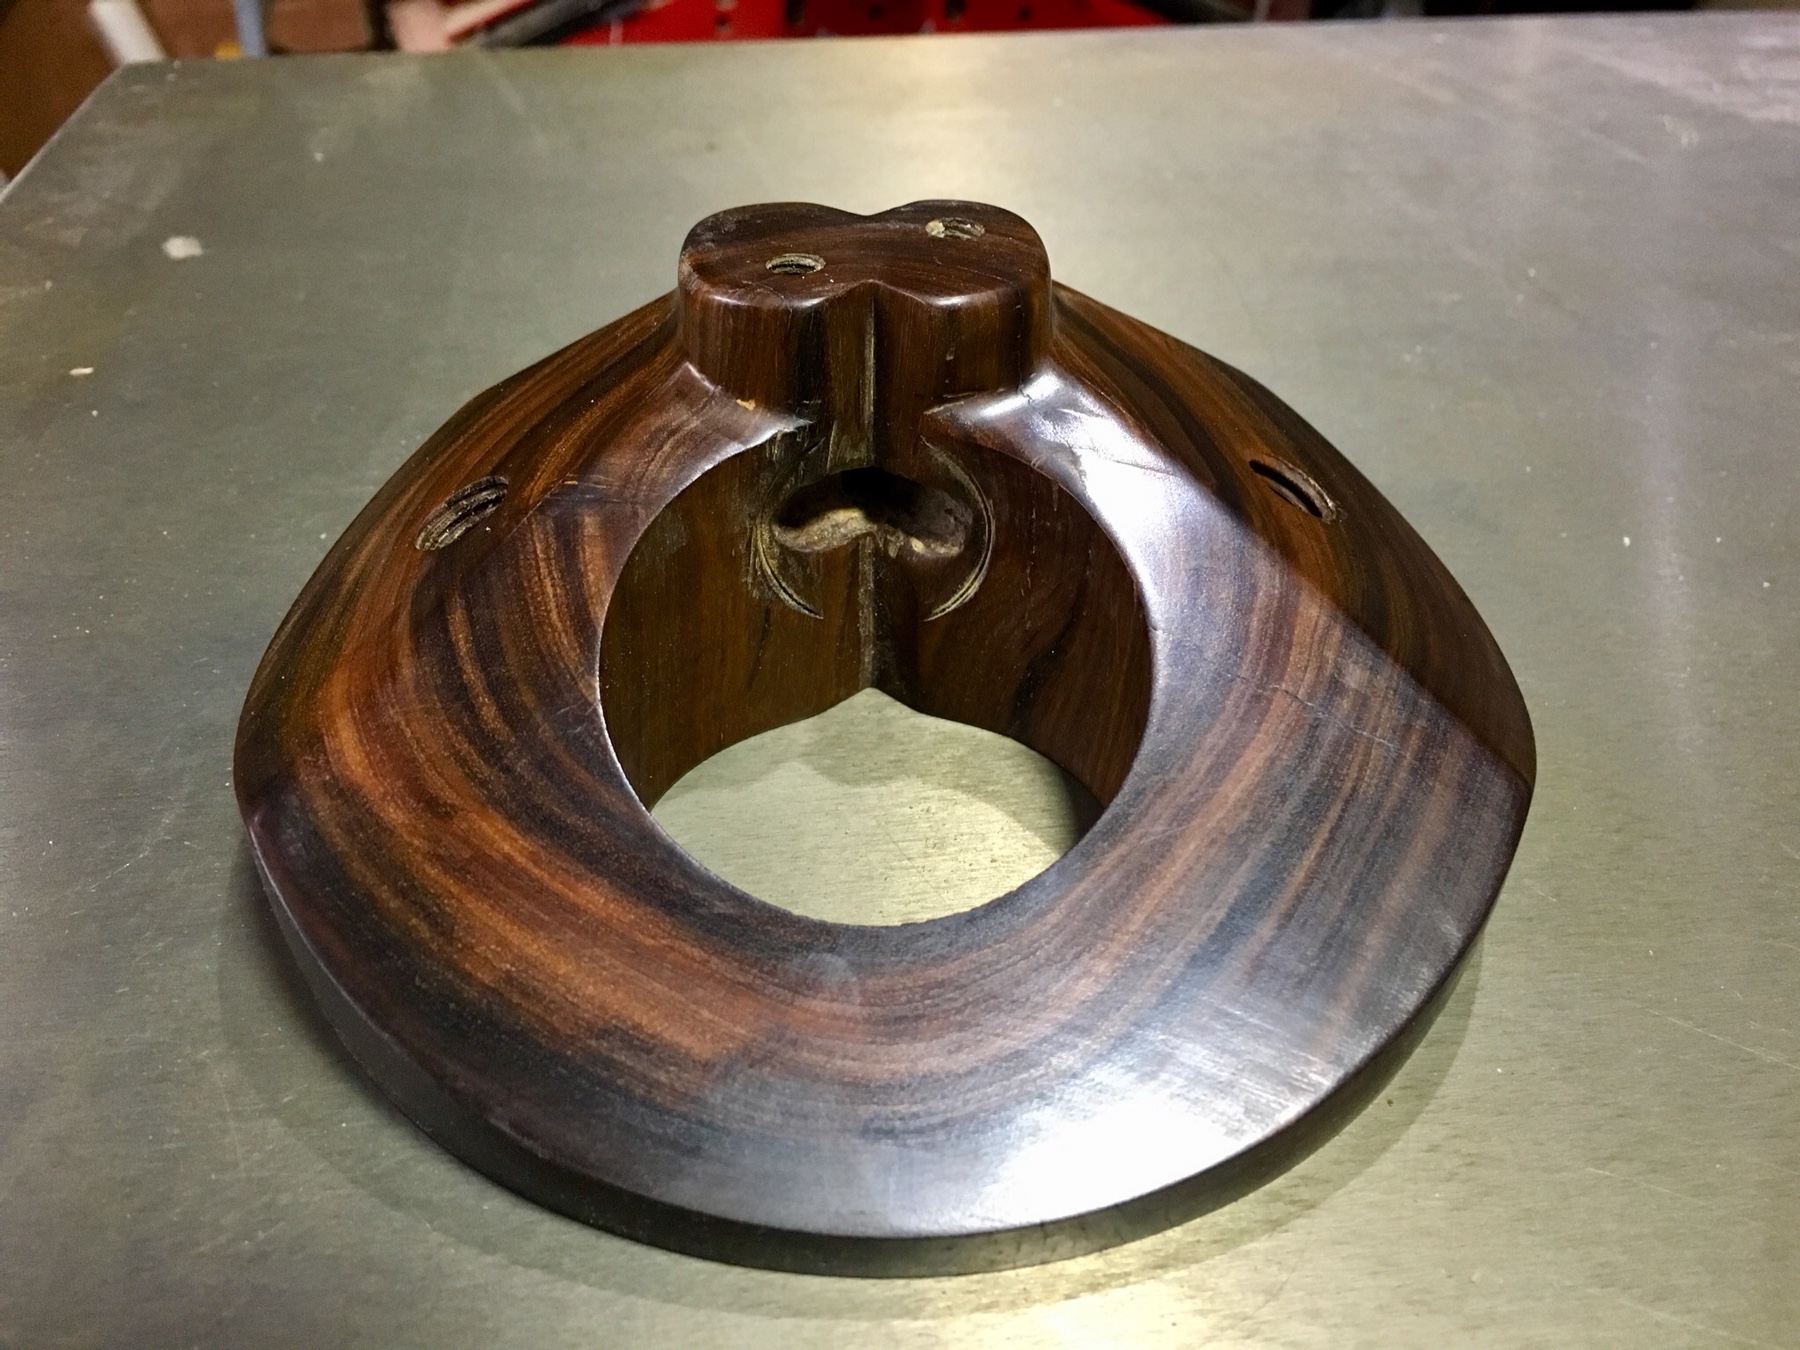
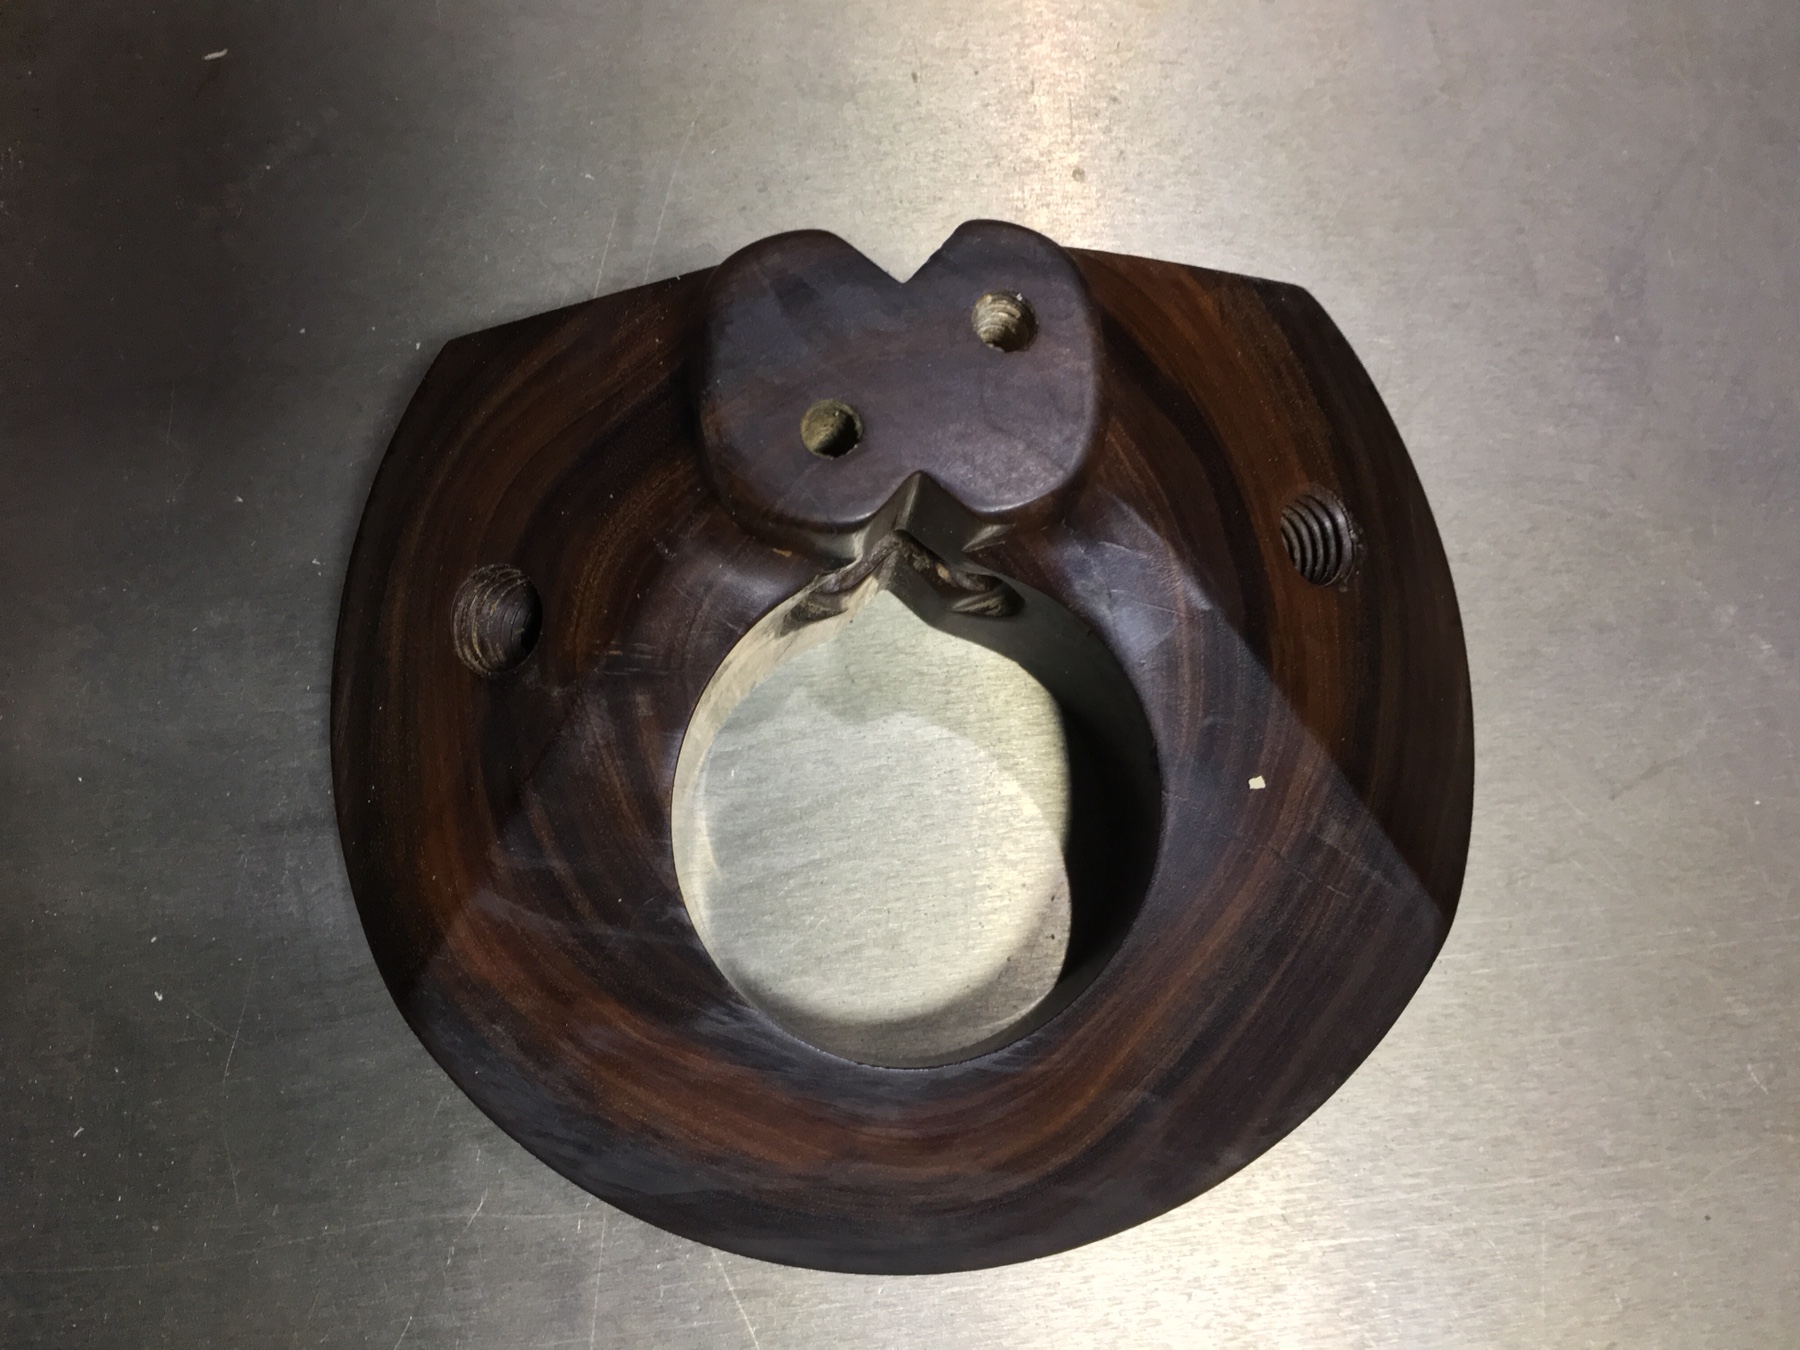
I then spent a while shaping the body by using carving chisels and lots and lots and lots of hand sanding, so the finished body currently looks like below. I’ve kept the outer circumference of the plane as the ball’s original surface as both a hint at its original use and to maximise surface area of the bottom. I’ve only buffed the body so far though (with an old waxy rag, hence a little sheen), but I do plan on using Alfie Shine once I’m satisfied that the plane body is finished.

42661cd2ba45f10a123890ecff4712bb.jpg


29bf4d84dd550dfb0b6c886769ab6e4d.jpg


d547ec869b5ede21dbc469021d6dd815.jpg


Will write up the handles and hardware when I get a chance next. And sorry for the long winded explanations and overkill on the photos :D
 
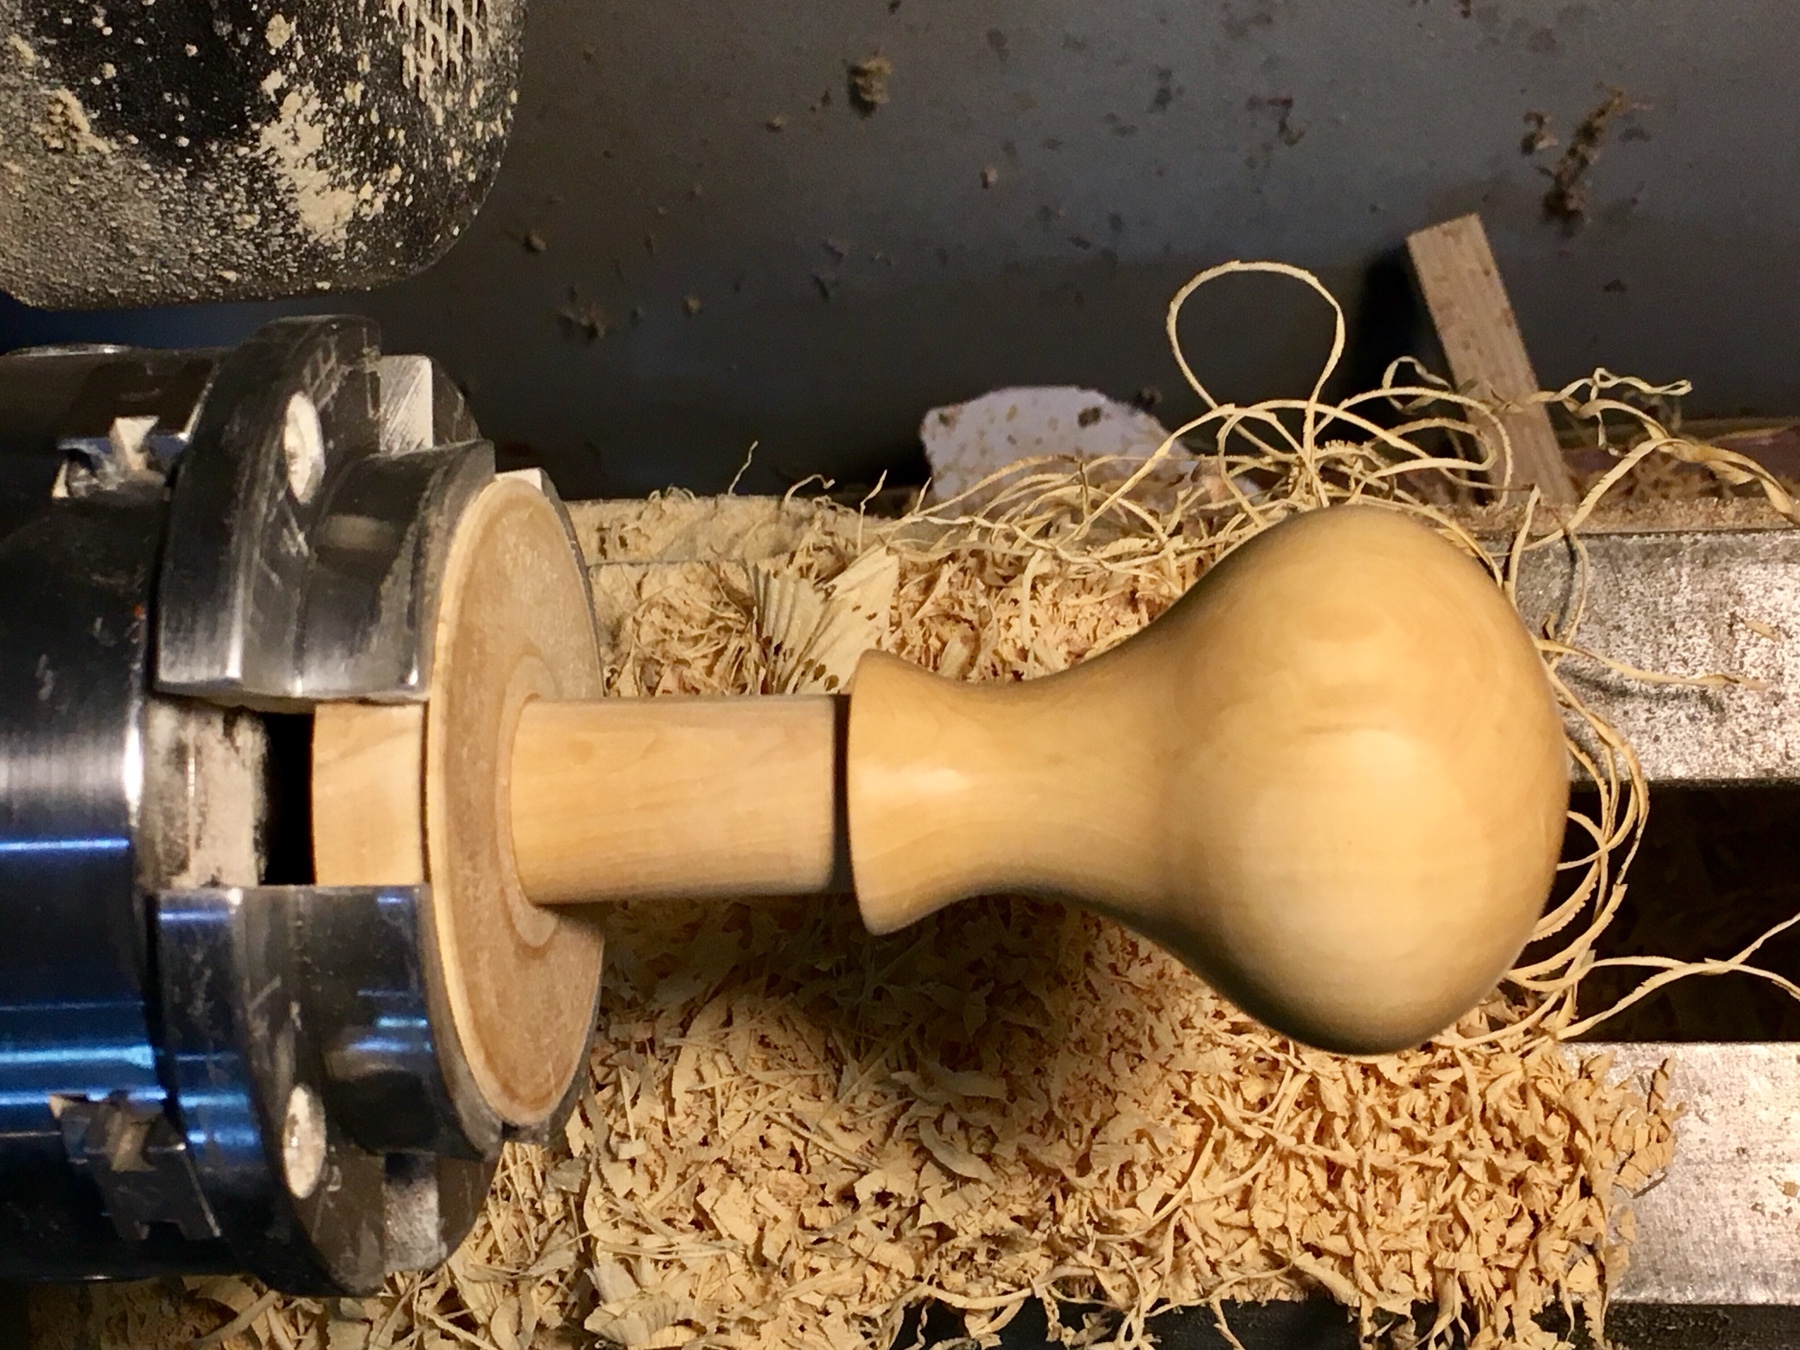
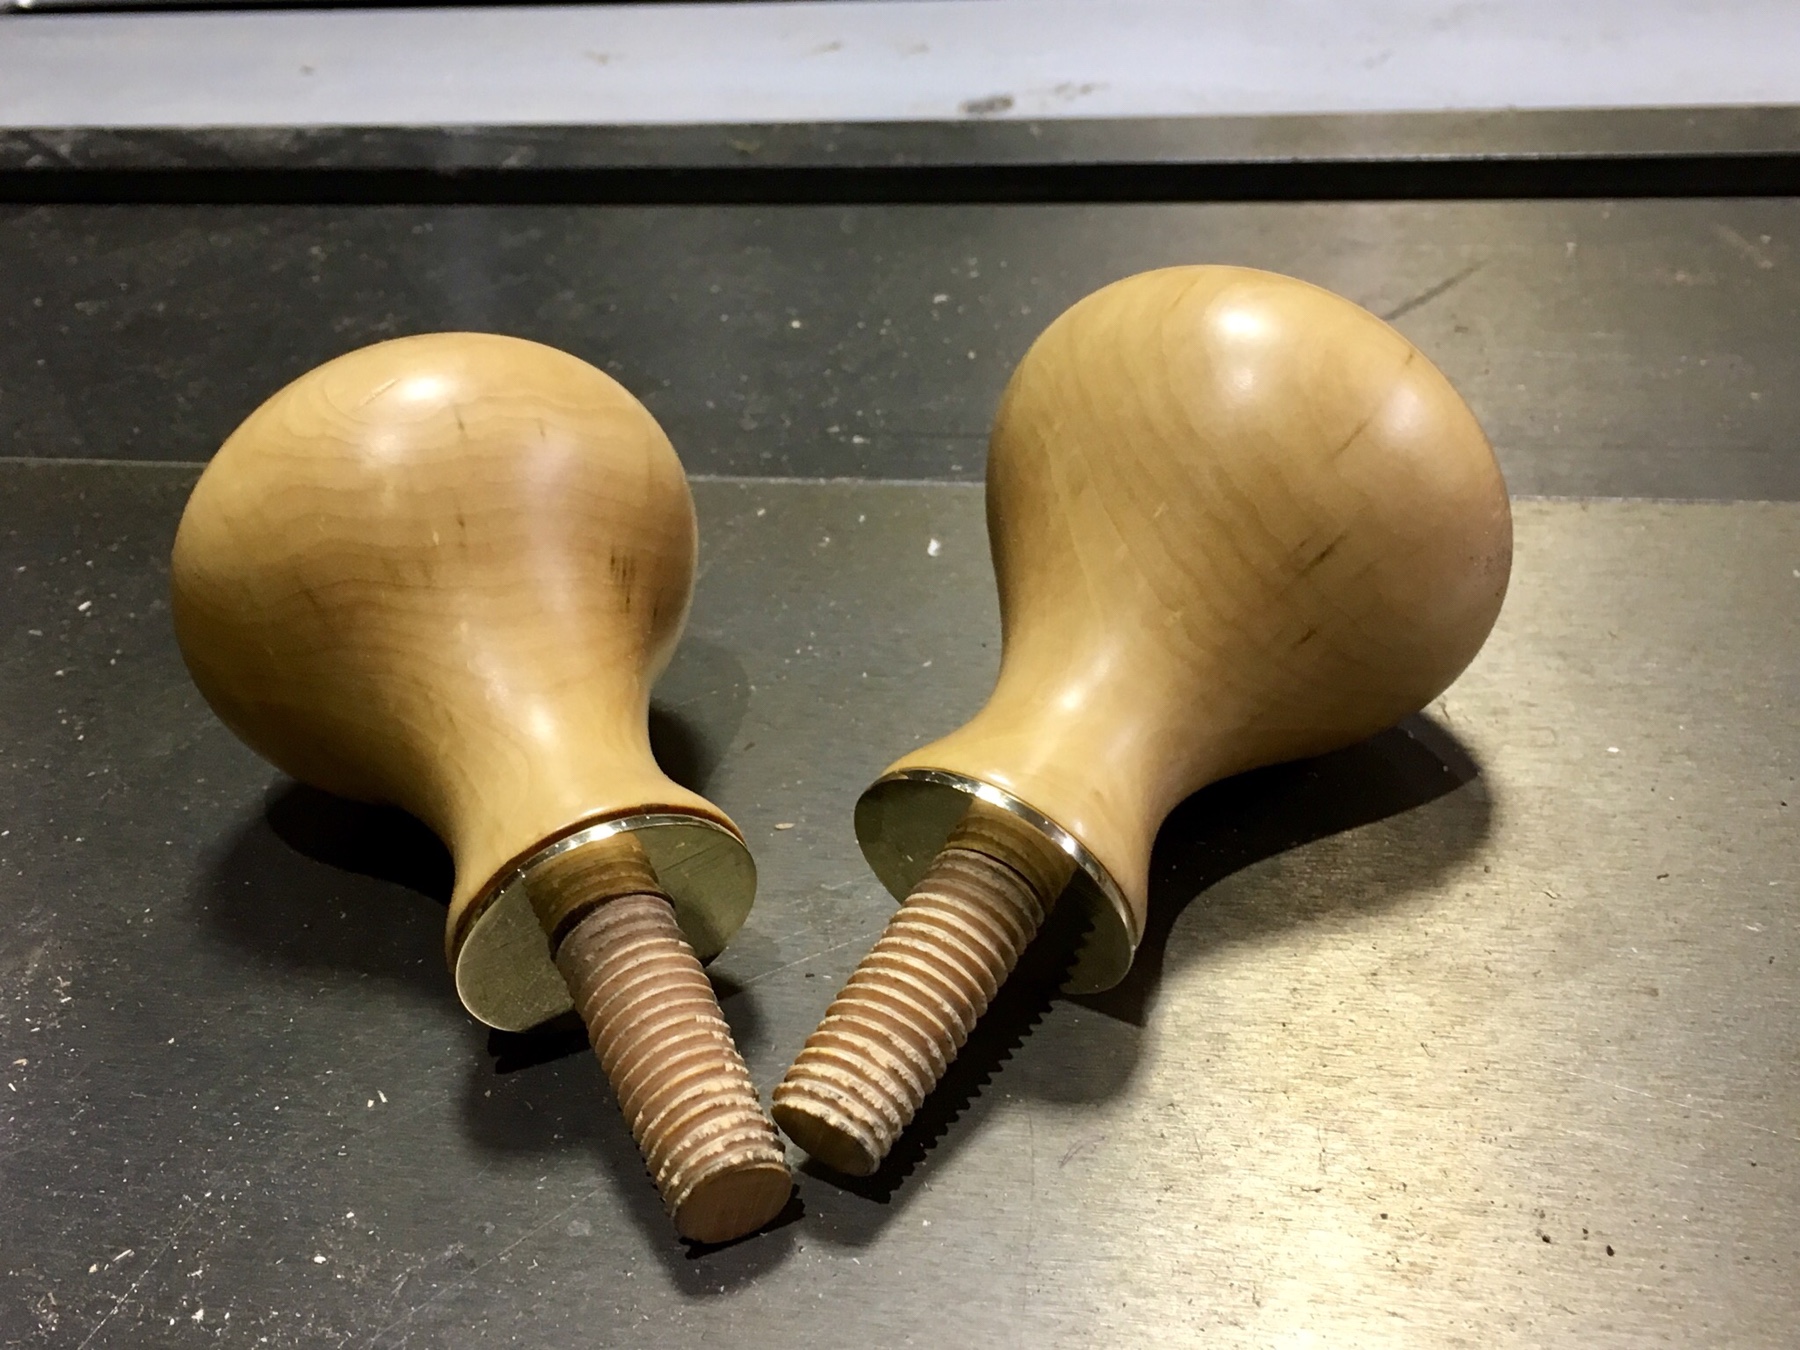
So for the handles I decided to use boxwood, which I’ve got a small stock which comes in handy for just such an occasion. So I turned the first handle on the lathe until i found a shape which I liked and was happy with. Then turned the base to as close as possible to 12mm. Replicating the handles was a challenge for me as I’ve not done any replicating on the lathe before. They’re not an exact match, but I’m happy with the result.

aa9f2c3b262e3a769ea5872d598ff3d6.jpg


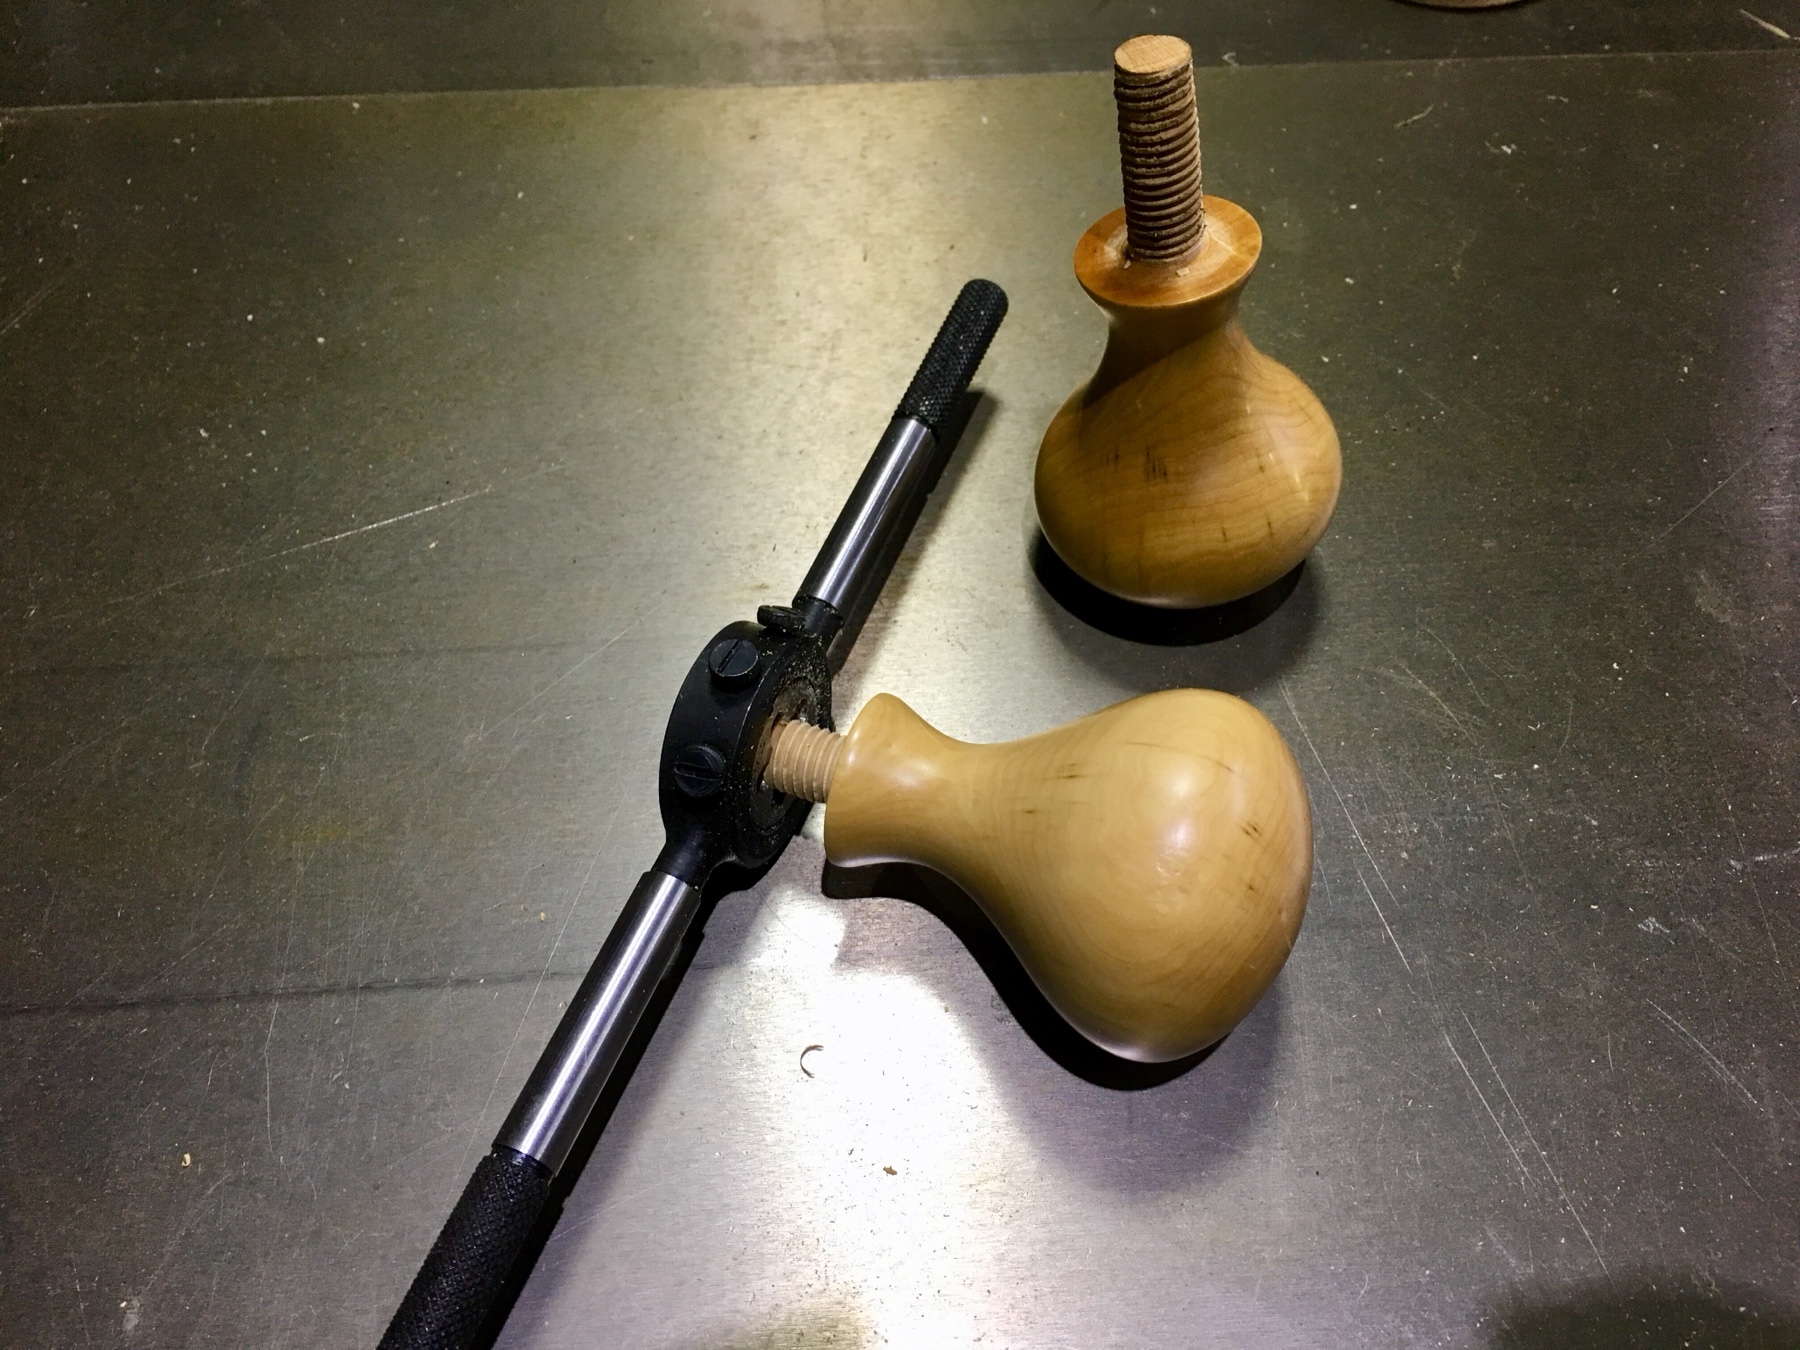
In order to thread the handles into the body I used an M12 die. It’s not some special wood tap, but it worked great. The boxwood did chip out a little, but the threads work great.

e7745fdbb6714f6d3786a7b56bfab34d.jpg


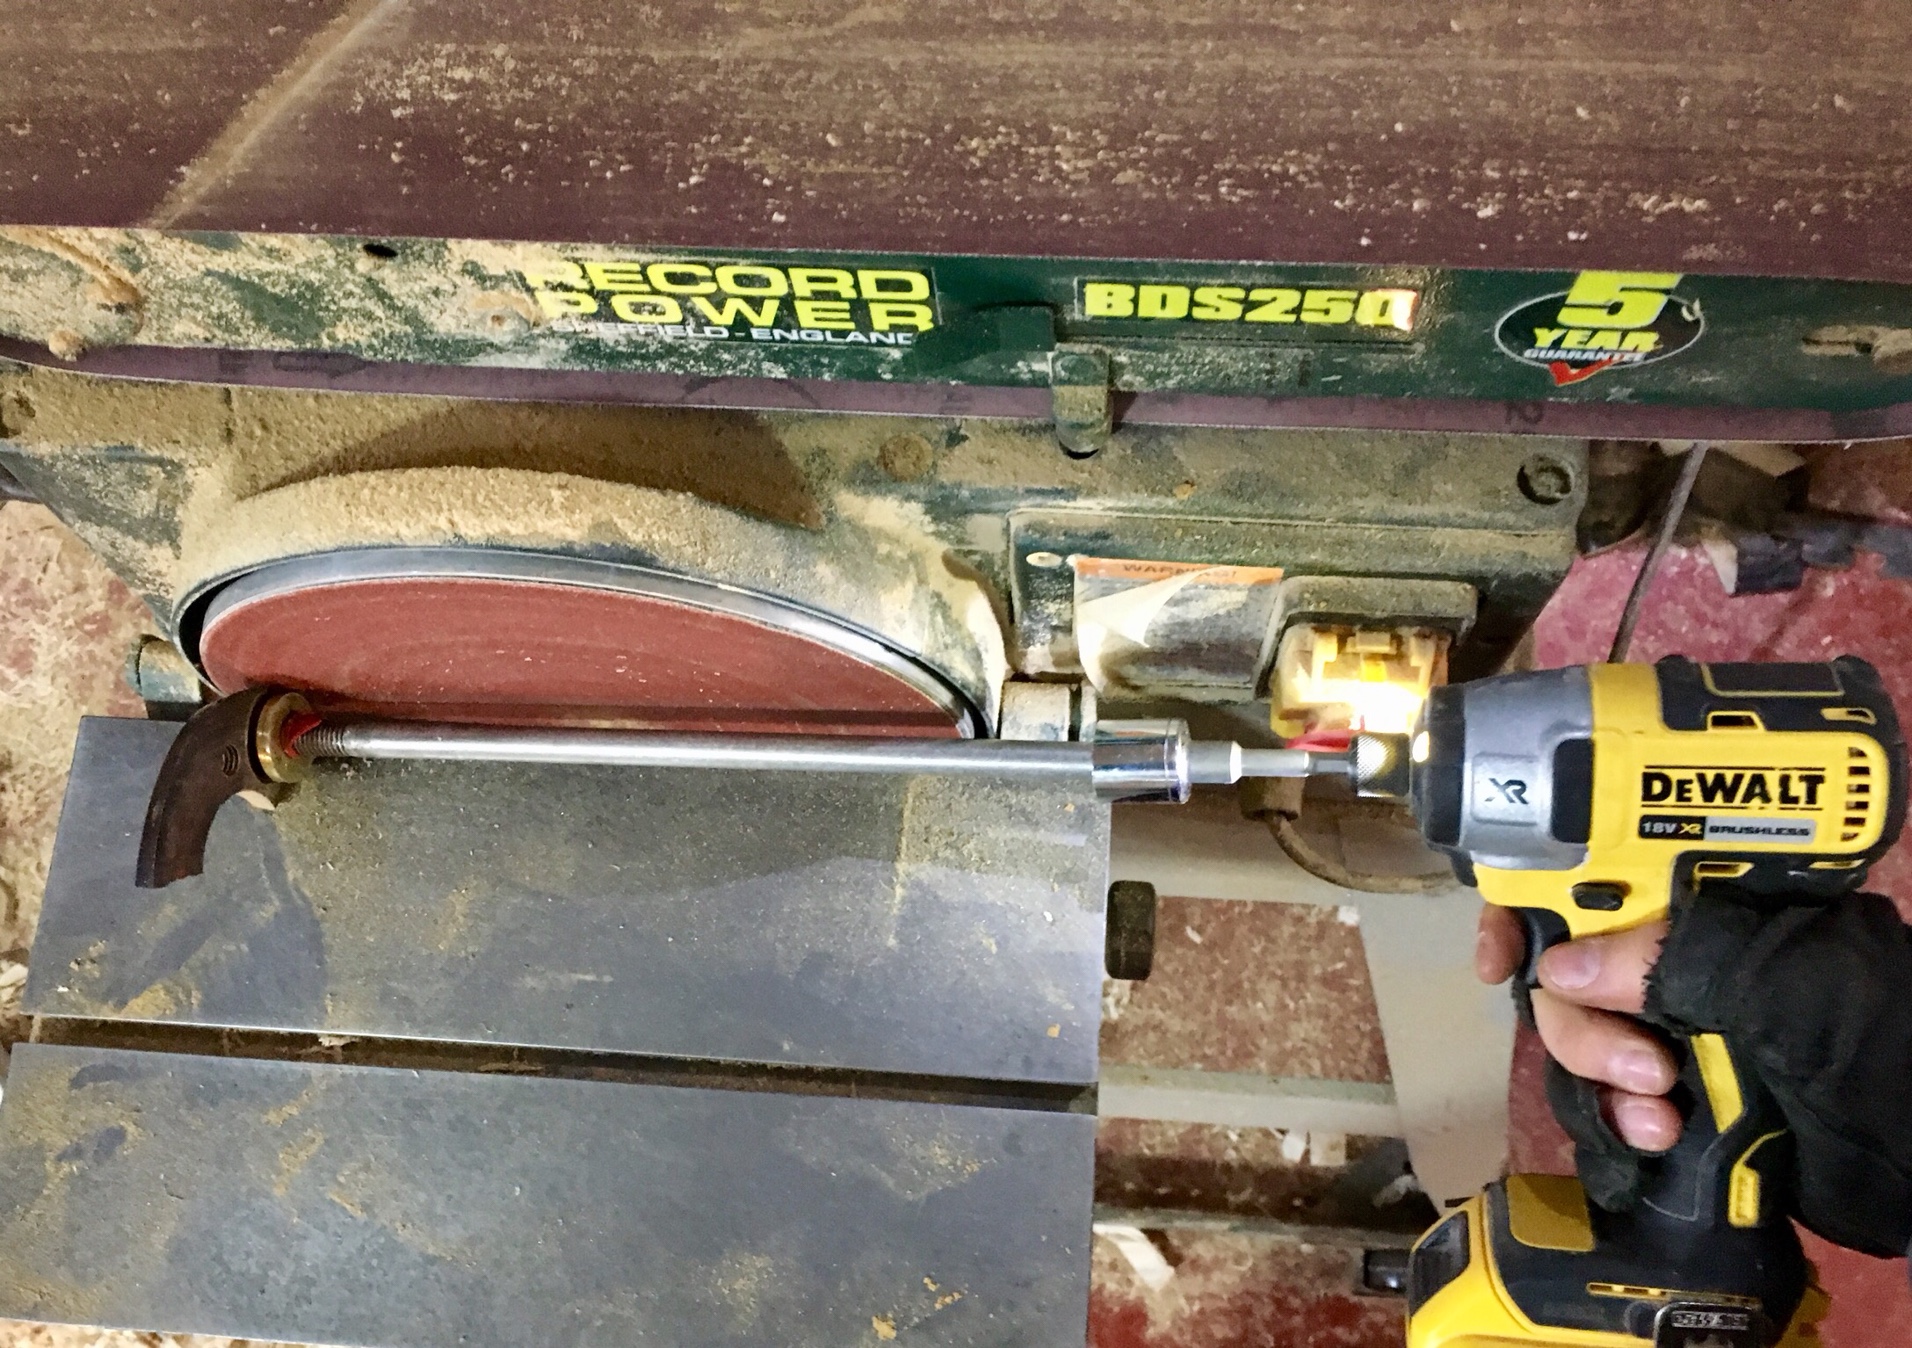
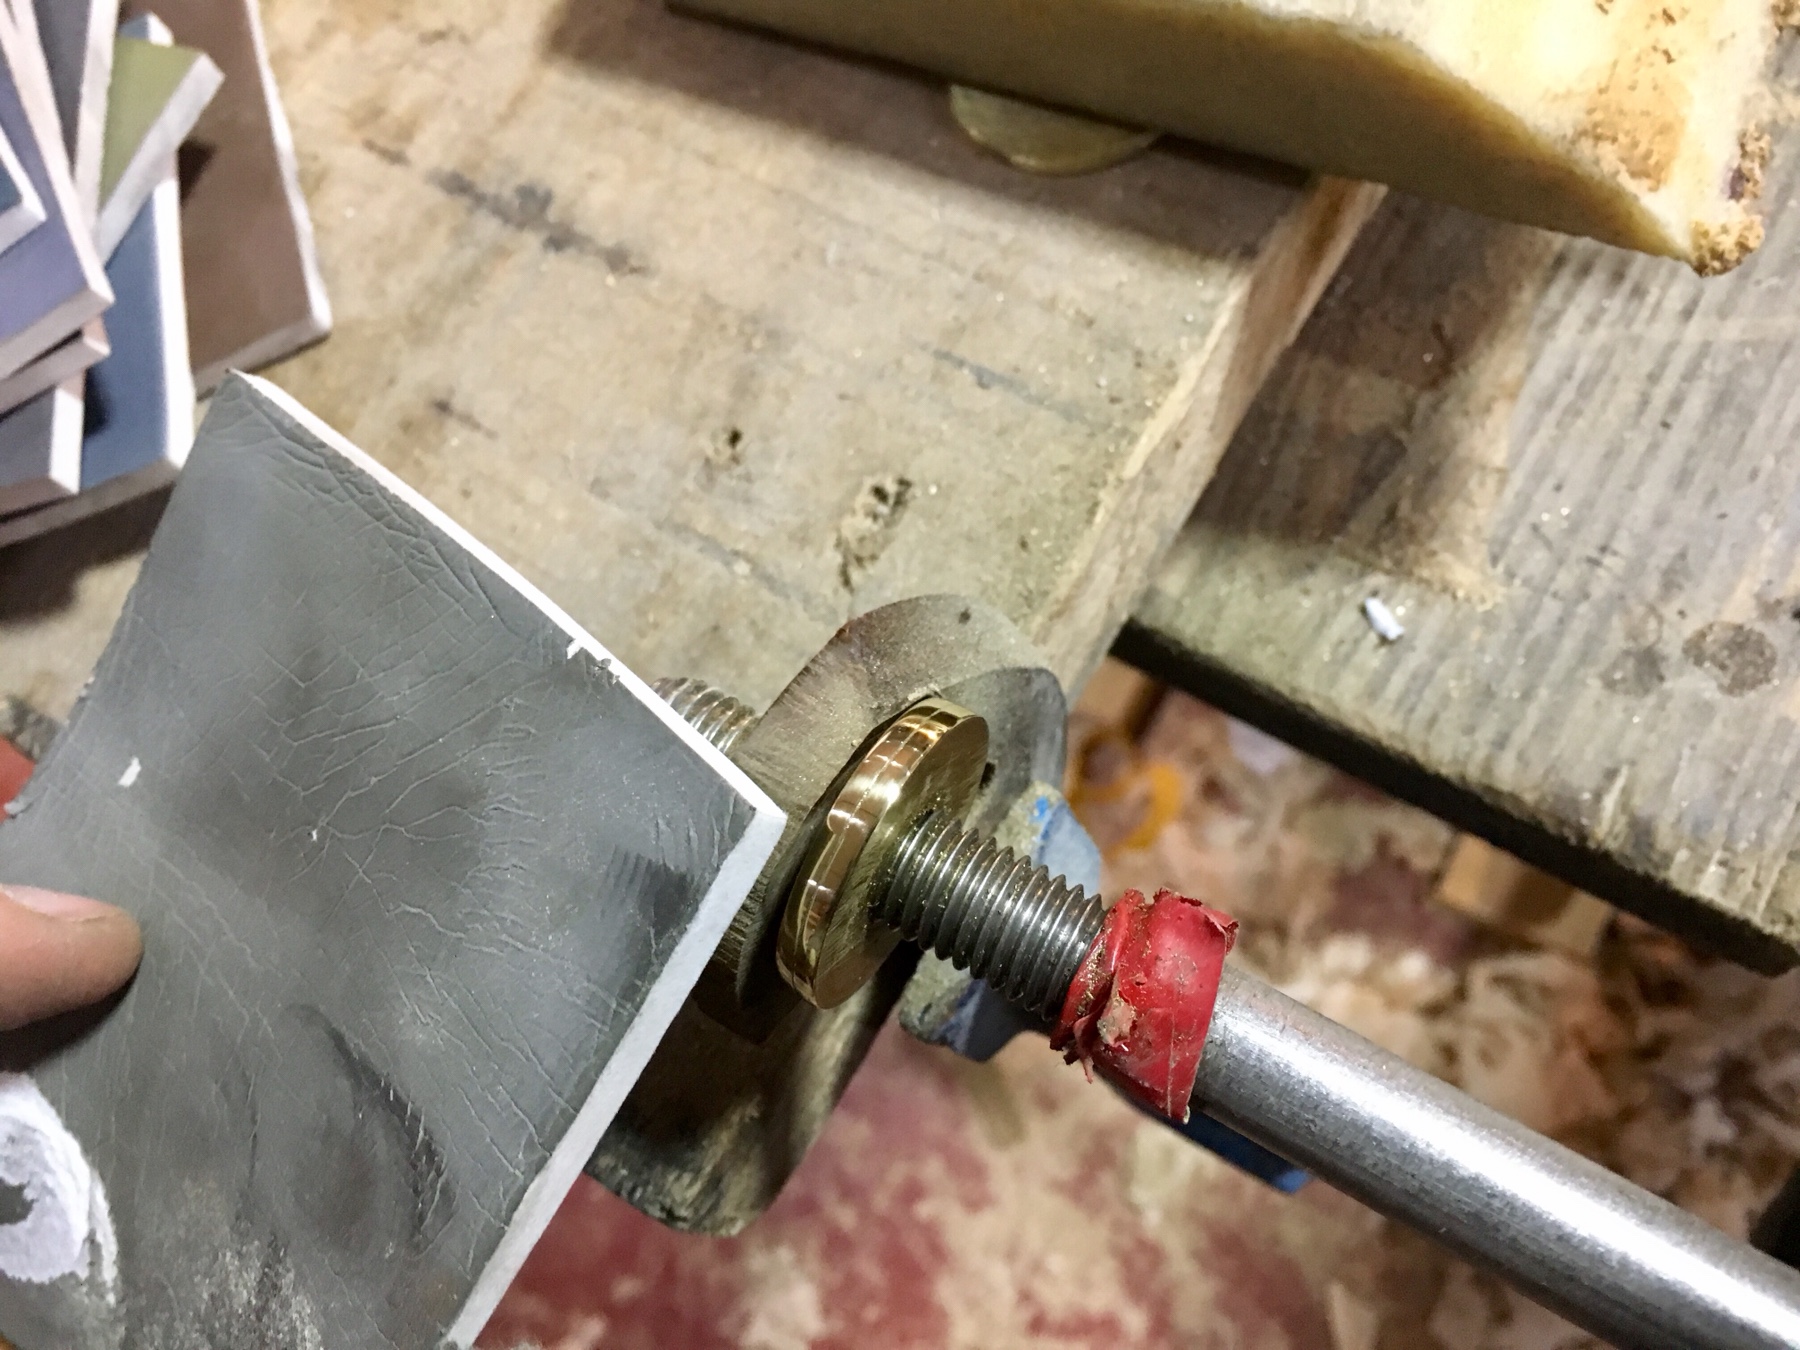
I’m no metal worker, but I fancied working with some brass to see what I could do, so started off by trying to make some brass ‘accent’ washers to the base of the handles. So as I always seem to make life difficult for myself I ended up needing to make my own washers to fit the already turned handles! What I did to start with was buy a plate of 1.5mm thick brass from eBay (got more than I need for use in future). So I decided that the only way to keep the washers central was to tap two M12 holes in the plate first. Then I rough cut an oversized octagon shape around both tapped holes using a hacksaw. Unfortunately at the time I didn’t have any M12 thread rod which I could try and use on the wood lathe in a drill chuck, but I did have a very long M12 bolt somewhere, so being impatient I decided to improvise a dodgy lathe type spinny thingy which comprised my impact driver with socket adapter at one end and an offcut of Lignum vitae with a 12mm hole held at the other end. I used this to spin the two washers against the disk sander to get the octagons circular and to the correct diameter.

83d25b4459593747dc66bb19edfe48c3.jpg


Once that was done I used my incredible lathe type spinny thingy to polish the edge of the washers using micromesh, working my way up to an overkill of 12000 grit.

5789b0ed425e481d34b5990b64d101e9.jpg


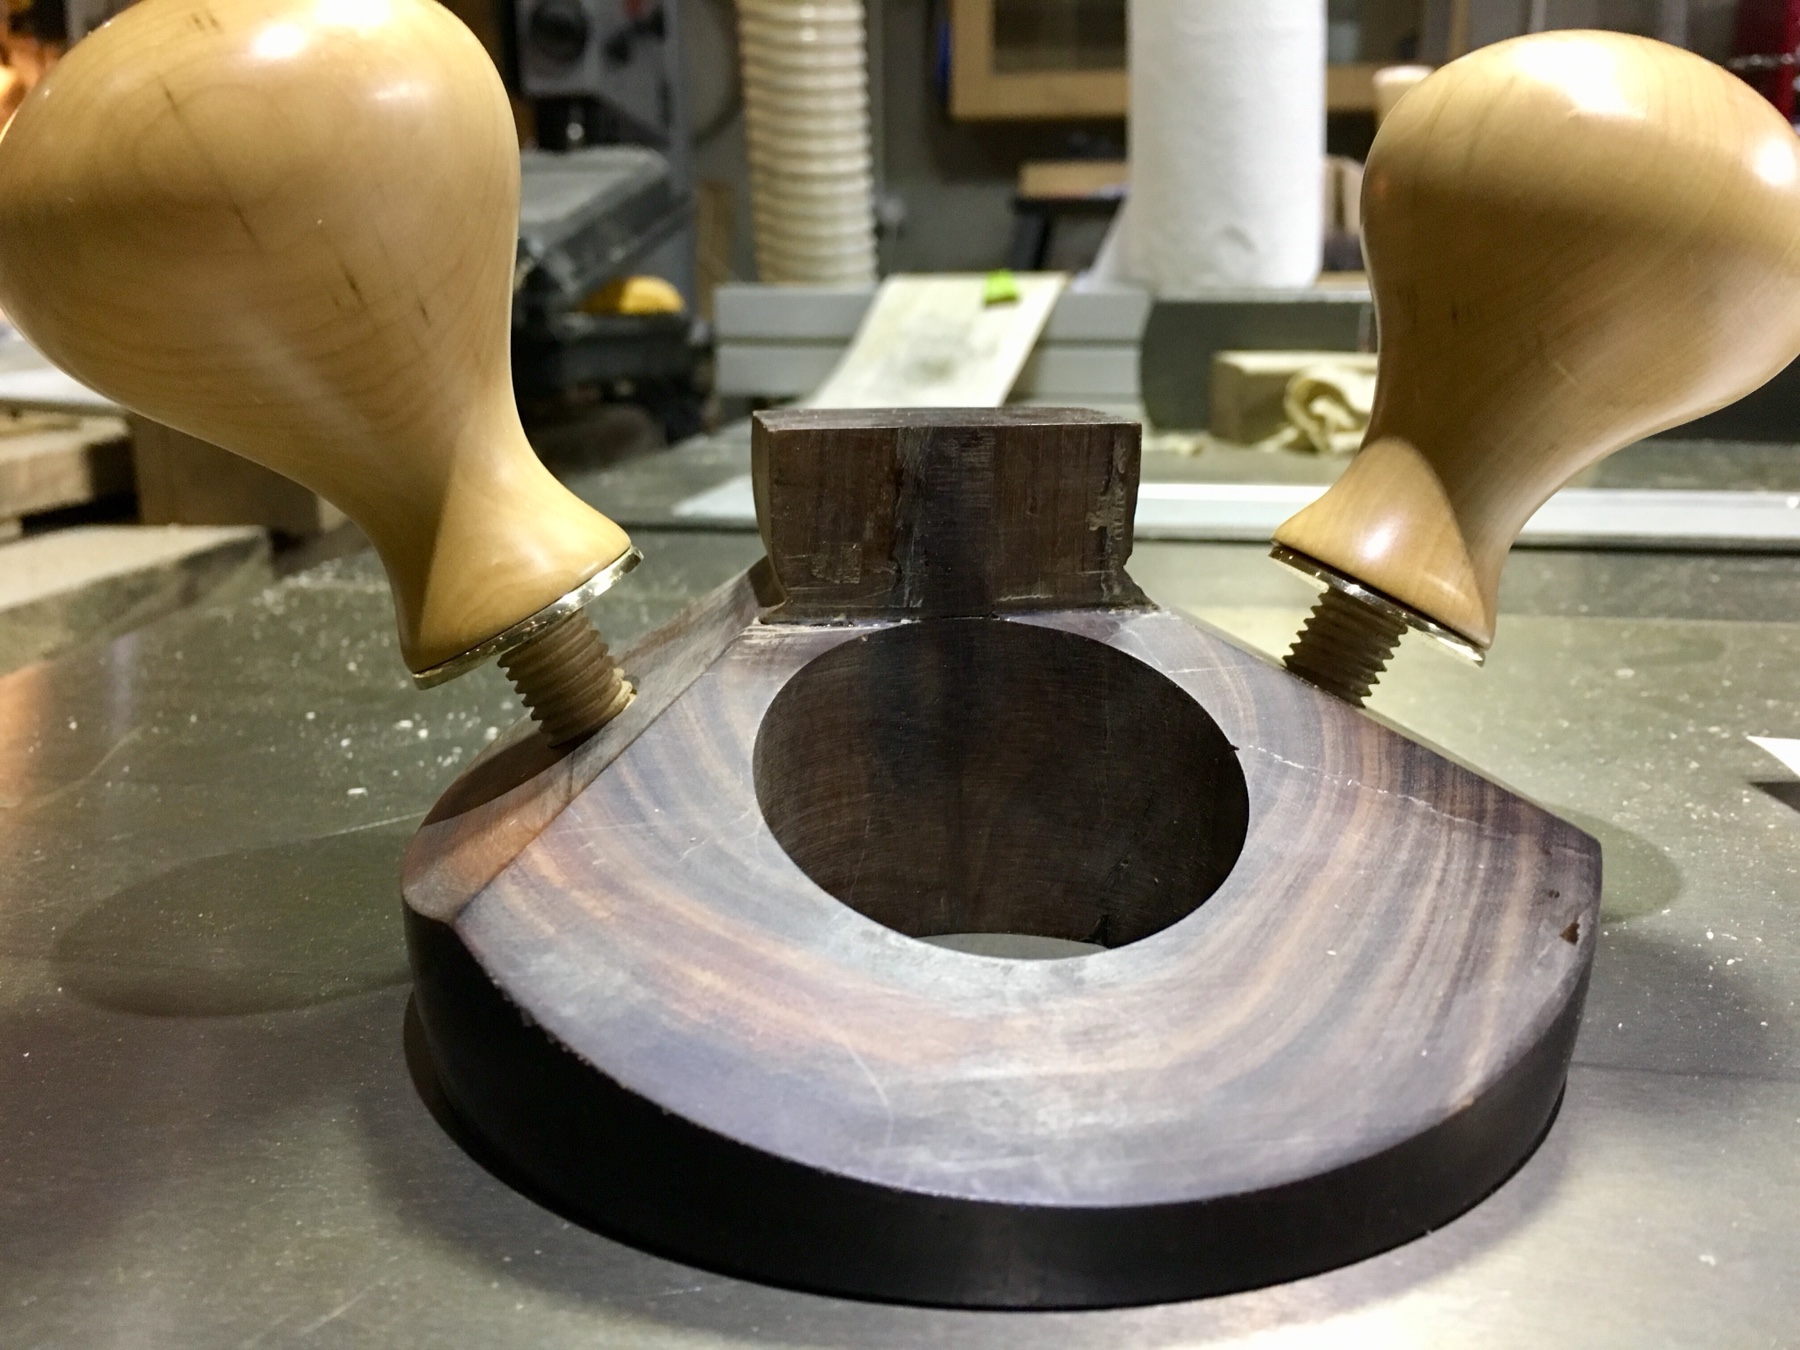
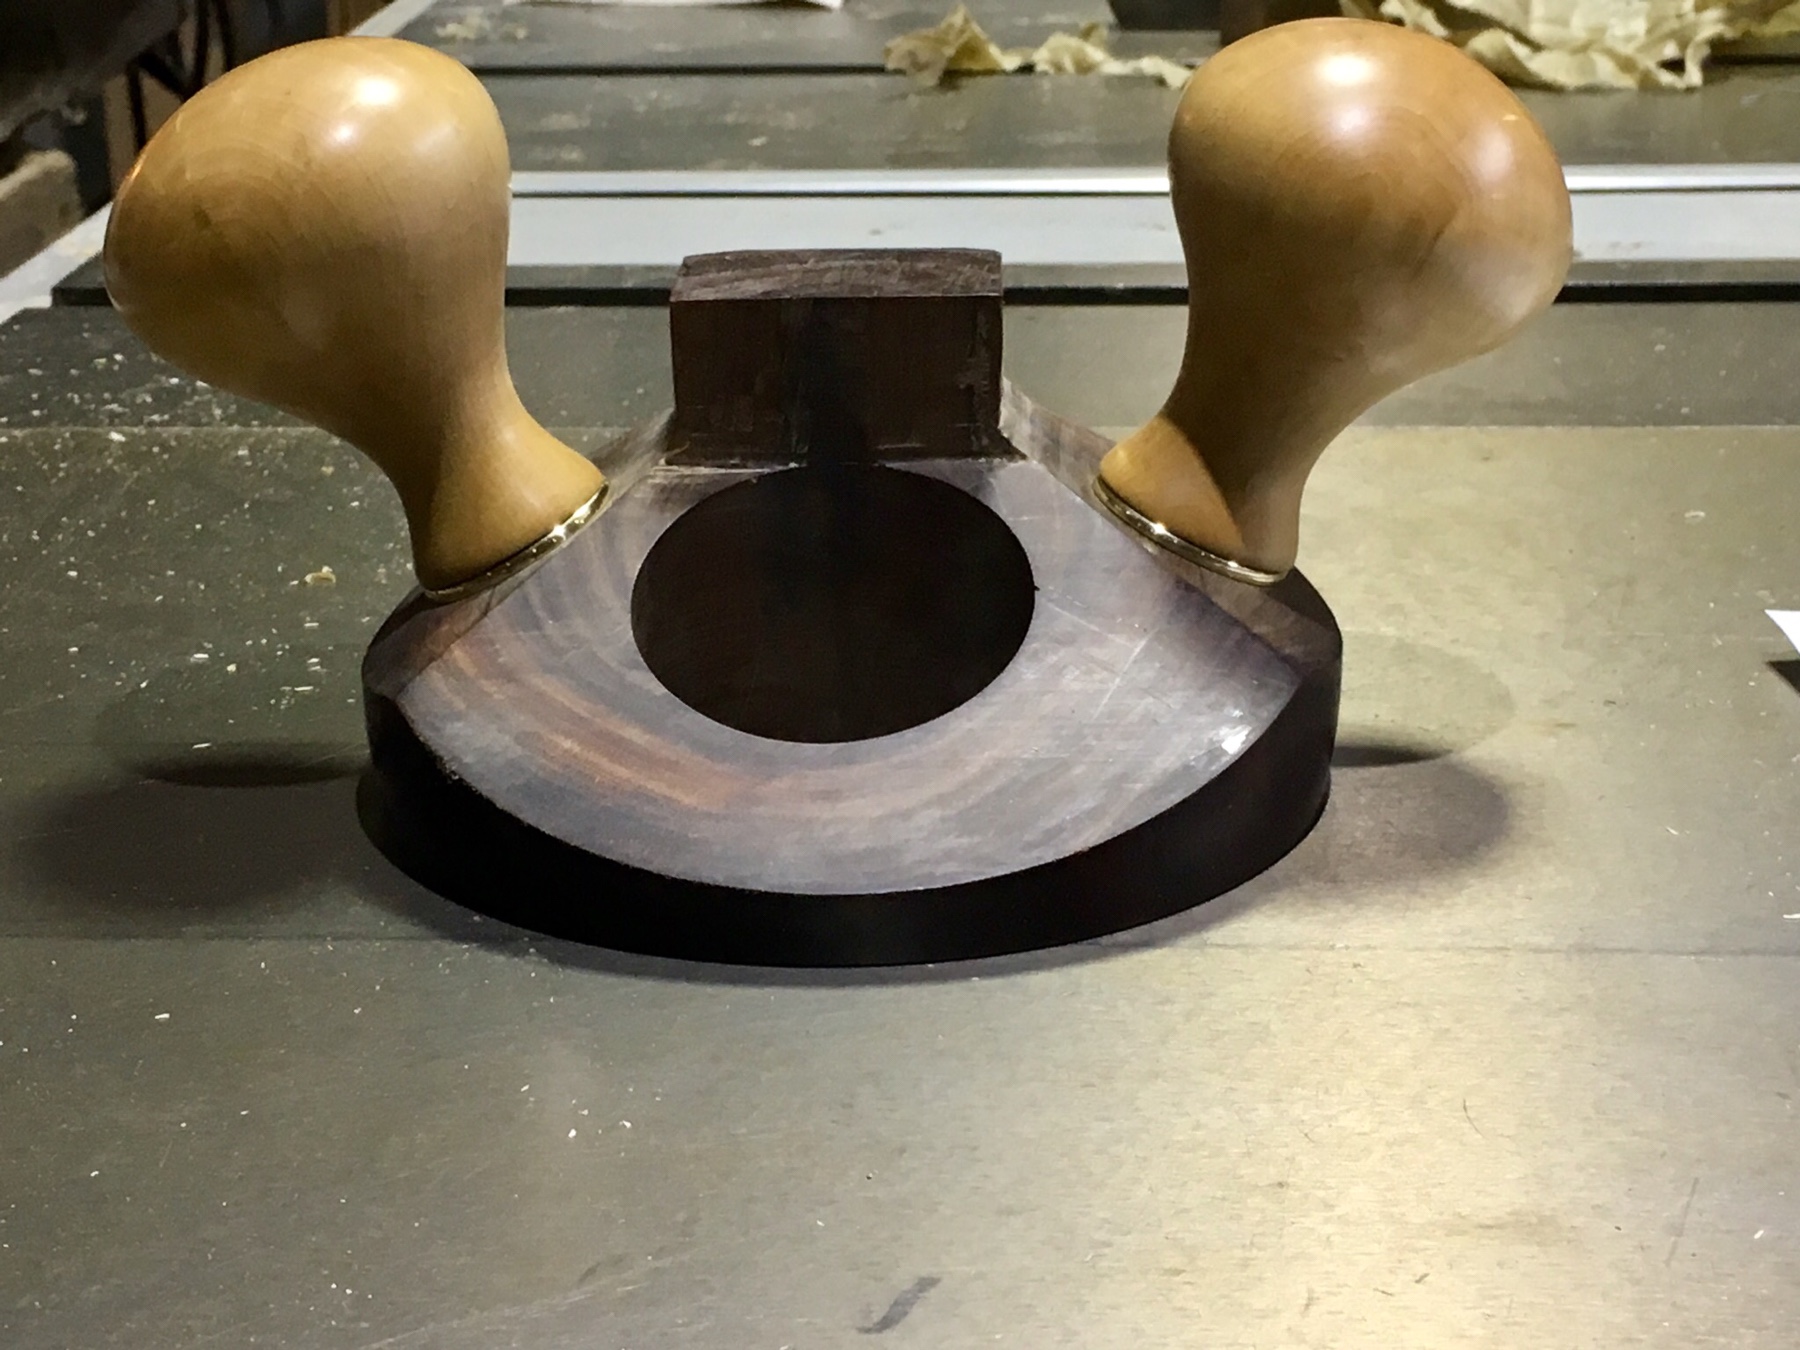
Now the accent washers fit the handles, and the handles thread into the body.

fe5037bd1aca8ed6096fc23dfaa83685.jpg


66382c442ba9bccbff6cbbf4b4991eaa.jpg


57d0c05873c8bfc79ead00bd3e961da7.jpg


Will try to write up more again tomorrow after work... first day back tomorrow :(
 
I’m no metal worker, but I fancied working with some brass to see what I could do,
You can turn Brass on your wood lathe with normal HSS tools, try it next time to speed things up and make life easier.
 
that's a really nice tool, funnily enough I saw some lignum vitae bowling balls in a charity shop near me a few months ago, very similar looking for only £10, I wish I'd have bought them now, it's good to see them re-cylced as such a well made tool, bet it'll last a while that one.
 
If you do wood tapping again in brittle wood you might want to soak the area to be tapped with superglue - cheap watery (poundshop) stuff is better to really soak in, it will help stabilise the wood and make the threads stronger too. You might even cut the taps and soak again to get the deeper parts of the thread and go over again with the tap.

DO make sure that you leave it to completely dry - and a bit more after that (DIMHIKT) before cutting the taps and assembly!
 
That's looking rather special - a lovely sculptural shape, worth all that head scratching and problem solving to make it. With LV being self-lubricating it should work really well too.
 
Thanks all. Will try to write up more of the hardware stuff tonight if i can.


CHJ":176fjt1y said:
You can turn Brass on your wood lathe with normal HSS tools, try it next time to speed things up and make life easier.

I thought you could, but i couldnt pluck up the courage to risk my turning tools! Will definitely give it a go next time. What I wish I could have done is some knurling and make my own thumb nuts from scratch, but that will have to wait for a small lottery win to buy a metal lathe i think. [I did try to keep all of the brass shavings tho for future inlays on turning projects :) ]
 
With a little ingenuity Knurling on brass would be possible on wood lathe.

If you can devise a method of holding one of these clamp type Knurling tools on your tool rest system you should be able to achieve the cut by tightening the adjaustment nut.

https://www.chronos.ltd.uk/engineering- ... w-chronos/

You might want to use a smaller version for your tool nuts.
 
Hmmmmm, intriguing!? When I was thinking about it I didnt think I'd have a stable enough support for the knurling tool, especially as my lathe is only a cheap-ish Delta clone of the Axminster AWVSL1000 so prone to slight movement of the headstock. If I had something solid like a Graduate lathe then I would've taken a punt and given it a go. Have you, or anyone else, tried using a knurling tool on brass on a (not so solid) wood lathe?
 
Not exactly, but I have used that sort of tool on my treadle powered Barnes metalwork lathe. It's the clamping that makes the knurling happen - I just pull the workpiece round by hand. As long as you can clamp the knurling tool so it can't escape forward, you're ok. You might be able to just clamp one alongside a short toolrest turned 90° . The height it sits at takes care of itself. With the ingenuity shown in this build, I'm sure if you bought one you'd find a way to mount it.

(My one has a longer shaft for a different tool post, which might be easier to mount, so check the models before you buy one.
 
There are very few forces involved other than holding the tool rigid as per your normal tool rest, all significant forces are between the two cutting wheels.
 
I made up an oddball tool post some years ago, not used often but it's surprising what you can bolt or clamp to it for that unexpected job.
post.JPG
 

Attachments

  • post.JPG
    post.JPG
    175.1 KB
Ooooh, that looks like it would be very handy indeed for random odd-jobs! That’ll be added to my ever growing to-do list, thanks for the tip. May consider trying the knurling myself then when I get a chance to make improvements to this plane :)
 

Latest posts

Back
Top