Tails or Pins first - Does it matter?

UKworkshop.co.uk

Help Support UKworkshop.co.uk:

This site may earn a commission from merchant affiliate links, including eBay, Amazon, and others.
The rebate trick solves some problems, but it can cause others. Two immediately come to mind,

-the way I fit a drawer into a drawer cavity demands having the dovetailed drawer sides sitting fractionally proud of the drawer front. It's much harder to arrange this with the rebate trick. I'm not saying my way of fitting a drawer is the only way or even the best way, but it's a fairly common method amongst top end furniture makers, so it's as well to know that with the rebate trick you'd have to find a different route to drawer fitting.

-the rebate trick means you can't fractionally extend the tail board past the gauge mark for tighter fitting dovetails. As above, that may or may not be an issue for you, but it's best to be aware of that limitation before launching into rebates.

I guess it underlines a common issue in woodwork, many of the processes are quite complex multi-step affairs. If you change one step in a bigger routine it can have implications elsewhere, so find someone who's work you like and who's equipment and skills you can replicate, then follow their entire methodology without cherrypicking different individual stages from different sources.
 
Thank you for the advice Custard.
I'm being a bit obtuse here as I don't really follow what you mean?
custard":1low8fi9 said:
-the way I fit a drawer into a drawer cavity demands having the dovetailed drawer sides sitting fractionally proud of the drawer front. It's much harder to arrange this with the rebate trick. I'm not saying my way of fitting a drawer is the only way or even the best way, but it's a fairly common method amongst top end furniture makers, so it's as well to know that with the rebate trick you'd have to find a different route to drawer fitting.
I'm with you in terms of having the sides slightly proud (which I do) but I would have thought that using a rebate would only result in the thickness of the wood in tails being reduced which I appreciate could be a problem?
custard":1low8fi9 said:
-the rebate trick means you can't fractionally extend the tail board past the gauge mark for tighter fitting dovetails. As above, that may or may not be an issue for you, but it's best to be aware of that limitation before launching into rebates.
I'm afraid I'm not with you at all on this one. I would have thought (but may well be wrong) that this relative to the gauge mark so as if you adjust for your rebate then you can extend the tails as far as you want?
Picture is of some really figured but evil brown oak I dovetailed yesterday.
IMG_0511.JPG
Please don't look too closely as I haven't cleaned it up and it isn't glued but you should be able to see the ends of the tail proud.
This was deliberate (to a point) as I quite like the design feature of having both tails and pins proud and then chamfered but this oak isn't the wood to do it with!
100% with you in terms of the theory of successive adjustments, not just in woodwork but in life generally.
Thanks again for the reply.
 

Attachments

  • IMG_0511.JPG
    IMG_0511.JPG
    245 KB
Hello,

The biggest problem I see, with the rebate trick in drawer-making, is that you don't really want to do the rebate trick on the back of the drawers. The rebate would show on the through dovetails on the sides, as the sides have a half tail on their top edge. But you would set your marking gauge to the thickness of the rebate in the side, not the side thickness. So you either have to have another gauge for marking the back pin depth, which is different than the front. It might get confusing!

Mike.
 
The rebate "trick" is used for carcase dovetails and ones that will usually be covered by a waist moulding. Its use elsewhere is misinformed (and belabors an otherwise simple process), and you don't really need it for carcase dovetails either. It's an affectation you could work an entire career and never find much use for.
 
Hello,

Thinking back, it was on a carcase when I gave the rebate trick a try, once. I think it worked well in that instance, as the dovetails were as much aesthetic as structural; I seem to recall there being 13 tails on each corner, so I suppose I reasoned I should give myself every small advantage I could. I haven't had the inclination to do it again. Don't suppose I ever will. It can make marking out a little easier, a far as registering the components together during layout transfer, and can make the inner corners neat, if there is some difficulty in getting a crisp fit there, because of poor chopping, doughing over the inner corners. But I use a right angle support block (as described earlier) so I have little trouble with transferring marks, and my inner corners are generally neat. For me, the rebate trick is more of a problem causer than solver.

Mike.
 
A big dovetailed carcase is a pig to cramp up for the transfer, so if the rebate helps the work holding then by all means. If I'm building a 7' tall bookcase on my own then the rebate trick is just good workshop practise.

To answer Glynne's questions, the way I build a drawer is to begin by fitting the front and back precisely to the drawer cavity opening. Having done that I don't want to be forced to reduce their dimensions, so I arrange for the drawer sides to sit fractionally proud of the front, I do this by setting the drawer front gauge line 0.5mm less than the thickness of the drawer sides, I'll later plane the sides down for a piston fit. You can see how a rebate would scupper or at least massively complicate this approach.

When it comes to extending the tails past the gauge line during a tails first transfer, then think about it, that tighter fit isn't a function of moving the actual gauge line, it depends on overhanging the gauge line by a whisker. There's a method that's called "the merest glimmer of light" trick, I see it used in workshops but I've never seen it described in any book. You place the tail board on top of the drawer front, but you have a bright light underneath, you tap the tail board forward until there is the merest glimmer of light showing between the tails, and then you mark around the tails. It automatically delivers the appropriate overhang for the density of the timbers involved. If I have a job where I absolutely have to get it right at the first go then I'll often use this method, however the rebate trick would prevent it.

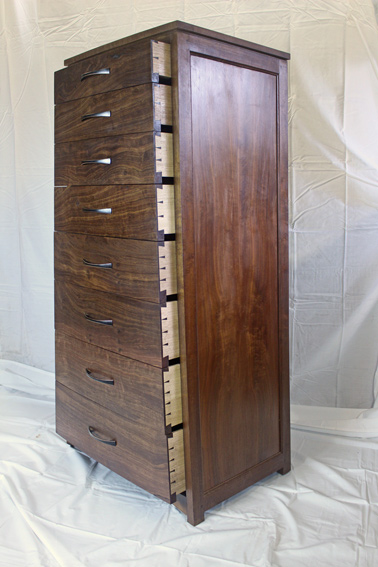
Take this job,

Pear-Desk-Drawer.jpg


that's a curved laminated drawer front where the grain runs unbroken across three drawers. There's hundreds of hours sunk into the job at this stage, so all those dovetails have to be perfect at the very first attempt. Under such circumstances you need a 100% predictable method of dovetailing. Every furniture maker will have their own approach to these high risk tasks, mine is the "merest glimmer of light" trick. It doesn't really matter that there are different methods, and I'm not going to argue the toss of one versus any another, what really counts is that you the maker have rock solid confidence in your own elected approach. So if a rebate precludes this approach then I personally wouldn't be interested in it for drawer making.
 

Attachments

  • Pear-Desk-Drawer.jpg
    Pear-Desk-Drawer.jpg
    62.3 KB
Hello,

Thanks for that, Custard, I too set my sides a smidgen proud with drawer fronts fitted tightly into the openings. In fact I actually plane a slight angle on the ends of my drawer fronts, so they only just begin to fit the openings and go no further than about the first 1/8in, then wedge. But I cut pins first, so no 'merest glimmer of light' for me! So I can see the rebate trick working here, though not necessarily advantageously. Bear in mind that Glynne is talking about pins first here, too. The more I think about it, though, the rebate trick is not for drawers, there are too many knots.

While we are on drawer making, I think it is a European method, Krenov certainly introduced it to America from Sweden, to make the drawer fronts a fraction over size in the width and setting the sides a fraction below the ends. This means that there is less work in planing the drawer to fit, as there is only the end grain of the pins to plane flush with the sides to enable the fit. It sounds logical, but the few times I tried it, I couldn't guarantee a piston fit. It obviously takes more practice than I was willing to give! It might be a good method for 'utility' work, though, where a smidge of slop is not going to hurt. And you might just get the piston fit, it is doable.

Mike.
 
Use miter clamps at the corners to hold the work for marking out carcase dovetails. Next time I do these, I'll try to post a picture.

Worth the investment for a pro or serious amateur.

Ciao.
 
I may as well toss in my tuppence.

Tails first ... just because it is easier to visualise the result. Occasionally I do gang-saw, but this is only when the drawer sides are thin (around 1/4"). Do it the same way enough, and it becomes second nature.

Work holding makes a difference, not just to the sawing, but also to the transfer. I've been using a Moxon vise for several years, and made a few mods to help ...

Basic moxon, with a rest at the rear ...

Moxon_transfer_rest1.jpg


I'm not a fan of the Moxon built into a table, as this places the work at the same level as the chop, and this this gets cut up when transferring tails to pins with a knife. As a result, I raise the work. The vise has a spacer that flips up ...

Moxon_transfer_rest2.jpg


The spacer has non-slip (400 grit sandpaper) attached ...

Moxon_transfer_rest3.jpg


.. which is on the rear rest as well ...

Moxon_transfer_rest4.jpg


The combination makes it very easy to hold the parts steady ...

Moxon_transfer_rest5.jpg


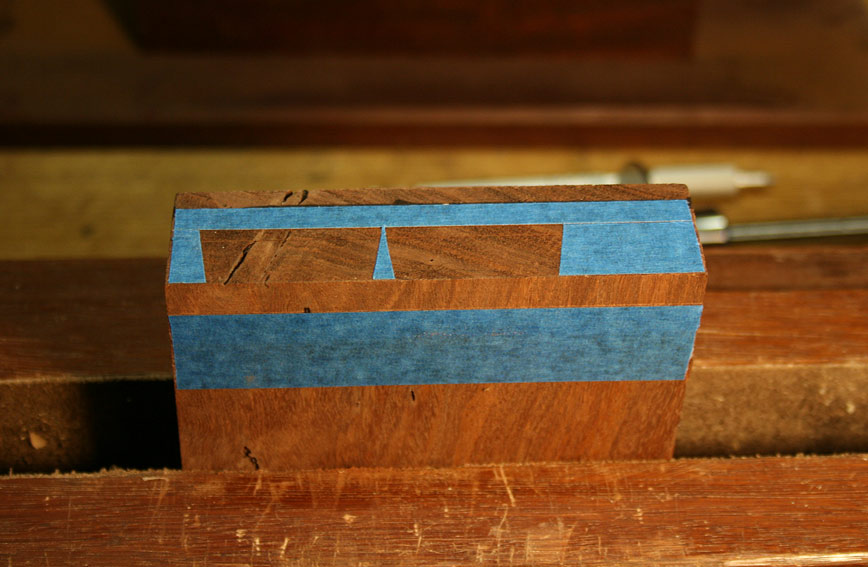
And then there is marking with blue tape, which aids old eyes, such as mine ...

HalfBlindDovetailswithBlueTape_html_m4f882f92.jpg


http://www.inthewoodshop.com/Furniture/ ... eTape.html

Like Custard, bow drawer fronts on angled sides, making for compound half-blind dovetails. Jacob's favourite "London" dovetails :)

TopOfTheWorldToYou_html_m233f38e0.jpg


Regards from Perth

Derek
 
It's interesting that Derek references vices, I've dovetailed at lots of different benches with lots of different vices, and even though they all got the job done eventually, some were much easier to use than others.

Currently I use a pattern makers vice, and that's got to be amongst the worst vices for dovetailing. The design of the vice means there's a big gap between the jaws and the bench, which automatically brings a load of problems into play, like how do you line up the top of your pin board with the top of whatever you're using to support the rear of the tail board? I've tried the Moxon vice that Derek uses, but personally I'm not wild about that either. I like my bench pretty high to begin with, stick a Moxon on top and you're working at chest level which feels a bit weird for precision sawing, plus it doesn't leave much room to get a light in behind for the "merest glimmer of light trick". A Record 52 1/2 is a great dovetailing vice...if it's in good shape, but so many of them are racked, which means they pinch the work piece at just one point, which in turn makes the workpiece liable to twist out of vertical. There's a not very common Scandinavian style of bench that has an arm with a screw thread set into it that in turn bears against the front of the bench. Maybe it's a case of the grass always being greener, but I've often thought the owner of those benches must be very happy and contented dovetailers, in fact they look like vices that were designed solely with dovetailing in mind.

All this sounds like a pretty good argument for the pins first approach, where your vice doesn't really come into it that much!
 
Back
Top