


sawdust maker
Established Member
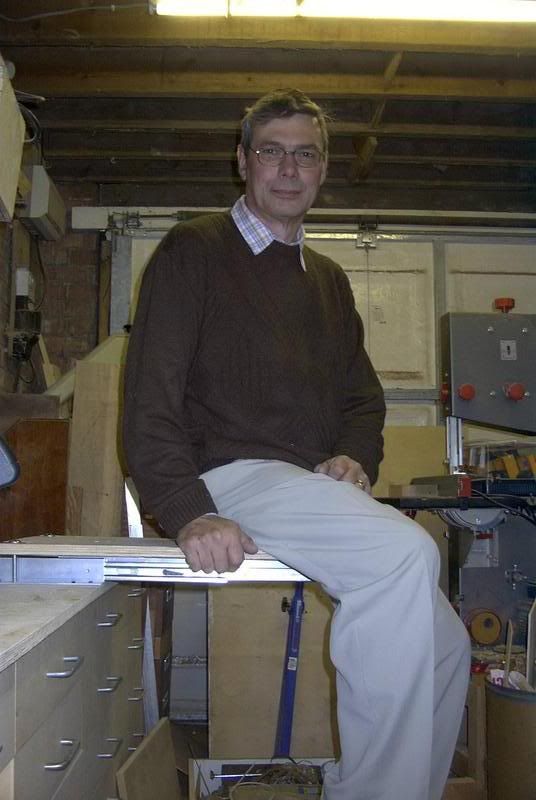
My workshop is a smaller than average single garage and space is very tight. The big stuff, planer thicknesser, table saw and 12” band saw are all on castors and are not too much of a problem. The real problem is the smaller stuff, mortising machine, sliding mitre saw, disc sander and my small band saw. Each time I needed to use one of these I had to lug it out of its storage place, cramp it to the work bench and once used return it to its storage place so I could continue work. I needed some way of moving each machine out into a working position and back again quickly and with the minimum of effort. I eventually came up with this idea. It is a sliding worktop. Now each machine can be stored closely together, taking up the minimum of my valuable space. The best runners I could find would take 45Kg max, enough for most machines, but not for the mortiser in use. However I came up with an idea that would make the slide strong enough to take my weight when it was extended and put little stress on the runners.
Although you cannot see my feet they are off the ground.
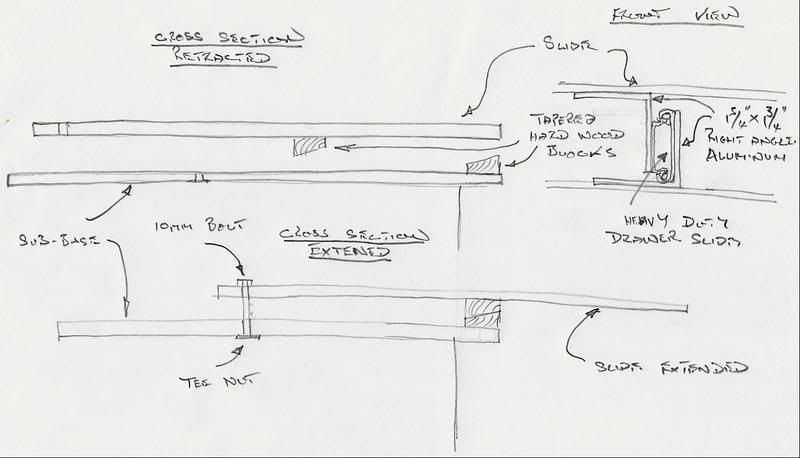
The runners are attached to 2” L section aluminium bar. As shown in the drawing. The slide and the sub-base are made of 18mm birch ply with the mounted slides screwed On the underside of the slide a chamfered hardwood wedge is screwed in a position that coincides with the edge of the sub-base when the slide is extended. This will act as a stop and support for the slide. A second wedge is screwed from the underside of the sub-base once the slid has been fixed to the sub-base.
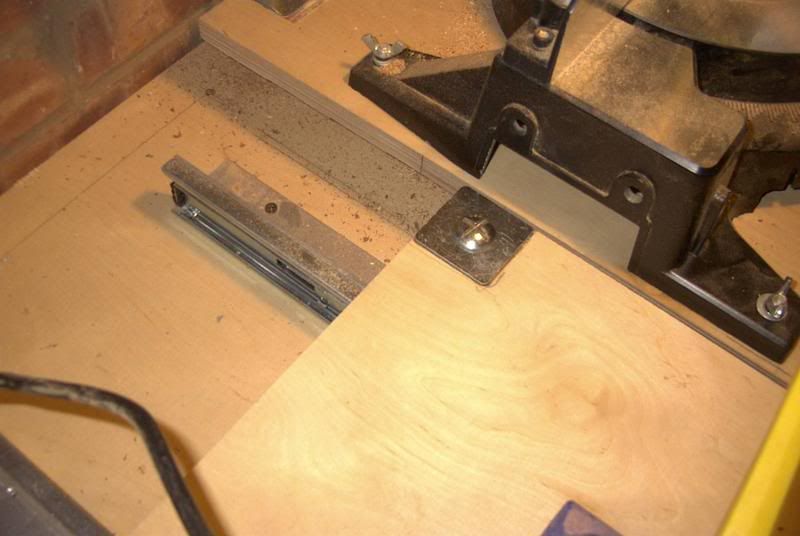
For machines that are very heavy or like the mortiser a lot of downward pressure is used the hardwood wedge needs to be placed so the slide only extends 75% of the way out. For other lighter machines the slide can come out 90% of the way out.
The next step is to position two bolts at the back of the slide. They go through the slide and screw into Tee nuts set into the underside of the sub-base. As their job is to stop the back of the slid lifting, they pass through large square washers that spread the strain. The bolts also prevent any lateral movement of the slide.
Scanned Drawing.
View under the extended slide showing the hardwood wedges.

Rear support bolts.
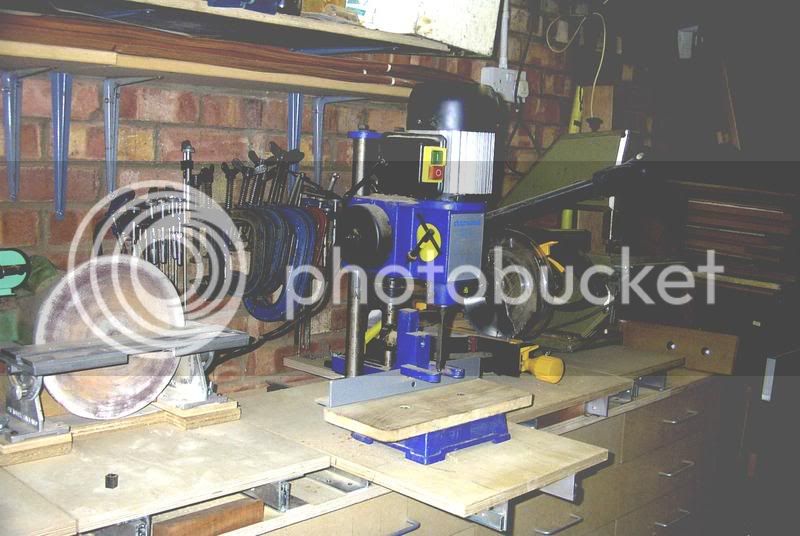
Completed slide with the mortiser in its working position.
Although you cannot see my feet they are off the ground.
The runners are attached to 2” L section aluminium bar. As shown in the drawing. The slide and the sub-base are made of 18mm birch ply with the mounted slides screwed On the underside of the slide a chamfered hardwood wedge is screwed in a position that coincides with the edge of the sub-base when the slide is extended. This will act as a stop and support for the slide. A second wedge is screwed from the underside of the sub-base once the slid has been fixed to the sub-base.
For machines that are very heavy or like the mortiser a lot of downward pressure is used the hardwood wedge needs to be placed so the slide only extends 75% of the way out. For other lighter machines the slide can come out 90% of the way out.
The next step is to position two bolts at the back of the slide. They go through the slide and screw into Tee nuts set into the underside of the sub-base. As their job is to stop the back of the slid lifting, they pass through large square washers that spread the strain. The bolts also prevent any lateral movement of the slide.
Scanned Drawing.
View under the extended slide showing the hardwood wedges.
Rear support bolts.
Completed slide with the mortiser in its working position.


