Small Workshop WIP (including costs)

UKworkshop.co.uk

Help Support UKworkshop.co.uk:

This site may earn a commission from merchant affiliate links, including eBay, Amazon, and others.
I found very little info on EPDM edge options, apart from the nail on plastic strip, horrid! I crafted something of my own design, not dissimilar to your solution. I'm not convinced there is a best way, but can't see much wrong with yours.

F.
 
Just a few observations:

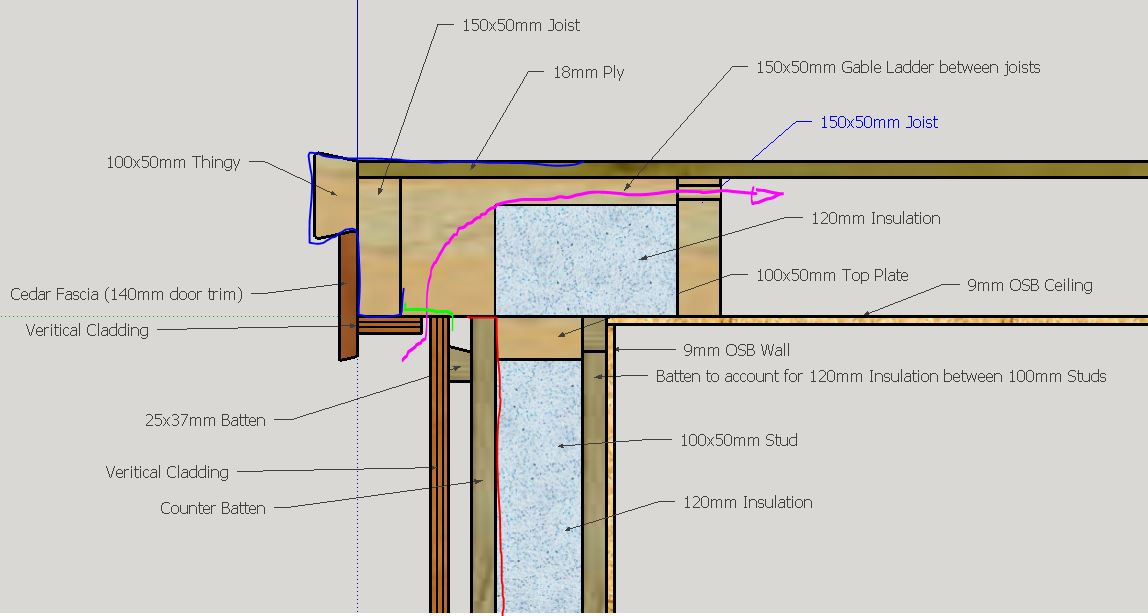
With regards the side and front edge of the roof you could fix an up-stand, (Check curb/Cant strip), to the top of the joists rather than on the side edge, take the EPDM up,
over and down the outside face, fix fascia to the joists, tall enough to close in to the the top of the up-stand, and if needs be, nail on a cover strip over sailing slightly the fascia and the up-stand.

Don't forget on the the gutter edge, the roof needs to oversail the fascia by 50mm (depending on gutter width) for it to reach into the middle of the gutter.

Also on your drawing you are showing an insect/ventilation strip, that looks like a lot of work, I would probably fix the soffit straight on to the underside of the joist
and drill and fit some round soffit vents in each joist row, making sure you leave a void in the insulation for an air flow through (cold Roof)

I also noted you have sloped the horizontal cladding counter battens, this should be at 15 degrees, the direction of slope will depend on the way the cladding is fixed,
if you are using a continuous faced cladding, backwards as you have shown is correct.

Also you show the ceiling OSB on top of the inside wall battens, I would fix the batten up to the underside of the joist/top of wall plate, then fix ceiling board up to the batten, which should push up to your 120mm wall insulation nicely.
 
HOJ":2i9dt4z6 said:
With regards the side and front edge of the roof you could fix an up-stand, (Check curb/Cant strip), to the top of the joists rather than on the side edge, take the EPDM up,
over and down the outside face, fix fascia to the joists, tall enough to close in to the the top of the up-stand, and if needs be, nail on a cover strip over sailing slightly the fascia and the up-stand.
The fascia I was planning on using was cedar cladding door/window trim, which is only 140mm wide, so to cover any EPDM that wraps around the front/bottom of the joists it can't be too high, or I'd need several bits. As it is, I may cut it down (I accidentally left it at the 140mm size on the drawing below).

HOJ":2i9dt4z6 said:
Don't forget on the the gutter edge, the roof needs to oversail the fascia by 50mm (depending on gutter width) for it to reach into the middle of the gutter.
Useful to know, thanks :)

HOJ":2i9dt4z6 said:
Also on your drawing you are showing an insect/ventilation strip, that looks like a lot of work, I would probably fix the soffit straight on to the underside of the joist
and drill and fit some round soffit vents in each joist row, making sure you leave a void in the insulation for an air flow through (cold Roof)
My vents didn't show on the cross-section drawing, so I've added them in (see purple air flow below). I guess I would need less insect mesh if I drilled occasional holes rather than leaving a 10mm gap, good idea, thanks!

HOJ":2i9dt4z6 said:
I also noted you have sloped the horizontal cladding counter battens, this should be at 15 degrees, the direction of slope will depend on the way the cladding is fixed,
if you are using a continuous faced cladding, backwards as you have shown is correct.
It's channel cladding, so I believe it should be sloping inwards, draining any moisture to the cavity created by the counter battens. http://www.code6timber.co.uk/fine-sawn-channel-cladding/4588337466
4618837144.jpg


HOJ":2i9dt4z6 said:
Also you show the ceiling OSB on top of the inside wall battens, I would fix the batten up to the underside of the joist/top of wall plate, then fix ceiling board up to the batten, which should push up to your 120mm wall insulation nicely.
I've shown that below. There will be a gap between the batten and the insulation, but there will be plenty of those anyway that need filling with expanding foam!

Thanks for the observations HOJ :)

New design:
Roof_Detail_2.jpg
 
Looks good, another quick one, the general consensus with regards cladding is to leave a 10mm gap at the top, to allow for air to flow up behind the cladding, I would run my soffit hard up to the wall plate, then fix the wall battens 10mm shy of it with an insect mesh on the top, treat the walls and roof separately with regards ventilation.

I would be interested to see how your Cedar cladding looks and works, I have a need for 100m2 of it for my current project.
 
Thanks HOJ.

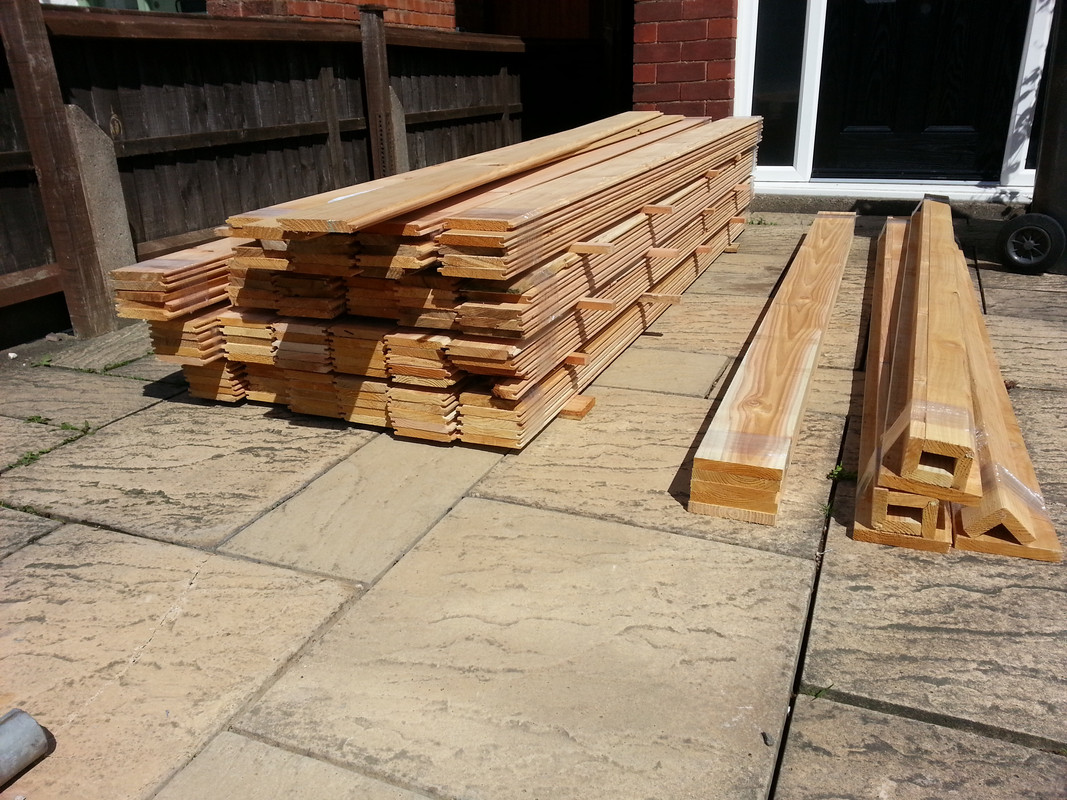
It's British Western Red Cedar from Code 6 Timber in Somerset. The price of British-grown is half that of the Canadian WRC (albeit it's almost a different product). Carmen there was very helpful, and I've got a good deal on a mix of grade A and B lengths that were accidentally cut too short for a different order. They don't advertise B grade as it usually gets snaffled up by locals. The rear and one side of the workshop was going to be any cheap feather-edged cladding as they aren't particularly visible, but the discounted grade B Cedar worked out about the same price.

240 linear metres (roughly 30m2) of 19x140mm grade A & B British Western Red Cedar, door/window trim and corner posts for £777 (incl delivery and VAT).

Delivery is later this month, fitting will be some point quite a bit later (need to sort the roof first, holidays etc.!). There will be photos!
 
Top Tip 5: Lightweight Tarpaulin is not very waterproof.
The blue tent leaks like a sieve in heavy rain. Wednesday's torrent left me looking at puddles on the plywood floor, tools with rust on them, and I wasn't very happy. Fortunately I was able to take yesterday off and it stayed dry, so I set to work fixing the roof (while the sun shined!).

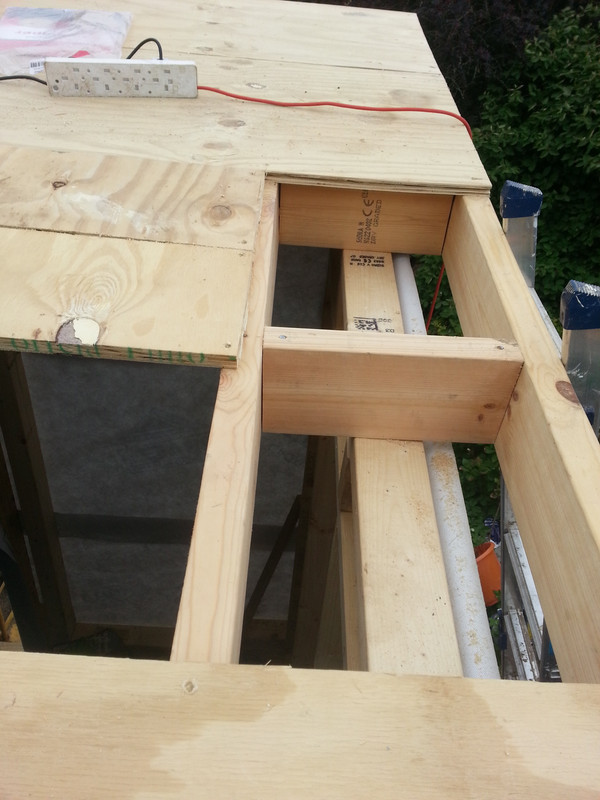
I set to work finishing the purlins (I think they're called) between the rafters above the top plates. Due to the rafters being bird's mouthed, and sloped, I used an electric hand planer to plane the top edges to be a flush fit... or at least I did, until the planer jammed... on the planer cable! Fortunately the fuse did its job, and I didn't get blown off the roof. Lesson learned! Hand plane was the way to go... And it took much longer than I thought.

I tried to tidy everything away so I could store the cladding that was due to arrive later. I didn't want that getting wet.

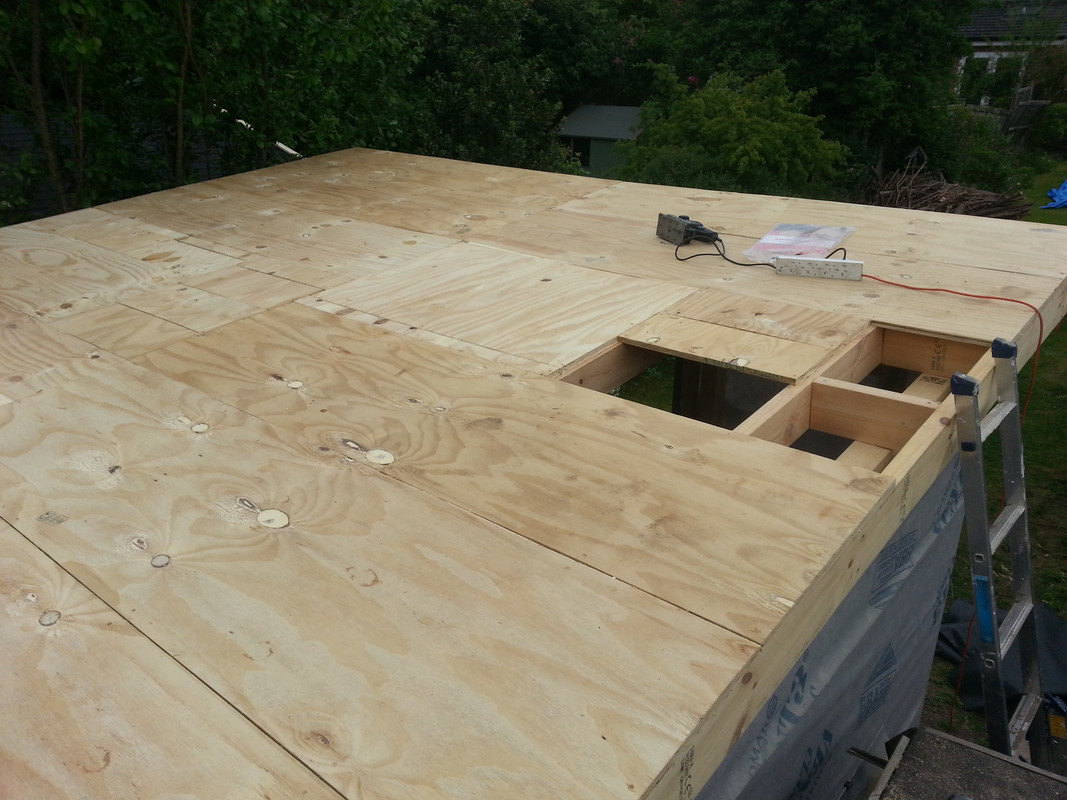
I also started tongue and grooving the plywood sheets for the roof, to make sure it was really flat. Unfortunately the boards were slightly warped due to the rain that got through the tarpaulin, and didn't fit together. So an hour and a half wasted. When screwed down they were pretty flat, so I just went with that (leaving 3mm expansion gaps).

Then the cladding delivery arrived. Grade A & B British Western Red Cedar. Most of it looks nice :)
2017-05-18_11.10.51.jpg


Some detail of the gable ladder holding the outside rafter.
2017-05-18_16.54.31.jpg


I realised I was running out of plywood mid afternoon, even trying to utilise offcuts, so wasn't able to entirely fix the roof while the sunshined. So frustrating!
2017-05-18_16.54.19.jpg


I decided I couldn't face another evening of puddles, so decided to get the rubber membrane up onto the roof, lay it out and temporarily batten it down.

Top Tip 6: Premium EPDM rubber sheet is the heaviest known substance in the universe. Use friends!
A roll of 5m x 5.5m x 1.5mm rubber (weighing about 63kg) is quite tricky to get onto a roof. Heck, it's quite tricky to get in/out of a car. After using a sack truck to get it to the end of the garden, I tried lifting the roll - I got it onto my knees, and no further. I didn't have any friends on standby to help unfortunately, and heavy rain was forecast for the evening, so had to try to get this sheet onto the roof. I managed to get one corner onto the shed roof, slowly pulled the rest of it up there (it must have taken 15 mins of backbreaking effort), and then from the shed roof onto the workshop roof. With my kids home from childcare, I had to batten down the roof as well as I could (nails will have punctured the edges of the rubber, but I think I ordered enough spare that it won't affect the waterproof-ness). I just hope it's heavy enough not to get lifted by the wind.

Current progress (note the blue sarcophagus of cladding):
2017-05-18_17.56.40.jpg


I'm now barely able to stand up or sit down due to excruciating pain in my lower back/upper glutes. So not likely to get much done for a little while...
 
Great progress, keep on going it'll all be worth it!

Fitz.

PS. I'm sat here giggling as having been through many of the same lessons. EPDM really is bloody heavy.
 
Finally sorted the plywood for the roof, and the EPDM rubber glued down (except around the undersides). The water-based adhesive was easy to spread (similar to paint or PVA) with a paint roller, but the solvent-based contact adhesive was horrible. Brushes sticking to everything. Definitely a good idea to have a supply of disposable gloves around!

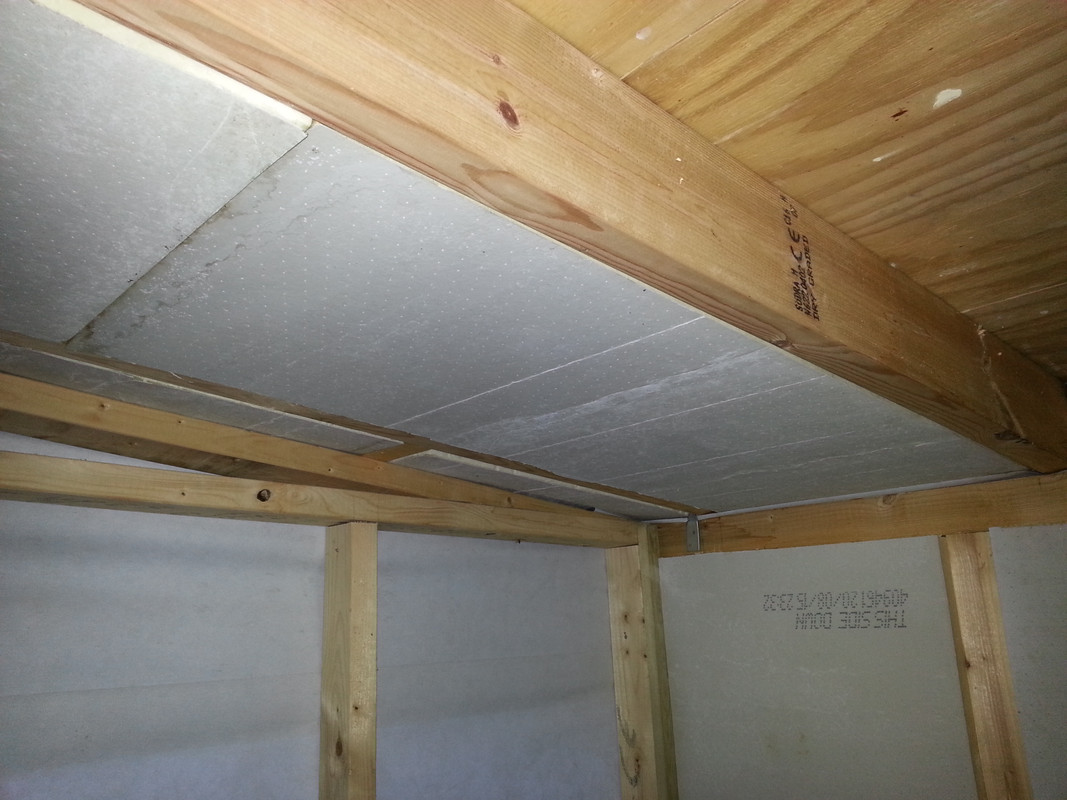
Cutting insulation is taking forever, especially when having to first dry out the insulation, and I'm running out of space inside the workshop. And family time is impacting a bit. I was intending to use the 120mm insulation mainly in the walls, but figured that most heat will be lost through the roof and the north-facing wall, so am trying to use the insulation in those areas first. In the top cm or two are some ventilation holes to allow any moisture underneath to escape and not condense (I hope).

2017-06-29_20.29.24.jpg


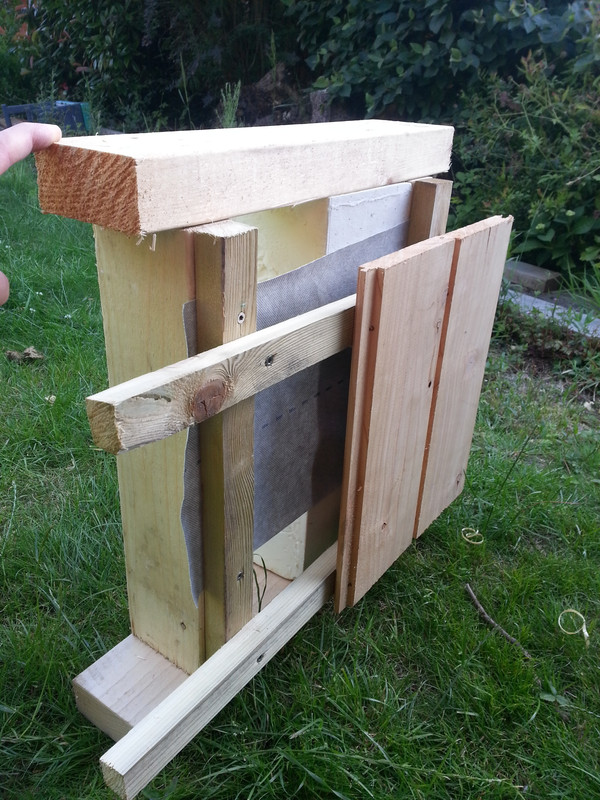
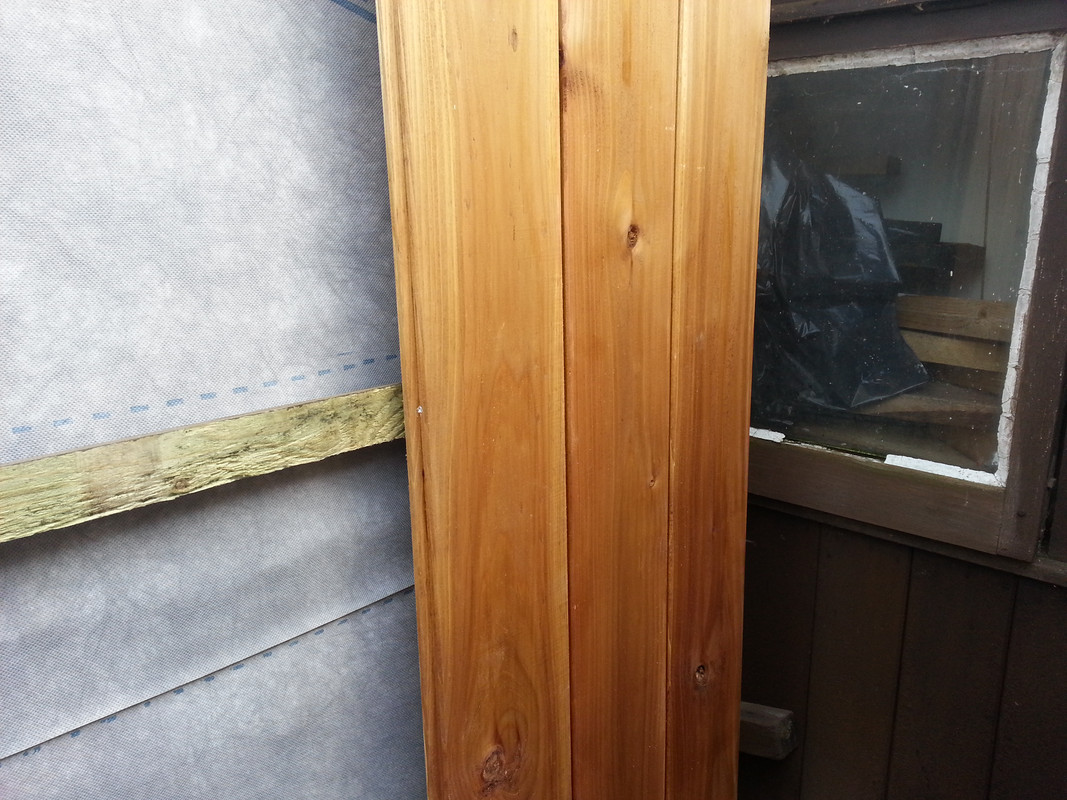
I've also mocked up a rough section of wall to work out how the cladding will work.
2017-07-02_19.22.43.jpg


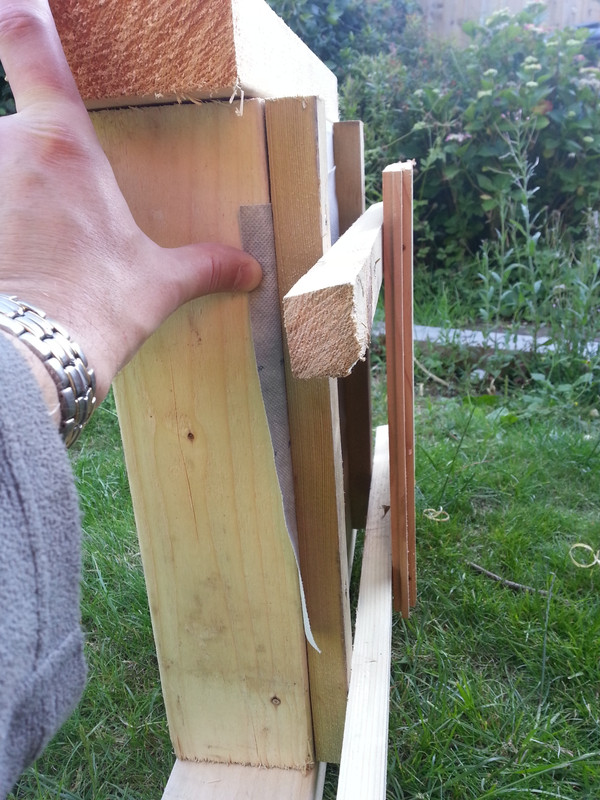
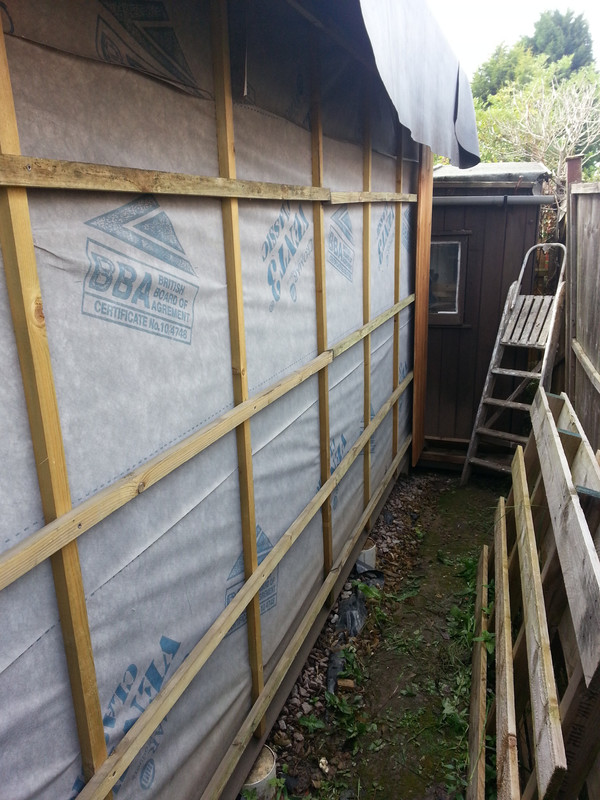
So to repeat myself: 47x95mm studwork with 120mm insulation inbetween (internal battens, not shown, will be on the inside of the walls, then internal OSB sheathing). Breather membrane, then vertical battens, then horizontal battens, the tops of which slope inwards to re-direct any moisture getting inside (bit difficult to see). Stainless steel screws for both. Then vertical British Western Red Cedar cladding with hidden stainless steel screws.

Note the air gap:
2017-07-02_19.22.59.jpg


Also, 4mm gap between cladding to allow for expansion:
2017-07-02_19.23.22.jpg


From those who have been here before, I presume that's all in order?
 
Great thread, any progress? I'm designing something similar as a garden bbq hut thing so looking for all tips possible!

Sent from my ONEPLUS A3003 using Tapatalk
 
Thanks for the reminder Brian!

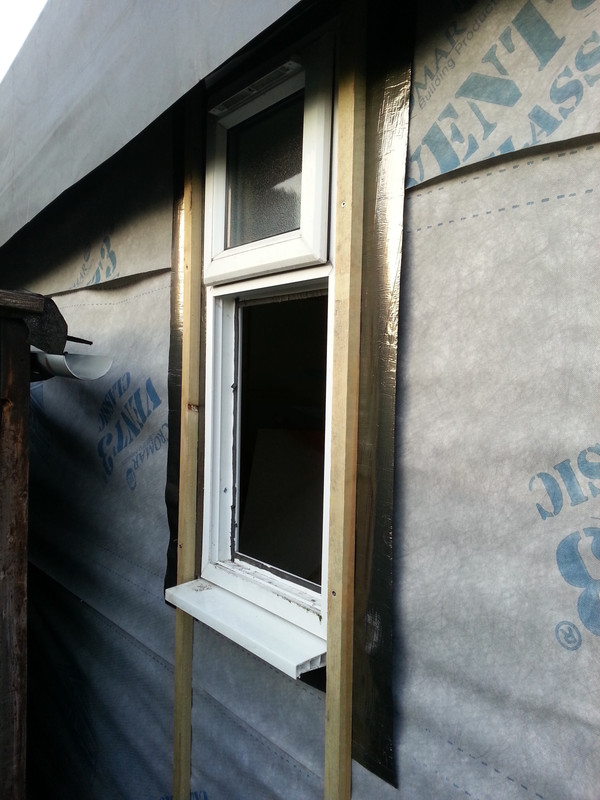
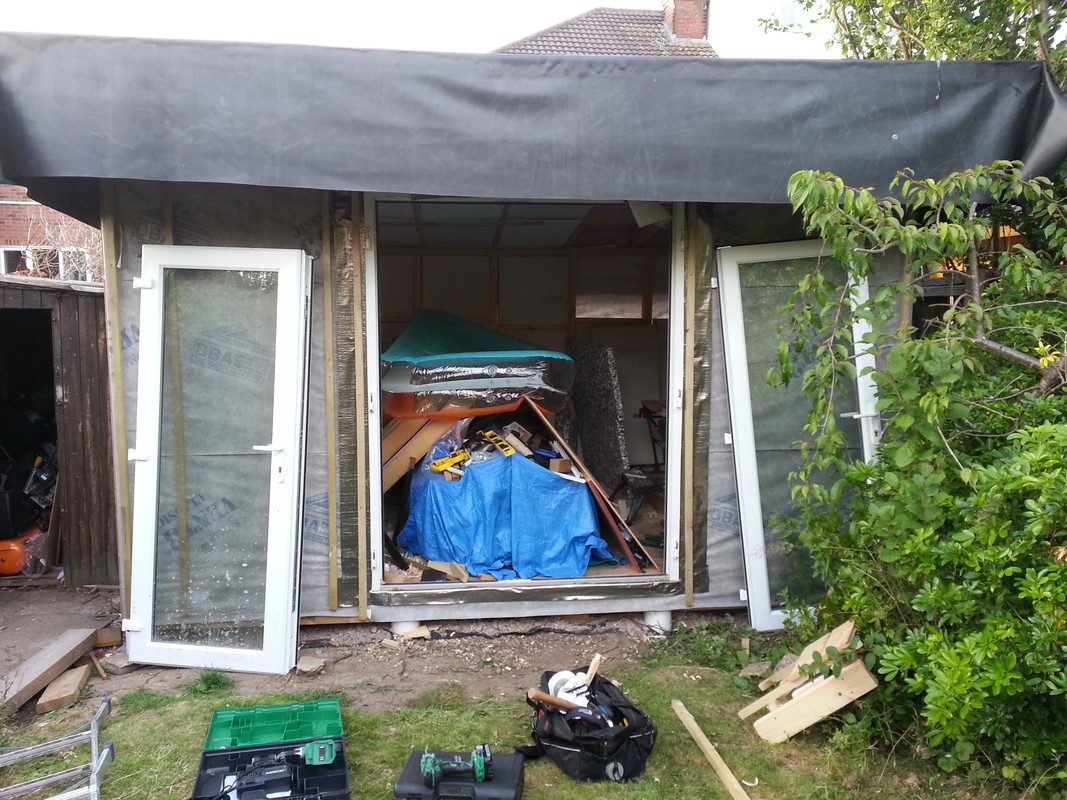
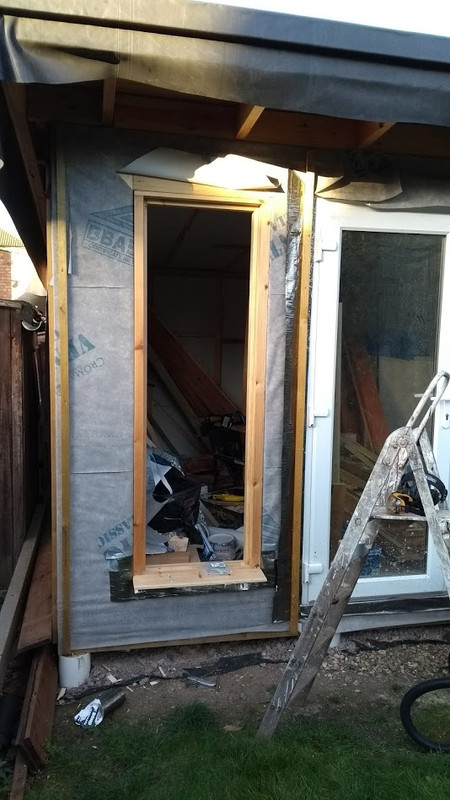
Fitting the window frames and French door frames was easier than I was expecting, though the flashing I used seems more suited to bitumen roofs than windows (hence the battens holding it in place!).
2017-07-15_20.40.39.jpg

2017-07-15_20.40.57.jpg

(Yes, there are some annoying bubbles in the rubber roof overhang. And already the workshop is housing an inflated paddling pool. Sigh...)

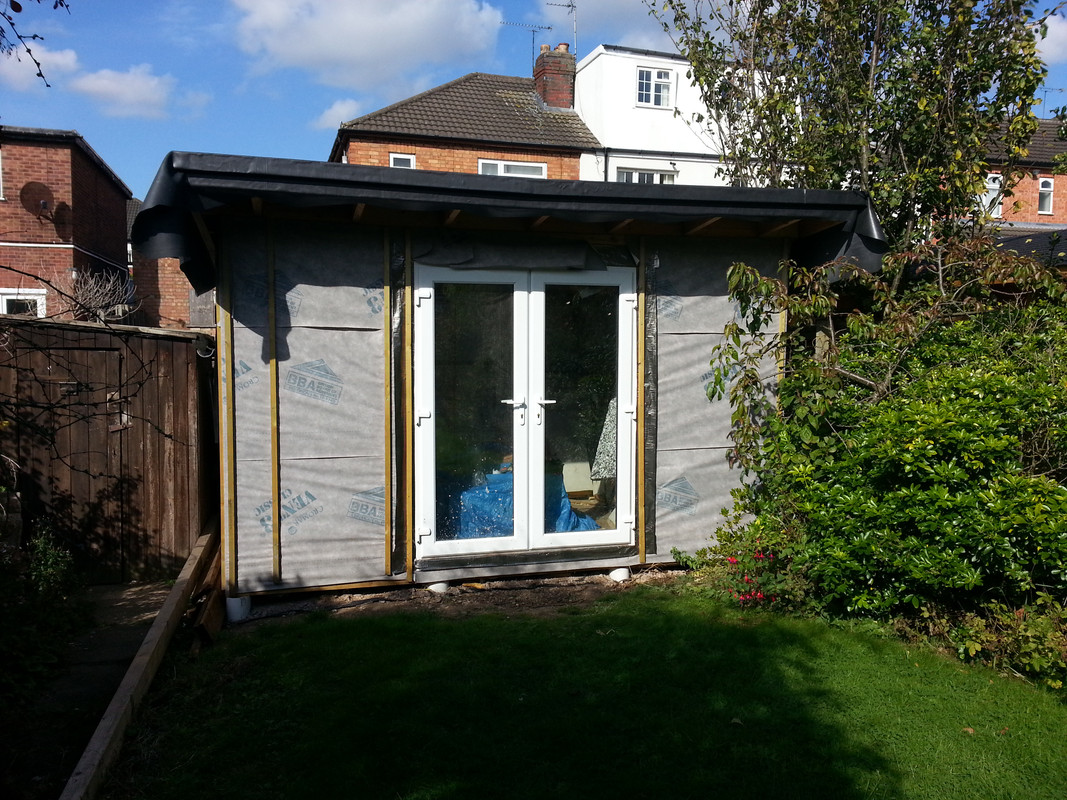
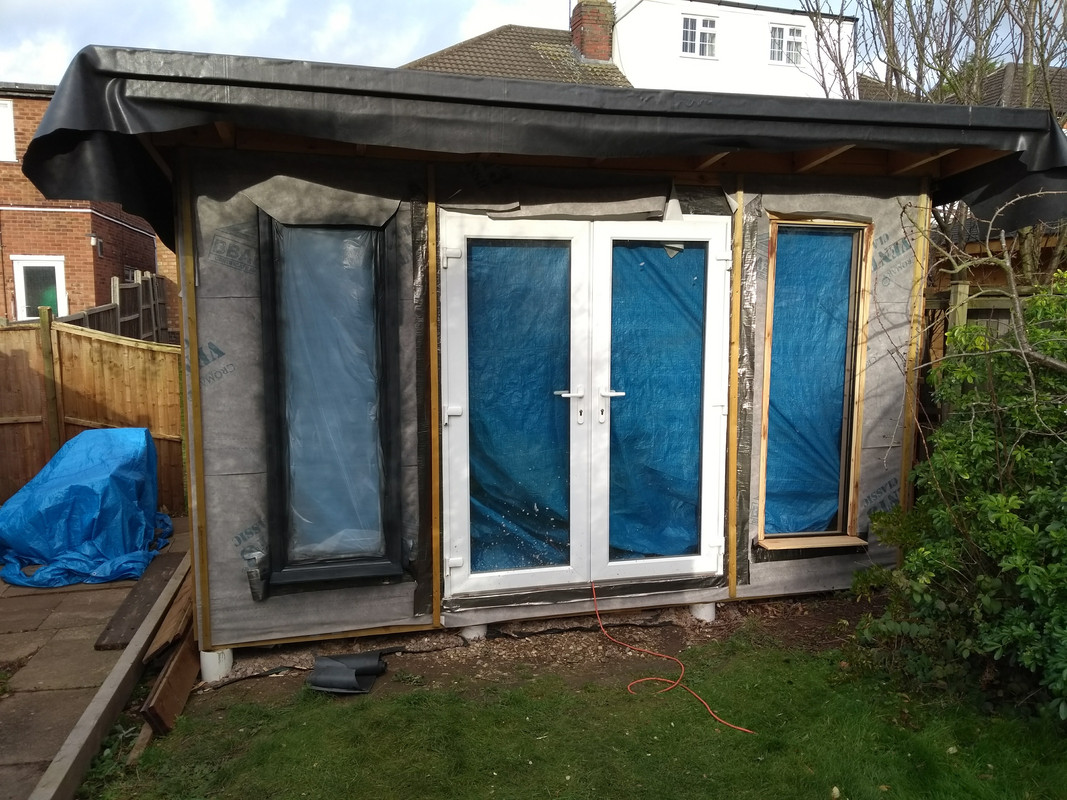
Fitting the UPVC window beading back in was a bit more tricky, and I managed to crack one of the sealed units after hitting the beading too hard with a rubber mallet. And French doors are the 2nd heaviest substance known to mankind (after EPDM rubber). But in the end there were place (and the rubber cut back). Almost looks like a workshop!
2017-09-19_15.05.21.jpg

(If you happen to notice the centre of the roof being fractionally lower than the edges, of course that's entirely deliberate to drain water inwards, and isn't the result of me mismeasuring anything, honest... :? )

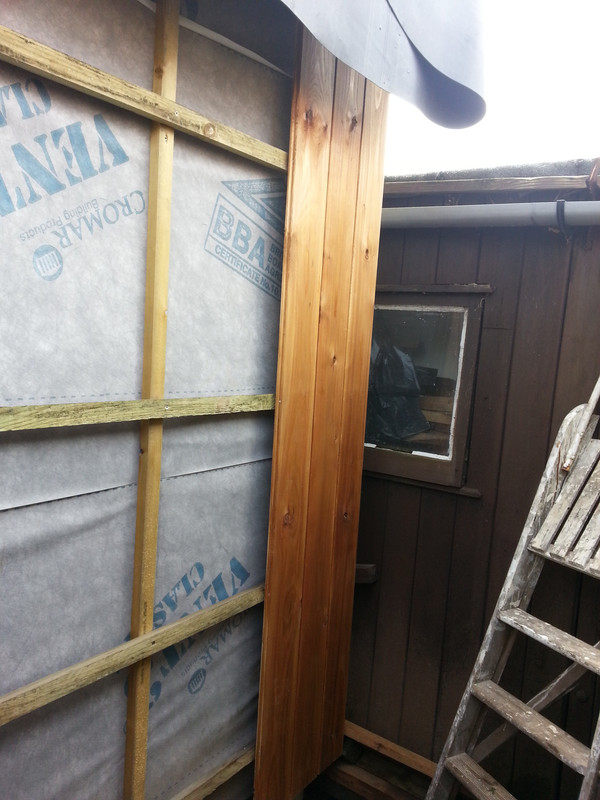
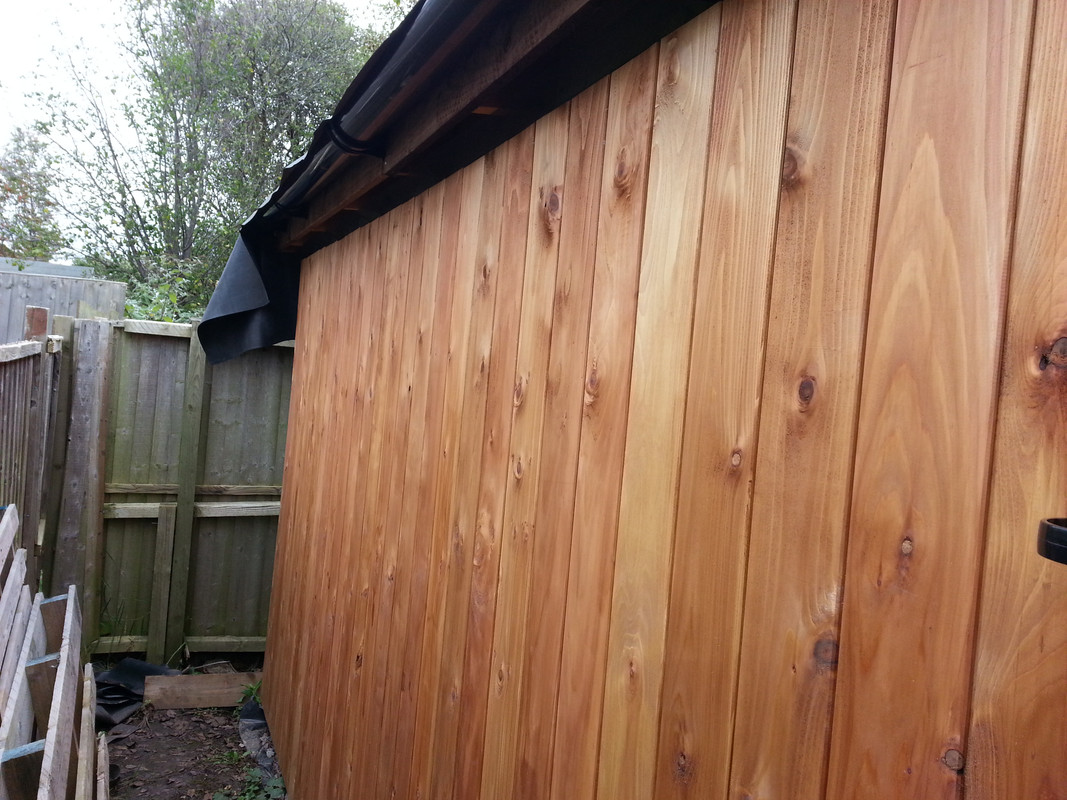
After that I started cladding the rear, which is the least visible side - hopefully I'll know what I'm doing by the time I get to the front! Vertical battens, then horizontal counter battens (which I had to bevel inwards with a hand-planer then weather-proof with stain), then the British Western Red Cedar vertical cladding:
2017-09-19_13.28.48.jpg

The counter-battens were only 2.4m long as that's what would fit in my car, so are lapped in the middle to help support the cladding.

I gave the cladding one coat of Treatex Cedar Oil before fitting, which gave it a great golden colour, I'll give it another coat when in place. 4mm expansion gaps, hidden TongueTite 3.5mm x 45mm Stainless Steel Torx fixings (you might just be able to see the screw in the 2nd photo). Slightly bevelled the top and bottom of each plank to drain water outwards.
2017-09-19_13.28.56.jpg

2017-09-19_13.29.11.jpg


I had to put some insect mesh over the back of a couple of loose knots to stop any bugs making their way in, will need to insect-mesh the top and bottom later.

I've now clad the whole of the back of the workshop (pictures to come!). Getting this far was so satisfying, though doing the sides (which increase in height towards the front) will be more of a challenge. I also need to paint the side windows (Anthracite Grey) before I clad around them, and then make and paint the front window frames on either side of the doors. And the rear and side soffits, and finish off the insect mesh...
 
It's been a while since the last update - not a huge amount has happened, due to illness, kids, holiday, etc.! But here goes...

The back of the workshop is now cladded (need to finish off the roof-line and insect mesh)...
2017-10-07_12.55.29.jpg


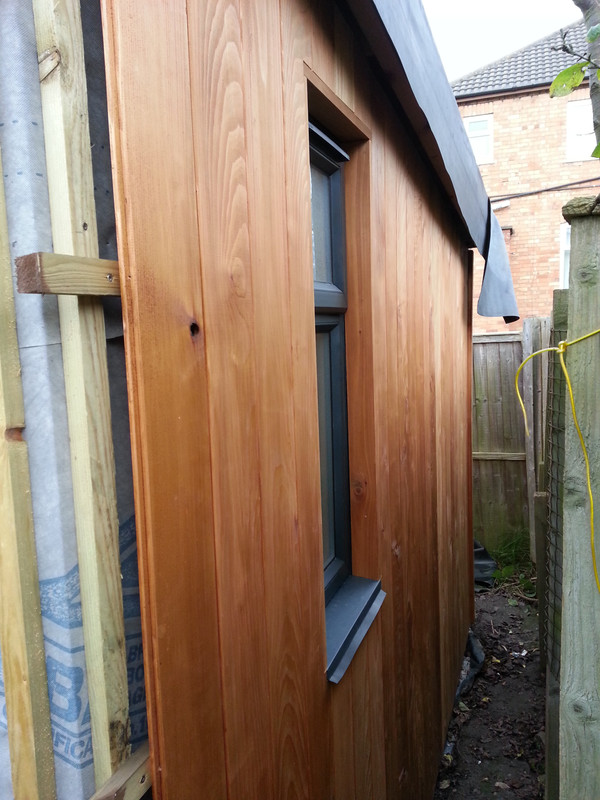
And the side, with the window (sprayed in Anthracite Grey) trimmed:
2017-10-21_13.29.59.jpg


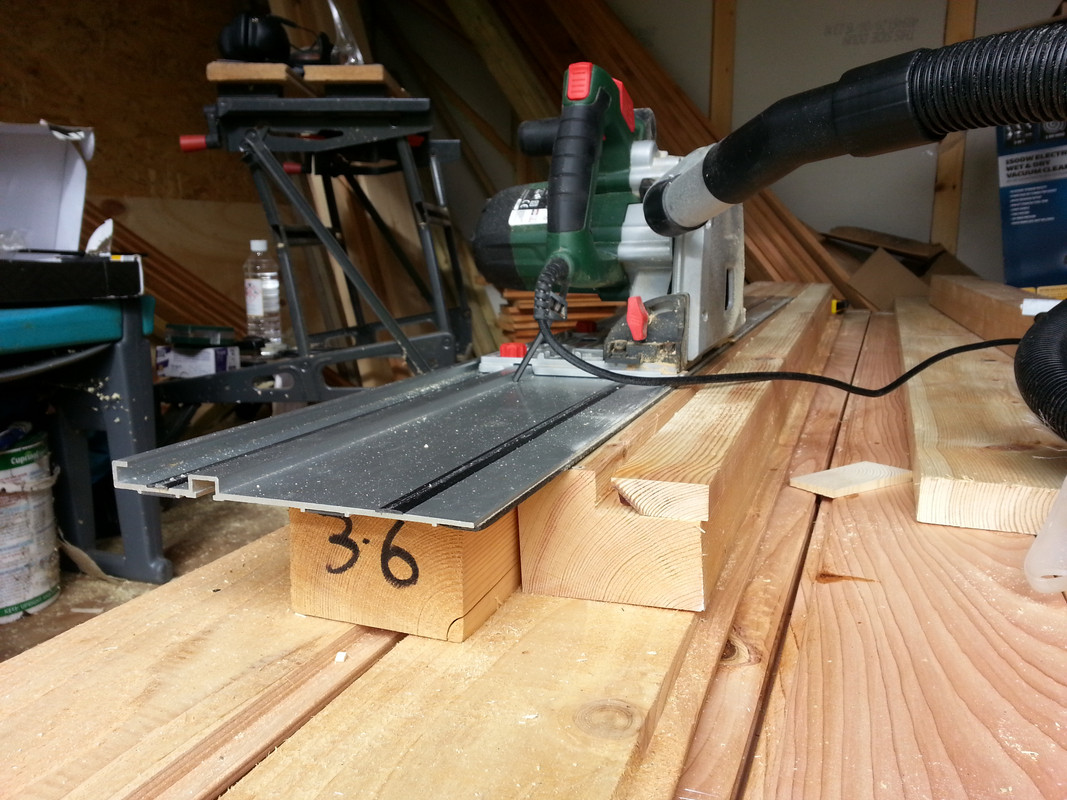
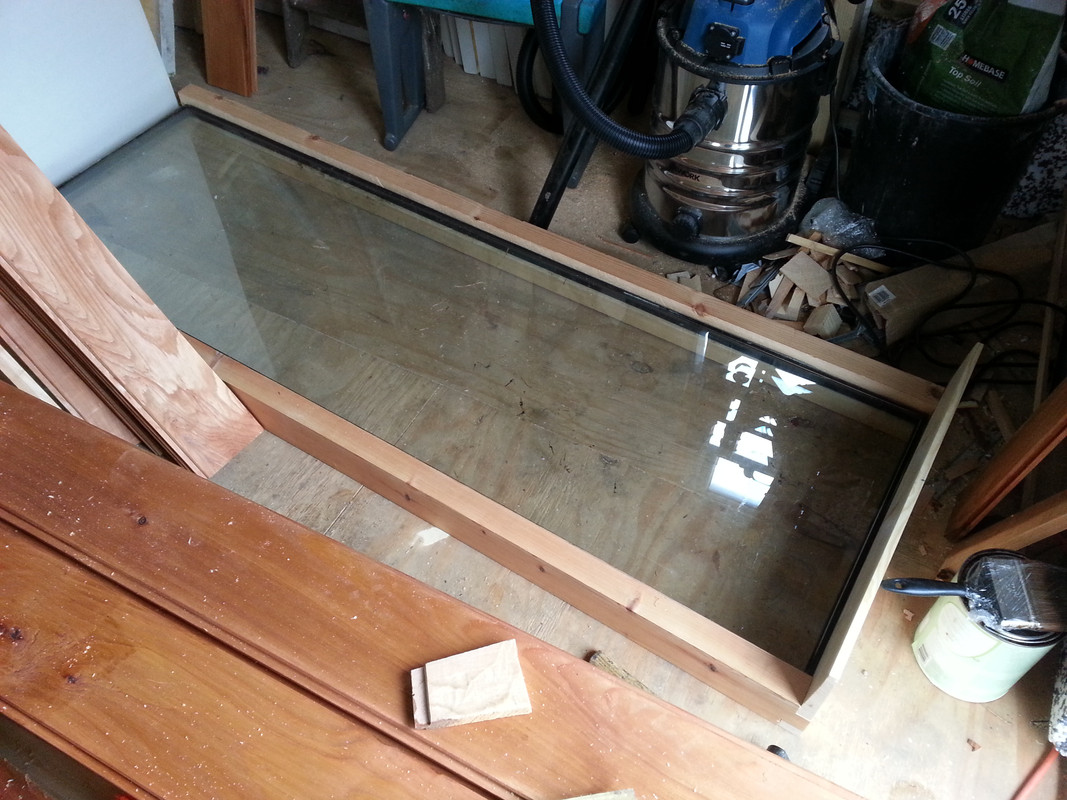
Now for the large side window frames... I wasn't sure of the best way to do this, and probably wouldn't do this in the future (too much risk of kickback!) but I cut sections out of 65x95 redwood using a plunge saw with several passes and many clamps (this is a side of one of the frames):
2017-10-13_11.28.25.jpg


Bridal joints at the corner with a bit of room for adjustment (thanks for the advice on your workshop post, Fitzroy!). A nice big sill to ensure water gets beyond the battens, counter battens and cladding (I may need to cut it back later).
2017-10-21_14.37.25.jpg


A nice fit for both the frame into the hole (held in by 85mm screws) and then the glass into the frame (with glazing packers). The glass is held in place using security tape, with battens in front, attached with butyl tape and panel pins. Frames and battens were coated with wood preserver, to be sprayed later.
2017-11-12_150843563.jpg


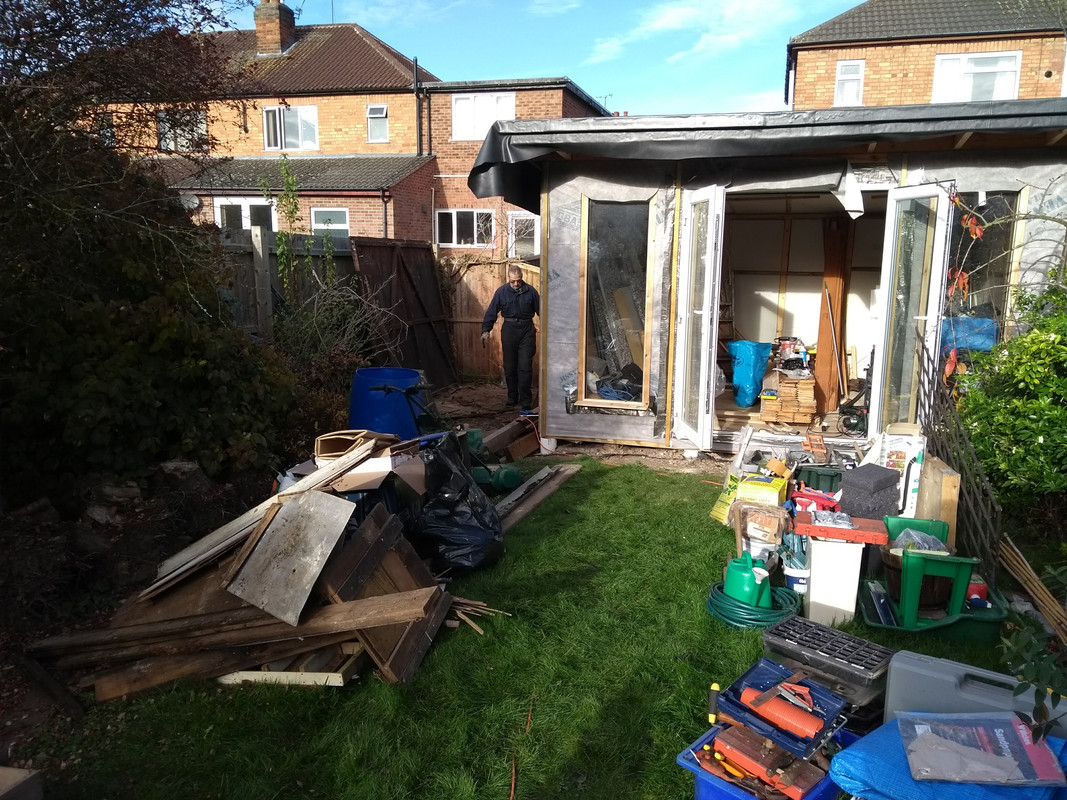
Dad came to help with the window frames and cladding, but, annoyingly, I ran out of window flashing to go around the edges of the windows (which goes under the cladding) and had mis-cut the top and bottom window battens for the right-hand window, so we finished insulating inside (it's amazing how much space 120mm thick solid insulation takes up!), and disassembled the shed which needed to go soon to allow cladding of the left-hand side. To do that, we had to empty it and then store everything in the workshop. Without the insulation, and things tidied away, there's a surprising amount of space (no photos of inside, sorry!).
2017-11-19_122626401.jpg


I filled the gaps in the window frames, and sprayed the left-hand window. Once the right-hand battens' wood preserver has dried, they can be fitted, filled and sprayed.
2017-11-23_132201455.jpg


Hopefully to be continued! Thanks for watching :)
 
Lots to update you on...

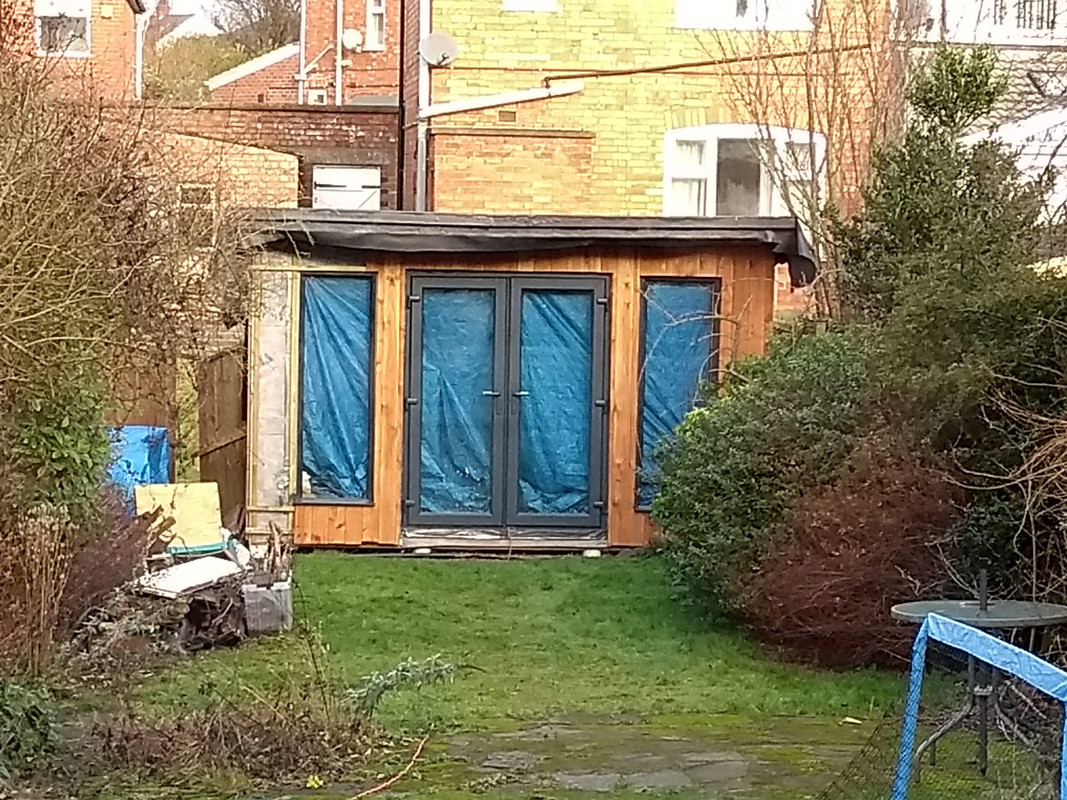
The whole of the workshop is now clad (with the exception of the underneath of the overhang, and around the edges of the EPDM. Unbelievably I've forgotten to take a photo since finishing it, but here's how it look partway through (sorry for the rubbish photo):
2017-12-24_105035443.jpg


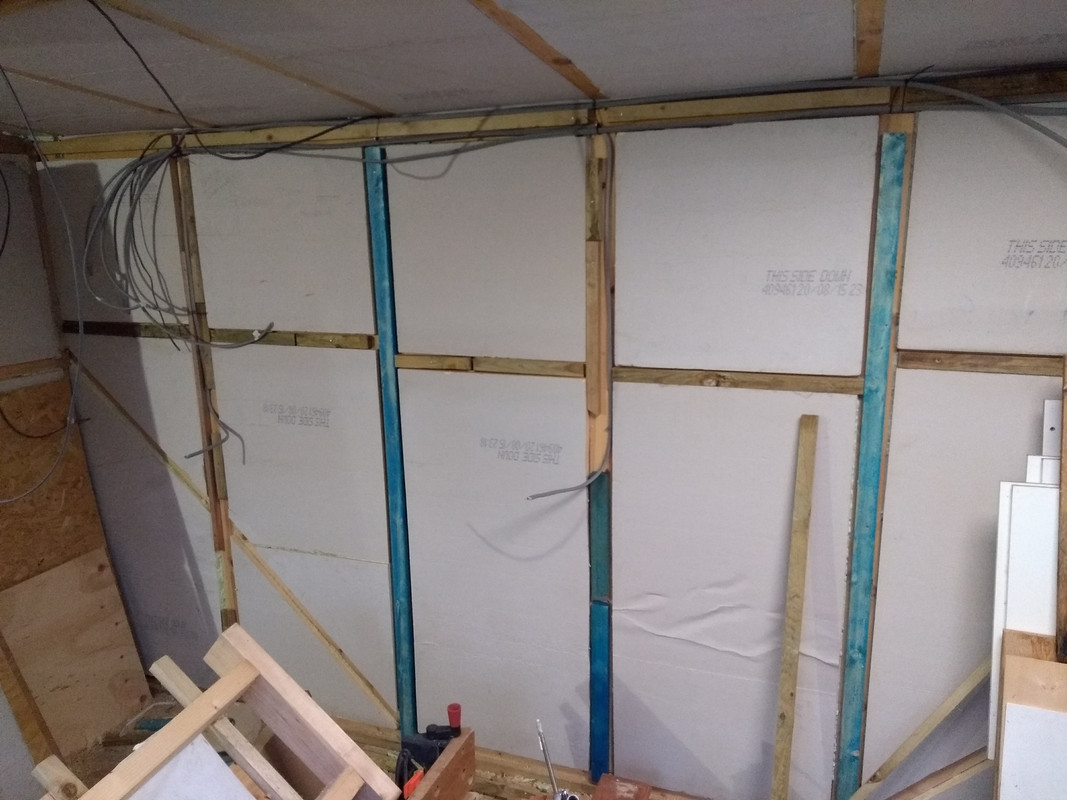
Inside we've laid out the cables, trying to keep them all at the ceiling and running vertically down studs. The consumer unit will go in the top-left:
2018-01-27_1.jpg


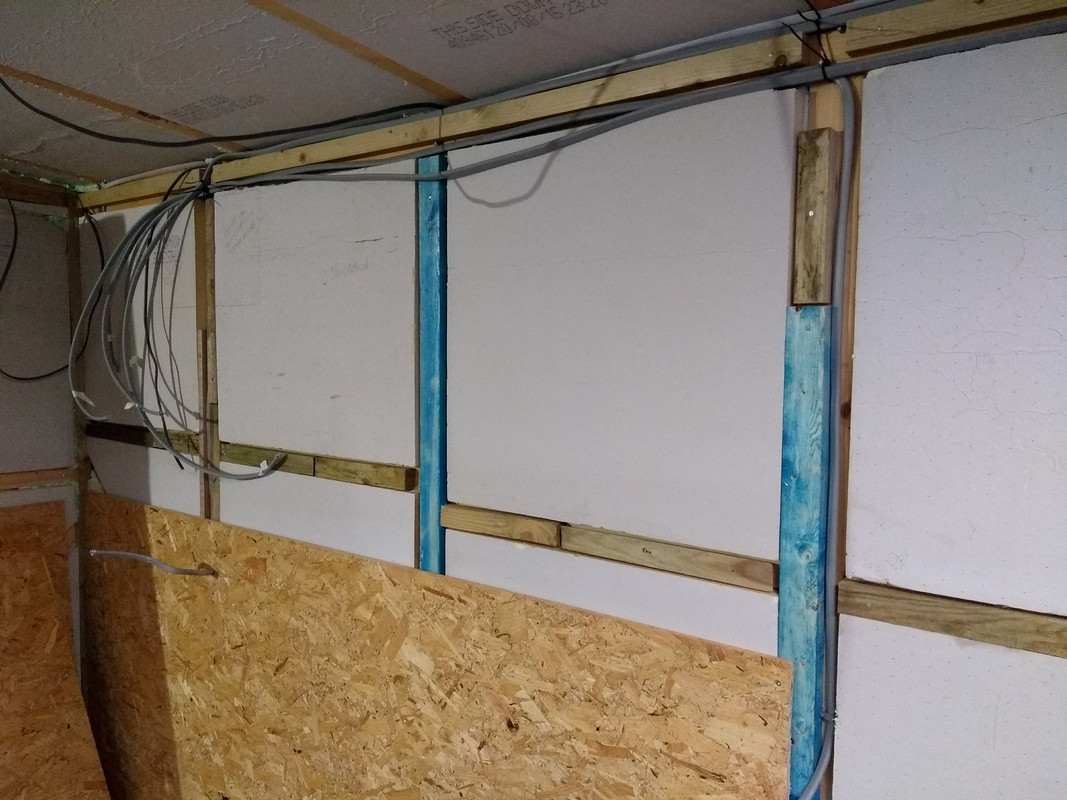
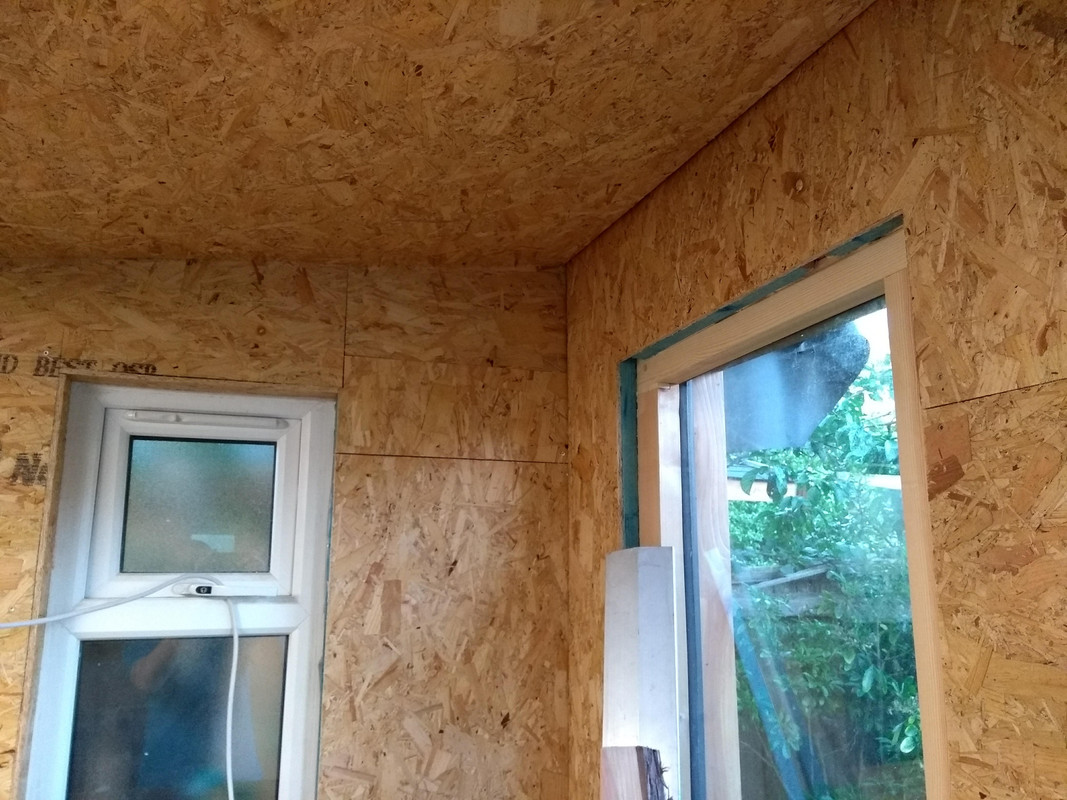
And sheathing can start! 9mm OSB3 onto battens (regular readers will remember that I have 95mm deep studs and 110-120mm thick insulation!). This neatly lets cables (even the overkill fat ones I ordered) to run down the gaps, as the battens aren't quite as wide as the studs. 12 double sockets should be enough...right?
2018-01-27_2.jpg


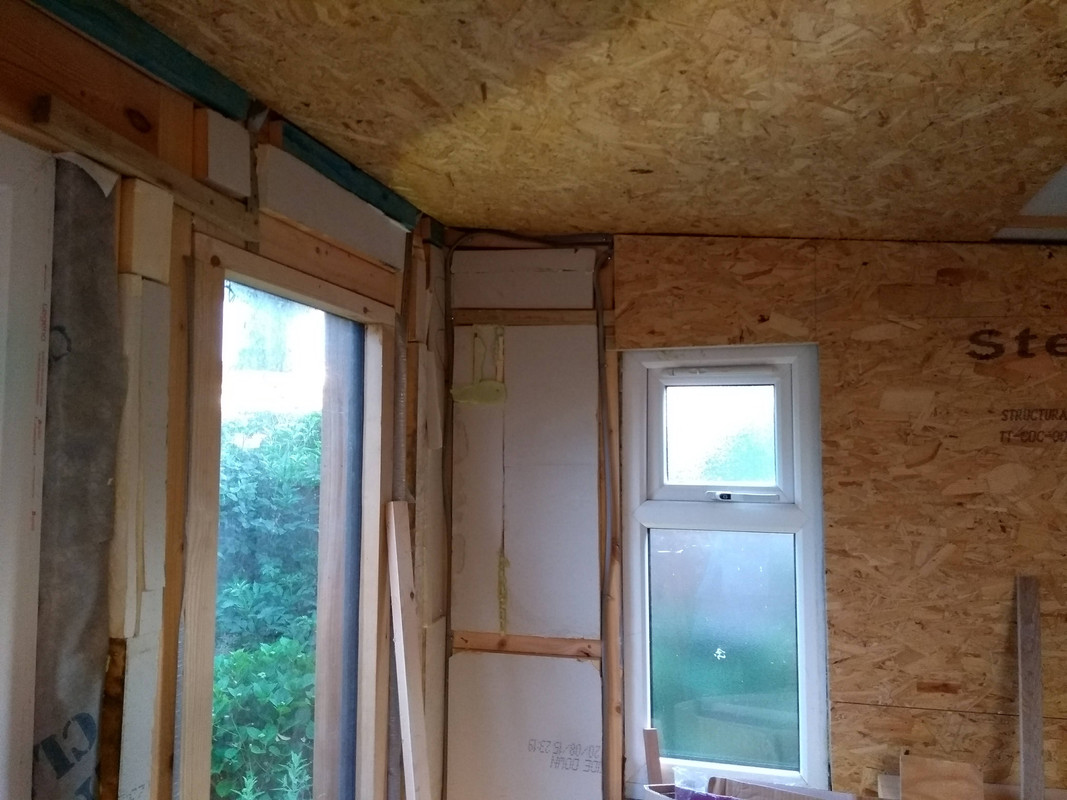
Sheathing continues...
2018-06-10_204416968.jpg


My clever camera-work has carefully hidden the large amount of mess everywhere!
2018-06-10_204407958.jpg


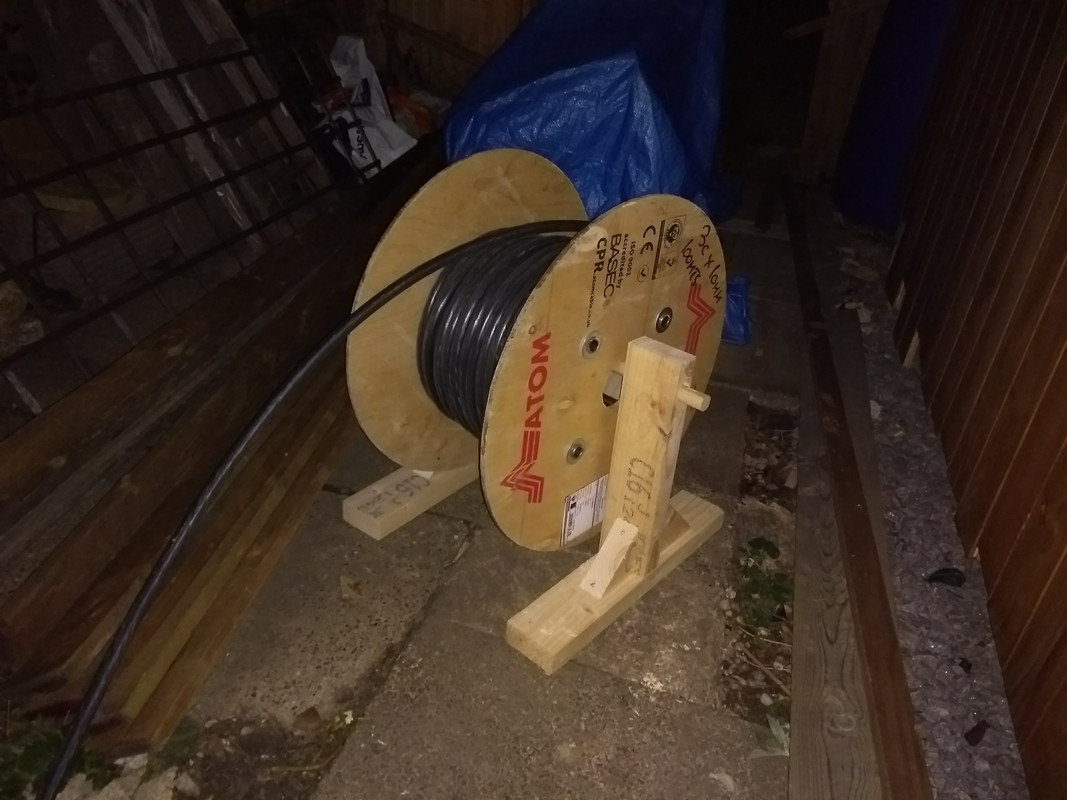
The 50m of armoured cable arrived, and I invented a stand to help run it down the garden. My invitation to Dragons Den hasn't arrived yet, but I hope to sell them for a fortune...
2018-02-02_201516361.jpg


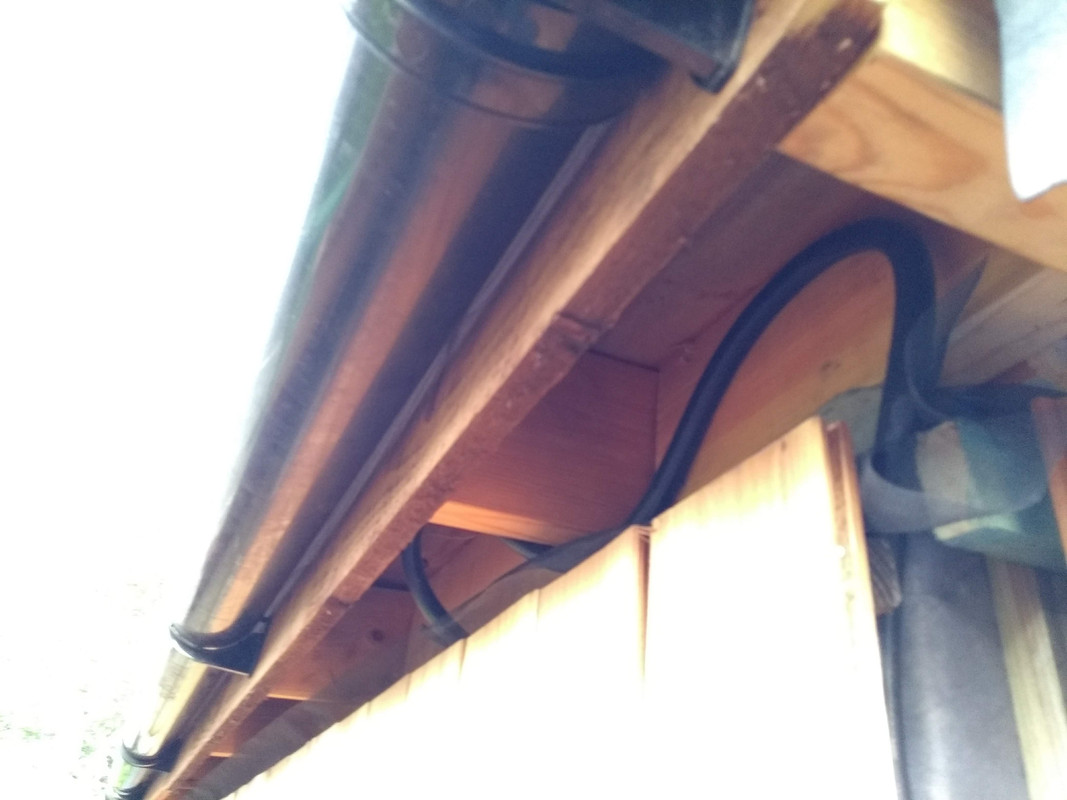
The recent hot weather helped with bending the cable so it runs up between cladding and insulation, curves around in the roof void, before heading inside through the insulation...
2018-06-10_204510593.jpg


Window and door trim, and most insect-meshing is done (no photos, sorry).

Still to do:
  • Attach the armoured cable to the fence with clips.
  • Clad underneath of overhang, and edges of roof.
  • Finish off internal sheathing.
  • Wire-up all sockets, lights, etc.
  • Finish off the corner cladding where the armoured cable went in.
  • Get an electrician in to connect up the armoured cable at both ends and sign off our connections.
  • Insect-mesh around the bottom of the cladding.
  • Neaten up the edges of the cladding (along the top and bottom of each side) by running a circular saw along them.
  • Spray the left-hand small window.

Then I can actually do some wood work!
 
Do you have any details on the anthracite grey paint you used on the windows? I'm looking to do something similar with white uPVC door and windows.

Martin
 
martin.a.ball":yw9nu8r0 said:
Do you have any details on the anthracite grey paint you used on the windows? I'm looking to do something similar with white uPVC door and windows.

Hi Martin, it's Monster Satin Anthracite Grey Spray Paint https://www.amazon.co.uk/Monster-Satin-Anthracite-interior-furniture/dp/B00ZAISDBU/ref=sr_1_1 (was £9.99 when I ordered).

I washed the frames with soapy water, and let them dry. I sprayed them with Monster PVC cleaner spray, wiped the frames again and let them dry, then sprayed the frames (having masked the glass and surrounding area).

It was easier than I expected, but took a bit of practice to avoid a streaky finish. The paint can scratch off if you're not careful, but it's far cheaper than getting coloured frames!
 
kdampney":3p3lisbo said:
...it's Monster Satin Anthracite Grey Spray Paint...

Quantity-wise, 2 x 400ml cans did the 2 small windows, 2 large windows and the French doors with one coat.
 
It's been a while since the last update, so here's where I'm up to:

Possibly repeating myself, but the cables conveniently fitted into the gaps between the insulation and battens (on the studs). See previous posts for why I've got battens on the studs :)
2018-07-30_195906916.jpg


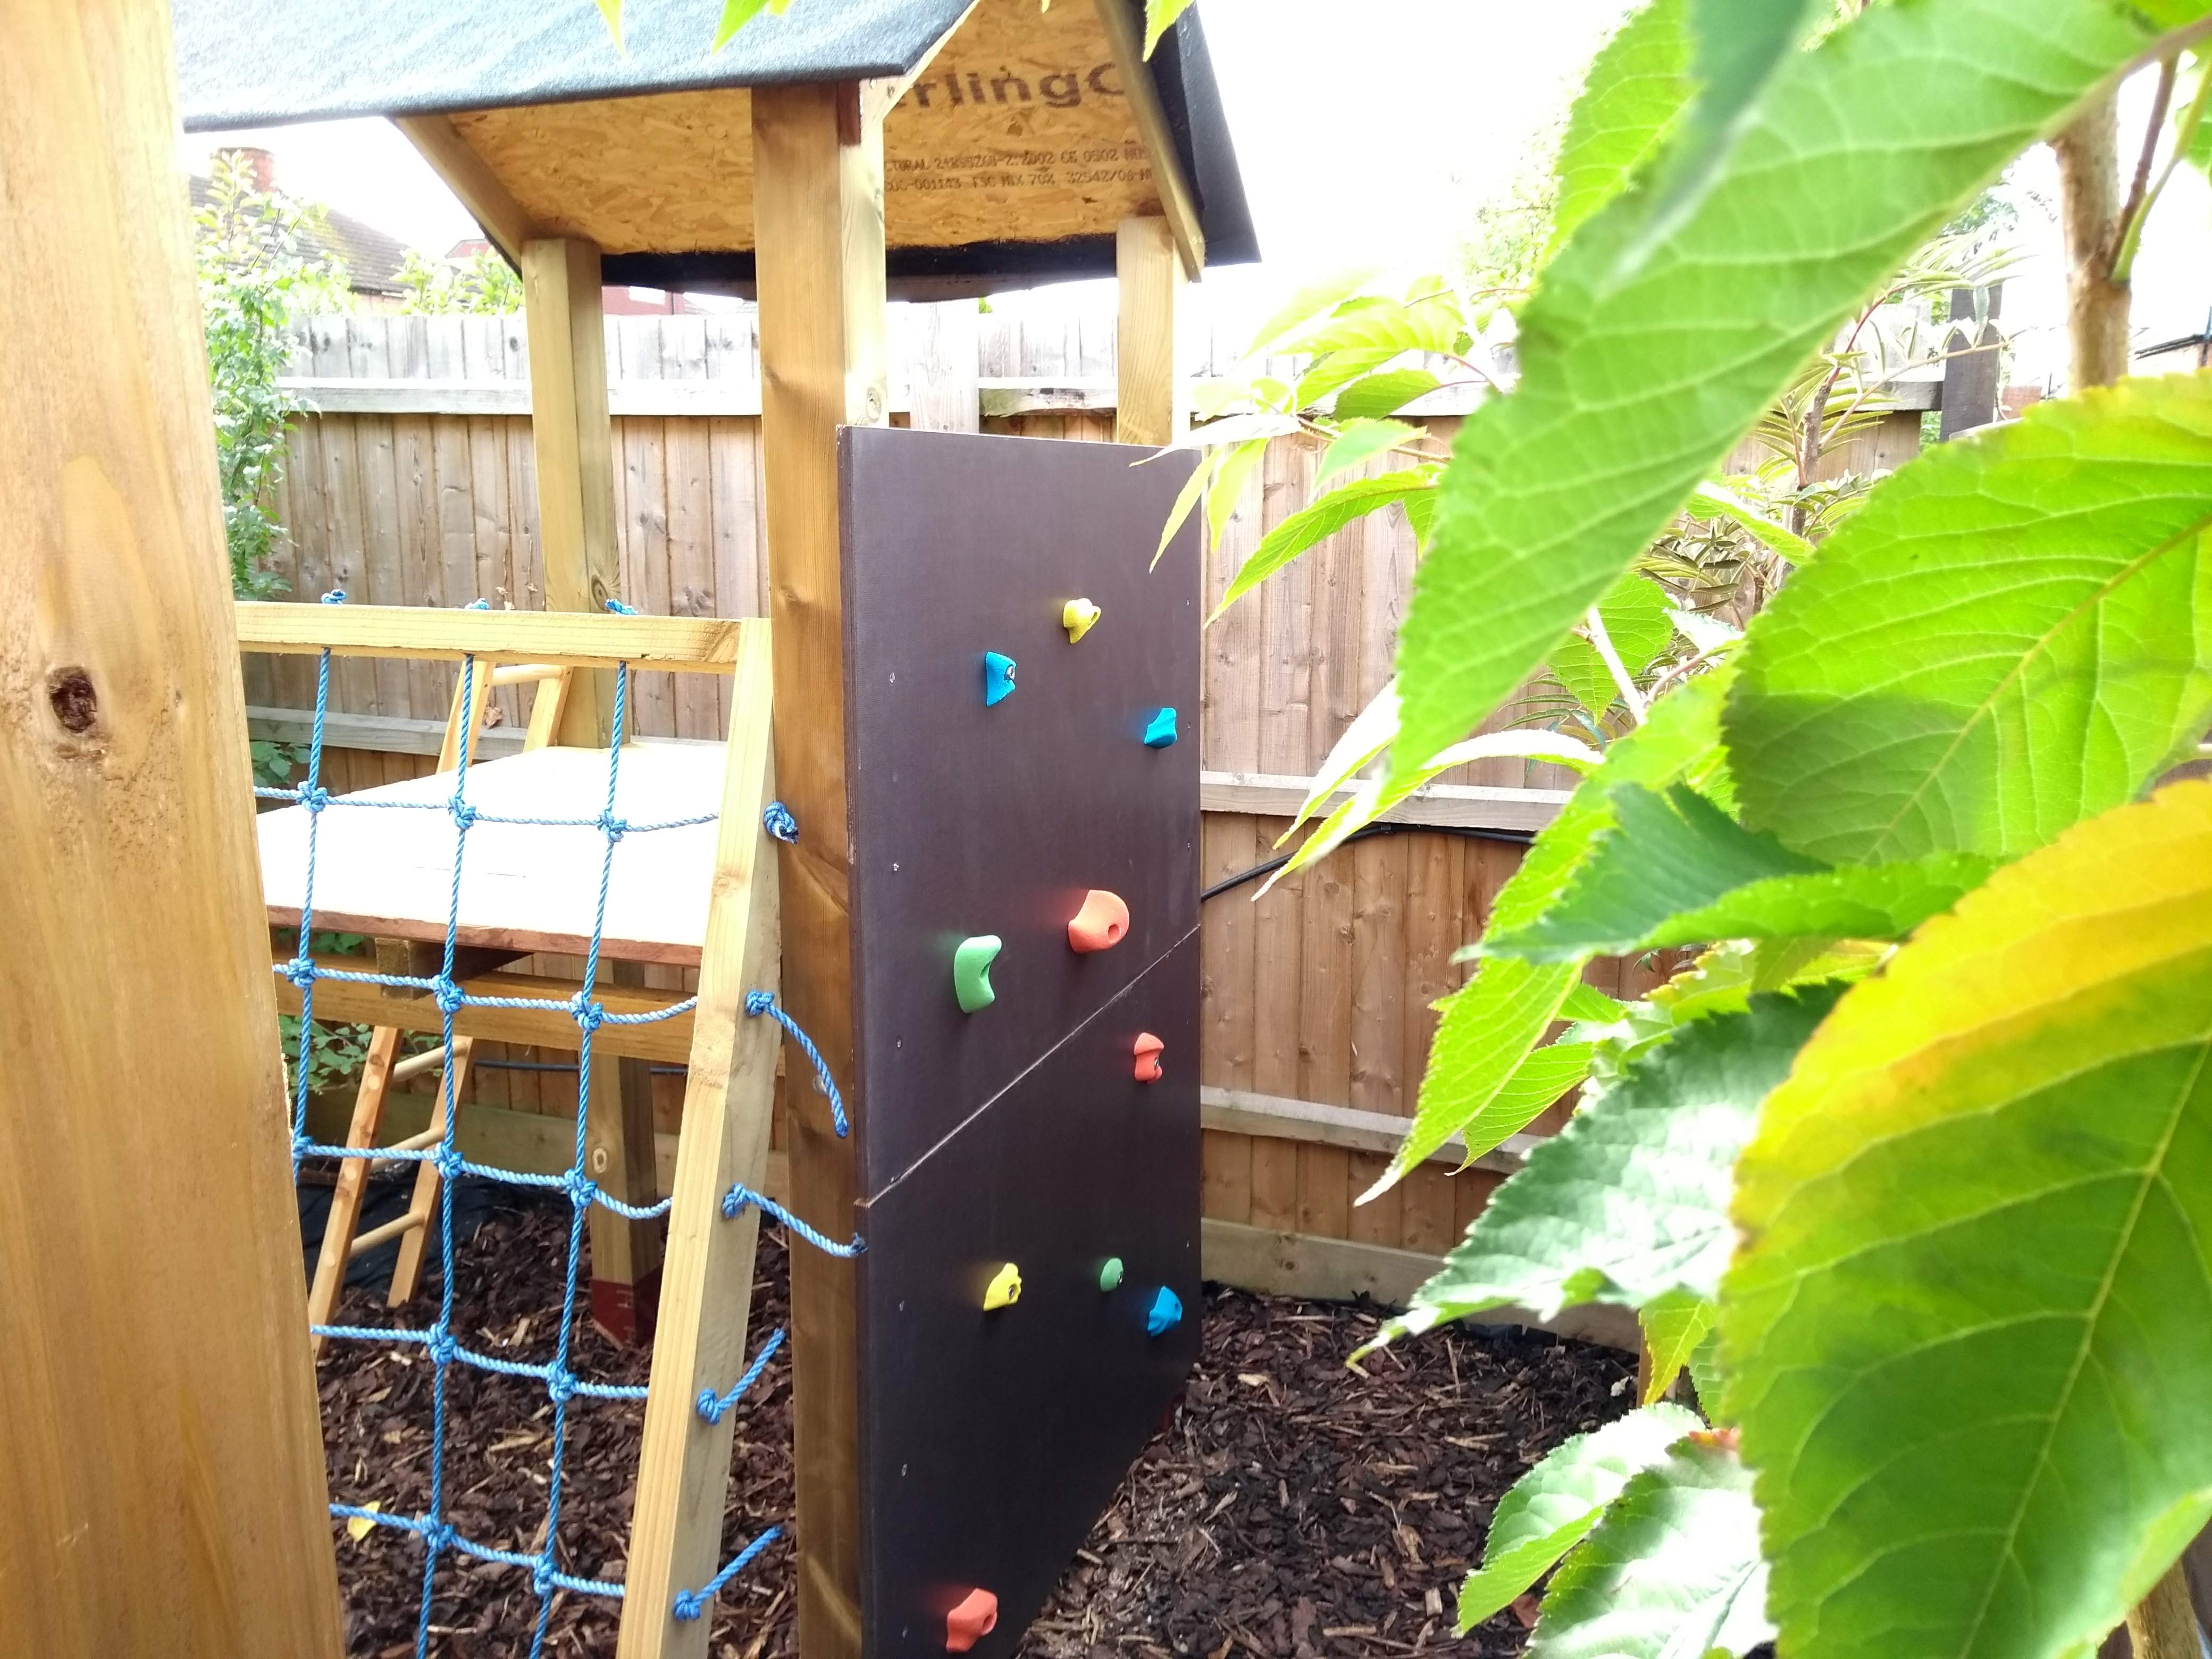
And then I got distracted. My lovely wife suggested we get something in the garden for our kids to play on, and, of course, that meant me building it... (I may do a WIP at some point, but it's fairly straightforward, and should be easy to extend):
2018-09-28_115123708.jpg


Climbing wall at the back:
2018-10-07_150930798.jpg


And then, as another distraction, we got someone in to put down decking around the house, remove a large concrete slab in the middle of the garden and turf it, and put down a patio in front of my workshop. Before:
2018-10-28_142031373.jpg


We carried on wiring up the workshop, and tested the spotlights (also check out the patio):
2018-11-30_204820582.jpg

Looking good :D

Here are the cables and the armoured cable coming together. I planned for the CU to be mounted on a smaller bit of OSB so that if it needed taking down for maintenance it wasn't on a huge unwieldy sheet.
2018-12-04_221217328.jpg


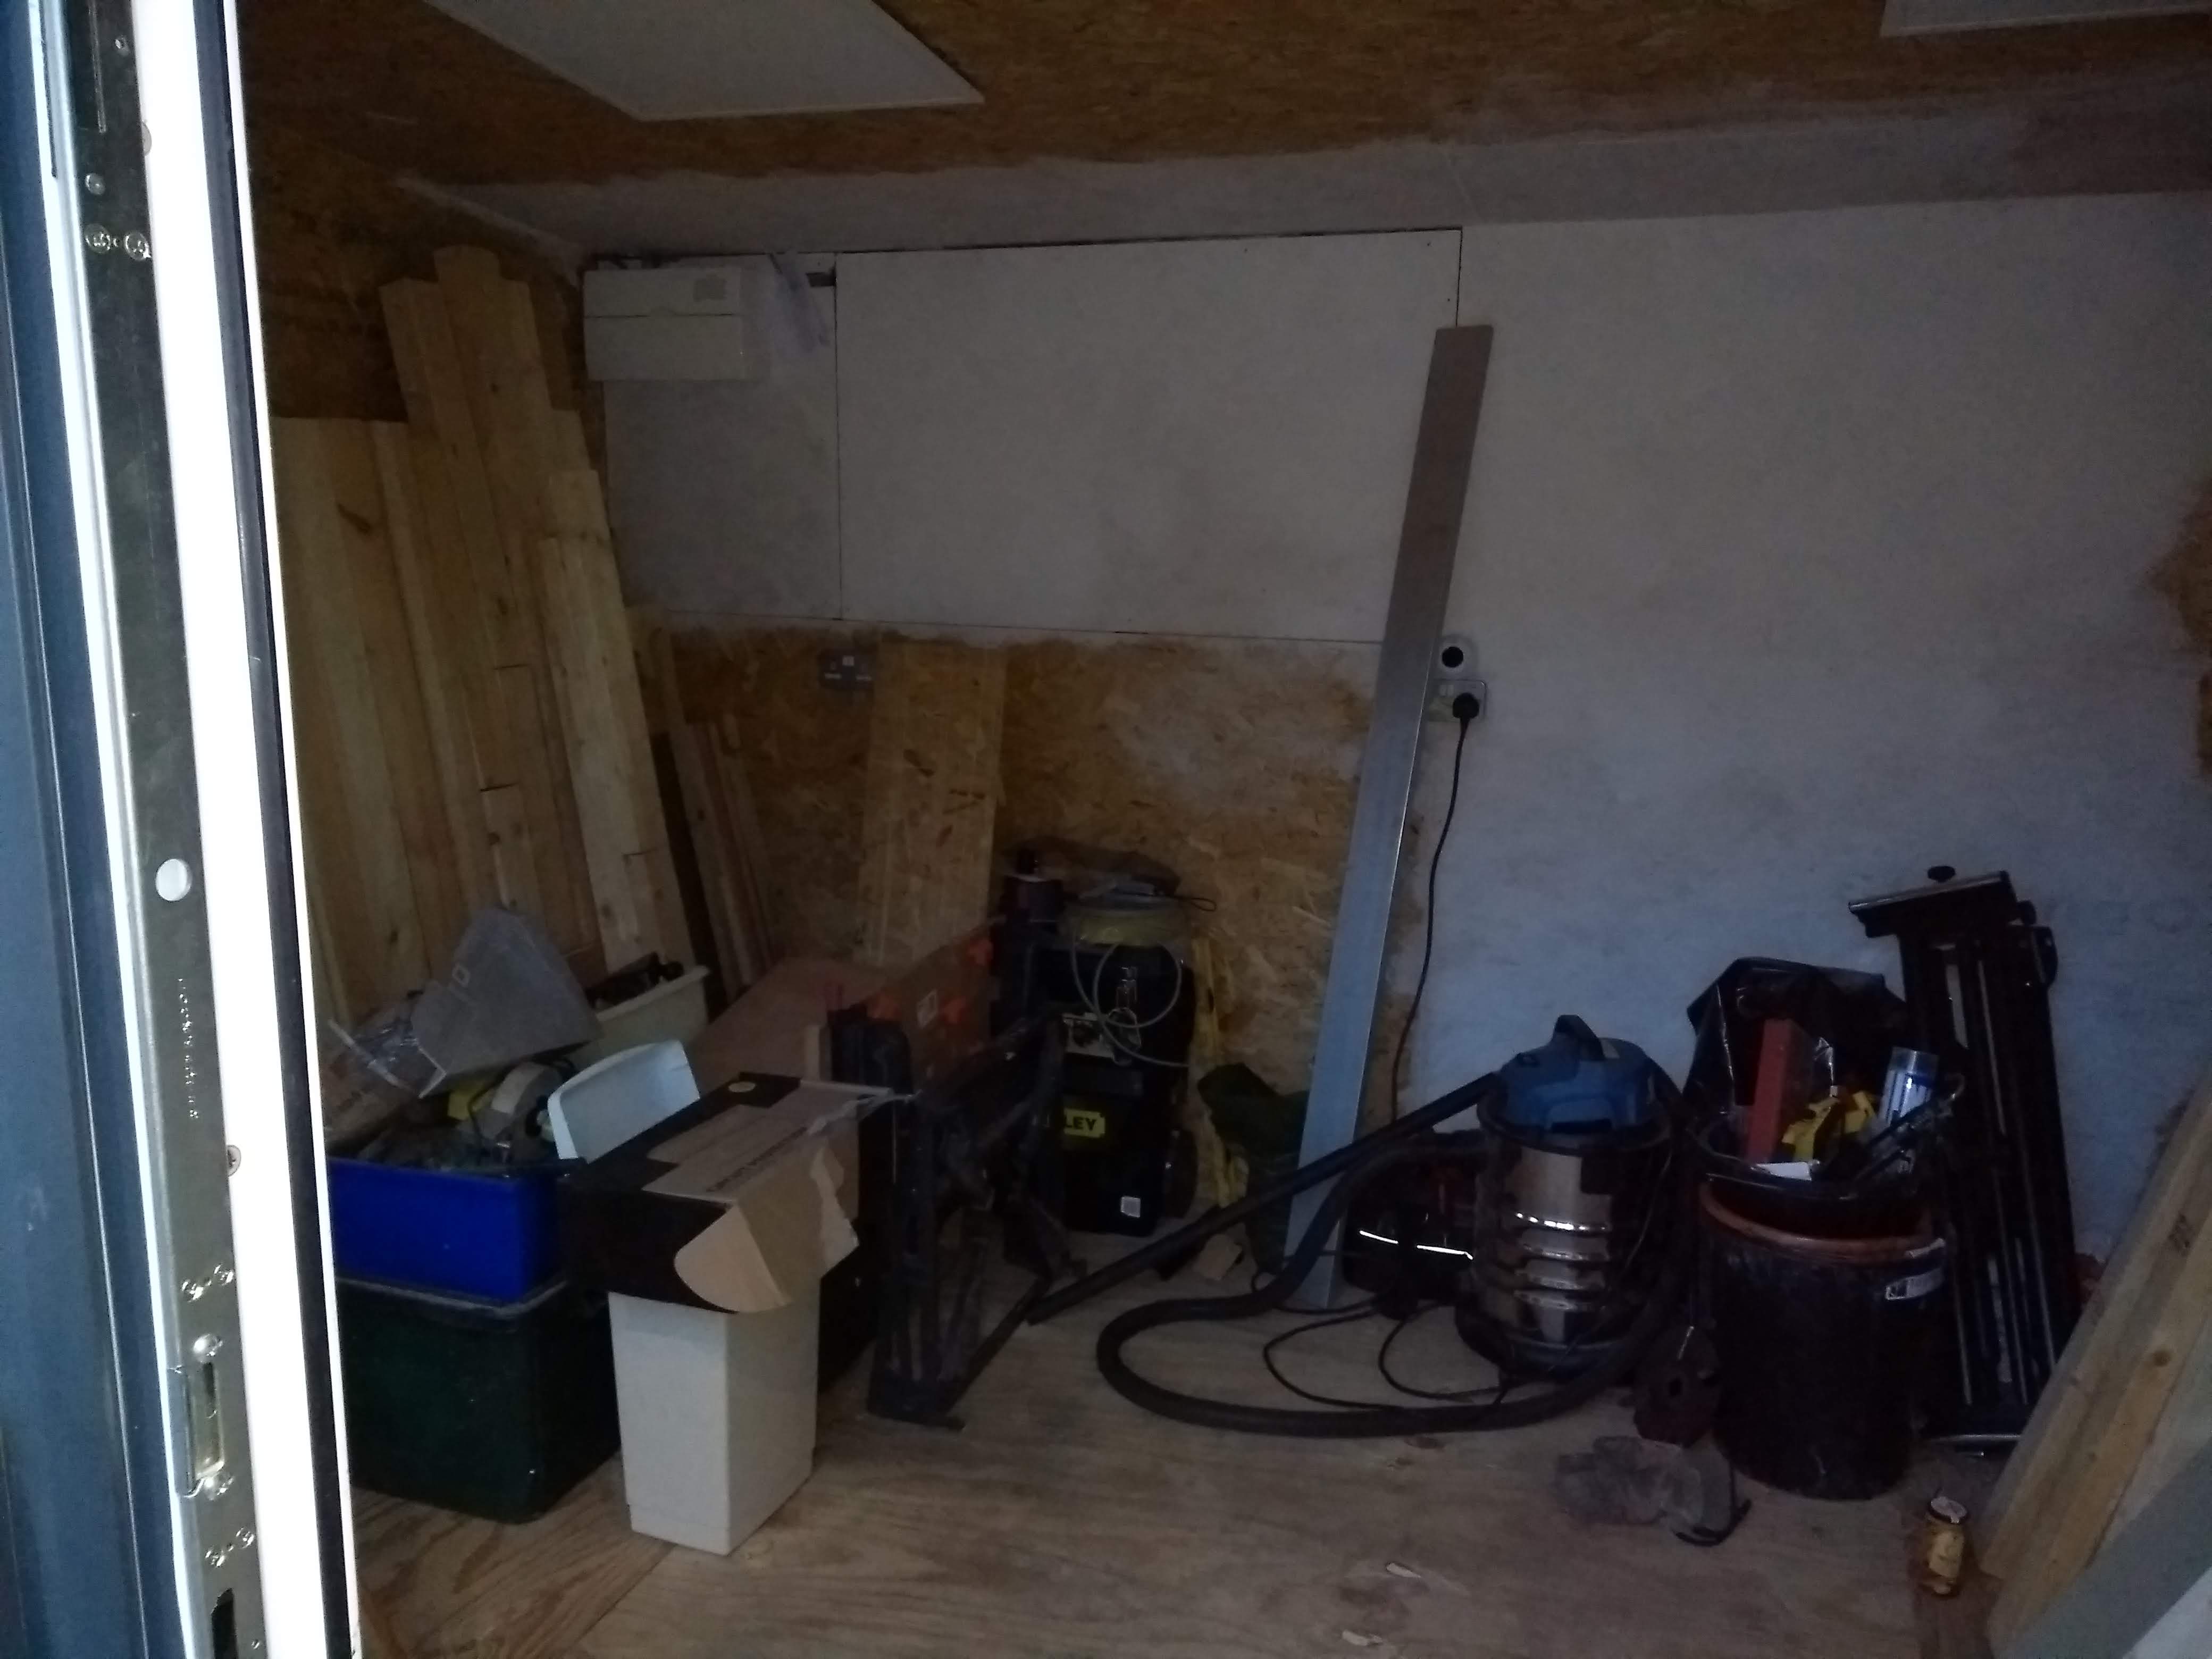
The electrician finally came round (a year after first quoting!) to wire up the consumer unit in the workshop, connect up the armoured cable to the house consumer unit, and test all of the sockets and connections. CU visible in the top left. And I shifted things around inside, so finally had enough room to do stuff in there!
2019-01-15_162229481.jpg


First step was to build a good-size workbench/mitre station (based on this Modular Mitre Station - I'll probably build the other bits later).
2019-01-28_210416923.jpg

It's a bit high currently, so I'll either chop the legs down, or use the assembly cart to build on.

Still need to finish off the underhang all the way around, sort out insect mesh and the last bit of cladding. Almost there!
 

Attachments

  • 2018-07-30_195906916.jpg
    2018-07-30_195906916.jpg
    370.6 KB
  • 2018-09-28_115123708.jpg
    2018-09-28_115123708.jpg
    2.7 MB
  • 2018-10-07_150930798.jpg
    2018-10-07_150930798.jpg
    1 MB
  • 2018-10-28_142031373.jpg
    2018-10-28_142031373.jpg
    1.9 MB
  • 2018-11-30_204820582.jpg
    2018-11-30_204820582.jpg
    714.9 KB
  • 2018-12-04_221217328.jpg
    2018-12-04_221217328.jpg
    2.4 MB
  • 2019-01-15_162229481.jpg
    2019-01-15_162229481.jpg
    350 KB
  • 2019-01-28_210416923.jpg
    2019-01-28_210416923.jpg
    1.2 MB
Back
Top