Sharpening very slim chisels. By hand.

UKworkshop.co.uk

Help Support UKworkshop.co.uk:

This site may earn a commission from merchant affiliate links, including eBay, Amazon, and others.
bugbear":3ew04ty1 said:
pe2dave":3ew04ty1 said:
http://flickr.com/photos/davepawson/2080831771/ Posted on Flickr with a couple of notes.

Can you post a photo of the chisel, preferably with something else in the photo for scale (e.g. ruler or AA battery) ?

BugBear

http://flickr.com/photos/davepawson/2081262266/ shows it, drawn to scale.
Is that any good?
x-section. Larger side, 3.3mm. Smaller 1.9mm
Length of square section 90mm, tapers over length from 6 down to 4.3mm
at start of bevel.

Had an idea last night. Using plastacine or blue tac to 'bed' the chisel
into the groove I cut out. It would hold it a little more firmly, unsure for
how long.
 
pe2dave":79oavjwy said:
bugbear":79oavjwy said:
pe2dave":79oavjwy said:
http://flickr.com/photos/davepawson/2080831771/ Posted on Flickr with a couple of notes.

Can you post a photo of the chisel, preferably with something else in the photo for scale (e.g. ruler or AA battery) ?

BugBear

http://flickr.com/photos/davepawson/2081262266/ shows it, drawn to scale.
Is that any good?
x-section. Larger side, 3.3mm. Smaller 1.9mm
Length of square section 90mm, tapers over length from 6 down to 4.3mm
at start of bevel.

Had an idea last night. Using plastacine or blue tac to 'bed' the chisel
into the groove I cut out. It would hold it a little more firmly, unsure for
how long.

Won't a Veritas Mk II hold that? It (also) references the back of the blade; I know it won't handle super-short blades (e.g. spokeshaves) but other than that, it's pretty versatile.

ah. found this:

Please note that the Veritas honing guide is not suitable for very short chisels. At a grinding angle of 25°, the minimum length of the iron must be 70 mm, and at an angle of 30° the length must be 60 mm (without tang). Most Japanese chisels have a blade only about 55 - 65 mm long when they are new, and this length gets less over time as they are sharpened, so that it is not advisable to purchase a Veritas system for Japanese chisels. The system is, however, the most versatile one for European chisels and plane blades.

(edit) which refers to the Mk 1. Darn.

BugBear
 
bugbear":26qi22tu said:
Please note that the Veritas honing guide is not suitable for very short chisels. At a grinding angle of 25°, the minimum length of the iron must be 70 mm, and at an angle of 30° the length must be 60 mm (without tang). Most Japanese chisels have a blade only about 55 - 65 mm long when they are new, and this length gets less over time as they are sharpened, so that it is not advisable to purchase a Veritas system for Japanese chisels. The system is, however, the most versatile one for European chisels and plane blades.

(edit) which refers to the Mk 1. Darn.

BugBear[/quote]


+1 to Veritas for being so open.

Richard Kell his number 2 claims to handle 'short' chisels. I've yet to see how 'thick' they can be (another issue with Japanes chisels). I'll let you know. I've ordered one.

I do wish people wouldn't advertise kit 'ex vat'. I wonder if he does sell to non_UK, which might explain it.


Dave[/url]
 
Mr Kell's excellent guide will nearly handle one of Mr Iles' wonderful OBMCs (guessing 1/3"+ thick and tapered) just enough to get me a square reference bezel when commissioning it) - it has no problems with 1/4" thick plough blades

Provided care is taken to ensure face stays properly registered when clamping, the guide handles tiny stuff (in width and/or length) rather well - the face registers against the underneath of two parallel steel rails, and is clamped between the inner faces of the roller assembly.

Cheers
Steve
 
dunbarhamlin":23gyvtvk said:
Mr Kell's excellent guide will nearly handle one of Mr Iles' wonderful OBMCs (guessing 1/3"+ thick and tapered) just enough to get me a square reference bezel when commissioning it) - it has no problems with 1/4" thick plough blades

Provided care is taken to ensure face stays properly registered when clamping, the guide handles tiny stuff (in width and/or length) rather well - the face registers against the underneath of two parallel steel rails, and is clamped between the inner faces of the roller assembly.

Cheers
Steve


Thanks Steve. Just what I wanted to hear! Perhaps I can retire my Eclipse jig now.


Dave
 
dunbarhamlin":3gn6czph said:
Mr Kell's excellent guide will nearly handle one of Mr Iles' wonderful OBMCs (guessing 1/3"+ thick and tapered) just enough to get me a square reference bezel when commissioning it) - it has no problems with 1/4" thick plough blades

Provided care is taken to ensure face stays properly registered when clamping, the guide handles tiny stuff (in width and/or length) rather well - the face registers against the underneath of two parallel steel rails, and is clamped between the inner faces of the roller assembly.

Cheers
Steve


Out in the workshop today with the number 2 honing guide. More than a little disappointed. Yes it can do the job. The ergonomics of using it are appalling though. Huge leverage (for my thin chisel it is 12:188 approx) tipping the chisel tip away from the stone, so there is no way to 'hold' the jig keeping the bevel on the stone. Tried all sorts of tricks but came away wishing he'd traded some of his engineering skills for ergonomics.

Steve, how do you hold an 'ordinary' chisel (say 1/4 - 1/2") when grinding?

I'm also curious about the material used for the 'tyres'. How many times before they wear out (running on the w+d paper isn't really a choice with the blade edge being 12mm from the wheels).

Dave
 
Hi Dave

Sorry it's proving awkward - it's the trade off for it being able to handle really short stuff (like the small brass spokeshaves from Tilgear, etc). I use it one of two ways, both of which are really like traing wheels for free handing:

I started just using a grip with finger(s) on top near the sharp end and thumb(s) behind as close to the axle as practical - the upper part of the tool can then be partly supported by the meat between finger and thumb, and pressure directed to the bezel instead of the wheels using a slight pivoting pressure.
[Edit - just remembered] I do also rest spare fingers on the nut/rods either side for extra stability[/Edit]

I do also now palm the tool in my right hand (just place it there - no real grip) to provide support at the appropriate angle and use the finger(s) of my left just above the sharp end, providing the downward force. This is how I also now sharpen free hand - the guide just provides a much larger apparent bezel when gauging the correct angle.

I use the first approach if I've messed up and I've got some reshaping to do.

If it's proving awkward and tipping, try just back strokes until you have the angle, and just like freehanding, try locking your wrists(/elbows) and drive from your ankles

I've had mine a couple of years now, and though the tyres look like they've travelled a few miles, there's no sign of actual wear - they may look like readily shredded little bits of plastic, but they are quite robust.

On the ex-VAT pricing, Richard certainly has outlets abroad (ToolsForWorkingWood, for instance) and so expect he does indeed ship out of the EU.

Cheers
Steve
 
I don't want to spoil the well-started honing guide game, but really, the time spent on the jigs could be used to learn a skill.

I konow, it's not the easiest chisel to freehand, but once you learn it it's easy as eating pie. And it gives you the ability to repeat the process with any chisel, so instead of building a specialized jig for one single chisel you get a skill usable on any tools.

First, clamp the stone down to waist height, kitchen table is about OK. Then, clamp your elbows to your sides (mentally). And then just move your feet and nothing else to move the bevel across the stone.

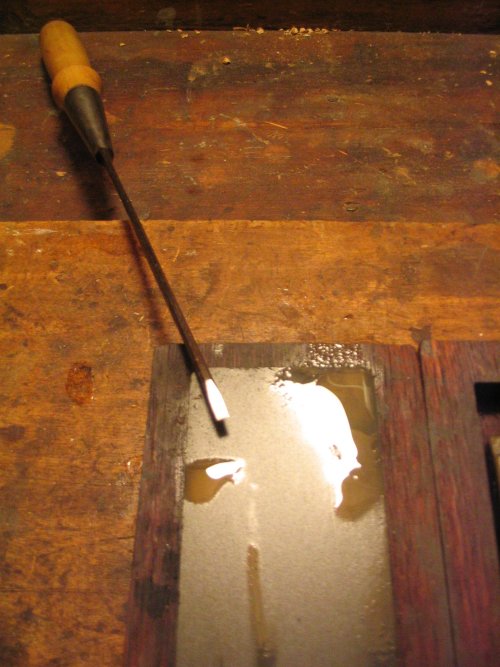
sikapiikki.jpg


It's a 13" long 1/8" chisel, just about the same as yours.

The suggestions on any jigs are good and valuable, but as far as I see it it's just stupid to try to substitute a skill with a gizmo.

I think myself as one of the clumsiest men who hasn't fallen off earth yet, but even I have been able to learn the movements required for sharpening any edge. I'm not brilliant at it, but I know I'm a lot faster at sharpening than building one-off jigs. And they end up pretty sharp in the end anyway.

Pekka
 
dunbarhamlin":hwaq1b29 said:
I started just using a grip with finger(s) on top near the sharp end and thumb(s) behind as close to the axle as practical - the upper part of the tool can then be partly supported by the meat between finger and thumb, and pressure directed to the bezel instead of the wheels using a slight pivoting pressure.
[Edit - just remembered] I do also rest spare fingers on the nut/rods either side for extra stability[/Edit]

I do also now palm the tool in my right hand (just place it there - no real grip) to provide support at the appropriate angle and use the finger(s) of my left just above the sharp end, providing the downward force. This is how I also now sharpen free hand - the guide just provides a much larger apparent bezel when gauging the correct angle.

I use the first approach if I've messed up and I've got some reshaping to do.

If it's proving awkward and tipping, try just back strokes until you have the angle, and just like freehanding, try locking your wrists(/elbows) and drive from your ankles

Cheers
Steve

Hi Steve.
Nice to know about the tyres, thanks. Guessed as much re the export/vat.

With small chisels I'm finding there's no room 'on top near the sharp end'?
Thumbs behind... on the chisel or the guide? I'm convinced something like
this is 'better'. I tried your second method (that's when I rounded the bevel
by lifting) and decided that's where I went wrong. Hard to keep the bevel on
the stone / w+d paper?

PIctures and 1000 words? http://www.flickr.com/photos/davepawson/2091876648/
is, I think, something like your first method?

I guess the key is PATIENCE ('scuse my shouting, I'm lacking it tonight Steve :)

I had tried your second idea. And again tonight. Unless you are very light,
very steady, it's harder was my verdict.

Thanks for the feedback Steve.


Dave
 
Pekka Huhta":2x5qnxlb said:
I don't want to spoil the well-started honing guide game, but really, the time spent on the jigs could be used to learn a skill.

I konow, it's not the easiest chisel to freehand, but once you learn it it's easy as eating pie. And it gives you the ability to repeat the process with any chisel,

Pekka

You have my admiration Pekka. As the saying goes, been there, done that....
and it didn't work for me. Definately not on my small chisel, hence this thread.
The Richard Kell gizmo did work on my 4mm. The 13mm was the problem
today. That now has a flat, 27.5degree bevel (and will be honed tomorrow).
I'd take a picture, but I can only see the result under a 6x eyeglass.
I was reassured by Steves method (I may be more patient next time!)
Like many (except I don't mind admitting it), I sort of, like, gizmo's?
Something about boys and toys?

Dave
 
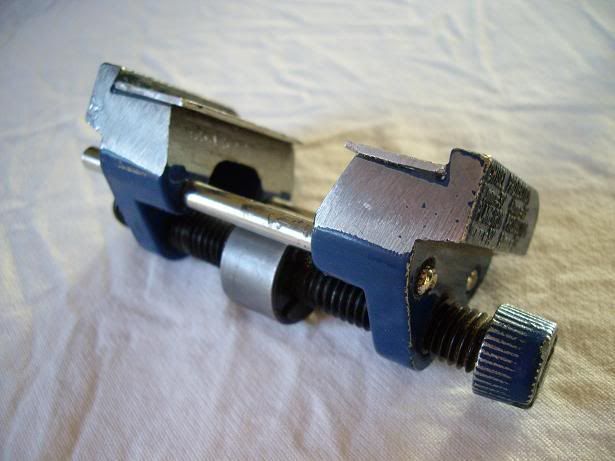
I use a Mr C modified Eclipse clone but it won't close far enough to hold a 3mm wide chisel, which I hone freehand. Pic shows the honing jig:

dfghdrtf.jpg


...with a 6mm LN, stone is the 10000g Spyderco ceramic - Rob
 
pe2dave":36gzg7sp said:
That now has a flat, 27.5degree bevel (and will be honed tomorrow).
I'd take a picture, but I can only see the result under a 6x eyeglass.

Aaaa, but I never cared about .5 degree bevel accuracy or 6x eyeglasses, only on the fact that the edge is square and sharp :D

And I'm not so brave as to try to shave my forearm on a 1/8" chisel. They're sharp enough for wood. :)

Pekka
 
Rob,

That's odd, mine will.

I spent a lot of time on the design so that it would, minimal overhang of the top plates should do the trick.

best wishes,
David
 
David C":3mswvxb9 said:
Rob,

That's odd, mine will.

I spent a lot of time on the design so that it would, minimal overhang of the top plates should do the trick.

best wishes,
David

That looks quite professional David.
You aught to drop Eclipse (whoever owns them now) a line.
They might even pay royalties!

Guessing you tapped into the body for the screws?


Dave.
 
David C":32460uxo said:
Rob,

That's odd, mine will.

I spent a lot of time on the design so that it would, minimal overhang of the top plates should do the trick.

best wishes,
David

David - the cloned jig is excellent, but as you can see from the pic:

sdfgf.jpg


...I was probably a little bit too enthusiastic with the files on the interior sides of the jig when I was doing the mod, hence the reason that it won't close down quite as far as your one - Rob
 
pe2dave":jrlr3693 said:
With small chisels I'm finding there's no room 'on top near the sharp end'?
Thumbs behind... on the chisel or the guide? I'm convinced something like
this is 'better'. I tried your second method (that's when I rounded the bevel by lifting) and decided that's where I went wrong. Hard to keep the bevel on the stone / w+d paper?
Yes, 'tis tight, especially with a steeper bevel.
When space permits, I put thumb(s) behind the chisel - so I'm really just holding the chisel.
The second approach is the same I use freehand, and so the same movements are needed - work on holding arms in a fixed position once you have found the right angle by feel (the guide makes this easier, as it makes the apparent bezel >2" wide and >1" deep) and then rocking from the ankles (or lunging at a constant height) to move your torso and arms back and forth as a fixed unit. If using lubrication, can also gauge when at the appropriate angle by guessing slightly low, drawing back slightly across the abrasive and the gradually raising the tool until a little wave of lubricant appears in front of the edge.

PIctures and 1000 words? http://www.flickr.com/photos/davepawson/2091876648/
is, I think, something like your first method?
Yep, except I tend to have the thumb behind the blade more.

I had tried your second idea. And again tonight. Unless you are very light, very steady, it's harder was my verdict.
With some practice, you will find you can apply more pressure. The key is a constant upper body, moved from below.

Cheers
Steve
 
Back
Top