Reproducing an old bow window

UKworkshop.co.uk

Help Support UKworkshop.co.uk:

This site may earn a commission from merchant affiliate links, including eBay, Amazon, and others.
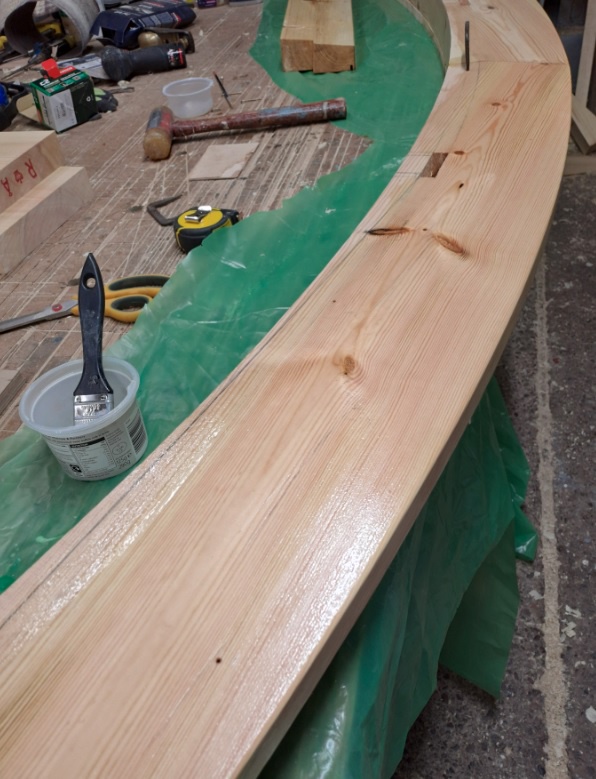
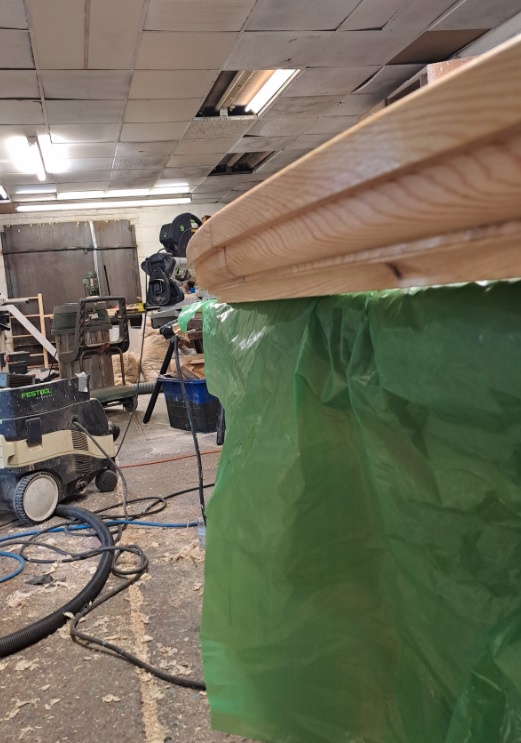
Great write up thanks, I'm about to rebuild a sash dormer window, and I'd always planed a rod for the sills but I'm going to steal the idea of the ply sections. The 'epoxyfied' sill is an interesting idea. You've also made me much more comfortable over my choice of redwood for the window.

F.
 
The epoxy is American smiths clear penetrating epoxy sealer. (Cpes).
Available in the UK of course. It's thin and does indeed sink in nicely even on new wood. Sash case parts are all sizes so decide on the sash thickness(40/45mm for single glazed/vac glazed) and work everything back bearing in mind the sizes of commercial staff/parting beads. I always find traditional sash joinery complicated and confusing and I don't make enough to make it automatic hence I've got one made up to refer to. It's much easier to add the meeting rail after(hence sensible to choose thicker parting beads)
 
The ply sections are basically the map to the window. As the sections end up exactly the same(as there a template on the spindle and a rod on the bench. Also the critical sizes were marked on the full sheet of mdf that's my bench so I've also got square references.
 
Thought I'd finish this of by showing how I cut the glass and put tied the casements.
This is all slightly arcane falling somewhere between witchcraft and legend as new single glazing is not at all common but the act is both slow and satisfying and the result pretty durable on the whole.
Any way the first pic shows tools required basically a sharpie, a straight stick, and a glass cutter.
Measure the opening then take 3 or4 mm of and aim to cut that size. This is to make sure it fits and isn't to tight. Mark the size on your glass. Now I was using old drawn glass I'd brought from Liverpool which was far from flat. But it's still simple to cut. The biggest issue is removing the paint/putty/scratched edge. Mainly because it's a narrow cut.(at least an inch) this means it's hard to get purchase for the break. I use a batten with a saw cut.
The next step is to mark the glass using a ruler and sharpie dots. Then get the glass cutter and line the wheel up with the mark. Then smartly score going forward and listening for an uninterrupted zipp. Just once. Trying to make it edge to edge. Then put a small rod of wood under the score and carefully put pressure on both sides. It should snap! With smaller pieces the rod isn't necessary tbh.
 

Attachments

  • 20240921_105948.jpg
    11.5 MB · Views: 0
  • 20240921_110014.jpg
    11.6 MB · Views: 0
  • 20240921_110018.jpg
    11.5 MB · Views: 0
Next onto the face glazing. This is the term used for finishing with a putty fillet hand applied. I use toupret putty which is a slightly less messy whiter version of the traditional linseed oil and whiting mix of old.
This requires the rebate to be primed otherwise the putty can crack as the oil is sucked out. Although old windows rarely have primed rebates(old stained glass doors seem to have a dark shellac primer)
Start by removing a lump of putty and kneading it to warm it up and make it pliable and homogenous. The old traditional putty can be far from ideal out of the bucket.
Then start to press the putty into the back of the rebate. Finally smooth it forward so its an evening thickness.
My putty knife is basically a polished straight scraper with a fairly robust blade. The ones sold as putty knives are trickier imho. The polish and round is most important.
 

Attachments

  • 20240921_110032.jpg
    11.4 MB · Views: 0
  • 20240921_110038.jpg
    11.4 MB · Views: 0
I can see your pictures up to post 11 but none after as they are 9 to 12+ MB. Curse of rural internet. Perhaps you could resize future pictures to 500KB or less.

You said in the opening post "It was basically a flawed design having a lead roof that didn't protrude far enough to protect the transom which was a poor design having a nailed on moulding almost designed to trap water." Was anything done to correct the roof to prevent the water from damaging your work in the future?

Pete
 
Good question about the roof. I've repaired maybe 6 other windows 2 of which have had new extended lead roofs. The bow window hasn't so I'll probably add a small gutter that can be directed to a nearby downpipe.
I'll try and resize
 
I can see your pictures up to post 11 but none after as they are 9 to 12+ MB. Curse of rural internet. Perhaps you could resize future pictures to 500KB or less.

You said in the opening post "It was basically a flawed design having a lead roof that didn't protrude far enough to protect the transom which was a poor design having a nailed on moulding almost designed to trap water." Was anything done to correct the roof to prevent the water from damaging your work in the future?

Pete

Can you see these Pete?

From post 19

zQSYWDX.jpeg


O0naXF3.jpeg


Try and do some more later or OP / someone else could help
 
Next push the glass onto the back putty until you achieve a visible "seal".
Next add the face putty basically the same thumb technique only scraped across the glazing bar to deposit. Then on to the finishing this involves starting in the corner then dragging the knife into the other corner. Cutting the excess off and leaving it on the glass. The secret being removing enough to allow the final strike off leaving perfect triangles of putty with perfect corners. I take a rather more loose approach doing my best. I prefer a more handfinished look! After I carefully pounce with a soft brush and whiting. The toupret takes 6 to 8 days and can then be painted using any paint. Traditional putty can be painted either immediately or must be left for a time until semi set. Does anyone have any hints they could share?
 
Yes Noel I can see those pictures. When a picture is 6000 x 8000 pixels they are just too large to upload and can't be viewed without scrolling around the screen. 600 x 800 pixels (close to what you put up) are generally good to view on most any screen.

Pete
 
Back
Top