Raised panel doors and yacht varnish tips for the weary.

UKworkshop.co.uk

Help Support UKworkshop.co.uk:

This site may earn a commission from merchant affiliate links, including eBay, Amazon, and others.
I have used fix-all to fill cracks in door panels, it stays flexible so can move with the wood.

I have only seen it in white or clear though but it is over paintable so will probably stain okay.

Don't use silicone as your stain and varnish won't stick to it.

https://www.screwfix.com/p/soudal-fix-all-high-tack-adhesive-sealant-white-290ml/64585
There are plenty of other similar products available, it's just an over paintable polymer based sealant/adhesive.
 
I know, I know, it's all UPVC nowadays!
Must be 50 or 60 years iroko has been used as the "go to" external timber.
Most of them I've came across have had silicone used for the panels,
so perhaps not "tradition" but a more fitting word should be used instead.
Whatever you call it, contemporary fashion might do.

Seems like it might be a better choice.

@Doug71
I think there's a very good range of these brand name tubes alongside some half gone off gorilla glue at the discount pound shop, but I've never looked at any,
will certainly be doing the squeeze test, lol.

Your comment might have saved me some further confusion in the shop. thanks.

Tom
 
....
Must be 50 or 60 years iroko has been used as the "go to" external timber.
.....
Yes as an alternative to more expensive teak, for special apps such as boat fitting, flooring, worktops etc, but wouldn't be wasted on a pair of rubbish garage doors!
 
My father was a builder 50 years ago - I don't recall seeing iroko in any place he built (from a random selection of hundreds). It was all all sapele, utile, meranti, khaya, and various unidentified African heavy reddish coloured hardwoods.
 
I wouldn't use a white filler under stain. Stain isn't fully opaque and the white would show through and give a tacky appearance, as if to advertise that filler was present ...
 
@rogxwhit I was hoping many options might be brown.
I have an idea that the polymer was used beforehand, kinda appears like the stuff from a brief look?

I'd imagine silicone would be a better job, should it be suitable?

SAM_6408.JPG


Seems the best idea if making a profiled scraper is to copy directly onto the sawplate.
Quick rub on the grinder and an old Bahco hacksaw blade made quick work of things so far.
Wasn't shooting to get the entire profile done with one tool, and may have to cut some away and make another, just having a go for interests sake.


SAM_6495.JPG

I'd love to have a buffing wheel to try, lal David's video linked in the first page.
I guess it would be just the job for this @D_W ?
(a must watch for those who would have use for such tools)
 
Silicone & finishes don't mix - ie it can contaminate surfaces, & nothing sticks to it. I certainly wouldn't entertain silicone anywhere in the workshop. Although this is just an external shed door, so you could use it - but it just goes against my prejudices, somehow ...
 
@rogxwhit I was hoping many options might be brown.
I have an idea that the polymer was used beforehand, kinda appears like the stuff from a brief look?

I'd imagine silicone would be a better job, should it be suitable?

SAM_6408.JPG


Seems the best idea if making a profiled scraper is to copy directly onto the sawplate.
Quick rub on the grinder and an old Bahco hacksaw blade made quick work of things so far.
Wasn't shooting to get the entire profile done with one tool, and may have to cut some away and make another, just having a go for interests sake.


View attachment 141925
I'd love to have a buffing wheel to try, lal David's video linked in the first page.
I guess it would be just the job for this @D_W ?
(a must watch for those who would have use for such tools)

I missed this earlier - even though I responded to the thread. I would heat/chemical strip the door first before considering any scraping as the varnish will just pummel a scraper and if the profile isn't perfectly even, it'll be hard to get it clean.

The buffer can help with simple scrapers and buffing the face, but on complex scraping profiles on something coarse - like an outside door - filing to shape and rolling a big burr and keeping the edge crisp will be more important.

I'd re-do the door - if it's going to be stained, and then fill the gap afterward. I've not had great luck with products that claim to be "paintable/stainable" in terms of the outcome being the same as it is on bare wood.
 
I hate to put yet more spanners into an already cluttered works.... but......if it is iroko, it contains oil - like teak & although it may be old iroko, some fillers & glues may not hold too well. Acetone wipe will enable stuff to stick. This is prob all over thinking tho.
Add me in against silicone.... looking at it, like Jacob suggests.. ..fill with 2 pack, sand, paint & forget.
Having planed many feet of Iroko & laminated it for boat ribs I suggest treating it with caution. Use a mask when you sand it.
BTW you were right about profile gauges, but they have been around quite a long time. Mine is over 50 years old.
 
Thanks for the replies folks
@rogxwhit I was thinking the silicone would be used afterwards, rather than beforehand.

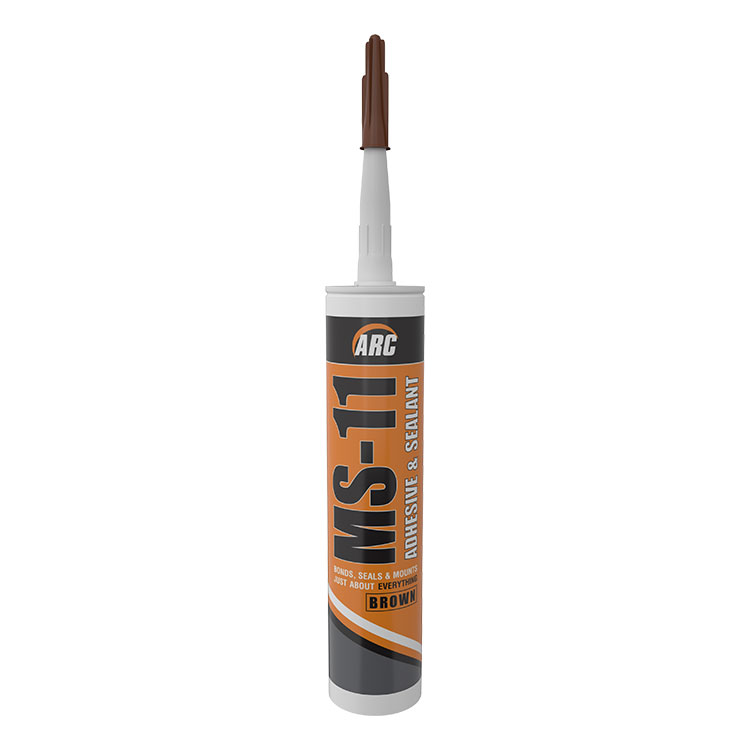
Went shopping and I found this stuff in a tube called MS-11
It was the better looking of the two brown sealants in the shop,
weighs and costs twice as much as the other stuff.
The man said it was like tech 7, and suggested this as I was looking for "something which didn't come loose"
It is a polymer composition, whatever that means

https://retailers.arcbuildingproducts.ie/wp-content/uploads/2018/01/MS-11-Brown.jpg

As an aside I did spot some brown silicone for half the cost at the poundshop, which I presume to have similar properties as what I bought.
Haven't looked up the stuff I bought yet, but presume it's likely the best non putty formula.
I was a bit concerned about the colour match to chance that without much info on the stuff.

@D_W Interesting to hear your opinions about a scraper tool like this.
Seemingly you can get into these corners with the buffing wheel !
From what I gather by your comment, seemingly your biggest worry is the tool getting blunt.
It might make sense to make two if doing this seriously, and have the template for resharpening, (not even sure how I will tackle that yet, just having a quick bash at it, so I can be prepared for something like this again)
And I did buy some sandpaper just incase, but only one pack as that's cheating myself out of some skills to learn otherwise.

@whereistheceilidh
I've heard lots of conflicting stuff regarding oily woods and whether a wipe down is necessary or not.
I've never experienced this happen with iroko and titebond or evo stick glues,
and even if it was the case, chances are the timber has lost any which may have possibly come to the surface, as the colour has washed out of the wood.

Hopefully the stuff I bought will do the trick and not loose its grip with expansion/contraction mostly regarding the stiles.

It says this stuff is paint-able, but I'll be testing before that, as most of the tube will likely turn solid.
Cheers
Tom
 
I would avoid any kind of modern silicones, because it'll just accelerate the rot further, if water gets behind it can't go anywhere, putty is a better option.
 
When I mention the scraper getting blunt, keep in mind the picture of the floor scraper that I'd put together in another thread. That was a high hardness blade similar to M2 high speed steel, and wore a lot longer than a chisel hardness blade of carbon steel. I sharpened it every 2 or 3 square feet with 80 grit paper (albeit dull, figure an edge like 240 grit paper intentionally burred over a little bit) as rolling a fine burr on it would have lasted a few strokes and then been a waste of time.

When you're working on hard wood or wood that's got some dirt, the scraper's wear will be very fast and getting the scraper back to shape quickly becomes more important vs. something like card scraping wood.

The buffer is "dumb" with profiles. It works like a slow bunch of loose sandpaper so it will "dumb" the crispness of a profile quickly. On an old door, though, it will all be moot - whatever is on the door will wear the scraper so fast that fine won't be the goal. Quick refresh will.

I can think of a gaggle of small tools that could be made with offcuts to address parts of the door as they are, but they may not be practical for the average person to make.

that said, I'd hate to also go completely in the opposite direction and just sand every bit of life out of those profiles just because it would be quick and crude. The door would look like a low resolution version of itself afterward, and the compromise in the middle would be to get as much of the finish off as possible with heat/chemical/steel wool, etc, and then do the rest of the work after. I think that'll be the fastest with the fewest surprises, too.

As a kid, I moved into an early 1900s house that had layers of paint and varnish and we removed every bit of it over the next couple of years, all the way down into door panel profiles. chemical stripper and heat were our buddies to get the wood clean enough that it could be stained instead.
 
I don't understand the reluctance to use modern power tools in this case, and I'm a fan of hand tools.
 
Suppose I could use a heat gun, but I know the stain will be easy to remove in this case, compared to other doors I've came across with extremely thick coats of tough paint.

Interesting point you made Ben, which wasn't raised before about breathability, should putty be more suitable for the application, and whether certain types can be stained over to match that dark brown.

Not looked up the product yet to have a better idea, and still pondering whether to apply the stuff to raw timber, stained, or after the job is finished.
Like to see folks thoughts on that, regarding whether the stuff would just pull it all off the timber or not.
Cheers
Tom
 
I don't understand the reluctance to use modern power tools in this case, and I'm a fan of hand tools.
what part of this door other than perhaps sanding the flat surfaces is the territory of "modern tools". sanding the moulding profile will ruin it and wire wheeling it will rasp it into a set of peaks and valleys and still leave the corners to deal with.

A two handed scraper would remove the varnish as it is faster than a sander and with a lot less dust.

I'll post a picture of one I made while working on the floors, along with the cart version that I made. A dual mode sander couldn't come close to matching it in creating an initial surface to refine.
 
Suppose I could use a heat gun, but I know the stain will be easy to remove in this case, compared to other doors I've came across with extremely thick coats of tough paint.

Interesting point you made Ben, which wasn't raised before about breathability, should putty be more suitable for the application, and whether certain types can be stained over to match that dark brown.

Not looked up the product yet to have a better idea, and still pondering whether to apply the stuff to raw timber, stained, or after the job is finished.
Like to see folks thoughts on that, regarding whether the stuff would just pull it all off the timber or not.
Cheers
Tom
You don't need to burn off the paint just sand it down a bit with an ROS or a hand block 80 grit and then slap on some paint.
Say 2 hours the whole first coat. Another 2 to finish it off.
Best match for dark brown paint is more dark brown paint.
 
There's no issue doing this, easy peasy removing the old finish,
as I said I am messing around learning some tips for making scrapers for again
should I wish to make some nice profiles for boxes or furniture.

Ben's comment regarding breathability was interesting, as I've encountered at least three differing types of putty, some like a rock, some much softer, and some quite soft,
which may actually be the stuff in the tube I bought.

Haven't ever seen a thread concerning putty come to think of it.
Be nice to know all about the stuff for again.

Tom
 
Putty was what I was thinking about when mentioning earlier that I'd address the gaps after the fact. At some point, you're going to have water held somewhere that you don't want it to be held, but you will be able to see it if it's starting at a transition that's trapping water.

The craftsman is on site, so to speak. But It's the case, to me, that if going whole hog and having the putty seal everything, it's better if a barrier finish like paint is used over all of it to really encase everything.

With stain, I'd rather putty the gaps after the fact and make some effort to get them to match the wood. To putty first and then stain or hope for similar adhesion of a top coat, i just haven't had great experience. If the putty is under the finish and it cracks or checks, then moisture gets entry. if you do the putty after the fact in the gaps, you can fix it easily, it's not under the finish. But you'll never have catastrophic anything because you know enough to see damage occurring.
 

Latest posts

Back
Top