Oak bedroom suite

UKworkshop.co.uk

Help Support UKworkshop.co.uk:

This site may earn a commission from merchant affiliate links, including eBay, Amazon, and others.

mailee

Established Member
Joined
26 Jun 2005
Messages
5,502
Reaction score
4
Location
grimsby Humberside
Ok guys you asked for it. I got all the AWO cut and planed.
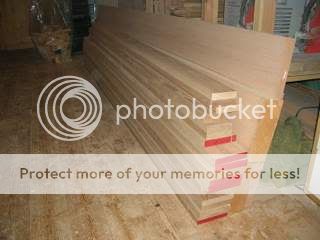
Bcutandplaned.jpg

Once all this was done I started cutting the mortices in the door stiles.
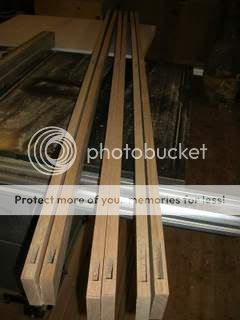
Cmorticescut.jpg

I used my trusty tennoning jig on the table saw for the tennons. (Don't tell me off again please) :oops:
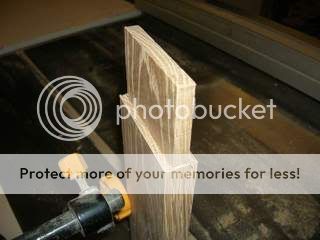
Dfirsttennon.jpg

I cut enough for one door to start with.

Etennontrimmed.jpg

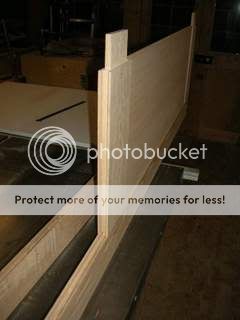
Took longer than I expected chipping out the haunches.
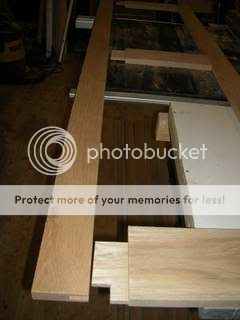
Falltennonscut.jpg

But by the end of the day I had one door ready for a dry fit.
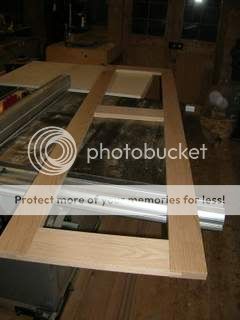
Gdryfit-1.jpg

I still have the other door framing to finish yet and a rebate for the panels to cut but think I got on quite well this weekend. Will keep you posted of course as I progress. :wink:
 
Ok,

Gona ask a stupid question!!

Why the use of the haunches? I know there is probably a simple answer. Just thought the tenon would look after movement in all directions

Just wondering

Cheers
 
Well Geno, the haunch is to stop the rail twisting. Not sure how much it will twist or even if it will but better to be safe. Besides it looks neat too and shows it isn't a cheap doweled joint. :D
 
Thats what I was figuring but I would have thought the tenon would look after most of the potential twist. Well suppose it depends on sizing.

Thanks for the prompt answer! :D

Cheerso!
 
Looking good Alan.

However,

You're going to have to find construction methods that are a little quicker than this if you are going to succeed in making a decent living doing this kind of work.

A more cost-effective system of door constuction is to machine a deep (20-25mm) groove around all your stiles and rails to accomodate the panel, and then to cut tenons on the end of your rails which slot into the grooves.

A spindle moulder is best for this, but it can be done on a table saw if you take the correct precautions.

Three wardrobe doors can easily be made by this method in half a day, including stock preparation and glue-up.

It might be argued that M&T construction is 'better' and stronger. It probably is.

The system I've described however, is certainly more than good enough.

Phil, who shares my workshop, always made his cabinet doors your way. When I came along he couldn't believe how quickly I could knock a set of doors out.

Needless to say, he soon changed!

Cheers
Dan
 
Dan Tovey":73zr70uv said:
Looking good Alan.


A more cost-effective system of door constuction is to machine a deep (20-25mm) groove around all your stiles and rails to accomodate the panel, and then to cut tenons on the end of your rails which slot into the grooves.


Dan

Dan's right, it will speed things up. I've always made doors with this method and have never had any problems. Try it, you'd be surprised..
 
Geno":2659172d said:
Why the use of the haunches? I know there is probably a simple answer. Just thought the tenon would look after movement in all directions.

Try to imagine the mortise without a haunch - what you'll have is basically a bridle joint. If the glue wasn't there (or failed...), the tenons and rails would simply drop out of the bottom of the stiles under the force of gravity. :)
 
A tenon saw would probably have been quicker to cut the haunches and you could cut the wedges for the tenons whilst removing the waste. the wedges would then be the exact thickness as the tenon.
 
Well this afternoon after work I got stuck in again and managed to get the other three door frames complete apart from the rebate.
Hallframescomplete.jpg

Well thanks Dan for the heads up on speeding up the work. I shall be using that method in the future mate, sounds a good idea. In the meantime I have set up the table saw for the rebates for the panels and done a test cut for fit.
Irebatetest.jpg

I am going to have a break shortly from the wardrobes as I have a counter to make for the local Chinese take away. I have just been to order the laminate for the job and when it arrives next week I shall be starting that. Will of course keep you all posted as to what happens. In the meantime I am working onpreparing myself for self employment and keeping my fingers crossed. :wink:
 
Looking good, and I agree that running the groove all around the stiles are rails is the fastest method. You then dont even need to haunch your mortice as the groove become the haunch. Cut all your tennons the same length and then you can just setup the fence on the bandsaw and haunch all the tennons in one go.
 
I got the rebates cut in the frames today. Got to admit it would have been a lot quicker to have used your method Dan. Still next time I will.
Jrebatescut.jpg

I also cut the first panels and fitted them to the first door.
Kfirstpanelin.jpg

I ended up the evening by completing the first door.
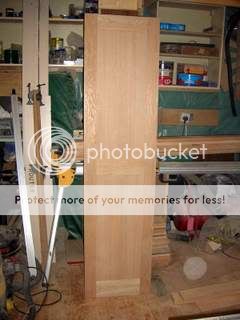
Lfirstdoorcomplete.jpg

I hope to get the rest of the door panels fitted tomorrow if all goes well. I will use Dan's method for the small door I still have to make. :wink:
 
Dan Tovey":8m3iqqov said:
Looking good Alan.

However,

You're going to have to find construction methods that are a little quicker than this if you are going to succeed in making a decent living doing this kind of work.

A more cost-effective system of door constuction is to machine a deep (20-25mm) groove around all your stiles and rails to accomodate the panel, and then to cut tenons on the end of your rails which slot into the grooves.

A spindle moulder is best for this, but it can be done on a table saw if you take the correct precautions.

Three wardrobe doors can easily be made by this method in half a day, including stock preparation and glue-up.

It might be argued that M&T construction is 'better' and stronger. It probably is.

The system I've described however, is certainly more than good enough.

Phil, who shares my workshop, always made his cabinet doors your way. When I came along he couldn't believe how quickly I could knock a set of doors out.

Needless to say, he soon changed!

Cheers
Dan

Dan, that's how I make doors for kitchens and cabinets too. Wealden tools make a deep groove cutter that gets you 22mm slots/mortices on the router table and the spindle moulder takes care of the tenons. I usually use an 8mm groover and 24mm thick stiles/rails. I agree it's a really quick and effective way and more than good enough - we're givng away our trade secrets here!!! On kitchens I usually peg with 9mm oak dowel on the rear of the doors, for an added feature/strength.
 
Between being busy with my website and fitting some cupboard doors today, I did manage to get into the workshop again this afternoon.
Thanks Dan I used your method for making the small desk door on the suite:
MDansmethod.jpg

I also got all of the doors finished ready for assembly:
Ndoorscomplete.jpg

Now the question is should I put a finish on the veneered MDF panels before assembly or afterwards? Normally I would be using home made panels so would finish them before assembly but not sure about veneered MDF as it won't move will it? :? Everything needs a sanding now and I will do this in the week before assembling the doors and moving on to the next part. :wink:
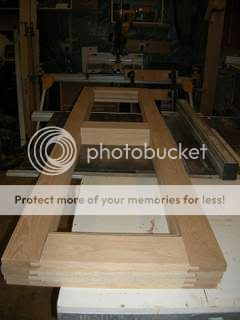
 
Finish the panels before assembly into the frames, you won't be able to get into the corners unless you do. If the job is going to be sprayed then you won't need to, but otherwise that's the way I'd go about it - Rob
 
I dont usually bother finishing veneered panels. I usually glue the panels in as well to give extra rigidity to the door and a finish on the panel will stop the glue from doing its job.

Jon
 
JonnyD":2wg8kmnt said:
I dont usually bother finishing veneered panels. I usually glue the panels in as well to give extra rigidity to the door and a finish on the panel will stop the glue from doing its job.

Jon

How times change.

I suggested it was fine to glue in MDF panels on the forum a couple of years ago and was showered with derision by the then usual suspects.

I was right, though.

And so are you, Jon!


Dan
 
Well I'd pre-finish AND glue it in.

Mask off 1/2" or so all round the edge of the panel and finish flat, then assemble and glue, then finish the frame. It's easier than trying to sand into corners.

S
 
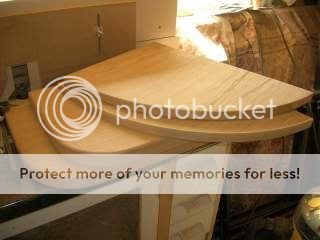
Finally got back to working on the Oak robes and am hard at it in the workshop now. I have finished making the floating shelves above and below the computer desk:
Oshelvescomplete.jpg

These will be held to the wall by pin brackets let into the rear:
Pfloatingbrackets.jpg

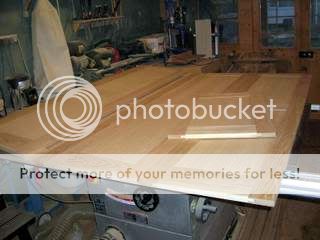
I also got the desktop completed:
Sdesktop.jpg

I am now starting to lip the edges of the hidden shelves. I took the forums advice and decided to compromise making the lippings 10mm thick:
Qshelfedgings.jpg

Next is the cupboard under the computer desk and then onto the wardrobe sides. Will keep you all posted. :wink:
 

Latest posts

Back
Top