***** March Round Platter Challenge *****

UKworkshop.co.uk

Help Support UKworkshop.co.uk:

This site may earn a commission from merchant affiliate links, including eBay, Amazon, and others.
Status
Not open for further replies.
First platter. Butternut picked up in Quebec this past fall. Bowl is 11'' by 3'' high. Started with the foot on a screw and turned it and finished it completely (danish oil 3 coats with sanding in between coats) then turned the tenon and parted it off. Then platter blank on a screw again, turned the bottom with the recess for the tenon and the chuck jaws. Danish oil as per foot, then use the chuck and recess and turn and finish the top.
I drilled the foot out from the top and put in 8- 1 ounce used tire weights and it nicely anchors it and gives it just a bit of heft. Turned mainly with my Crown 3/8" bowl gouge with side grind, and the excellent Crown scrapers. Thanks. Forgot to mention,buffing done with the Oneway kit.
 

Attachments

  • P1010648.JPG
    P1010648.JPG
    146.8 KB
  • P1010646.JPG
    P1010646.JPG
    167.1 KB
  • P1010644.JPG
    P1010644.JPG
    168.7 KB
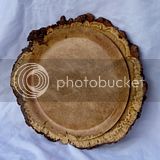
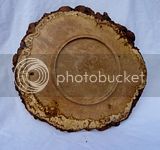
OK, here's mine - my first ever Natural Edge which was stressful wondering if I'd be able to keep the bark on; especially as it turns out to have some areas which are rather eaten away. The wood is apparently Burr Walnut kindly donated by a chap at work who's had them at the back of his garage for 15 years after he gave up the idea of wood turning having had one detonate on him.

The platter is between 9.25 and 10.5" in diameter and just under 1" high. It sits on a simple raised ring which has a gentle concave curved base (very proud of keeping the edges nice and crisp!) which is undercut to mimic the top. The base mirrors the curve of the top to give a nice even and light feel to the platter. The top face is flat (oh boy that was hard to do) across the required 75% and then it raises up into an OG curve like a wave which is sharply undercut. This delimitates the circular section of the platter from the Natural Edge and gives the user's thumb something to hold rather than then natural edge. The outer section rises in a gentle curve to the same height as the inner rim on the outer most section. The bark stayed on (!! :) phew) and that whole outer section is a fascinating range of wood structures ad worm attack.

The whole thing was sanded to 320 by hand as I couldn't get the rotary sander into the base section, I was worried about whipping off the bark or rounding off the edges on the top. I then applied one coat of Chestnut Spray Sanding Sealer and allowed to dry before sanding with 400 wet and dry. Initially I then coated the whole platter in Chestnut Gloss Lacquer however I was very unhappy with the finish this gave on the central section - it seems to have a very fine speckle which totally obscured the wood at some angles and wasn't very glossy. So I rubbed that off on the central section (400 and then 600 wet and dry) by hand and buffed and applied my normal canuba wax finish which also has the benefit that it further differentiates the central and outer sections of the top.

Overal I am intensely happy with this platter but it will only be used to display things for eating etc - I don't think I could face cutting cheese on it :) I think I will always remember the gut tightening feeling of cutting the edge that I couldn't see and only being able to cut inwards and not just fade a cut back to address a thickness issue.

Hope you like it as much as me :) :)

Miles
 
This is my badly photographed effort.
It's some kind of rosewood (I think), approx 10" diameter and 1 3/8" thick.

Cut from a short plank approx 2" thick, mounted first on a screw chuck to form the outside profile and recess, then mounted using the recess to do the face.
I was originally going to leave the recess, but reverse chucked using my cole-type jaws to form the base which has a few circles for decoration. (SWMBO complained that my finishing was rough until I pointed out they were meant to be there... :roll: )
Sanded to 600 grit then finished with woodwax 22 applied with webrax-type pads (all from Chestnut).

I kept the base wide deliberately - if it's too narrow you cant easily use it as a platter...

platter top.jpg

platter side.jpg

platter bottom.jpg
 

Attachments

  • platter bottom.jpg
    platter bottom.jpg
    246.5 KB
  • platter side.jpg
    platter side.jpg
    74.2 KB
  • platter top.jpg
    platter top.jpg
    186.8 KB
original.jpg

Top view
The centre part is completely flat


original.jpg

Bottom view
The centre part is concave by about 8mm


original.jpg

Profile (obviously!)


Diameter: 35cm
Thickness: 2cm
Wood: unknown but hopefully food-safe. There was pretty much no smell from it during turning. Perhaps mahogany?
Finish: IKEA food safe oil

The board was hiding in the back of the wood store and looked a bit manky but was about the right size for me and would have ended up as a platter anyway so I thought I might as well give it a go.
With it only being 2cm thick I didn't want to waste wood with a spigot, couldn't be bothered to wait for a glue block and I don't like recesses so I thought I'd try turning it from start to finish using a vacuum chuck. It was so flat that an excellent grip was held throughout so no problems with the vacuum method.
The design is based on one in Mark Baker's book.

The top is flat and can be used for chopping at any point on the surface. I considered adding a decorative bead around the top lip but decided against as it would get in the way of any cut. Also, the wood is incredibly figured with tightly locked alternating grain and gentle ripples (although it doesn't show up well in the photos) and any bead would have been a distraction.
The platter can be used either way up and the centre part of the underside is slightly concave so it can be used for anything that's likely to roll around (like fruit).

The symmetrical rim has 2 functions - it allows your fingers to get underneath to pick the platter up and the shallow dip next to the centre element will catch any crumbs when in use.

The finish is a new one for me - IKEA food oil which has been mentioned a few times on the forum.

Turned using 1/2" bowl gouges, 3/8 spindle gouge, a home-made tool for the shoulder and a shear scraper. A tricky wood to turn with the interlocked grain and I had to resort to 80 grit more than I would like :oops:

Duncan
 
This is my entry for March, the platter.

This was originally 10" diameter, however, after an unexpected design change (where the rim decided to detach itself from the platter), the platter was promptly reduced to a diameter of 6.25".

Made from Oak, and finished with danish oil.
 

Attachments

  • PICT0577.JPG
    PICT0577.JPG
    159.8 KB
  • PICT0580.JPG
    PICT0580.JPG
    144.4 KB
  • PICT0581.JPG
    PICT0581.JPG
    161.2 KB
Hers's my effort;

Spalted beech [I think]

I concentrated on flatness and 75%, perhaps to the detrement of the rim shape.

Overall diameter 230mm, central flat surface 175mm ie. 76%.

Finished with a few coats of cellulose sanding sealer to harden the surface for finish turning and sanding, then a couple of coats of melamine laquer buffed up with the monkeybiter buffing system.

Good Luck Everyone
 

Attachments

  • P1060046kj.jpg
    P1060046kj.jpg
    106 KB
  • P1060047kj.jpg
    P1060047kj.jpg
    127.4 KB
  • P1060059kj.jpg
    P1060059kj.jpg
    114.4 KB
Wood: Unsure
Size: 10" dia, 5/8" high
Finish: Burnished in shavings and then several coats of Boiled Linseed Oil

Underside is intentionally curved but (75% of) the top is flat though it is hard to see due to the grain of the wood.

Beads (?) on underside done with Skew.
top (Custom).JPG

base (Custom).JPG

profile (Custom).JPG
 

Attachments

  • base (Custom).JPG
    base (Custom).JPG
    55.9 KB
  • top (Custom).JPG
    top (Custom).JPG
    57.3 KB
  • profile (Custom).JPG
    profile (Custom).JPG
    43 KB
Status
Not open for further replies.

Latest posts

Back
Top