Making a semi circle cabinet,GRANITE FITTED

UKworkshop.co.uk

Help Support UKworkshop.co.uk:

This site may earn a commission from merchant affiliate links, including eBay, Amazon, and others.

doctor Bob

Established Member
Joined
22 Jun 2011
Messages
5,171
Reaction score
1,881
Just a few images I took today.
Firstly making the beaded face frame.
I'll try and take a few of the doors tomorrow

j2sy.jpg


0g30.jpg


0lf4.jpg


a374e.jpg


1qpg.jpg


jwy1.jpg


0zxv.jpg


fzcg.jpg


c1vg.jpg
 
nathandavies":1enxdqg5 said:
Do you push the curved cabinets bob or do people tend to ask for them after seeing your previous work?

We never push them, we lose money on everyone we make, however if the customer wants one and the kitchen is big enough to absorb the cost then we will do them. If you don't do them then you don't always get the big high end kitchens.

We can rough cut them through a band saw and then put them through the speed sander. However if the curve is big enough it's easier running them though the panel saw with someone pushing through and another taking off.
 
Looking good Bob. I have to ask a question though, how do you make the face frame beading? Obviously you can't place the curved section in the Morso notcher and it would be difficult to do it on the router table and get an accurate cut with the 45 degree cutter? I assume the actual bead is cut on the router table but the notches are puzzling me? Thanks. :?
 
mailee":19eo3oya said:
Looking good Bob. I have to ask a question though, how do you make the face frame beading? Obviously you can't place the curved section in the Morso notcher and it would be difficult to do it on the router table and get an accurate cut with the 45 degree cutter? I assume the actual bead is cut on the router table but the notches are puzzling me? Thanks. :?

They are done on the notcher with the curve going upwards.

znpm.jpg
 
That has turned out really nice Bob. I am surprised there is no breakout from the notcher on the back side? Do you use a sacrificial piece behind it? what did you use for the panel, 6mm MDF? Great WIP's thanks. :D
 
Excellent, it's good to see work away from the usual straight lines. Sorry if I've missed this, is it tulipwood carcase? And how is it going to be finished? Also, what is a notcher... don't think I have one of those :cry:
 
Once the piece has dried, is there any kind of movement over time? or if it's right when the glue goes off it stays right?

Nathan
 
nathandavies":33vuqncj said:
Once the piece has dried, is there any kind of movement over time? or if it's right when the glue goes off it stays right?

Nathan

In my experience this depends on a few factors.

If you laminating thin MDF, Flexi ply or flex MDF and using a UF based glue in general they stay put.

If you are laminating -6 mm veneers they generally stay in place when you start laminating thicker constructional veneers you can find a bit more creep. This does also depend on the tension within the timber it self, the thickness of the lamina and the radius you are forming.

Here is a lamination from 5mm Flexi ply this has stayed in good shape it has now been over veneered with ripple sycamore.
https://www.facebook.com/photo.php?fbid ... =1&theater

These .6 mm veneers stayed in shape they were formed in a 20mm radius former very tight to bend around in Burr https://www.facebook.com/photo.php?fbid ... =1&theater

The handles in this tray are 3 pieces of 2.3mm Walnut they spring very slightly but this is not an issue with my design. https://www.facebook.com/photo.php?fbid ... =1&theater

The large arch in this former stayed in place this was a radius of 700mm made up of 1.5mm constructional walnut veneer. https://www.facebook.com/photo.php?fbid ... =1&theater

It looks from this like we only ever work in Walnut!

If you like our Face Book pages or students work place like and follow.
Cheers Peter
 
condeesteso":2ratzt3f said:
is it tulipwood carcase? And how is it going to be finished? Also, what is a notcher... don't think I have one of those :cry:

Yes this is tulipwood, it will be painted.

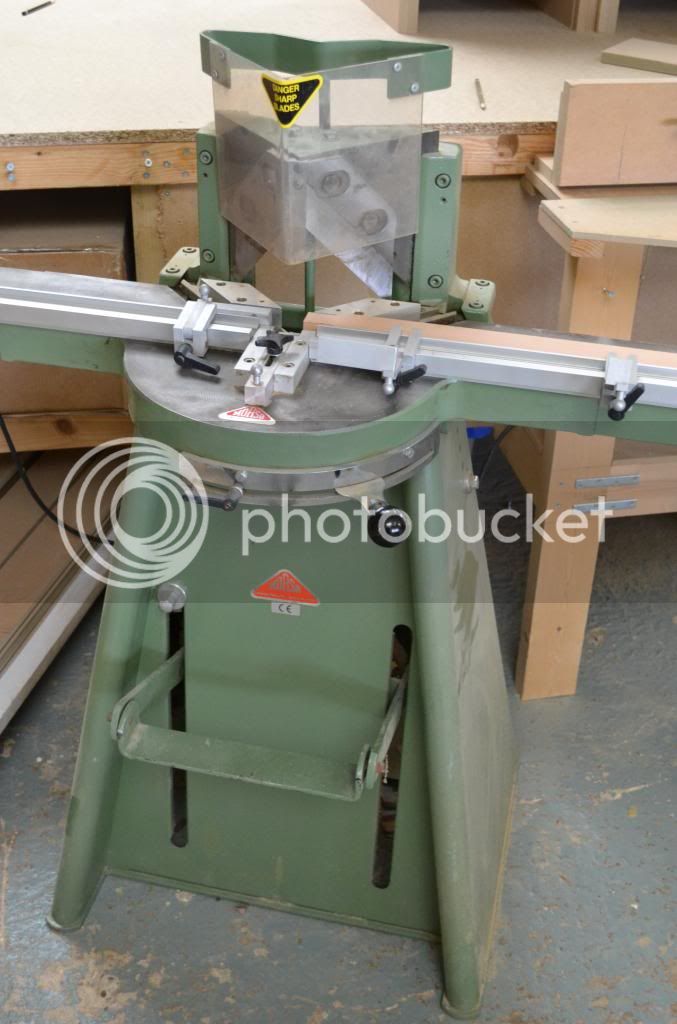
A notcher,

Detail_5.jpg


DSC_0371_zps5ab3381a.jpg


Unlike a guillotine it has a 20mm flat front on it then 45 degrees so it cuts a notch rather than a "v".
 
mailee":23lw0s5v said:
I am surprised there is no breakout from the notcher on the back side? Do you use a sacrificial piece behind it? what did you use for the panel, 6mm MDF? Great WIP's thanks. :D

Panels are 2 x 3mm MDF as the door has a bead, on shaker doors we do 3 x 3mm MDF.

The notcher can be adjusted to nibble the slot, so we just take the last bit out half a mm at a time.
 
nathandavies":1bp8g2mf said:
Once the piece has dried, is there any kind of movement over time? or if it's right when the glue goes off it stays right?

Nathan

Pretty much as Peter has said, I think his more scientific research and more experience in different sizes etc he is far more expert than me.

I find there is a bit of spring back but the great thing is everything springs back the same, frame and doors.
So for a 800 cabinet I may make it 10mm smaller to allow for spring back.

One big point make the carcass to suit the frame, otherwise you may have to squeeze the frame on and then the doors are out.
 
doctor Bob":2cxqdcvn said:
So for a 800 cabinet I may make it 10mm smaller to allow for spring back.

One big point make the carcass to suit the frame, otherwise you may have to squeeze the frame on and then the doors are out.
I agree with that order of work when doing laminated stuff. It's bass ackwards to standard square or rectangular cabinets in a sense, but absolutely the right order in curved work. Slainte.
 
Back
Top