woodbloke
Established Member
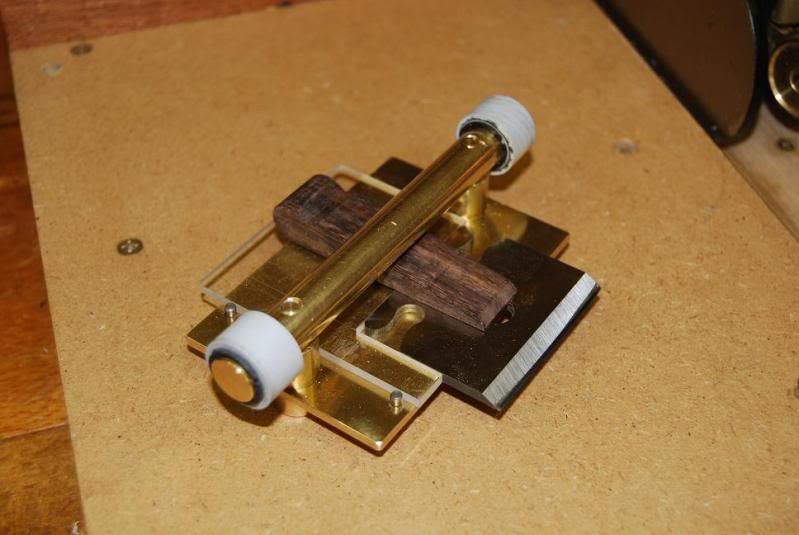
Anyone who knows me will vouch for the fact that I've been after a single honing guide (note Paul :wink: :lol: ) that will hone almost (pig stickers excepted) anything, simply and easily. The registration is on the reverse side of the brass plate, so setting up is easy. All the honing medium should be used which means that the rollers need to run on the outside of the medium used.
The Kell III is the one that does it all, and after having seen it demonstrated by Matthew a couple of weeks ago, I thought a review of this method (as I've developed it) might be of some interest.
Matthew supplied me with some PSA lapping sheets which after thoroughly cleaning the glass plate are easy to apply. I cut the papers up into 70mm strips so I'm able to get four from a single sheet:
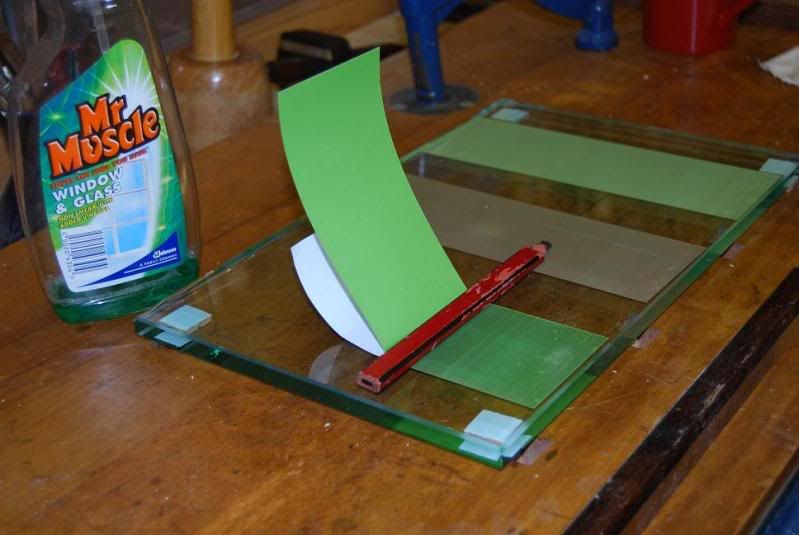
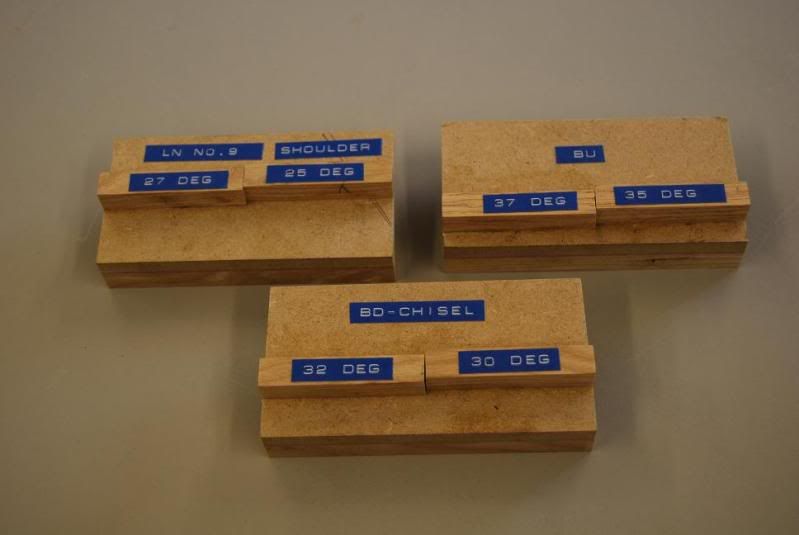
I then made a series of projection boards, very similar to the Eclipse system I was previously using:
and a series of wedges to suit different applications:
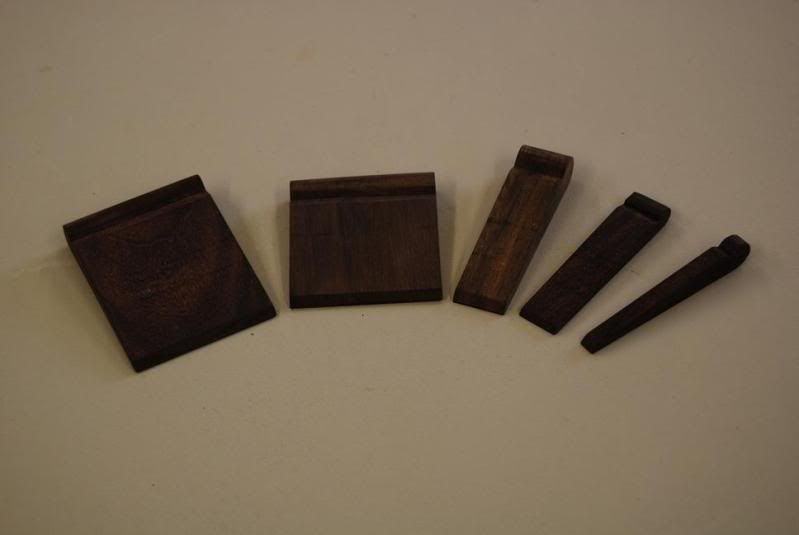
Richard Kell supplies an excellent data sheet so it's really easy to sort out the wedges and boards. Making a new wedge for a particular tool is the work of moments, once you know the slope details.
The tool is then offered up to the projection board:
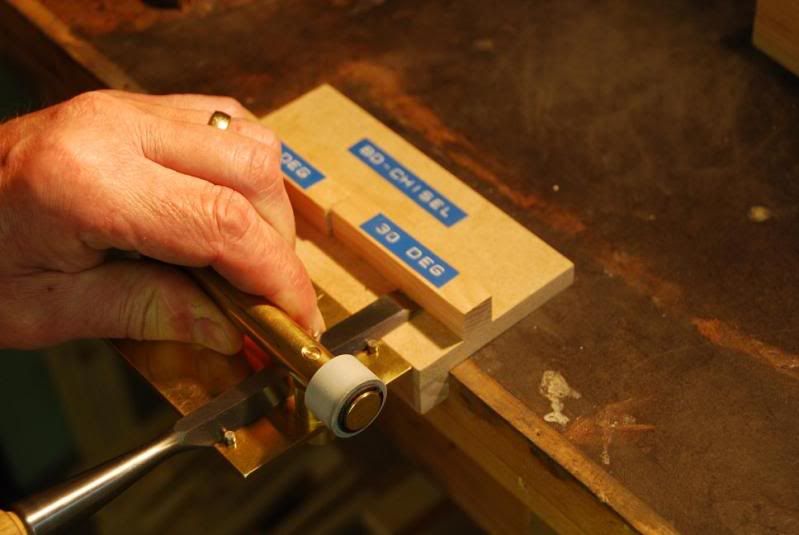
by holding the bar and using the fingers to push the side of the chisel (in this case) against the two registration pins. Once everything is firm:
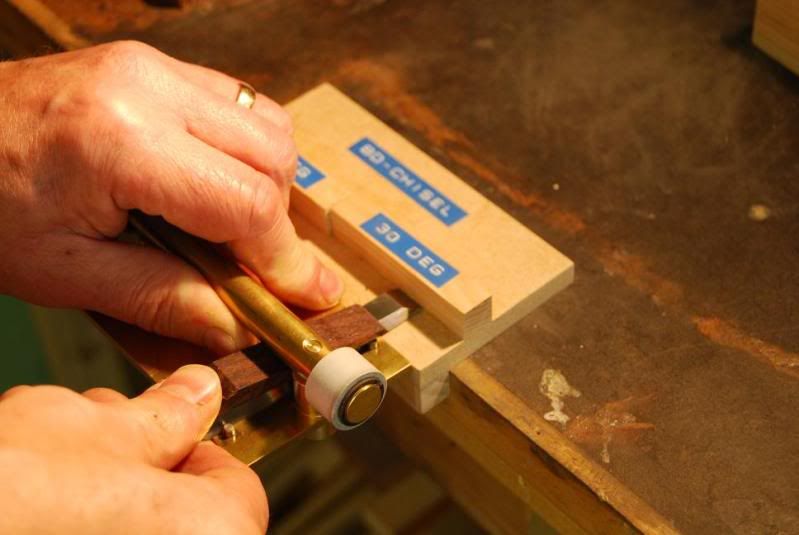
the appropriate sized wedge is firmly pushed into place, locking the whole thing securely. It then goes onto the lapping papers:
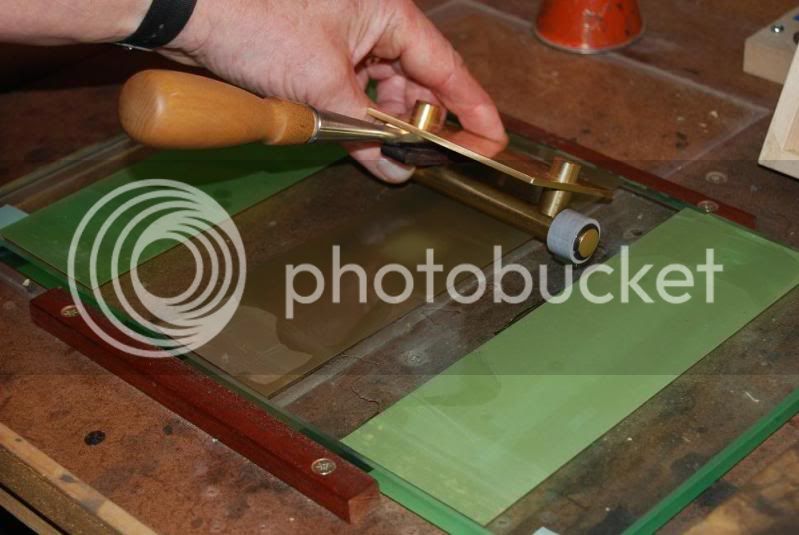
The green 30um is used to make the honed bevel (30deg), and the brown (5um) is used to crate a secondary bevel:
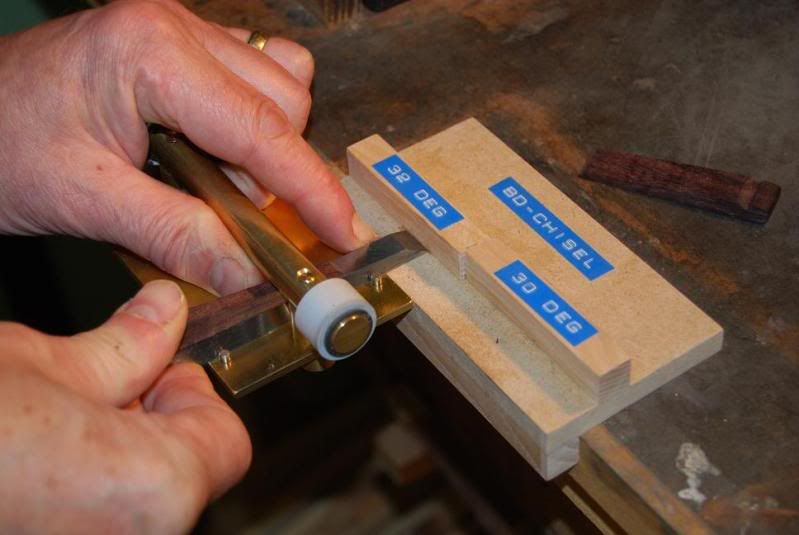
with the final polish being achieve with the yellow brown paper (1um). Note in this shot, I've set the bevel on the LN to 32deg and am using a thinner wedge...this does in fact make using the KIII much easier and I thick is the secret to how it ought to be used successfully.
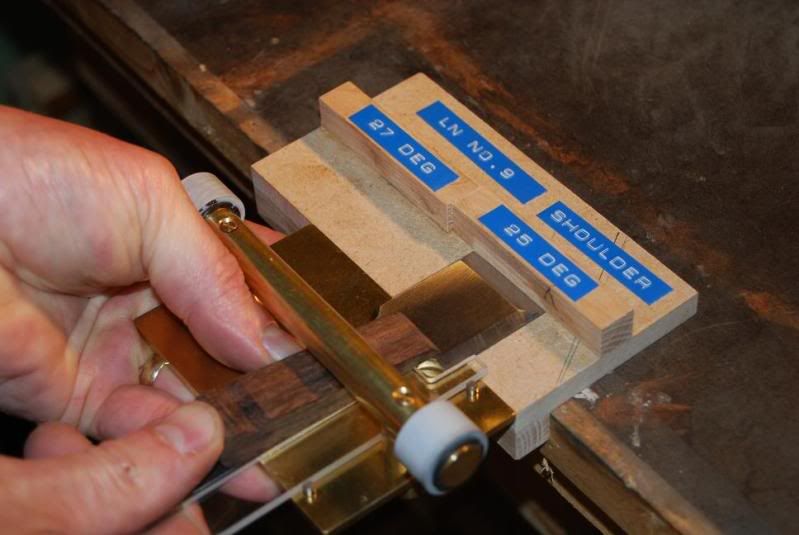
Awkwardly shaped shoulder plane blades are also easily held, simply by making a parallel shim with a cut out:
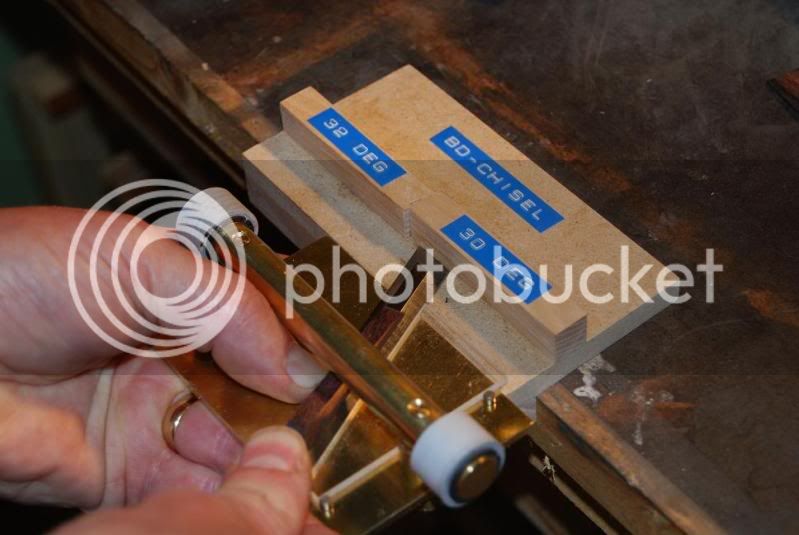
as are skewed blades, again with another shaped shim:
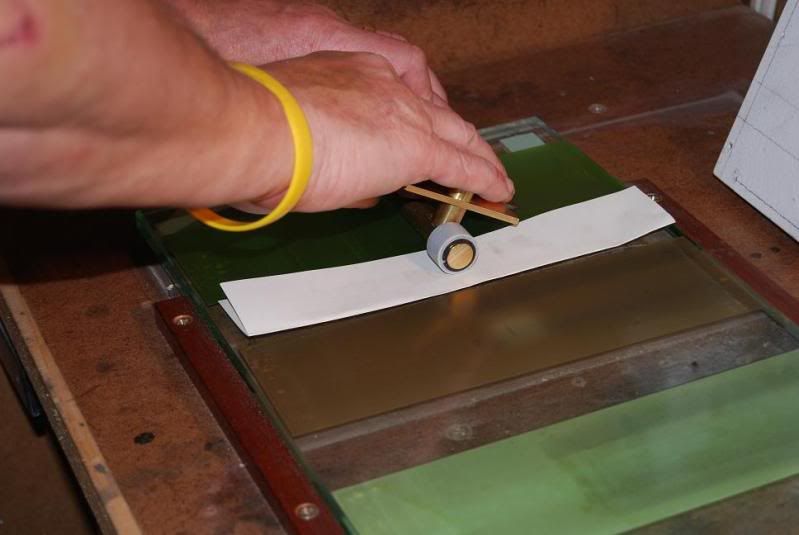
Want to do cambered blades?...easy :wink: Set the blade up in the guide to the required projection, and then run one side of the gauge on a double layer of cartridge paper a set number of times, say 6 This has the effect of lifting one side of the guide at a time:
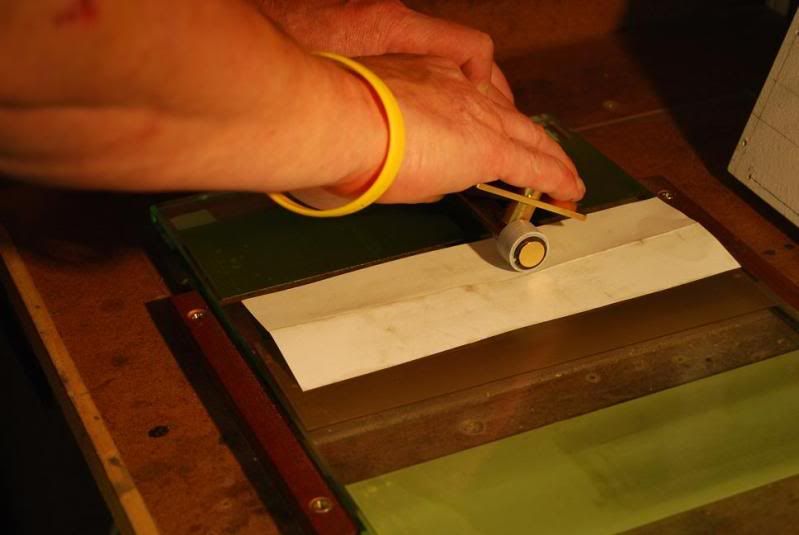
Do this each for each side of the blade in turn, then repeat unfolding the paper, again working a set number of passes on each side:
and continue to work your way down through the grades, repeating each step. Once the desired camber has been established, it's only a matter of tickling the edge using this method with the 5um and 1um papers.
The big disadvantage of this method is that the lapping papers are very fragile...the slightest burr on the honed side bevel will rip the paper in use and the guide must be used on the pull stroke. This presents a problem in removing the burr on the flat side, so I opted not to use the papers but to polish this (the flat side) using the Spyderco 10000g ceramic stone:
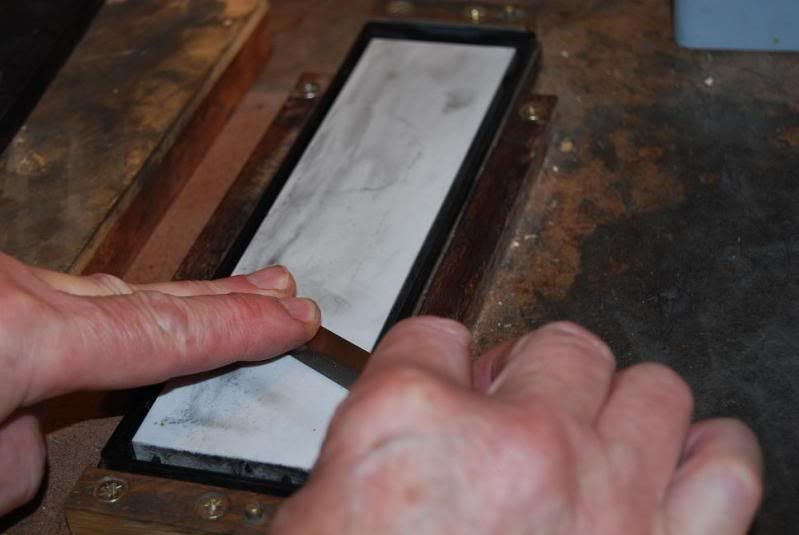
The results speak for themselves:
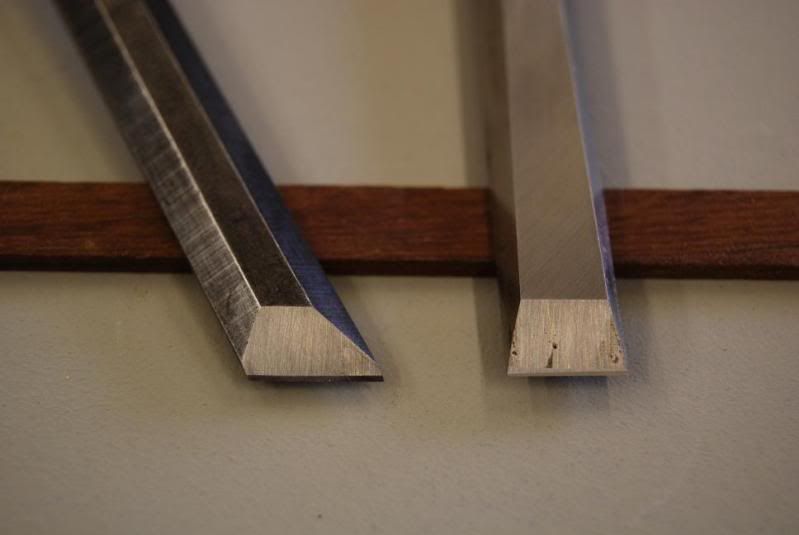
the LN has been honed dead square and shows up inacuracies in the previous method and the skew is spot on
Here's the cambered blade...a crappy old No4 just honed for this demo:
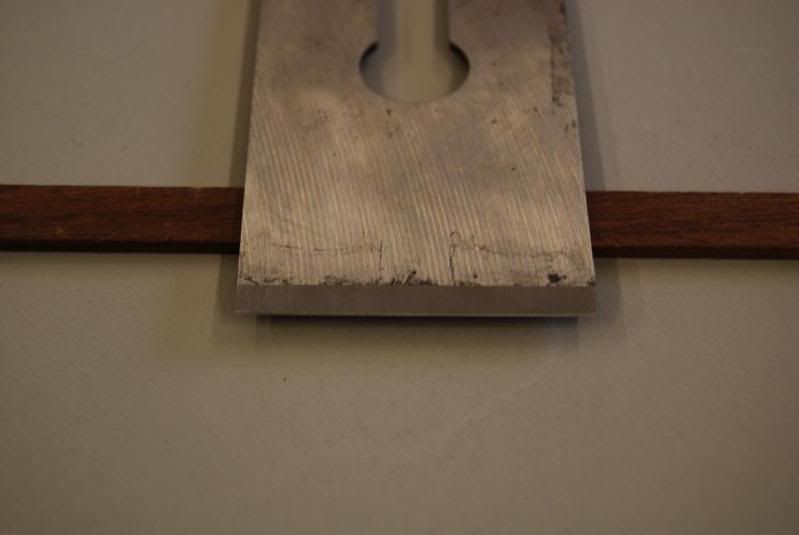
and although you can't see it, there's the merest whisper of a cambered blade on the edge.
It does take a little bit of getting used to, but once you've got your system organised, the KIII is just about the best honing system that I've ever used...highly recommended - Rob
- Rob
The Kell III is the one that does it all, and after having seen it demonstrated by Matthew a couple of weeks ago, I thought a review of this method (as I've developed it) might be of some interest.
Matthew supplied me with some PSA lapping sheets which after thoroughly cleaning the glass plate are easy to apply. I cut the papers up into 70mm strips so I'm able to get four from a single sheet:

I then made a series of projection boards, very similar to the Eclipse system I was previously using:

and a series of wedges to suit different applications:

Richard Kell supplies an excellent data sheet so it's really easy to sort out the wedges and boards. Making a new wedge for a particular tool is the work of moments, once you know the slope details.
The tool is then offered up to the projection board:

by holding the bar and using the fingers to push the side of the chisel (in this case) against the two registration pins. Once everything is firm:

the appropriate sized wedge is firmly pushed into place, locking the whole thing securely. It then goes onto the lapping papers:

The green 30um is used to make the honed bevel (30deg), and the brown (5um) is used to crate a secondary bevel:

with the final polish being achieve with the yellow brown paper (1um). Note in this shot, I've set the bevel on the LN to 32deg and am using a thinner wedge...this does in fact make using the KIII much easier and I thick is the secret to how it ought to be used successfully.
Awkwardly shaped shoulder plane blades are also easily held, simply by making a parallel shim with a cut out:

as are skewed blades, again with another shaped shim:

Want to do cambered blades?...easy :wink: Set the blade up in the guide to the required projection, and then run one side of the gauge on a double layer of cartridge paper a set number of times, say 6 This has the effect of lifting one side of the guide at a time:

Do this each for each side of the blade in turn, then repeat unfolding the paper, again working a set number of passes on each side:

and continue to work your way down through the grades, repeating each step. Once the desired camber has been established, it's only a matter of tickling the edge using this method with the 5um and 1um papers.
The big disadvantage of this method is that the lapping papers are very fragile...the slightest burr on the honed side bevel will rip the paper in use and the guide must be used on the pull stroke. This presents a problem in removing the burr on the flat side, so I opted not to use the papers but to polish this (the flat side) using the Spyderco 10000g ceramic stone:

The results speak for themselves:

the LN has been honed dead square and shows up inacuracies in the previous method and the skew is spot on
Here's the cambered blade...a crappy old No4 just honed for this demo:

and although you can't see it, there's the merest whisper of a cambered blade on the edge.
It does take a little bit of getting used to, but once you've got your system organised, the KIII is just about the best honing system that I've ever used...highly recommended


